
Visit Library for MBP Pro eBooks |
Sales of my new Fine Art Border Tools plugin for Adobe Photoshop are picking up, so a quick thank you to any of you that already bought the plugin. I've invested more time to implement a few new features one of which I had planned to do from the start, and some others which were a bit of an afterthought but have in many ways stolen the limelight, as I'll explain in this episode. I wanted to gauge interest before investing another month or so of development time into implementing Text-Based Watermarks. The graphical Watermarks were added in my first release, and in a follow-up release shortly after that, I added the ability to store multiple Watermark files making that feature much more useful.
Autopilot for FAB Tools
The second thing that I added as an after-thought is incredibly cool, and I will share more details in a tutorial a video very soon too, but I was about to submit the plugin for review ten days ago when a thought bubble popped into my mind with pretty much the entire mechanism to implement what I've called Autopilot. Then, over this last weekend, I figured out how to make the batch processing even more robust, so I've literally just submitted another new build, which includes more robust batch processing. As you can probably imagine, Autopilot takes control of FAB Tools, so you will be able to perform either a Web Frame or Print Frame resize with your fine art frame, and if you turn on the checkboxes, you can automatically add your graphical and new text-based watermarks, completely automatically. Please allow me to explain in more detail.
With Autopilot active, all images that you have open in Photoshop will be processed according to your settings. In the past, batch processing has been in the form of opening many documents at the same time and hoping that you had enough system resources for Photoshop to work with possibly many gigabytes of images open, then you had to click the Apply button and wait for each image to be processed. The Automatic Save & Close button and checkboxes for adding the watermark automatically helped, but with no support for Actions with these plugins in Photoshop, it was a manual process to select each image.
I realized though that I can detect when your image closes, especially when Automatic Save & Close is turned on because FAB Tools is issuing the command, so I figured that I would just wait for the next image to be selected, and kick off the processing again automatically. It sounds easy and was actually a relatively difficult task to program this into the already very complex code, but it was possible. I then had another thought bubble and figured out how to open multiple files in batch mode, so if you want to process more files than you can realistically open in Photoshop simultaneously, simply use the Open button with Autopilot turned on, and it will batch process your images, opening them one at a time, processing your resize, frame and watermarks, and then save and close it before opening the next image that you selected in your initial Open. I'm going to wait for Adobe to release my current build before uploading another update that I've just finished, but once you get to version 1.1.7 you will also notice that the Open button turns blue to attract your attention when Autopilot is active and the Open button label changes from Open to Batch Open, to make this all more obvious.
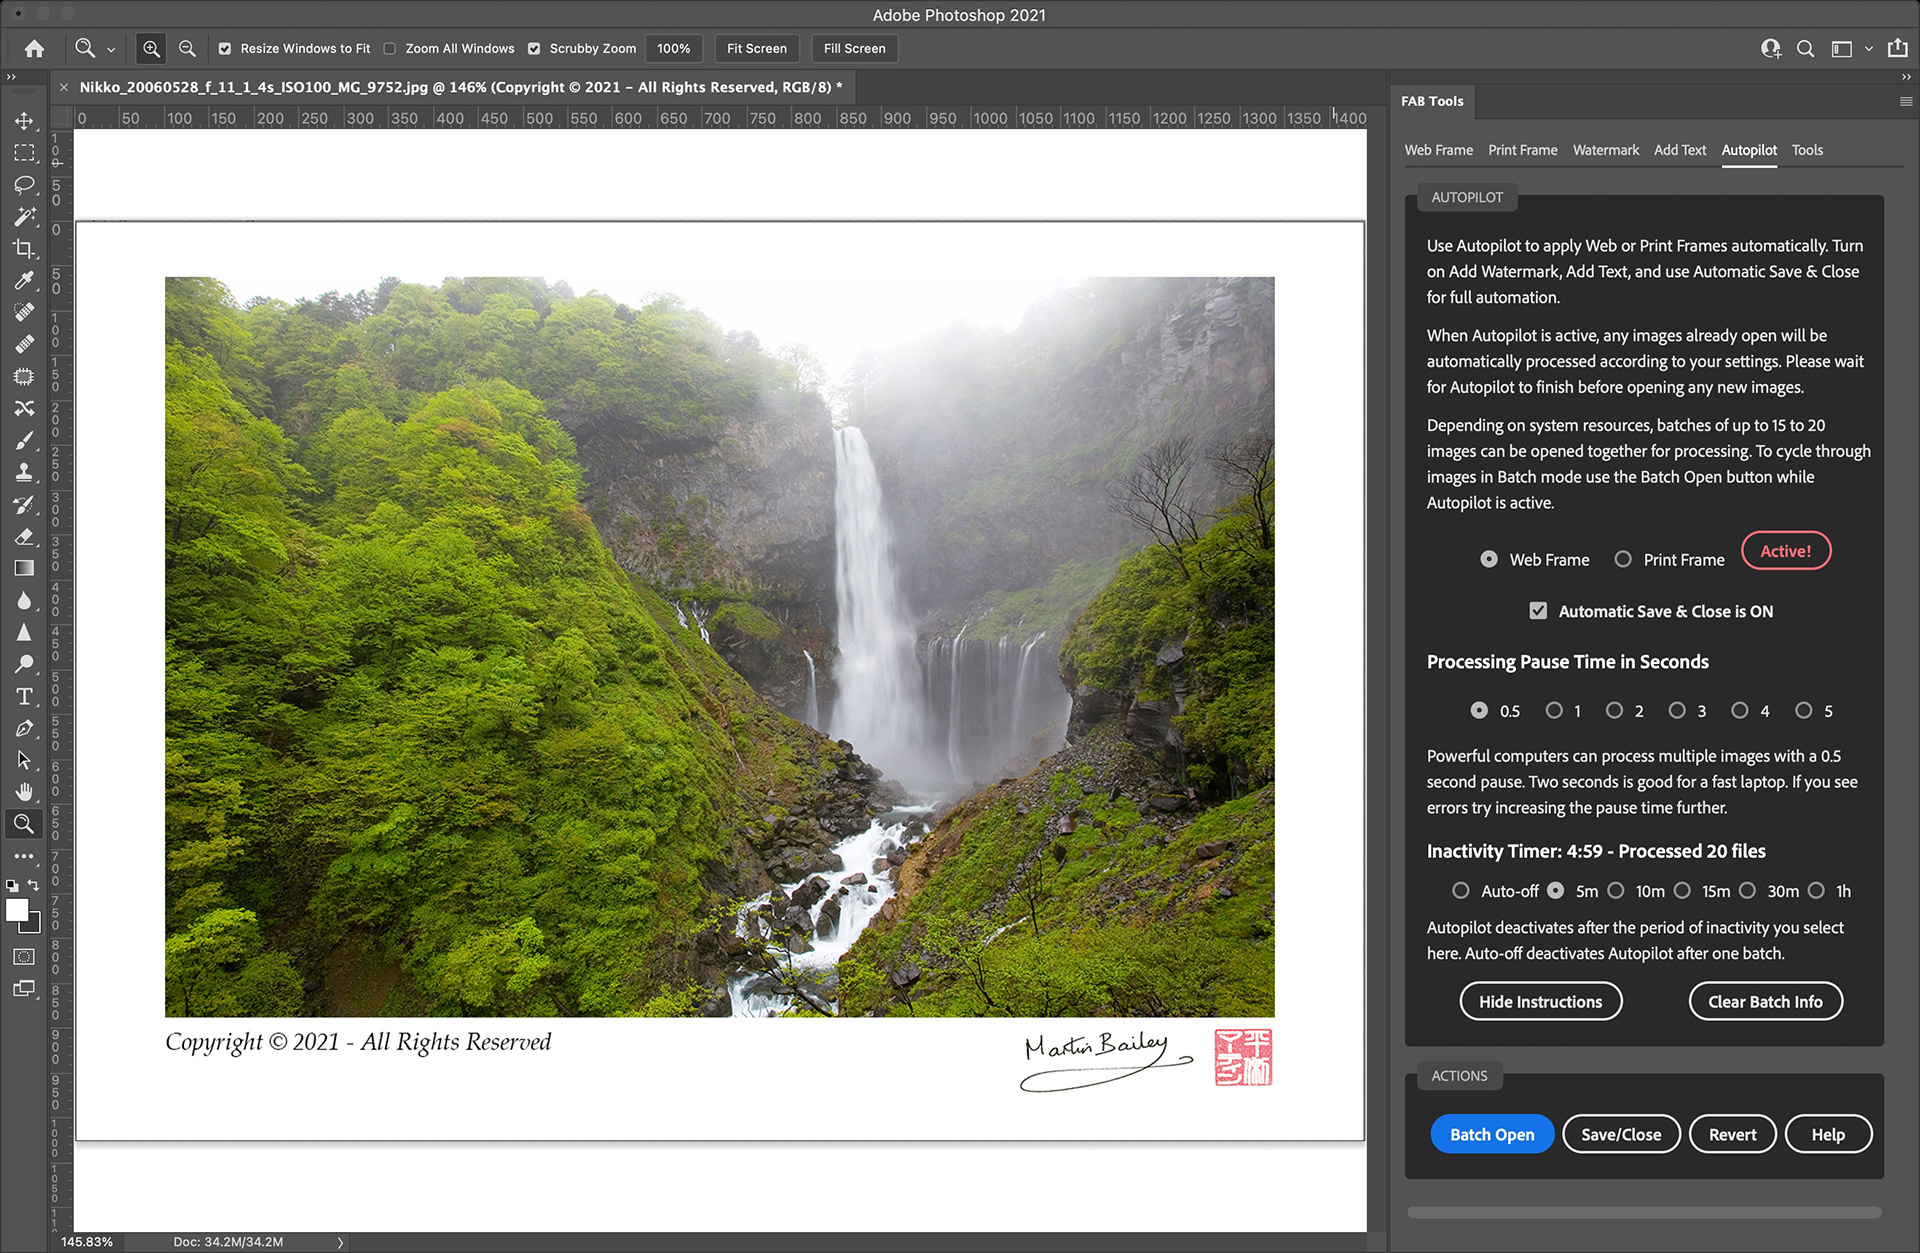
Also, note that because there is a lot of text on the Autopilot screen, I've added a Hide Instructions button which removes the five paragraphs of text when pressed, and your selection is saved, so you won't need to press this every time you start using Autopilot. The instructions are turned on to begin with though, to help you avoid inadvertently processing something.
Benchmark Tests
I've done some benchmark tests and found that on my powerful 8-core CPU iMac Pro, with Autopilot active I can open around 20 TIFF files at once before Photoshop starts to complain that there are too many tasks running in FAB Tools. Because they all open together though, for small batches, this is slightly faster than my new batch processing, due to the overhead of opening and closing all the files individually. I was able to process 20 TIFFs, a total of 2.79 GB of data, and saved them as large B2 media size print files in two minutes and 10 seconds. The same 20 files in batch mode took 20 seconds longer, so there is a 15% overhead. You have no choice if you want to process more than 20 files at once though because the system won't handle too many files.
I then tried a batch of 100 TIFF files, for a total of 18 GB, and saved them as Web-sized framed and watermarked both with graphic and text-based watermarks and with the new batch mode, which took 10 minutes and 47 seconds. For all of my tests, I was using the 0.5-second pause to prevent errors, but I have found that even on my 13" Mac Book Pro, with the new batch mode I am not getting any errors even when using the 1-second pause, so this has improved the number of files that can be processed and the stability, so it was a weekend well spent on the updated batch mechanism.
You can mix and match as well. For example, say you start working on a batch of images that you have FAB Tools open via the Batch Open button the intelligent batch mode, and then you want to process another 10 files. You can set your larger batch running, and gather your next ten images while the batch runs, and then once it's finished, drag and drop your new 10 images to Photoshop. As long as Autopilot is active, it will automatically switch between batch modes without you having to change anything.
If you leave Automatic Save & Close turned off, the images will process and sit waiting for your review, and if all's well, you can hit the Save/Close button to do just that. If you want to make a change, you can change your settings with Autopilot active and then hit the Revert button to remove your first frame and watermarks, and Autopilot will instantly reapply the frame with your new settings. Once you are happy with your settings, you can turn on that Automatic Save & Close button, and any other images you open while Autopilot is active will be automatically processed. Please do work on copies of your images, especially as you experiment, because they will be overwritten if Save and Close is active.
Round-Robin Processing
Because Autopilot will just sit and wait for images though, you can use it to Round-Robin from programs like Capture One Pro or Lightroom to add your frames and watermarks very efficiently. I figured this would be more impressive to watch so I created a three-minute video to share how easy it is to Round-Robin from Lightroom and Capture One Pro, which you can find below, but I'll also explain a little more about the Autopilot feature. Say you're working on an image that you want to prepare for print with a border, or you're working on some images to upload to Instagram and you want to resize, add a square frame, and watermark them ready, you can simply locate your images, select edit in Photoshop if it's available, ensure that you make a copy of your image during the edit or export command, and then when it hits Photoshop your frame will be automatically applied and saved, then appear back in your based program a few moments later.
I'll work on a longer video to fully explain these new features over the next few days, and embed that below as well, so please check back later if it's not already here when you visit.
As I worked with the new Autopilot mode myself, I did find that I would occasionally forget that it was still active, even though there is an inactivity timer that automatically turns it off, and I opened a file that I didn't intend to frame and resize, so I have also just added an Auto-off mode in addition to the Inactivity timers. The options are there so you'll figure out the best way to work, but if you know you're processing a one-off image or batch then select the Auto-off option and Autopilot will still wait three minutes for your images, before deactivating, but after you've sent something to be processed, be it a single image or a batch, after completing the processing, Autopilot will automatically deactivate.
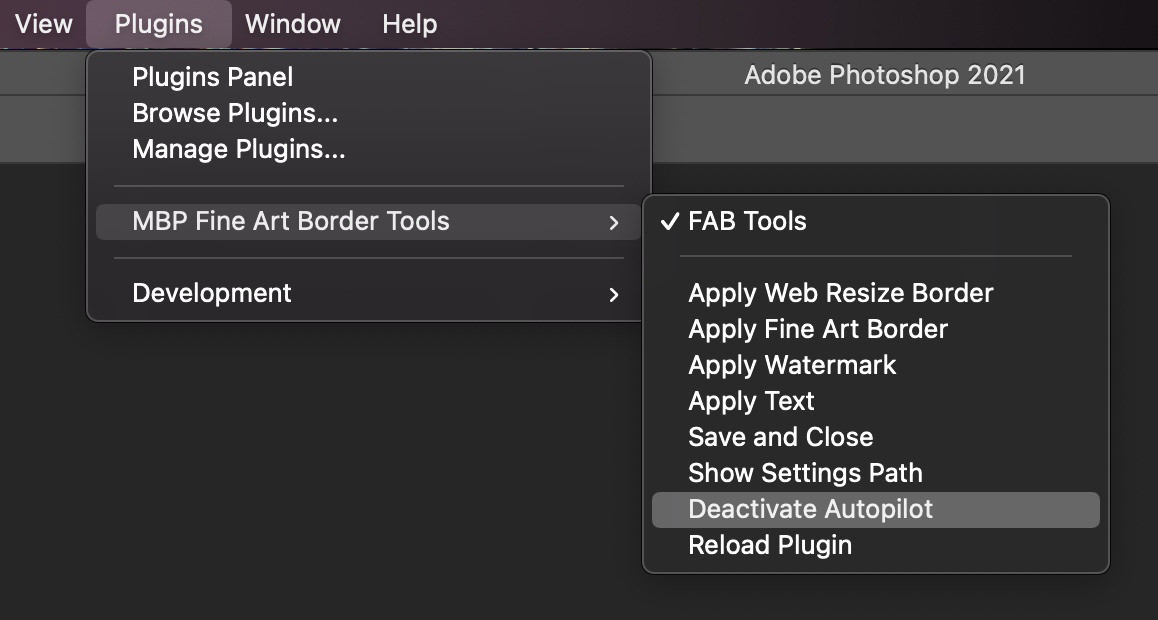
Also, I found it useful to open the Photoshop Preferences General tab and uncheck Auto show the Home Screen checkbox. With that checked, Photoshop will always go back to the home screen, hiding your plugins when there are no images open. If you prefer to leave the Home Screen turned on, you can go to the Plugins menu and turn on FAB Tools under MBP Fine Art Border Tools to display the plugin, even from the Home Screen.
You can also select Deactivate Autopilot from there too if you have a longer timer set but need to open an image that you don't want to process before the Inactivity timer expires. If you turn off the Home Screen, when you open Photoshop you'll just see any open Plugins or panels you have open and this makes it more intuitive to use the new FAB Tools Autopilot, especially when round-robin-ing. Is that a word?
One thing that you do need to keep in mind is that I was not able to prevent you from opening new images while Autopilot is processing other images, and most of the time during my tests, if you do open an image while Autopilot is working, it will result in a bit of a mess. If things go wrong, I try to deactivate Autopilot and provide a message to let you know that things went wrong, but depending on the timing, an image might get saved with errors before we realize that something is wrong, so please try to avoid opening new images while Autopilot is working on other images.
Text-Based Watermarks
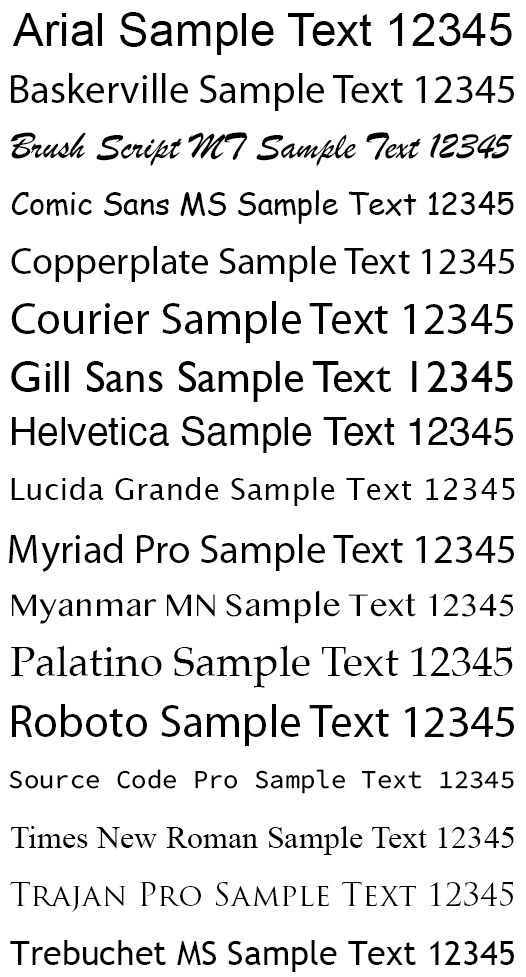
OK, so let's take a look at the new Text-Based Watermarks in a little more detail too. Based on the same layout the new Add Text module looks very similar to the first Watermarks module, but in addition to simply storing multiple text strings for placement on your image or in its new border, there is a selection of 17 fonts, most of which will be available on your system already, and I also store the font style, like Regular and Bold, etc. and the color that you select for your text, as you can see in this screenshot.
I've left the Text options open in this screenshot for you to take a look at, but as you can see, there is a lot on that panel, so when you've finished adding or modifying your watermark text, hit the Done button, and all of the text options will collapse away leaving just the Show Options button, which says Hide Options in this screenshot, and the pulldown with the text inside. If you don't need to change any settings, you can simply select any of the stored text watermarks from that pulldown without displaying all the settings.
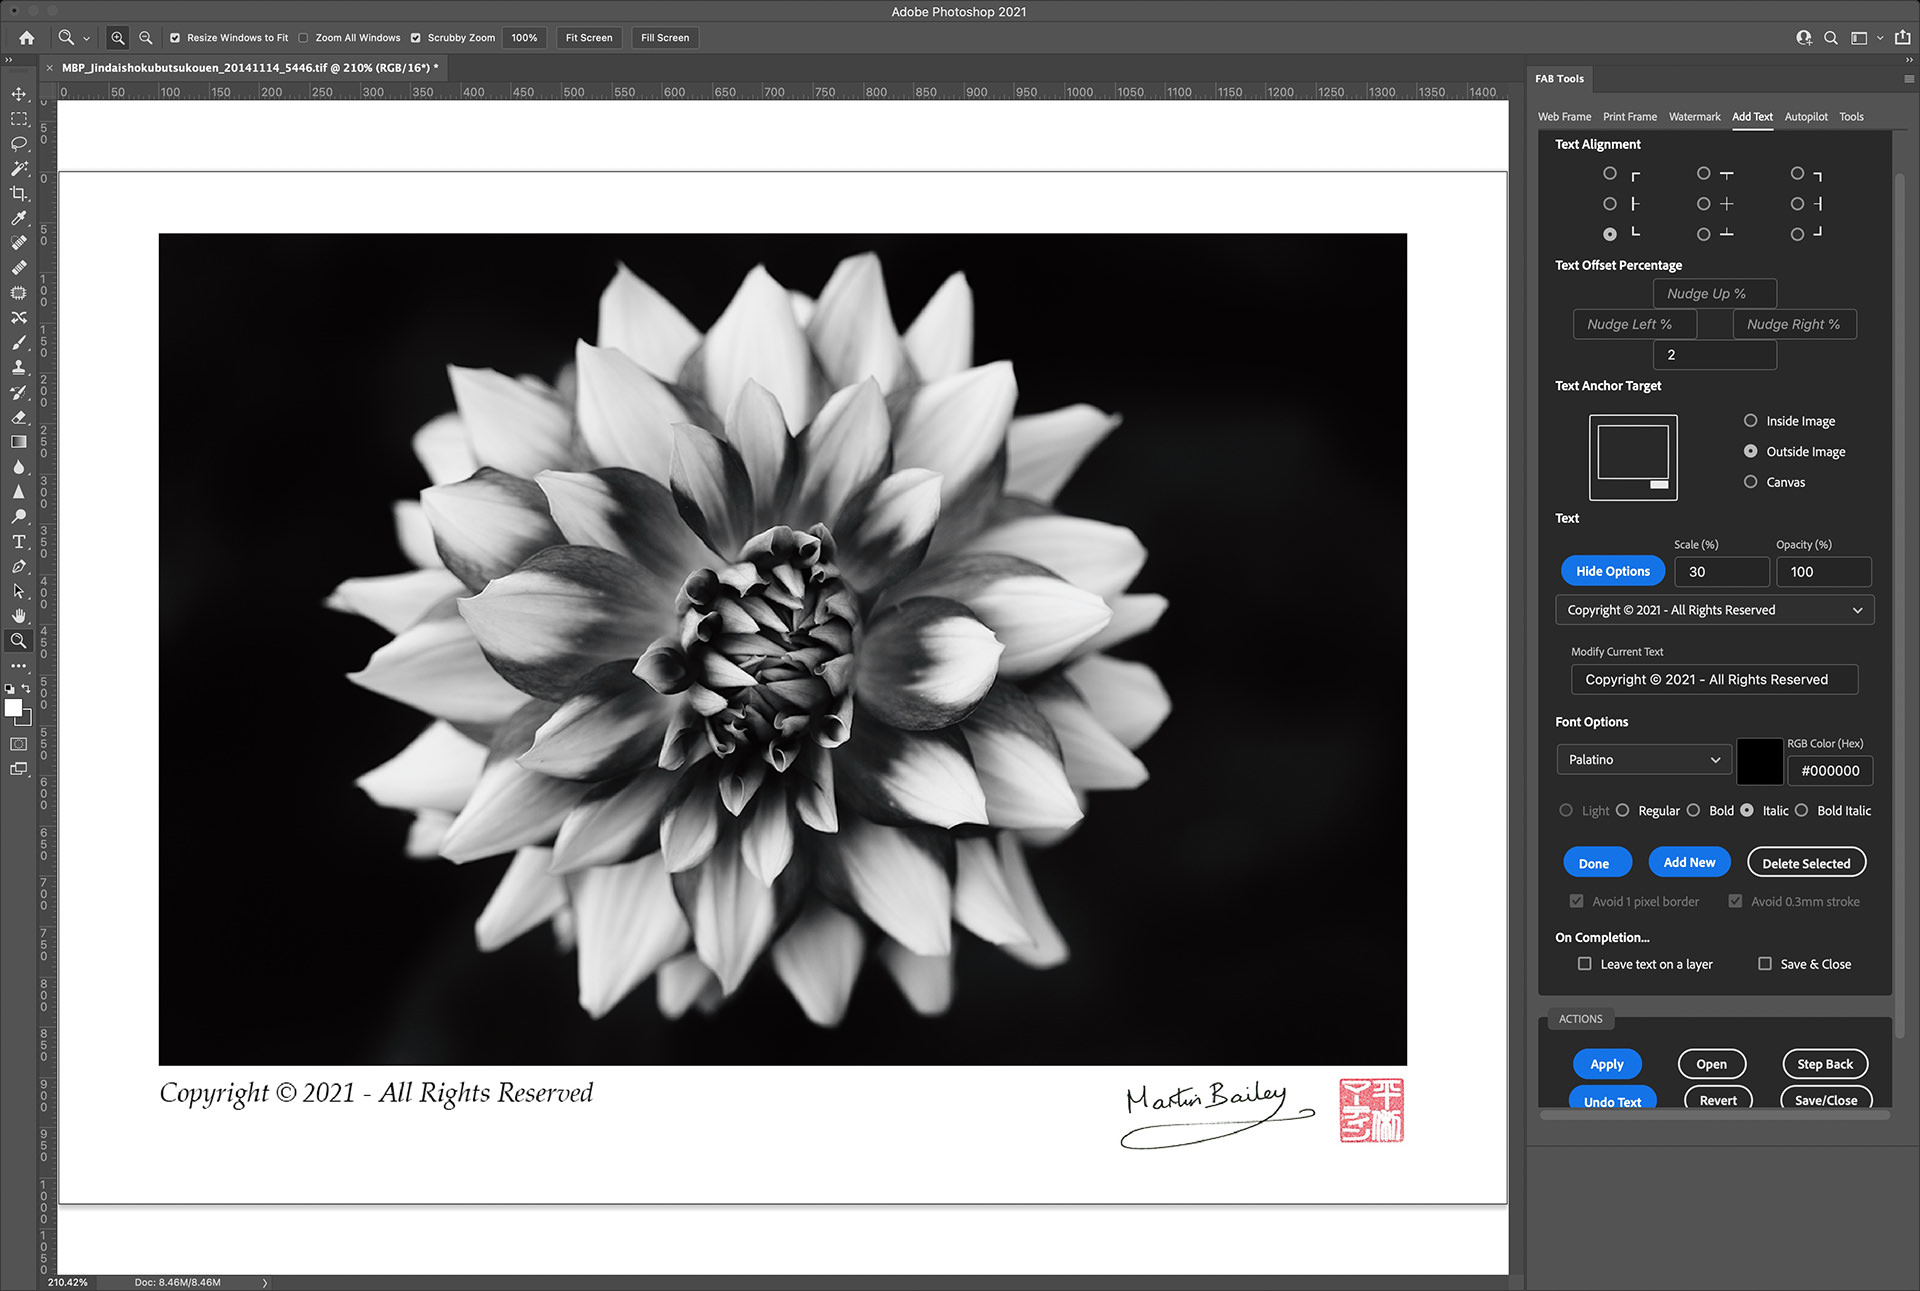
Note too that we don't use points for the font size because that would mean you'd need to change the size in points every time you change the size of your resized image. Instead, as with the graphical watermarks, we use a Scale value, which I've set to 30 by default, although you can obviously change that, and this intelligently scales your text to 30% of the width of your image, regardless of the size your image will be resized to. I also fixed a problem with the opacity, which of course, sets the opacity of your image between 0 and 100%. All of these settings are stored on a per string basis, so when you change to a different text string, all of its settings come with it.
Due to limitations in the plugin framework, I'm currently not able to simply access all of the fonts on the users' system, and there is no way for me to know if the fonts I've listed are actually installed, so if you select a font and it looks bland when applied, check that you have the font installed, and if you don't, install it, and it should kick-in just fine. Also, if there are any fonts that you believe are installed by default that you would like to add, please let me know, and I'll try to add them in a future update. Similarly, if you use a font in a language that is not covered by these default fonts, let me know, and I'll figure out a way to make additional font sets available for other languages, etc.
I have also tested that a certain amount of intelligence ensures that if, for example, I store some Japanese text as a watermark, even though I have a Western font assigned, Photoshop realizes that it's Japanese text and uses a default Japanese font, rather than applying garbled characters. I would like more control over this, so I've got a note to work on a solution, but for now, if you do need to use non-Western text, FAB Tools should at least not fall flat on its face.
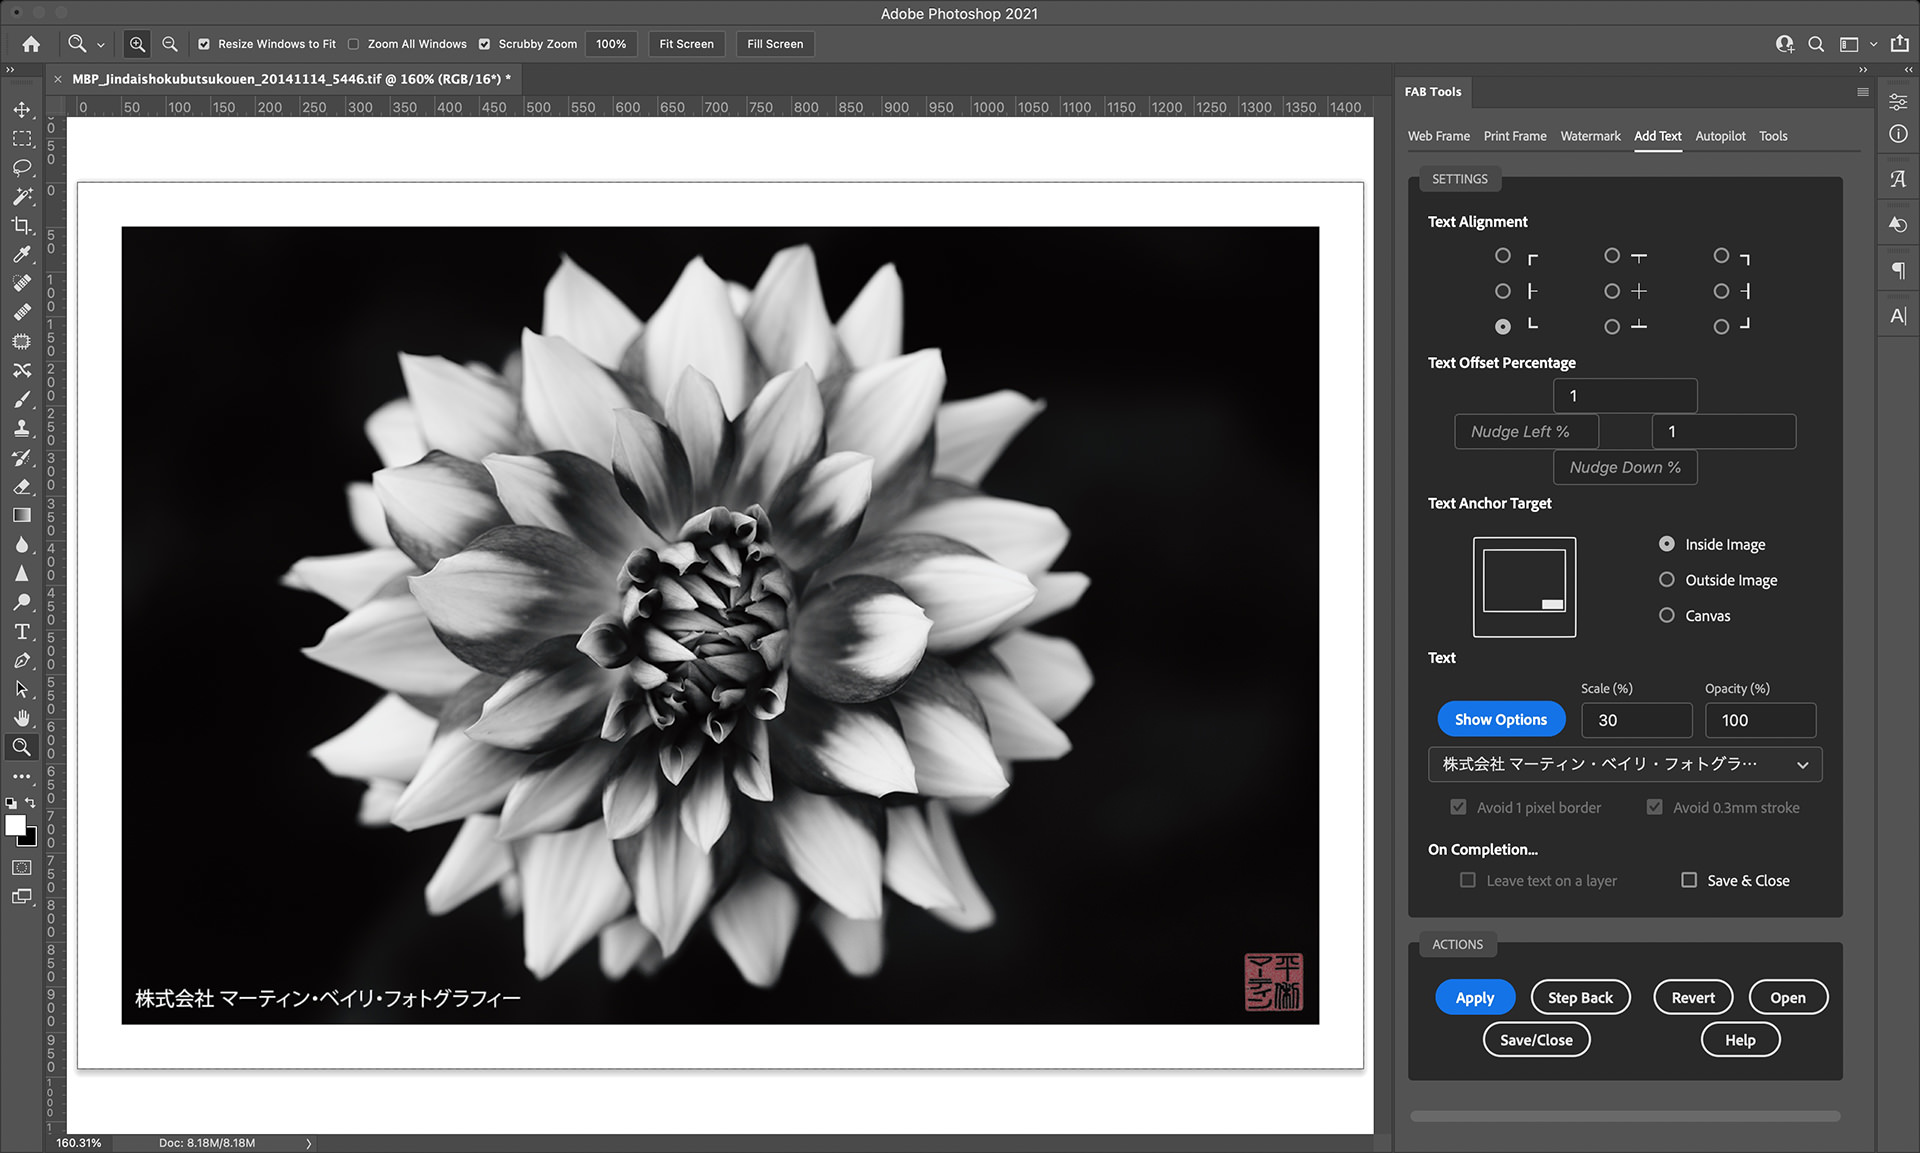
For this example, I applied both my Text and Graphical watermarks inside the resized image, as opposed to in the border, so I made the outer border a bit smaller, and also reduced the opacity of my name stamp to 50%, to make it look more like it has actually been stamped over a dark background. Even with the generic Japanese font to display my company name, it doesn't look too bad, although some options at some point soon will be nice.
Here is the overview video that I mentioned earlier. I hope you find it useful!
OK, so that's a quick rundown of these new features for MBP Fine Art Border Tools which have now passed Adobe's review, so these features will be in FAB Tools when you buy it. For more information on all of the features available, check out the product page, and if you just want to run off and pick up a copy, you can find the plugin in the Adobe Exchange Marketplace. Make sure that you use the same email address as your Adobe ID when checking out, to ensure that your plugin is delivered to your account. Note too that you need to be running Photoshop version 22 or higher to use the MBP Fine Art Border Tools.
Tag FAB Tools!
If you are finding FAB Tools useful and use it on any of the images that you post on Instagram, tag your image with the hashtag #mbpfabtools and I'll keep my eye out for anything you post. I'd love to see how you are using FAB Tools.
Show Notes
See details on the FAB Tools product page: https://mbp.ac/mbpfabt
See FAB Tools in the Adobe Exchange Marketplace: https://mbp.ac/fabtmp
Subscribe in iTunes to get Podcasts delivered automatically to your computer.
Download this Podcast as an MP3 with Chapters.
Visit this page for help on how to view the images in MP3 files.

Hi Martin. I just installed FAB Tools v1.1.8 and I have been having great fun trying out some of the options. The time saving and consistency that your plugin provides is well worth the investment. Every PS user should have it :o)
If you have some spare time (!) and are looking for things to add, I was wondering how easy it would be to read the installed fonts so that they can all be available for the text-based watermarking… a nice to have feature but you know how people love fonts! Thanks for all of your efforts with this and your other work!
– Best wishes, Ian [Scotland, UK]
Hi Ian,
Thanks for picking up FAB Tools!
At this point, there is no way to directly tap into the Photoshop font list, but there is word of this being supported in a future update, so I’m keeping my eye on that and will modify FAB tools when that happens. In the meantime feel free to let me know what fonts you’d like to use and I’ll see if I can add them.
Also note that there is a problem that was introduced in Photoshop 22.5 that makes entering text into the text fields a little troublesome under certain circumstances. I have a temporary fix in an update that I’m working on, and hope to submit that in a few days. It will also bring savable presets which will help with storing specific settings in each module. It’s all working already and I have one last bug to squish before submitting it.
I hope you continue to find FAB Tools useful!
Regards,
Martin.