
Visit Library for MBP Pro eBooks |
Following on from my previous post about the moral dilemma I'm struggling with regarding killing an insect for a photograph, we're going to put that aside for this episode, and simply talk about how I went about the process. If you don't agree with this and feel uncomfortable listening or reading, please turn this off or close your browser now. I won't do a lot of this kind of post, but I do think that there will be at least a portion of the audience that will find this useful, so here goes.
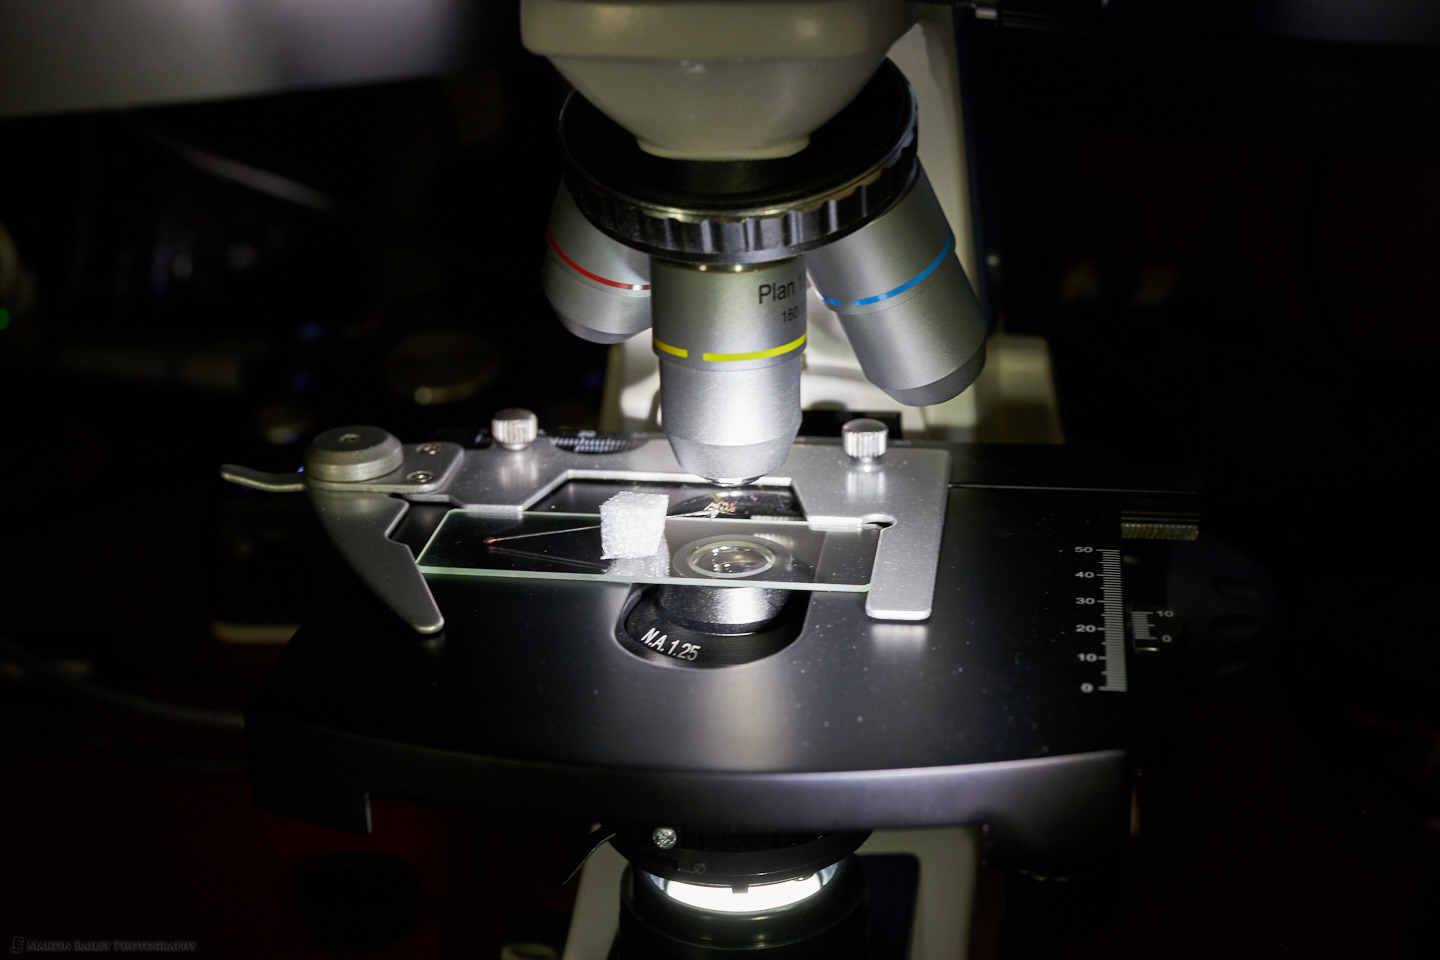
I've been quietly preparing to photograph insects more over the last few weeks, based in part on the very informative videos from insect photographer guru Allan Walls, so a public shout-out and thank you to Allan for making that stuff available. You can actually see most of what I used in this photo, so let's walk through this item by item, and I'll fill in some gaps as we proceed. Firstly, you'll see the jam jar that I caught the fly in, and then poured in 90% alcohol and 10% water which both kills and cleans the fly. Allan Walls also recommends using an ultrasonic jewelry cleaner to clean off stubborn dust that can form on insects, but so far I haven't needed this. Maybe at some point, I'll pick one up.
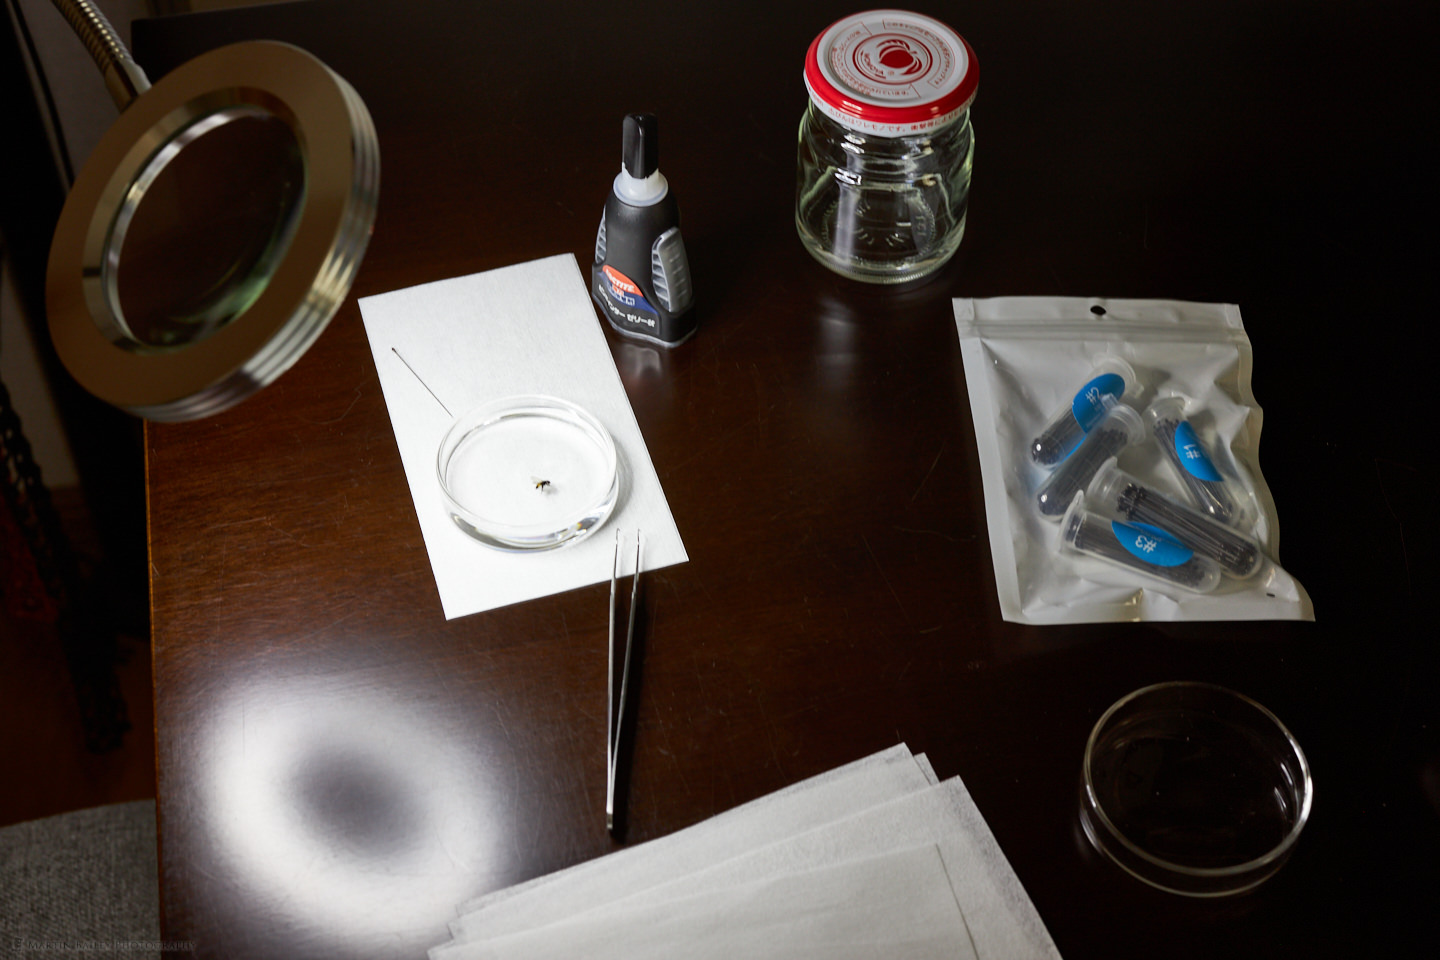
I left the fly in the alcohol overnight, both because it was late when I caught it, and to ensure that any parasites that might have been inside the fly were also killed by the alcohol. Then, before I photographed it, I placed it in a Petri dish with some distilled water in it, to rehydrate the fly. I then selected a #2 insect pin which is the second to thinnest pin in that selection of pins you see in the white envelope on the right. You can also see the pin next to the Petri dish on that sheet of lens cleaning paper. I used a pair of very fine tweezers that you also see here to open up the wings of the fly a little, and also pull its legs away from its body a little too, then as it dried naturally in the air, I placed a tiny blob of superglue onto the insect pin and stuck the pin to the underside of the fly's abdomen.
The fly was probably only 3 to 4mm in length, so I used the magnifying glass that you see on the left with the built-in USB-powered LED lights to see what I was doing. The paper is lens cleaning paper that I use to clean my microscope slides, and, of course, lenses, but reuse them like this when dried to guard against spilling alcohol, etc. on my work surface. Once they actually get dirty I throw them away. After preparing the fly, I use a soldering stand to hold the insect pin and position the fly under my Stereo microscope to start photographing it, as you see here.
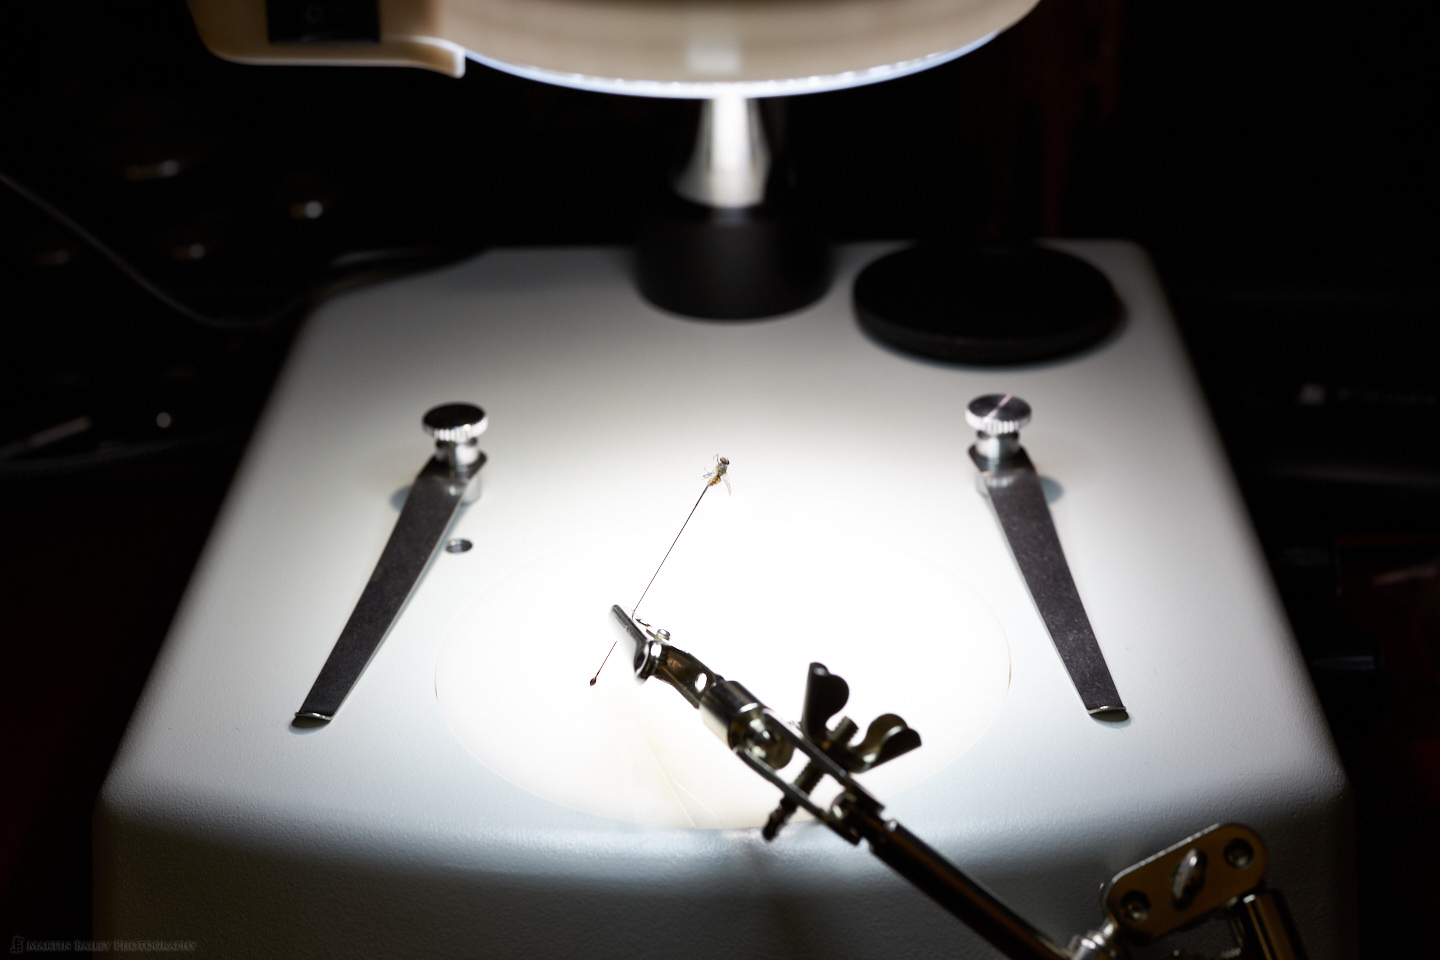
I didn't photograph every step of the shoot, because keeping the fly out of the alcohol or water gradually allows it to dry out, and the eyes start to collapse in, which doesn't look good. For some of the images, I used a piece of black velvet below the fly to give it a black background. The microscope came with a black plate that replaces the semi-transparent circular plate in the above photo, but it's so reflective that it appears almost white when illuminated from above, so I find that the black velvet soaks up the light much better. I am also using an LED ring light that attaches to the bottom of the microscope lens, providing really nice adjustable light for the subject.
Here is one of the first shots of the Housefly using my Stereo microscope and the 2X Barlow lens. My Stereo microscope has a zoom mechanism that provides 7-45X magnification with the 10X eyepieces, and the Barlow lens doubles that to a 14-90X magnification range. I haven't yet calibrated my Stereo microscope to find the magnification of my camera adapter with this scope, but it's probably around 2X, so we're actually looking at around 24-180X magnification in the photo with the 2X Barlow lens in place.
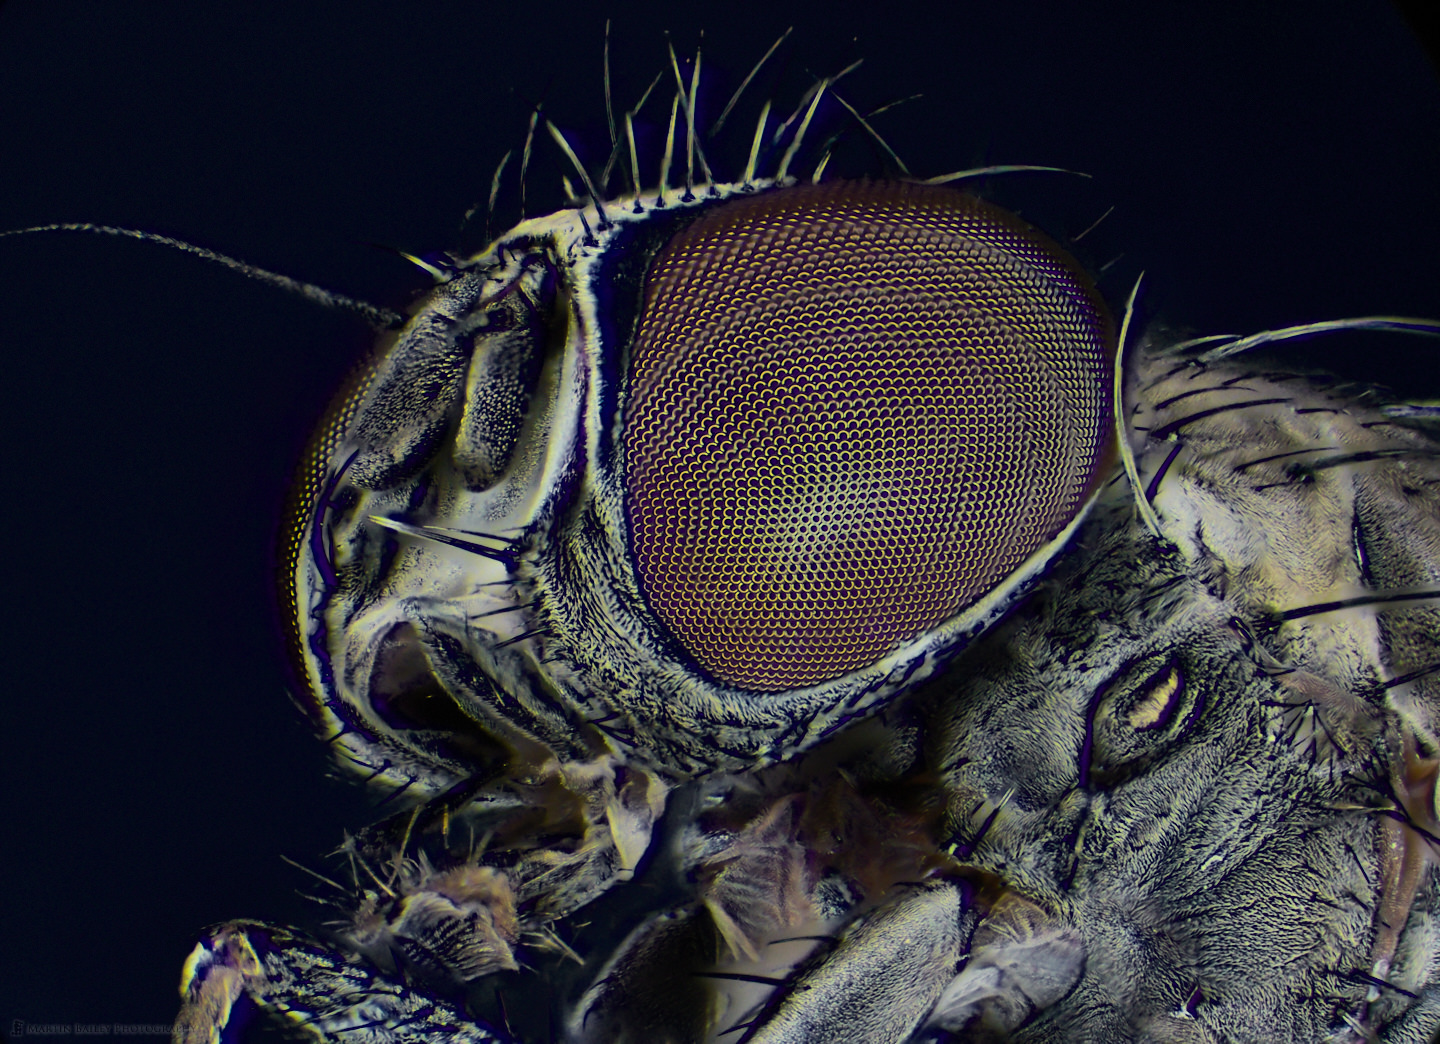
I learned an important lesson with this first photograph though, and that is that you have to be very careful with the amount you adjust the focus when shooting images of insect eyes to focus stack. You can probably notice the four slightly darker rings around the top half of the eye that is caused by too large a gap between my focus stack images. To prevent this I turned on the "Focused" checkbox in Helicon Remote, which shows the area of the specimen that is in focus in blue, as you can see in this photograph of my computer screen as I worked.
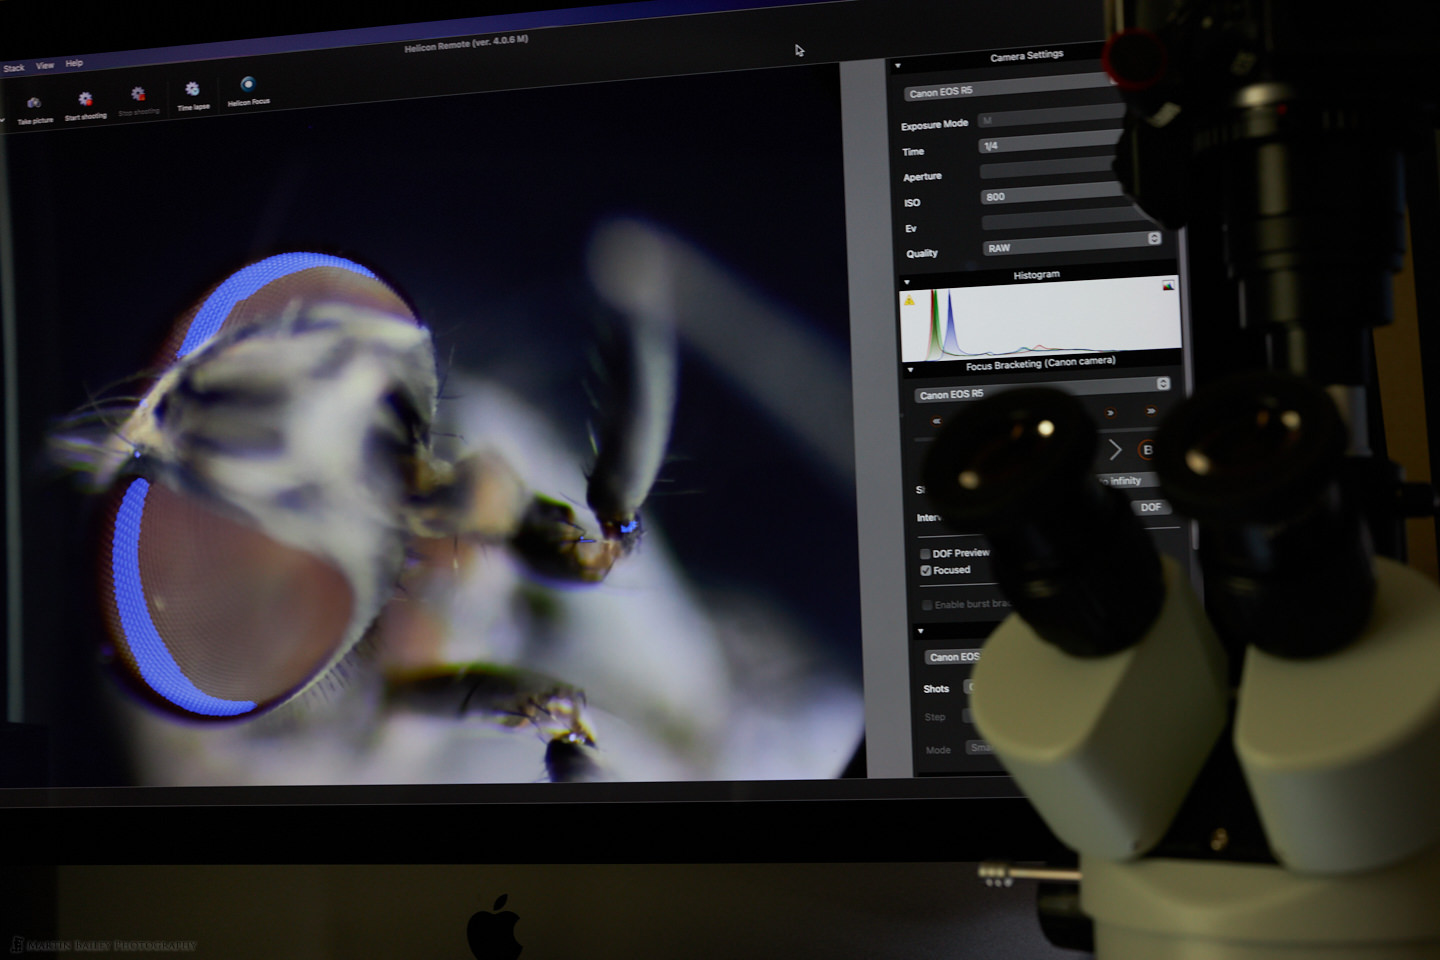
Once I'd identified the problem and the cause, I started to place my thumb on the back edge of the focused area on my screen and then adjusted focus for the next image with my finger marking the previous edge, and I only moved the focus halfway back from there, so it was half overlapping the previous image. When you shoot the eyes like this, you don't get the nasty focus error rings that you see in the earlier image of the Housefly.
Extra "Hand"
At times like this, it helps to have an extra hand to trip the shutter, so I used the built-in Mac OS Voice Control feature, found under System Preferences Accessibility options. There were also times when I was photographing the fly with my compound microscope when I was holding a flashlight to illuminate the subject, and I also have to adjust the focus of the microscope between each frame for the stack, so I set up a voice command to enter the keyboard shortcut to take a photo in Helicon Focus every time I said "new photo". I also configured a command to create a new stack every time I said, you guessed it, the words "new stack".

There were also times when although I was not holding a flashlight, or marking the focus zone with my thumb, but it just kept things more stable by not physically touching my keyboard. It helps reduce vibration on my work surface, so the voice control came in very handy.
Parallax Shift
There is one limiting factor working with a Stereo-microscope for photography, in that, because they are designed to provide a stereoscopic view of the specimen, there is a parallax shift as you adjust focus when redirecting the image from a single lens to the camera port. This means that as I adjust the focus the subject gradually drifts across the screen, and will eventually move so far that there is nothing left to stack, so I am still limited to a certain depth of field. In this photograph of a scarab beetle, which I luckily found dead outside of my apartment recently, I initially tried to stack enough images to get the entire beetle in focus, but the parallax shift caused the beetle to move so far over to the right that I ended up with only half a beetle after stacking. To avoid that, I stopped my stack around halfway down the beetle, and I actually like the out-of-focus abdomen anyway, so all was well. This still took 40 frames to create this image, with around half of the scarab beetle in focus.
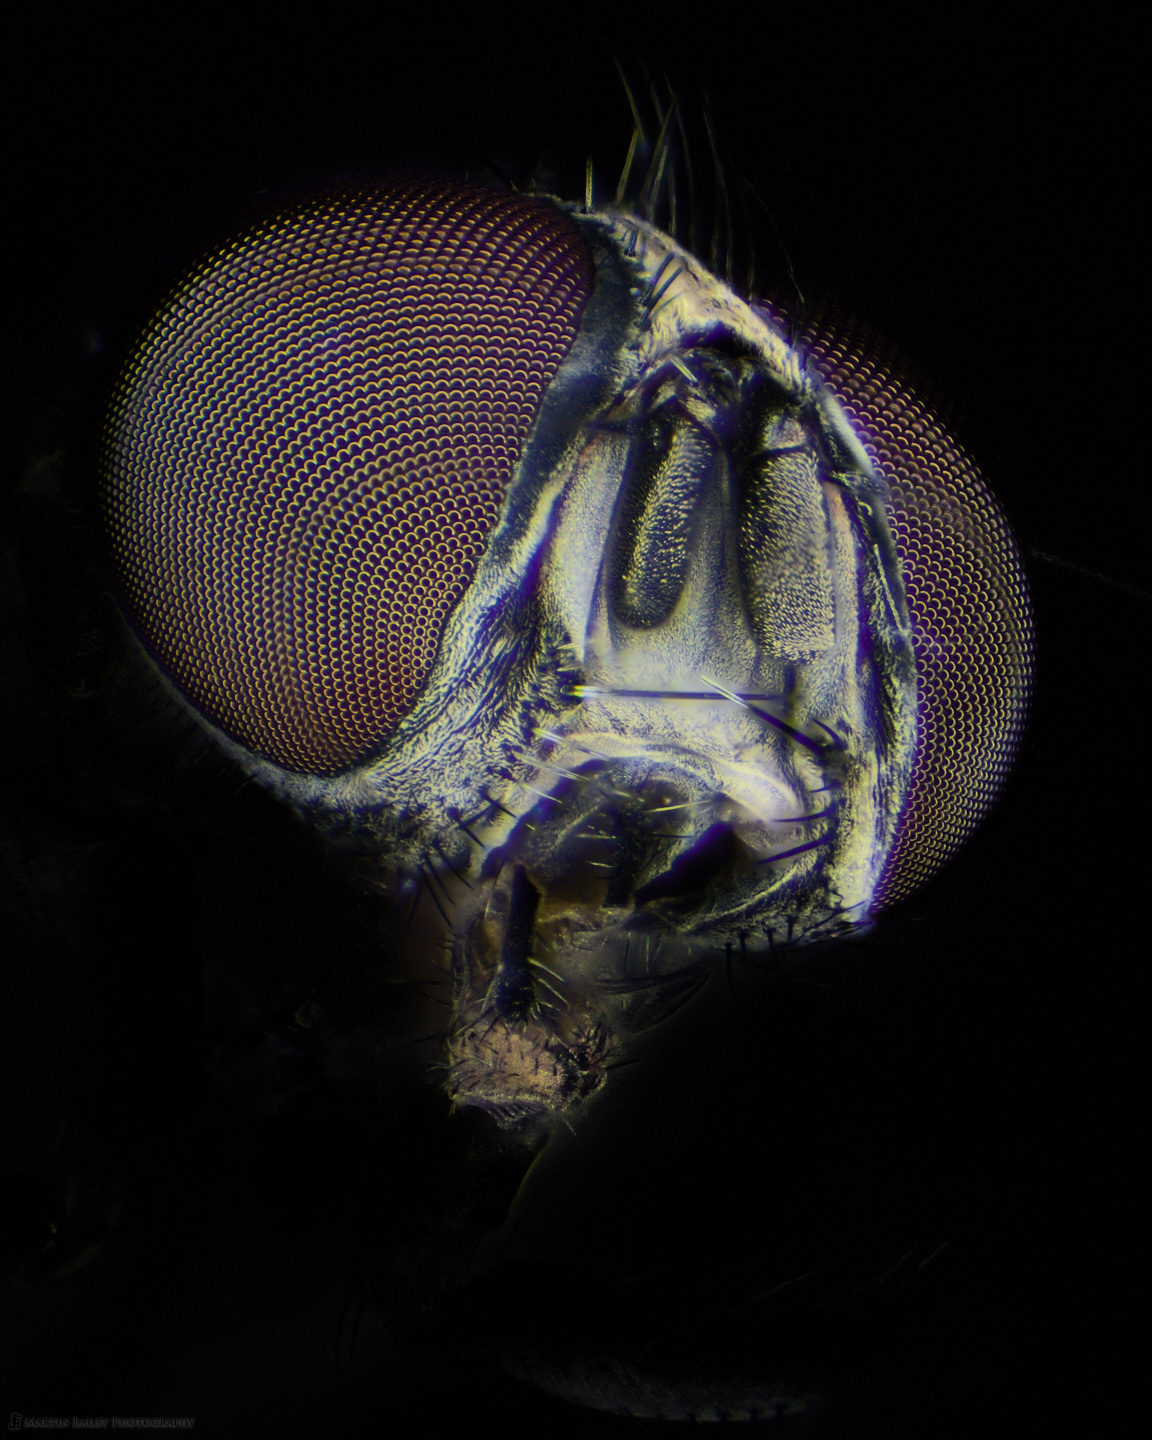
Anyway, having figured out how to photograph the eyes on the housefly without the nasty focus rings, I also shot a few stacks that resulted in some images that I am relatively happy with, such as this one, off slightly to the left of the face. I darkened down the body in this and a few of the images, as there are areas that don't look great, but also there were a few stacking issues that left a few too many remnants, but I actually am mostly interested in the face of the Housefly.
To get this look relatively naturally I used an adjustment brush in Capture One Pro and brushed out the background in a number of different layers, probably up to five or six per image, and allowed some of the layers to overlap with the back of the eyes a little so that it looked like the fly was poking into a spotlight rather than being more fully illuminated from the start. I reduced the Exposure and sometimes used a tone curve adjustment on the layers to gradually darken the background.
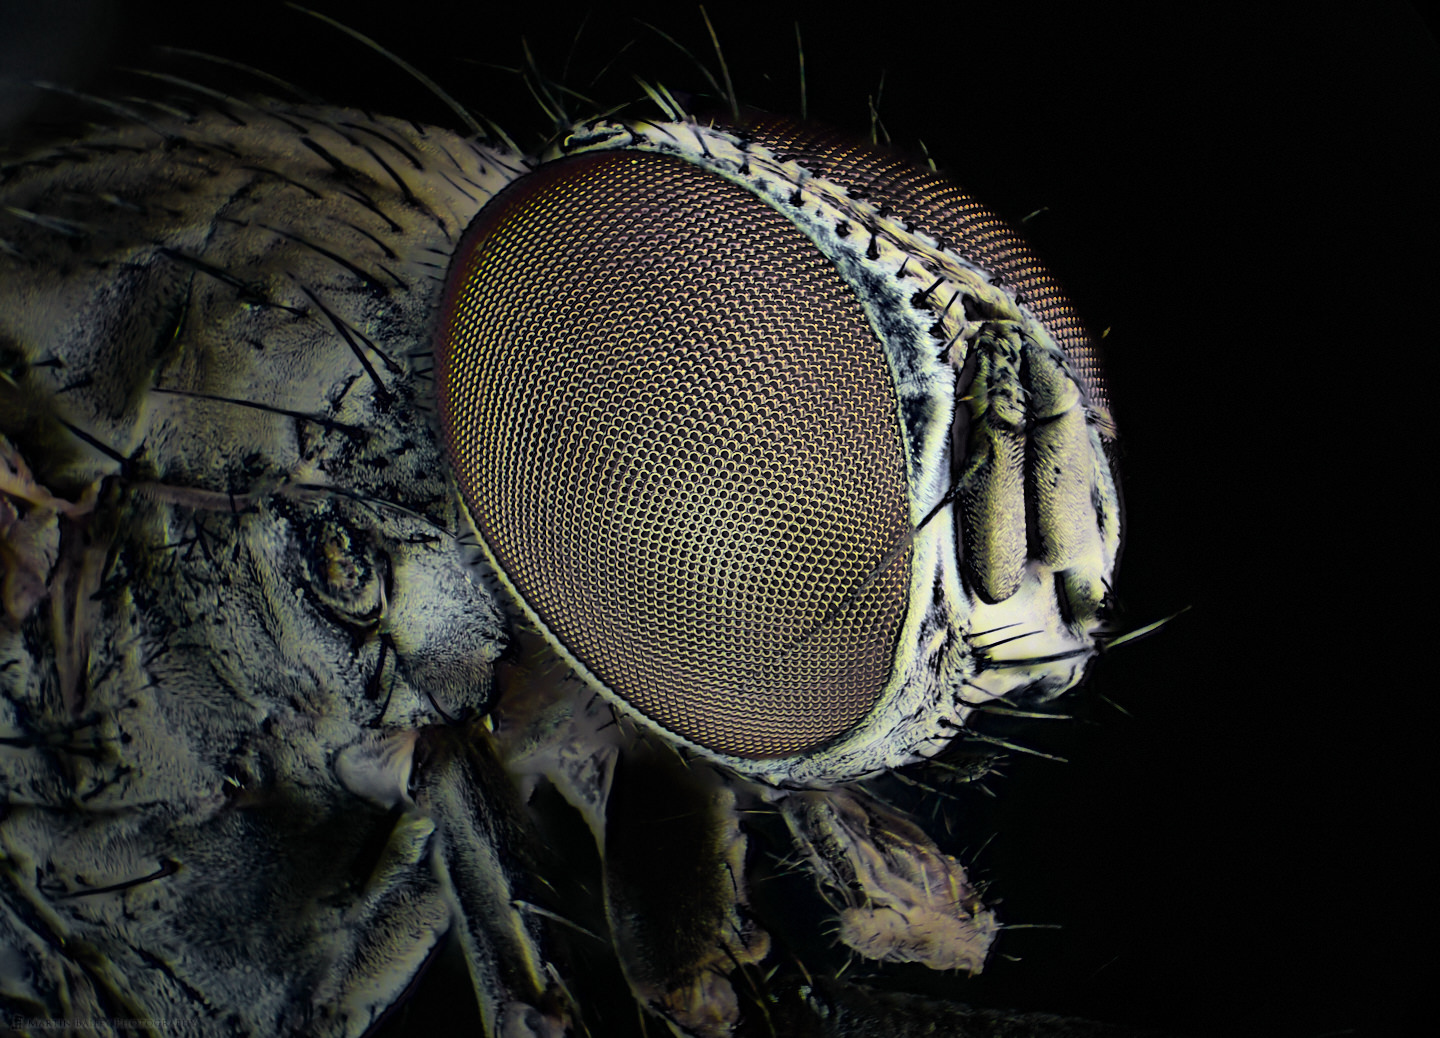
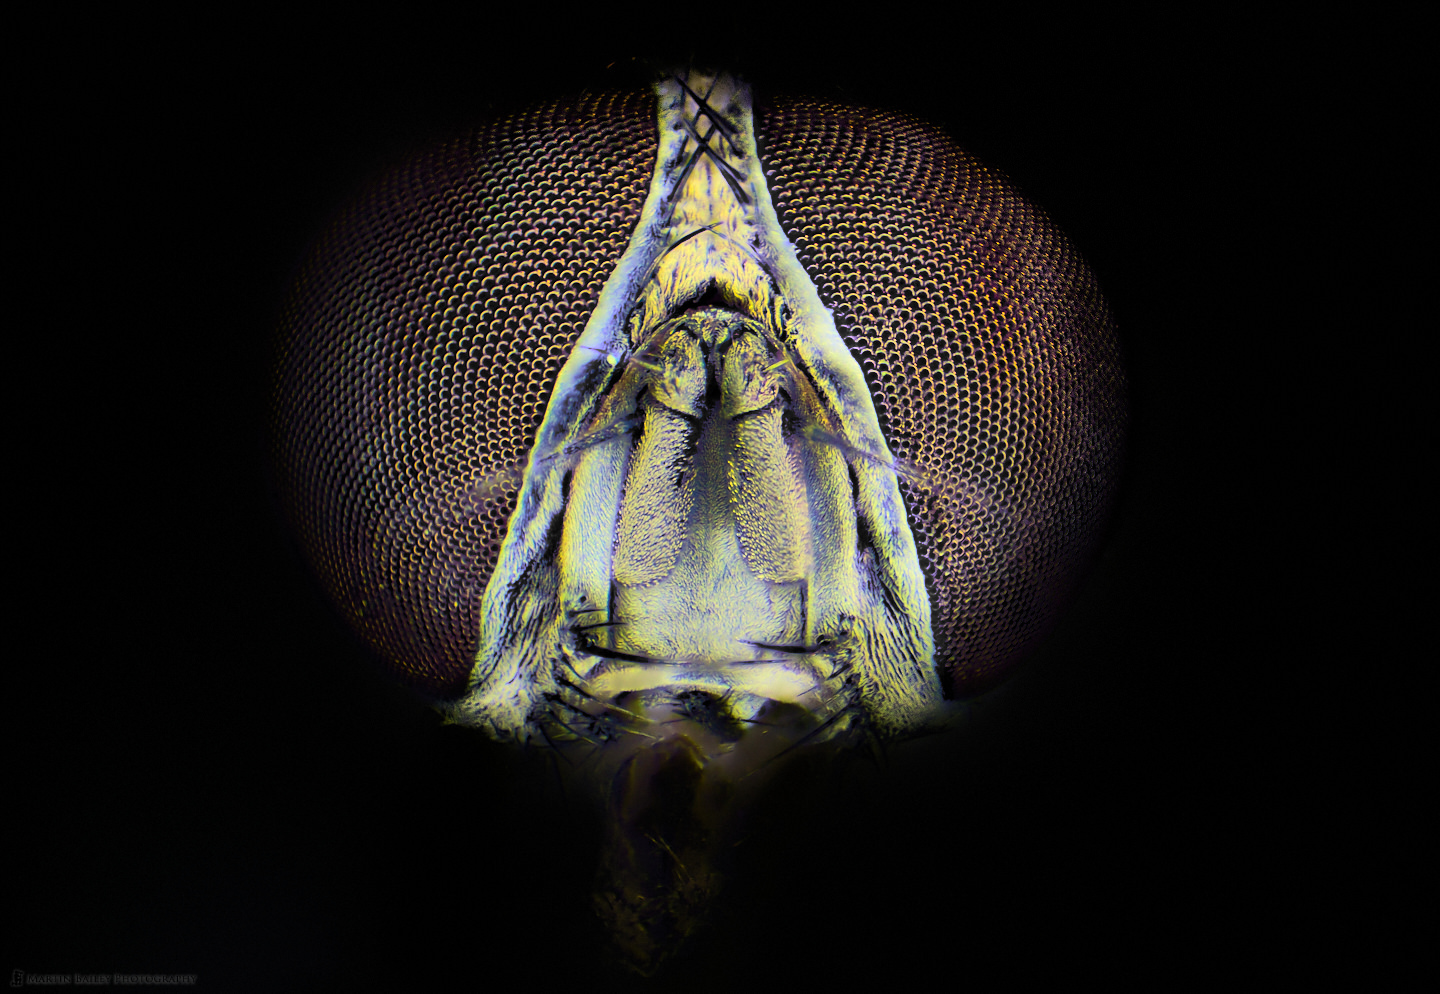
To the right, above, I've also included a shot where I didn't totally darken down the body, and again, without the focus rings in the eyes, so I'm pretty happy with this. Both of these images were shot at around 60X magnification through the eyepieces of the microscope. It's a little bit scary to first look into the eyepieces at this magnification, but seeing all of the detail in this creature is incredibly fascinating.
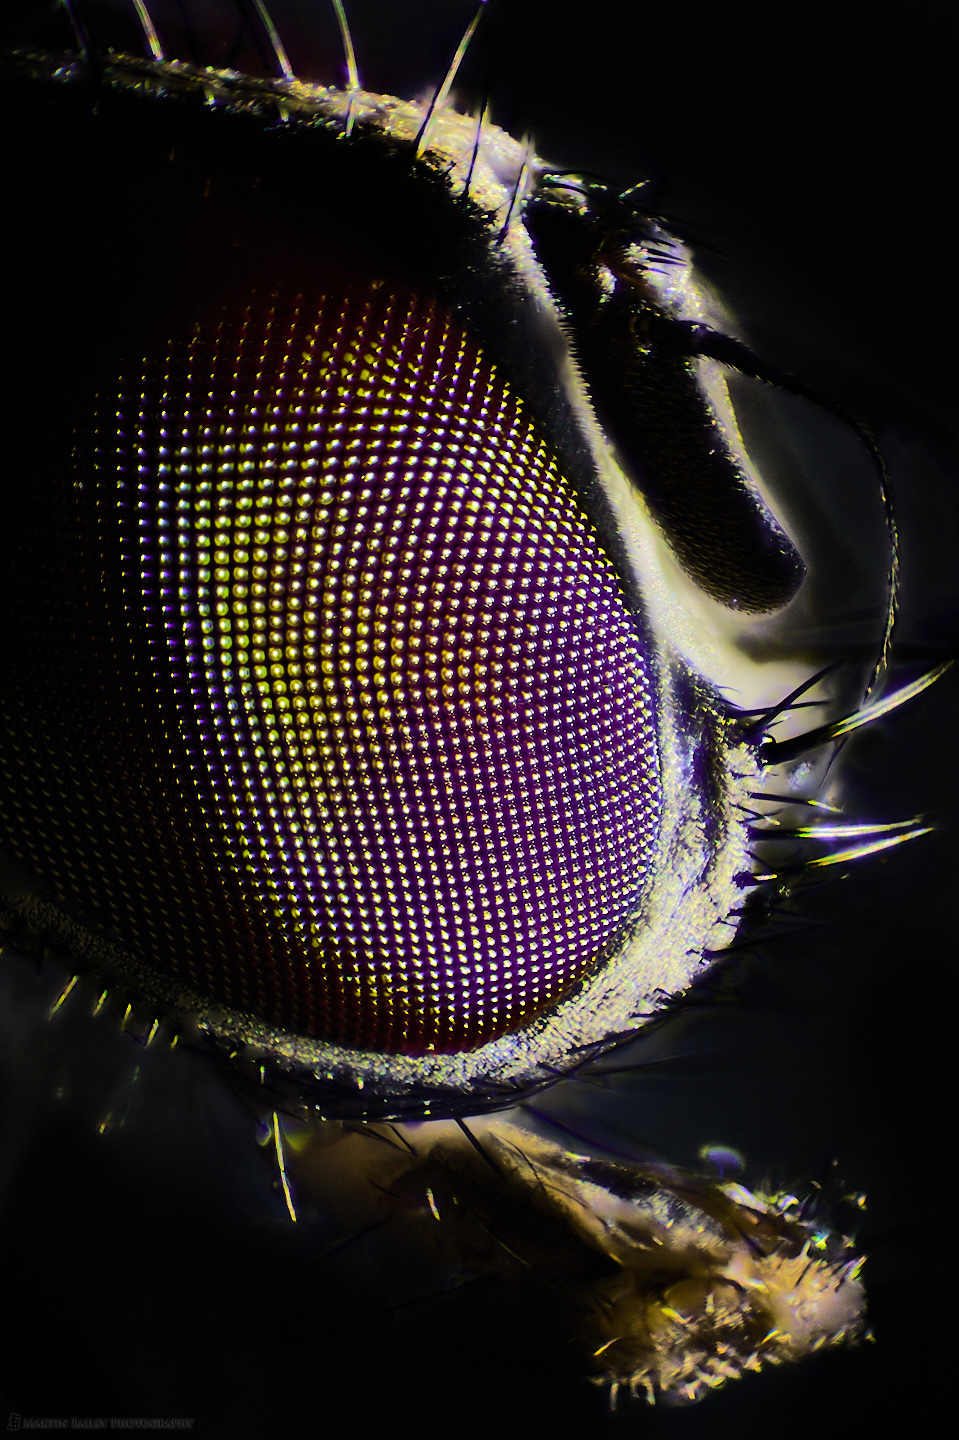
Here are two final images to finish with. The first was shot with my Compound microscope, illuminating the Housefly with an LED flashlight, at 100X magnification. The second and final image is from the Stereo microscope again, and I had started to run out of time as the eyes were gradually losing their luster and starting to concave very slightly in a few areas.
As I mentioned in my previous episode about the moral aspect of doing this, this fly was pretty much doomed the moment it came into our apartment, but I don't feel 100% happy with killing it for these photographs. I'm struggling with the decision a little bit, although I do find it fascinating. For larger insects, I'm pretty much going to rely on finding them dead after they've lived their lives, and see how much I can make of that. As I mentioned earlier, I'm not going to do a lot of this kind of episode, so if you don't like it, stay tuned anyway, as we'll be back to my regular work more often than not as we move forward.
Show Notes
Check out my Microphotograph section here: https://mbp.ac/microphotography
Subscribe in iTunes to get Podcasts delivered automatically to your computer.
Download this Podcast as an MP3 with Chapters.
Visit this page for help on how to view the images in MP3 files.


0 Comments