
For this week’s post I have created a video starting with the loading of a 120 format roll of Ilford Delta 100 film into the Ars-Imago Lab-Box and then go on to develop it using Ilford chemicals. You’ll notice that in the video I was pretty nervous, as this was my first time developing film with the Lab-Box, and actually the first film I’ve developed for almost four years, as I guess I found the Paterson Bag a little too tedious.
Note that although this is a video post, I have created the MBP Pro Members’ eBook, as usual, to share the scanned 120 film images at much higher resolution, so download your copy if you are a member. If you are not a member, consider subscribing here.
[download id=”389879″]
Towards the end of the video, as I really got into the process, I was pretty much just mumbling to myself rather than making a video, but you should be able to follow along with the process and hopefully find this useful. I shot the video in 4K so that I could zoom in but then I filled a 128GB card on one camera in just over 20 minutes, so I had to record the ending again. All in all, it’s a bit of a mess, but the process is covered, so please take a look if you are interested, and there is some other information below the video, so please check that out too.
Note that I was using the Massive Dev app for iOS as my timer, and I also find this app invaluable for calculating the new development time based on the temperature of the water. This changes up to a few minutes with every degree of variance, so having an app that just spits out the new time as the temperature changes is really useful.
DEC 2019 UPDATE – HOW TO AVOID LOSING THE FIRST FRAME
OK, so in the weeks after releasing this post, I found that you cannot pull the film out of the light-tight chamber this far to attach the lead clip to pull the film into the spool. I am now literally peeling off the tape and backing paper without extracting any film, and now I’m able to keep the first frame on my rolls. If you pull the film out as far as I showed in the above and below photos, you will lose your first frame.
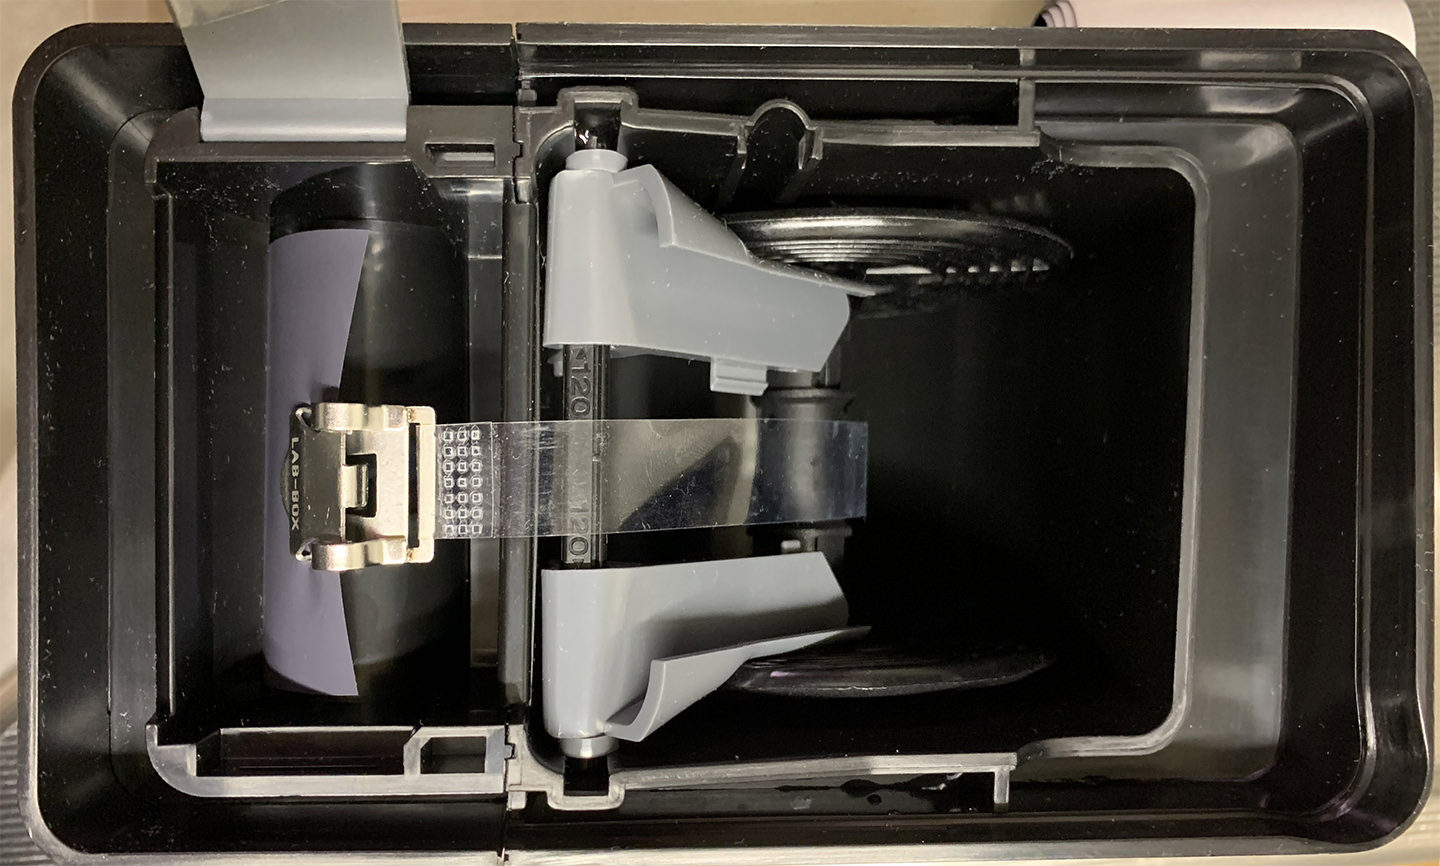
The above is an iPhone shot from a later development session and this worked perfectly!
CHEATSHEET DOWNLOAD
On request, here is a button to download my ILFORD cheat-sheet that I use when processing, in Excel spreadsheet format.
[download id=”390000″ template=”dlm-buttons-mbp-freebie”]
CanoScan 9000F MarkII Scanner
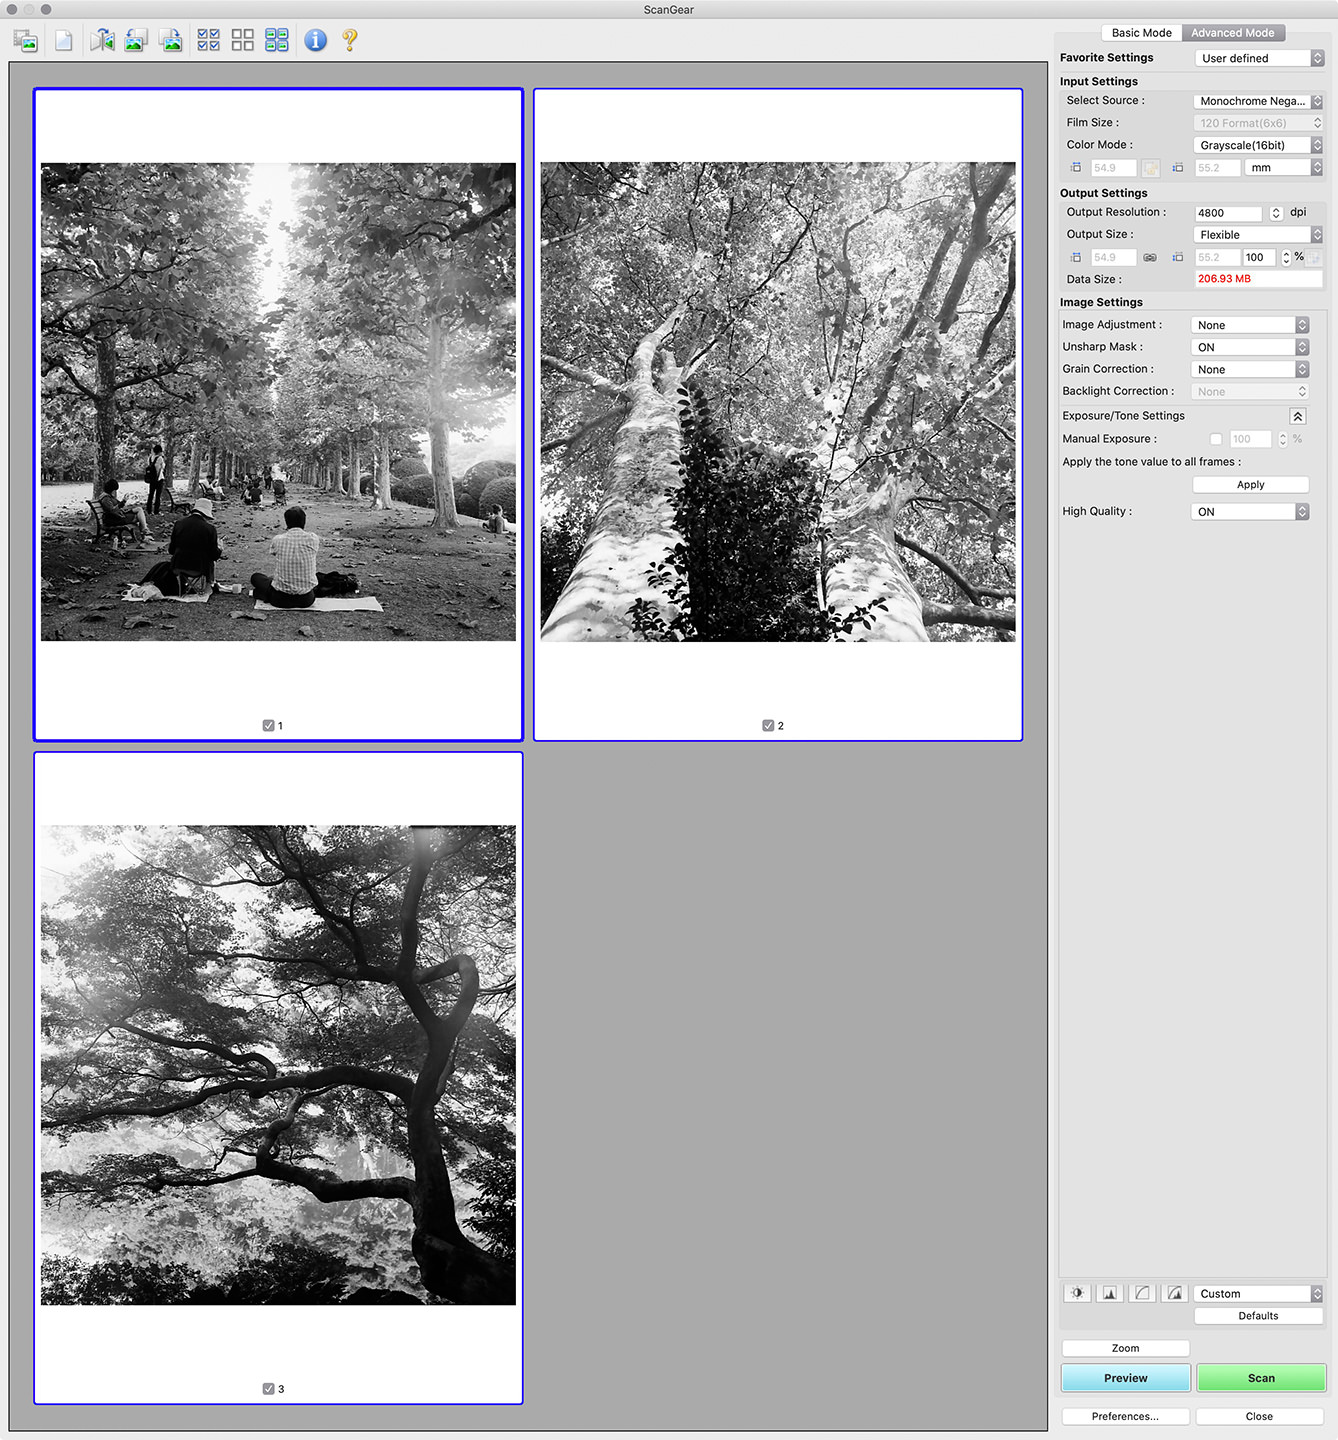
When I completed my Film Fun series in 2016, we finished with an episode in which I walked you through the process of scanning the film using an Epson Scanner that I bought a little over ten years ago. Although I was happy to see that Epson had released Catalina drivers for the scanner, unfortunately when I plugged it into my computer for the first time in a few years, it had given up the ghost. I have scanners built into multifunction printers that I use for document scanning, so I didn’t really want to buy a new scanner, but because all of the dedicated film scanners that I could find online are all relatively low resolution, I decided to buy a Canon CanoScan 9000F MarkII scanner, and I’m actually really pleased that I did.
The quality of the scans is incredible, and the software makes it really easy to scan in a row of three 6 x 6 medium format negatives without really having to do much more than feed in the film, close the lid and press a few buttons. I did a few tests before I scanned the entire roll to see how high I could take the resolution and still see increased detail in the scans. I saw a difference up to 4800 dpi, but doubling that to 9600, the highest resolution of the scanner, did not give me any more detail, just much larger files, so I’m scanning these shots in at 4800 dpi, which is giving me just over 100-megapixel images to work with. Here is a screenshot of my settings in case this is useful for anyone.
Gallery
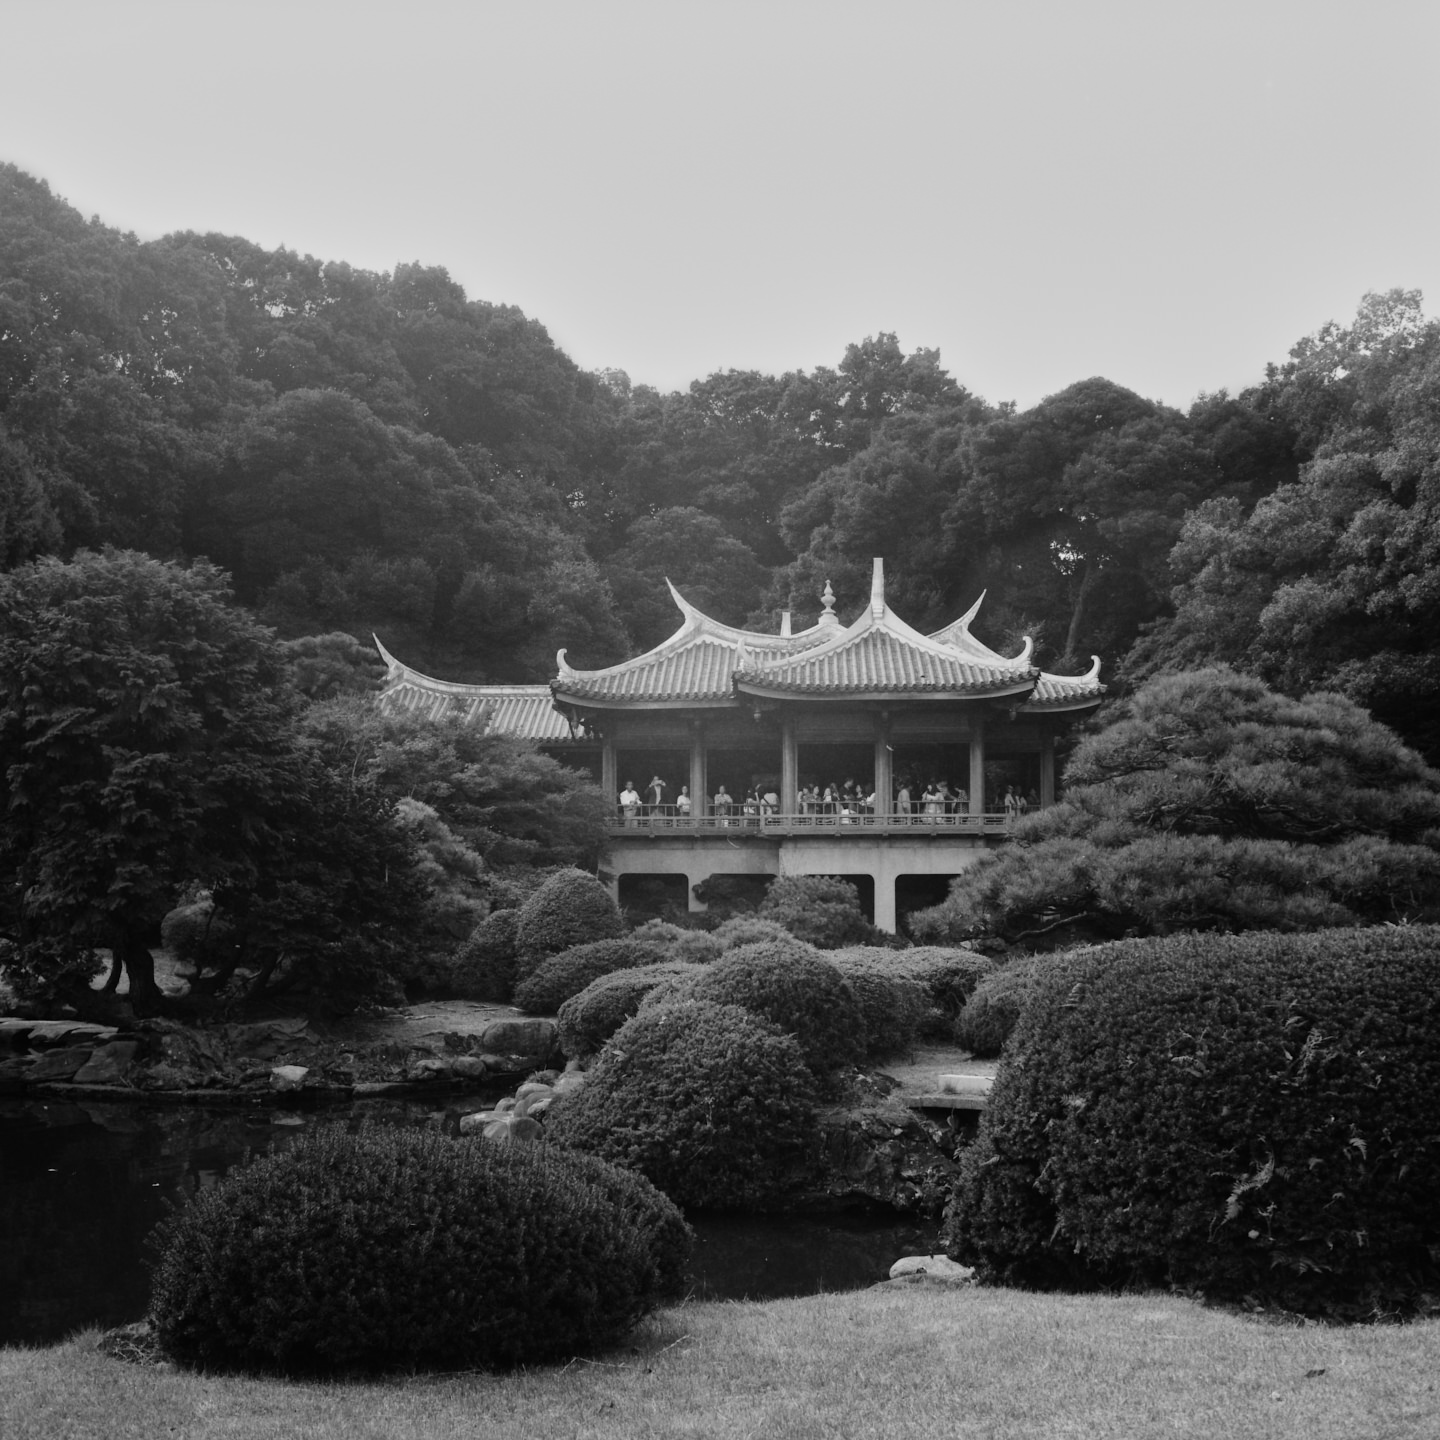
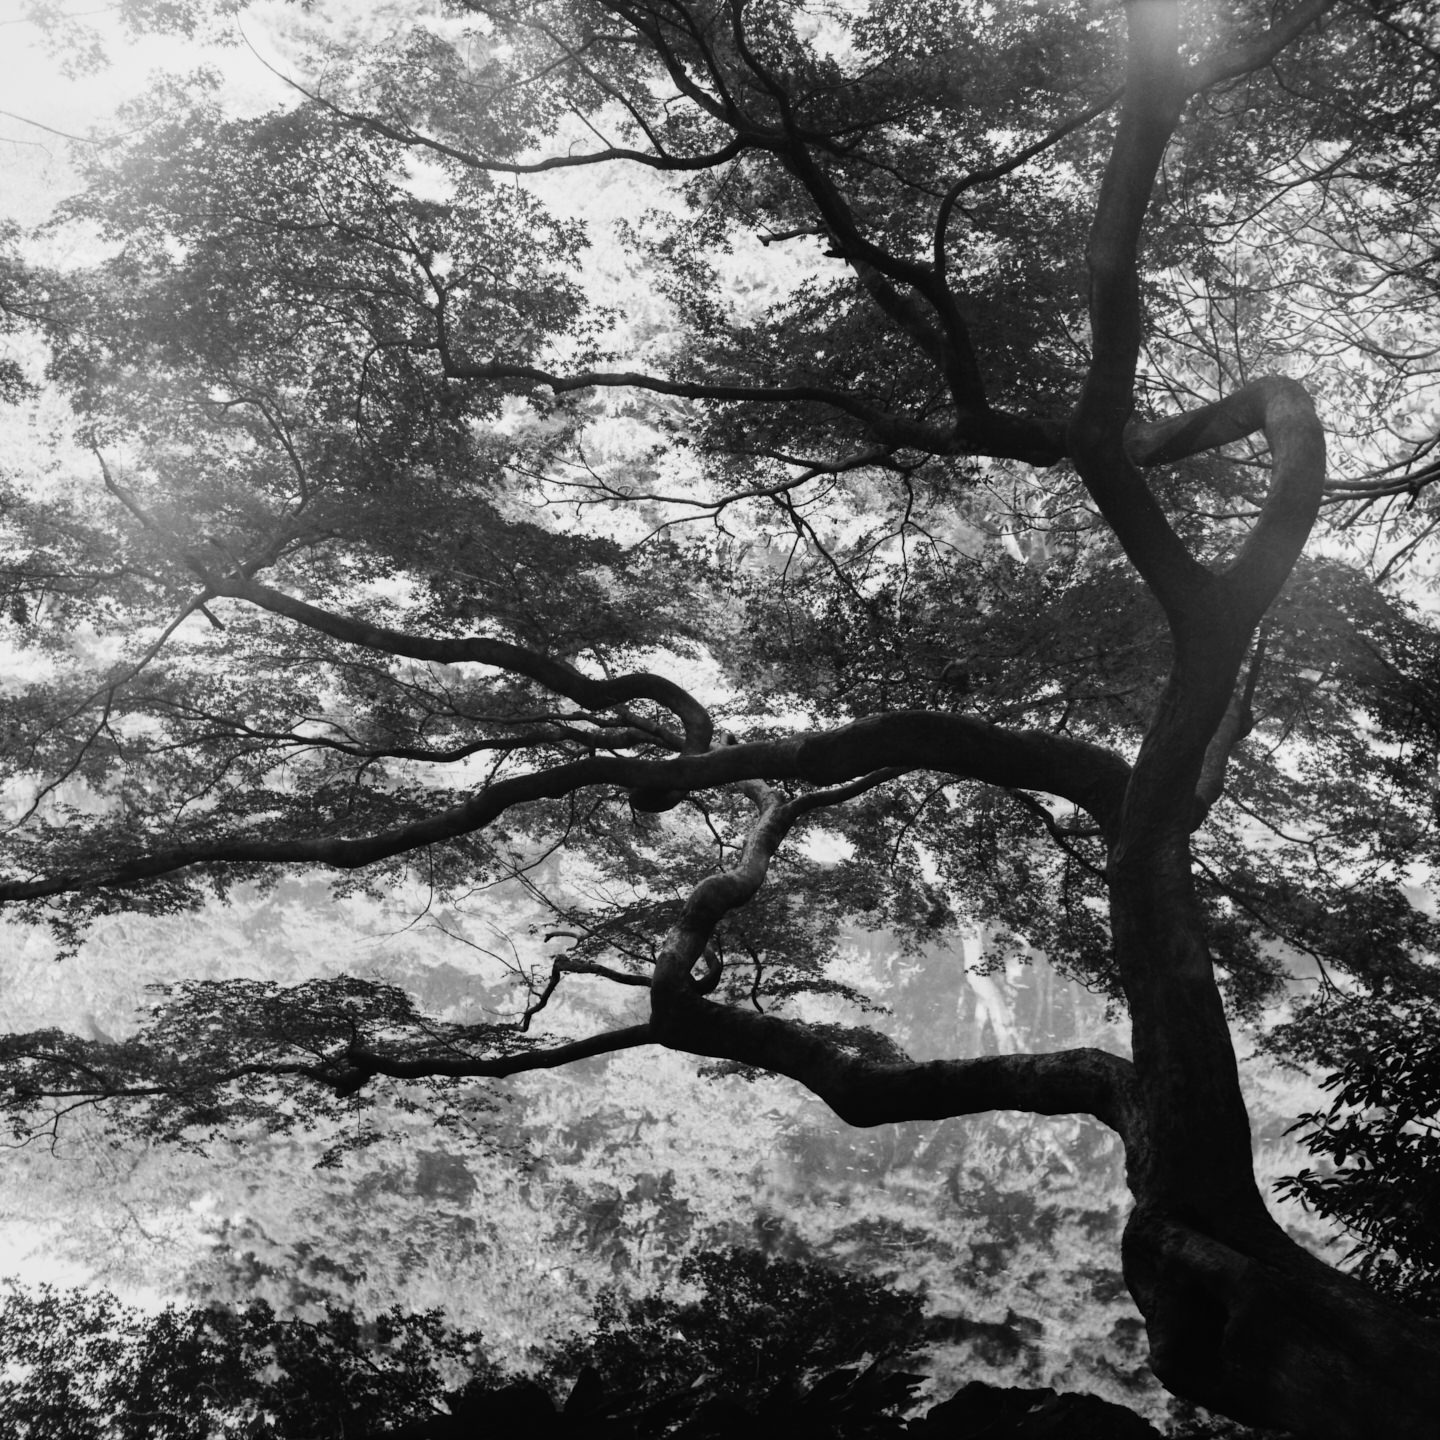
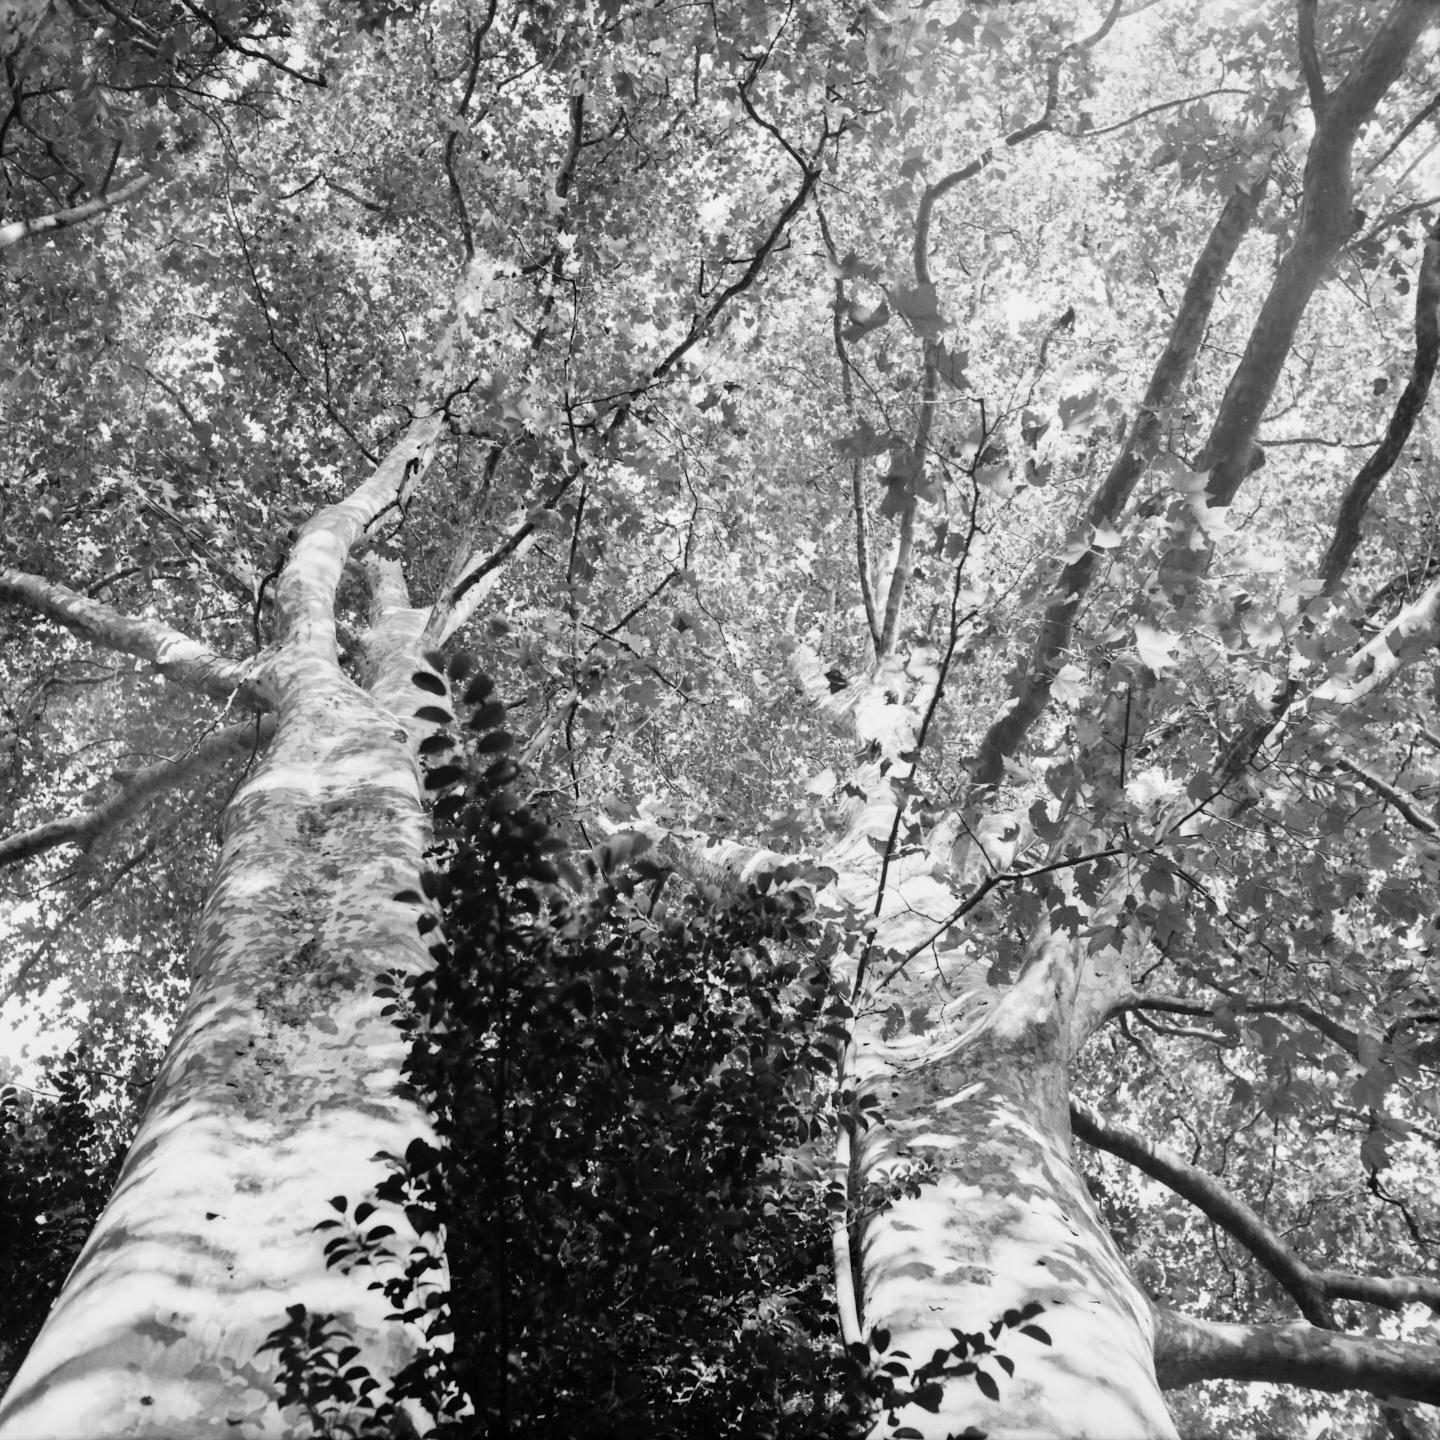
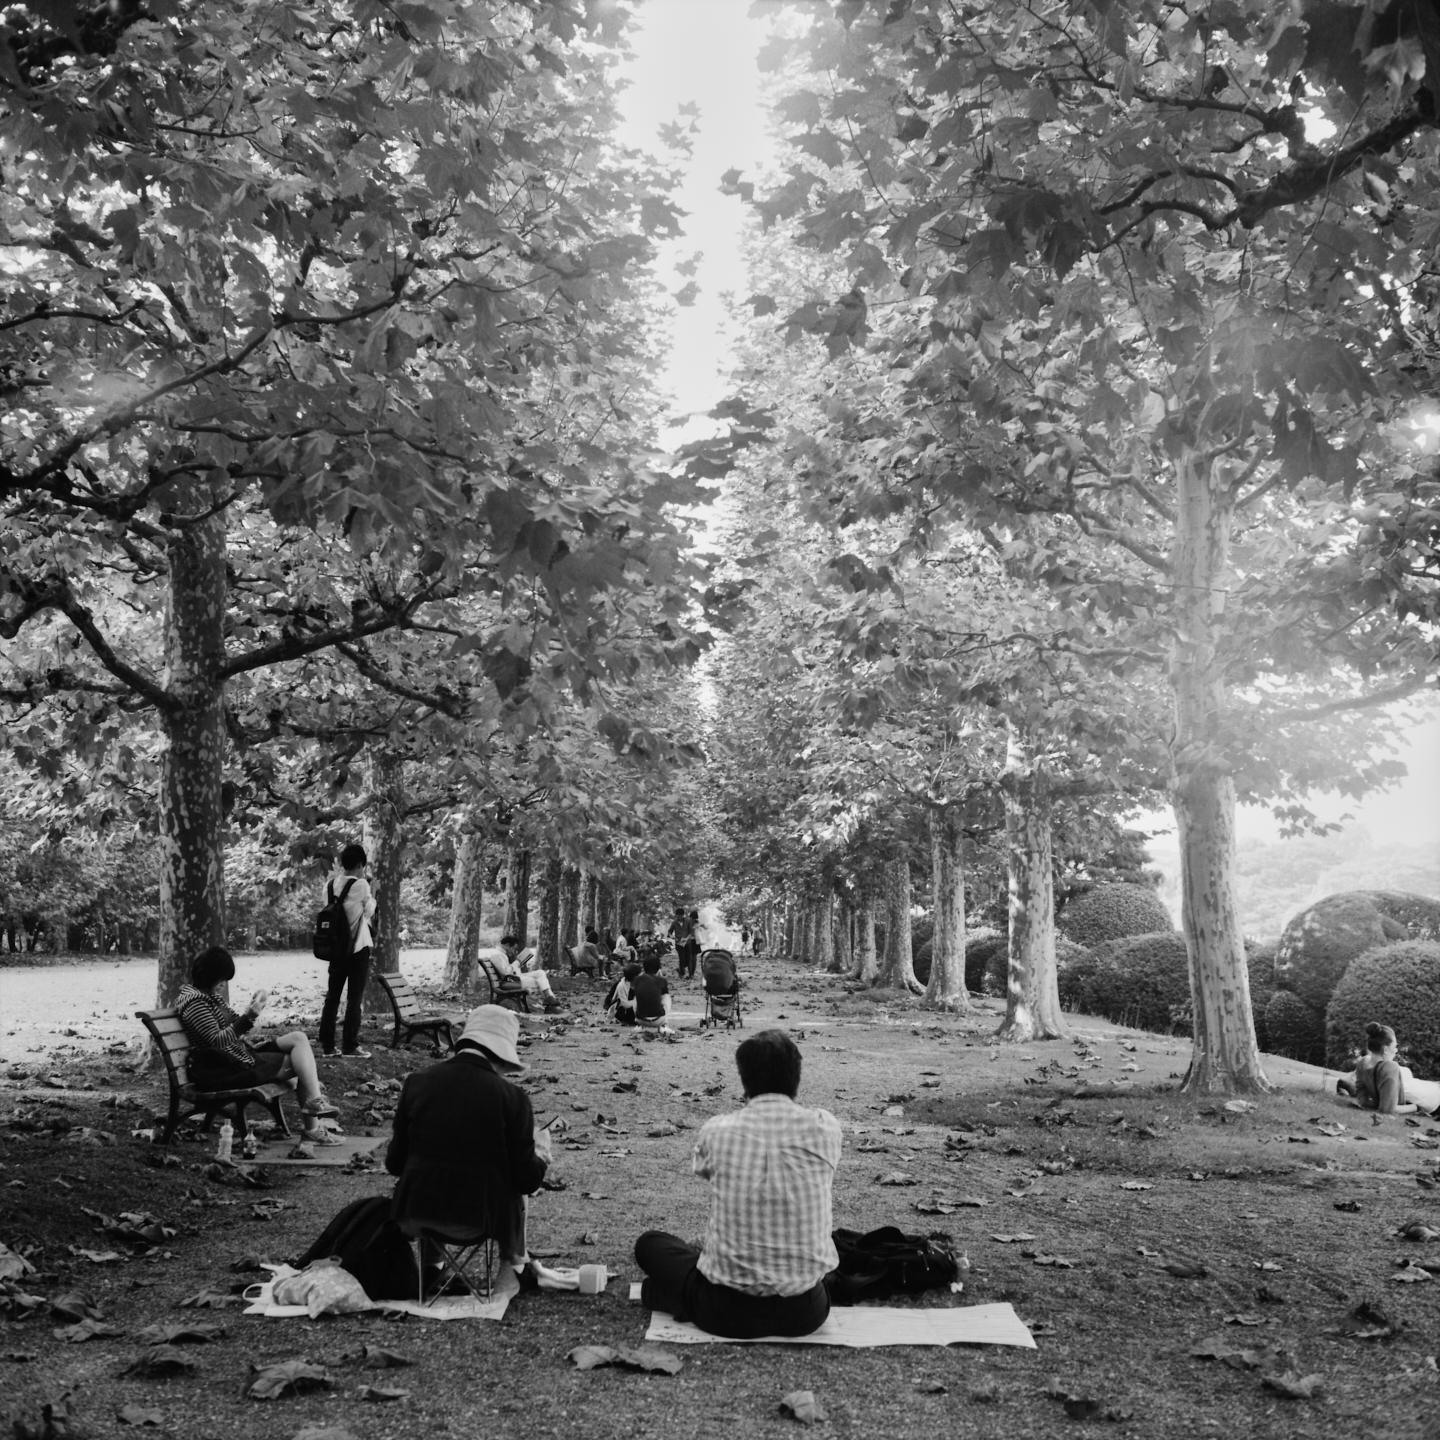
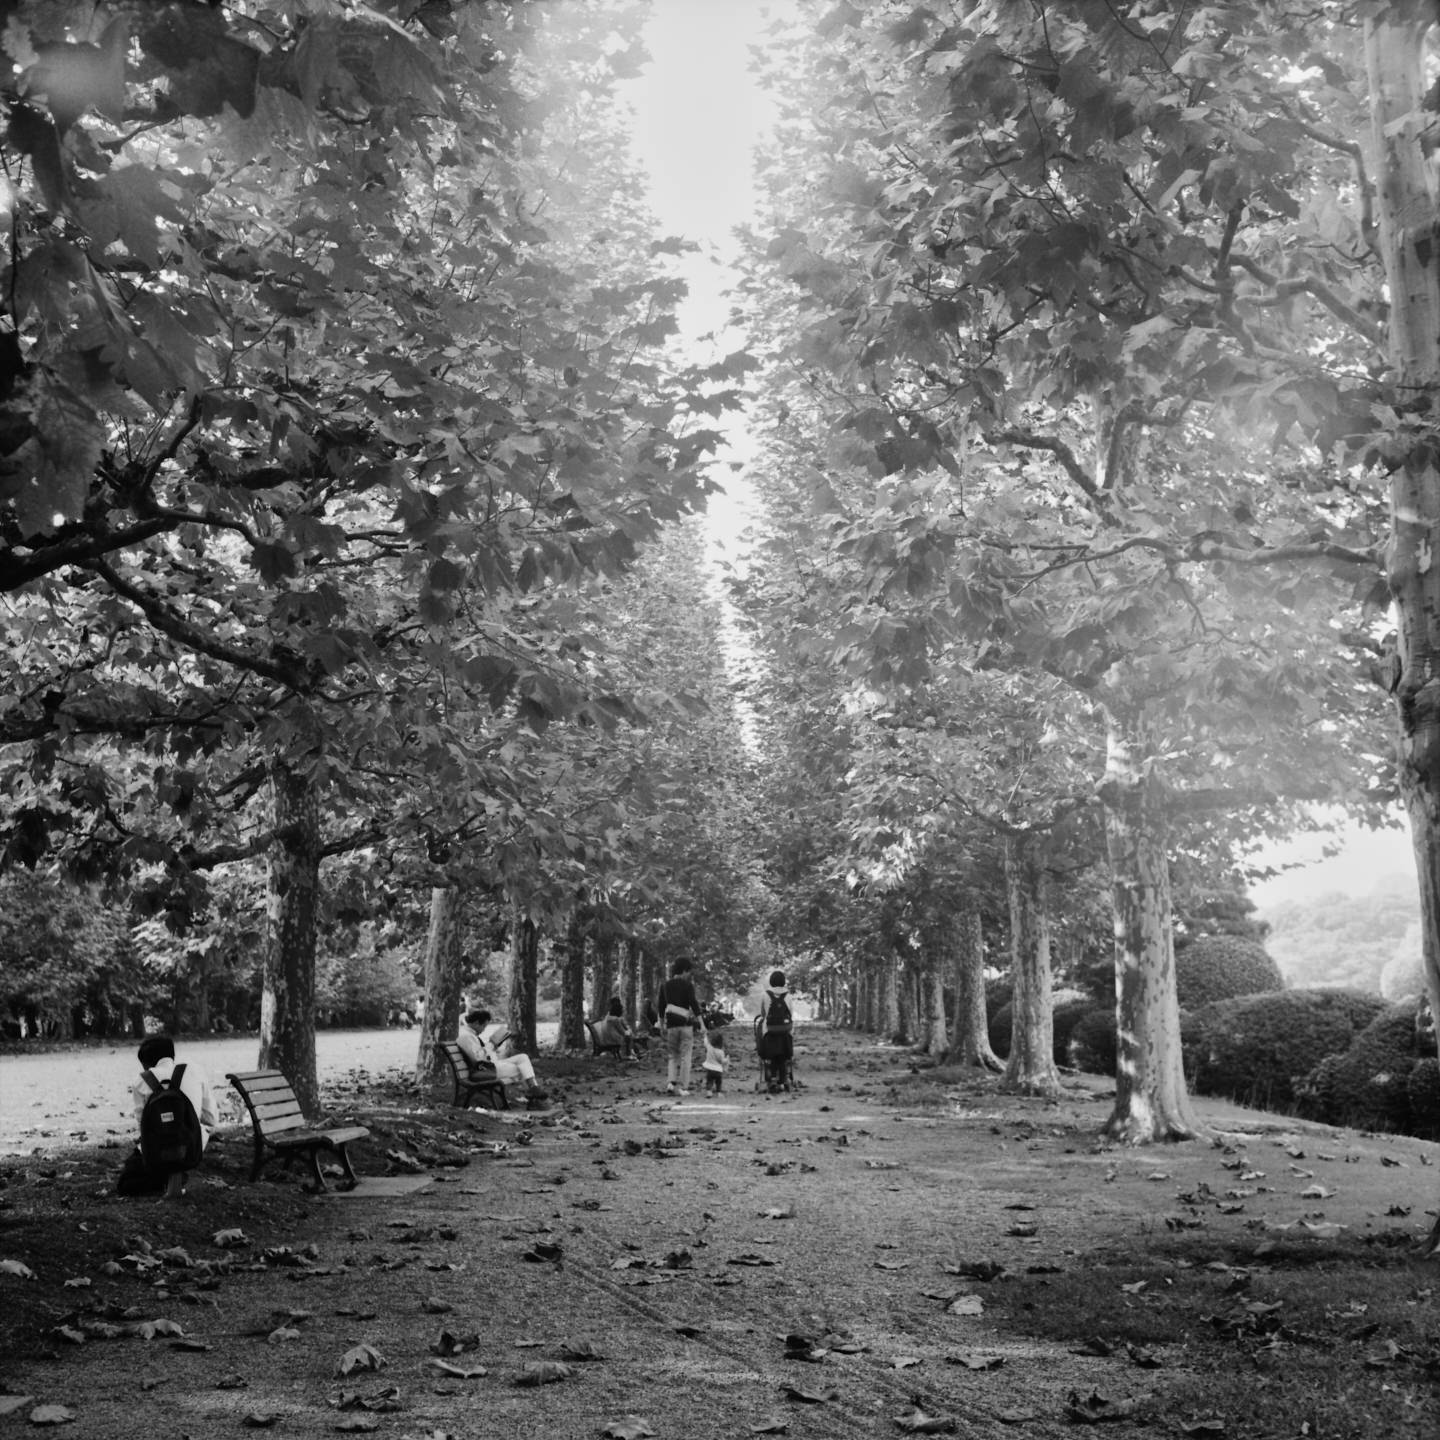
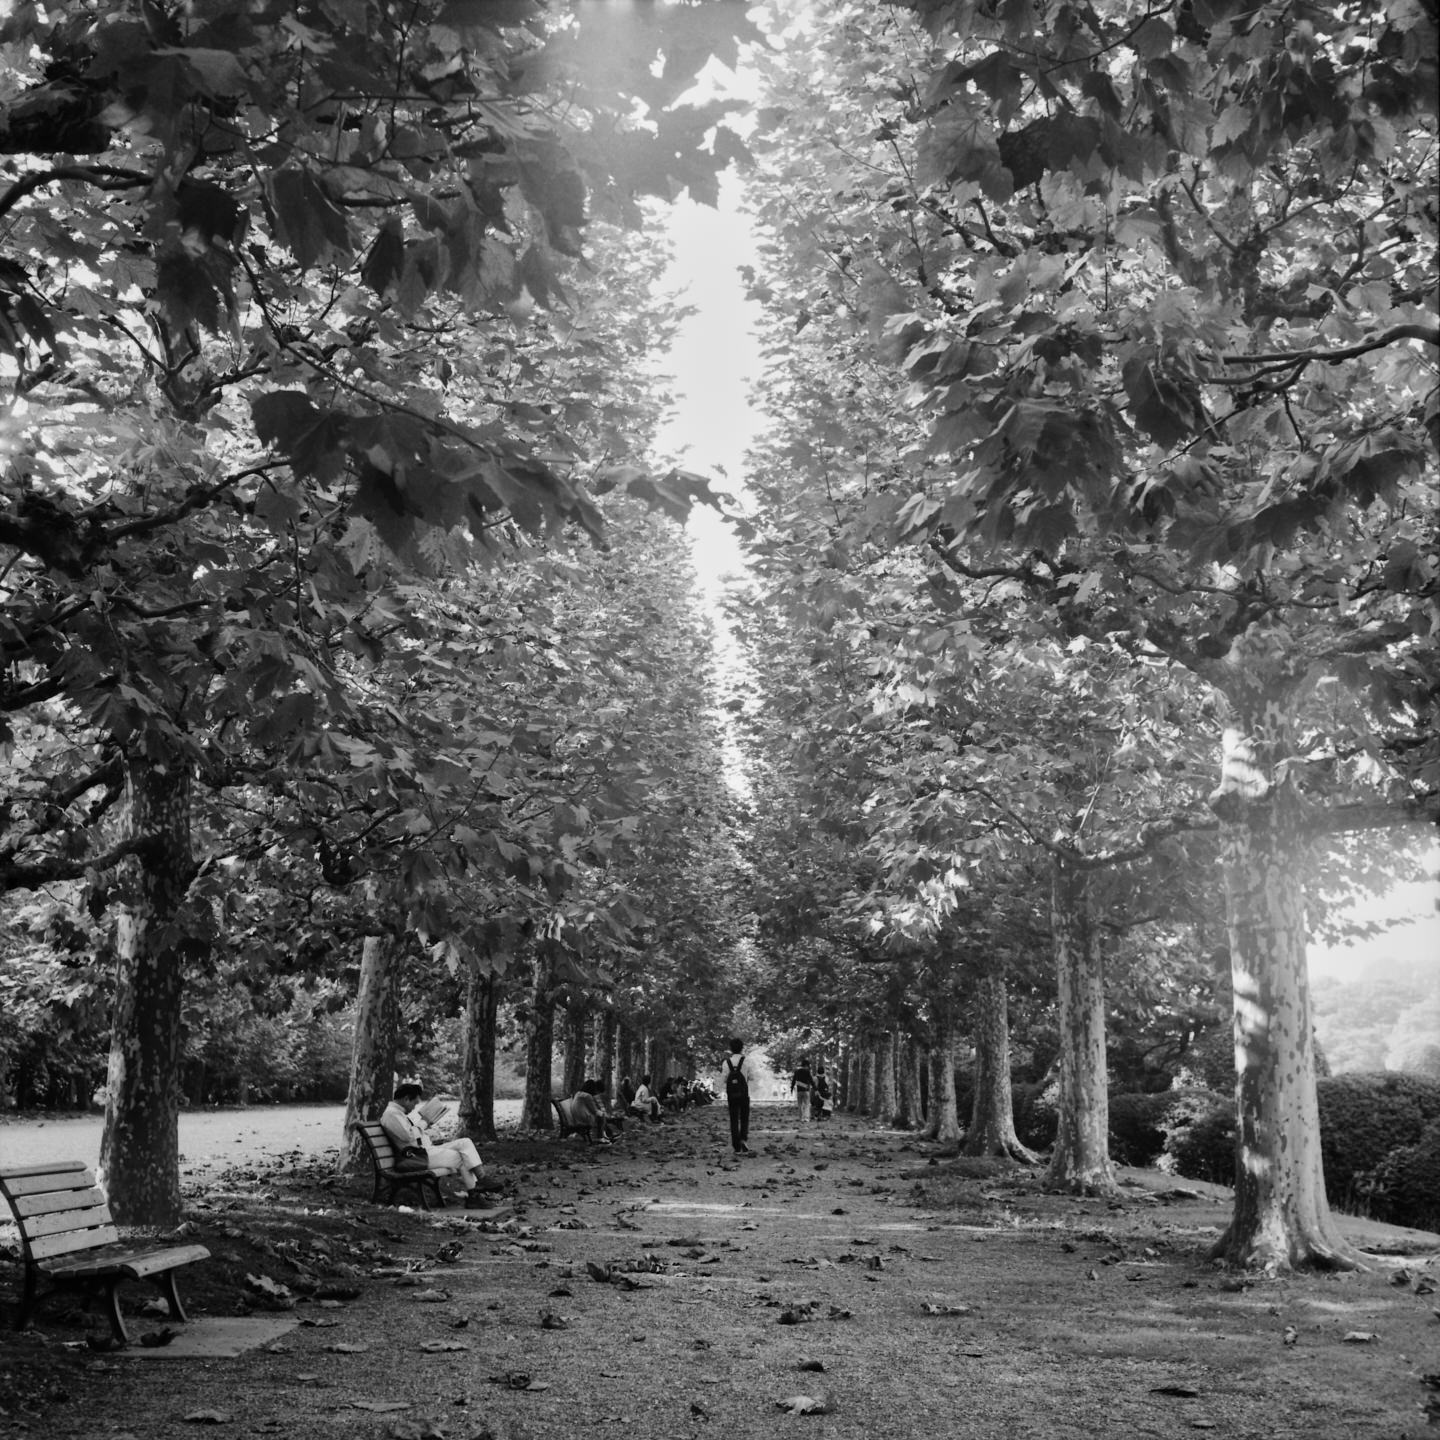
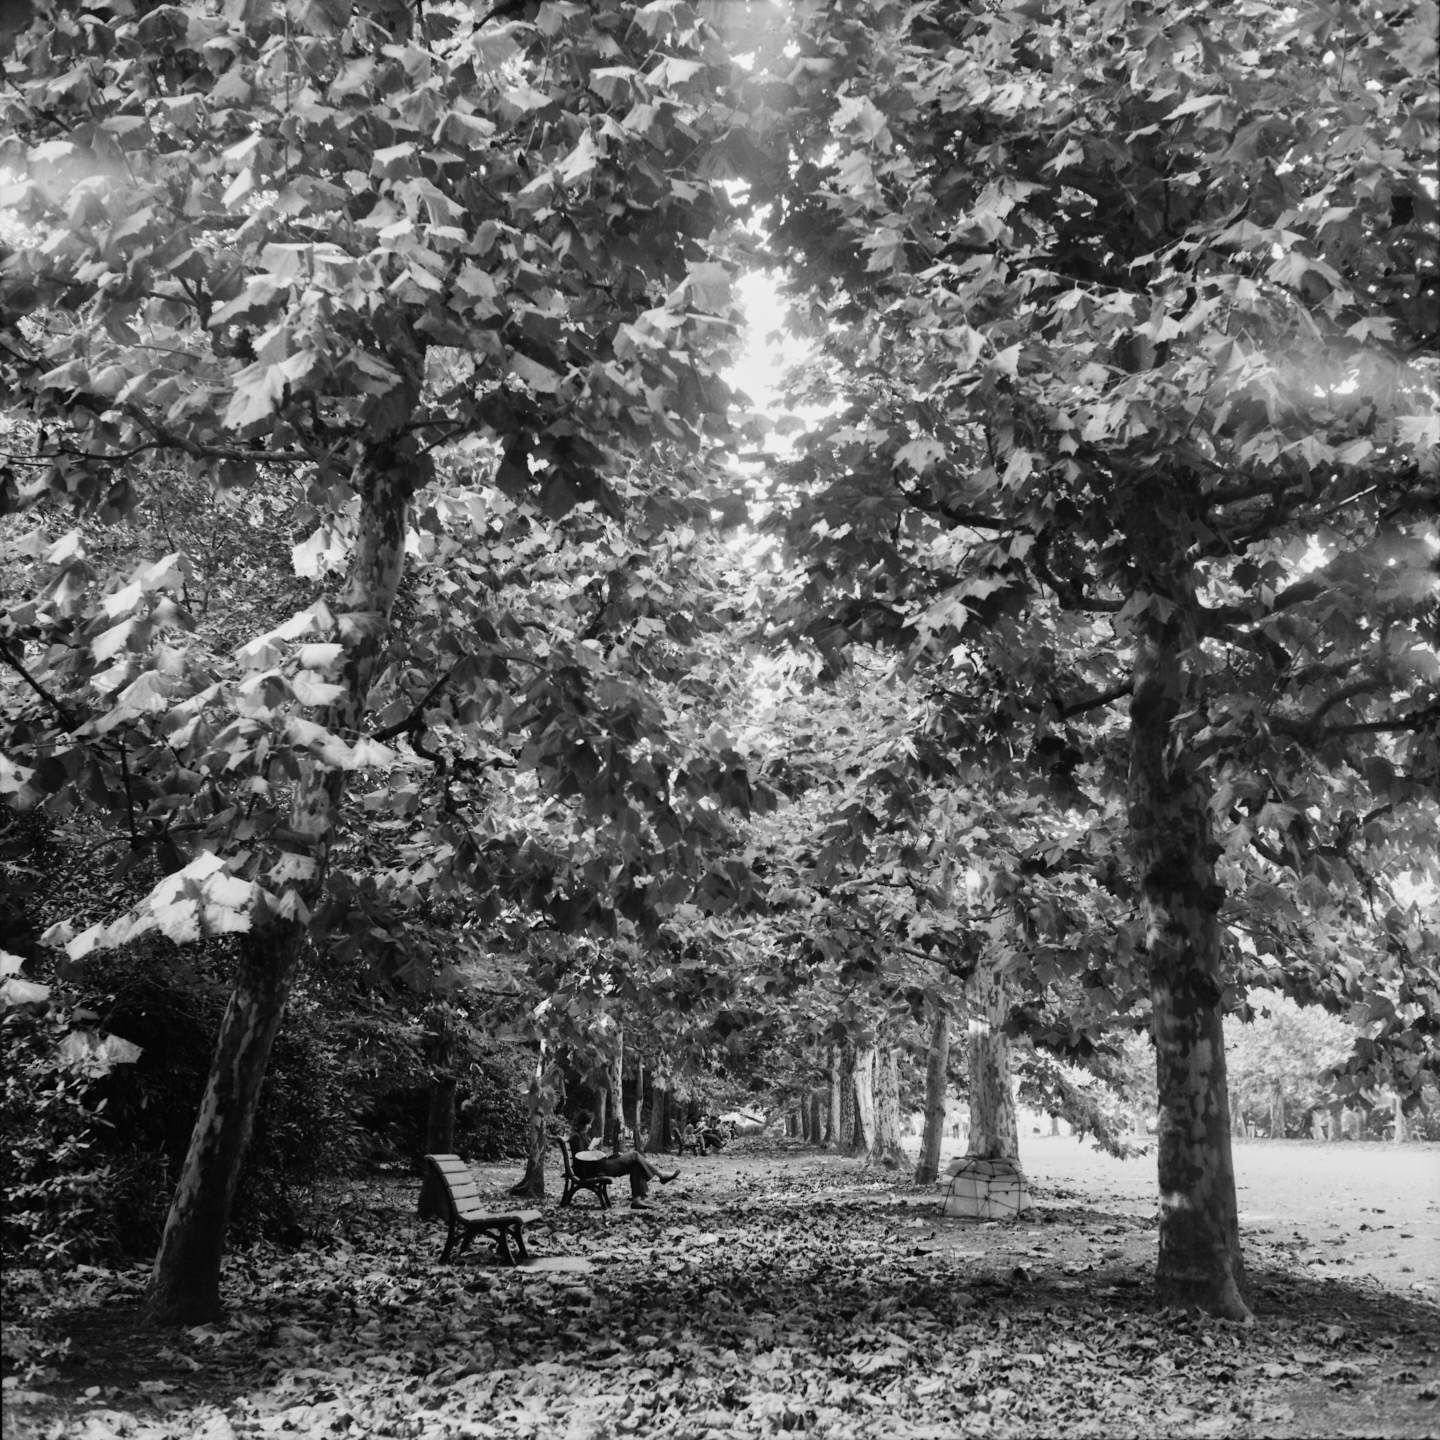
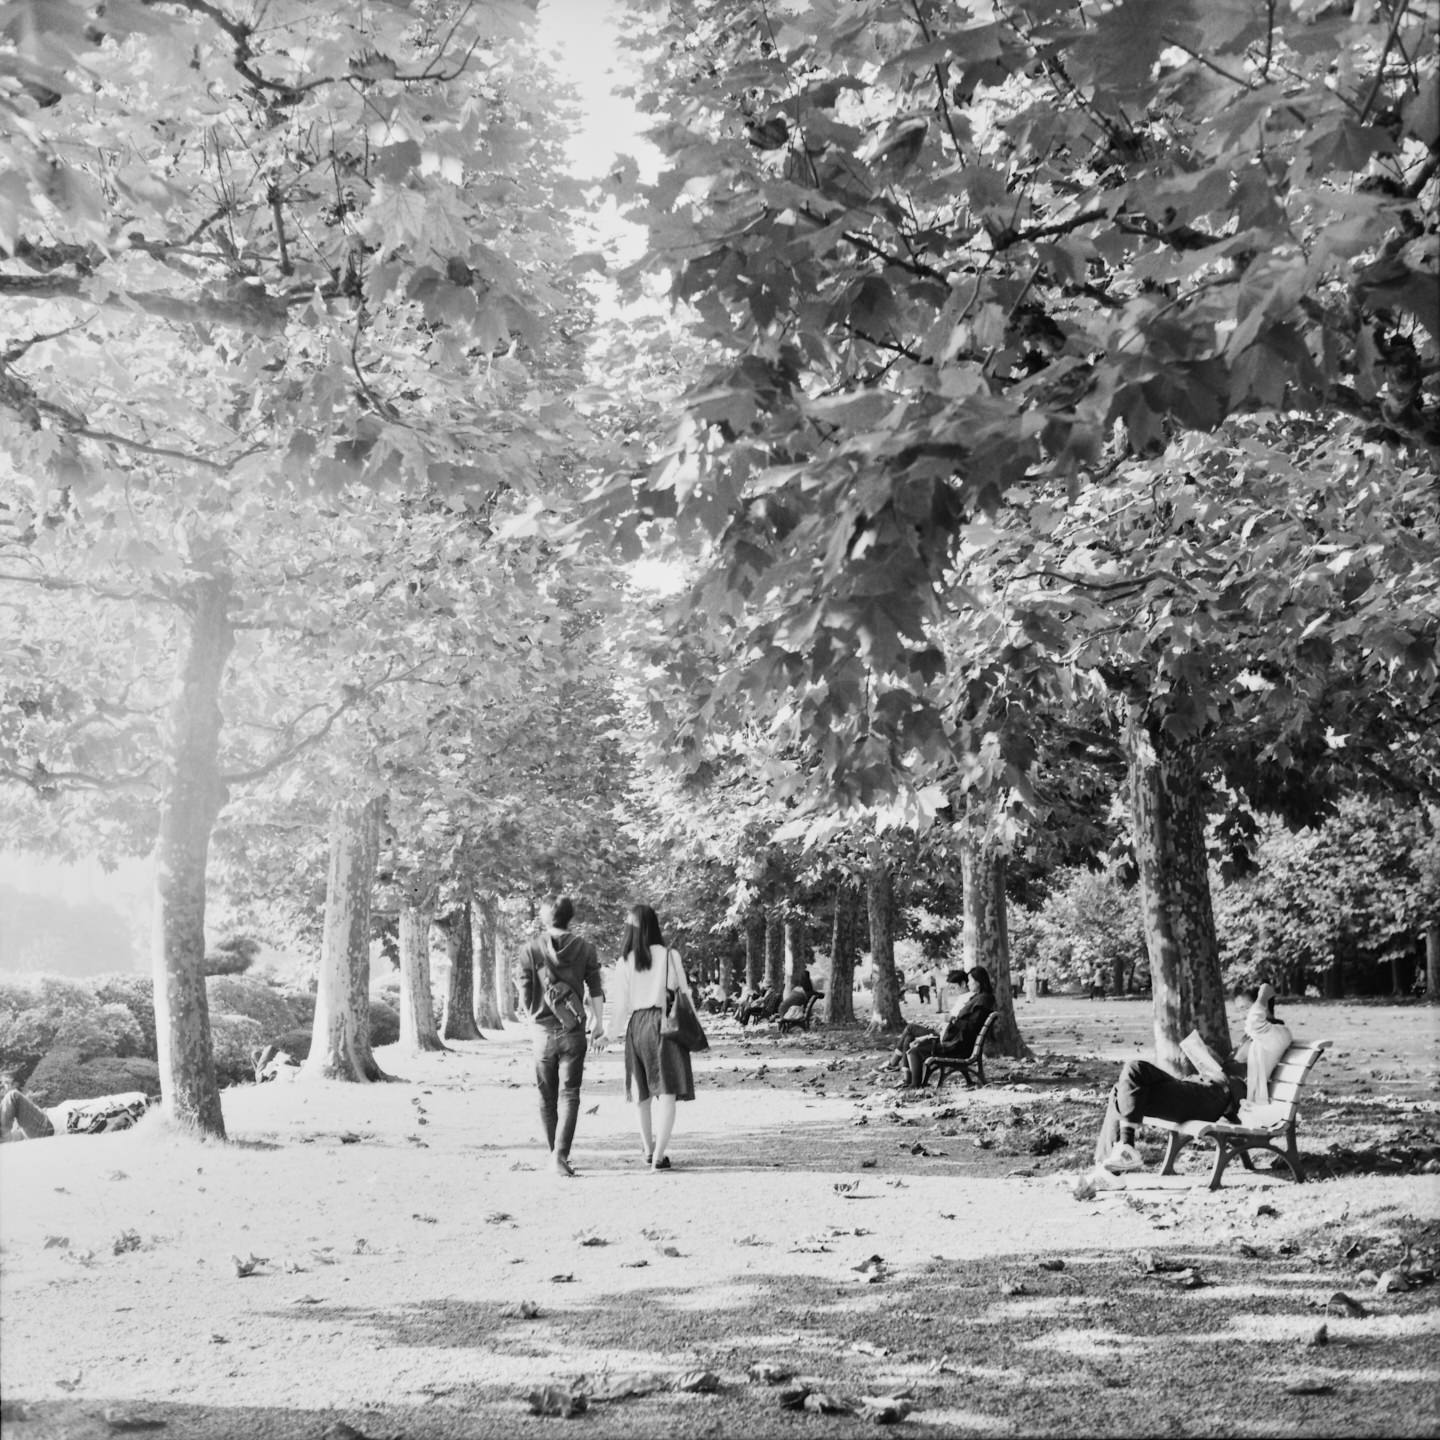
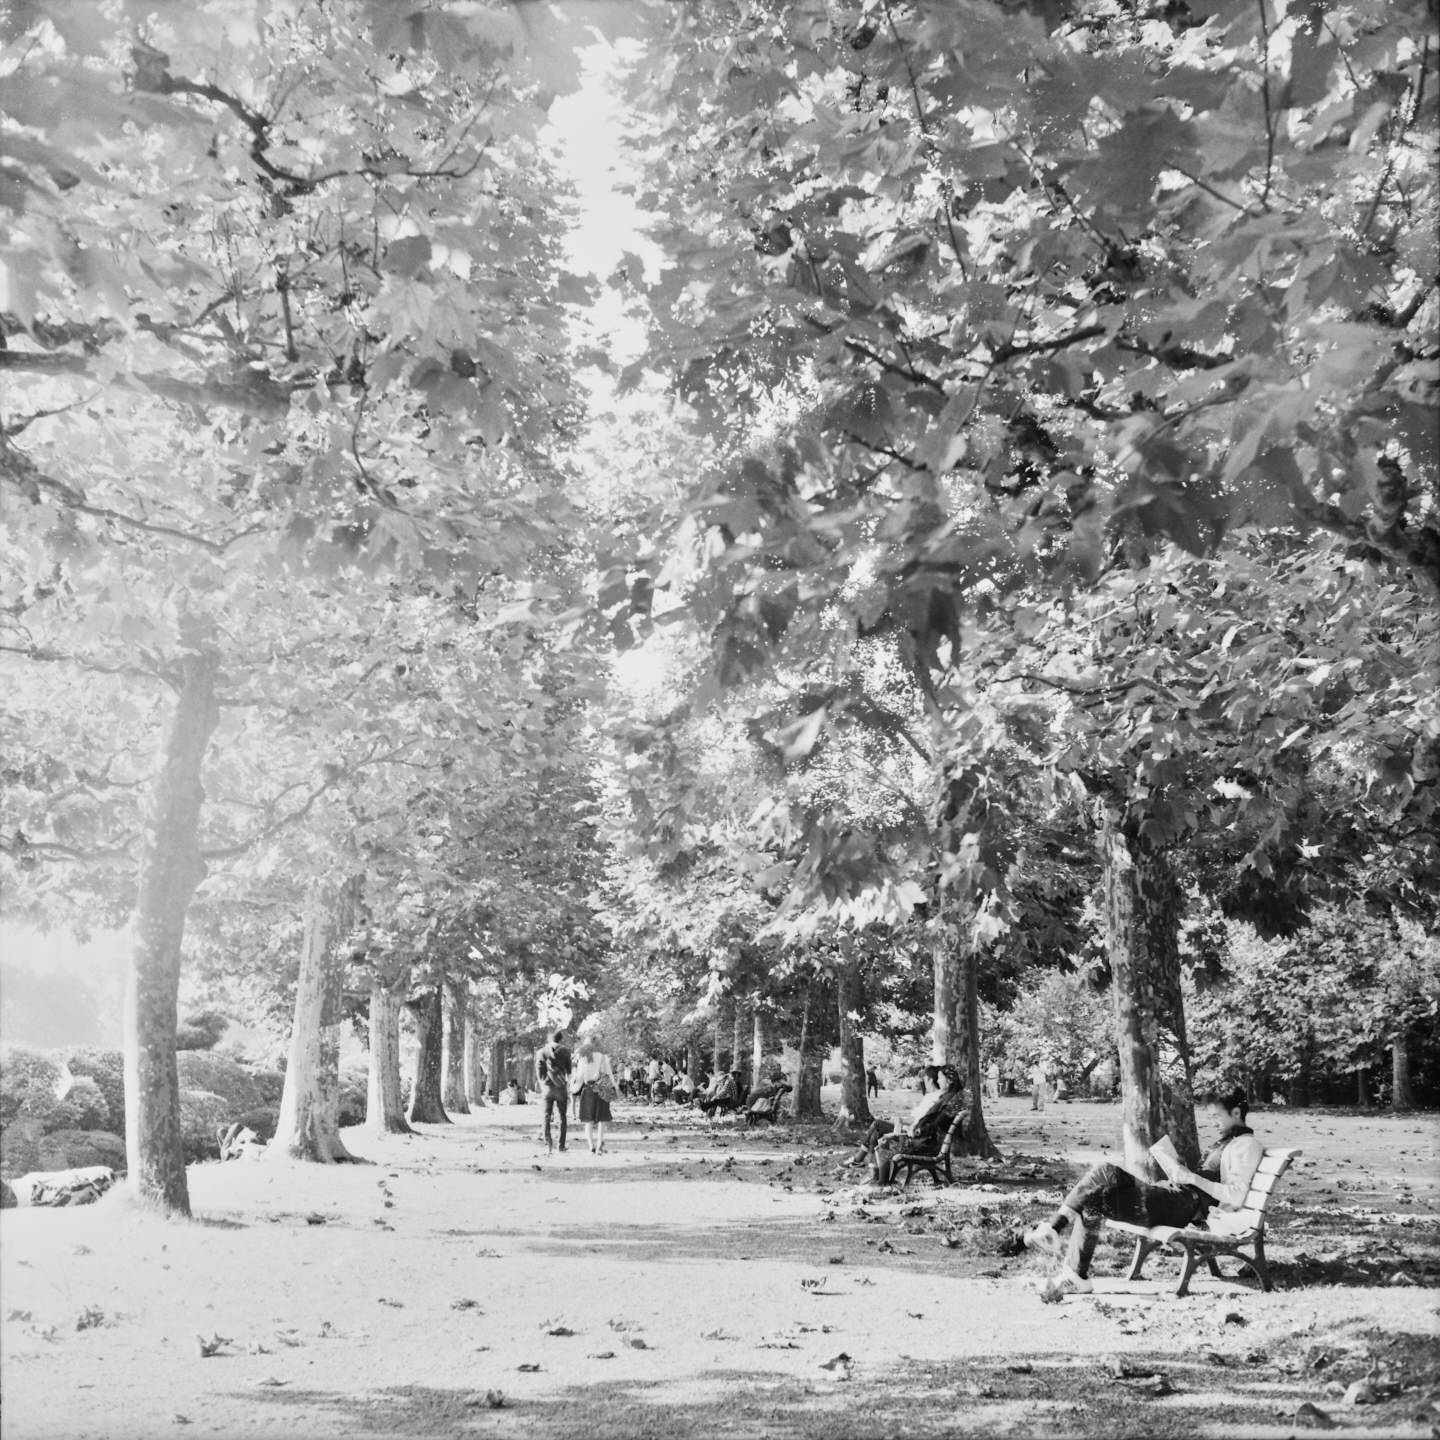
Here is a gallery of nine of the eleven images that I developed in the video. There are some with a bit of flare in them, as there is no hood on my Yashica-D TLR camera and a definite film-feel that I think you’ll be able to appreciate. The shots were just from a walk in the Shinjuku Gyoen Park here in Tokyo, and I believe I shot these four years ago, in the autumn of 2015, not three years ago, as I mentioned in the video. There was one that was a little too nondescript to include, and I shot two frames of the single lady looking at her phone, and on close inspection, the first of the two was slightly blurred. I suspect I’d felt myself move as I released the shutter and shot a second frame as a replacement.
My Chosen Developing Items on B&H Photo
Here is a list of the chemicals and tools required to develop the film as I did in the video. Note though that at the time of publishing this post the list still contains the Paterson Changing Bag and Tank, which I no longer recommend. The Lab-Box is currently back-ordered, but will be available here: https://mbp.ac/lab-box Also, don’t forget to add the optional crank to your order. It makes life much easier than the standard knob.
A Meditative Process
Last week was a bit hectic, as I fought with broken computers and a few too tasks than I could reasonably handle, but now that I have a little more time, I’m adding this final few paragraphs in closing. On Saturday morning, after releasing the video and initial blog post, with my first hour to breath for a few days, I developed my second roll of film that I’d exposed in 2016 and kept in my fridge.
Without the need to reach over the Lab-Box so that you could see my hands in the video, I pulled up a chair and sat down at my table, and took my time to load the film. The warm morning sun was pouring into my studio as I did so, making me feel relaxed, but also appreciative of the fact that I could sit in the sun developing film! I finished loading the film into the lab box, then prepared four beakers of chemicals. I’d ordered a fourth beaker so that I could prepare my final wetting agent before I started, to make life easier.
I cranked up the Massive Dev app and found that the Delta 400 I was about to develop needed 8 minutes and 40 seconds in the DD-X, and I started the timer. This, along with the three minutes for fixing and a 3-minute final wash provided me with around 15 minutes of almost meditative bliss. No video to worry about, just me, my roll of film, the Lab-Box, and some quirky smelling chemicals. With how good it felt to develop this roll of film I was sold. The Lab-Box is absolutely the way to go when developing at home. I’ve just ordered some more 120 format film, and now I’m looking forward to developing them too now. As much as I love digital photography, I think film has found a place in my work again, after a 20-year hiatus.
Film Related posts
[ess_grid alias=”film-posts-grid”]
Show Notes
You can find the Massive Dev app here: https://www.digitaltruth.com
You can order the Lab-Box from B&H Photo here: https://mbp.ac/lab-box
Audio
Subscribe in iTunes to get Podcasts delivered automatically to your computer.
Download this Podcast as an MP3 with Chapters.
Visit this page for help on how to view the images in MP3 files.

Martin – I have started doing some film work after a over 30 years. I can appreciate your struggles loading a reel in a changing bag. I finally realized if waited for the nighttime and turned off all of the room light outside I could close the door on a bathroom and have a perfectly dark room. It made life easier. I’m using old Kindermann and El-nikor tanks and reels. Easy enough to load with a little practice. The wash time you used seemed short. I generally use 20-30 minutes under gently running water. Keep up the Analog work!
I’m going to bring up another topic if you don’t mind. A long time ago my Ex-wife gave me a book of Shinzo Maeda photos (Oku Mikawa). The photos are beautiful. I purchased another book of his photos the photographs are equally wonderful. I find no mention of him in the modern landscape photography world. Is Mr Maeda well known in Japan? In my opinion he is in the same league as Ansel Adams or Eliot Porter.
Rich Ball
Hi Rich,
Thanks for the comment! I have too much light coming through our bathroom window for that, but I can certainly appreciate that it would be nice to get out of the bag as it were.
As I am doing my developing in my studio, without running water, I researched alternative methods, and the one I showed, with agitation, came up and seems to work fine for me. The film that I developed with this technique four years ago looks fine, so I’m happy enough to stick with this method.
I’ll definitely keep up the analog work, mostly thanks to the Lab-Box. Now I’m hankering after a new Rollei. 🙂
Shinzo Maeda is somewhat famous here in Japan. He is the person that put Biei on the map as a photography location. We spend the first three days of my Hokkaido Winter Landscape Photography Tour in Biei, and visit his gallery while we’re there. He has some beautiful work, and his son Akira also shoots and displays at the gallery.
Regards,
Martin.
This blog post and video were awesome Martin! Enjoyed both very much. I was lucky enough to see the LabBox at Photo Expo NY this past October. Even helped the inventor develop a roll of film and I’m convinced it’s the way to go for 35mm and 120mm rolls. I just started shooting 4×5 film and recently developed my first sheets using the Stearman Press SP-445, which is similar to the LabBox in that it let’s you develop 4×5 film in a self-contained unit … eliminating the need for a traditional darkroom. Please keep us updated with your film progress as well as your other endeavors. By the way, yes I would appreciate a download link to your excel spreadsheet. Thanks again.
Hi Angela,
Thank you! I’m really pleased that you enjoyed this post and video.
I’m happy too that you are enjoying developing your own film. 4×5 must be a lot of fun. Without the nerves associated with videoing my first roll in four years, the second roll that I did on Saturday morning was an absolutely and completely relaxing experience. I have another roll in the Yashica-D now and look forward to finishing it so that I can develop again.
I’ll be sure to keep you updated with my work, film or digital. I really have been bitten by the film bug though. I shot film for years until 2000 but mostly moved away since digital came in. I’m really enjoying it again now though, so I’ll keep sharing.
I’ve added a button to download the spreadsheet just below the video. Thanks for asking. I was hoping someone would find that useful.
All the best!
Martin.
Thanks for the thoughtful review Martin. I’ve been considering the Lab Box and it’s good to get the opinion of someone whose opinion I trust. I’ve been shooting 120 film with my new Ondu pinhole camera lately and love the larger format. My film photography has been given a boost this week though as my uncle has given me his Rolleiflex 2.8F on loan as he’s no longer using it. I’ve shot a couple of rolls so far on expired film and am awaiting the results but in the meantime the camera has gone off for a much needed CLA. I can’t wait to get out shooting again and may well need a Lab Box soon to develop the films!
I was interested to read your thoughts on digitising the negatives. My scanner is 20 years old and not suitable for negs so I use the high res mode on my camera and photograph them over a Lightbox (well, my iPad Mini actually) with my macro lens. That gives me 80 megapixel files which seem to work well. All it’s cost me in set up is a small wooden orange box (I ate the oranges!) and a piece of glass from a picture frame on top to lift the negs away from the iPad screen – bargain!
Hi Helen,
Thanks for the comment, and for placing your trust in me. Pinhole cameras are a whole lot of fun, right!? I have a pinhole lens for the Canon EF mount and love messing around with it.
I envy you having a chance to use the Rolleiflex 2.8F! Not quite as much as I would have done though, as I’ve just broke down and ordered a 3.5F, which should arrive in the morning. I haven’t actually checked it out yet, but it’s the best quality in its class that my local store has, and it comes with the original box, case, strap and manual, so I think it’s been pretty well looked after. If there are any problems I can take it back for up to a month and it comes with a 1 year warranty, which isn’t bad for a 54 year old camera! 🙂
I cannot recommend the Lab-Box more if you are going to develop yourself. It’s so easy, and as I mentioned in the text above, without the videos and the experience from just a few days before, compared to four years before, I found the experience on Saturday morning almost meditative. It sounds like you have your digitization process all sorted, so that’s great.
I had two rolls of the new Fujifilm Neopan Acros II 120 film delivered today, and I’m looking forward to shooting that, hopefully in the new Rollei assuming there are no problems when it arrives. The Lab-Box has reignited the film bug in me, so I’m really grateful for that.
Have fun, and keep me in the loop on your own film fun!
Regards,
Martin.
Martin – To continue this discussion a bit. If you were to print from your negatives how big would you feel comfortable making the print before you felt the quality would start to break down? When you scan the B/W film are you using the JPEG setting or as A TIFF? It seems like a TIFF is overkill. It will be fun to hear your thoughts on the Rolli vs the Yashica. The Yashinon lens is highly regarded. I recently bought a Rolliflex T. it was available locally here in Seattle.
I have another suggestion for a camera in the medium format size. One that should be easy for you to find and not break the budget. Try finding an Okako, Waltax or Zenobia folder. They are folders and are, essentially, all the same camera. All of these cameras were made in Japan. I have an Okako that I need to do a little work on the bellows. Last week I shot a roll with a Voightlander Bessa 66 (The Baby Bessa) which is the model for the Okako. The negatives are quite nice. The beauty of the camera is the photographer has to do everything. Zero automation! No computer with a lens! Lastly the cameras are quite compact.
I have considered your tours but they are a little to long and intense for me. At this point in my life I’m content to shoot locally with occasional forays into parts of the Western US.
All the Best – Rich
Hi Rich,
Looking at the detail I have in the Delta Pro film, over the HP-5, I’d be happy to print these new images at 44 inches square, which is the largest I can print at home. They’d go higher, as the images are a relatively clean 100 megapixels.
I am saving them as TIFF. They are large files, but JPEG is a poor option. Even if you don’t consider the fact that JPEG will degrade every time you save the image, they are poor quality right from the start. Details like grass or fine texture get mushed together the moment you save the first copy of the file, so in my opinion, it’s important to use a pixel for pixel uncompressed or non-destructive image format for the original copy.
I have yet to put a film in the Rolleiflex, but I’ll be sure to update you via the blog when I do get some shots to compare. I am hoping that the image quality increases at least a small amount, although the Yashica images on Delta Pro were very good, so I’m not sure how much improvement to expect at this point. The main reasons for getting the Rollei are to avoid losing that last frame on every roll I shoot. The Rollei doesn’t require/recommend that you wind the film on to line the arrows up inside the camera, so I’m thinking that it starts to shoot earlier on the film. I’ll have to see how this works. The other reason is the ability to use a cable release, which my Yashica does not have, and the Rollei has a built-in light meter, which is new compared to the Yashica. I have really enjoyed the Yashica-D, but at the end of the day it’s a copy of the Rollei, so I figured I’d come back to the mother ship and see what that’s like.
I’ll keep my eyes open for the cameras you mention, but having just spent almost $1,900 for my Rollei, I think I’ll hold off on any future film cameras for a while. I realize that this is probably more than you’d expect to pay for one of these in the US, but here in Japan, that was actually a good price for a model with all the accessories and a year’s warranty etc. I’m very happy with it, and can’t wait to get a film into it.
Regards,
Martin.
Wow – That is about twice as large as I would have guessed.
With respect to the OKAKO, Waltax and Zenobia camera’s they are quite inexpensive on ebay around $50.00. They are very compact about 12cm X 9.5cm X 4.5cm when folded up. Actually pocketable. They are very elemental. No range finder – it’s up to the photographer to determine where to set focus, advance the film and cock the shutter. The format is 6cm X 4.5cm.
Hi Rich,
It really depends on the film and the scanner, but I am confident that prints of that size would be no problem with the Delta Pro film and my current Canon Scanner. I tried scanning at higher resolution, but it was overkill. The file size went up without any increased definition.
I’ll certainly keep my eyes open for those cameras, but it will be later if I’m able to get any of them. Right now if anything I need a few of the Rolleinar close-up lenses, and they probably still cost more than one of these cameras. I have to pick my battles carefully. 🙂
Regards,
Martin.
Hi Martin,
Thanks for the great post about using the Lab Box. Your first impressions were obviously very positive. How has it held up since then? Are you still satisfied? I’m trying to decide whether to get this, or go the Paterson Tank & changing bag route.
Thanks
-Daniel