

I’m often asked how I package fine art prints for shipping to customers, so I’ve prepared a short video showing the process, and we’re going to expand on that a little today in today’s Podcast. I’m also going to be giving away the print that you’ll see in the video, so look out for details on that at the end of the episode!
This episode is brought to you by Squarespace, the all-in-one platform that makes it fast and easy to create your own professional website, portfolio or online store. For a free trial and 10% off, go to squarespace.com and use offer code MBP.
Whether you sell your own prints, or simply want to send something to a friend or relative, every so often, we have to put one of our prized photographs into the postal system. Having shipped hundreds of prints to all corners of the globe, I’ve come up with a pretty good system for rolling and packaging my fine art prints, which I’m going to share with you today.
The video (below) is pretty much self explanatory, but I’m going to walk you through in more detail as well, to ensure that everything is clear. Here to start with is a photograph of the tubes that I use. I buy these from a shop in Tokyo called Sekaido, but this won’t of course be of much use to the majority of you that don’t live in Japan. The thing to note when you try to source a shipping tube, is to ensure that they are sturdy enough to not be crushed in transit. I had a few issues when I first started shipping prints, but since finding these particular tubes, I’ve not had an issue.
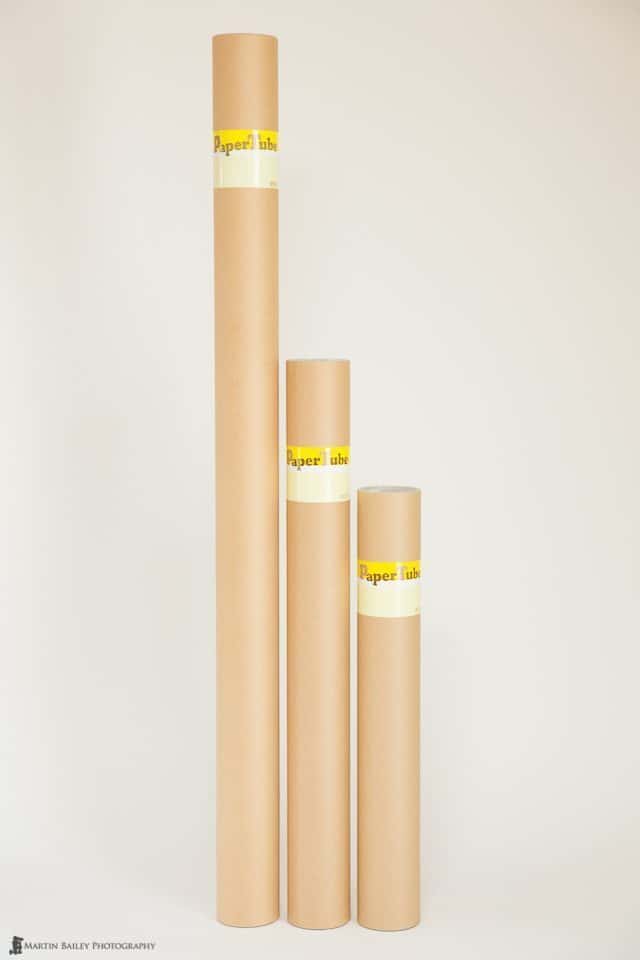
Shipping Tubes
The tubes I use are 70mm in diameter, and they need to be pretty wide, so that you don’t have to roll the print too tightly. This is highly recommended if you are using heavy fine art paper, that can kink when you roll it if you try to get it too narrow. The smallest you’ll want to go it probably a 2 inch diameter tube like the one’s I see on Amazon, but ideally, a little wider is better. 70mm is two and three quarters of an inch.
The short tube here is the one you’ll see in the video. This is 505 mm, the medium one is 655 mm and the tall tube is 1,020 mm. That makes them 19.88, 25.78 and 40.15 inches respectively. The plastic caps on each end of the tube actually extend into the tube by about 10mm each end, which is about just over 3/4 of an inch in total, so the short tube is perfect for 13 x 19 inch prints, the medium tube is good for 24 inch wide prints, and the longest tubes is good for longer prints up to 39 inches. I can’t print wider than 24 inches with my printer, but sometimes I like to roll the print lengthways, as this is better for really wide prints because you don’t want to be rolling them too tight.
I always wear cotton gloves when handing prints, to stop any oil in my hands from getting on them and generally help to prevent me from marking them. It’s important to note too that if you brush the face of a matte print you can easily mark it, even with gloves on, so you basically treat that as a no-touch area.
Before I roll the print, I place a piece of facing paper over the printed area, to protect it. For this I actually use Canon Coated Paper that is available in 24 inch rolls for my printer so it is large enough to use for any print size that I can create at home. For 13 x 19″ prints I actually use sheet A3 paper which is large enough to cover the printed area.
I roll the print with the printed area facing upwards. This not only protects the printed area better, it also rolls the paper the opposite way to it’s natural roll, so it essentially de-curls the paper after being given time to lay flat when opened at the customer end. If the print needs to be de-curled again, I generally suggest people roll it around the tube using the facing paper to protect the face of the print again. These instructions are included in the Certificate of Authenticity that I also include with the print. I also include an Archival Quality Certificate from Breathing Color when I’m shipping an archival certified print such as Pura Smooth, which you’ll see in the video.
Once I have the print rolled, I wrap a piece of paper around with the words “Tear this paper away to unroll your print” printed on it. I actually print this along the entire page on A4, so that the customer doesn’t have to turn the rolled print around to see what they need to do. I also print the MBP Logo alternatively with the line of text, which is partly just marketing, but also to ensure that the paper catches the customers eye.
I actually apply two pieces of tape to this sheet of paper before I roll the print, so that I can just feed it in as you see in the video. Trying to roll this around and tape it without doing this can cause you to lose your grip on the rolled print, and it starts to open up and sometimes needs to be rolled again, and I like to avoid that.
You have to roll the print smaller than the tube of course, and if you are wondering why I even bother to apply the last piece of paper to the outside of the rolled print, it’s to stop it from opening up inside the tube. If you simply roll and insert the print into the tube then let it unroll to fill the tube it becomes very difficult to get out. You essentially force the customer to pinch at the end of the print in the tube, possibly creasing the edges, and then they have to tug it out of the tube. With the paper stopping it from unrolling, the print can be easily slid out once a tube end cap is removed.
Some prints fit perfectly into the tubes, and some have a little play. If there is much play between the ends of the print and the tube caps I make a little padded bung by rolling strips of bubble wrap and then taping them to hold it all together, and place one of these at one or both ends of the tube. A few millimeters of play is fine, but if the print can travel far inside the tube it will bang against the plastic cap potentially damaging it, so I like to prevent this.

Bubble Wrap Bung
I tape the ends caps on to the tube, applying a good amount of tape around one end, and slightly less on the other. I use really heavy duty packing tape now, so it’s really strong, meaning I can get away with less, and this makes it easier for the customer to cut the tape away to remove the cap and get to their print.
I find that little details like folding the tape back a little to form a tab so that the customer can get to their print more easily all help to improve the overall user experience. It’s like applying the sheet of paper to stop the print from unrolling in the tube. It’s all very well just rolling and feeding the print into the tube, but you have to consider how easy it will be for the customer to then get the print out. I like to try and think my processes through to the very end as much as I can, so that I create as best possible an experience for my customers.
Anyway, here’s the video. It’s only about 6 minutes long, but probably worth a watch to really understand what I’m trying to relay here.
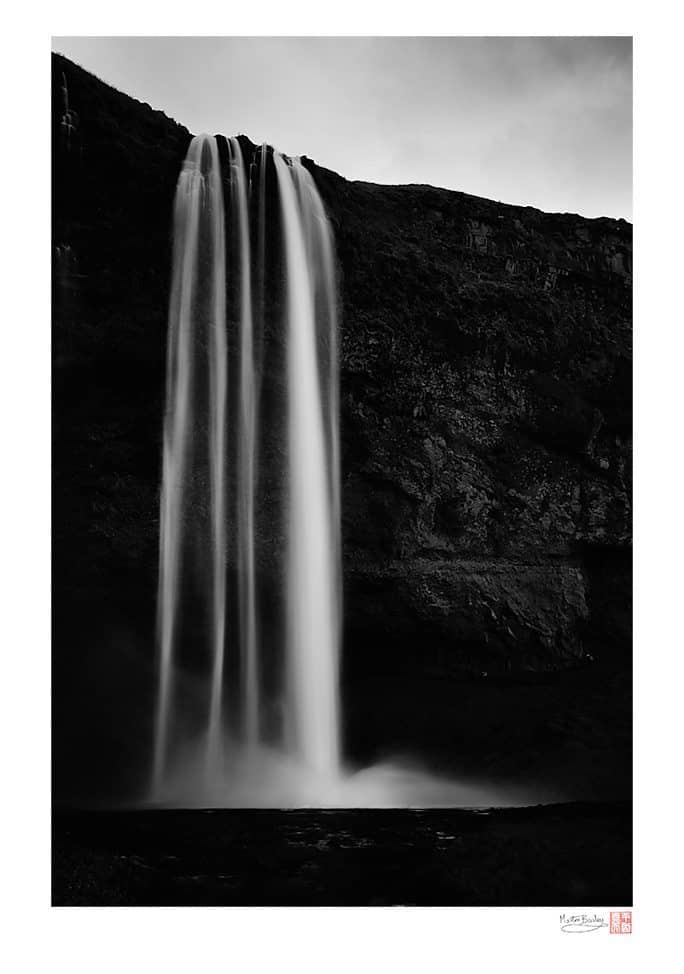
Seljalandsfoss (Falls)
Enter our Giveaway!
Let’s have some fun with the print that I made to shoot this video. I have set up a newsletter subscription list, that you can subscribe to with the button below. On June 23, 2014 I will randomly pick one person from the list, and mail the list to let everyone know that we have a winner. By subscribing, you agree that I can use your name in the announcement, but of course your email will never be disclosed, and that goes for anyone that signs up of course. I’ll also then email the winner for a shipping address, and get the print out to you as soon after the 23rd as possible.
Note that once we have a winner, your email address will then be merged into the MBP General Information Newsletter list, so you will continue to receive the occasional newsletter from us after that date. We hope that you’ll find any information we sending interesting and useful, but if you decide to, you can unsubscribe at any time with the links that you’ll find in every newsletter.
Good luck!
NOTE: The subscription link has been removed, because this particular giveaway has now finished. If you’d like to enter our current giveaway, please check the Fine Art Print Giveaway page.
 This Podcast is Sponsored by Squarespace
The Martin Bailey Photography Podcast is proud to have Squarespace on board as our current sponsor.
Visit www.squarespace.com and use the code MBP for a free trial and 10% off new accounts.
Show Notes
Music by UniqueTracks
Subscribe in iTunes for Enhanced Podcasts delivered automatically to your computer.
Download this Podcast in MP3 format (Audio Only).
Download this Podcast in Enhanced Podcast M4A format. This requires Apple iTunes or Quicktime to view/listen.

Great post Martin. Thank you. I have a question regarding paper thickness. I’ve been printing on hahnemuhle papers that range from 290-325 gsm. Is it safe to roll papers of this thickness? I worry about damaging the paper especially the printed side.
Thanks
Stew
Hi Stew,
Thanks for watching!
This is exactly the weight of the paper you saw me roll in the video. The facing paper, as long as it’s smooth, is enough to protect the printed size of the print. If you don’t use that, for sure, the print will be marked. As long as you have a nice smooth facing paper though, it should be fine.
Cheers,
Martin.
Thank you Martin, for so freely sharing your knowledge. We do appreciate what you do. I hope you don’t mind but I have a follow up question. What is the largest size that you will ship flat. I own a Canan 9500 so print size is limited to 19×13.
Thanks again,
Stew
Hi Stew,
I actually only ship 8.5 x 11 prints flat. Everything else gets rolled. I’ve been considering developing some boxes to ship my own 20×30″ gallery wraps, but I’m not sure it’s worth the hassle at this point. I have started to use Art Storefronts for larger prints (there’s a link under the Shop menu). They’re not “original” but the quality is there.
Cheers,
Martin.
Thanks very much Martin
I have a 19×13 print that I will be shipping in a few weeks. In the meantime,I think ill mail a rolled 19×13 to myself as a test to see what the process feels like and then improve on the real deal.
Thanks for your help
Stew
The important thing is finding a sturdy tube. As long as you nail that, and use a nice smooth facing paper, the way I show in this video is solid. Let me know how you get on though.
Hi martin – thanks for all the insight – do you mind linking to the facing paper you use?
Thanks Martin, I’ll give it a go.
Hi Martin. Very informative and helpful post. One question I have is will I be able to roll matte papers which are cut sheet and not coming off a roll? Are you using roll based prints which already have that natural roll as they come off the printer? Thanks again for the informative article.
Hi Fred,
I’m pleased you found this helpful.
You can roll pre-cut sheets like this too. I do use roll paper, but it’s natural curve as it comes off the roll is the opposite direction, as the printable side is always on the outside of the roll. I’m actually rolling against the curve of the paper, so flat sheets are not an issue.
Cheers,
Martin.
Wonderful! This is exactly what I needed to know. Thank you so much. <3
You’re welcome Michelle! I’m pleased this was useful. 🙂
Hello Martin –
Wondering if you can make a recommendation for the “facing paper” you use? Is this a special paper you use, or is it just a simple roll of inexpensive, thin paper?
Thanks!
Hi David,
The roll that I bought in Japan seems to be discontinued, but it’s basically just a thin coated paper, like this: http://www.bhphotovideo.com/c/product/519417-REG/Canon_1099V649_High_Resolution_Coated_Bond.html/BI/5296/KBID/6081
I hope this helps!
Martin.
Thank you for sharing all your tips and tricks! I just used your method to ship onionskin paper!
Whoops! Sorry for the late reply Ruth. I just saw your comment.
You’re welcome, on the sharing. I’m pleased this has helped.
Hello I’m new to printing what paper do I use. Print shops around here use a laser printer do I send my file to a company and have them print on special paper thanks so much
Hi Sissy,
If you are going to send your images out for printing, try zno.com. They have some beautiful paper and framing options.
Regards,
Martin.
Very helpful video. Thanks so much for the great tips.
Thanks Vernon. I’m pleased you found it useful.
Thank you so much for this highly educational video Martin. I’ve been wanting to get into printing for a while and I finally took the plunge a few weeks ago and picked up a Pixma Pro-10s which I’m very happy with. I had a bit of a head start with printing as I bought your book Making the Print some time ago so I already some of my workflow in place to support printing. Just as I got my printer though a friend of mine in Sweden asked me to make her a print of an image I had taken on a recent visit to Scotland. Thought I wouldn’t necessarily class my photography as fine art, I followed all the steps in your video to ensure the print would arrive in great condition – including the paper with the sticky tabs and bubble wrap stoppers! All great advice. Thanks again for all the content you make – I’ve been listening for more years that I can remember!
That’s great Julian! I’m really happy that this video helped.
Thanks for listening for all those years. I hope you continue to find my content useful.
Congratulations and good luck with the new printer.
Cheers,
Martin.
Hi Martin, really helpful post thank you. I’ve just jumped into the world of printing and am loving it. Hearing your tips on rolling/posting prints has been very timely! A quick question: regarding the facing papers you use, can these be any ‘coated’ paper? I’ve found a coated Canon 140gsm paper that looks promising but wanted to check your thoughts on whether such facing papers have to have acid free qualities, so that the archival status of the print is unaffected? Many thanks, Graham
Hi Graham,
Thanks for stopping by. I’m pleased this was useful for you.
The Canon 140gsm coated paper is probably very similar to what I use. They are usually very smooth, produce no dust, and aren’t glossy, so they won’t stick to the print.
You’ll probably find that these papers are very neutral, if not acid free, although Canon are less likely to make a statement to this effect on such a paper. If you wanted totally acid free archival paper, you might consider some interleaving paper from University Products here: https://www.universityproducts.com/photo-products/interleaving-tissues-and-papers
In fact, this one is probably what I’d select, because it comes in 36″ wide rolls, which is perfect for most of the prints I ship.
https://www.universityproducts.com/heavyweight-unbuffered-tissue-18-29-gsm.html
I may pick some of this up at some point too. I hope that helps!
Regards,
Martin.
hello!
i was wondering if i could roll package my 13×19 glossy print the same way? Thank you so much!
Hi Melissa,
It depends on the paper and its coating. I would imagine there are some papers that don’t do well rolled. My suggestion would be to buy a nice wide tube and roll a print, then leave it in the tube for a few days, before taking it back out and checking the print.
BTW, I have rolled and shipped gloss prints on Breathing Color media without issues.
Regards,
Martin.
What is the thickest paper you would ever print and roll?
Breathing Color’s Pura Bagasse Smooth is 20mil thick, 320 gsm, and I roll and ship that. If the media comes on rolls, rolling is not an issue, as long as the diameter of your tube is sufficient. Note that I generally try to roll against the original curl to help decurl the image, but for very think media that sometimes requires some decurling beforehand. I feed the print (with facing paper applied) into an old roll of canvas and leave it for half a day to a day.
Hey Martin, thanks very much for the information, man. I’m just starting to ship prints and have been seeing what the best method would be. I’m shipping 13″x19″ Canon Photo Paper Pro Luster paper. I was just wondering about if the paper would retain too much of the curl when shipping in a tube? And, can you recommend a source for ordering the best tubes (strongest). Thank you so much, man. You’re a big help!
Hi Ted,
I’m pleased this helped!
I roll the paper against its original curl (for roll media) so after a while it generally just lays flat. For sheet media, or if the print was left in the tube for so long that it doesn’t uncurl itself, I include instructions in my insert for the client to apply the facing paper to the printed side, and roll it around the tube against its curl. If they leave the print like that for a day or so it will flatten out.
I buy my tubes here in Japan where I live (Sekaido) so I’ve never had a need to source them overseas I’m afraid. The important thing is that they are at least 70mm or around 3 inches in diameter, and the walls should be 2mm or thicker. Ideally also get tubes with capped ends, not pinched. The ones that you pinch closed are easier to crush.
I hope this helps.
Regards,
Martin.
Thank you so much for your input and help, Martin. I really appreciate it. Very cool, man, I’ll go with the tubes and if I get any issues I’ll try something else, but for now it seems like the safest way to go. Thanks again, Happy Holidays! Ted
You’re very welcome Ted. The best of luck, and Happy Holidays to you too!
Thanks for the video! Very helpful. I was wondering – do you think it’s better to roll a print by the short side or long side? My husband thinks it should be the latter because you don’t have to roll it as much and it would get less curled, but I’m not so sure.
Hi Laura,
I’m pleased this was useful.
Whenever I can get a tube long enough, I prefer to roll the print by the long side, as your husband suggests. For very large prints this is sometimes not possible, and it works fine, but I do prefer to roll as little as possible.
Regards,
Martin.
Hi im looking to ship 3 prints in one tube. Do you think it is possible in rolled form? I have options of 230gsm vs 400gsm. I think it may be hard to do that for 400gsm, seems like 230gsm can be rolled (not sure how many in one tube) while 400gsm may be better to be shipped flat than rolled. What do you think?
Hi Elvina,
Your thinking is good, but it’s hard to say if three will go in one tube without knowing the diameter of the tube, and even then, the ultimate test is actually trying to roll them down to the necessary diameter to fit inside the tube. You can tell when you are overstressing them.
Also, note that when rolling prints together, you need to have an interleaving sheet between each of them, although this can be very thin interleaving paper, like soft tissue or tracing paper, but it should also be archival quality if possible. Here is what I mean on the University Products website:
https://www.universityproducts.com/buffered-acid-free-interleaving-tissue-paper-10-16-gsm.html
400 gsm is quite stiff, so it might be better to ship it flat, but again, trying to roll a print and feeling how much resistance you get is the only way to really tell. Some paper is just more flexible than others, depending on its physical makeup.
Regards,
Martin.
Hello Martin,
Thank you for the valuable information on this video. I am new to print making and I was wondering if I could use tracing paper (wax paper) or Tyvek instead of canon coated paper to protect my print. Also, I would like to ask what other paper options I may have aside from canon coated paper if it is not recommended to use wax paper or Tyvek, please. Thank you.
Hi Fierelle,
You absolutely can use tracing paper, but I would avoid wax paper, as it may mark your print. Ideally, the paper you choose will be archival for long term storage, or at least a media that will not discolor your print, like the Canon paper I use. Tyvek is archival and has no damaging chemicals, but for use as a facing paper, you’d need to check how smooth it is. It can be a bit rough, and therefore could damage the print.
If I was to buy something specifically for this use right now, I would select this product from University Products: https://www.universityproducts.com/standard-paper.html
I hope that helps!
Regards,
Martin.
Thank you for your helpful post. I don’t usually market my photos. I am retired from being a location manager on movies. Someone contacted me and wants to buy 6 photos in 4 different sizes. Can 2 16×20 prints be shipped in one tube? Also 2 12×16’s? How about adding an 11×14 to the 12×16’s and a 20×24 to the 16×20’s?
Thank you very much.
All the best,
David