
Visit Library for MBP Pro eBooks |
Spring is in the air here in Tokyo, and the Cherry Blossom has come early. Although at the time of writing it's pretty much fallen from the trees, replaced by the green leaves that you’ll see in some of the shots that I’ll share today. As usual, I have been busy with one thing and another, but I didn’t want to let the blossom pass by completely without a single photo, and the relaxation of just being out with my camera is more necessary than ever, so on Saturday, I grabbed my gear and set out for a walk around my local area where there are a few rows of Sakura Trees that I was sure would provide at least a few opportunities.
I started with some wider shots of the tunnel formed by the blossom just after the nearest train station to our apartment, but as is often the case, I’m not really a fan of the wide shot. Tokyo is an urban jungle, and although makes for great street photography, I find it too busy and not really pretty enough for my tastes. For that reason, I tend to shoot very tightly cropped images of the blossom, as you’ll see, although I do have some shots that appear to be wider, but, in fact, are shot at 500mm on the long end of my RF 100-500mm lens.
I’ve selected ten images from my two-hour walk and will walk you through my thoughts as I shot each image. These aren’t really anything special, but in the spirit of sharing my life as a photographer and business owner, this is about my lot at the moment, and hopefully, you’ll be able to gain something from this.
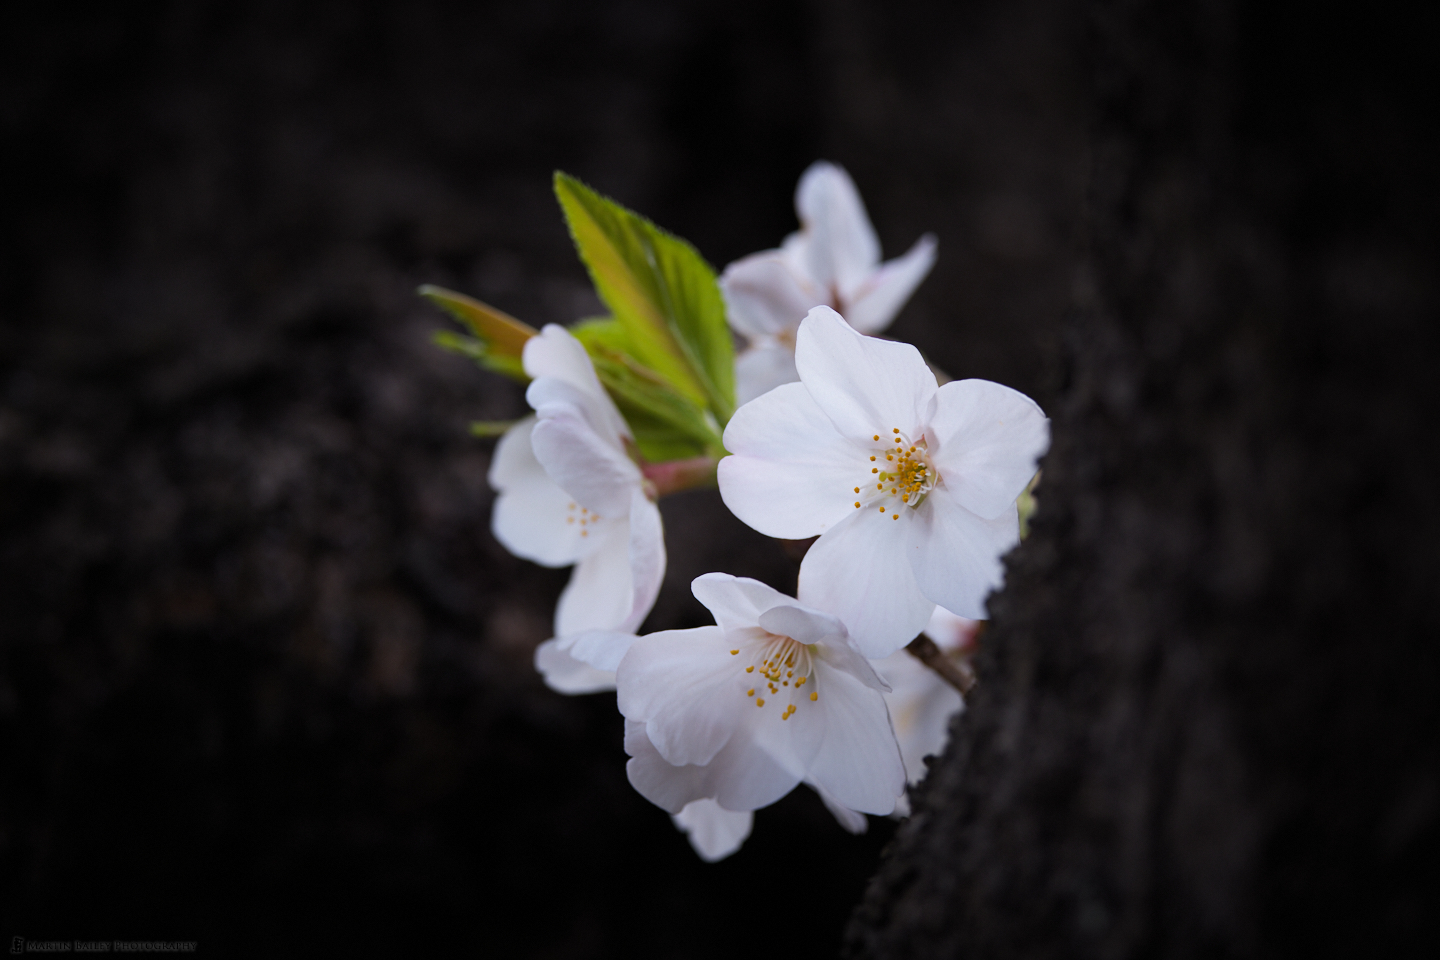
The first thing that I look for as I try to decide what to shoot, is some flowers that can be isolated to a degree. The other thing that appeals to me is flowers that are mostly in the shade or being caught by the light shining through a gap, like these first few sprigs of flowers that were blooming in the base of one of the first branches from the main trunk of the tree.
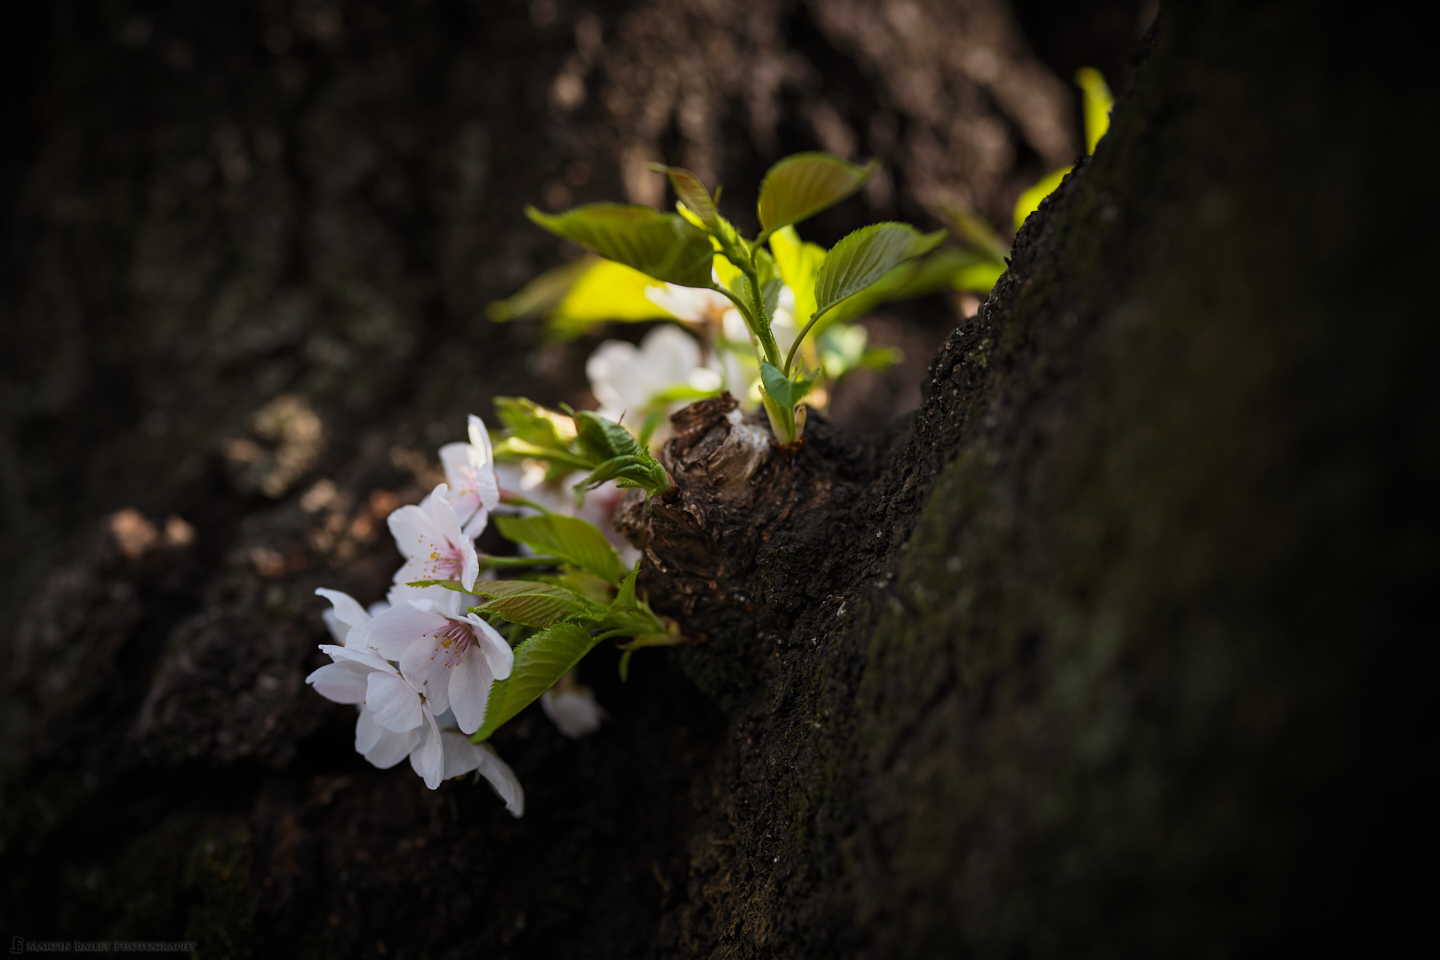
As I said, the green leaves were already starting to mingle with the blossom, which is a sign that the blossom is coming to an end. The light was catching the leaves towards the top of the frame, increasing the contrast somewhat, but also adding a splash of slightly more vibrant color, which I don’t dislike. For me though, the main appeal of this shot is the blossom in the left foreground. I shot this with the Canon RF 50mm ƒ/1.2 lens with the aperture set to ƒ/2.2 so the depth of field is intentionally very shallow. I focussed on those foreground blossoms and let everything else gradually go out of focus.
When working with such shallow depth of field, I generally move my selected focus point so that I can place it over the main subject, rather than focussing with the center focus point then recomposing. The plane of focus moves slightly as you refocus, and can cause the main subject to slip out of the depth of field, so I try to avoid that. It’s also important to note that I was shooting handheld, so I also will be rocking slightly as I breathe, so moving the focus point also reduces the time between focusing and releasing the shutter, and that also helps me to avoid moving and again losing focus on the main subject.
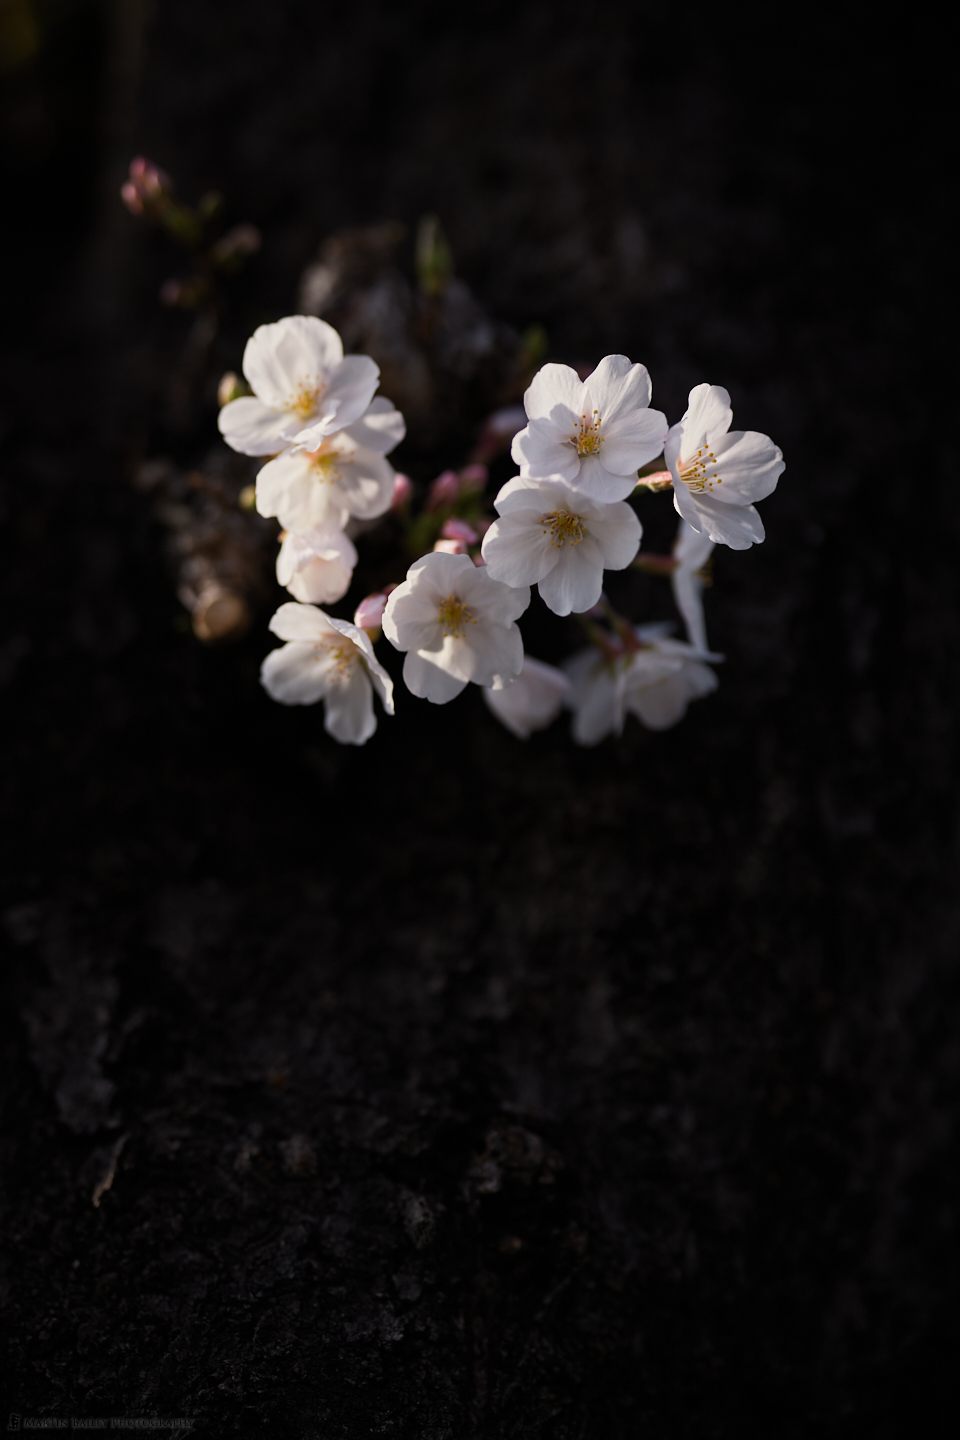
This next image (below left) is a similar deal. I found a sprig of blossom shooting from the main trunk that was mostly in the shade. I went with a vertical orientation for this, mainly because horizontal would have allowed the edges of the trunk to come into frame, and I wanted to avoid that. Because I'd gone vertical though, I placed the blossom on the top third. I was physically looking up at the blossom, so this composition helps to give them some perceived height. This was shot at ƒ/2, so a slightly shallower depth of field, and again, I moved the focus point around so that I didn’t lose focus on the flowers. I’m actually generally trying to ensure that I get some of the stamen sharp, as I find that these details are the most important element to give the overall impression of the sharpness of the blossom.
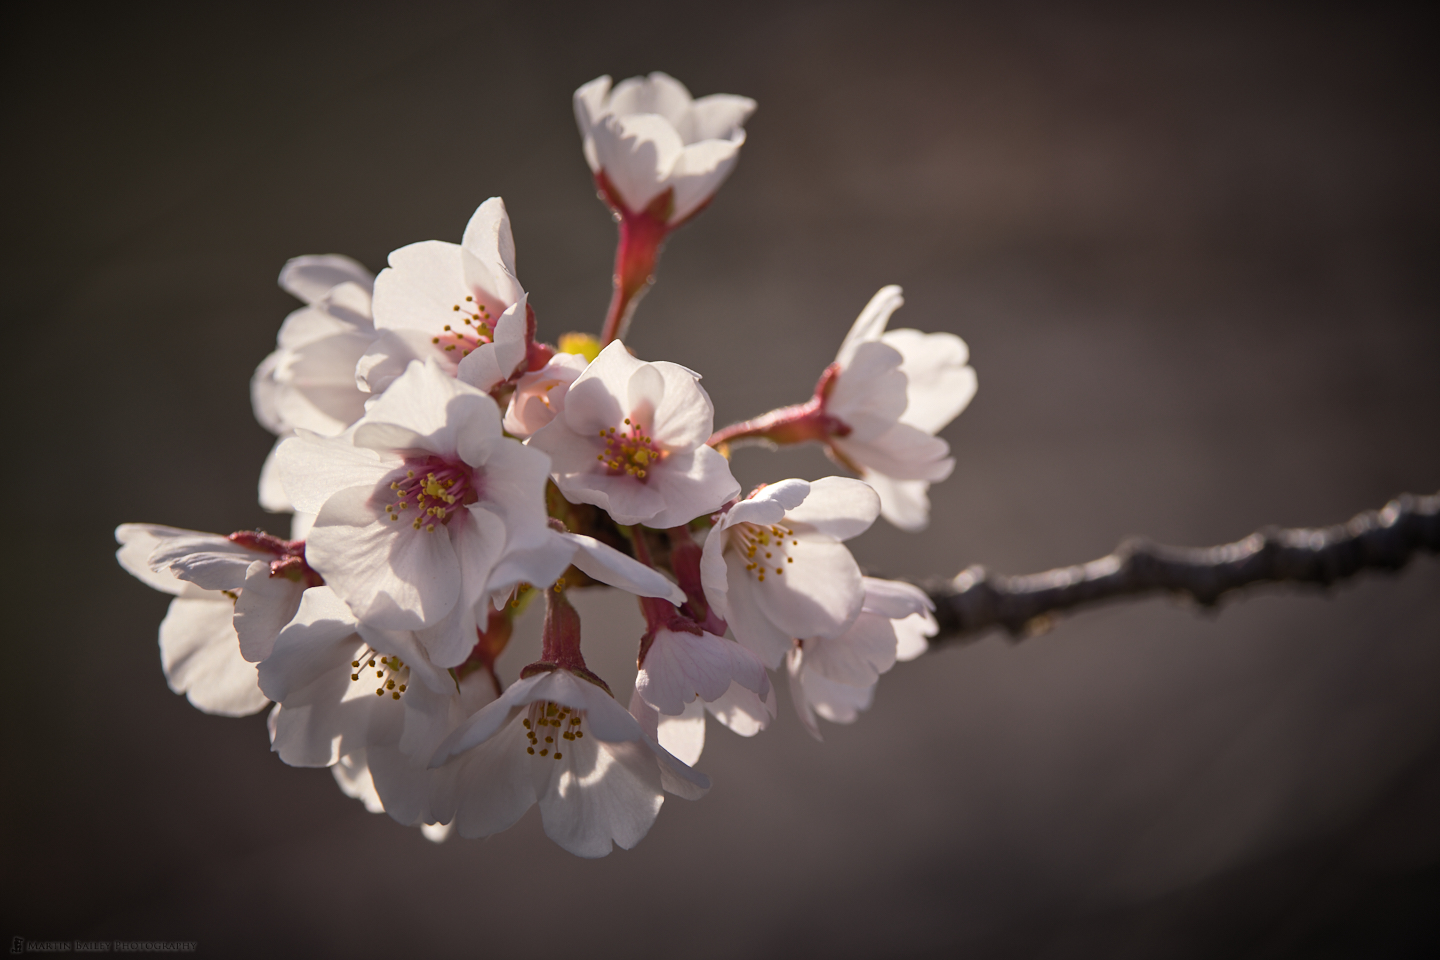
There is a water duct that flows alongside the road where I was walking, and the cherry blossom trees have some branches that reach out over the water. There are some places where it was possible to isolate just one sprig of blossom with a relatively clear background, like this, but because the branches and twigs were much further away, I had to switch to my RF 100-500mm lens at this point and would continue to use it for the rest of the shots I’ll be sharing.
At 500mm with this lens, my widest possible aperture is ƒ/7.1, and that is what I shot this at. Because the longer focal length causes the depth of field to become shallower, I actually have a shallower depth of field for this shot at 500mm and an aperture of ƒ/7.1 focusing at around 1.6 meters or 5 feet than I did for the previous images, shot at 50mm with an aperture of f/2 at around 55 cm. This is why I really enjoy playing around with the 100-500mm as a close-up lens. It not only enables me to frame up things that are further away and sometimes not even physically approachable with a macro lens, and it still has wonderfully shallow depth of field.
Note too that to keep the eye in the frame for this shot, I applied a vignette to this image in Capture One Pro, and reduced the exposure of the vignette by around two stops. There was also some natural vignetting which helps to keep the look quite natural.
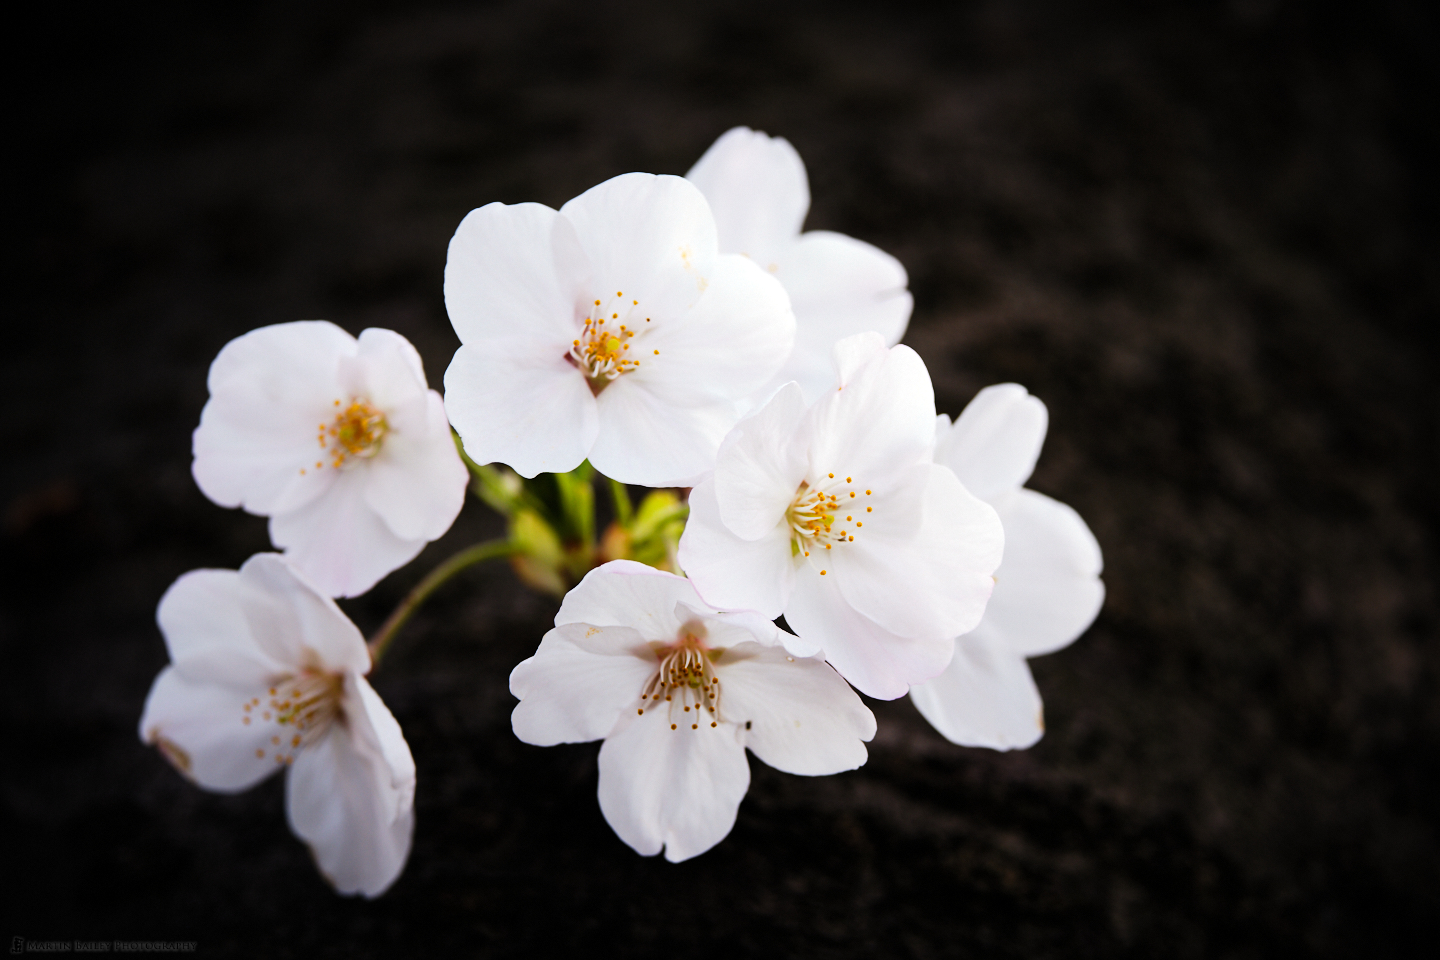
I walked back to the trees by the road and found probably one of my favorite clusters of blossom, that you can see in this image. I like the balance of these flowers, almost forming a starburst, or like an asteroid shower, all coming from a single point in the center of the flowers. They are also relatively clean, and don’t have a significantly large green leave in with them, so I like the relative minimalism of this shot.
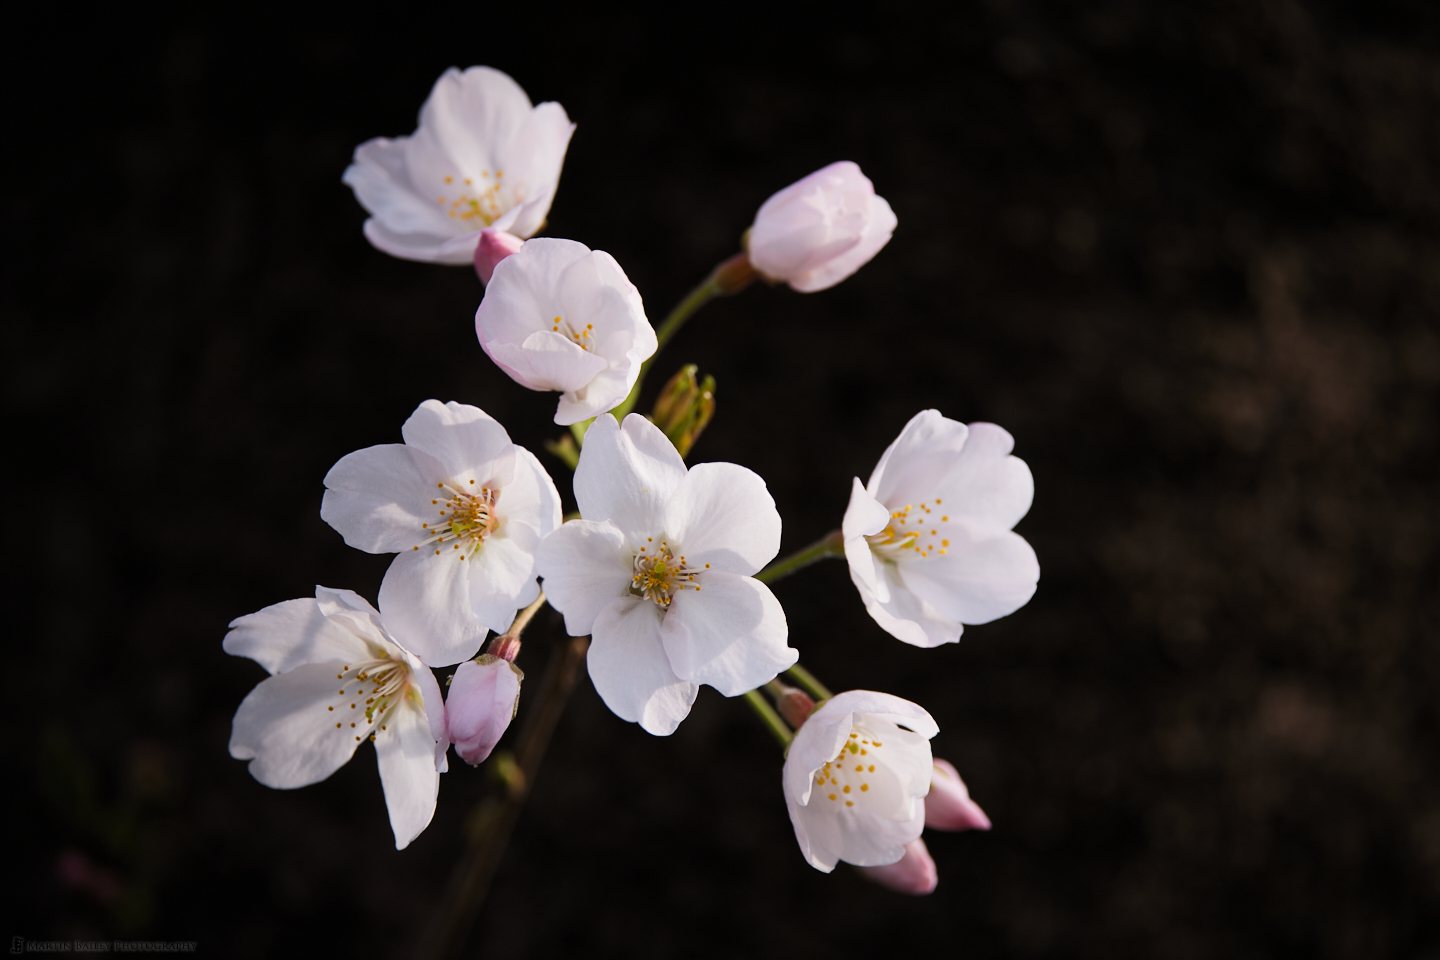
I positioned the blossom on the left side of the frame as there were more flowers that seemed to be “looking” to the right, so I wanted to give their gaze more space. The focal length was 451mm, and that being slightly closer allowed me to open up the aperture slightly to ƒ/6.3.
As I walked along further, there was another bridge over the water duct, so I stepped out onto that and shot this next image. This was towards the late afternoon sun which was out of frame to the left of the camera. It’s a busy shot, but again, at 500mm the aperture of ƒ/7.1 enabled me to isolate some of the blossom with the focus plane.

You might also notice that there are multiple lines formed by the out-of-focus twigs and branches, which is caused by the aperture of the RF 100-500mm lens. It’s not the best bokeh I’ve seen in a long lens, but with this kind of subject, I still find it relatively pleasing.
Sticking with the Japanese photography terminology, in addition to the word “bokeh” which we’re all used to using, there is a compound word called “maebokeh” which means foreground bokeh. This is the technique of placing subjects in the foreground, between or as in this next image, around the main subject. This technique can be very appealing, and indeed, this is another favorite shot from my walk.
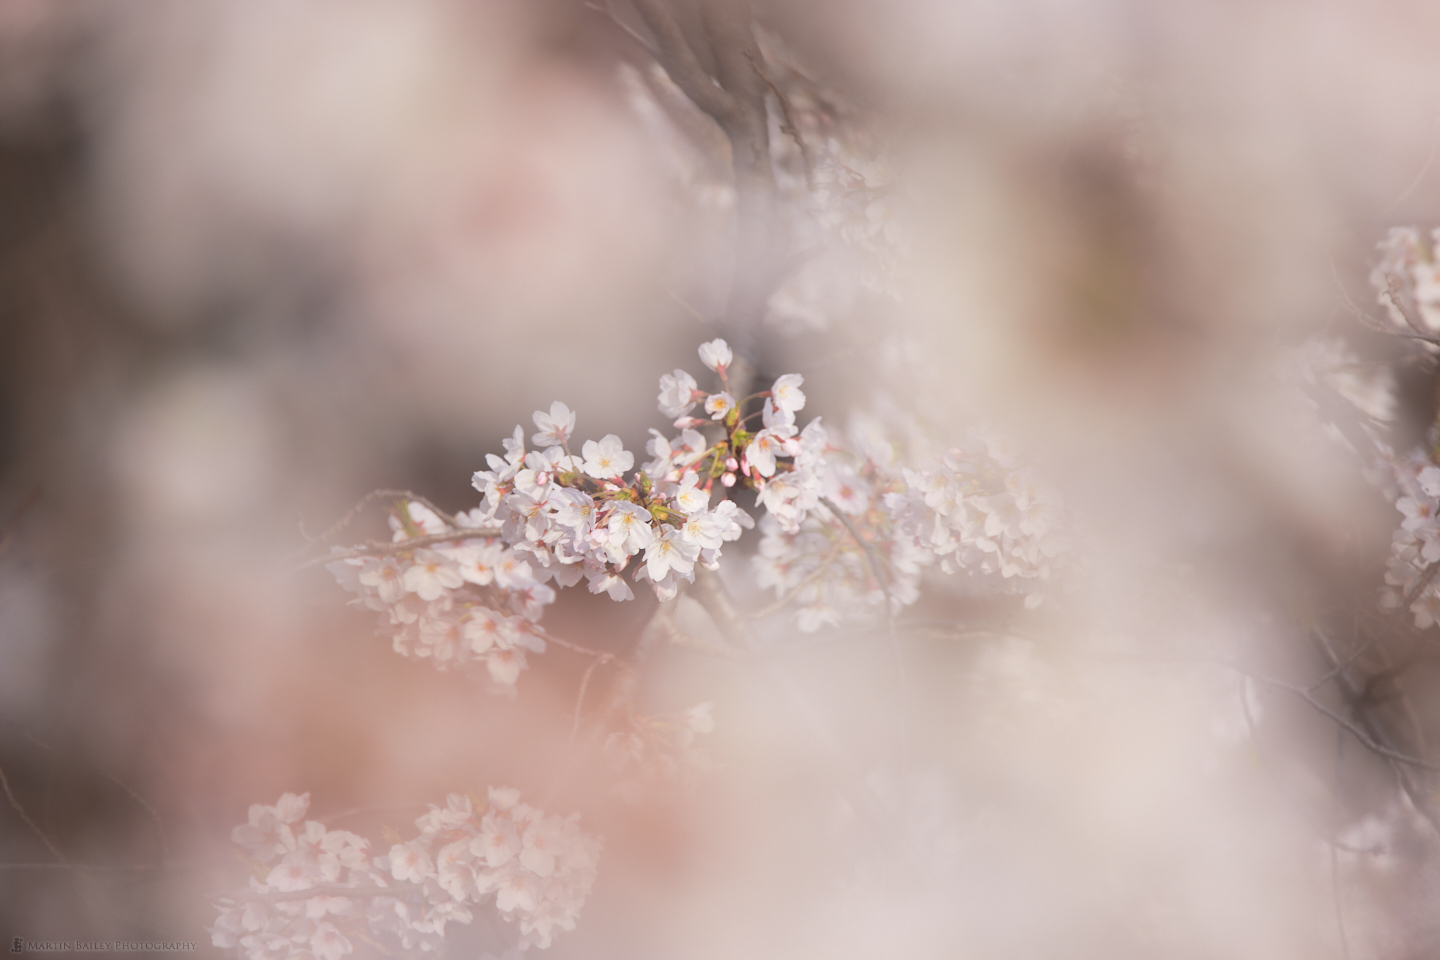
It was tricky, timing-wise because the breeze was moving the foreground blossom around continuously, so I had to shoot around thirty frames to get one that I liked. Ironically, this was one of the first of the batch, but the experimentation was necessary to give myself some options and something to compare the images against. This was still at 500mm with an aperture of ƒ/7.1 and I find the foreground bokeh in this shot to be much more pleasing than the previous shot.
The next image (below left) is similar to an earlier image, but I wanted to include this as well, for a few reasons. Firstly, despite the majority of this image being beautiful, clean blossom, there is a patch of decay starting to form on the bottom-left flower. This is, to me, somewhat in line with the Japanese concept of “Wabisabi” or beauty in imperfection.
I’ve seen some cups made by Japanese potters that have bugs painted on the inside. This was originally done to hide imperfections in the vessel but became a way of intentionally adding an imperfection in the spirit of wabi-sabi. I also own a number of cups that I’ve bought with my wife over the years that are made from clay that uses a high level of soil, so they are very earthy and rough. They are some of my favorite cups to drink sake from. I should put a few hours aside to photograph them and share them with you as well, as they are quite beautiful in their own right.
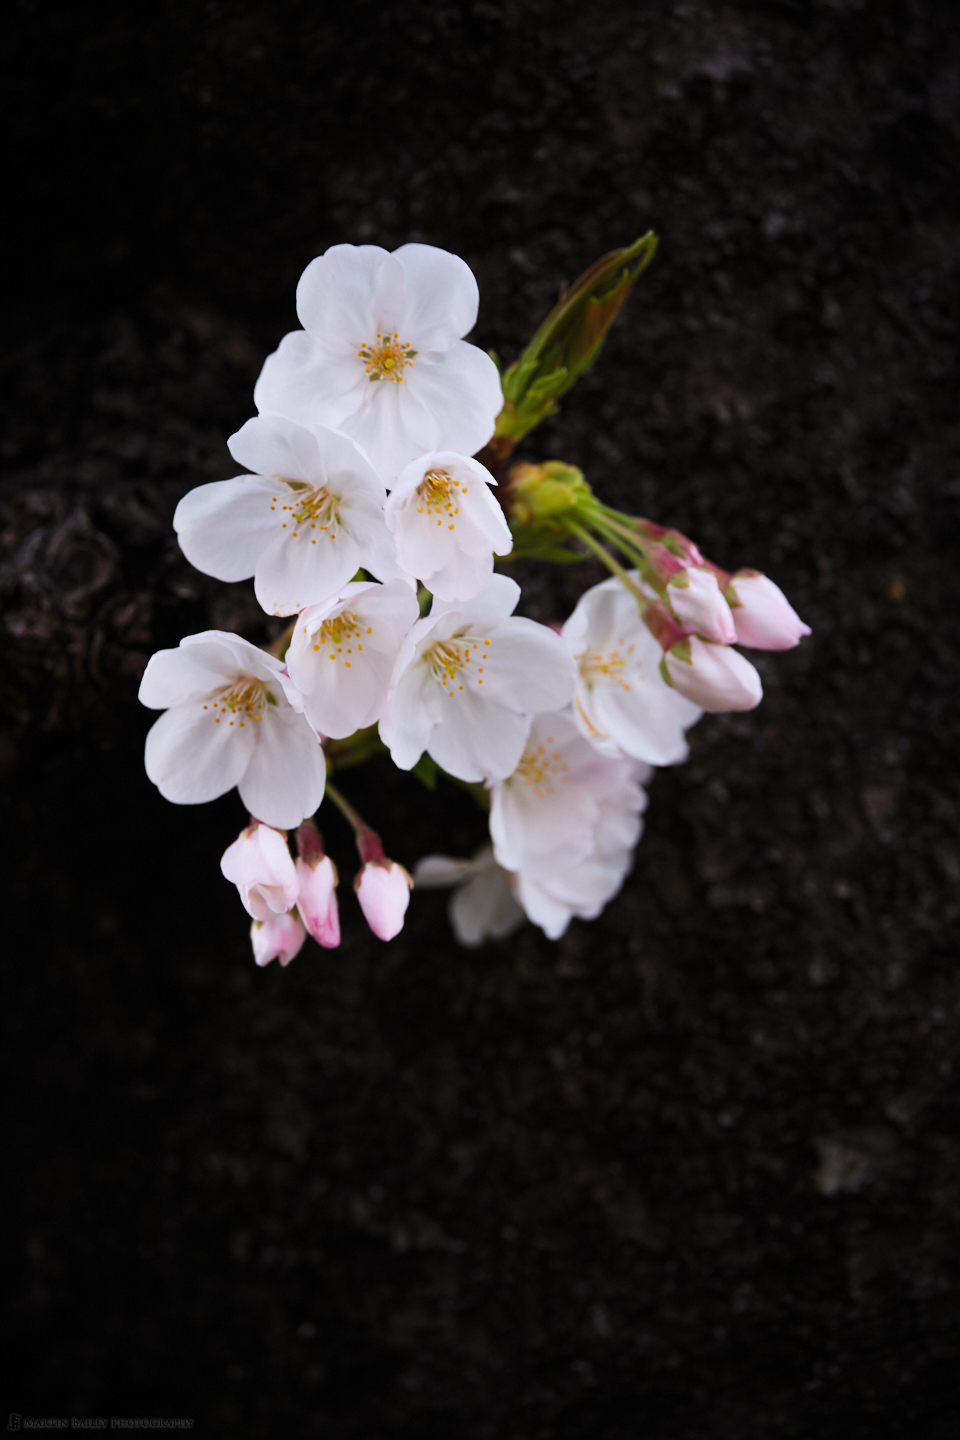
Here is another vertical orientation image (above right), though this time it was purely for aesthetic reasons. The blossom and accompanying buds and leaves were slightly taller than they were wide and just felt that portrait orientation would suit that more. Plus, from a stock photography perspective, it’s always nice to have some vertical options as well. One of these portrait aspect images will probably find itself on the cover of the eBook that I’ll put together for MBP Pro Members as soon as I’ve released this post.
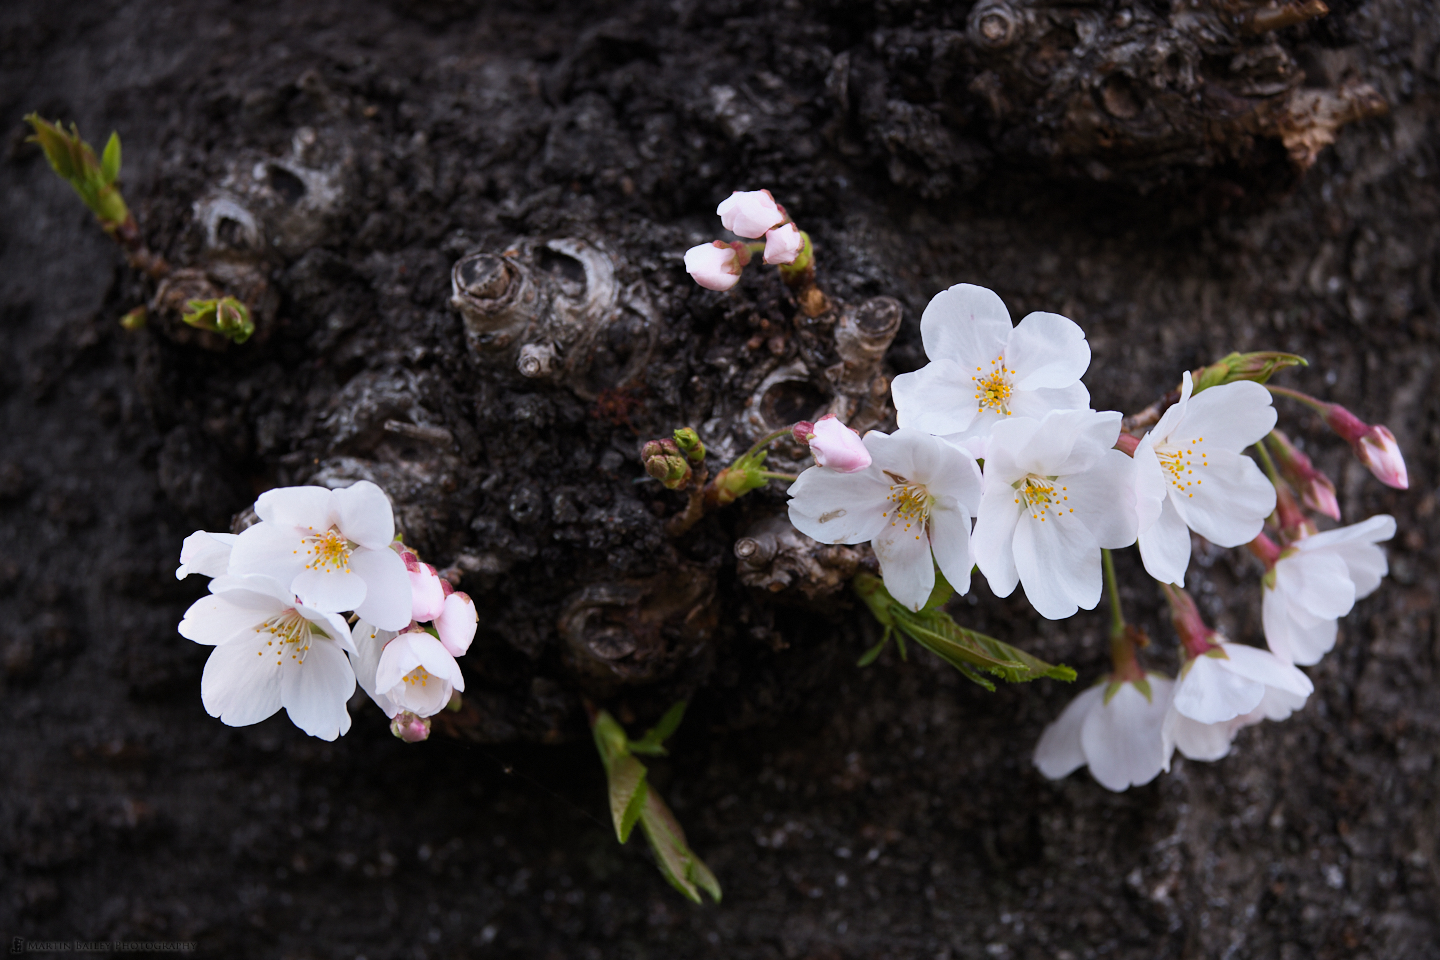
This next image is somewhat different to the rest of the closeup shots, simply because there is more detail in the bark, and a wider area of blossom, buds, and leaves included. This is actually a little too busy for my liking, as I really prefer a minimalist look. Come to think of it, I actually used a Luma Tone Curve and darkened the bark down very slightly in most of the other images, just to make the blossom more prominent and reduce the competition for the viewer's attention.
We'll finish this relatively short episode with one last image, which I shot from the side, so that the bark of the tree overlaps with the right edge of the blossom, to kind of give it a peekaboo feel, as though the blossom is looking around the side of a building. Again, shallow depth of field with the 100-500mm lens at 300mm and an aperture of ƒ/5.6, and once again, I was careful to get the stamen sharp, as it feels like a mistake to me when I see the stamen out of focus in shots like this. I think those little orange balls of detail help to anchor the image visually in the midst of the rest of the blurriness.
Like I said, nothing really special, but I like to keep you updated with my antics, and as I mentioned recently, these short shoots of things that I enjoy photographing are keeping me sane as I work on other tasks that are not always as enjoyable as being out with the camera. If you still have some blossom in full bloom near you at the moment, I hope this might give you some ideas on how you might compose something perhaps a little more minimalistic than the wider shots that can sometimes feel more natural to shoot. And, of course, if you have any shots of your local blossom to share, feel free to drop a link into the comments below.
Show Notes
You can buy the Canon EOS R5 used for these shots here: https://mbp.ac/EOSR5
And here's a link to the 100-500mm lens: https://mbp.ac/100-500
And finally, the 50mm ƒ/1.2 lens: https://mbp.ac/RF50mm
Audio
Subscribe in iTunes to get Podcasts delivered automatically to your computer.
Download this Podcast as an MP3 with Chapters.
Visit this page for help on how to view the images in MP3 files.


Martin, I’m really enjoying the thought processes of your “antics” as it gives me some new ideas and at times validates my own experimentation/experiences. I’m still using an android phone so the best I could do is pass on the details of PF to a photographic colleague. He is now embarking on a PF journey.
Thanks for the comment Bruce! It’s great to hear that you find these posts useful.
I’ve started to study the software and programming language to make an Android version of Photographer’s Friend, and although it will take a number of months, it’s now in the works. I’ll let you know via the blog when it’s ready to go! 🙂
Hi Martin. Beautiful images and interesting process to read about. Looking forward to the sake cup series.
Hi Ulana,
Thanks for the comment and kind words. I’m definitely going to make time to photography some of my cups, and probably some of my wife’s other crockery. We have some nice stuff, but I want to do it justice, so I’m thinking of how best to do this. I have a few ideas so we’ll see how it pans out.
Regards,
Martin.
Hi Martin, nice to see these photos. Also great to read and learn about your process which is always so deliberate and well thought out. Very recently I have been selling my used gear and getting ready to purchase the R5. I sold my two 5D Ml IV bodies and I’m in the processing of selling off all of the Nikon Z gear that I have used the past two years. I kept and plan to use my EF 70-200mm f 2.8 and (what was most often my go to lens with the Mark IV) the EF 100 – 400mm for awhile rather than forking out the bucks for the RF lenses. Your thoughts? Thanks, Jan
Hi Jan,
It’s great to hear from you! Thanks for the comment and kind words.
Working with EF Lenses on Canon mirrorless cameras is pretty painless, and the image quality actually seems to improve slightly, not that it’s poor on EF mount cameras. The one thing I would strongly recommend though, is getting the mount adapter with the control ring built-in (https://mbp.ac/ccrma). I map the ring to directly change my ISO, which enables fine tuning of exposure while looking at the histogram in the viewfinder. Because it’s built into the adapter it works with all of your EF lenses.
For me, there is an incentive to migrate quickly, so that I can report on my findings with the new lenses, but otherwise, taking your time switching is a sound plan. The overall size reduction that comes with using native RF lenses does become quite an attractive proposition. Sometimes the lens itself isn’t much smaller, but not using the adapter shrinks the overall size of the system quite a lot. Due to this, I actually decided for the first time since 2001 that I would no longer use the battery grip with my cameras, and I’m enjoying the much more compact format. It makes traveling easier too, when we’re able to, of course.
One other thing to keep in mind, is that there is possibly a higher resolution EOS R5s (or whatever the name will be) in the works. Canon Rumors have been sharing information on this for a while now, and it looks as though there will be an announcement from Canon anytime now. They are saying 80MP or thereabouts. This may not be of interest to you, but if higher resolution is appealing, keep your eye out for that. I personally cancelled my order for a second EOS R5 in favor of the higher resolution body. The R5 is currently the best camera Canon has ever made, and for fast-paced shooting it will probably remain so, but I can see my having one of each so that I can work with the R5s for landscape etc. although with a 12fps that is also being touted, I would probably shoot wildlife with the higher resolution body as well. I’m a sucker for resolution though, so as I say, don’t worry about this if you aren’t. 🙂
I hope this helps some. Stay well Jan.
Regards,
Martin.
Looking forward to the cups.
Have you ever been to ‘mingeikan’, the Folk Crafts Museum in Tokyo?
Been a couple of times and always enjoyed it.
https://mingeikan.or.jp/
Luc
Hi Luc,
Thanks for the comment. I’m planning the cup shoot at the moment and will get to it very soon.
I’ve not been to the Mingeikan, which now you’ve pointed out to me is somewhat embarrassing as I lived in Meguro for ten years. 🙂 I am in need of a good Indian curry or Yakitori from my old neighborhood, so as soon as we get this poxy pandemic under control I think a visit is in order. Thanks for the link!
Regards,
Martin.