
Visit Library for MBP Pro eBooks |
When I bought my iMac Pro four years ago, I seriously considered buying a VESA Mount adapter with it, so that I could mount the iMac on a flexible arm, but at the time, all of the arms I could find that would support the iMac Pro were around $200 and so with the mount adapter, I was looking at around $300 so I decided to pass on this option. Since then, my eyesight has changed slightly, as presbyopia sets in, and I've found that the distance to my iMac was just at the point where my short distance glasses were not helping, and my long-distance glasses didn't help either. I also developed some pain over the last few weeks as I spent way too much time sitting at the computer in an awkward position, so I decided to check on the price of the adjustable arms again, to see if there was anything more reasonably priced that would do the job.
To my pleasant surprise, I found a brand called Huanuo that made a number of stands that would be perfect for what I wanted to do, and the price was so low that I almost felt guilty paying so little, but I found the engineering quality and usability of the two stands that I bought to be excellent, so I figured I'd share my findings with you today, and I'll include a few photos of the various positions in which I am now using my dual-display setup, with both of the displays on adjustable arms.
Stepping back in time a little, I'd actually always been slightly disappointed that the iMac comes with a stand that does not allow the adjustment of the height of the display. It always seems slightly low to me. I also like to use my displays vertically sometimes, like when viewing lots of portrait orientation images, or investigating problems in programming language code, but there is no easy way to flip the iMac up on its side with the stand that comes with it. Once you change this for the VESA mount though, you can easily rotate the display, and I will also share the keys that you need to press to actually see the rotation options in the Display Preferences, as these are not visible by default.
So, the two adjustable arms that I bought for my iMac and my second display are the Huanuo Single Monitor Stand HNSS8 (https://amzn.to/3sfOFgp) which supports holding a hair under 20lbs, so I've used this for my 32 inch BenQ display, and the HNSS12 (https://amzn.to/2RnkN4U) which holds up to 26.4lbs, making it compatible with the slightly heavier iMac Pro. Although the lamp and mic stand that are also attached to the back of my desk make this somewhat difficult to understand what's happening, here is a photo of the back of my iMac and my second display on the stands, so that you can see what I'm talking about.
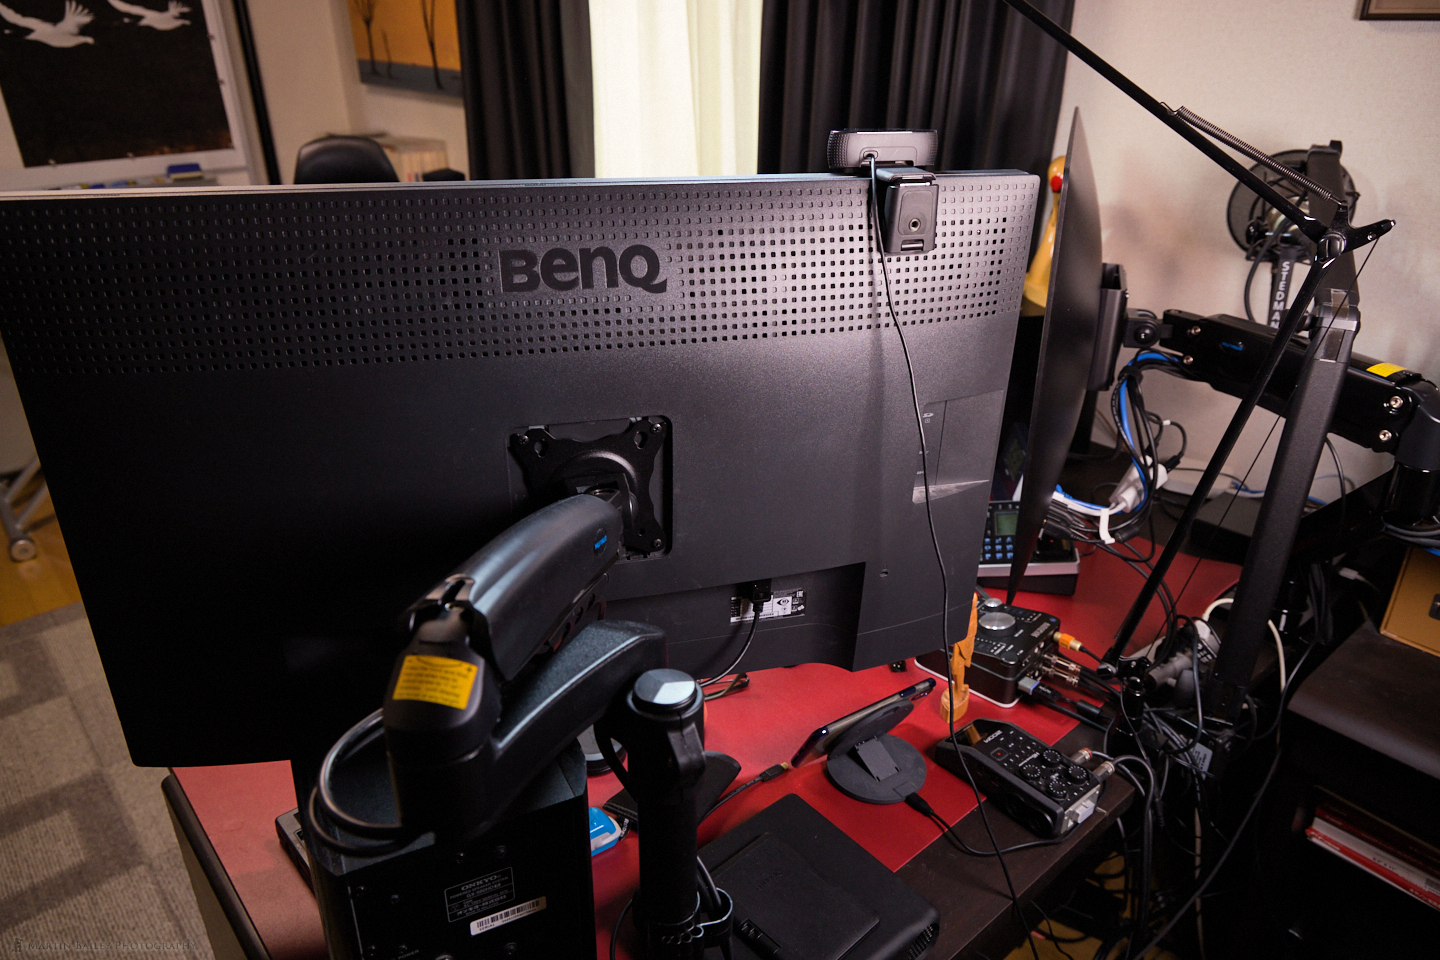
The two stands together only cost me around $70 on Amazon here in Japan, and ironically that is about the same price as the iMac Pro VESA Mount Adapter Kit from Apple. The BenQ display comes with the screw holes to attach the VESA Mount without any adapters, as you can see in the above photo, but the iMac comes with a stand that has to be removed and a plate affixed to the back to take the screws that fix it all together.
Attaching the iMac Pro VESA Mount Adapter
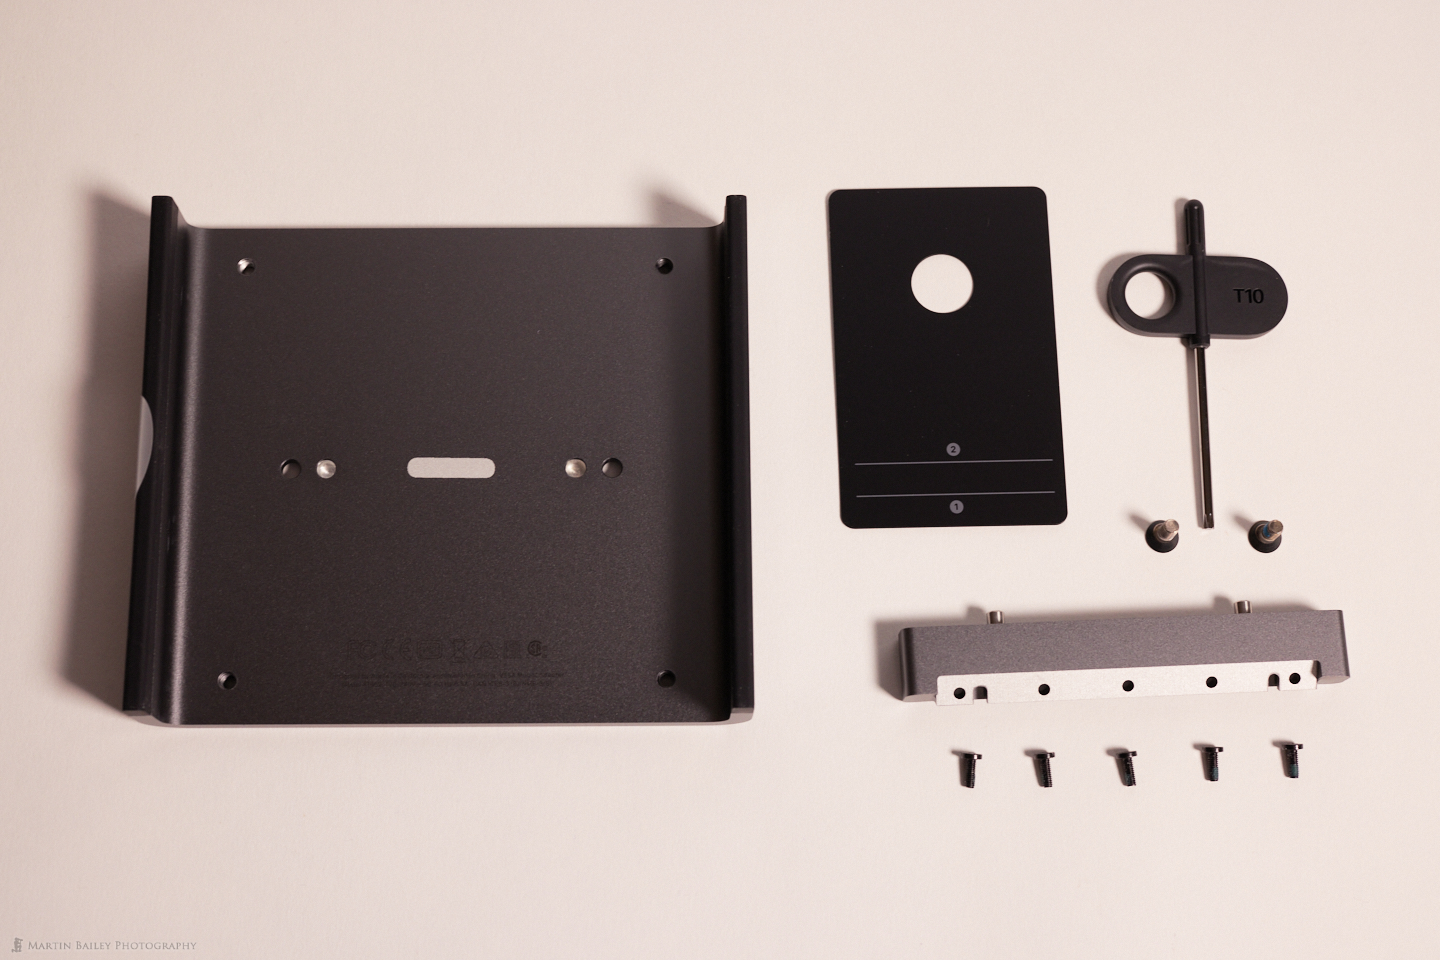
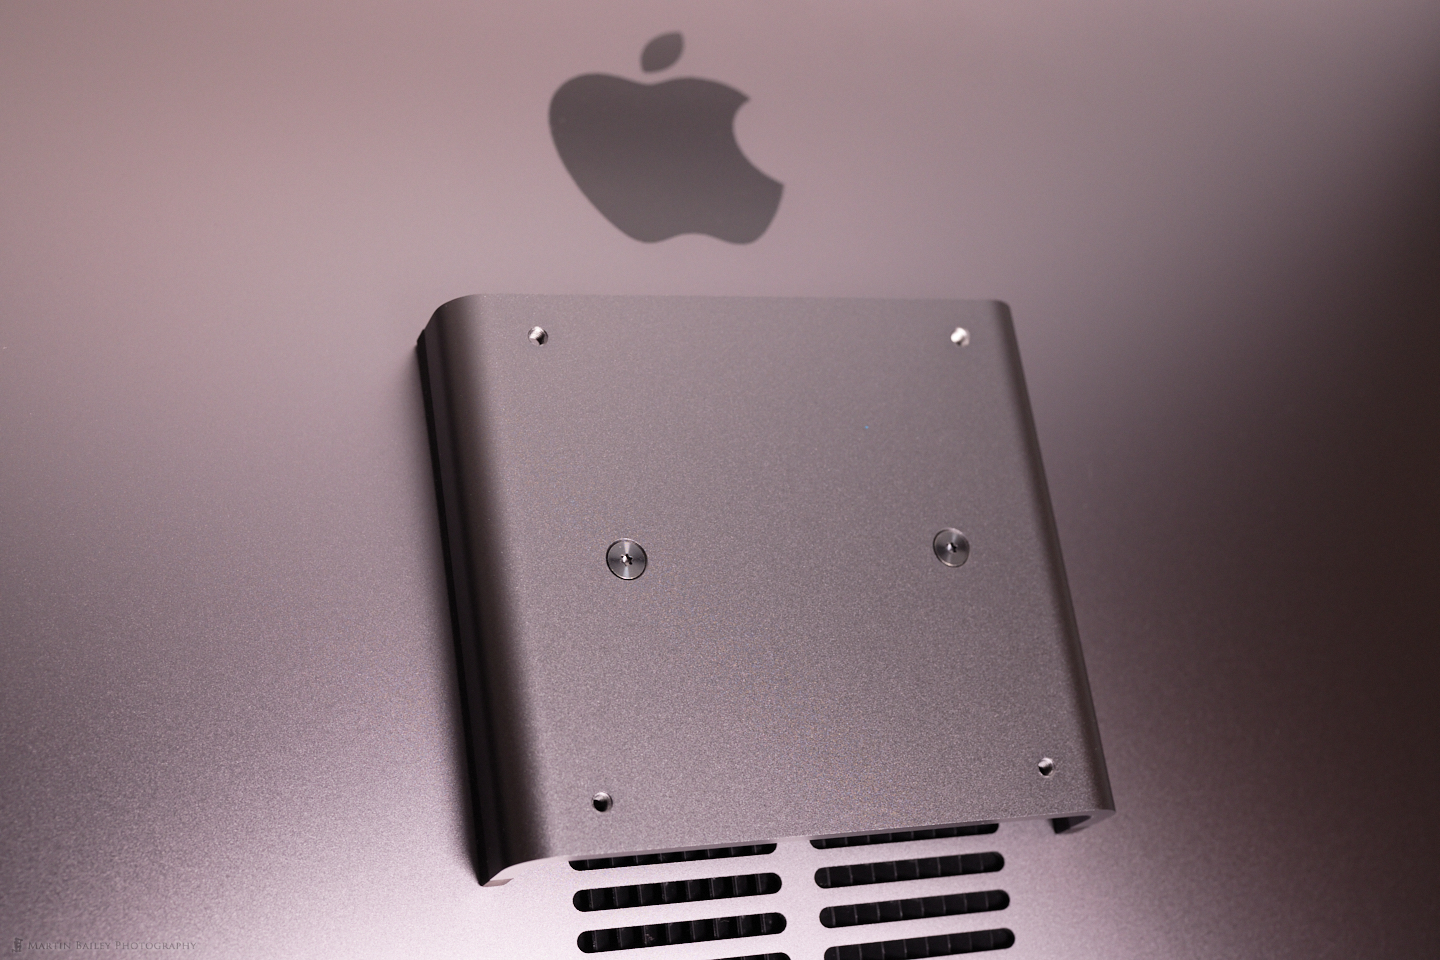
I found the whole process pretty fascinating, so I shot a few images as I replaced the iMac Pro stand for the VESA Mount Adapter. First of all, here are the kit components, out of the box, ready to use. As you'd expect, they're well-engineered and match the dark grey of the iMac Pro.
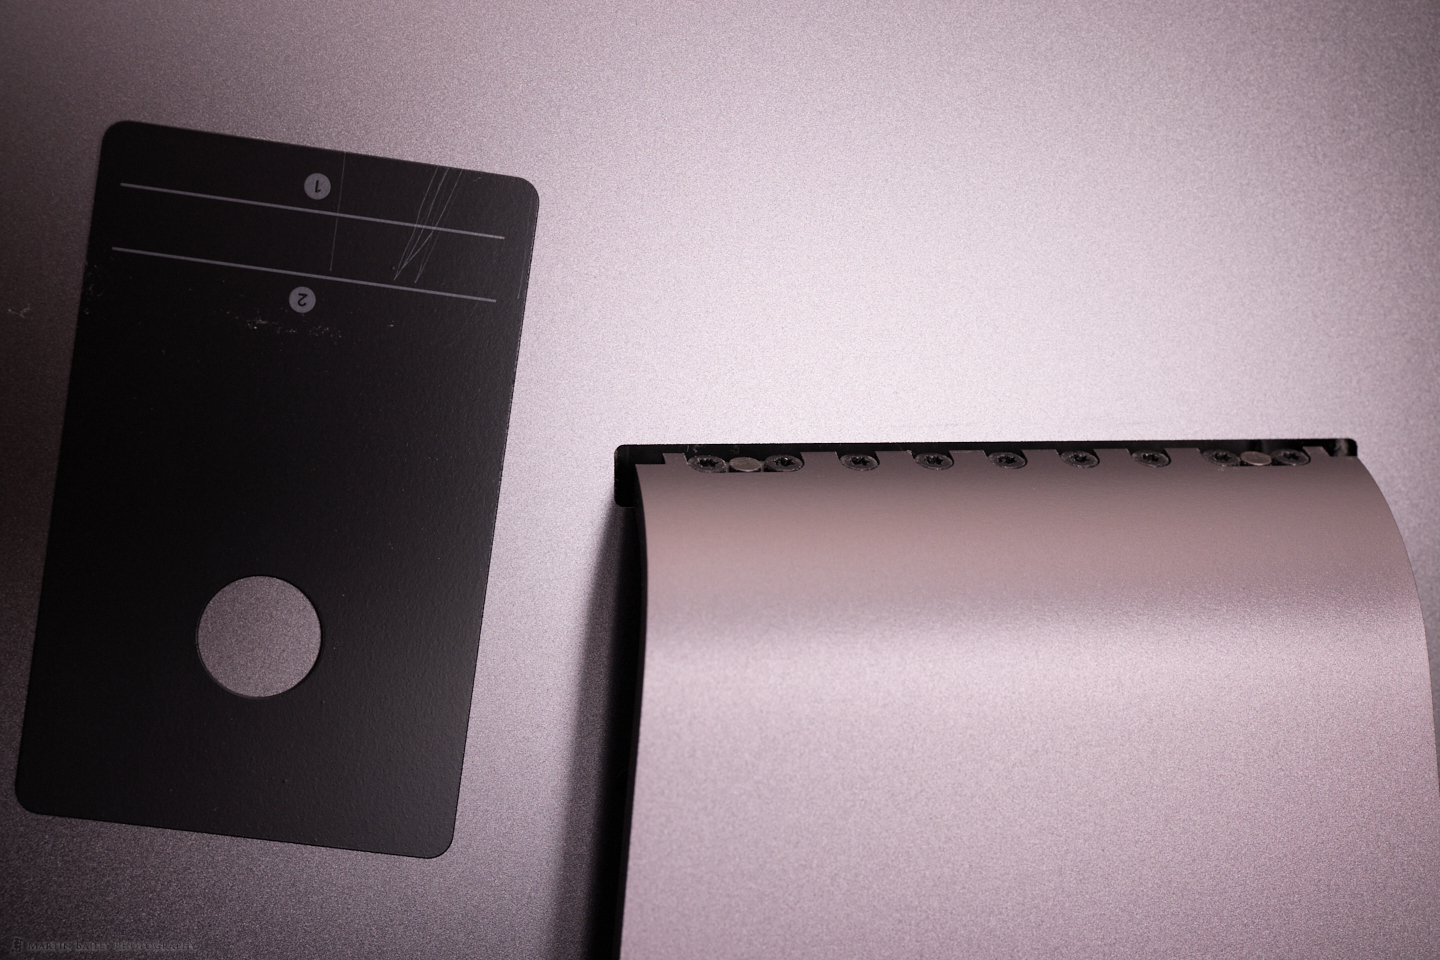
To remove the stand that comes with the iMac you have to slide that credit-card-sized piece of plastic into the slot that the stand is fixed into and move it around until the stand is released slightly allowing you to push it down to reveal the line of screws along the top, as you can see in this next image.
You can then unscrew the default stand screws with the driver that comes in the VESA Mount Adapter kit and apply the base for the adapter as you see here.
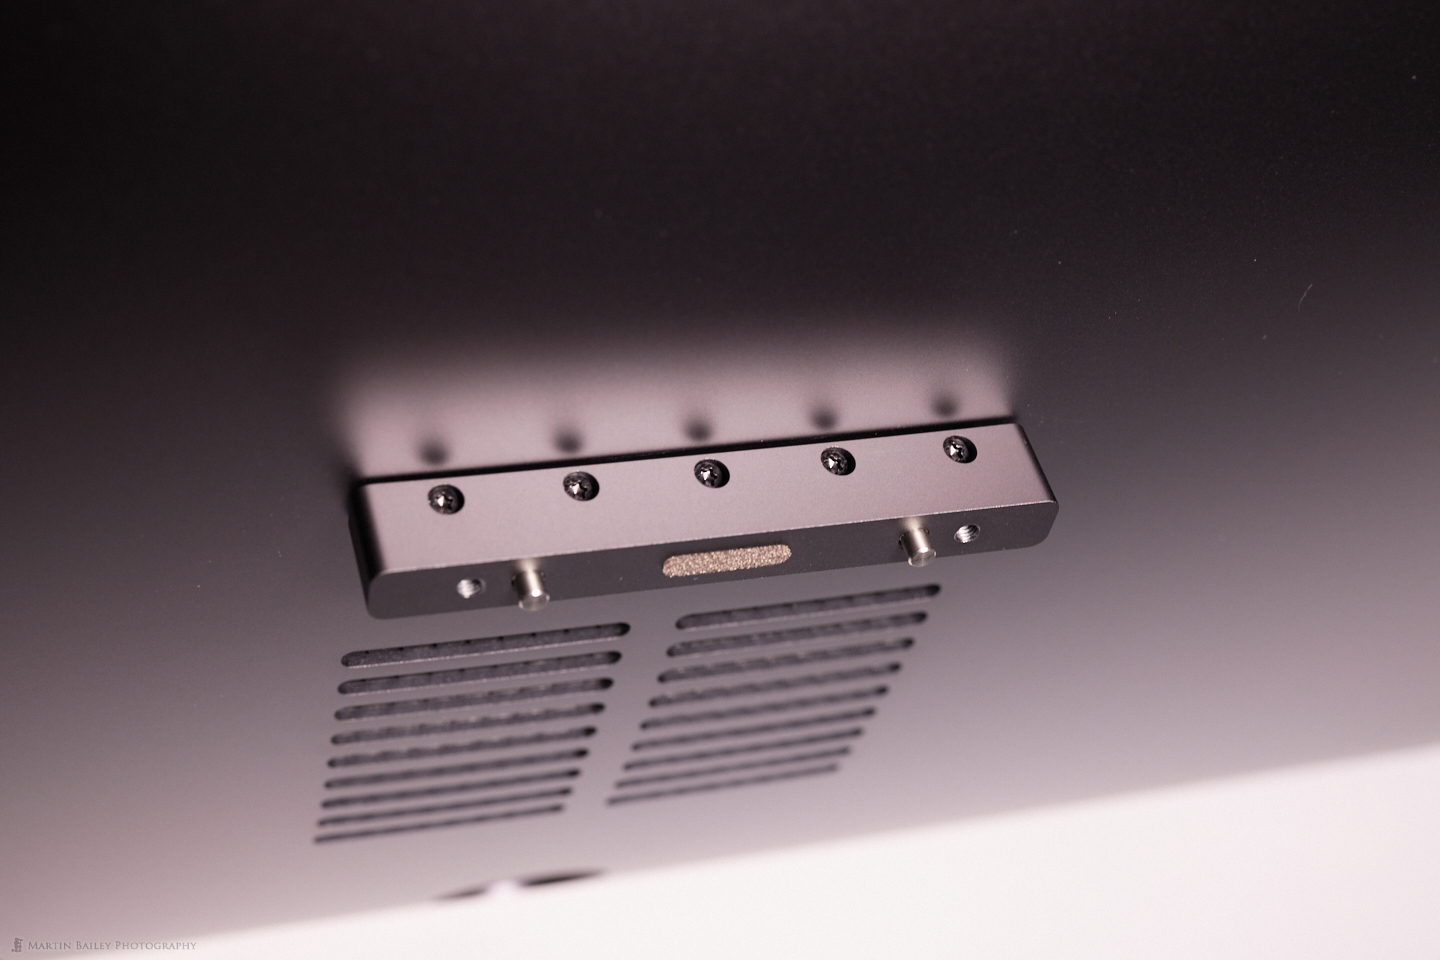
Then you can attach the VESA Mount base plate with the four corner screws at 10 centimeter spacing ready to attach the third party mount.
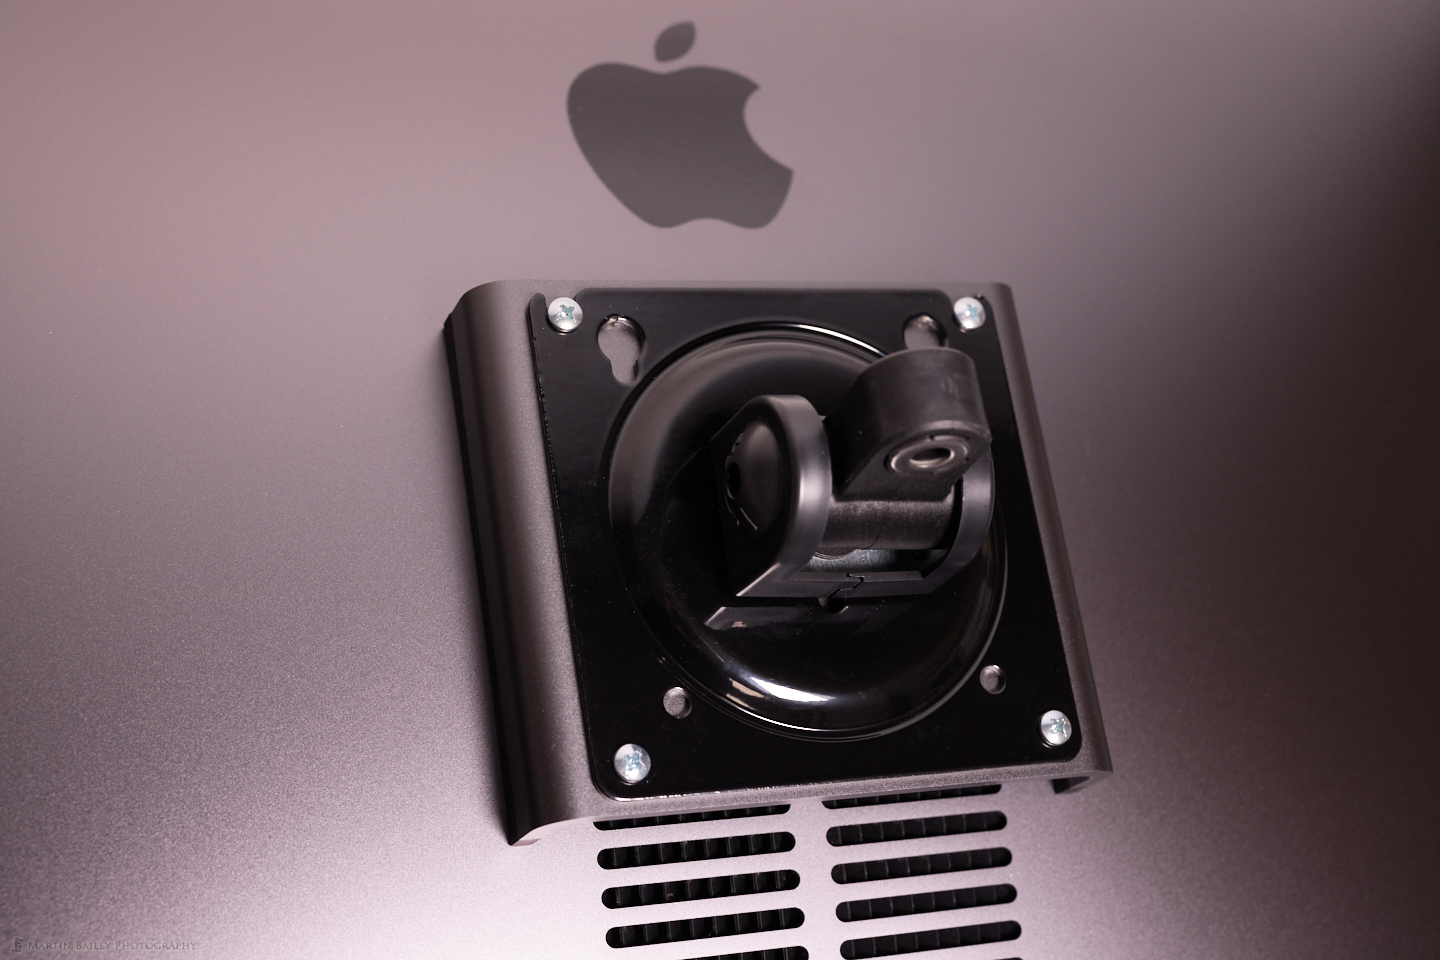
And here is the mount that came with the Huanuo adjustable arm that I bought to support my iMac Pro.
After that, I attached the adjustable arms to the back of my desk, and attached both my iMac Pro and BenQ 32 inch displays, and started to play with the positioning. I won't go into detail on the actual process of putting the adjustable arms together, but I will say that it was again a relatively easy process. The only thing that you have to really be careful of is the arm springing open as you undo the locking strap. There is a lot of pressure stored in these arms and you could easily hurt yourself when they spring open if you rush the process. Thankfully there are plenty of warnings in the instructions so you have to ensure that you read the manual rather than getting stuck straight in.
Regular Landscape Orientation Dual Monitors
I've found the freedom to move the two displays around quite liberating over the last few weeks since I installed these adjustable stands, so I've shot a few images to show you the variations I'm using, and easily switching between, because the stands just support the displays wherever you move them to. First up, here is just a regular landscape orientation dual monitor setup.
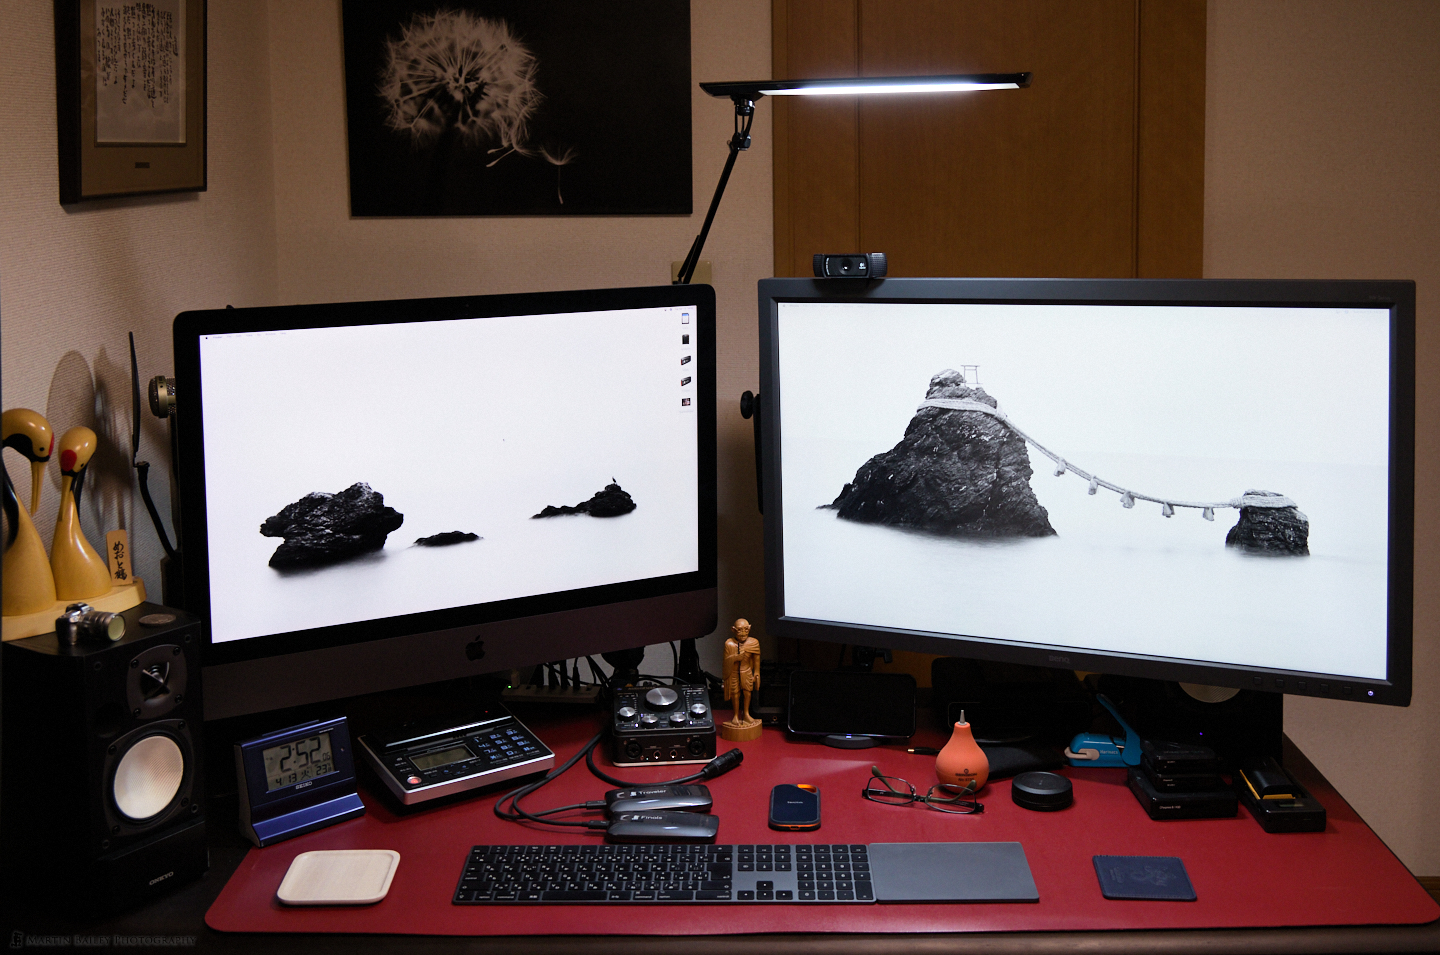
Even this is better with the adjustable arm stands though, because I can easily bring the displays towards me more, which helps me to see the screens properly without using my short distance or long distance glasses. Also, because the displays are free-floating now, I don't have to worry about all of the other things on my desk.
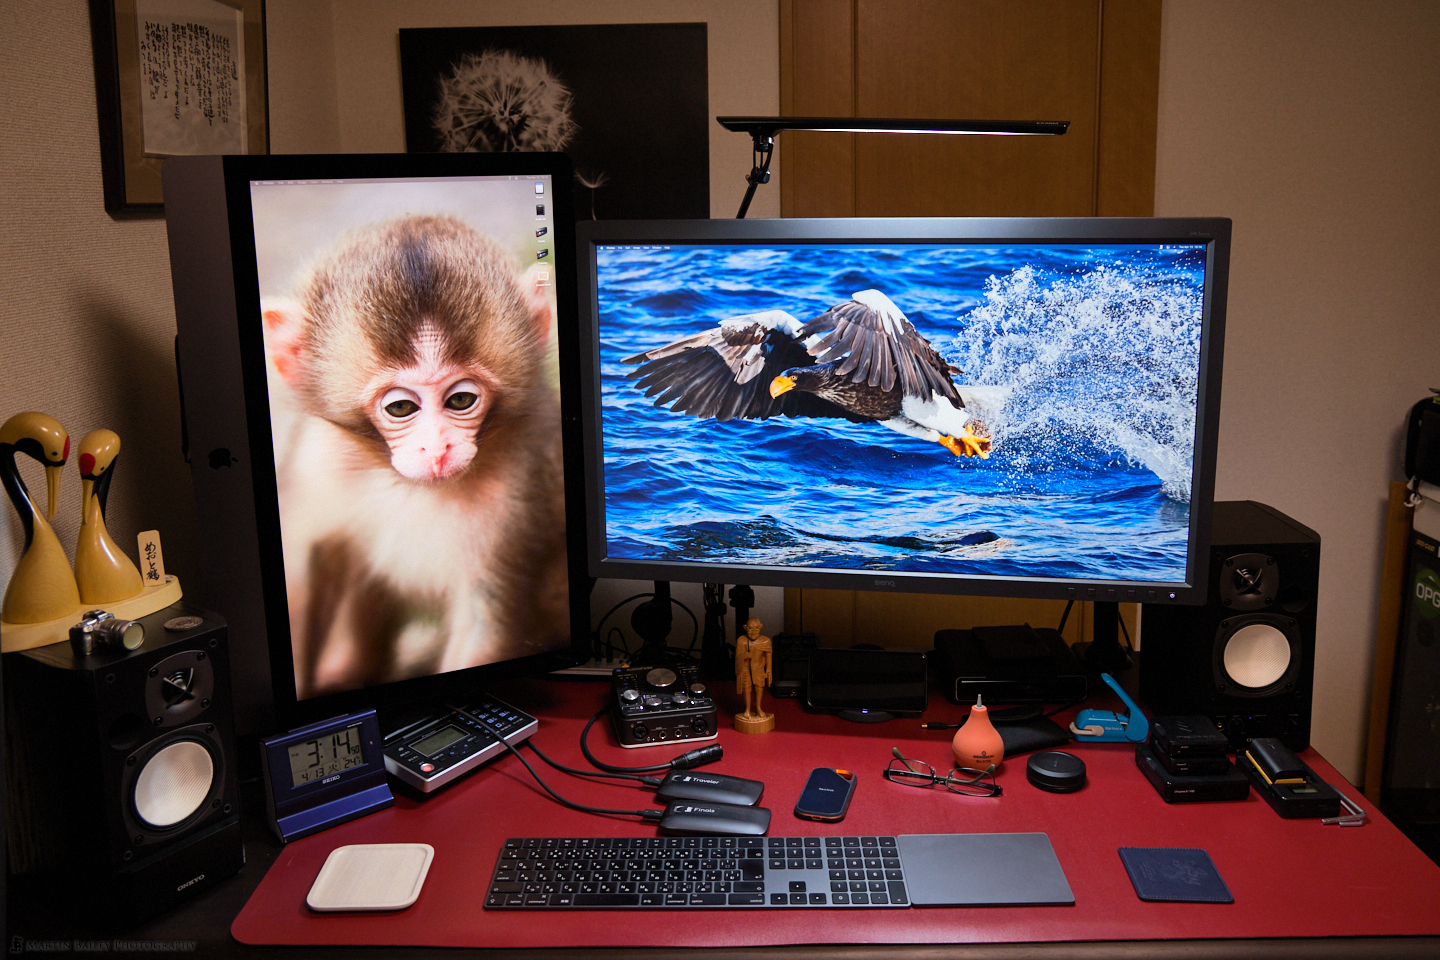
iMac Pro in Portrait Orientation
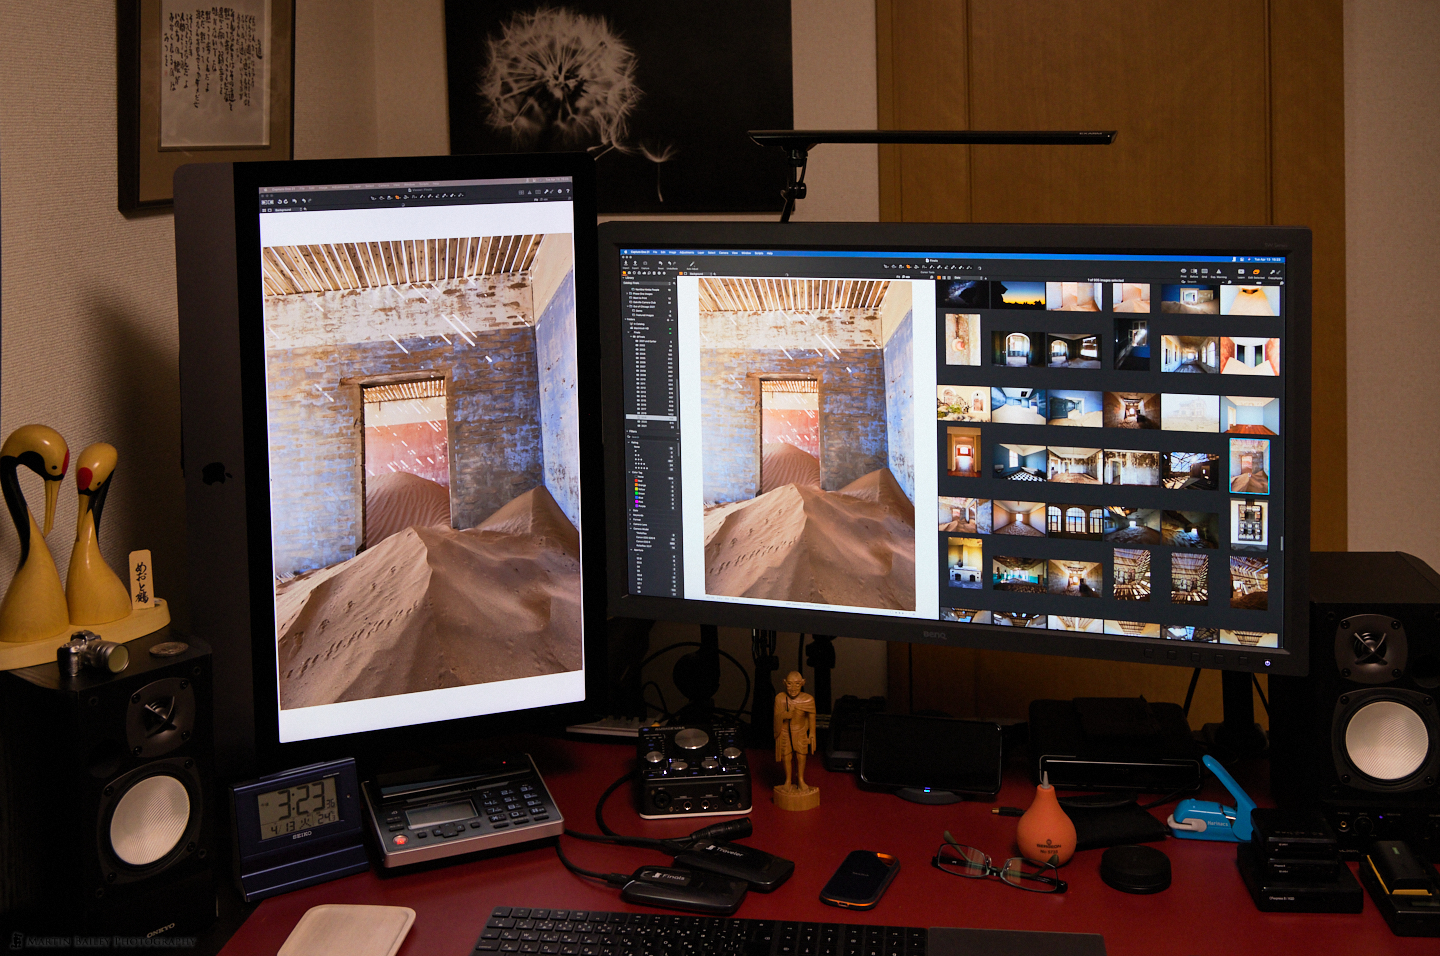
Probably one of the most useful setups I've started using is the one you see in the next photo, with the iMac Pro rotated 90 degrees into portrait orientation. Although I could always easily rotate the BenQ display on its stand, I find that the 32 inch display is slightly too large to be useful in portrait orientation. The slightly smaller 27-inch screen of the iMac Pro on the other hand is a good size to use in portrait orientation, and is, of course, great for viewing portrait orientation images without compromise.
Here also is a photo of a dual display setup in Capture One Pro still with the portrait orientation iMac and the Viewer filling the screen with a portrait image. Of course, you can save your workspace so it's easy to recall the various positioning of the Browser and Viewer etc. as you move between screen layouts.
This would also be great for a tethered shoot with portrait orientation images of a model being streamed back to the iMac and displayed instantly as you shoot.
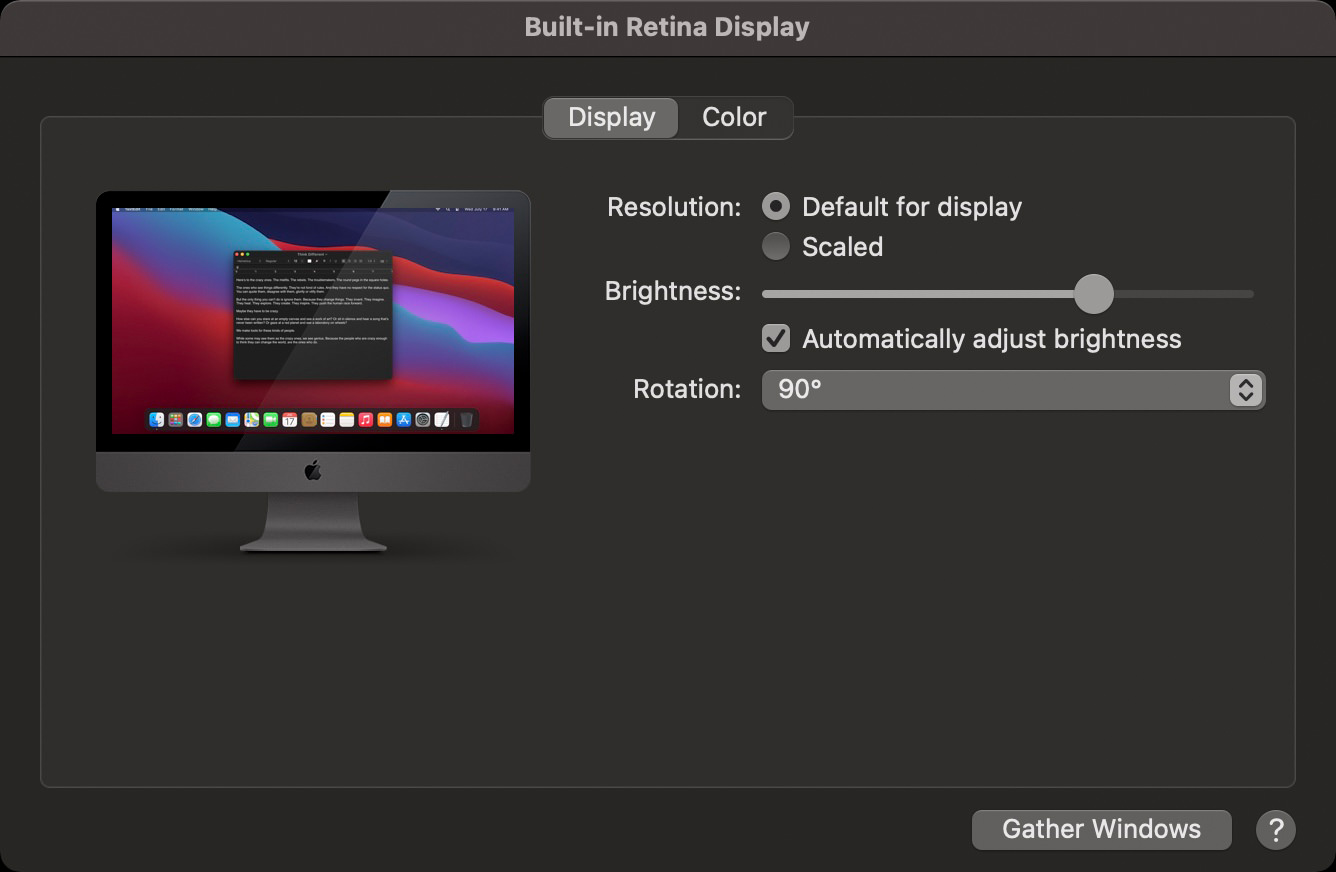
Rotating the Screen on a Mac
You may notice that the option to rotate the display on the iMac is hidden by default, probably because the vast majority of people just use them on the default stand that doesn't allow for portrait positioning. To show the Rotation option when using an adjustable arm mount like this, press the COMMAND and OPTION keys together while selecting Displays from the System Preferences, and you should then see a Rotation option. If it doesn't show straight away, try a few times. The timing can be a bit finicky. Luckily, once you have the display rotated, you don't have to press this key combination every time you open the preferences.
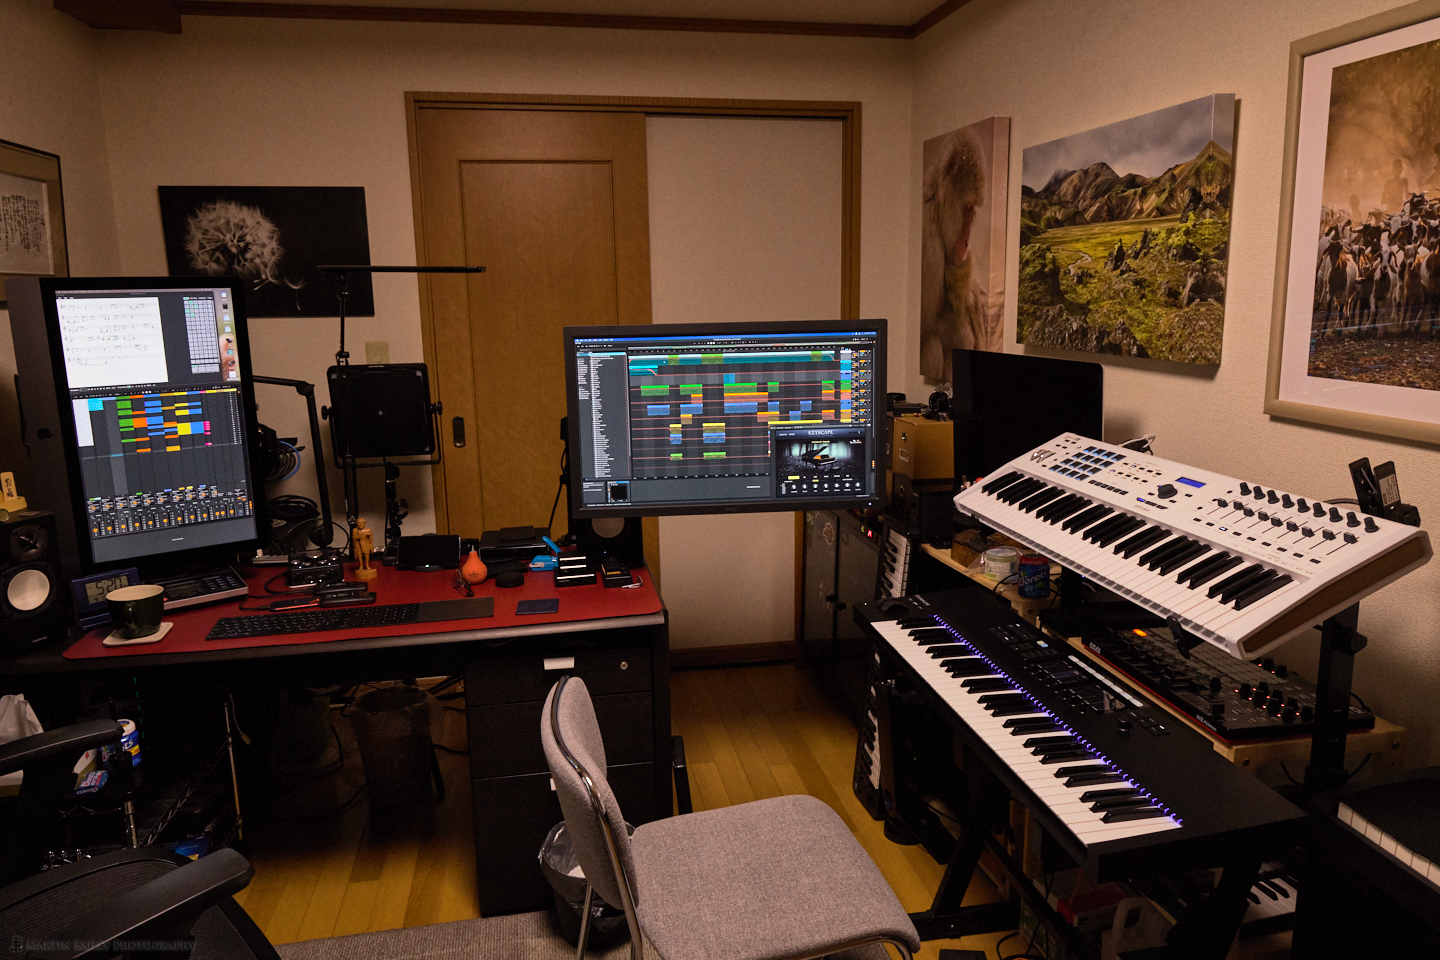
Impressive Swing Range
As an added bonus, I'm even now able to swing my BenQ display out so far to the right that I can use it directly while playing my keyboards making music as well. Because my keyboards have all the buttons required for me to select instruments, record, stop and undo my recordings it's actually really easy to work on music even with the display off to the side like this, so this is a liberating new change as well.
As I mentioned, I'd developed a bit of pain in my shoulders and right arm as I worked too long in the same position, and I've found that since I added these adjustable arms it's gotten much better. It's easier to adjust the height, and having both screens at a comfortable viewing distance has made a huge difference too. I also bought a stand for my MacBook Pro so that I can get it up to eye level when working at my dining table downstairs, and that has also helped as I'm not sitting with hunched shoulders to look at the small screen.
OK, so not directly photography related, but we pretty much all use computers, and also if you are a Windows user you can use these adjustable arms as well, so it's not just about Macs either, and therefore should be useful to at least some of you.
Show Notes
The Huanuo Single Monitor Stand HNSS8: https://amzn.to/3sfOFgp
And the HNSS12: https://amzn.to/2RnkN4U
Audio
Subscribe in iTunes to get Podcasts delivered automatically to your computer.
Download this Podcast as an MP3 with Chapters.
Visit this page for help on how to view the images in MP3 files.


Martin, thank you for the tip. I wasn’t able to rotate my iMac 5K, but I was able to rotate my Dell monitor which I use for my Layers, History, etc panels. Should I feel the need to rotate a portrait oriented image, I now know how. Thank you again for making me look into it.
Hi Larry,
I’m glad you found this useful. Please try again and ensure that you hold down both the OPTION and COMMAND keys while viewing the system preferences, then click on the Display icon with these two keys held down.
I have checked that this does not work with my MacBook Pro, so it isn’t every Mac that will work, but I’d be surprised if the iMac Pro work and the iMac 5K does not, although being surprised is nothing new. 🙂
Regards,
Martin.
Hi Martin,
Thank you for this post. I’ve followed you for many years now and appreciate your style and approach to photography and other endeavors. Always of the best quality.
I know when you recommend a product that it has passed your test for quality. I’ve got the monitor arms your recommend in my cart, but I have a question. Is there a reason you didn’t get two of the HNSS12?
Best regards,
Matt
Hi Matt,
Thanks for following my antics.
There are two reasons for getting the HNSS8 for my BenQ. The first is the pole that it’s mounted on enables me to get the BenQ slightly higher, and I figured I’d need that extra height for portrait orientation because the BenQ is a 32-inch display and needs a bit more height to rotate it. The second reason, and probably more important in my setup, was the ability to swing it way out to the right of my desk to get it next to my MIDI keyboards, as you see in the final image for the post. The HNSS12 doesn’t have that much reach sideways. I actually slightly prefer the design of the HNSS8, but it won’t hold the weight of my iMac Pro according to the spec, so I split my choices into these two designs. I’m really happy with the results though.
I hope that helps. Do let me know otherwise.
Regards,
Martin.
Martin – It looks like you have made the most of a small office. With respect to the VESA mounts did you use the clamp or the grommet mount shown on Amazon. The grommet mount would require drilling a hole in your desk top? Also when you have the monitor extended out like you show positioned next to your keyboard are they reasonably solid? I’m looking to remodel my workspace and you have given me some good ideas.
As an aside – You haven’t talked about your Rollie in a while how are getting along with it? I just shot and developed a roll of Lomography Berlin Kino. I haven’t scanned the negatives yet but it looks promising.
All the best Rich
Hi Rich,
Yes, after 10 years I finally found a layout for my room that provides the best use of my space. Looking the other way I have my work table and background pully system setup, and there are about 3 meters between the two areas, so I have space to shoot from as well.
You are correct; I would have had to drill a hole in my desk to use the grommet, so I decided on using the clamp, but they are both rock solid so I’m happy with that decision. The displays do wobble a bit when you touch and move them, but once you take your hand away they stay where you put them really well.
I’ve pushed a few rolls of film through the Rollie, but nothing to really talk about recently. The Lomo sounds fun. Share a link to some work at some point. I’d love to check it out. I am working on a post about my latest crazy rabbit hole right now, so look out for that over the next day or so.
Regards,
Martin.