
Visit Library for MBP Pro eBooks |
Last month, in episode 732, we talked about Depth of Field, Hyperfocal Distance, and Infinity, and also touched on the Circle of Confusion, the Airy Disk, and Diffraction. I originally shared how to test your lenses to find their Diffraction Limit around four years ago, but I had yet to go through this exercise with my EOS R5 and new RF lenses, so I decided to talk you through this process again today. This is also relevant right now because I have just released a new version of our Photographer's Friend app for iOS that includes a new Pro feature called Diffraction Limit Guide Adjustment, so I'll also share a little information about that today as well.
As we discussed in episode 732, the depth of field in our images gets deeper as we stop down our aperture, so ƒ/11 has a deeper depth of field than ƒ/8, and ƒ/16 has a deeper depth of field than ƒ/11. The problem with stopping down the aperture for deeper depth of field though, is that it forces the light through a smaller hole, and when you force light through a small hole, the Airy Pattern starts to get disturbed and spreads out, causing it to overlap the neighboring Airy Disk pattern to the point that the image is considered no longer resolved, as I've shown in this diagram.

Based on my Pixel Peeper calculations which I added to Photographer's Friend, around four years ago I realized that I could calculate the diffraction limit based on the size of the Airy Disk as it grows with the decreasing size of the aperture, and I provided Diffraction Limit Warnings in the form of traffic light coloring of the Airy Disk label, and the Aperture dial, which is responsible for the limitation. Unless you have changed these colors with the theme customization feature, green will show you that you don't need to worry about Diffraction. Orange or amber shows when Diffraction will probably start to show itself and red alerts you to the fact that that you will almost certainly be seeing the effects of Diffraction in your images. These color warnings correspond with the Well Resolved, Just Resolved, and Not Resolved Airy Patterns in the diagram.
The calculated warning points are pretty accurate, but how much you allow this to concern you depends really on how much Diffraction you are seeing in your images, and this is both why I like to test my lenses, but also with this latest release, why I wanted to be able to adjust the kick-in points of the warning in Photographer's Friend.
Where to Start?
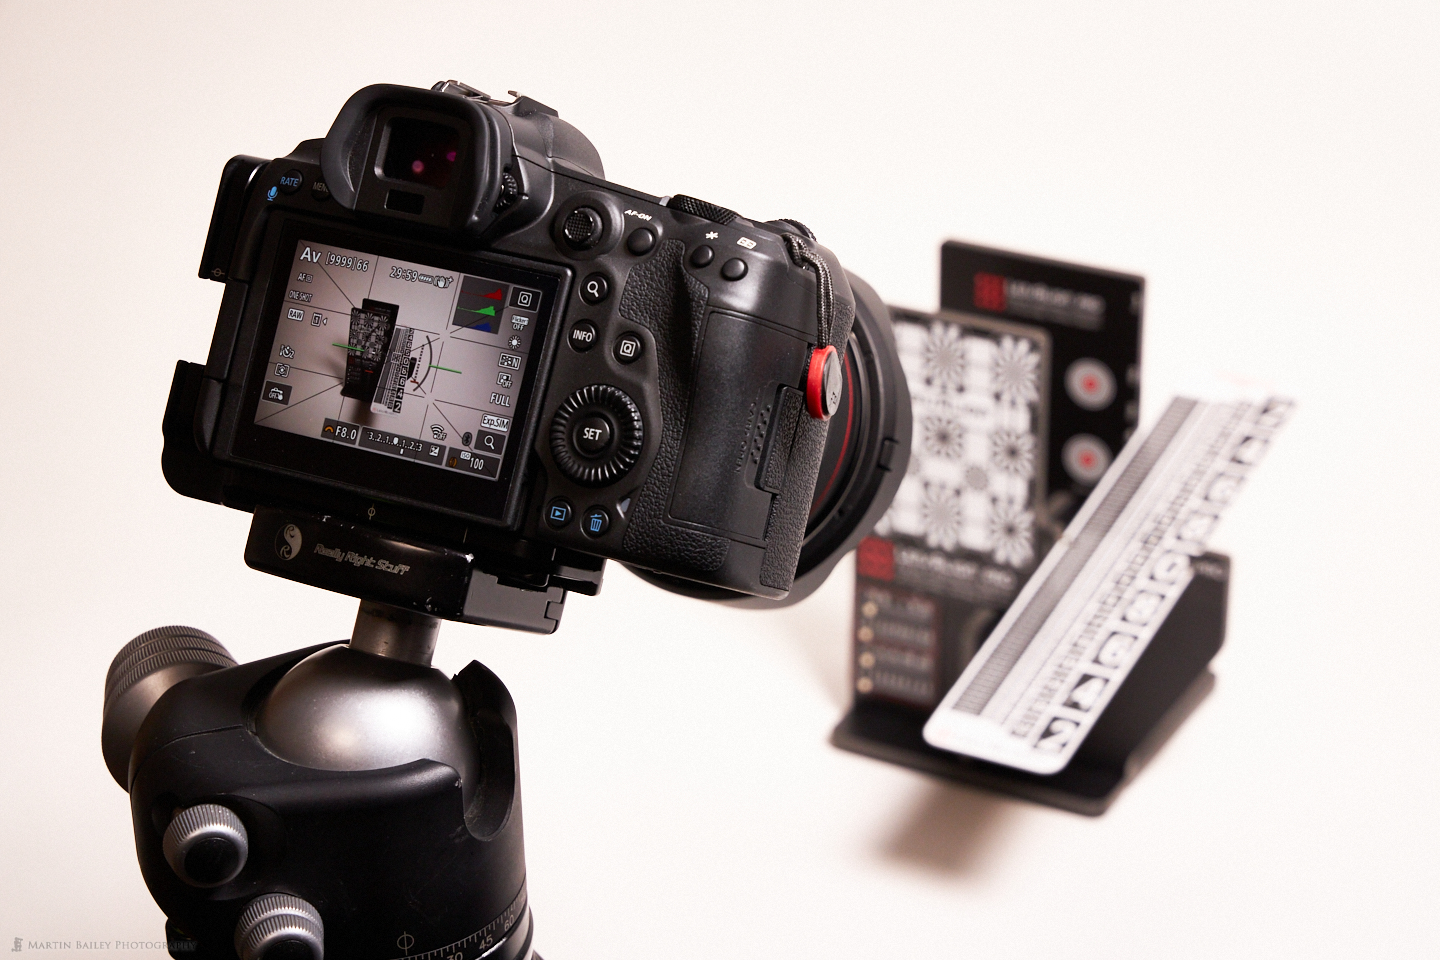
The tests are easy to do, and although I used an old Lens Align tool that you can see in the above photo, you can just use a steel rule or even just an open book with a page of text. I like the Lens Align tool because it is easy to vary the angle of the rule and it has lots of text and numbers along the rule to help you to evaluate sharpness. Although we'd usually be looking to see where the focus falls on the rule, for Diffraction Limit testing the point at which you focus is less important. We're just going to check for a lack of sharpness across the entire image as we stop down the aperture.
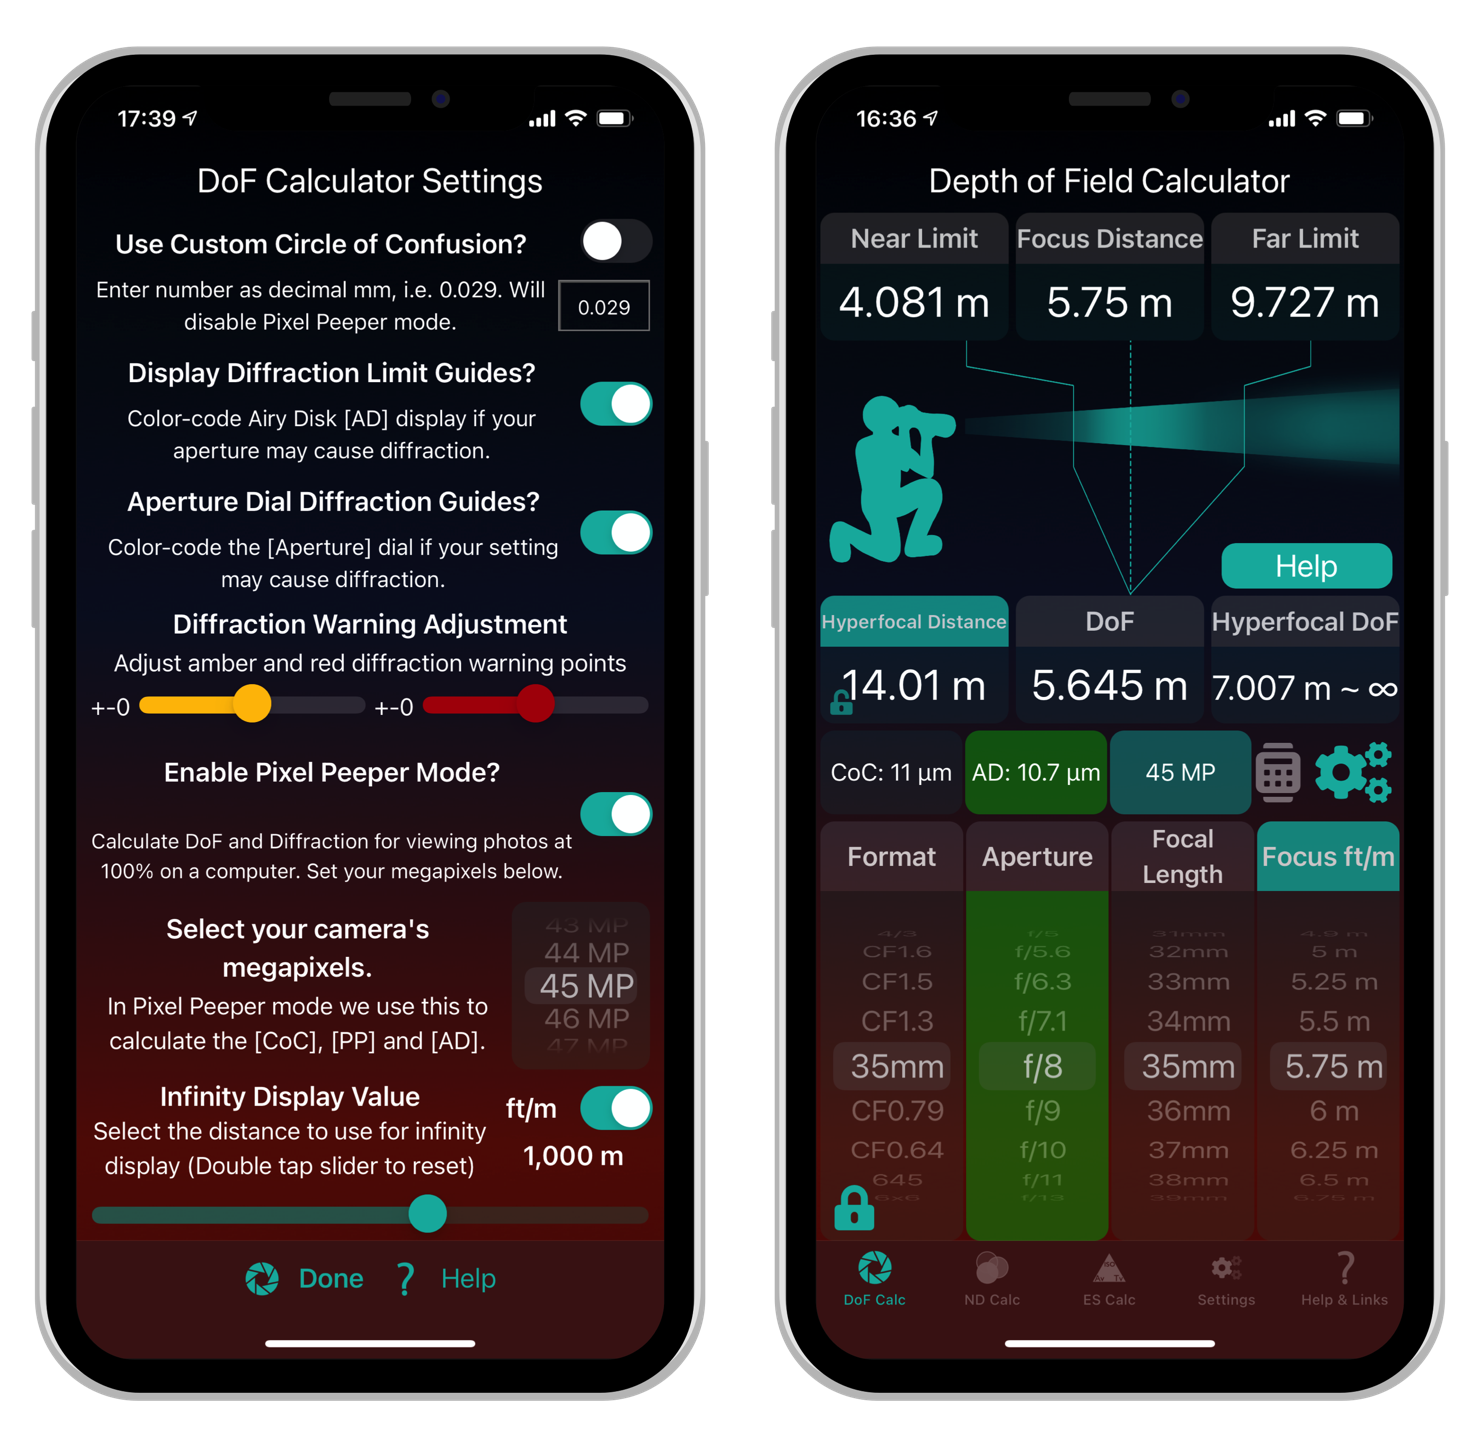
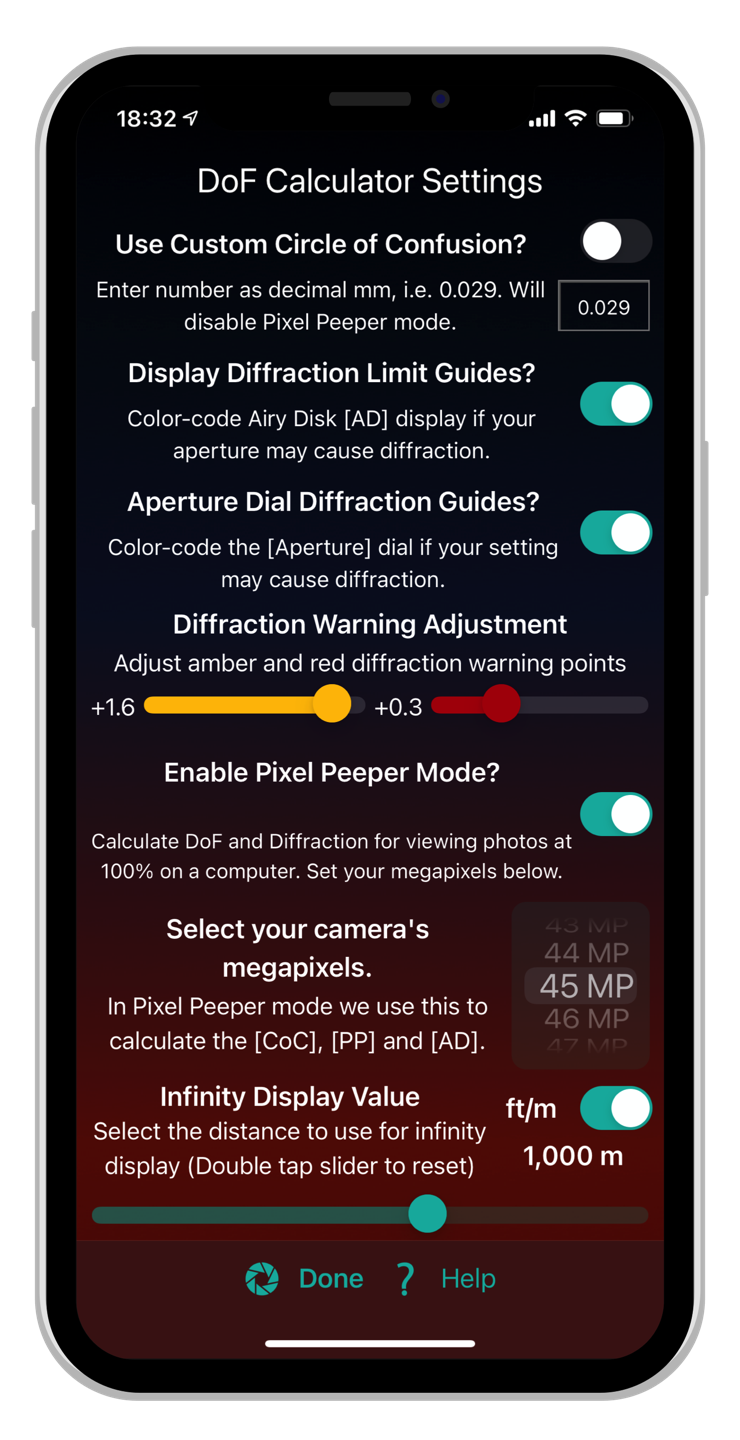
I recommend using Pixel Peeper mode in Photographer's Friend for the most accurate information on which aperture to start testing from, and it depends on your camera's sensor and the number of megapixels, which you'll need to dial into the Depth of Field Calculator settings. You'll also need to select your sensor format with the Format dial. For the Canon EOS R5 I'll select 35mm as it's a full-frame 35mm sensor. If you use a crop factor camera or medium format camera, select the appropriate Format. I then press and hold the Format dial to lock it, to prevent me from accidentally changing it later.
With the megapixels set to 45 and Pixel Peeper mode enabled in the settings, and also ensuring that the Diffraction Limit Guides are turned on for the Airy Disk label and aperture dial, we can then adjust the aperture until we see the dial change from green to amber. The last green aperture is where we'll start to test from as we know that this should not be displaying any signs of Diffraction. With my camera details dialed into the settings, I see that my starting aperture is ƒ/8, so I'll set my camera to ƒ/8 for my first test shot.
With your camera on a tripod, line it up with the Lens Align tool or whatever you are going to use in your tests, and pick a point at which you are going to focus, just as a reference.
If you don't have Photographer's Friend and don't care about Pixel Peeper mode, then ƒ/8 is still a good starting aperture for your tests, then stop down one third or half stop at a time, depending on your camera, and shoot an image with every change until you reach the smallest aperture of your lens, which is ƒ/22 with most of my Canon RF Lenses.
To make exposure easy, I use Aperture Priority mode for this, and I set the ISO to 100. High ISOs can cause the image quality to degrade as well as Diffraction, so it's better to avoid auto-ISO. In Aperture Priority mode though, your camera should automatically adjust the shutter speed for you as you stop down the aperture. I also use a two-second timer so that I can take my hand away from the camera during the exposure to avoid shaking the camera.
If you are testing a zoom lens, to be thorough, it's a good idea to test at least three focal lengths. The two extremes and then something close to the middle of the zoom range. For example, when I tested my Canon RF 15-35mm lens I shot both 15 and 35 mm shots as well as a series at 24mm. For the 24-105mm lens, I shot at 24mm, 50mm and 105mm.
Once you've shot an image for each aperture from the starting aperture to the smallest aperture available on your lens, you'll then need to transfer your images to your computer and open them up in your usual image editing software and evaluate the sharpness. With the high-resolution displays that we have these days, I generally find that I have to zoom in to around 200% to really see the sharpness, and as I worked through these images shot at 24mm starting at ƒ/8 then working through each smaller aperture, the first noticeable degradation in sharpness I could see was at ƒ/16. A certain amount of diffraction kicked in right there, and the image got gradually softer towards ƒ/22, although we are talking a very small amount.
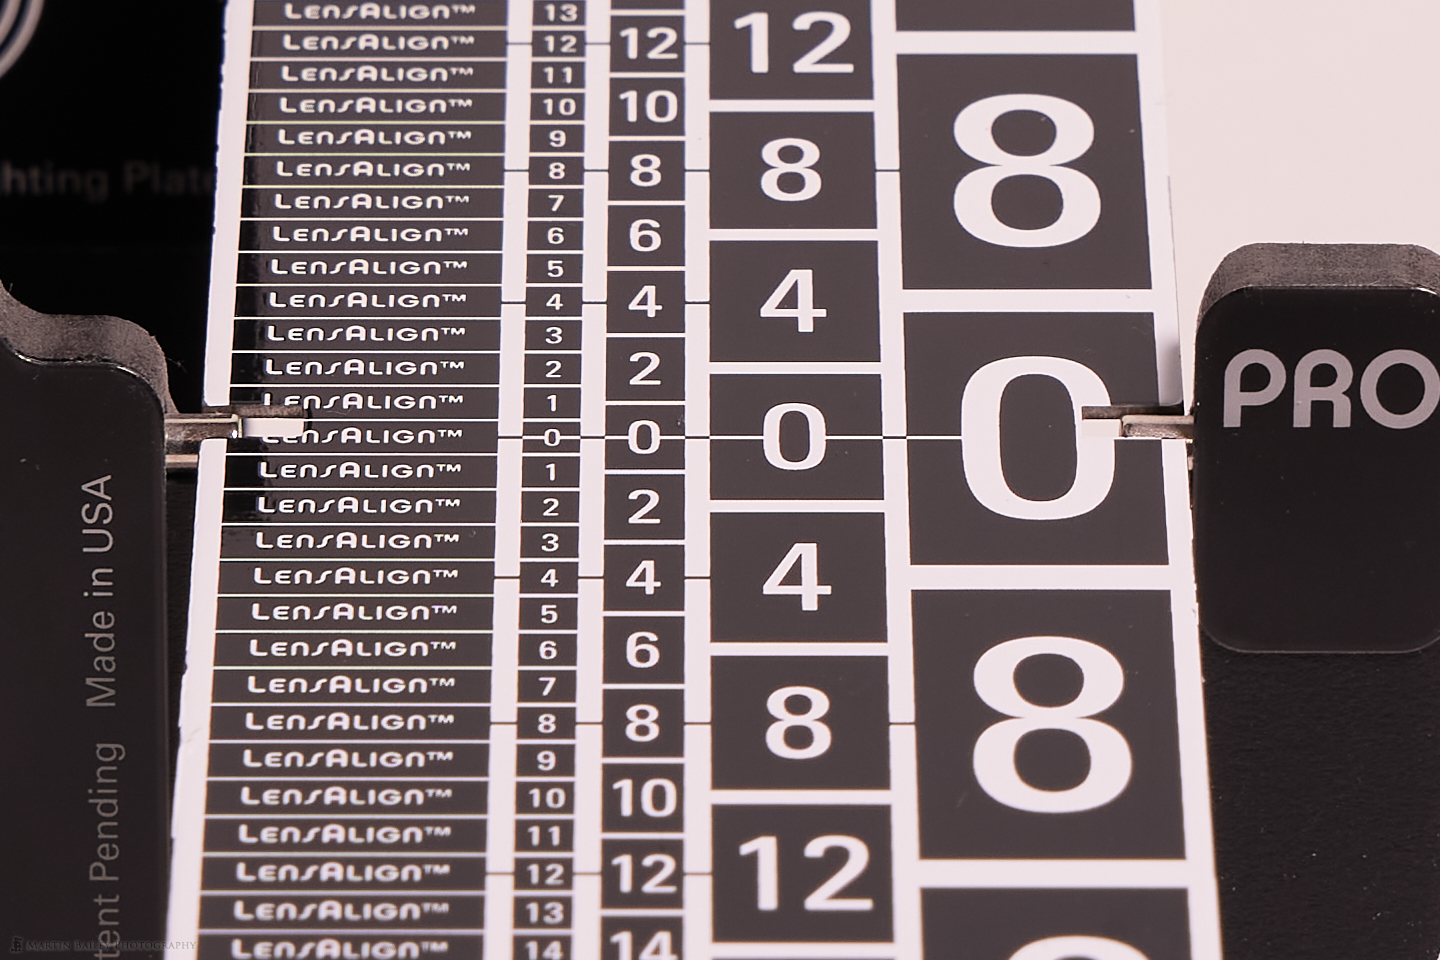
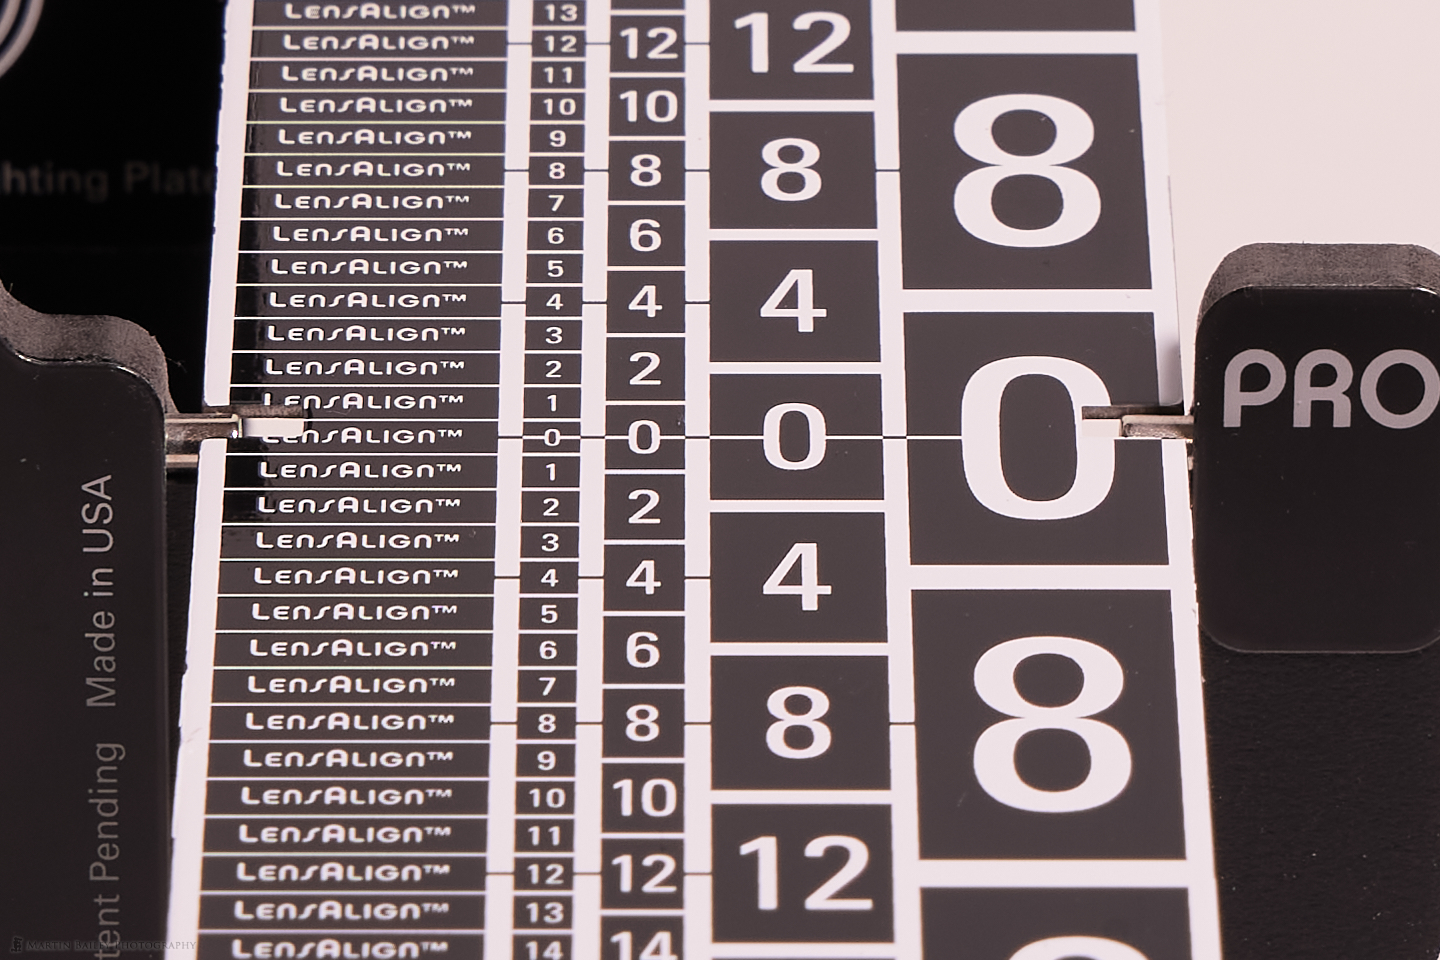
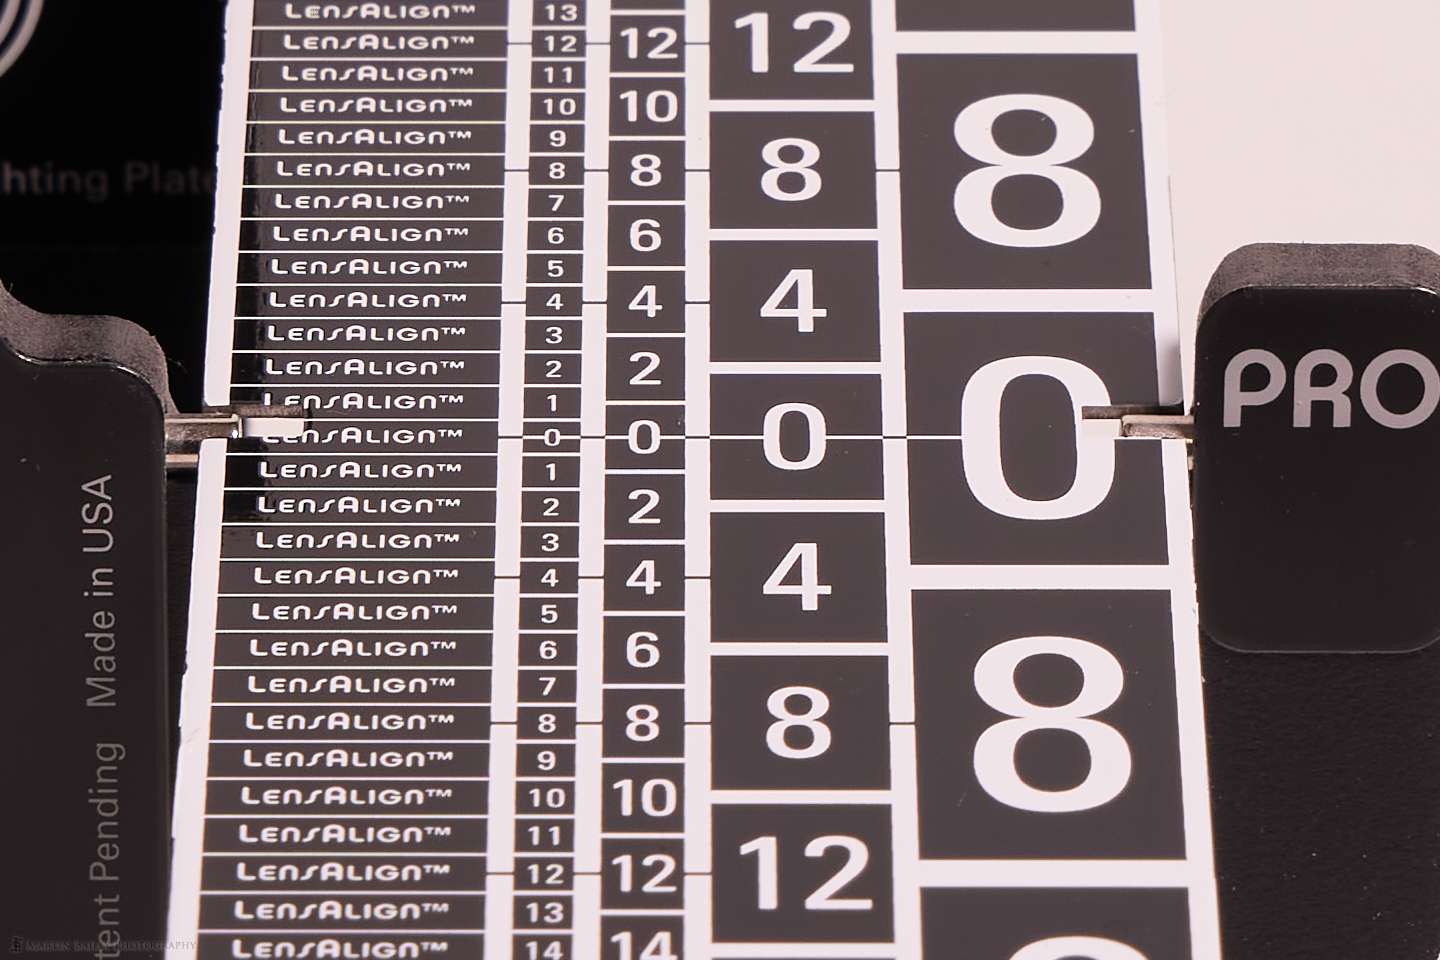
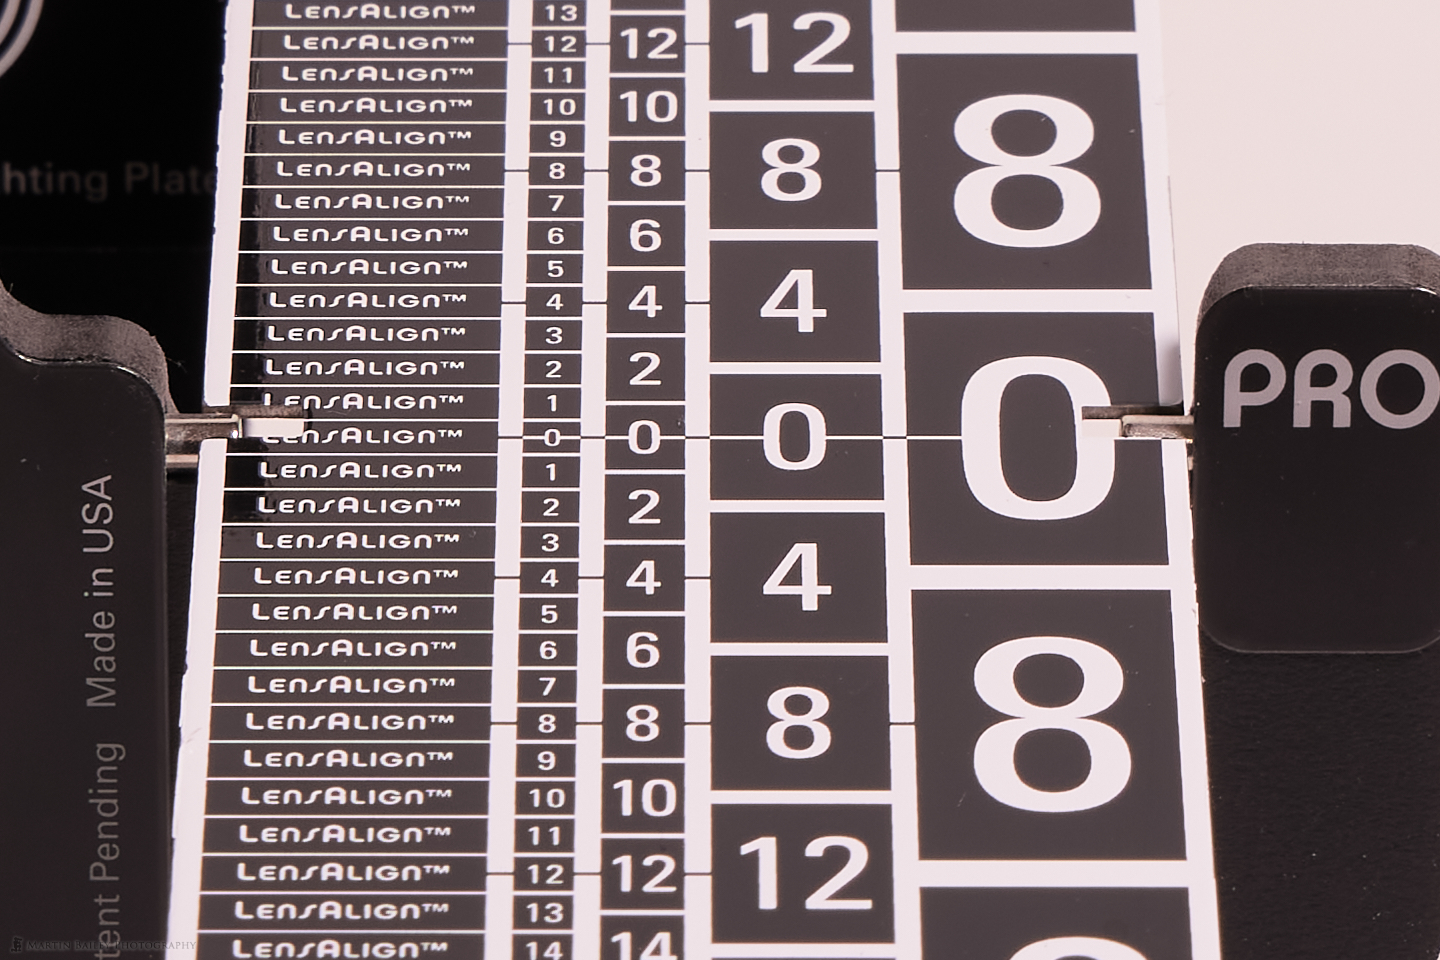
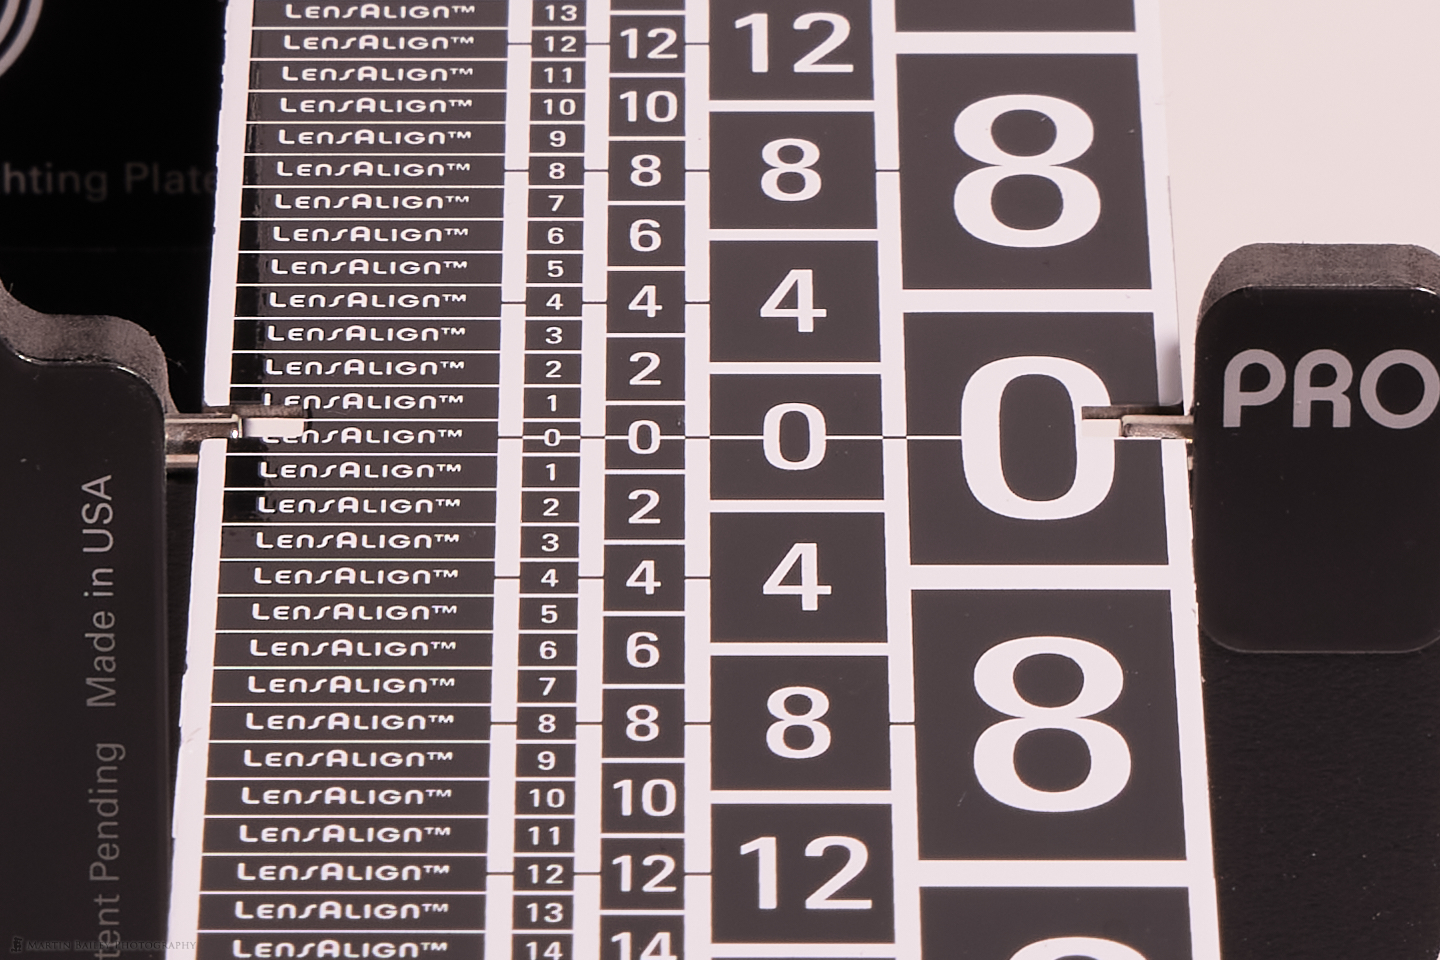
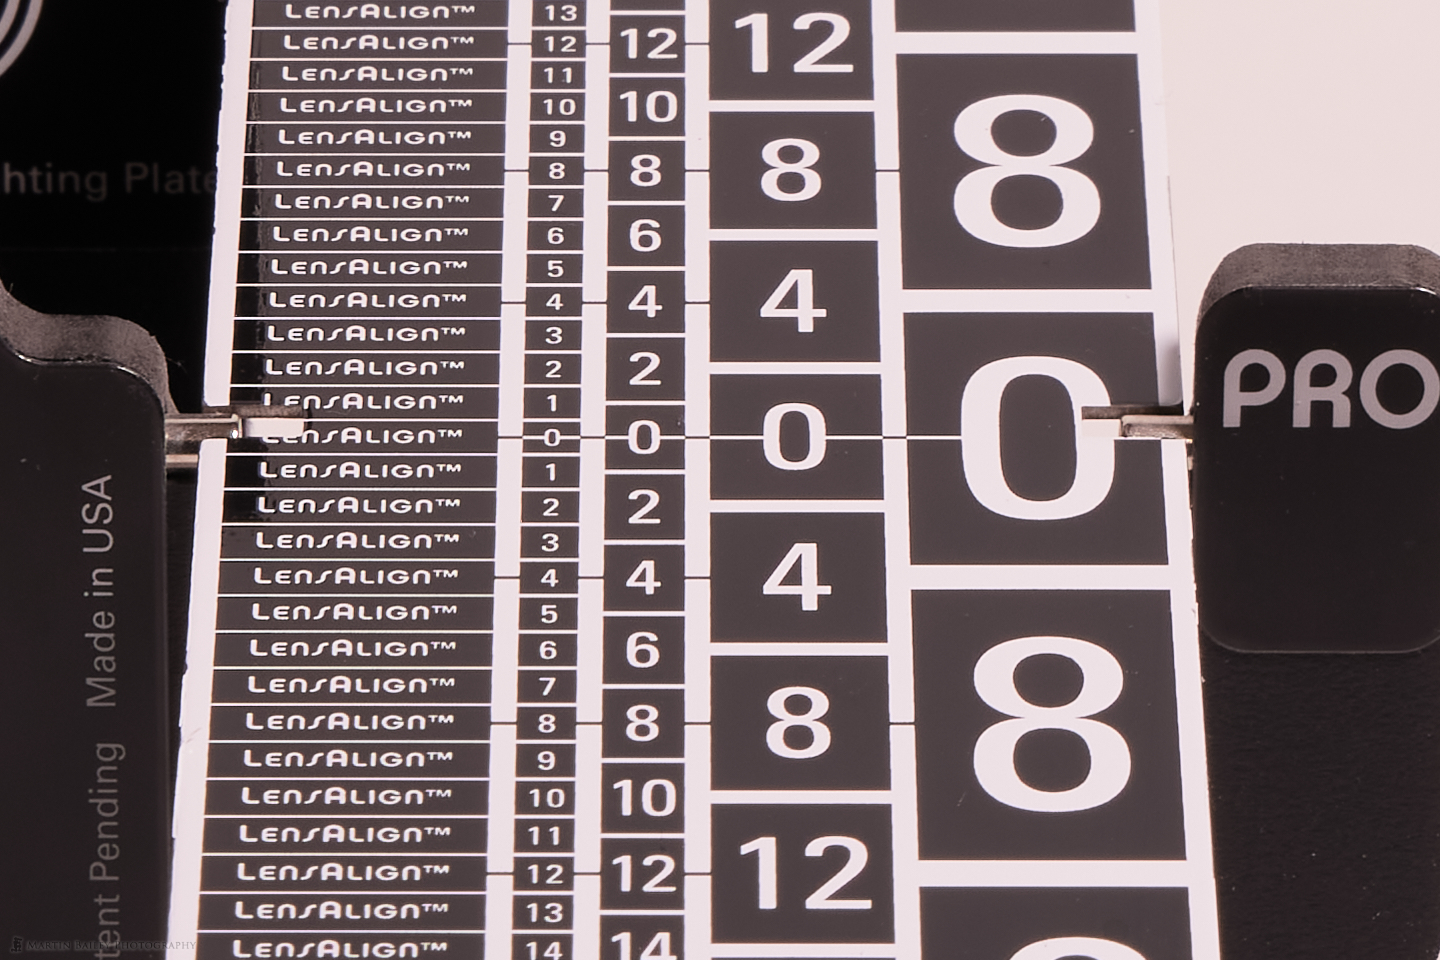
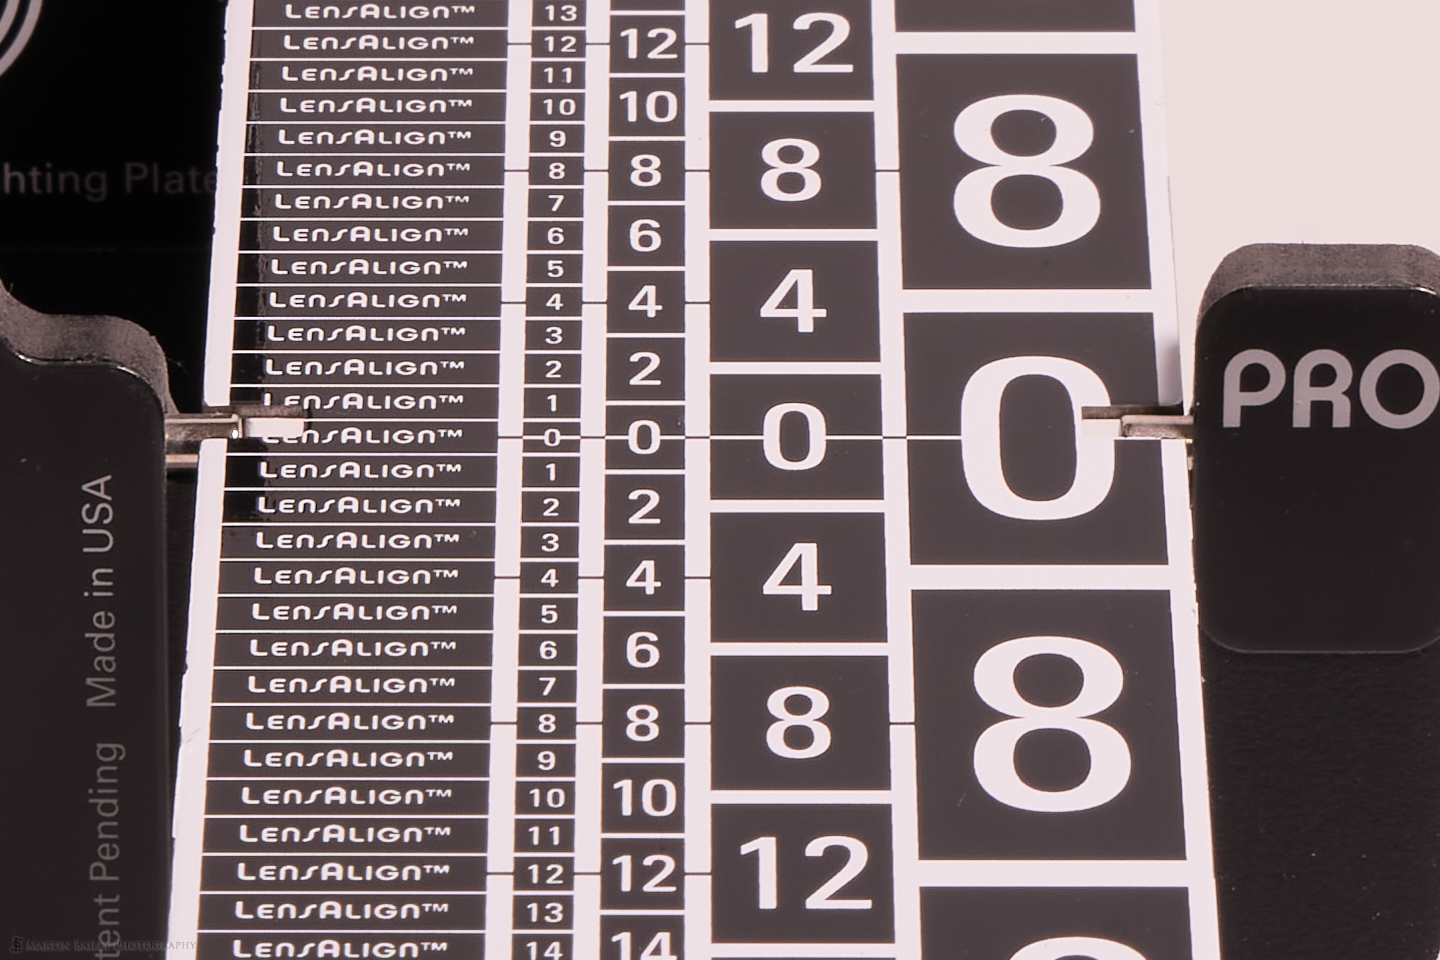
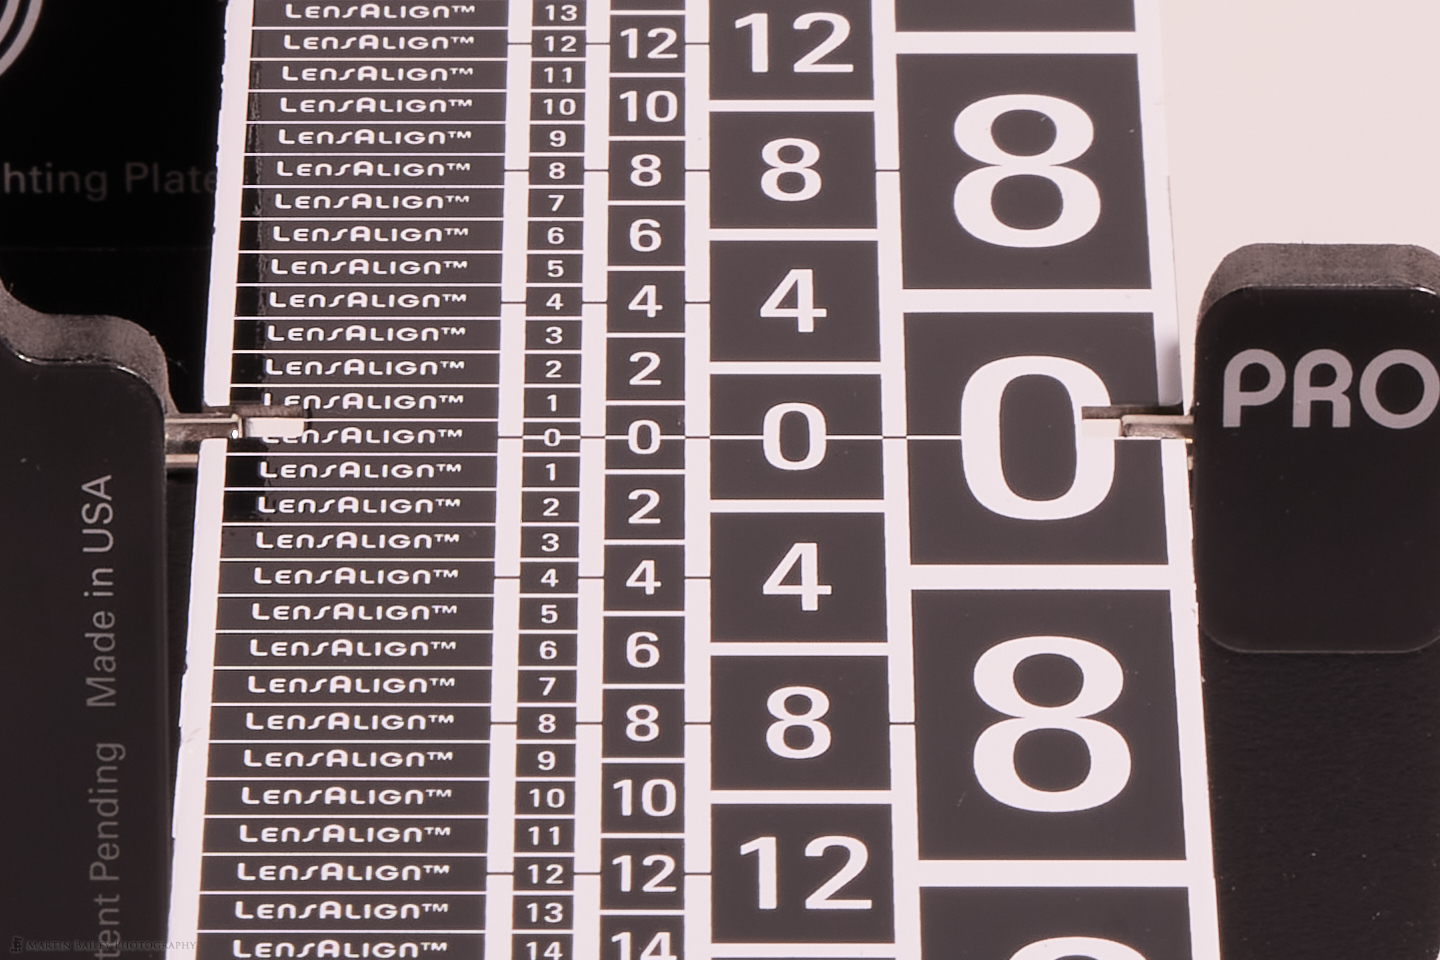

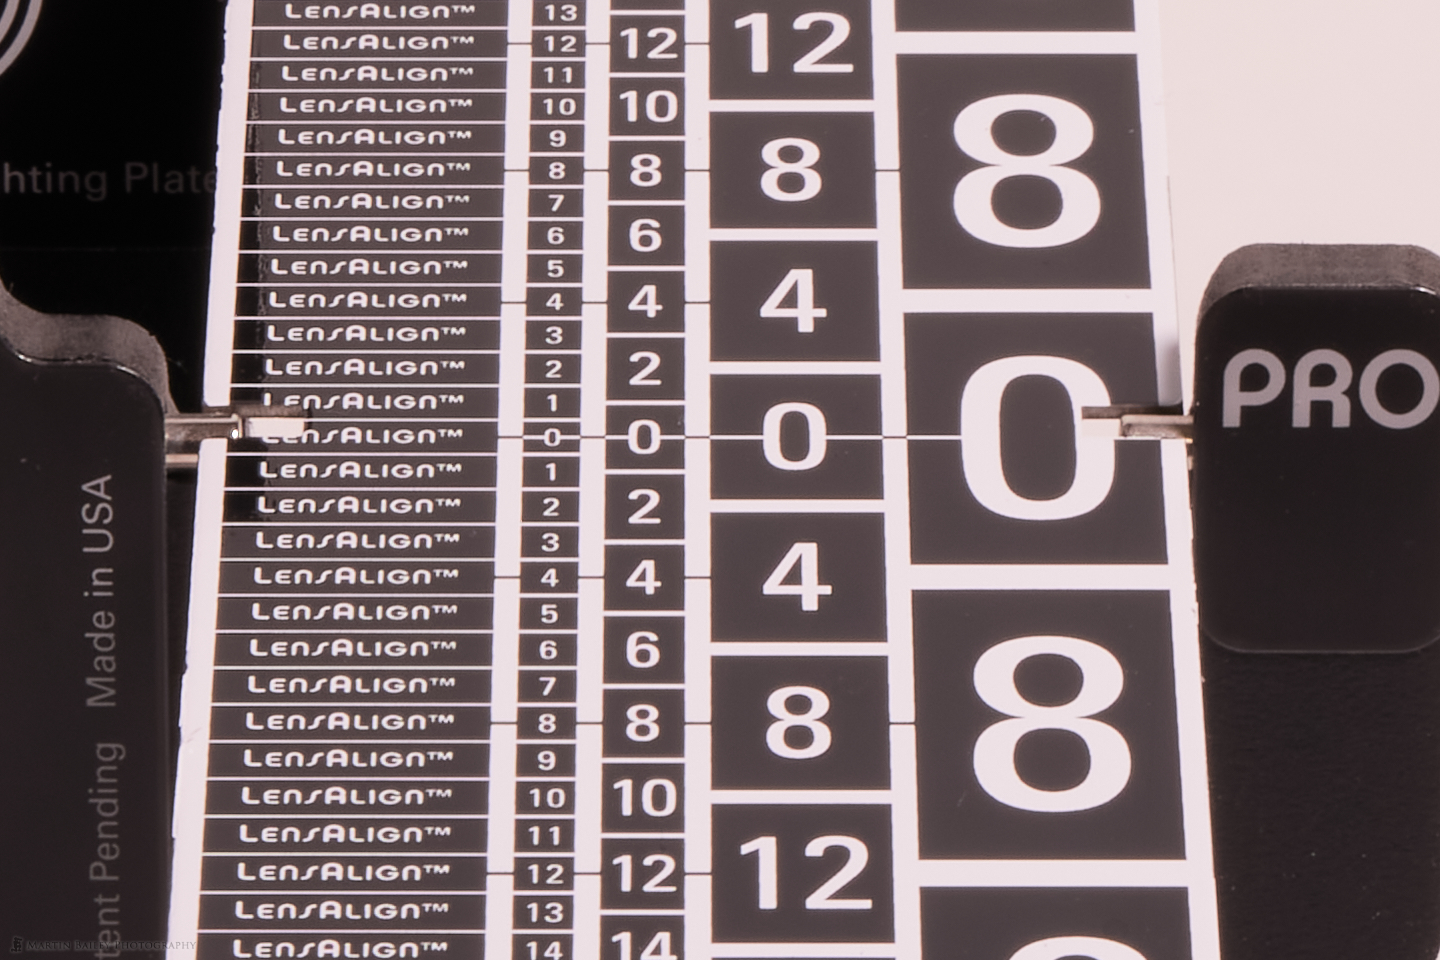
Here is the series of images from my Canon RF 24-105mm lens at 50mm, so that you can see what I'm talking about. This is the center 1440px of each image cropped from the larger image, so if you click on these to open up in the lightbox you will be able to see the images at 100% and may be able to see the diffraction starting to kick in.
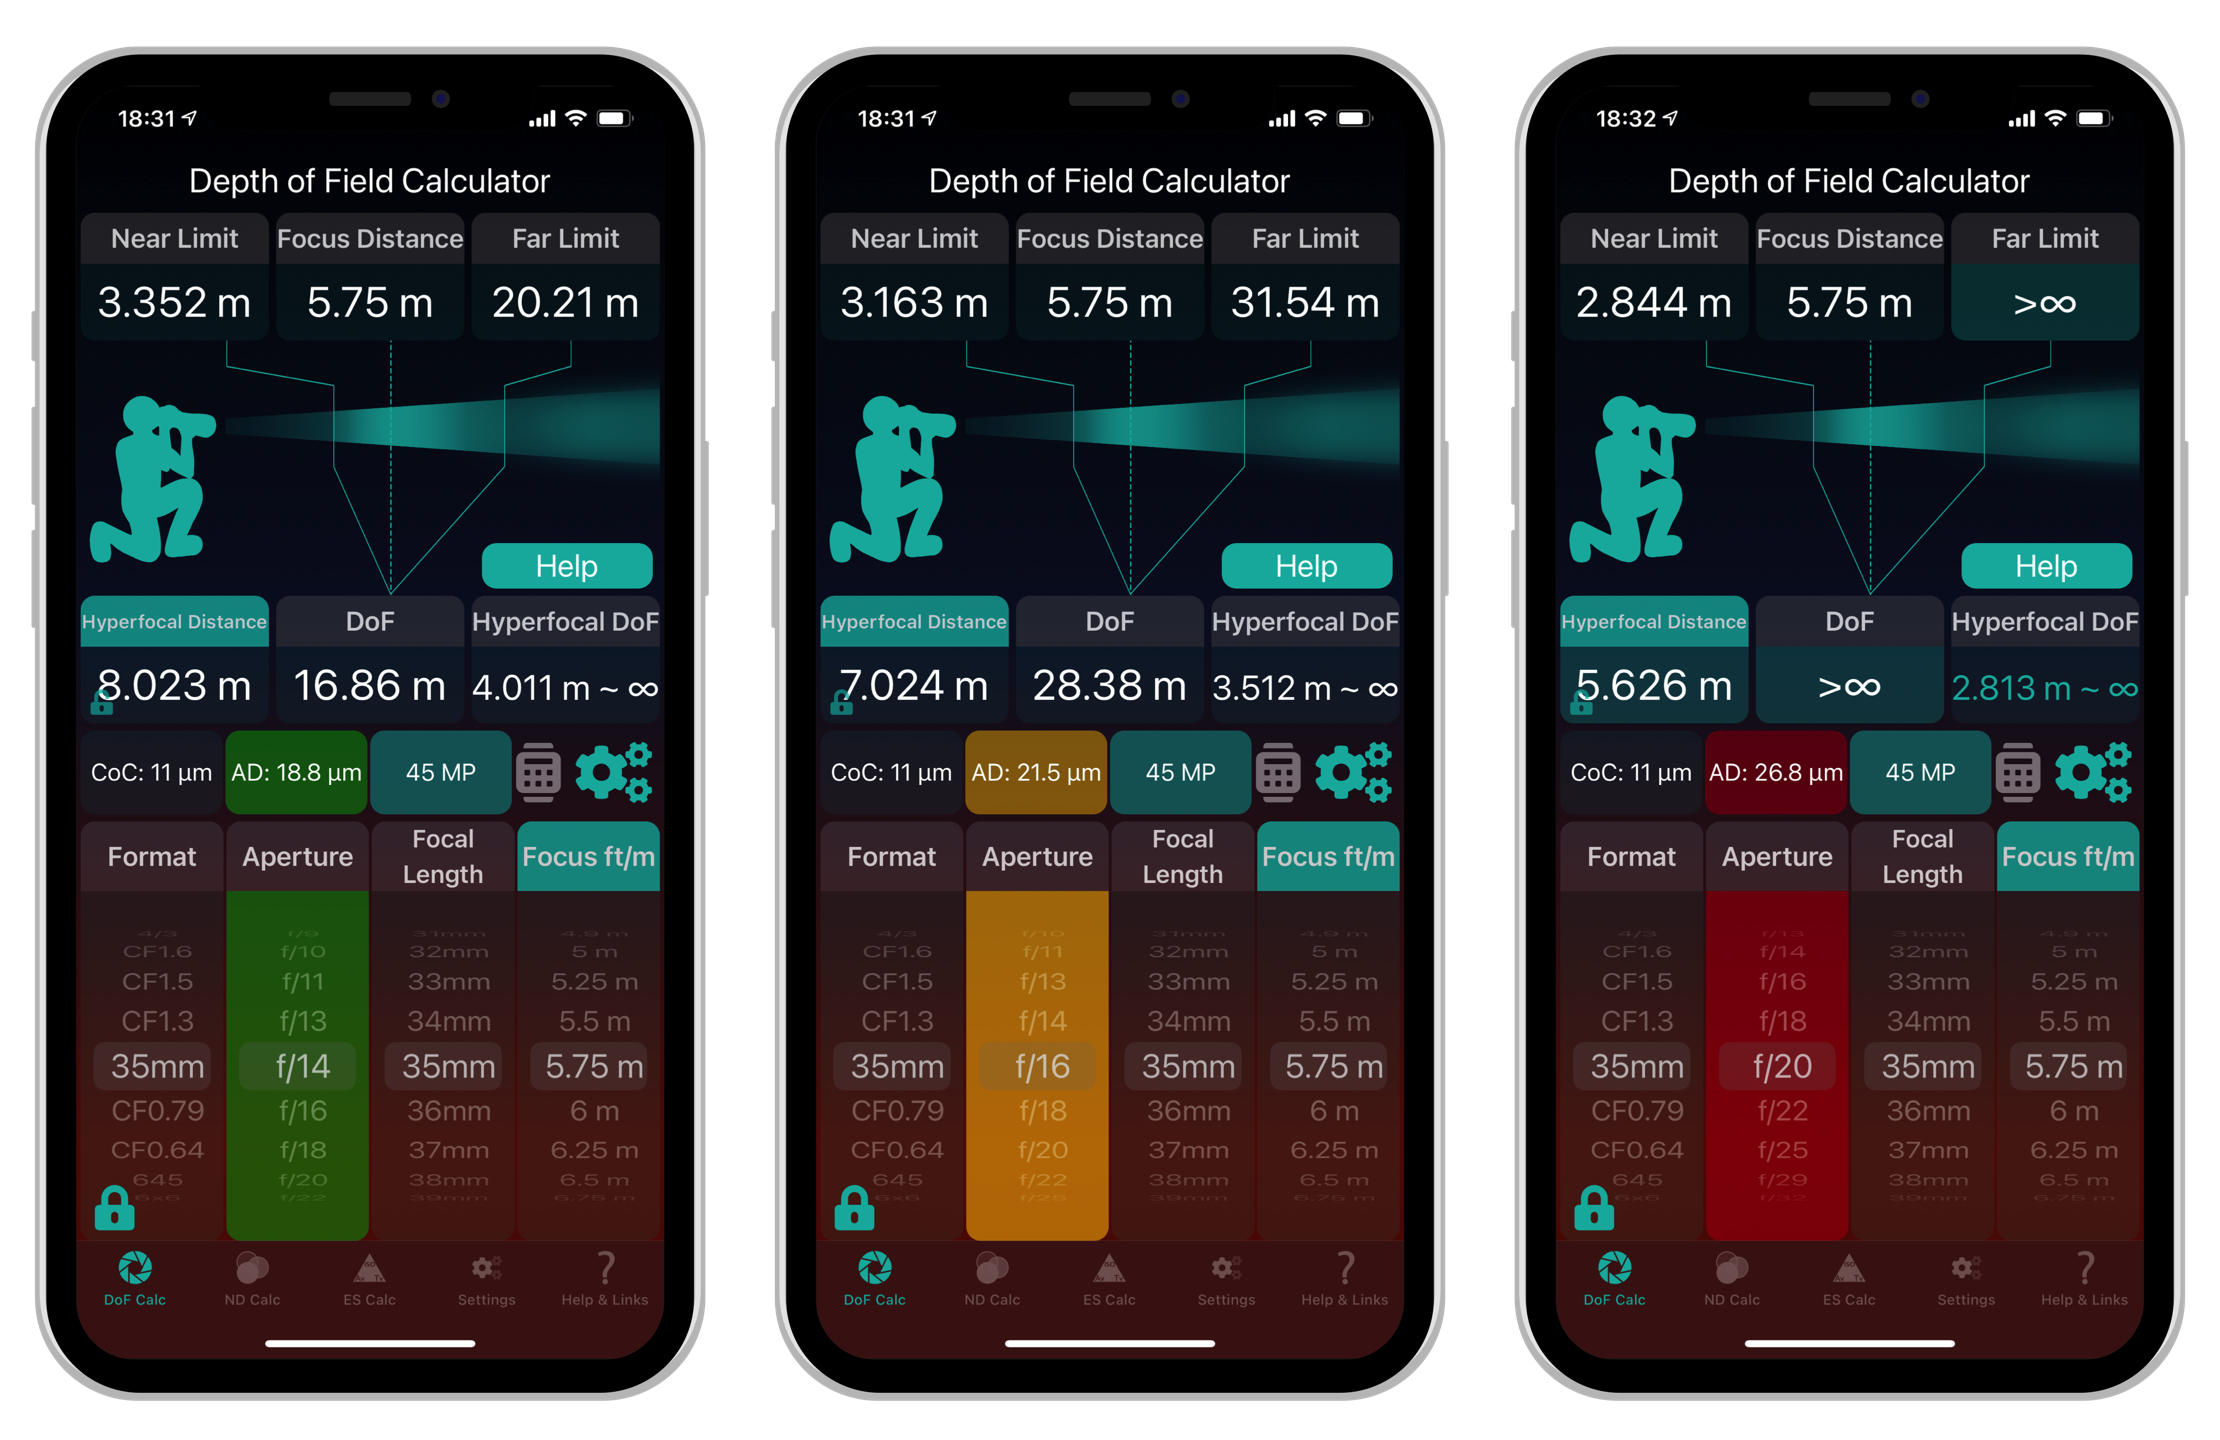
At 50mm diffraction didn't really start to kick in until ƒ/18, but it got worse slightly quicker and by ƒ/22 it was about the same softness as at 24mm. At 105mm diffraction was relatively weak but slightly noticeable from ƒ/16 and got worse at ƒ/20 and slightly worse still at ƒ/22. From my findings though, I now know that I don't have to be concerned about Diffraction until ƒ/16, and if possible, I want to avoid using ƒ/20 and ƒ/22. Based on this, I went into the settings of the Depth of Field Calculator in Photographer's Friend, and adjusted the amber warning slider to +1.6 stops, and also the red warning slider to +0.3 of a stop. As you can see from these screenshots, that puts the actual warning colors displayed so that the aperture dial is green until ƒ/14 then changes to amber at ƒ/16 then to red at ƒ/20.
For your reference, note that I also tested my Canon RF 50mm f/1.2 lens, which has a smallest aperture of ƒ/16 and once again, I really couldn't see any diffraction until I hit ƒ/16, so I'm pretty happy to leave my warning color guides at these settings. Because the math dictates where the default settings go, and because I'm testing some of the best lenses available, I don't want to adjust the default settings. I really think people should do these simple tests themselves to really see the effects of diffraction as it kicks in, and if you do use Photographer's Friend, I hope you find the ability to adjust your warning sliders useful.
Note that this is part of the Pro Add-on as it all takes additional work that was not included in the base price of the app, and also not something that everyone will want. The good news is though, if you already bought the Pro Add-on or the Complete Pro Bundle including the Apple Watch add-on, this feature will automatically be activated when you update to version 3.7.1 which is available now in the App Store.
OK, so I hope you found that useful. Before we finish I'd quickly also like to mention that if you absolutely must stop down to a small enough aperture to cause your system to become diffraction-limited, it's not the end of the world. If you are a Canon user, you can consider using Canon's Digital Photo Professional software and applying the Digital Lens Optimizer, which removes the effects of diffraction very well when detected. Also, my image management and editing software of choice, Capture One Pro, has a Diffraction Correction option under the Lens Correction section which also does a very good job of cleaning up the effects of diffraction when your images are affected. Photoshop and Lightroom also have lens correction in Adobe Camera Raw which removes the effects of diffraction pretty well too. I rarely have to use this option because I'm generally fine with the slighter wider apertures, but it's good to know what your options are.
Freebie Post
This post is unlocked for non-Patrons as it is a sponsored post or advertising Martin Bailey Photography products. If you found it useful and would like to unlock all other posts please click the button below. Thank you for your support!
Become a Patron!
Show Notes
You can find Photographer's Friend in the App Store here: https://mbp.ac/pf
The Lens Align on B&H Photo: https://mbp.ac/lensalign
And here also on Amazon.com: https://amzn.to/396sUci
Audio
Subscribe in iTunes to get Podcasts delivered automatically to your computer.
Download this Podcast as an MP3 with Chapters.
Visit this page for help on how to view the images in MP3 files.


0 Comments