Last month I completed my fifth epic Complete Namibia Tour, and today we are going to start a series of travelogue-style episodes to walk you through the tour step by step. As is often the case, I’m selecting my ten images for each episode as I go, so I’m not sure how many weeks this will span yet, but it will probably be three or four episodes, and for those of you that like travelogue shows, I think you’ll enjoy this.
As usual, we kick
Here is one of my favorite shots as the sun dropped below the horizon, and this is a slightly different take on what I’ve done in previous years. I just liked how the tree on the right helped me to frame the shot, although it did not lend itself to the separation that I usually like to try and get among the other Quiver Trees in the distance
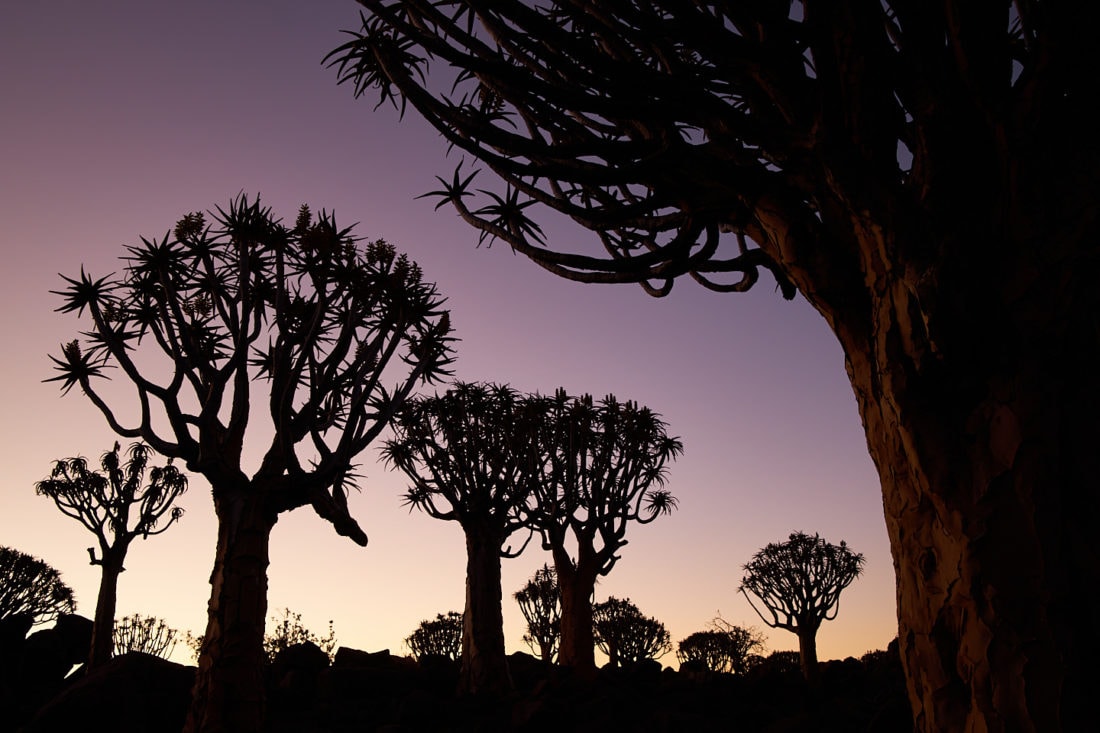
I think the soft pink tones in the sky and also the warm light of late dusk illuminating the trunk of that right tree help to give us some more information about the trees when most of the others are almost completely silhouetted. At this point, my settings for this shot were 0.6 seconds exposure at ISO 100, with an aperture of f/14, at 35 mm. I was, of course, using a tripod, and all of the images that I’ll share in these travelogues were shot with one of my two Canon EOS R cameras. I was also using my Canon
As the sun got deeper below the horizon, I shot a few final images with the warm glow just along the bottom of the frame, transitioning gradually to the indigo of twilight at the top. Here too I abandoned my desire to keep each tree separated in order to get these many different quiver tree forms in the frame, including many of the trees which were flowing.
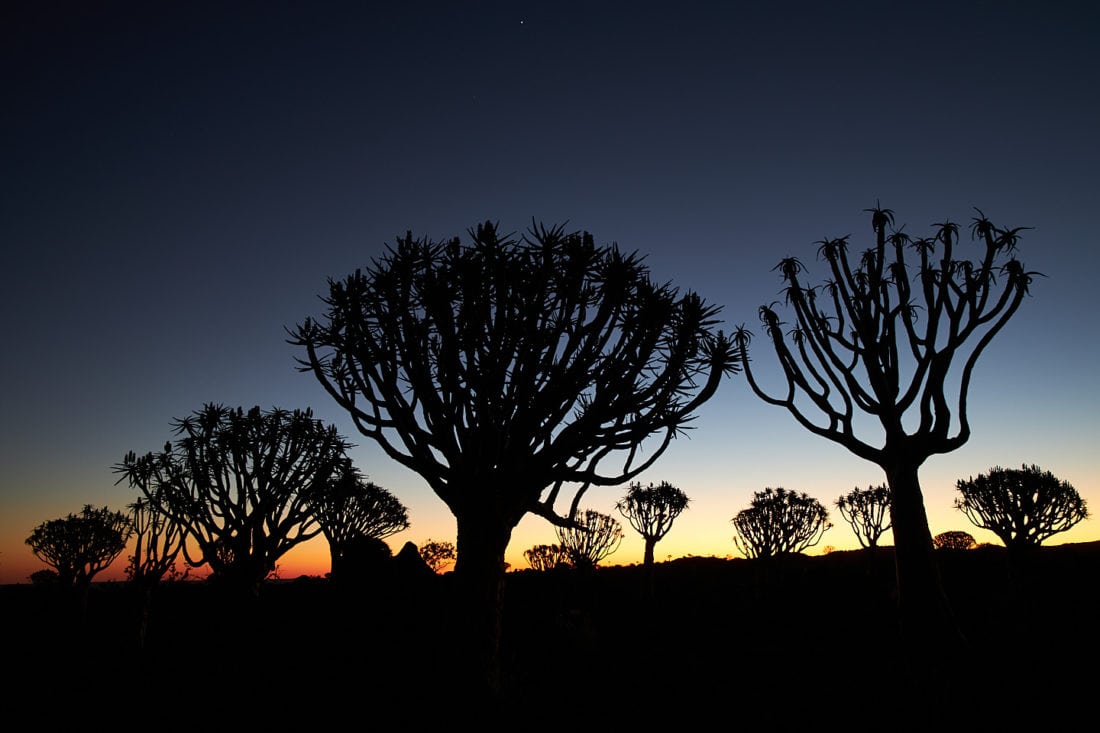
My shutter speed for this shot was now down to 13 seconds at ISO 100, still at f/14, and now using a slightly wider focal length of 27 mm. It’s always fun running around the Quiver Tree Forest trying to find compositions that I feel work as the sky gradually turns red. Unfortunately, this year, there was no cloud cover, so the sunset had nothing to reflect onto, making it somewhat uneventful. However, that was probably a good thing, as I’d planned for us to be at the Quiver Trees when there is a new moon this year, and that gave us the opportunity to come back into the forest after dinner, for some
The Milky Way with Jupiter
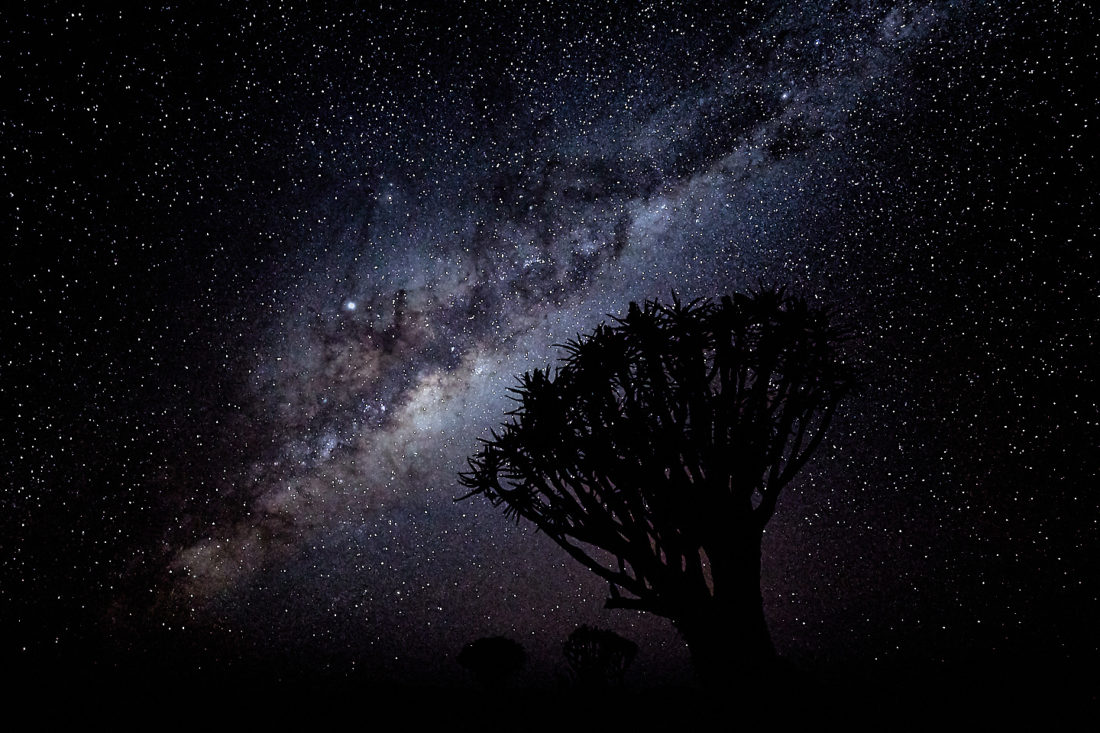
As you can see from this next image, the clear skies did help us to get some pretty neat shots of the Milky Way with the quiver trees silhouetted in the foreground, and the timing of our trip actually placed Jupiter right in the Milky Way, shining bright to the left of the Quiver Tree in this image.
The 340 Rule
You’ve probably heard people talking about the 500 Rule or the 600 Rule, which is intended as a guideline calculation to help you avoid elongation of the stars discs in your images of the night sky, caused by the rotation of the earth.
Well, I imagine this is affected by where you are on the planet, as I imagine the movement of the earth affects the stars more when we are closer to the equator, so just south of the Tropic of Caprico
The Giant’s Playground
The following morning, we got up bright and early to head out to the Giant’s Playground looking to capture this kind of image, again a silhouette, but this time of the comical faces that we can find in the dramatic rock formations of the Playground. It’s literally like giants have placed these rocks so that they look like faces. If you were in the UK in the 70s and 80s you’ll probably recognize the late Bruce Forsyth with a trilby hat on looking up at Venus from his pile of rocks, Shrek is also peering up at Venus from just right of center, and of course, the baboon or Easter Island statue is pretty prominent on the left side of the frame.
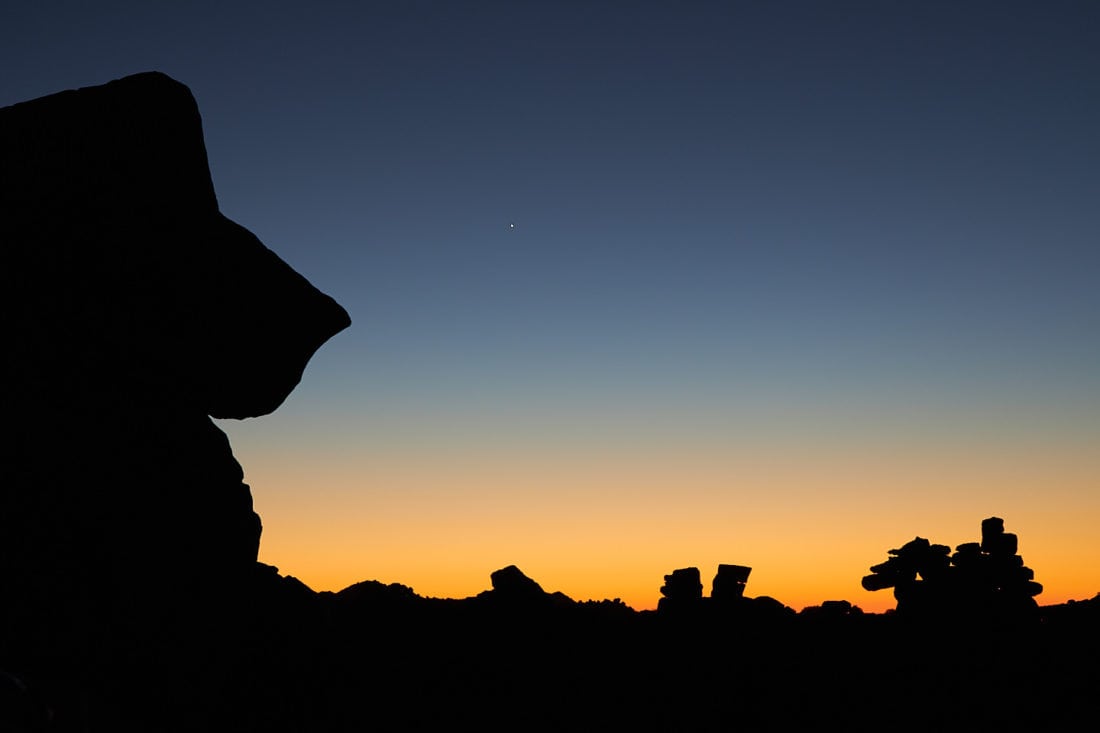
My settings for this were a 6-second exposure at f/14, with ISO 100 and a focal length of 70 mm. Once again, I continued to shoot some images once the sun started to come up, but they really don’t do as much for me as these dramatic silhouettes, so we’ll skip them.
Kolmanskop
After breakfast, we drove through the morning to the Atlantic shore, just short of Luderitz, our base for the next two nights, and we spend the afternoon in Kolmanskop, the deserted diamond mine town, that is gradually being reclaimed by the desert. Although I have somewhat skeptical views on trying to create “something different” as discussed in episode 571, I do like to try and find things that I have not photographed before, especially as I visit many places time and again on my tours, and I was happy to find the room that we see in this first image from Kolmanskop, which I found for the first time this year.
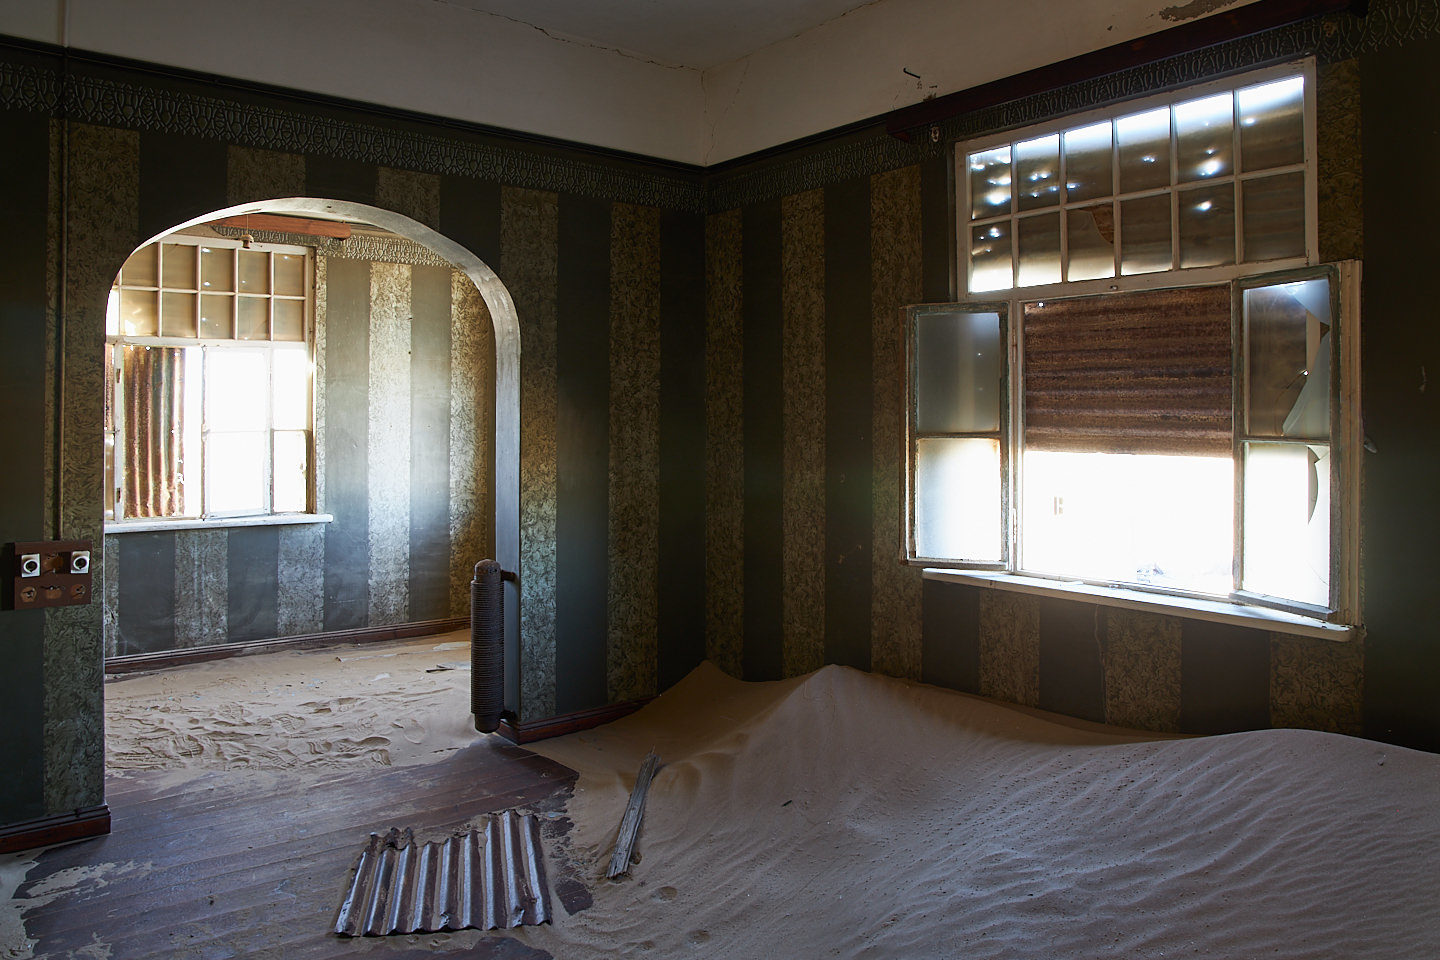
Maybe the owners of Kolmanskop are gradually clearing the entrances to some of the rooms that are still in relatively good condition, as the roofs cave in on other buildings, gradually taking them out of commission, or maybe I just missed it, but I did enjoy this room, with its vertically striped moss-green wallpaper. I also liked the half-sheet of corrugated steel on the floor, and as I’ve mentioned before, I generally like to allow the light from the windows to glow like this, rather than trying to let the viewer see outside, as I feel this adds to the mystery of the image. My settings for this were a 1-second exposure at f/14 with ISO 100 and a focal length of 24mm.
School Corridor
One shot that I pretty much repeat without change every year is this image of the school corridor, from the furthest building from the entrance to the town. There’s just something about the one-point perspective that I use for this shot that continues to appeal to me. I also pay attention to getting the camera at just the right height and position to enable me to get
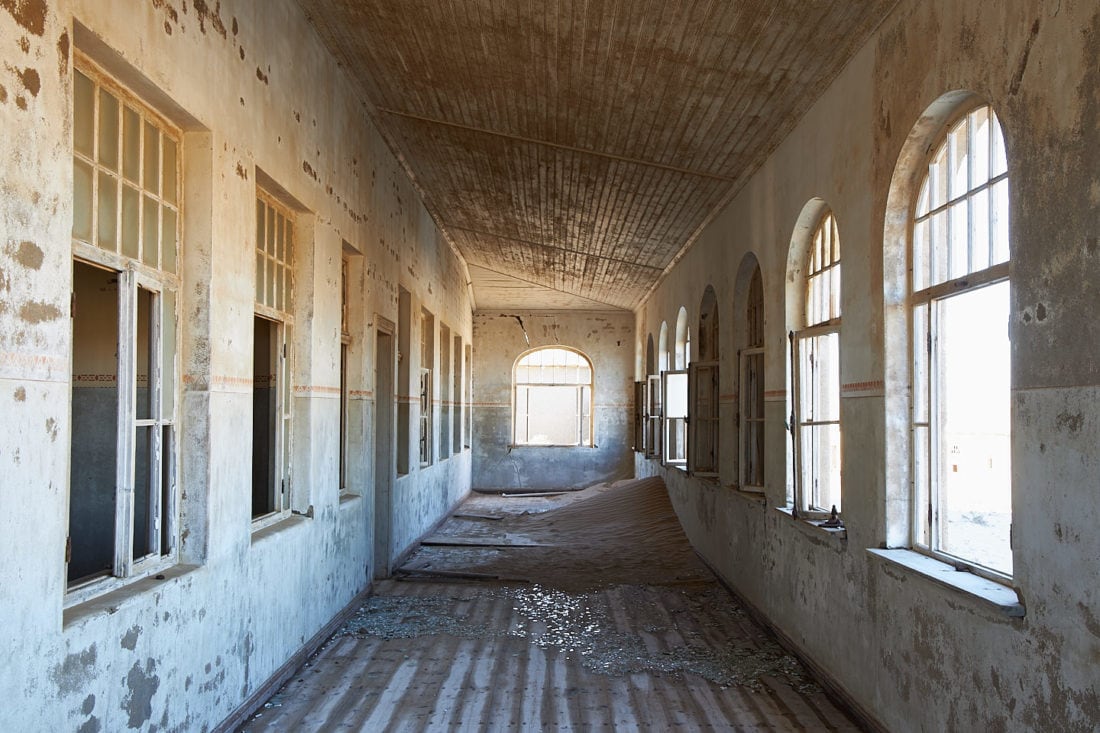
The contrast between the inside and the outside world here is actually not so high, so with a tweak of the sliders in Capture One I can actually bring the highlights down to show you the buildings outside for this image, but I prefer not to. I just like that glow, as I mentioned earlier, and really don’t think that we have to see outside unless i
Blue Room
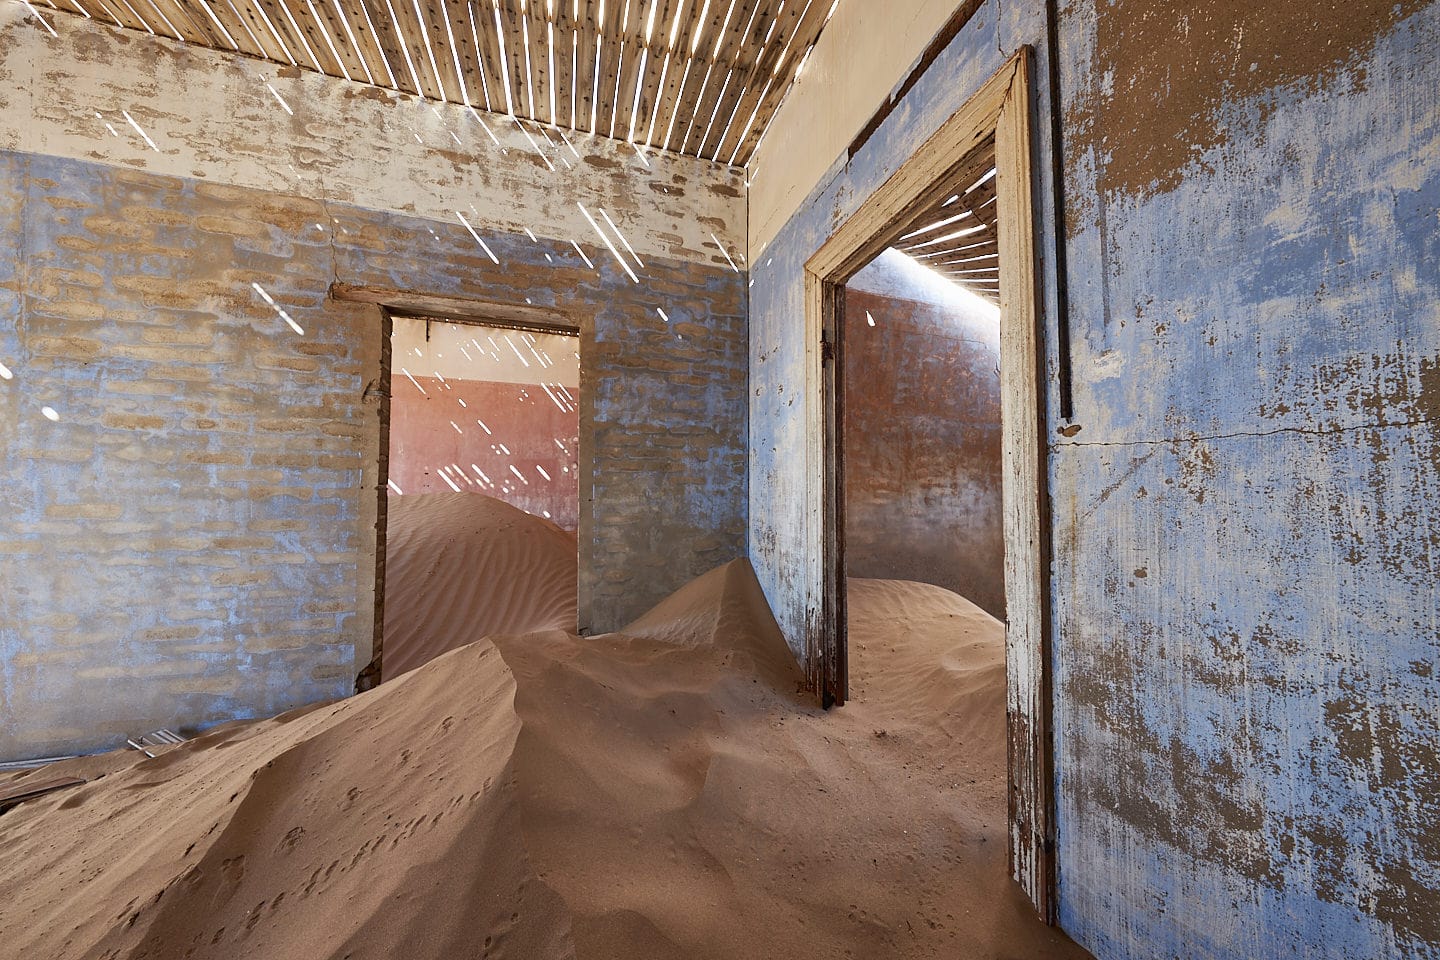
As I shoot Kolmanskop, some of the rooms that we peer into have direct sunlight pouring into them, and although that can be effective, it can also introduce too much contrast, so I make a mental note to revisit the room the following morning when the sun is on the other side of the building. I’d just walked away from the room in this next shot when the sun went behind some clouds, so I quickly walked back with a few of my guests, so that we could shoot it while the window of opportunity lasted.
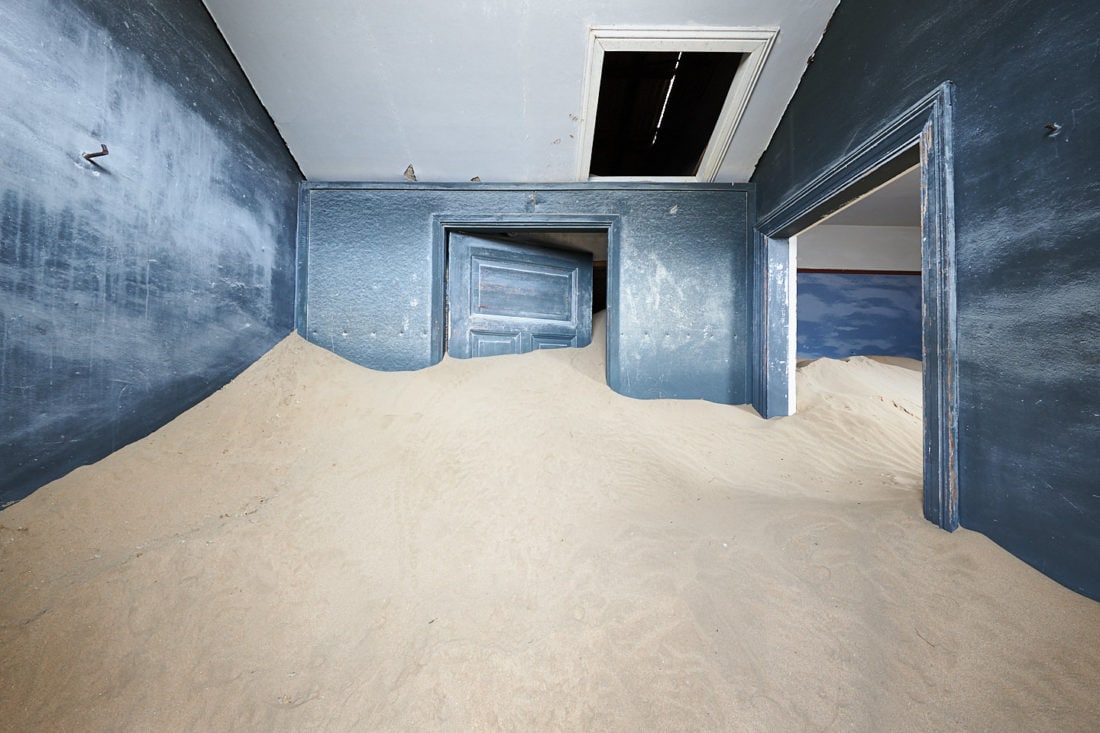
I really like this room, so full of sand, yet still in relatively good condition. For this shot, we literally have to just shoot through a broken panel in the wooden door, which will never be opened again with all this sand pushing back against it. For this perspective, I also used my Canon EF 11-24mm lens, almost wide open at 12 mm, being careful to get the back wall square in the frame, but allowing the wide lens to cause all of these great diagonal lines of the side walls and ceiling. I also like how we can see into the second room with its healthy amount of sand against its blue wall as well. My other settings were f/14 for a 4-second exposure, this time at ISO 400, because the wind was gusting a little, and I didn’t want to risk a longer exposure.
The following morning we went back to Kolmanskop and were presented with a foggy start of the day, as the sea mist made its way inland, engulfing the deserted town for our first hour. We got a number of shots of the mine manager and accountant’s houses in the mist that
Indoor Sand Dune
After the mist cleared, the sun once again became strong enough to create these slithers of light on the walls in one of the rooms where the roof has caved in, and the upstairs floor-boards have decayed away, leaving the slats of the first-floor ceiling exposed. This building is another favorite, with an indoor sand dune that almost seems like it might have been the “in” thing to do at one point in history, like keeping a bonsai tree or doing indoor fireworks at a party.
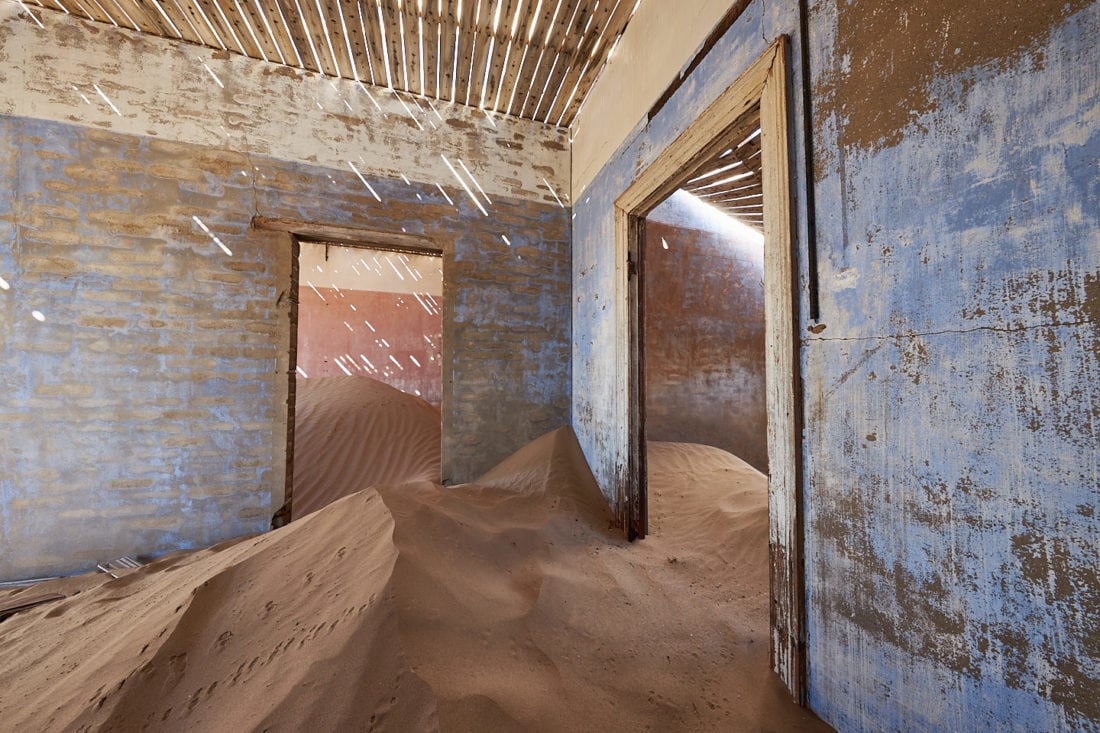
Once again I am playing with the lines in the walls caused by my wide angle of 12 mm, causing the angles to open out from the vertical lines in seemingly random order, accentuated perhaps by the roof of the room to the right caving in, forming another completely unexpected angle. My other settings were a 0.4-second exposure at f/14, ISO 125.
View From the Hospital
I mentioned earlier that I like the glowing windows unless there is a story to tell by being able to see outside. Well, this is probably the first photo I’ve shot at Kolmanskop where I felt there was a story to be told by being able to see out of the window. I went through one of the rooms in the hospital and found a corridor at the back with windows that looked out across the desert, with some of the distant buildings of the entrance to the Elizabeth Bay diamond mine, that we would visit later this day.
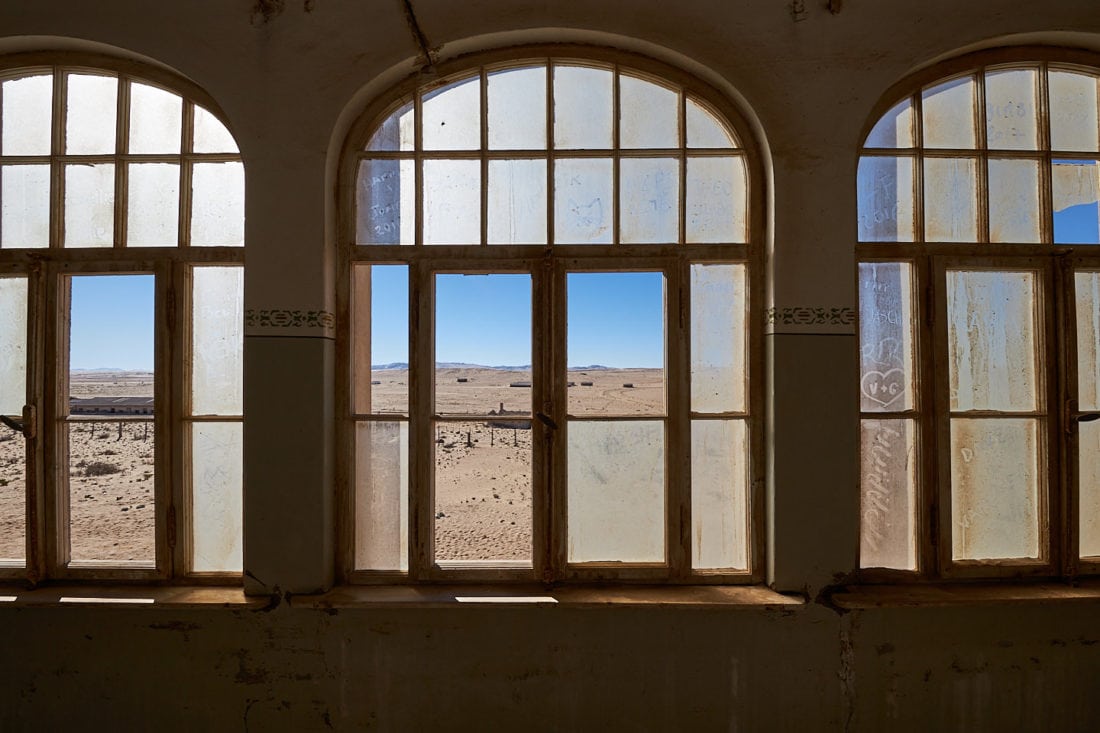
As I looked at the scene from these windows, I thought of all the people that must have sat in this corridor looking out across the desert, just as I was, and perhaps some with ailments that may have made them long to be able to go outside, despite it
Doors and Slats
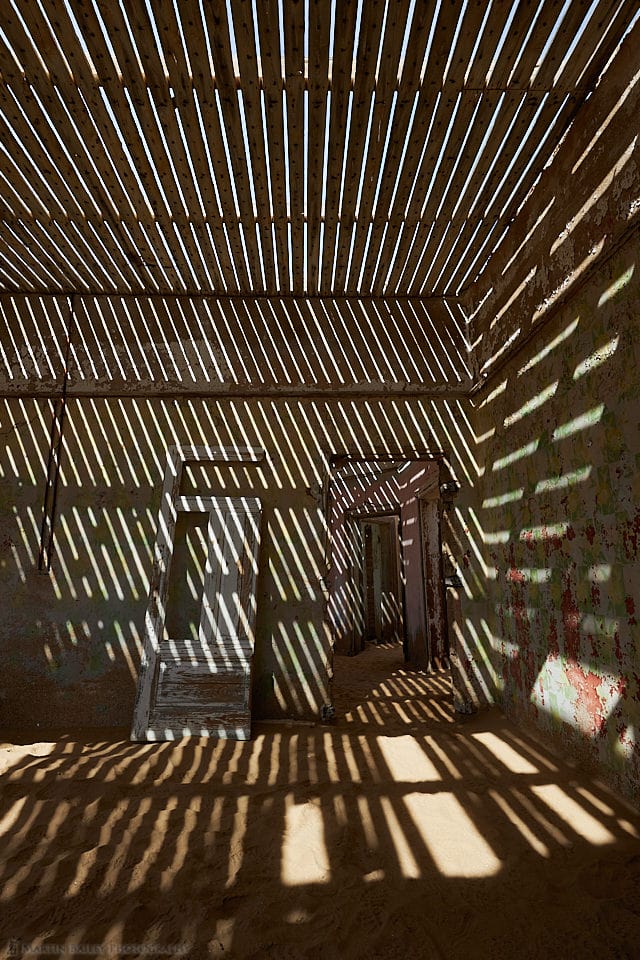
The last image from Kolmanskop that I’d like to share from this visit is this one, of another favorite building, where the roof and upstairs floor-boards are missing, but at the right time of day, provide this wonderful display of diagonal slithers of light throughout the building.
I, of course, lined this up so that the doors in the other rooms of the house are in view, but also went vertical to emphasize all of the gaps in the slats in the ceiling and the slithers of light on the floor. With the camera horizontal, in landscape orientation, you get a bit too much of the dark walls either side of these slithers or light, so I prefer portrait orientation here.
I kind of like the door that someone has stood up against the wall, as an extra element of interest, but I was happy with it not there as well. I guess this is something different that moves me so little that I really don’t care either way.
My settings for this were 1/50 of a second at f/14, ISO 100, with a focal length of 19 mm. Again, the wide angle is helping to accentuate all of these lines making for a very graphically pleasing shot, although I do realize that some people struggle to understand what’s happening in this image, at least to begin with.
OK, so that brings us to 10 images, and the end of this first episode in the series. Next week we’ll pick up the trail as we head into Elizabeth Bay, where this is still a diamond mine in production, which means strict security as we enter and leave, although our goal is to visit the run-down houses and buildings in the old mine that has been closed for some fifty years or so now.
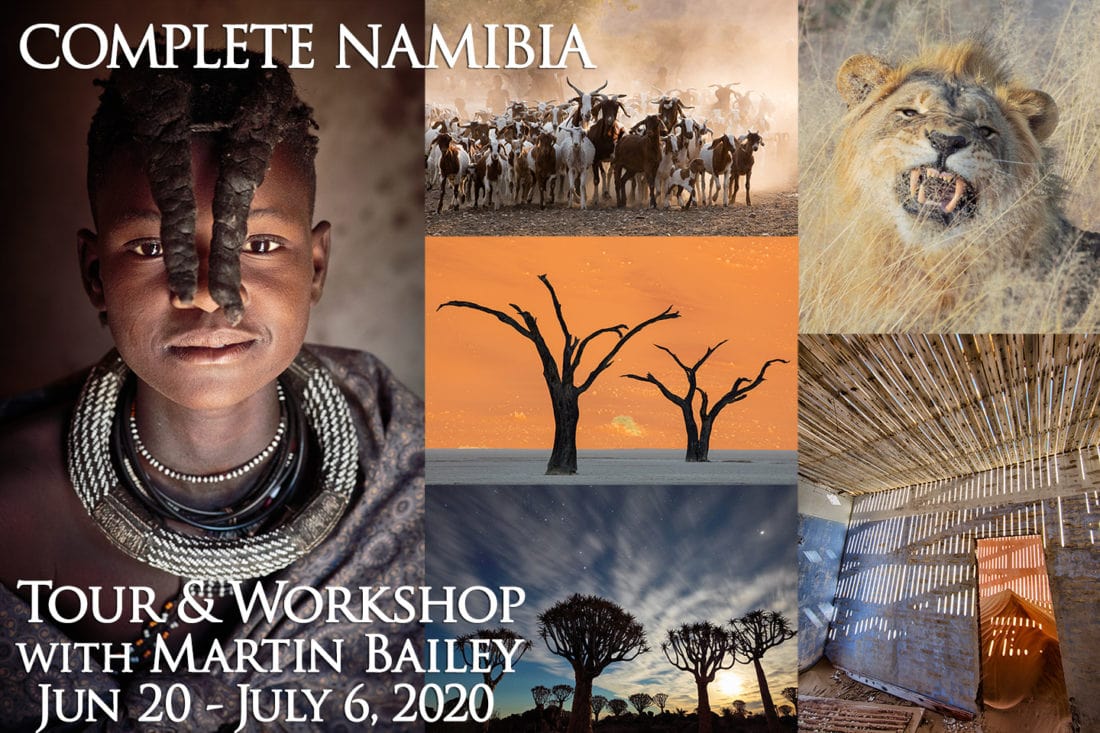
Complete Namibia Tour 2020
Note that we have filled the first vehicle for this tour in 2020, so the tour will go ahead, but we do now have spaces in the second vehicle, so if you’d like to join me, please check your schedule and book your place at https://mbp.ac/namibia2020 as soon as you can. The lodges and other service providers in Namibia force us to lock in on our numbers very early, and once we are locked in, we can’t take any more people, so time is of the essence, as they say.
As you’ll see during this travelogue series, this is a truly epic tour in which you will see and photograph many of the highlights that Namibia has to offer, and I’d really like to share it with you on my sixth visit.
Show Notes
For details of the 2020 Namibia tour check here: https://mbp.ac/namibia2020
Audio
Subscribe in iTunes to get Podcasts delivered automatically to your computer.
Download this Podcast as an MP3 with Chapters.
Visit this page for help on how to view the images in MP3 files.


Re: the 500 rule. I use a Nikon 1.5 x crop camera. Should I use the actual focal length or the 35 mm equivalent focal length?
Hi Fred,
Because your crop factor essentially magnifies the stars in your resulting image, you need to use the 35mm equivalent, so if you are shooting with a 24mm lens, your calculation would be 500 / 36 which gives you approximately 14 seconds. If you used my 340 Rule, it would be 9 or 10 seconds.
It’s important to do some tests and see what works best for yourself. It differs depending on where you are on the planet and the resolution of your camera’s sensor etc.
Regards,
Martin.
Our friend, Greg Benz has an excellent tutorial on making selections of the light and dark areas in images like your Doors and Slats photo: https://www.youtube.com/watch?v=pcW7vf4JFbI
Thanks, Eric,
But as I mentioned, I choose to leave them like this. I prefer it that way. I know how to do it, but choose not to. 🙂
Regards,
Martin.