

Today we take a look at the MindShift Gear PhotoCross 15 Backpack from ThinkTank Photo, as this was the bag I used for my recent trip to Namibia, where I really put it through its paces, to find that this relatively little bag is more than up to the big job that I asked of it.
I'll start my travelogue series next week but wanted to talk about this great new bag before we got started, as I was able to shoot a number of images of the gear it held while packing my stuff away over the weekend, while I caught up with business. I also shot a number of images of the bag in the field, and as you can see from the clay on the bottom of the bag in this first shot, I gave it a bit of a hammering in the conditions that we work in but had no issues.

The bag is built well, with weatherproof zippers and materials, and is resistant to abrasion. I scuffed the bag on dirt, sand and against the doors in the deserted diamond mine town of Kolmanskop, and there was no damage to the bag. Although it was pretty dirty by the end of the trip, the majority of the marks came off easily by giving the bag a scrub with a damp cloth.
Holds Up to 15" Laptops
The 15 in the name is to show that this bag can hold up to a 15-inch laptop in the compartment that you can just see the flap of below the camera in the middle of the bag in the following image. I didn't travel with my laptop in this bag for this trip, as I flew with an airline that doesn't force me to have only one carry-on bag, but I would be fine carrying my laptop in that back compartment if necessary. The actual volume of the bag is 20 liters, although you wouldn't think it by looking at the bag. It seems smaller than this until you actually start to put your gear in, and I'll share a photo of everything that I got into this bag a little later.
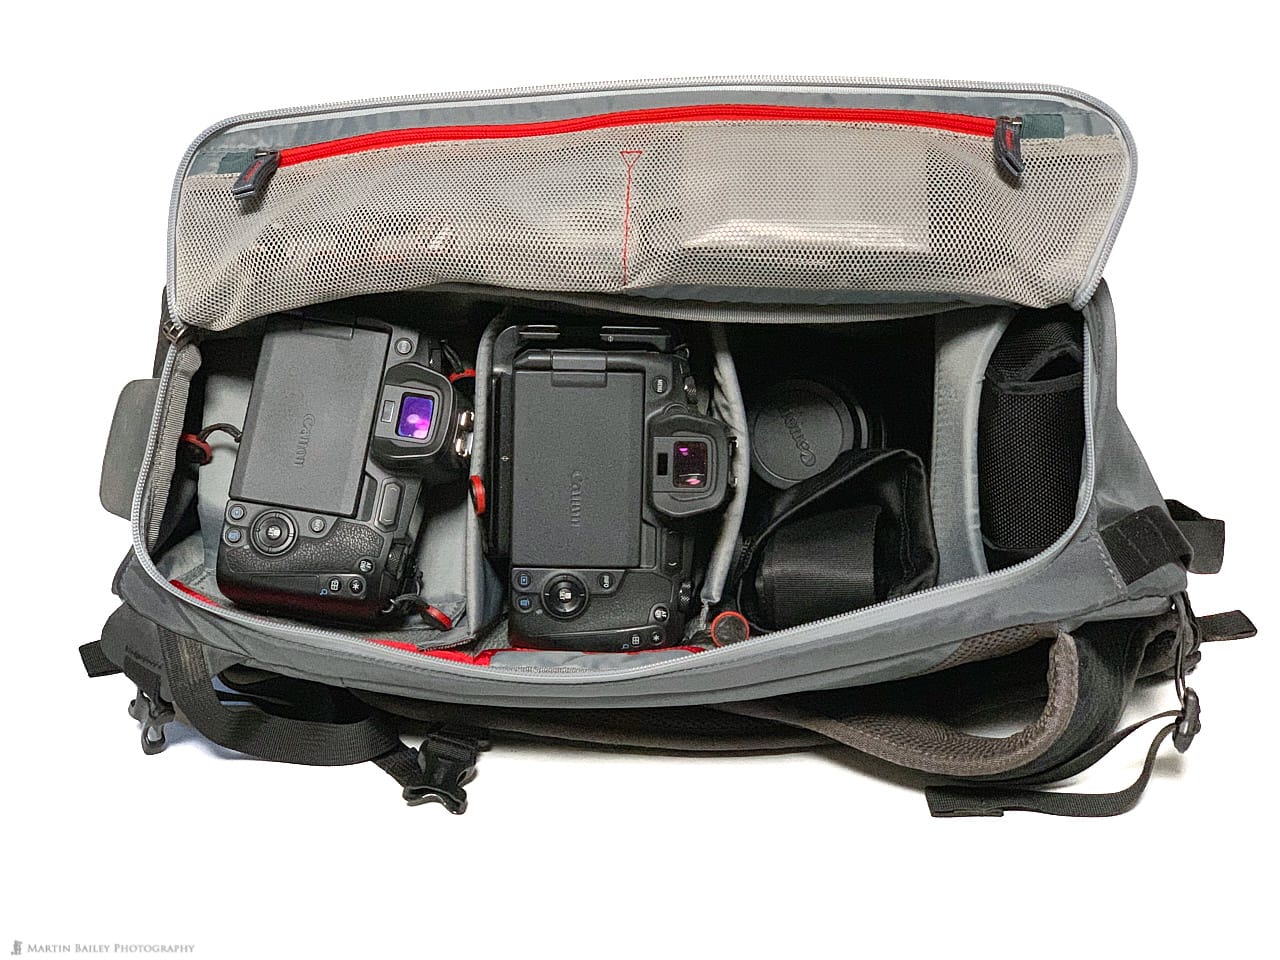
Remove Bodies from Long Lenses
I've included this photo of the bag for another reason too, which is to tell you that I generally remove my camera from long lenses when I travel, especially when it's at the bottom of the bag, which is the left side of this photo (above). With this bag, I put two padded dividers between the camera body and the 100-400mm lens that sits in that space behind the dividers. If you leave the camera on the lens and it gets a good knock, it can damage the mount on the camera body or the lens. We also travel on some very bumpy roads in Namibia, and because the bag sits on the floor of our vehicle, I really wanted to avoid it getting constantly knocked, so for my flights to and from Namibia, and whenever we were going to drive for very long on bumpy roads, as a precautionary measure, I split the body and lens like this.
Regular Shooting Configuration
Once on location though, I attached my 100-400mm lens to the Canon EOS R camera body, as you can see in this next image. This is basically the configuration that I used for most of my 17 day Namibia tour, with my 100-400mm lens on the bottom, which is the left in this photo, and my RF 24-105mm lens attached to a second EOS R in the middle compartment. At the bottom of that middle compartment, I have a flap-style divider with my Canon RF 50 mm f/1.2 lens, which I used for the first time on this trip and am absolutely blown away by. We'll talk about that in the coming weeks too, as I share some photos shot with it.
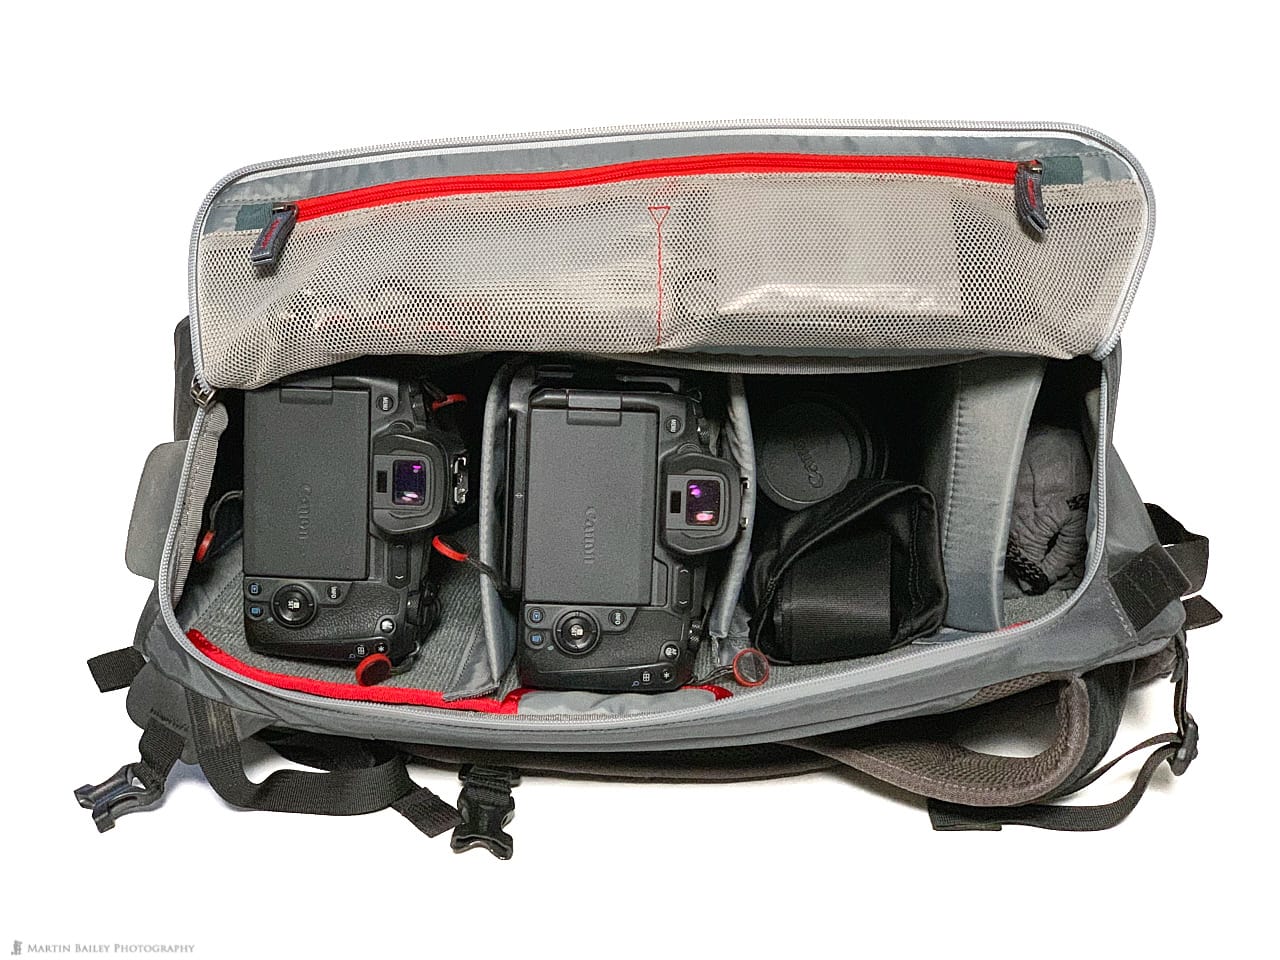
In the second compartment from the right, I had my 11-24mm lens and a camera strap and sometimes put a second strap in there too. In the top, or the right-most compartment that you see in this photo, I keep my 1.4X and 2X Extenders, and when not in use, the Control Ring Mount Adapter that I use to mount my EF lenses to the EOS R bodies.
What's in the Bag?
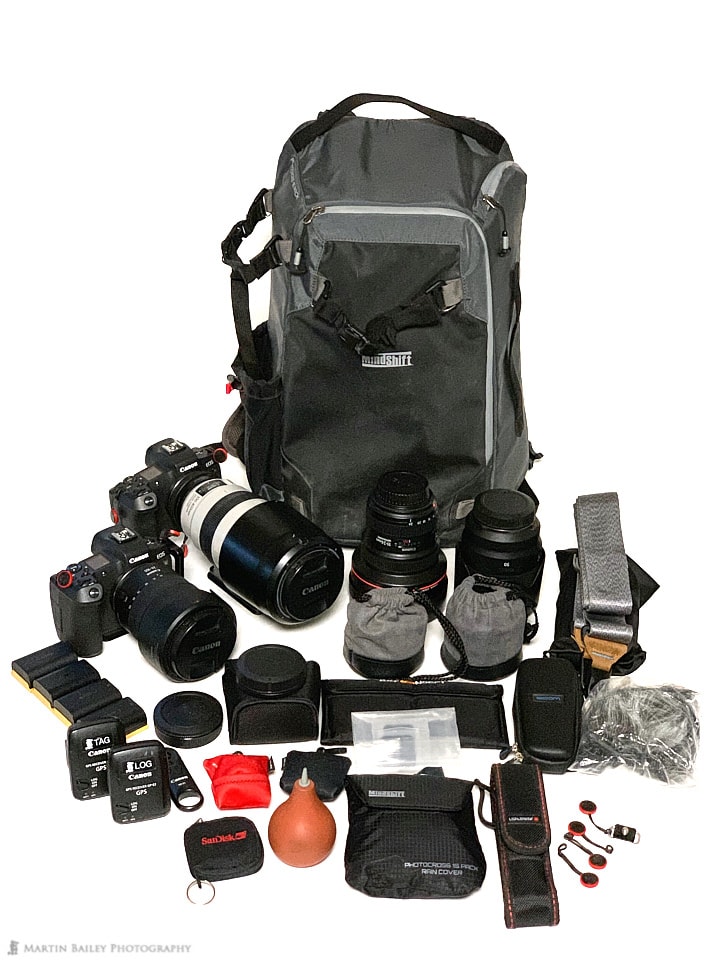
Because I currently only own these two EOS R bodies, I shot these photos with my iPhone, including this next shot, which shows all of the stuff that I had in this bag out on the table, then I gave everything a wipe to get the dust and sand off of it before putting my gear into my humidity controlled camera cabinet. It was a bit of a shock to come back from Namibia which is really dry, to Tokyo in the rainy season, with humidity up at around 80%, so I wanted to get my gear packed away relatively quickly.
The two cameras, four lenses
The black pouch at the front of this photo between my lens blower and the flashlight is the rain cover that comes with the PhotoCross 15 Backpack. Although I'm sure the construction of the bag will protect my gear from light rain, if it starts to pour, it's nice to have a separate cover to put over the bag.
I should mention though that the cover is a perfect fit for the bag, and does not take into account that I might have a large tripod attached to the side of the bag. If there was a chance of having to carry this bag for long distances in the rain with a tripod attached, as I've done in Iceland, I would need to buy a larger rain cover.
As you can see though, this bag really does hold quite a lot of gear, and I found it perfect for use with my new mirrorless Canon EOS R bodies, which are lighter and smaller than my old 5Ds R bodies with the battery grips attached.
Despite its capacity though, I really like how narrow this bag is. I was able to squeeze through the bottom panel in a broken wooden door in Kolmanskop with this pack on my back, and I could never do that with my 18L Bataflae bag from Gura Gear. I loved that bag, but it's much wider than this bag. I also think it looks much more like a camera bag than this. I'm finding that international travel with lots of camera gear is getting more and more difficult, so the lighter and less conspicuous my bag looks, the easier it is to travel with.
With my new mirrorless cameras, I was actually only slightly over the weight limit for my carry-on bag, but I was never even asked about it. With my bulkier looking bags it was often weighed, and then we had to go through the rigmarole of moving lenses to my vest pockets, etc.
Removed the Belt
I should also mention that I removed the waist belt that comes with this bag, as it was just not heavy enough to warrant using a belt in my opinion. If I was going to be trekking long distances, I'd be sure to take it, but the most I walked with this bag was an hour or so, as we approached a distant sand dune in Sossusvlei. Removing the belt is easy, and reduces the overall footprint of the bag, again, making it less conspicuous, so I'm happy to have removed it, and it can be refitted easily should I need it in the future.

Side Opening
OK, so let's take a look at some of the other things that I like about the PhotoCross 15 Backpack from MindShift Gear. In addition to its large capacity in a relatively small form factor, I like the side opening configuration, which means if necessary I can swing the bag around from my shoulder and open up the side flap to change my camera or lens without putting the bag down.
Tripod Straps
The bag comes with two straps, and I configured it so that I could attach my tripod to the side of the bag, as you can see in this image (right). You can see that I also put a strap on the back of the bag, which I often used to attach a jacket that I wore at dawn most days, but then didn't need as it started to warm up during the day.
Even a tripod as big as the one I use sits well on the side of this bag, and you can also attach the second strap to the bottom of the back, and attach the tripod to the back instead.
Only One Side Pocket
A number of times I did find myself having to attach my water bottle to this strap on the back when carrying my tripod attached to the bag, as there is only one side pocket, because of the flap on the right side to get into the bag.
No Huge Demerits
There really are no huge demerits that I can point out about this bag, but in addition to the rain cover not being large enough to cover my tripod and the fact that the bag can only have one side pocket, I do find the bag a little awkward to pack because it leans over when rested on its side, due to the angle of the sides of the bag. If you look at the photos you'll see that the front of the back is narrower than the back, so when you put it on its side on a flat surface to load your gear into it, the bag leans over at quite an angle. I actually just got used to laying the bag down flat on its bag to pack it though, so this is really a very minor issue, as are the other two things I mentioned.
Thumbs-Up!
So, all in all, I give this bag a big thumbs-up! It is perfect for my current gear, including four lenses and two camera bodies, along with extenders, adapters and a whole slew of other stuff that we looked at earlier. I am really happy that ThinkTank Photo, under their MindShift Gear brand has brought this bag to market just at a time when I felt like I needed a change as I downsize my gear with the EOS R mirrorless system. It was a pleasure to travel with and use.
Full Disclosure
In the spirit of full disclosure, I'd like to mention that this bag was provided to me free of charge from ThinkTank Photo, with the help of Ginichi, ThinkTank's distributor for Japan and my go-to store for studio gear here in Tokyo. This, of course, did not affect my opinion or review of the bag in any way. As with any gear I receive for review, I only accept things that I feel I would probably buy anyway, and I always take gear with the understanding that if it sucks, I am free to say what I feel, or even decide to abandon the review if I find that the gear wasn't for me after all. That was obviously not the case with the PhotoCross 15 Backpack from MindShift Gear.
Links
You can buy the PhotoCross 15 or any of the MindShift Gear bags via the ThinkTank Photo website, or if you'd like to support this blog and website, you can use these links to my friends at B&H, for the PhotoCross 15 in Orange Ember or the one I have, which is Carbon Gray. You can also get these two colors on Amazon, with this link for Carbon Gray, and this link for Orange Ember.
Purchasing using our affiliate links costs you no more than if you went directly to these online stores, but the small payments that we get do help keep the lights on at Martin Bailey Photography, and so it's very much appreciated.
OK, so we'll wrap it up there for this week, and I'll be back next week as we start our series of travelogue-style episodes to walk you through this year's amazing Complete Namibia Tour and Workshop. Stay tuned!
Show Notes
See all products from MindShift Gear and ThinkTank Photo here: https://www.thinktankphoto.com
Use the affiliate links above for B&H and Amazon to support this blog and website.
Audio
Subscribe in iTunes to get Podcasts delivered automatically to your computer.
Download this Podcast as an MP3 with Chapters.
Visit this page for help on how to view the images in MP3 files.


Nice! I have the PhotoCross 13 and love it. It’s surprising how much can fit in there, and it seems like the 15 is no different.
Sorry Matthew, I thought I’d already replied to your comment.
That’s great that you are using the PhotoCross 13. I agree, these bags really do hold a lot for their size. Great designs!
All the best!
Martin.