
Today we're going to dive into some of the thought processes I use when composing my photographs, with some real-world examples to help illustrate my ideas.
This post is a continuation of last week's post in which I relayed many of the shooting methods that I use to ensure that I get great quality images without having to spend lots of time finessing my photos on the computer. It was already a long post, so I decided to talk about composition as a separate subject this week.
Having said that, although I'll provide some explanations regarding compositional formulae, I am not going to provide an A-Z guide, preferring instead to give you advice on the questions I ask myself in the field and my methodology, so that you can implement this in your own unique photography.
Be Deliberate
The first and foremost advice that I can give on composition, is to be deliberate in your work. Although I've met some very talented exceptions, the majority of the time, if you shoot without giving much thought to what you are doing, your images will be weak and unrefined.
Of course, it's easy to just tell you to think about what you are doing, but it takes time to develop what I call a Mental Checklist which you run through as you shoot, to help with the considerations that you need to think through in order to decide on a pleasing composition. The good news is that the more you shoot, the more automatic many of these decisions become, and that leaves us free to ask the questions that lead us to our most compelling compositions.
Settings Order
Some of the main questions I ask myself as I approach any scene start, for me, with my exposure settings, which I mostly decide in this order. Keep in mind that I work in
The majority of the time, I start by setting my Aperture, as this to me has the greatest effect on the visual appearance of my resulting photograph. You may have noticed that I use f/14 a lot for my landscapes, and that is because I like to get a lot of the scene in focus, and f/14 enables me to get deep depth of field, with most if not all of the scene in focus, from the foreground to infinity.
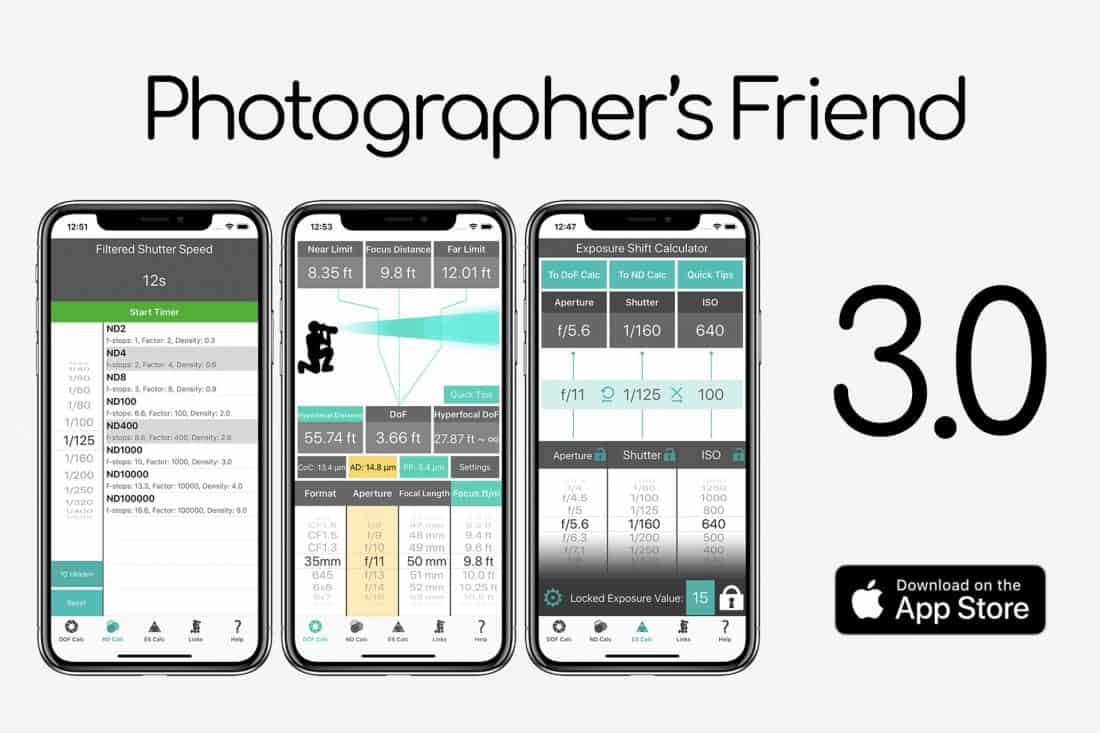
When using long telephoto lenses, the depth of field becomes shallower and shallower still as you focus closer to the camera, but you learn how much depth of field you get through experience, and also I spent a lot of time, especially in my early days, using Depth of Field calculators, such as the one I now have in our Photographer's Friend app for iOS.
The reason I try to avoid using an aperture much smaller than f/14 is diffraction, that can start to creep in. Diffraction is caused by light spreading out as it passes through a very small hole, and I built in diffraction warnings to the Depth of Field calculator in Photographer's Friend, to help show when this might start to affect your images as you stop down the aperture.
In my tests last year I actually found that most of my lenses don't really start to suffer from Diffraction until I stop down to f/22, so now continuing to use f/14 is more of a habit than a requirement, but it's enough to get the depth of field that I want with wider lenses. I explained all about Diffraction and shared how you can test your own lenses in Episode 594 if you'd like to check that out.

I will, of course, use a wider aperture when I want a shallow depth of field, and also, sometimes it's simply too dark to stop down the aperture for more depth of field. For example, when I photographed this gentleman (left) inside an irrigation channel in Morocco last year, there was so little light that I opened up my aperture to f/4, the widest the lens I was using would go before I even raised the camera to my eye.
The next setting I decide on usually is Shutter Speed. I've already decided what depth of field I want, and now I have to decide if I want to freeze the motion of anything that might be moving or allow it to move over time with a longer exposure.
In Morocco, I actually try really hard to use Aperture Priority, as the street photography style environment makes manual a little bit difficult to keep up with sometimes. For this photograph, I ended up with a shutter speed of 1/40 of a second, and that really is as slow as I'd risk shooting something like this at.
To get to 1/40 of a second, I actually had to dial in minus two stops of exposure compensation, because the dark environment was fooling the camera into thinking that it had to increase the exposure too much, which would have resulted in the man being over-exposed, and the dark background too bright.
Even then though, the risk of using a 1/40 of a second shutter speed is that the man might move during the exposure, and also at 105 mm focal length, even with Image Stabilization turned on, I'm risking introducing camera movement as well. The rule of thumb is that you use the focal length as your minimum hand-held shutter speed, so at 105 mm I really want at least 1/100 of a second, but in such low
After setting my aperture and shutter speed based on what I need for the aesthetic values of the photograph, or based on restrictions placed on me by the environment, I generally adjust the exposure with the ISO. As I mentioned last week, it's important to not be afraid to crank the ISO up a little when necessary, as shooting with too low an ISO will introduce noise because the image gets too dark. You are actually less likely to see grain by increasing the ISO.
Again, because I was using an automated exposure mode for this example photograph from Morocco, I had also turned on Auto-ISO and set a maximum ISO for the camera to use at 6400, and that is what I shot this image with. What this means though is that I was at f/4, my widest aperture, with a 1/40 of a second shutter speed, the slowest I wanted to risk shooting at, and the highest ISO. The resulting image was actually a little bit darker than I'd have liked, but with my hands tied, I rolled with it, and the grain was there, but acceptable.
I knew it would be because I have worked in these conditions often enough that I know what my camera will give me under these conditions. The important thing is that you think through each setting and understand why you select them, and what you can expect to gain from each setting.
Use a Tripod When Possible
For the previous example, it wasn't possible to use a tripod, as I was in a narrow passageway with my workshop group, and also even if I had used a tripod, using an even longer exposure would have just introduced more risk of subject movement, but when it's an option, using a tripod will generally help with your composition. Some people dislike using a tripod because they slow you down, but guess what? That's one of the main advantages of using a tripod.
I use a tripod for 99% of my landscape
Use LiveView When Possible
Another thing that I recommend is to flip your camera into Live View at least as a part of your process to check your composition. When we look through the viewfinder, although the scene is framed, it's still a three-dimensional scene, and our brains find it much easier to ignore distractions if it can move back and forth between the layers of the scene. Live View, on the other hand, shows us the image in two dimensions, flattening it, so that all of the elements in your frame are on the same plane, and this really helps us to identify problems and fix them before we make the exposure.
Of course, Live View doesn't work well if you are hand-holding with a DSLR, but the electronic viewfinder on mirrorless cameras probably does bring some of these benefits to hand-held shooting, because you are looking at a flat image, as opposed to the actual scene through your lens.
Give Your Subjects Space
Shortly I'll talk about using a tight crop to add drama, but as you saw in the previous example, I did two other things that I'd like to mention, the first of which is that you might notice that I left a lot of negative space to the right of the subject and above him. The space to his right is to add some balance. I'm not afraid to place a subject in the middle of the frame when it suits, although that's generally considered to be a no-no. We'll get to that too shortly as well though.
I've actually used the rule of thirds here, by placing the subject along the left third of the image. Although you'll probably hear people telling you to avoid the rule of thirds because it's overused, I really also want you to keep it in mind, because we as an art-loving biological being find it pleasing to look at. Artists have been placing their subjects on the third intersections of works of art for centuries.
Of course, just plonking your subject on a third line won't help it if it's badly lit and not well thought out, but in some circumstances, it's definitely a compositional technique to consider as an option, and definitely, don't try to avoid it just because someone told you its cliche. Make up your own mind!
The reason that I added some space above this gentleman, is to give him some space to look into. The light in the scene is coming from directly above, and I had asked him to look up into the light like this. If I'd cropped the image off directly above his head, it would look unnecessarily cramped. The other thing that I did consciously that I wanted to mention, is that I decided to crop of this gentleman's feet, simply because he was wearing white sneakers that really didn't match the rest of his traditional clothing.
The Not-So Dreaded Bullseye Composition
Just as I don't want you to rule out the rule of thirds, I also want to dispel the common advice to not put your subject in the middle of the frame. Even though we call it the rule of thirds, it's not a rule at all. It's a guideline. Just one option from a plethora of compositional techniques to draw from as we see fit.
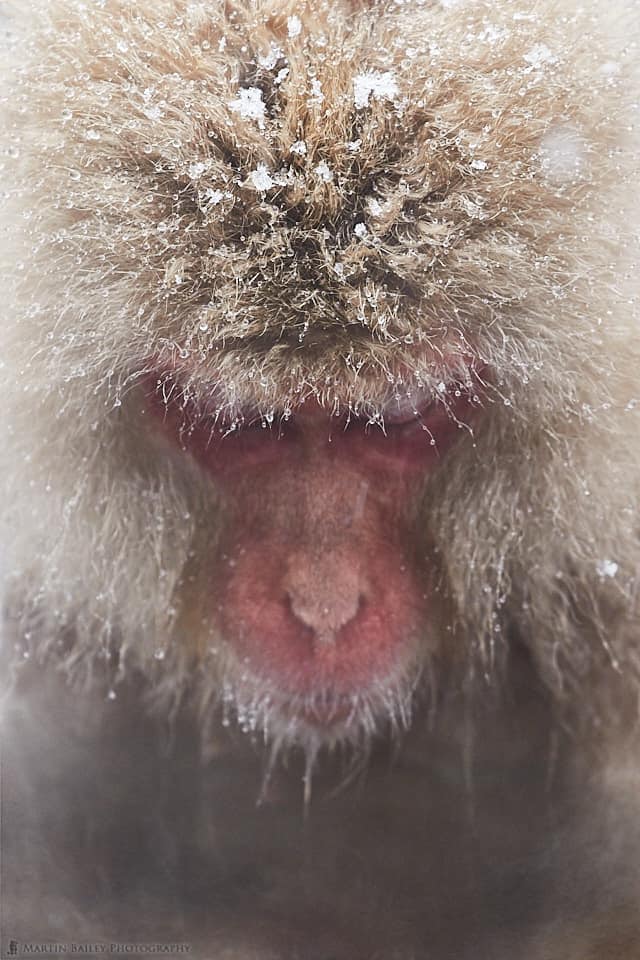
As you can see in this photograph of a snow monkey, I chose to put the monkeys face smack in the middle of the frame, and I think it works this way. I was careful to get equal amounts of space all around the face, but notice too that the face isn't even sharp.
I broke another so-called rule here, by focusing on the monkey's wet fur, rather than the face. To me this adds a little bit of mystique, forcing the viewer to fill in the gaps for themselves. I've even partly obscured the monkey's eyes with its fur, again, something that you might try to avoid, but I think this all helps to add a certain amount of emotion to this image.
At least for me, I feel as though this monkey is deep in thought, because of the position of the face and the downward looking pose, but most of that is simply created by the composition. The reality is that the monkey was simply snoozing at the side of the hot-spring bath, probably not thinking about anything more than its next meal, but we can read so much more into this because of the composition.
The Tight Crop
Another reason the snow monkey photo works is
Quite often, getting in closer and focusing on the most interesting visual elements will result in a stronger image. The problem is that when we are actually in the field, somewhat overwhelmed by the beauty of our location, our brains tend to ignore the boring parts of a scene, and trick us into thinking it's more beautiful than it is by focussing only on the elements interests us.
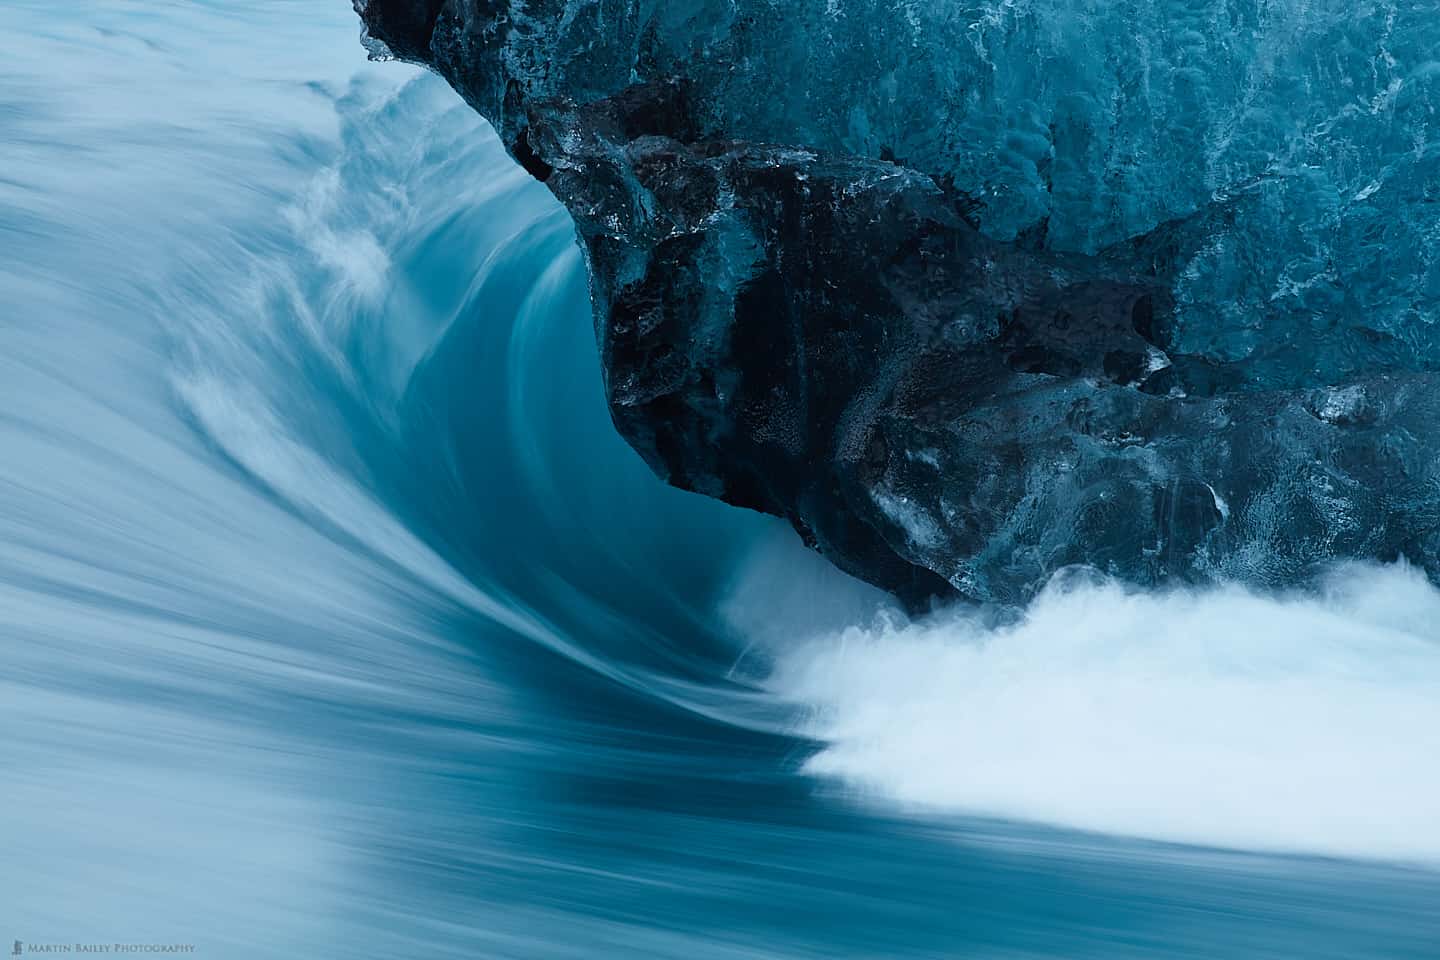
It's important to evaluate what it is exactly that is attracting you, and think through your options to maximize the impact of those elements of interest. For example, here is a photograph of the mountains and glacial lagoon at Jökulsárlón in Iceland. I've never shared this photograph because it's absolutely boring! It's boring because going wide like this has left all of the individual elements of the scene so small that they lose their impact and drama.

This is a somewhat extreme example, but to me, grabbing a long lens and finding details like the water flowing around the base of an iceberg can often be a much more compelling image than a wider scene trying to include too many elements.
The Human Element
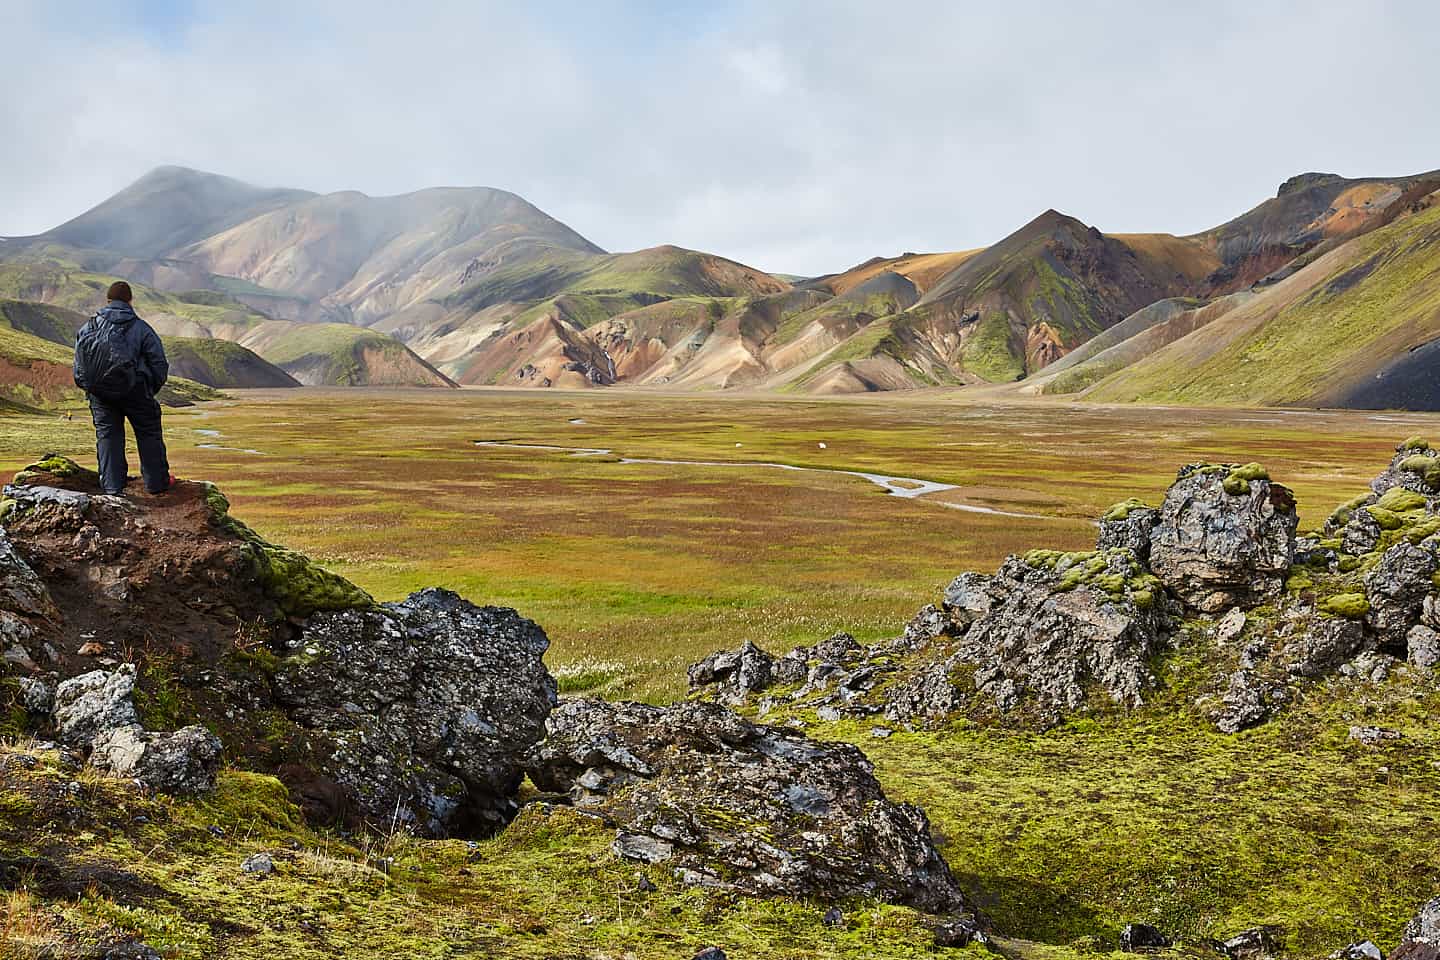
Talking of elements, I also sometimes find that adding a human element to a scene can help the viewer to put themselves in the environment. As beautiful as the valley can be, one of the most popular photos from my first visit to Iceland turned out to be this one, where I used jumped into the frame myself and looked out across the land.
Despite us patiently waiting for the crowds to disappear to get a clean shot of the Skogafoss waterfall also in Iceland, this shot became an instant hit thanks to the guy that walked barefoot out in front of the falls with an umbrella! Even for what is essentially a landscape photograph, the human element can add so much, even without being very large in the frame.
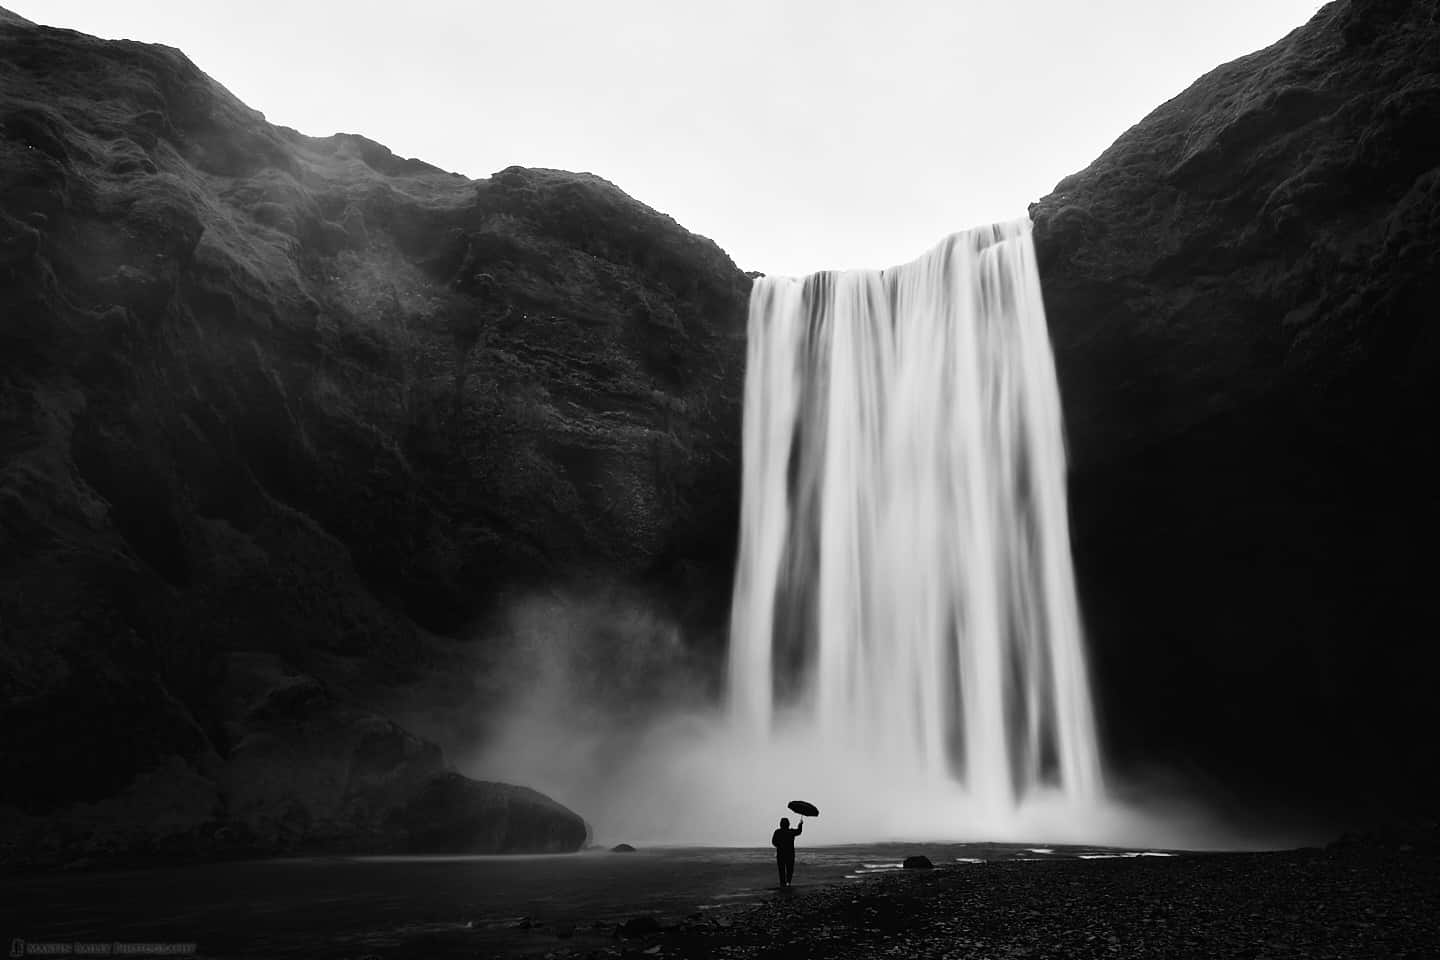
Also, note that as deliberate as I like to be, this photo was very spontaneous. I was walking away from the falls with my group when the man started to walk out like this, so I had literally just a few seconds to drop my camera back down again and frame this up for just one shot.
Zoom However You Like!
There is one popular mantra blindly regurgitated by photographers around the world that rubs me up the wrong way, and that is "Zoom with your Feet". This is one of those phrases that is used in my opinion for one of three reasons, all of which I take exception too, which are...
- To make you feel guilty for not walking
If you blindly walk closer to a subject, you completely change your perspective. You might remember my episode 568 post "The Effect of Subject Distance and Focal Length on Perspective", in which I show examples of how the perspective of our photos changes as move closer to our subjects.
Assuming you change your focal length as you move, this changes the relationship between the foreground and background elements in your frame, so there is always going to be an optimal distance for your composition. If you need to walk towards your subject to get to that distance, you'd essentially be zooming with your feet, but we should never do that blindly without considering perspective. - To protect the ego of the 50mm lens shooter
Some people latch on to mantras like zoom with your feet to help them to live with their decision not to buy a longer lens. There is a certain snobbery I sometimes come across with regards to using short focal length lenses and I sometimes meet people that have decided to only use prime lenses, and again, that's your decision, but that doesn't mean that you have to attack others for their decision to use a longer focal length to get their shots.
It's just another decision, like whether to use a Mac or a Windows computer, or whether to by a Canon or Nikon camera, or any of the other amazing cameras on the market. We make our own decisions, and it is completely unnecessary to tell other people why they are wrong about their own choices. - Inability to think objectively
The third reason I believe some people spout the zoom with your feet mantra is more understandable, as a general flaw in our human nature, but some people really just lack the ability to think objectively about the possible reasoning of others to do what they do.
For example, a street photographer may well be able to shoot 90% of their images with a 35mmlens, and get stunning results, but if I were to take a 35mm lens to Namibia and try to photograph this lion doing what is actually just a fierce looking yawn, I would obviously have to get a little bit too close to avoid being eaten.
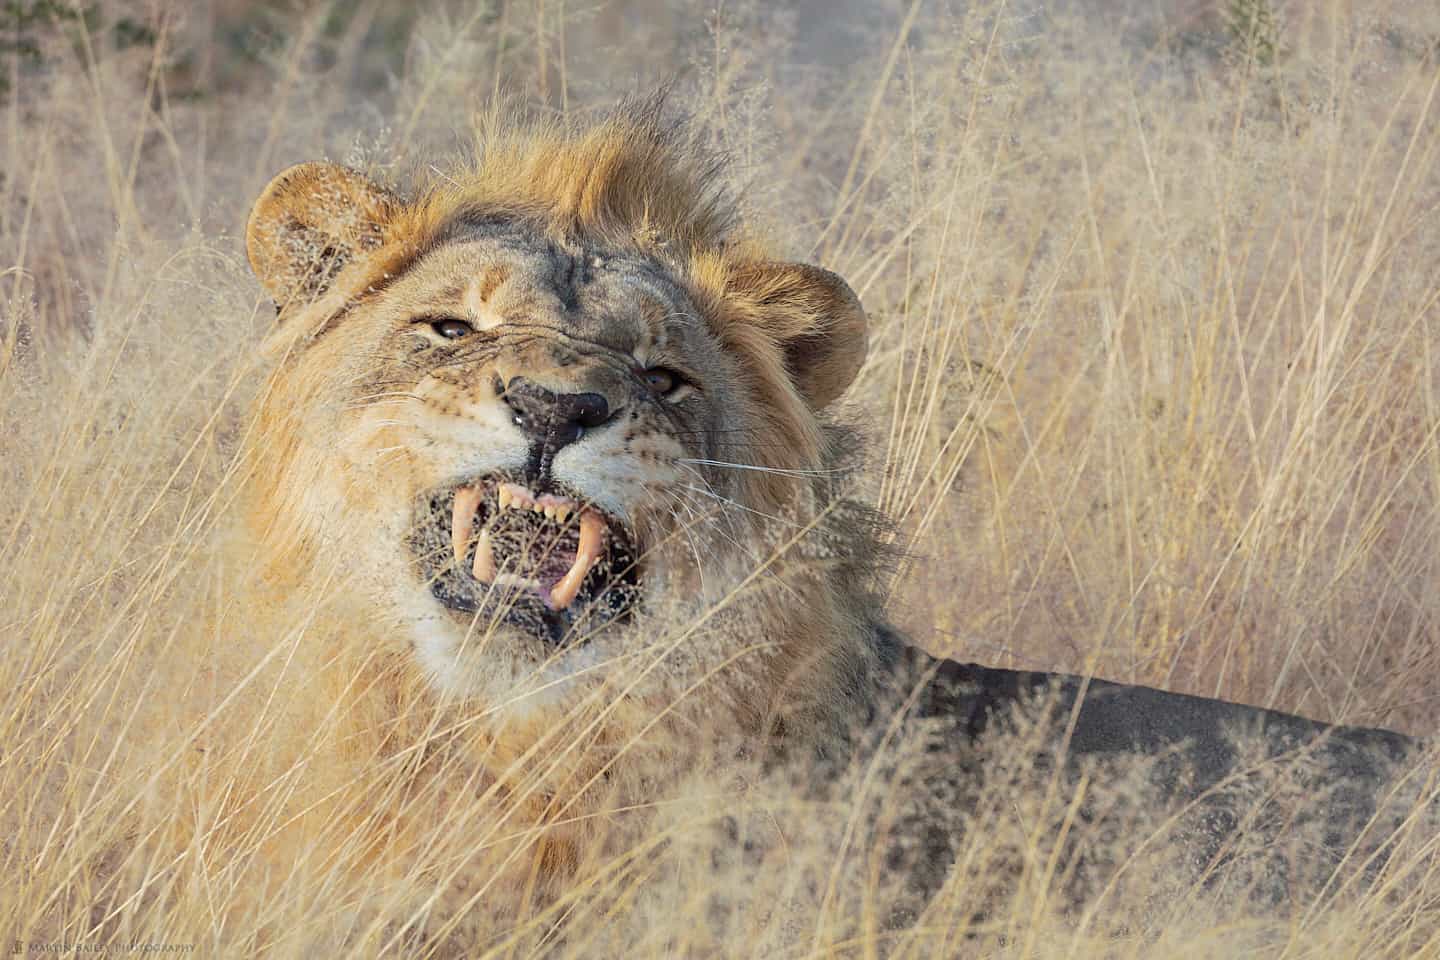
The same goes for walking off the edge of a cliff or into a body of water. There are a plethora of reasons why zooming with your feet may not be the best option, but I've talked enough about this for now, so I'll jump off my soap-box and move on.
Effects of Subject Distance and Focal Length on Perspective
In fact, before we move on, let's look at an example of the effects of subject distance and focal length on the perspective that we achieve in our photographs, using some images from last year's Complete Namibia Tour. First of all, here is a photo from a distance as we approached a sand dune. In this first

This shows the dune in its entirety, with the trees at its base, but it's not a very impactful image. The trees seem a little insignificant, and the dune itself doesn't look all that impressive. My focal length for this image was 200mm.
As we move closer, here is another photo, shot with a focal length of 148mm, which shows the trees much better, because I'm closer to them now, but including the top of the sand dune makes it look much smaller than the previous shot. This is because of the relationship between the larger trees, and because I'm now forming a more acute angle on the first peak of the dune, almost obscuring the more distant peak, making it look much smaller.

I think this is a nicer photo than the first, but it doesn't do the sand dune any justice. This third image though, shot with a focal length of 312mm, enables me to completely fill the frame with the sand dune, which in my opinion does both the trees and the dune justice, by balancing their visual weight in a much more appealing way.
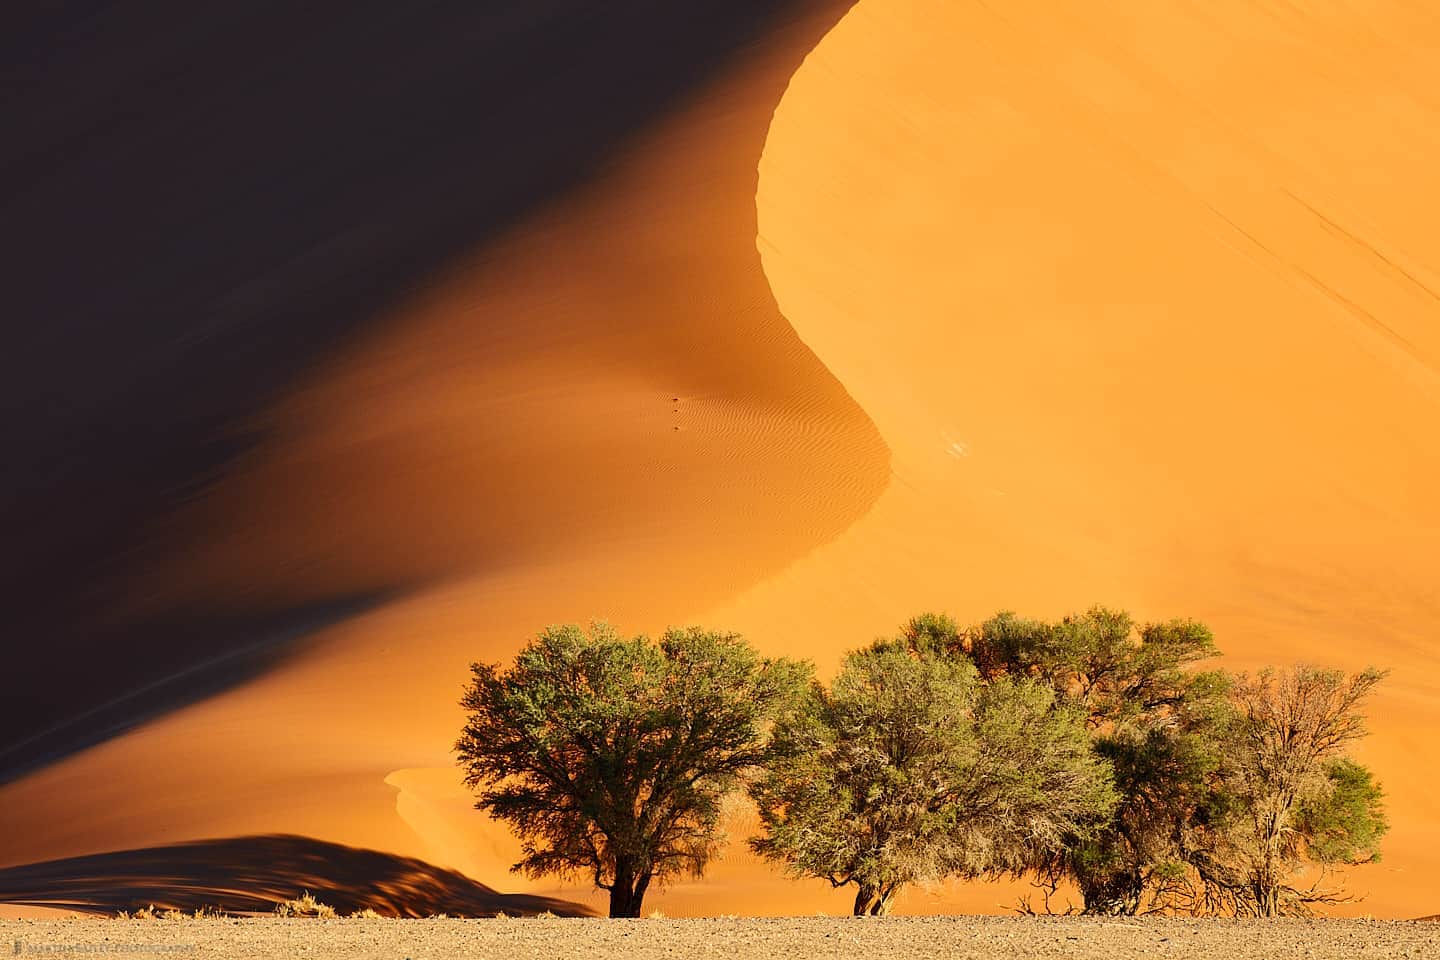
You could also argue that the dune appears larger in this final image than the first two, simply because we cannot actually see it's edges. We have no clue as to how large the sand dune is, but we do know that it's at least four times or so larger than the trees. The other point that I wanted to make about this composition is that it also becomes harder to understand what you are looking at, with the darker shadow side and the texture in the sand apparently confusing some people, and I like that. I find that images can be more visually rewarding if you have to work a little to understand them.
And to circle back to the zoom with your feet topic, I did indeed walk a fair distance to get close enough to this dune to make these photos, but I also zoomed with my zoom lens to 312mm to make what I consider to be the optimal image that this dune has to offer. It's more about using your brain and your own sense of the aesthetic than rotely following a mantra that is used for the wrong reasons far too often.
Tell A Story When Possible
Another mantra that I am kind of sick of hearing, is that every photo should tell a story. I don't believe that every photograph can tell a story, opting myself to at least try to evoke some kind of an emotion in the viewer, as I described in my post about What Makes a Photograph Fine Art back in Episode 589.
But, when we can tell a story with a photograph, it can be a powerful thing. For this next image (below) I had arranged for a couple of camel handlers to walk through the dunes in
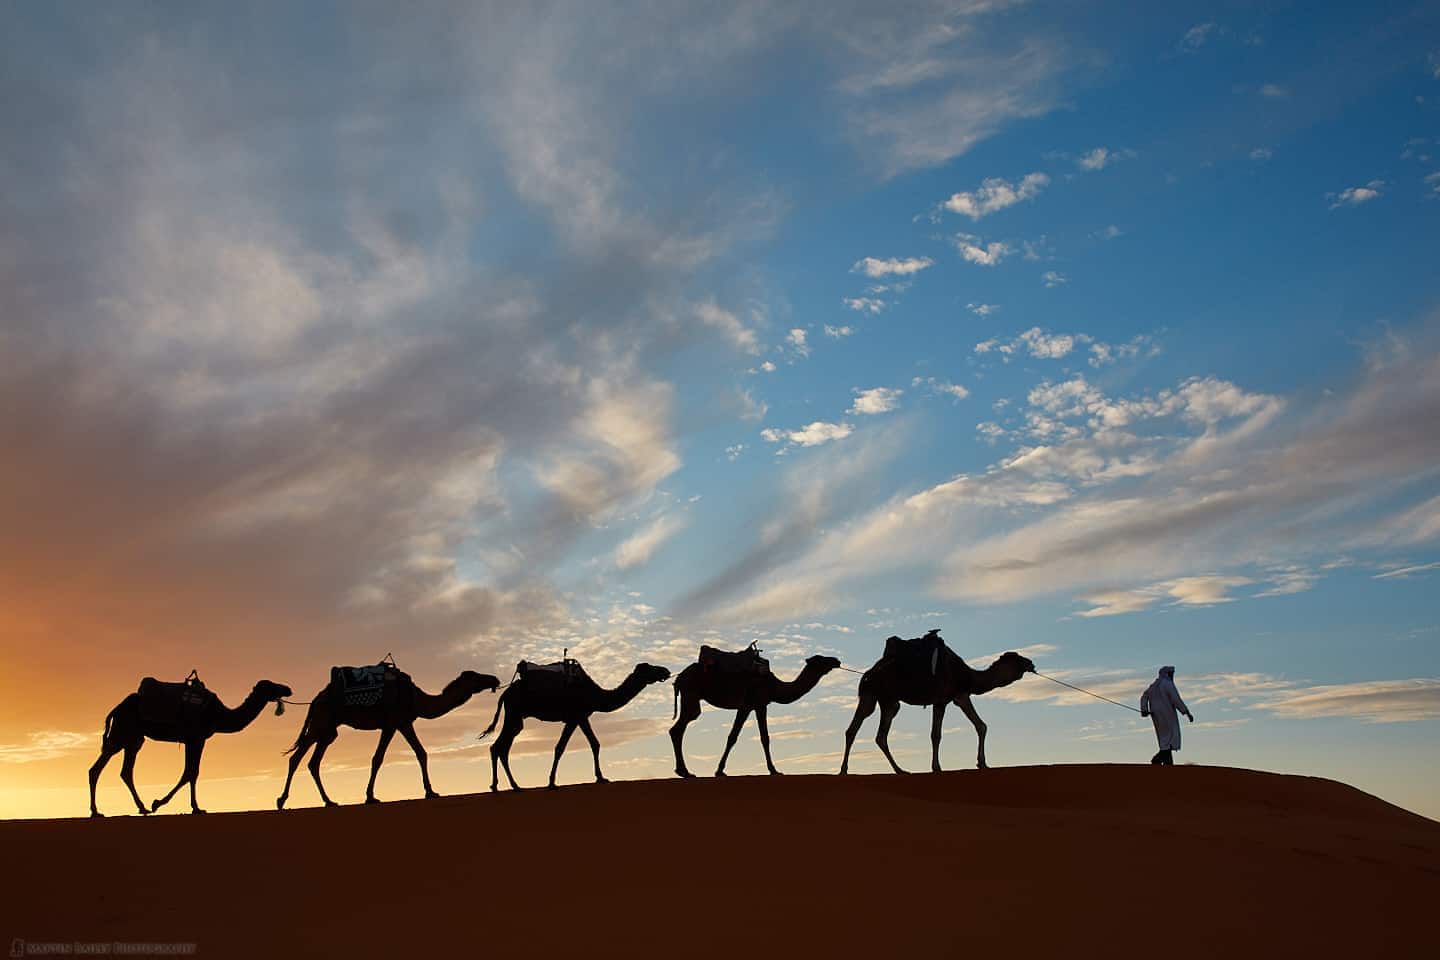
Again the human element helps here, but we can build our own story based on the visual clues in this photograph, perhaps thinking of a romantic distant land, with the camel handler hear making his way to meet his future wife with his camel dowry, or something like that. I don't even know if they have a dowry system in Morocco, but you get the picture.
Decluttering and Minimalism
I love minimalist photography. A tree on a snow-covered hill to me is one of the most satisfying types of photography I do. I mentioned giving the subject some space earlier but wanted to follow up here and say that in this kind of minimalist work, I really feel that in many ways, space is the subject. The tree and its shadow, and the grasses poking through the snow in this photograph (below) are nothing without the snow itself that is taking up most of the space in this image.

Because of the need for this space, I find that when composing this kind of image, the opposite approach to the tight crop is called for. I tend to go wider and include more space around what you might consider
The reason this space works though, is because its uncluttered. Some of my images like this don't even have the additional grasses, so there is nothing but snow, a tree, and a white or grey sky. Just as the snow absorbs sound, making it a surreal and relaxing environment to work in, it cleans everything up visually too, and this is incredibly appealing to me, and probably why my Hokkaido Landscape Tours are so popular.
The other takeaway from this though is the importance of decluttering your images, even when there is no snow to help with this. We are responsible for everything in the frame, and it's our job to select a camera position and focal length that enables us to best isolate our subjects in an environment that contains the least distractions, and this comes back to my point about being deliberate. Look and really see what is in the frame, and ensuring that the edges of your frame are clean, and cut off in a pleasing way is of paramount importance.
Cropping in Post
One subject that came up in the comments for last week's post, that I want to mention for thoroughness, is that although I prefer to get my images as close as possible in the field, there are times when I'm happy to crop my images, so let's explore when I might do this.
The main reason that I consider cropping my work, is when it feels to me as though it will simply work better in a format other than the 3:2 aspect ratio that my camera records images in. For example, in the below image, I wanted to include a lot of zebras in the main group to show the one of the left as standing outside of the main group. I also wanted to cut off the group to the right in open space, rather than splice through a zebra, so this naturally led to an image with a lot of detailless
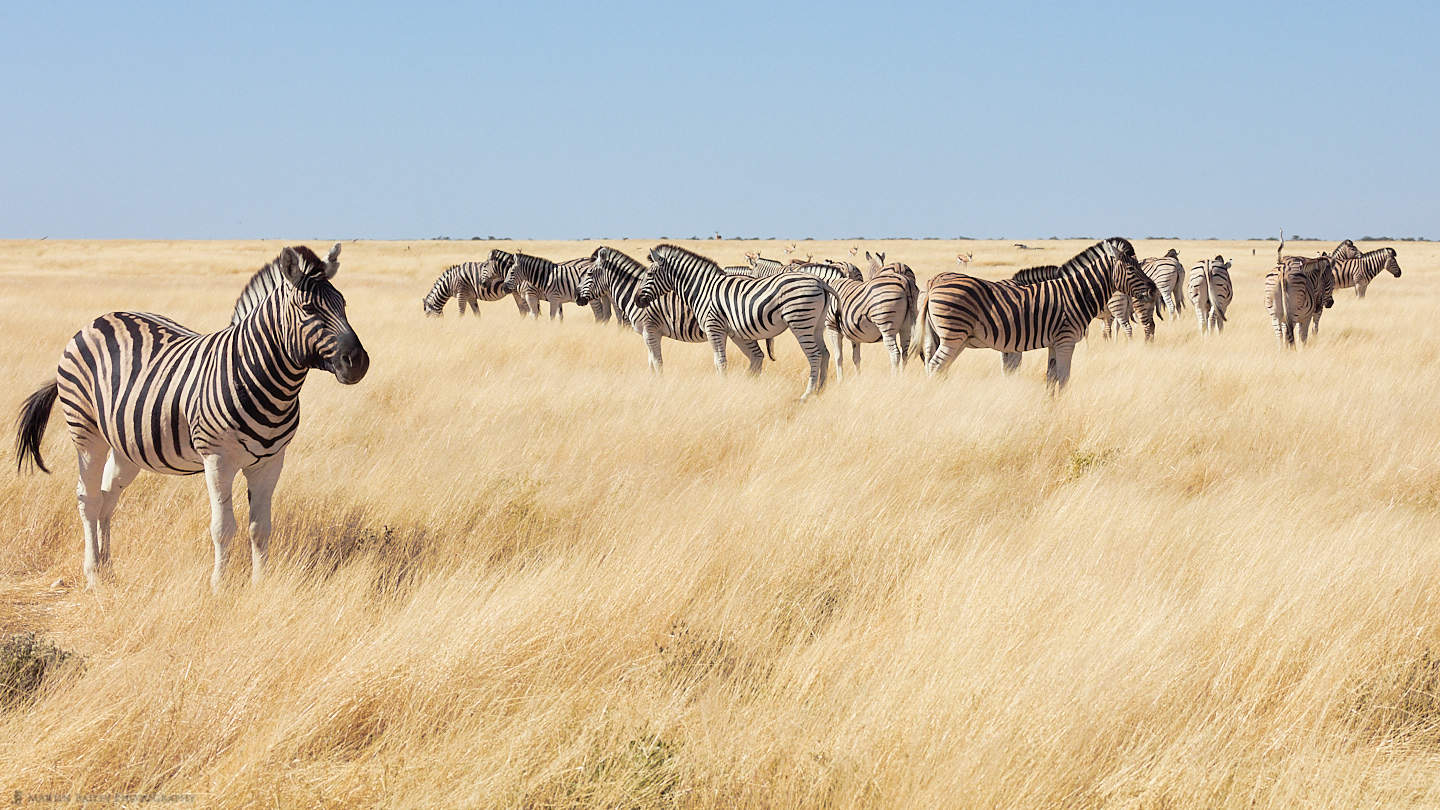
Cropping this down to a 16:9 ratio helped me to reduce the amount of sky in the shot, and I also like the 16:9 crop, because it looks great on a widescreen computer or TV. I'm finding myself viewing images on the TV more and more now that we have such large 4K screens to really do our work justice.
I will also try to decide on the crop when I'm shooting, but unlike my policy to not clone anything out that I didn't see in the field, that I mentioned last week, for cropping, I'm fine with cropping it and just seeing what it feels like after the event. My camera does have a feature where I can crop the images in the camera, and I can also tell it to not actually crop the image, just add the cropping information, so that I can edit it later, but I personally don't do this. I can imagine what the various crops will look like easily enough without emulating it in the camera.
I Rarely Crop Arbitrarily
I also wanted to mention that I rarely simply use the crop tool without locking it to a specific crop ratio, simply because I like to ensure that I can print images with at least a certain amount of conformity. Of course, the 16:9 crop that I just mentioned is more for screen viewing, but for prints, I like to use either the native 3:2 aspect ratio, and I also like 2:1, where the image is twice as wide as it is high.
I don't only create canvas gallery wraps, but using specific ratios also make it easier to get the right sized stretcher bars for my prints. For example, for the regular 3:2 aspect ratio we have 20 and
For fine art prints, it's not really a problem to have arbitrary crop sizes, because I always print with a border, and the image would just fit inside the borders, but having my images all cropped to specific aspect ratios does still enable me to select images of the same crop ratio just for conformity. When possible I like to present work that adheres to a specific set of attributes.
Again though, like many of the decisions I make, these are all just personal preference, and if you are happy to crop your images freely, rather than sticking to specific ratios, that's completely fine. I'm just relaying what I do in case it can inform your own decisions in any way.
The 4:5 Crop
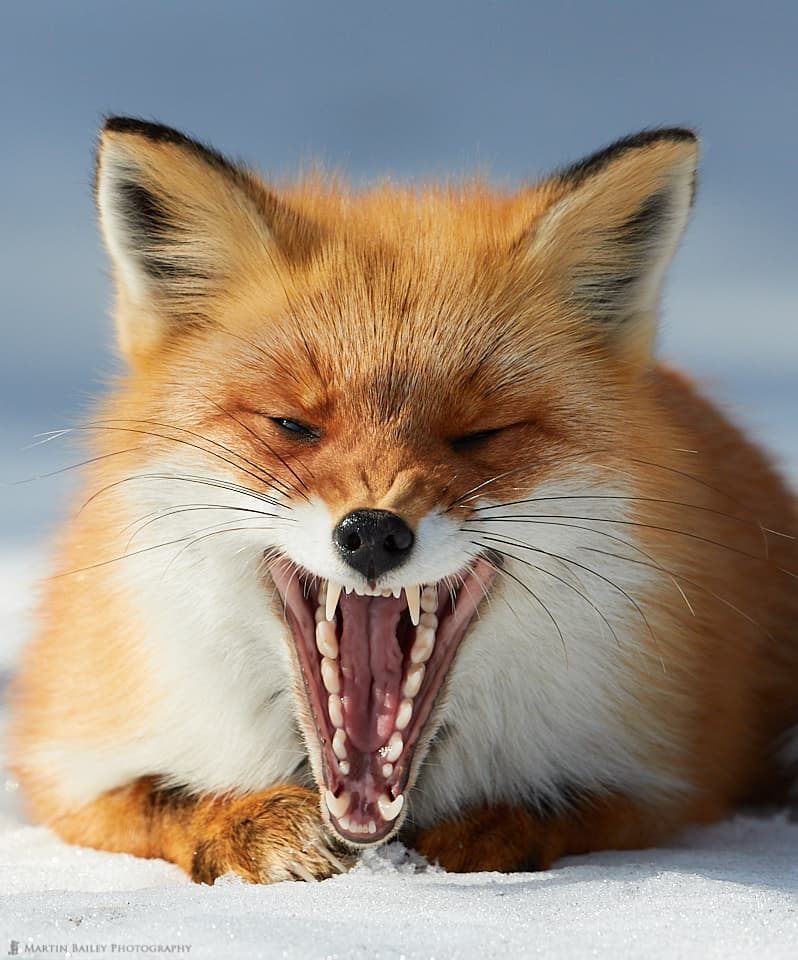
Another crop ratio that I like to use is 4:5, based purely on the aesthetic quality I associate with the popular medium format ratio.
This ratio really suits portraits and was a popular film size with portrait photographers. In my own work, the image that sprang to mind as I tried to locate an example image was this one of a Northern Red Fox yawning, as we photographed him from the bus during one of my Japan Winter Wildlife Tours a few years ago.
Again, here I was using the crop to reduce the blue above the foxes head, but I do think it enhances the image by making it feel more like a portrait, as I think we've been conditioned to associate the 4:5 with portrait work.
I also use the 1:1 square crop too occasionally, but by that
Having said that, now that I'm shooting with 50-megapixel cameras, I'm more likely that I was before to crop in a little more heavily, as I can still leave myself more pixels than I used to get with an uncropped image just a few years ago.
Conclusion
I could go on, and keep looking for examples and my thinking behind each photograph, but again, this has turned into a bit of a mega-post, so we'll wrap it up there for now. As I mentioned at the start, a lot of what I've covered today aren't solid guidelines, but I hope that what we have touched on will help you to make the optimal decisions regarding compositions as you create your own photographs.
I'm a firm believer in not necessarily learning rules but learning how to think for ourselves, and then thinking our way through situations to reach our own often new and refreshing conclusions. I'm being contradictory here in that I hope you read or listen to what I have to say on this stuff, but at the same time, don't want you to think too much about what people say, especially when there are a lot of "shoulds" in the post.
I prefer myself to avoid using the word "should" because I don't think we can really tell people what to do or how to do it. As we gain more and more experience in our wonderful pursuit of photography, we gradually fill a mental toolbox with tools which we can draw from as we work. The more tools you have in your toolbox the more likely you will be to pick the best tool based on your own interpretation of any given situation, rather than have someone hand you a tool and tell you exactly how you should use it.
Show Notes
Check out my Mental Checklist post here: https://mbp.ac/498
I explain about Diffraction and how to test your lenses for it here: https://mbp.ac/594
Here is my post on what makes a photograph fine art: https://mbp.ac/589
You can check out my tours and workshops here: https://mbp.ac/workshops
Audio
Subscribe in iTunes for Enhanced Podcasts delivered automatically to your computer.
Download this Podcast in MP3 format (Audio Only).
Download this Podcast in Enhanced Podcast M4A format. This requires Apple iTunes or Quicktime to view/listen.


0 Comments