
Today I explain the effect that changing your subject distance and focal length has on the perspective of the visual elements in your photographs. This is often confused with a change in perspective due to your lenses focal length alone, but that really isn't the case. Let me explain why.
I'm actually writing this post on request from my friends over at Craft & Vision. They asked me to do this last year, and I'm just getting to it now that the dust is settling after my winter tour season. I also shot the example photos that we'll reference on the park near my brother's house in the UK on Christmas Eve 2016. They aren't great photos, but I wanted a scene with two distinct elements in it, one close by and one far away, so that we could see the effect I'm going to explain.
Focal Length Alone Does Not Change Perspective
People sometimes get confused when talking about this subject, and end up talking about how changing the focal length changes the perspective, and it actually does not. The only time the perspective changes is if you change the distance from your camera to the subject.
If you also change your focal length to maintain the same subject size, you will see a dramatic change in the relationship between the foreground subjects and the elements in the background. If you simply put a camera on a tripod, and without changing the distance to your subject, then shoot a series of images as you zoom in or out, you can crop away the excess image that is captured in the images at wider focal lengths, and you'll see that the relationship between the main subject and the background will be exactly the same. The perspective itself does not change by changing the focal length alone.
The reason the perspective will change in my example photos, is because I moved closer to my main subject and zoomed out, changing my focal length, to make the the main subject appear the same size in each photograph. When you do this, the relationship between the subject and the background elements changes dramatically, as we'll see.
The Effect of Subject Distance on Perspective
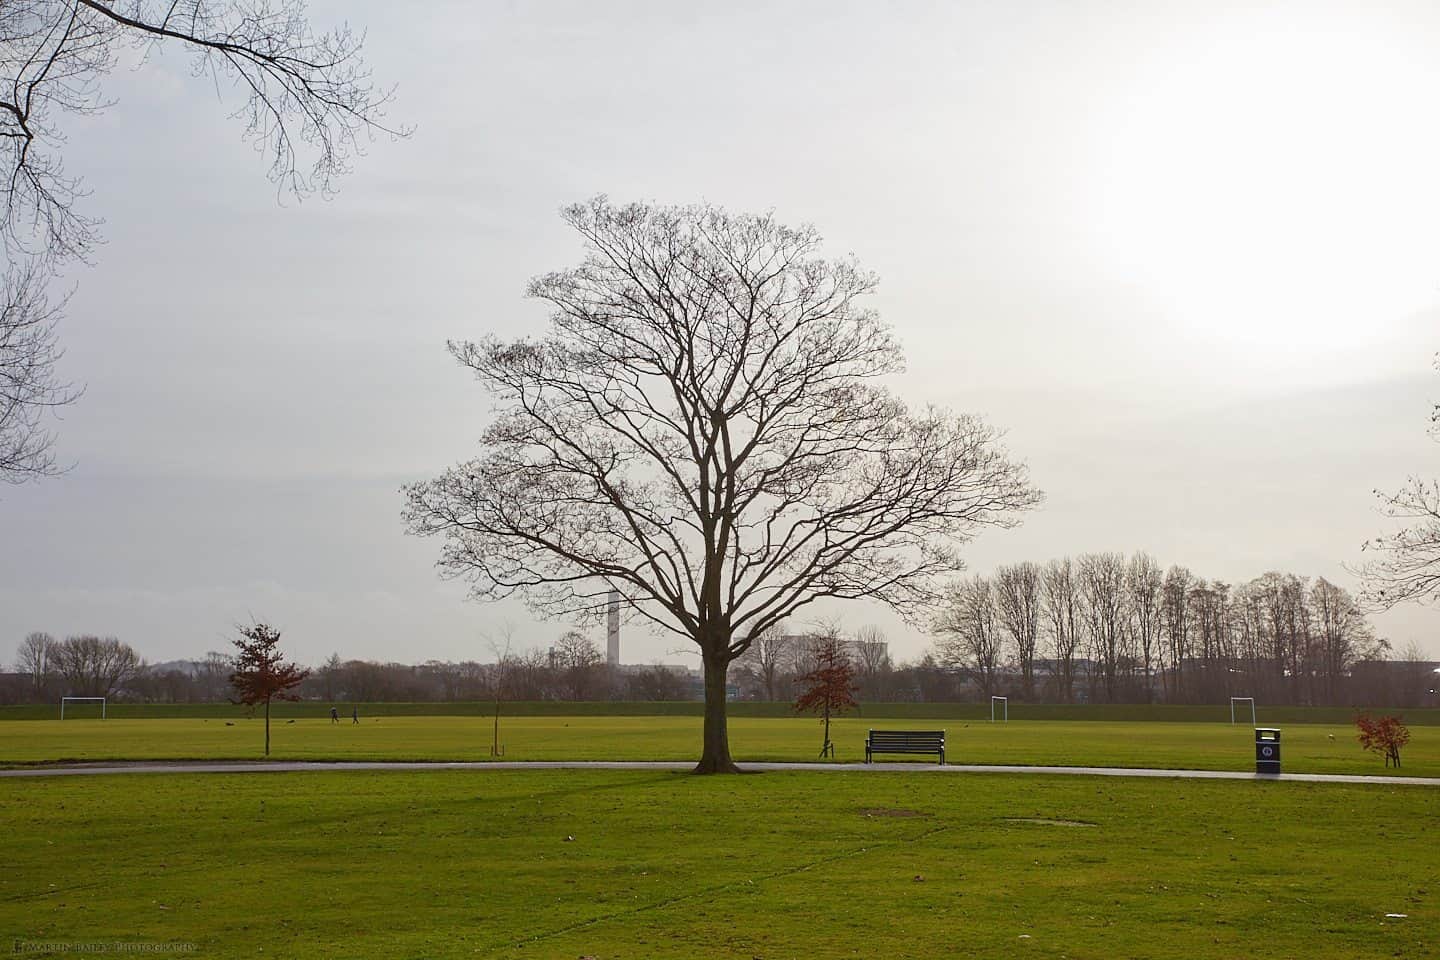
Let's take a look at my example shots to explain. For these examples, I needed a nearby and a distant subject, so that I could easily explain this theory. I grew up playing in this park on holidays and weekends, and knew that I'd be able to find a tree to place in front of the power station in the distance, so let's work with this.
My first image was shot at 105mm, from a distance of approximately 100 meters (330 ft). After making this first exposure, I made a mental note of where the tree was in the frame, so that I can recreate that as I moved closer.

I changed my 24-105mm lens from 105mm to 70mm, looking at the focal length markings on the barrel of the lens. Then I walked closer to the tree, checking the size of the tree in the frame, until I got it approximately the same size as in my first photograph. This second image was shot at 70mm from a distance of approximately 70 meters (230 ft). Notice how the tree is the same size, but the power station behind it has shrunk a little.

I repeated the process, changing the focal length of my lens from 70mm to 50mm, and moved closer still to the tree, until it was the same size in the frame again and shot my third image approximately 55 meters (180 ft). Once again, see how much smaller the power station has become.
For my final image I zoomed all the way out to 24mm and moved close enough for the tree to look the same size in the frame, and shot this from approximately 25 meters (82 ft).

To compare these four images, you can click on them to open the images in a viewer, and then click the right or left side of the images to move back and forth.
When you compare all four of these images, you'll see that the tree is pretty much the same size in each, but if you look at the apparent size of the power station in the background, you'll see that it changes dramatically as we get closer to the tree and zoom out to maintain the size of the tree. Let move on to explain why this happens.
Field of View
As we change the focal length of our lenses, we change their field of view. This is how much of the world we are able to capture in our image, and it's directly linked to the focal length. On a full frame or 35mm sensor camera, at 105mm we can photograph horizontally 20° of the world around us. At 70mm we get 30°, at 50mm we get 40° and at 24mm, 75° of the scene before us enters our lens.
You can usually find the field of view for your lenses on the manufacturer's web site, but I checked the field of view for each of my example photographs with a program called Raw Digger, that allows me to dig into my EXIF data. Canon actually write the field of view for the focal length used in the EXIF data of each image, and that's really handy.
I also went into Canon's Map Utility that comes with my GP-E2 device that I use to geotag my images, and using the scale on the map and a rule against my computer display, I calculated the shooting distances that I mentioned earlier. With these two pieces of information, we can easily chart out the relationship between the four example images, including our shooting distance and the angle of view, as you can see in this diagram (below).
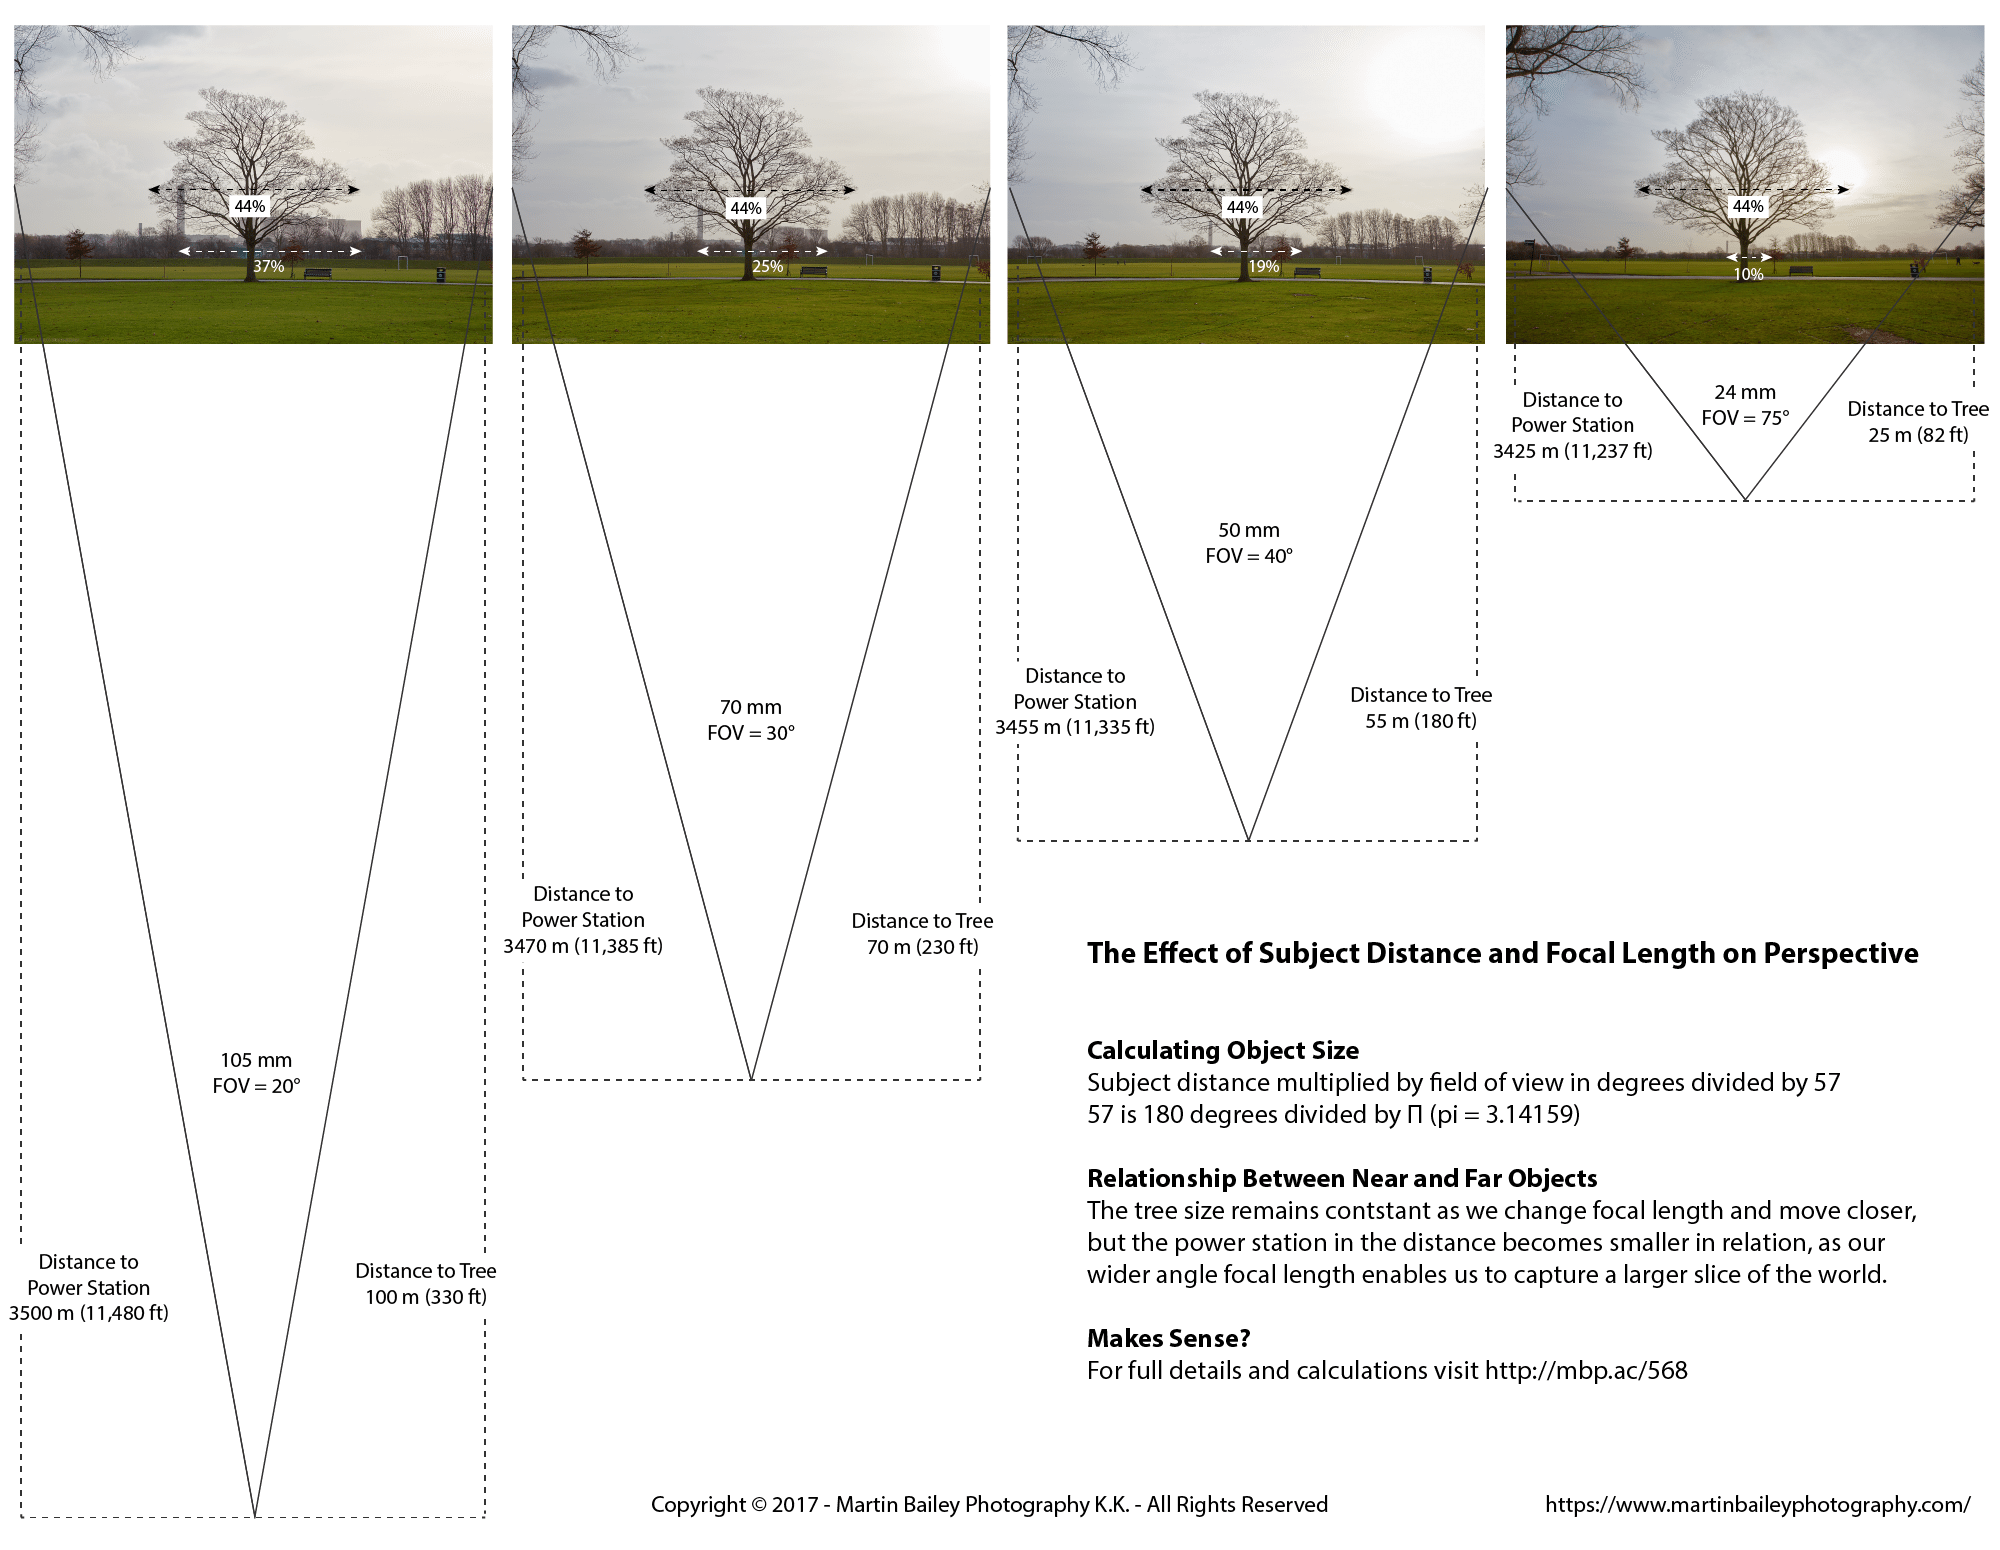
After you click to view it larger, to stop the image from automatically advancing, just place your mouse cursor over the image.
Calculate Subject Size Based on Distance and Degree
To really explain this we're going to have to get a bit geeky. Believe me, I'm no mathematician. It was my worst subject at school and I hate numbers, except when it comes to something that I'm interested in, like business, computers and photography, then I do like to dig down a little. First of all, for my own sake, I want to make sure that I'm doing this right, and to do that, I first figured out how to calculate the size of the tree in the photograph.
We know that Π (pi) = 3.14159, so if we divide 180 degrees, the widest field of view we're ever likely to be using in photography, by 3.14159, we get 57. That means we can calculate the size of an object by multiplying the distance by the field of view in degrees and dividing that by 57.
Armed with this formula, we can calculate that at 105mm, when I first photographed the tree from a distance of approximately 100m, the field of view captured in the photograph was about 35 meters at the distance of the tree.
100 × 20 ÷ 57 = 35 meters
In Adobe Illustrator I resized the example images to 1,000 pixels wide, and used the measure tool to find that tree was 440 pixels wide, so it's taking up 44% of the field of view. So we can multiply 35 by 0.44 to learn that the tree is approximately 15.4 meters across at its widest point. That sounds about right!
Width of Subject = Subject Distance × Field of View ÷ 57 × Subject Width (i.e. 44% = 0.44)
If we take the widest focal length of 24mm and do the calculation, we get roughly the same answer. At 24mm the field of view is 75° and I photographed the tree from 25 meters. So, 25 x 75 / 57 x 0.44 equals 14.4 meters. There's a small variance, but I'm getting my actual shooting distance from my GPS information, and measuring it with a very small rule on a computer screen. There may also be something going on as we focus the lens, so I'm not too concerned about this variance. It's close enough to prove to me at least, that my math isn't too cranky.
Near and Far Objects
We can also mathematically understand why the power station gets smaller in relation to the tree, starting by doing the same calculations. Measuring out the distance from where I was when I took these photos, we are about 3,500 meters from the power station and it takes up approximately 37% of the field of view in the 105mm focal length photograph, so, 3500 x 20 / 57 = 1228 x 0.37, the power station is about 454 meters wide from this angle.
In the 24mm photograph, the power station takes up about 10% of the field of view, and we've moved 75m closer to the subject so 3425 x 75 / 57 x 0.1, which comes to 450 meters. Again, there is a very slight variance, but based on this we can see that we are able to approximately calculate the size of the objects in the frame based on the distance to the objects and the field of view of our lens at any given focal length.
Field of View in the Distance
To understand why distant objects are smaller in wider focal length images, let's do one last pair of calculations, and find the width of our slice of world captured at the distance of the power station, kind of as a checksum. We actually got these numbers as part of our previous calculation, but to recap, we know that the power station is approximately 3500 meters away in our 105mm photo which has a field of view of 20°. At 100 meters, where the tree is, this captures 35 meter of the scene, but if we extend this out to where the power station is, we are capturing 1,228 meters of the world.
At 25 meters with a focal length of 24mm we are capturing 33 meters of the world, but at 3,425 meters, where the power station is, that captures a 4,500 meter wide scene. So an object which is approximately 450mm wide is going to take up 10% of a 24mm image, as opposed to 37% of a 105mm photograph. We know that we maintained the tree size at 44%, so this is our proof for why things get smaller as they get further away.
Not being very good at maths, after spending most of the day working on these formula, you can probably imagine how happy I was when I entered my calculations into an Excel spreadsheet, and calculated the size of the tree and power station based on field of view and distance alone, and then calculated that the percentage of the width that the power station would take in my images, was exactly the same as that which I'd calculated by measuring the pixels in Adobe Illustrator.
One Sentence Take-Away
In practical use, we simply need to remember the following sentence.
As we widen our focal length and move closer to our main subject the background elements in our scene will appear smaller.
That's it! I know that this is somewhat obvious, and many of you will look at this alone, and think, I knew that! And that's great, but I hope now that you'll have a better understanding of why this happens. I know I understand it better than I did this morning, when I sat down to think about the math.
A Practical Examples
Let's look at a few more photos from the field, not shot to illustrate this point per se, but they will help to get a better understanding of how different our images can be just by thinking about the distance to subject and focal length.
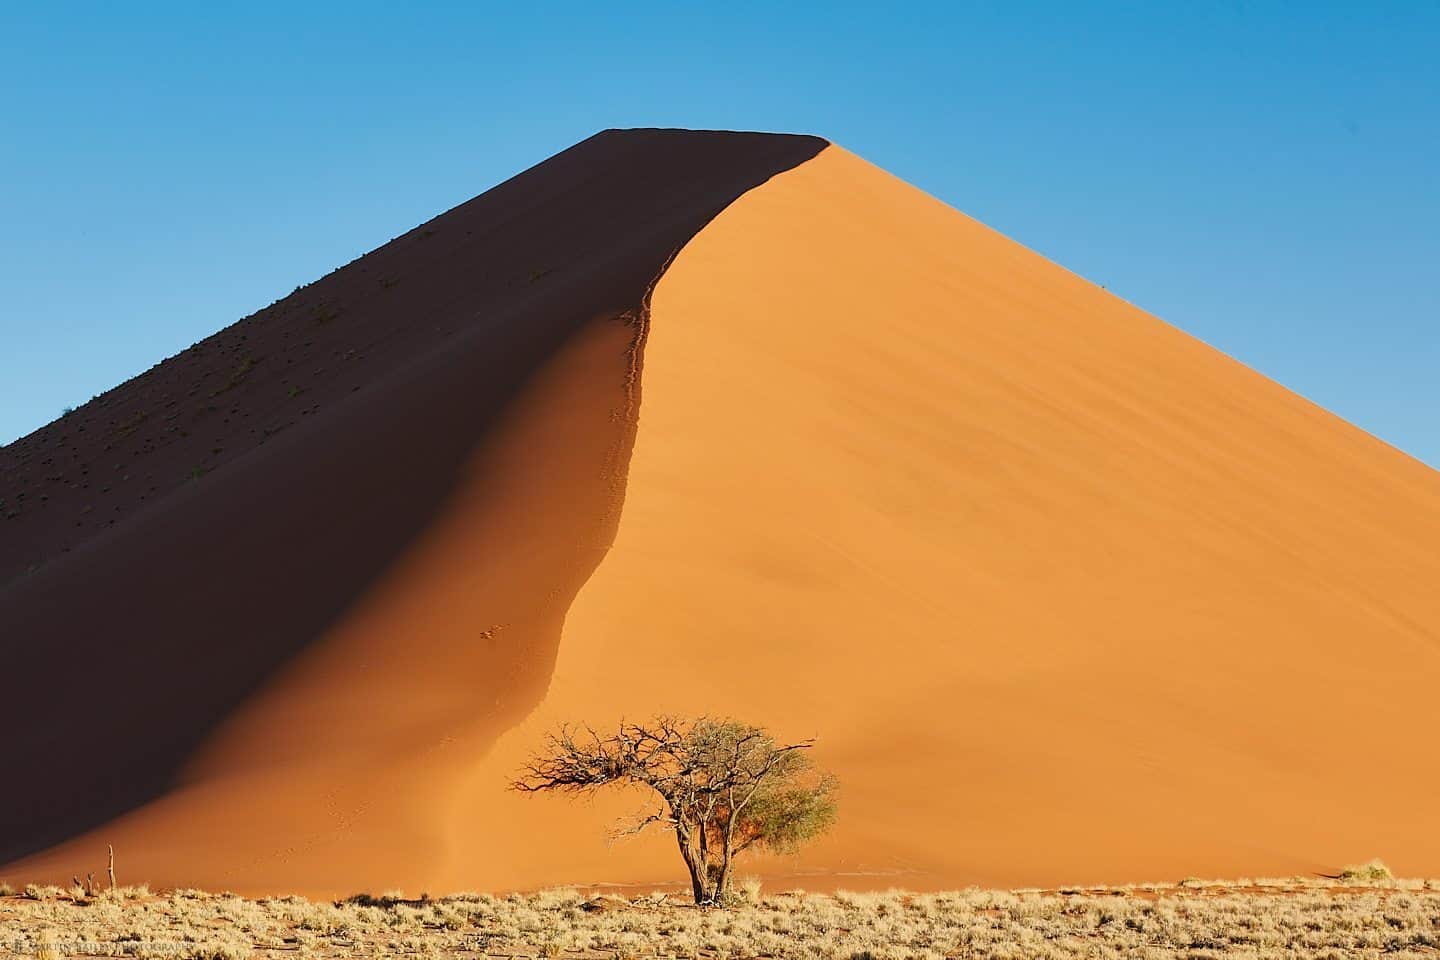
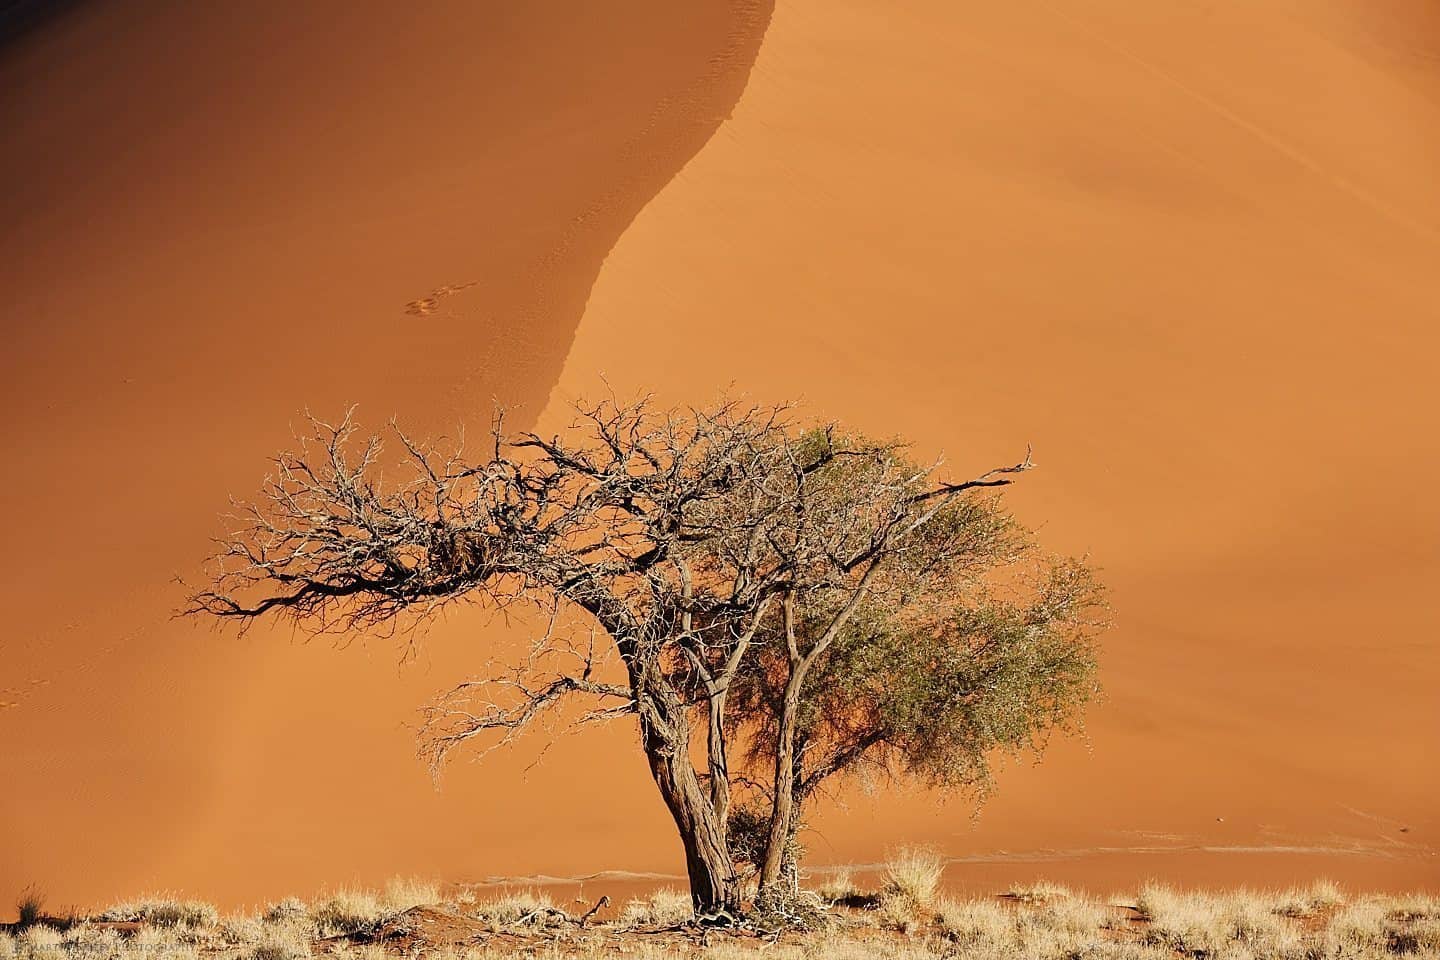
Here is a photo of a tree in front of a sand dune in Namibia (below), which I shot from 85 meters (280 ft) from the tree. Again, I know this because I geotag my images and checked on Google maps. My focal length for this was 80mm, but I cropped in a little along the top, so it's probably the equivalent of 90mm.
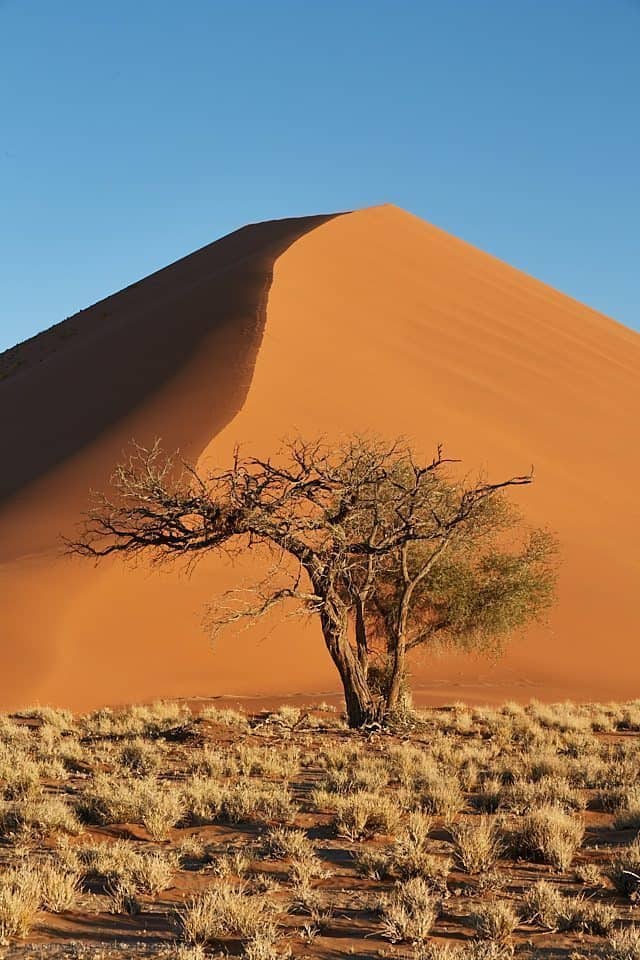
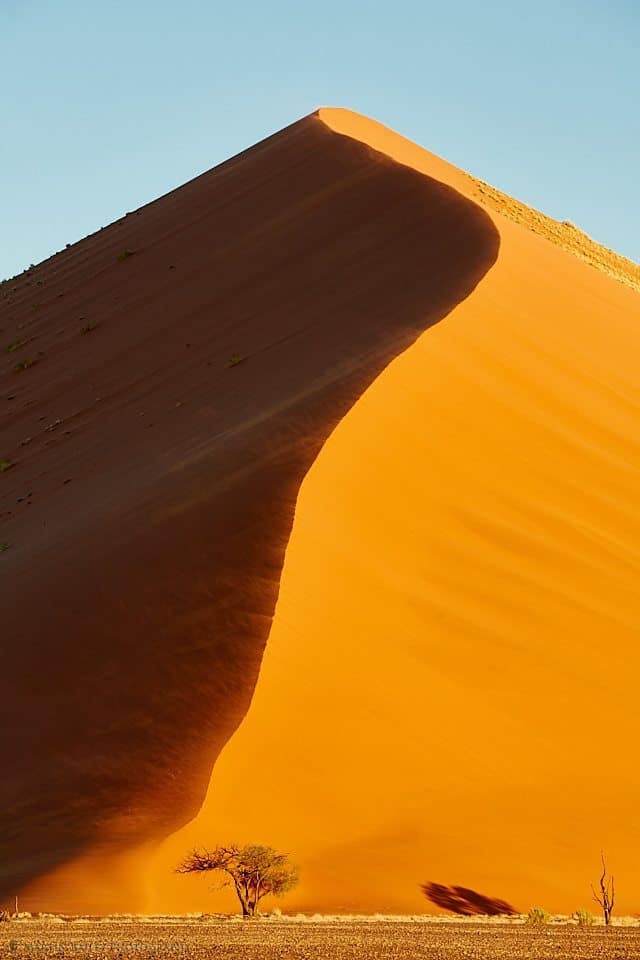
The next image (right) was part of a series of images that I shot vertically to stitch together as a panorama, but it didn't work, because the dune looked tiny in relation to the tree. In all honesty I don't really know why I proceed to shoot the series, but it helps to illustrate this point, so all is good.
I actually shot this from around 30 meters (100 ft) away from the tree. Because I've gone to portrait/vertical orientation with the camera for this photo, we automatically get more foreground and sky, so it's not a straight comparison, but you will surely be able to appreciate how going a little bit wider and moving closer to the subject has shrunk the apparent size of the background.
Knowing that the final image is what I wanted, I actually exposed the next photograph (below) before the others, from around 75 meters (250 ft) away from the tree, with a focal length of 165mm.
I think you'll appreciate that the background looks very different in the long focal length shot, from a distance, compared to the shorter focal length shot closer to the tree, even though the dune starts pretty close behind the tree. But, because the sand dune is so large, it quickly recedes into the distance, and so starts to shrink in relationship with this tree very quickly.
Finally, here's one last image (right) that I made as we walked away from this sand dune. I shot this at a distance of 1.3km (4,400 ft) with a focal length of 200mm.
Obviously now the tree is much smaller in the frame from this distance, but I want you to think about the difference between how the tree looks in this shot compared to the first two photographs of this tree and dune above. In all three images we can see the tree with the sand dune from top to bottom.
The apparent size of the tree compared to the sand dune is portrayed totally differently simply by changing my focal length and distance to the tree from the camera.
Don't Zoom With Your Feet Just Because
One other thing that I'd like to mention, is that you'll often hear people talking about zooming with your feet. Just as I did to get closer to this sand dune. Zoom with your feet is one of those mantras that people latch on to and use for a number of reasons.
I'm not going to go into details on my theories here, but I imagine that part of the reason for the popularity of this phrase is because people need to protect their egos, by backing up a decision to buy, or sometimes to not buy, a certain piece of gear. Worse still, sometimes people are just regurgitating a phrase that someone who should know better said in a confident tone.
Personally, when I'm photographing wild animals or photographing a valley from a cliff edge, I prefer not to walk forwards. In a situation when you can move forwards, you need to be making your decision to do so based on how the focal length, or more specifically the field of view, and the distance to your subject and scene will effect the look of your photograph. You definitely don't want to be zooming with your feet just because someone etched the phrase zoom with your feet into your brain.
I hope that what we've covered today will help you to make an educated decision for yourself, as to whether it's better to move closer to your subject, or shoot it from further away, while zooming with your lens, not your feet.
Show Notes
You can find Raw Digger here: https://www.rawdigger.com
 Subscribe in iTunes for Enhanced Podcasts delivered automatically to your computer.
Download this Podcast in MP3 format (Audio Only).
Download this Podcast in Enhanced Podcast M4A format. This requires Apple iTunes or Quicktime to view/listen.


I always listen to Martin’s podcasts, he explains things in a way that is easy to understand. On top of that he has plenty of pictures to illustrate the topic.
Thanks Oscar! I’m pleased you found this easy to understand. It took me quite some time to figure this out.
And, which one of the (Tree and plant) photos looks like the real life? At 50mm, 24 or?
Hi Héctor,
Generally, people consider 50mm to be the most natural focal length, closes to our eyesight, but it depends on the sensor size as well. The best thing to do is to attach a mid-range zoom, like a 24-70, and start at 50mm, then look through the viewfinder, then move the camera away so that you can see the scene directly. Adjust the focal length until the magnification is the same, and you will be able to see the exact focal length on the barrel of the lens, or take a photo and check the EXIF data.
I hope that helps!
Regards,
Martin.
Hey nice explanation… but one question… can u also explain why subject magnification changes while shooting different subjects at different distance with same normal focal length as observed in your other post…68mm focal length…closer ones appear more magnified…
And to shoot closer ones at same normal magnification we need lower focal lengths…(varies with distance from 35 to 68mm)
So our normal view focal length changes with subject distance…
Hi Viraj,
Sorry, but you’re going to have to help me out here. Which “other post” are you referring to?
Regards,
Martin.
Interesting content Martin, thanks for that