
This week we conclude our 2018 Complete Namibia Tour travelogue series, with our Wildlife Extravaganza in the Etosha National Park, literally completing the photography of the main photography genres that Namibia offers visitors.
When I put this epic trip together and called it the Complete Namibia Tour & Workshop, I was very conscious that I wanted to make Etosha a part of it, and I am so pleased that I made this decision. Without Etosha on the Itinerary, you generally leave Namibia with a feeling that you didn't do her wildlife justice. The thing is, there is wildlife across most of Namibia, and we had some beautiful opportunities before getting to Etosha, but you never feel that you've really done Wildlife until you spend at least a few days in this beautiful national park.
As I mentioned last week, we actually start our Etosha experience in a lodge with a private reserve adjacent to the park. The animals actually come and go as they please to an extent because neither the owners of the reserve nor the Etosha wardens can keep the animals from breaking down segments of the fences. The great thing about the private reserve though is that the guides know the place and the animals like the back of their hands. I don't want to play down the knowledge that our two main guides and drivers for the trip have. They know the entire country like the back of their hands, but when in a small reserve, its often a good idea to take the game drives that they offer, as they can be very productive.
A Lion's Fierce Yawn!
At the end of last week's travelogue, I shared a photo of a lioness that I'd shot accidentally in 3D, and that was literally one of the first images that I shot as we started our first game drive with the lodge after lunch on our first day at Etosha. A few minutes later we came across a male lion lying in some beautiful long golden grass, as you can see in the first photo that I wanted to share for today (bel0w).
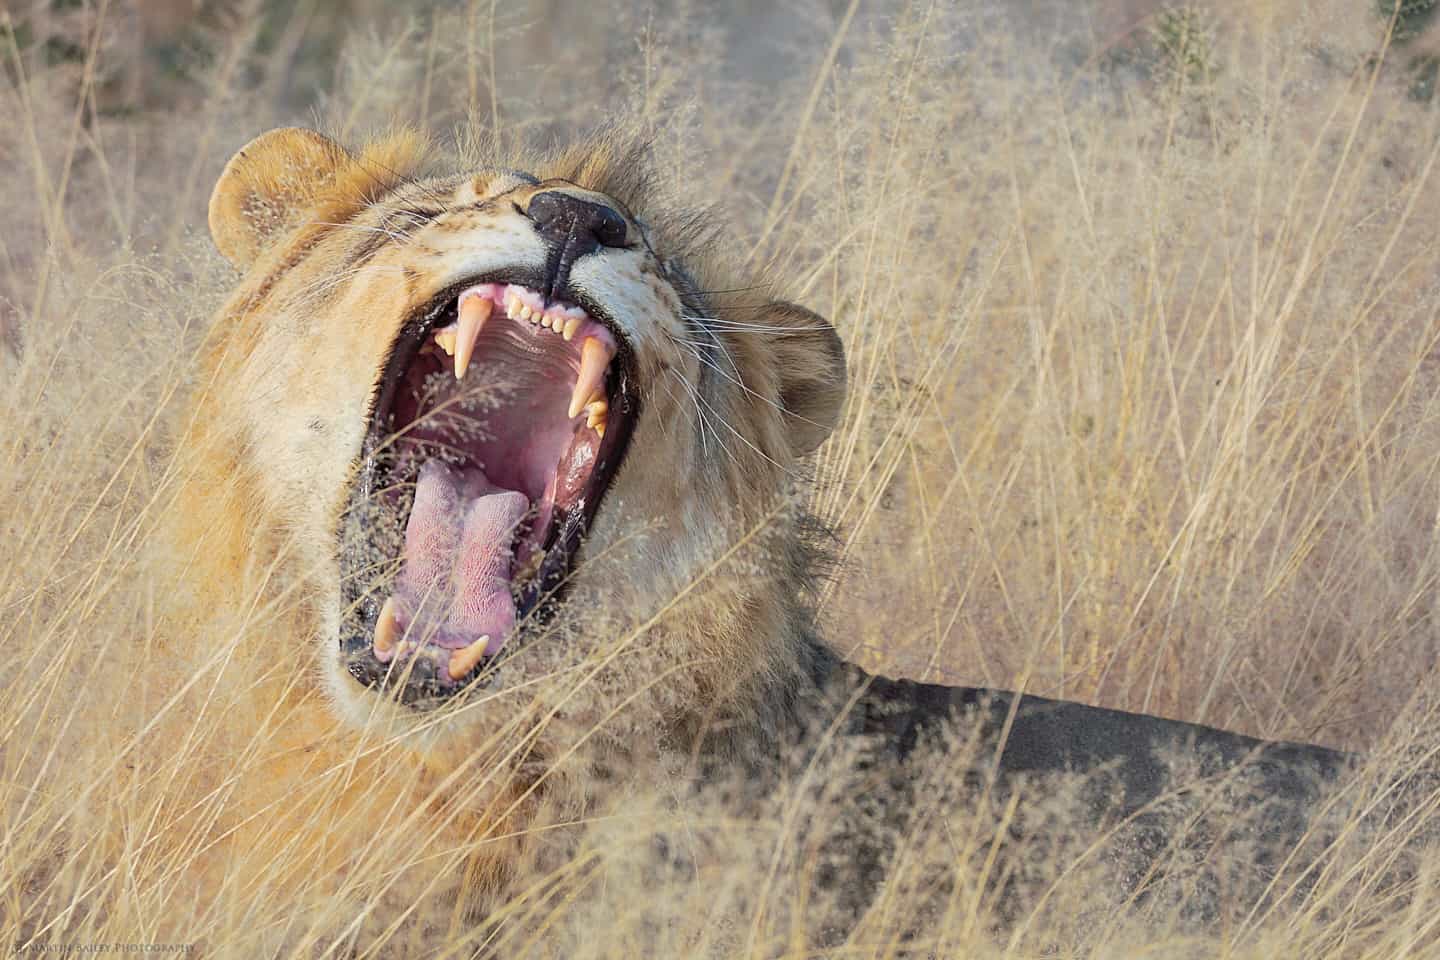
In my first few shots of this majestic young lion, he was just sitting in the grass. That's great because it gives me a moment to check my exposure, but then as they often do, he rolled his head back and gave us a great big yawn! If you know lions you can probably tell it's a yawn, but it also might look like an almighty roar. I love the detail in his mouth with those huge teeth and the rasps on his tongue. To focus I had been careful to not catch the blades of grass in front of the lion, as that would leave the main subject soft.
Back Button Focus
At some points, I think I manually tweaked the focus to ensure that he was sharp. Because I use the back button to focus after I've manually tweaked the focus, I can simply not press the back AF button again, and because I have also disabled auto-focus on the shutter button, the camera doesn't try to focus again as I release the shutter. This is one of the most useful aspects of using back button focus. You can switch between manual and autofocus just by pressing or not pressing the AF button.
In fact, if you are in a continuous focus mode, AI Focus on a Canon camera, you also have access to continuous focus, by keeping your finger on the AF button, or One Shot focus, by pressing the AF button to focus then releasing it. It's like having three focusing modes without changing anything on the camera. My other settings for this shot were ISO 1600, to get a shutter speed of 1/800 of a second at f/8, and I was using my Canon 100-400mm Mark II lens at 400 mm.
Rich Dyson
We'll briefly hear from the co-host that I invited to help me with this year's tour in the recorded comments that I'll play you later, but I wanted to quickly give a shout out to Rich Dyson before we move on. Rich lives in Edinburgh, Scottland, and I'd traveled with him before on my own tours. Rich impressed with his professionalism and knowledge of photography, so I asked him to help out on this trip. I want to mention this now for a couple of reasons, but I was reminded of Rich at this point because when I showed this photo to Rich, he said: "You know when you show people this someone will pull you up for the grasses over the lion's face."
My reply to this was not really repeatable here, but the sentiment behind it was that if you can only see the grasses in front of the lions face in a shot like this, then you really need to develop a better appreciation for the artistic side of photography over the technical. This wasn't directed at Rich of course, but anyone that might say that. I'm thinking people at a camera club, who have to find something negative to say because they aren't able to talk in a positive way, and I think there are way too many people like that out there.
Anyway, before that develops into a full-on rant, I wanted to add that Rich was really good at helping people in our group that was struggling with some of the more basic aspects of photography. I often tend to start at a higher level and need to see some glazed over eyes before I realize that I'm talking over someone's head, but Rich does short courses starting from beginner level in Edinburgh and is really good at it. Of course, he can help advanced photographers too, so if you live in or can get to his neck of the woods, and want a bit of help with your photography, get in touch with Rich Dyson at richdysonphotography.com.
The Scowl
Literally, just moments after I shot the previous image, as the lion closed his mouth, I got this next image (below) which looks to me like a scowl now, again, not really like a big frightening yawn! There is still grass in front of his face. More now than before in fact, and yes, I notice it, but I think these two photographs go beyond that and guess what, this is the sort of environment that lions like to rest in.

I don't usually post two images of the same subject, but I've been going back and forth between these two photos for the last few weeks, and I simply can't decide which one I prefer, so I decided to share both of them. They are both cropped very slightly, maybe 7% of the width of the image, so at 50 megapixels, the detail is absolutely incredible. I'm looking forward to getting fully caught up on business so that I can have an afternoon printing some of these photos out and just pouring over them. Having said that, I also now export my images at full size to the Apple Photos application, and because I have the 4K Apple TV, I can view them on my 55-inch 4K television as well, and they are really powerful images to see at that size and with this amount of detail. My settings were, of course, the same as the previous photo. It was not even a full second later. The EXIF data shows them as being shot at exactly the same time.
A Whittling Struggle
At this point, talking out loud as I prepare to record this episode, I'm struggling to whittle down my final selection of images to talk about. I like to keep each episode to ten photos, and I currently still have 14 in my selection, and that was a struggle. I could have easily done more episodes on this wildlife section of the trip alone, but I think we should move on next week, so there are some difficult decisions to make. What I'm going to say for now is that I will also be updating my Namibia Portfolio, and will no doubt include some of the images that I have to cut from my selection here, so if you are interested in seeing the larger body of work, please check out my portfolio at https://mbp.ac/namibiaportfolio or by following the Portfolios link in the menu above.
Edge Case
So, still pained by the photo I've just deleted from my selection, let's take a look at some shots from a visit to a waterhole in Etosha on our second day there. I'm always amazed at the variety of different species of animals that visit some of the waterholes in Etosha, but trying to show them all in a single photo often doesn't work for me. Although I like to show animals in their environment, especially when the environment is a beautiful landscape, when that isn't the case, or when there is too much noise, I prefer to get in close and show the subjects in more detail, with as few distractions as possible.
When there are hundreds of zebra at a waterhole though, it can be somewhat difficult to decide exactly where to place the edges of your frame, as was the case with this next image (below). Although I've cropped this image on the top and bottom making it a 16:9 aspect ratio, the side edges are exactly as I framed this in the camera, to kind of make a point.
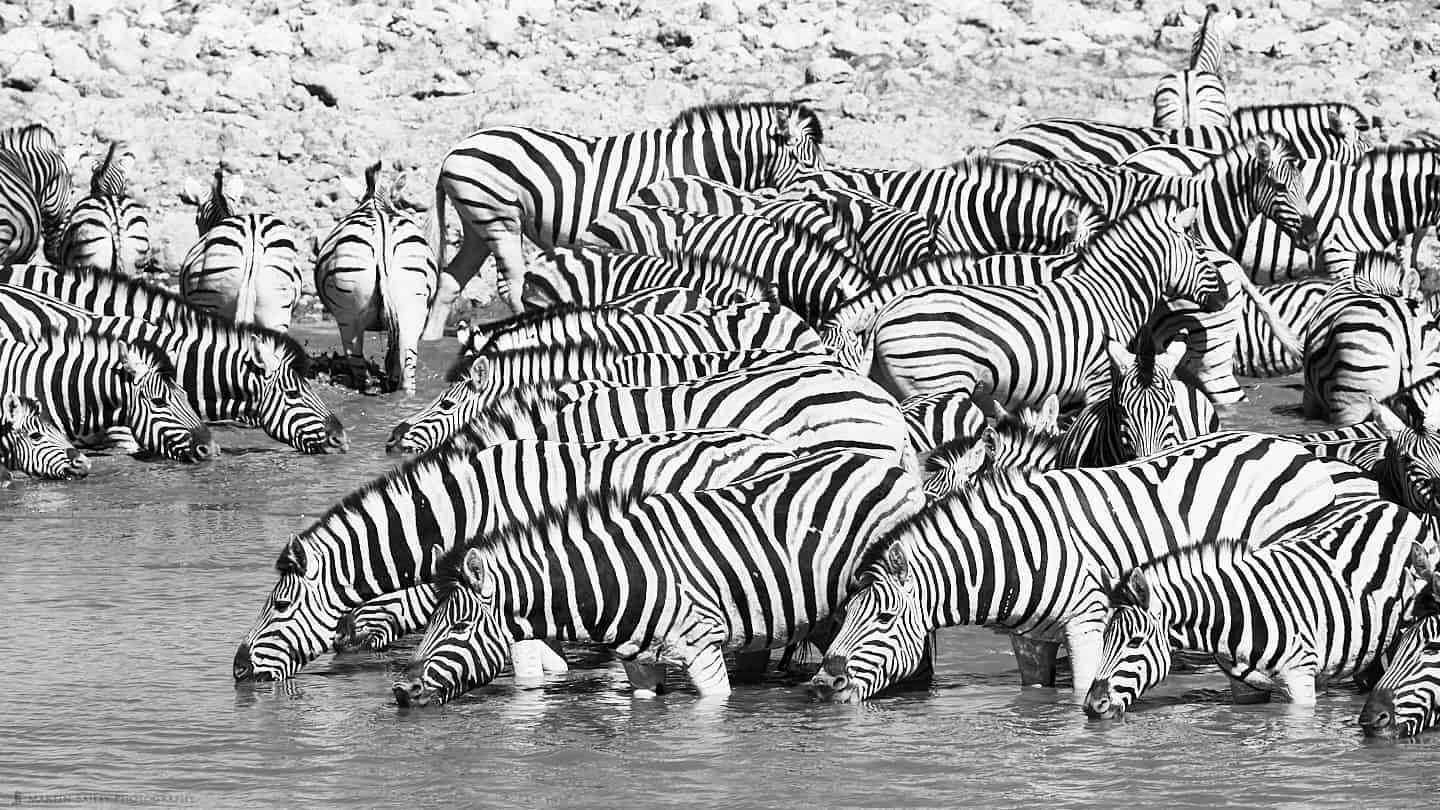
I'm relatively happy with the framing of this image, especially on the left side, but I will probably clone out the bit of a nose poking into the frame just below the young zebra's head in the middle of the left edge. The right edge is more complicated, and although I considered cropping in to just after the nose of the head in the bottom right corner, because I slightly crop his eye, and there is another zebra just above him with only half a head, I actually found that the chaotic right edge looks better than the cleaner one that I created, with the temporary crop that I tried. I guess that comes from the feeling that there is a continuation of the herd. My settings for this were ISO 800 for a 1/800 of a second shutter speed at f/14, and a focal length of 400 mm.
Elephant Skinship
At the same waterhole, 30 minutes later, I shot this next image (below) of two elephants bonding by rubbing their trunks together. Again, I went in tight on the composition, to reduce the image to what I feel are its necessary elements. This means that I have some animals across the top of the frame that are cropped off, but I opened up my aperture to f/9 to stop them from being too in focus. They still bother me a little bit, but the main subjects hold my attention enough for the blurred animals at the top of the frame not to be too much of an issue. I kind of like the zebra in the center of the frame, although it does fight for attention a little.
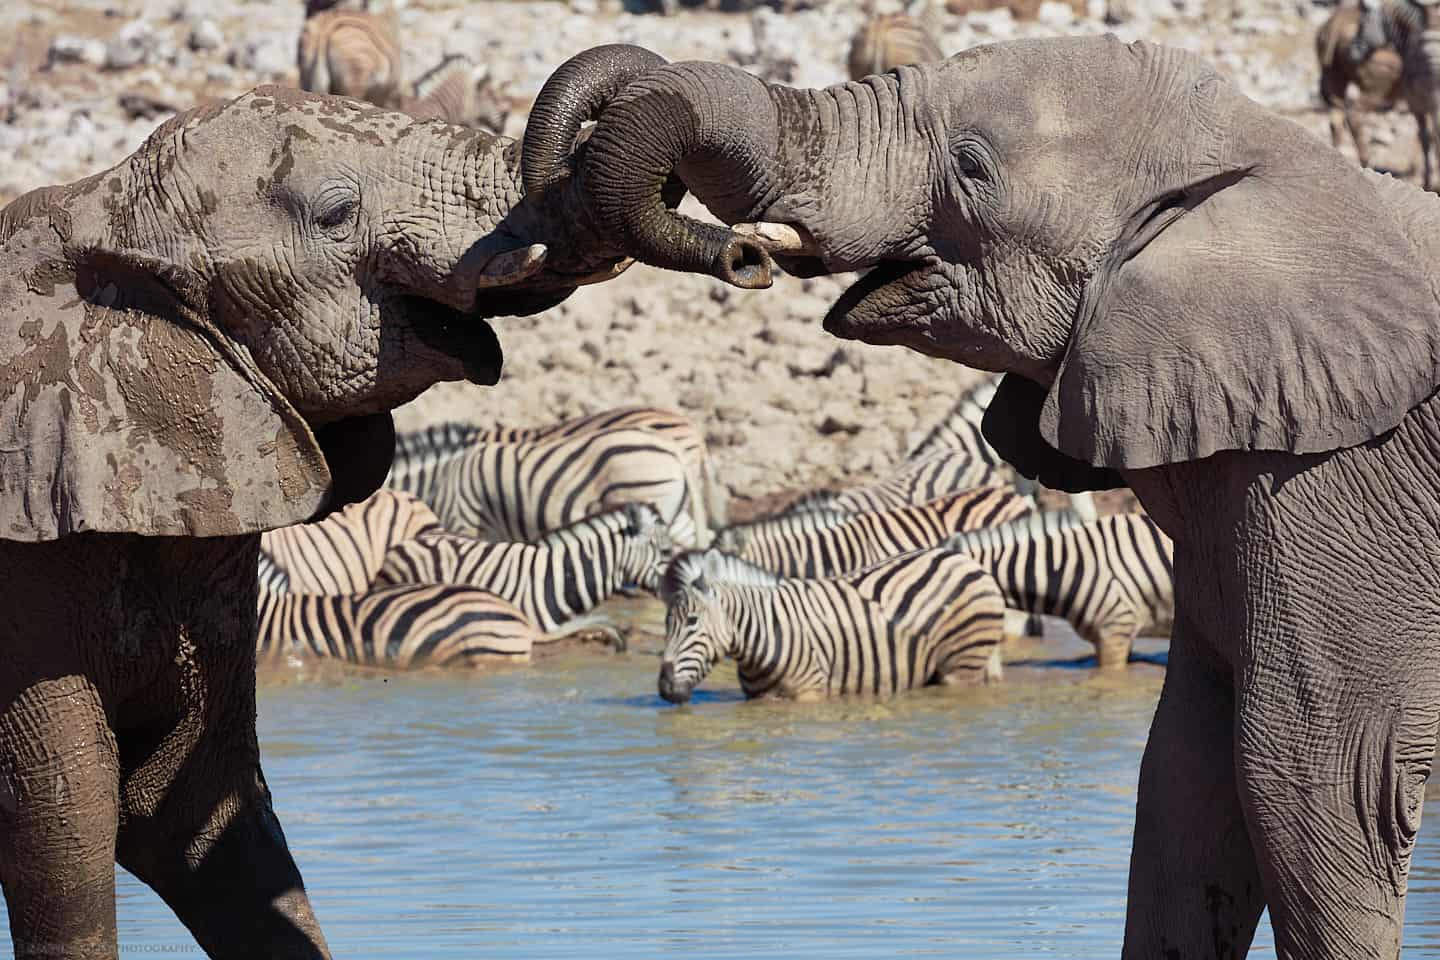
I have gone back and forth on this and many of my images as to whether or not I convert them to black and white. I think I prefer the zebra shot earlier in black and white, but this morning I went back to color with this image, as I like the earthy warm tones. With landscape photography, I generally know when I shoot the image if I will convert it to black and white or not, but for me, it's not so clear-cut when it comes to wildlife. I generally have to convert it and then live with the black and white image for a while before I can fully decide. My settings for this image were ISO 800 for a 1/2000 of a second at f/9 and a focal length of 400 mm. I went to 1/2000 of a second because the elephants were jumping around a fair bit and I didn't want them to be blurred.
White Rhino
That afternoon, we went back out for a game drive with the guides from our lodge and were treated with some more amazing opportunities. They asked us what we'd like to see, so we requested White Rhinoceros, as we knew there were some in their reserve. Sure enough, after an hour or so driving around, we were presented with a group of seven White Rhinos! I got some shots of the entire group, but here is one of my favorites shots, showing one of the Rhino in great light, allowing us to see the amazing texture in its thick skin, and there is a second Rhino looking in from behind the first (below).
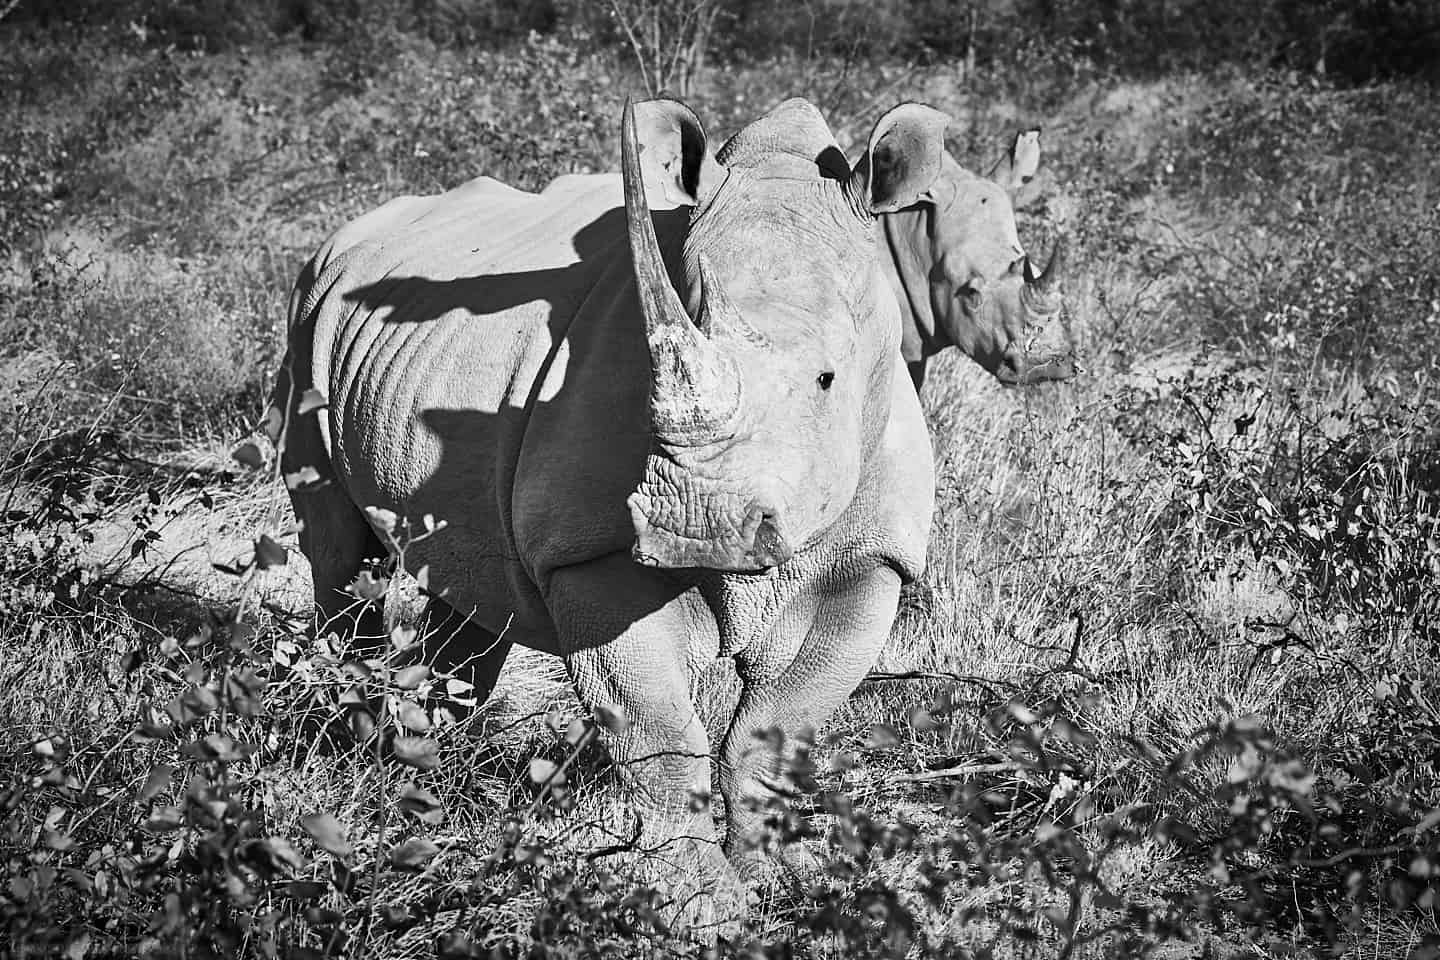
Also, as the bushes and trees in the foreground added a nice oval frame to the image, I added a vignette in Capture One Pro, darkening down the edges by almost two stops, and that helps to draw our eyes to these magnificent creatures. It is of course really nice to get to photograph Rhinos that have not been dehorned in an attempt to prevent poaching. It turns out that a dehorned rhino still has half a horn that can be gouged out if you are an unscrupulous poacher, so that isn't as effective as they'd hoped anyway. It was a real treat to see these animals though, in such numbers and with their young as well. My settings for this were ISO 1000 for a 1/1000 of a second at f/10, and only 148 mm, so you can tell how close we were to them.
Wide, Not White
Another thing to note is that these animals are called White Rhino based on a bit of a mistake, more than being related to their color. The White is a misunderstanding of the word "wide" which was used to describe the shape of their wide mouths. The White Rhino is a grazer, which eats grass and other low foliage from the ground. You can see how wide and square shaped their mouths are in the previous image.
In the following image though (below) we see a Black Rhino from the following day in Etosha, and you can perhaps make out his much more triangular shaped pointed mouth. The black rhino is a browser rather than a grazer which means he uses his hooked lips to eat leaves, branches, and roots. As the naming is based on a misunderstanding, these two rhino are also now sometimes referred to as the square-lipped and hooked lipped rhinoceros. You maybe can't tell from these two photos, but the White Rhino is also up to almost double the size of the Black Rhino.

I had no trouble deciding on whether to stay in color with these images. With the rhino being basically large living grey-cards, they really lend themselves to black and white photographs, especially when the surroundings aren't adding much color-wise. I think the conversion really helps to see the texture in their skin too. I added just over a one-stop vignette to this image as well, for the same reason as the previous image. I'm actually thrilled that we were able to photograph the two types of rhinoceros in Etosha, both with their horns as well. I had shots of them from last year, but none with horns. Now, of course, I fully support any attempt to stop the poaching of animals in Africa, but these were very special photography opportunities, that I was very grateful for. My settings for this shot were ISO 800 for a 1/800 of a second shutter speed at f/11, and I had my 1.4X Extender fitted to my 100-400mm lens for a focal length of 560 mm.
A Journey of Giraffes
The next photo (below) is another image that I have decided to overlook an imperfection for the greater good. As we headed for our lodge for the second two nights we'd spend in Etosha, we stopped to photograph this "journey" of giraffes. I love that collective noun for giraffes on the move. A Journey! How cool is that!? The imperfection might not be obvious in the web-sized image, but as with the Oryx image I spoke about in episode 623, the heat is causing the air to shimmer like a mirage, so the giraffes are actually all wobbly. We can, of course, see exactly what they are, and depending on how you look at it, the shimmer might even add to the story by showing us that the air is hot.

I toyed with the idea of cropping this down to a 16:9 or even 2:1 aspect ratio, but the foreground isn't distracting, and I placed the giraffes at the top of the frame to emphasise the fact that they were in the distance, as well as minimize the boring pale blue sky, so I think I'm going to leave this in the original 3:2 ratio crop, at least for my base copy. I may crop it for specific uses later, but that goes for all of my work really. My settings for this image were ISO 800 at a 1/1000 of a second, at f/11, and a focal length of 400 mm.
Elephant at Waterhole
I'm really quite happy with the next image (below) as I've been hoping for a shot of an elephant looking straight back at me from the waterhole for a number of years. I'm particularly happy that the waterhole looks relatively natural because from a few paces to the right of the frame here the concrete edge of the waterhole starts to become visible and doesn't look nice at all. I would have liked to have a bit more of the elephant's reflection in the water, but this waterhole is very narrow, so if I pulled back any more, you start to see the bank on this side. Still, I like the way the elephant's ears are spread out a little, but that he's not really in a defensive pose.

I decided to convert this to black and white because I think it adds to the mood, and as with the rhino shots, it helps us to see the texture and detail in the skin of the elephant. I also think the shadows look better in black and white, and with the lack of color, I think we depend on the contrast between the shadows and the highlights a little more. My settings were ISO 800 for a 1/800 of a second at f/11, and a focal length of 271 mm. I have cropped in on this slightly in post.
Cheetah Family
The following day we heard from a few people and also checked the sighting log at a nearby park office, and there had been multiple sightings of both a family of cheetah and leopards in the same area. After looking around for a while, we figured that the leopard sighting was probably someone somehow mistaking the cheetah for a leopard, but we did indeed find the cheetah. In fact, despite us driving along the area of the sighting for a while, on our second pass, our driver and guide found the mother sitting on the edge of the salt basin so far away that literally no-one in the car would have thought it was any more than a stick or small bush. Surely enough though, I shot a photo of it at 400mm and zoomed in to 100% on my camera, and confirmed it was indeed a cheetah. In my photo, it was probably around 20 pixels tall.
We waited for a while, but she was obviously not going to come close enough for us to photograph her for a while, so we decided to go and get lunch, and hoped that she'd come back to the shade of the closer trees as the midday sun got the better of her. We also knew that she had to be hiding her cubs somewhere, and that may well have also been the shadow of the trees that we could see. This turned into a bit of a test of the group's patience, as after lunch she did come a little closer to the road, and we started to see her with the three cubs that had been sighted, but we weren't really able to get any great shots for a number of hours. We voted, in our car, and a little bit of persuasion on my part led to my group staying, and the second vehicle went off to try and find something else to shoot.
Personally, I'm pleased we stayed, because there were a few beautiful shots for the making shortly before 4 pm, as the cheetah family became a little active, as you can see in this photo (below). We can see the mother looking out vigilantly for any possible predators that might threaten her cubs, but also here we can see all three of the cubs up and about, with one of them catching some nice light on his face as he leans against the low bow of the tree. There were very few moments when all three cubs were visible like this, along with the mother, so I'm really pleased to have been able to shoot this.
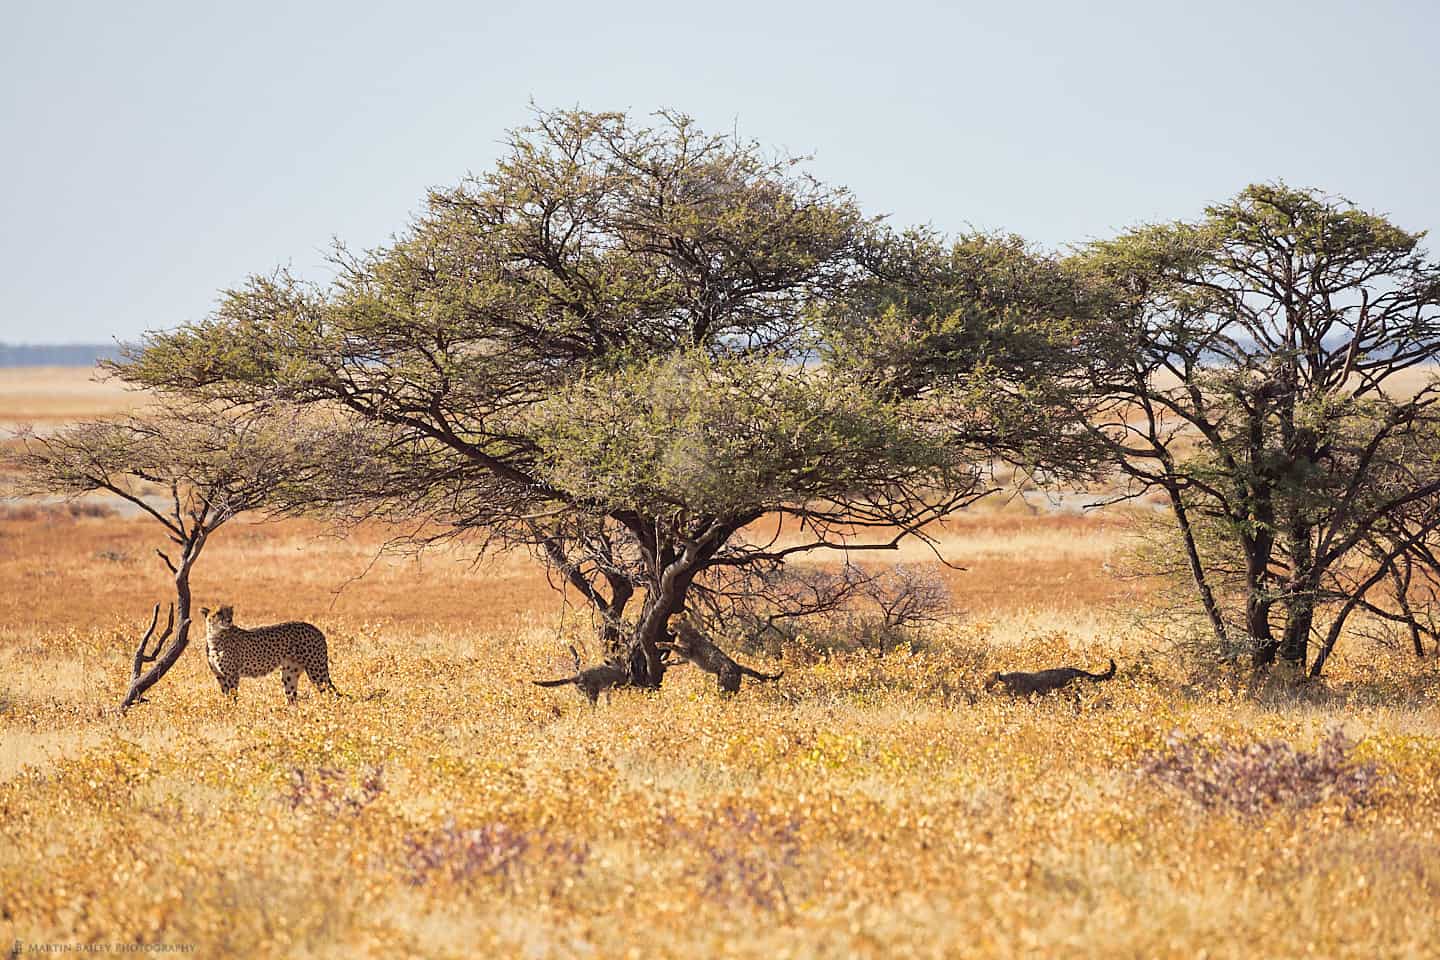
The other thing that I really like about this shot is that it's also a relatively nice landscape image, with the golden foliage and camelthorn trees, and the plain in the distance just visible through the trees. At 400 mm there was also an element of luck, as this image is clear of the shimmer that we sometimes see from the heat, but a few of my other images of these cheetahs were a bit wobbly from the heat, so I was really relieved to see that this one was fine. My settings were ISO 1600 for a shutter speed of 1/2500 of a second at f/8. I was set at a high shutter speed because the mother was also obviously hungry, and there were springbok in the area, so I wanted to be ready if she gave chase.
One of the great things about photographing in Etosha is that people are very open with their sighting information. They will sometimes stop and ask us what we've seen, but quite often if someone has seen something cool, they'll just stop as they drive past and let us know. After we'd got what I believe were the best shots to be made of the cheetah, with of course the risk of missing a chase for a Springbok, a car stopped and told us that there were some elephants at the waterhole 10 minutes down the road from where we were, so we decided to go and check that out.
Dust Bath
When we got there, the elephants were moving away from the waterhole, but one had stopped, and with one foot up on a rock or dirt mound, was picking up dust in his trunk and throwing it up onto his back, having a dust bath (below). With the sun behind the elephant, it was almost a silhouette shot until I opened up the shadows in post, but that also gave me some great backlight for the dust, highlighting against the side of the elephant, so I was happy with the camera angle.
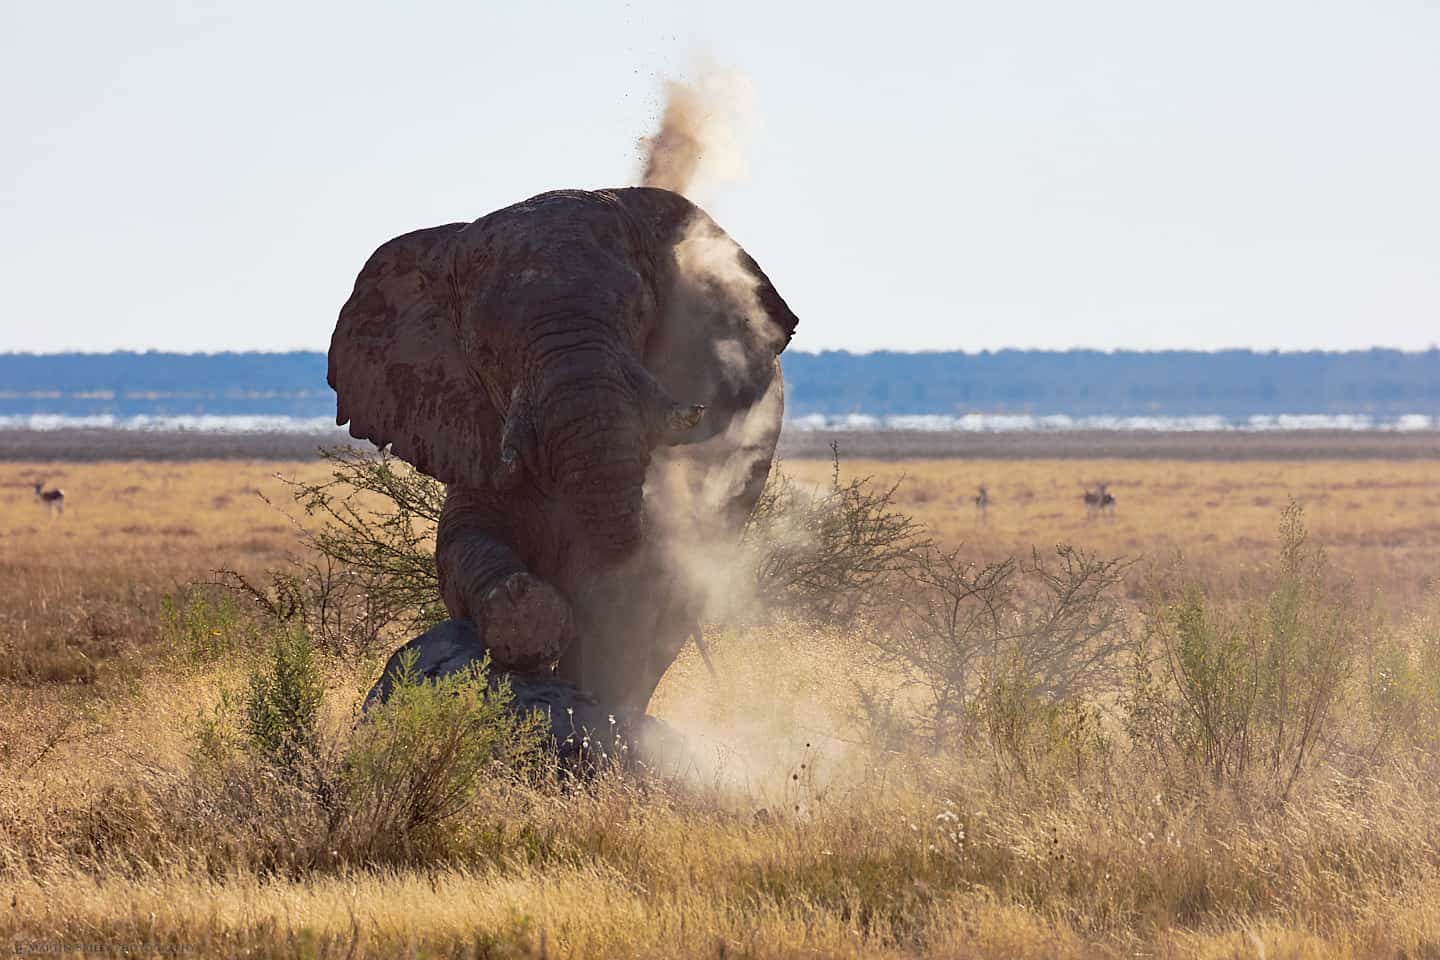
We can also see a few springbok on the plain in the background, and that distant shimmer, a telling sign that we're in Africa, even though it was towards the end of the day in the middle of the Namibian winter. It's actually a really comfortable time to visit, as it gets hot, but not uncomfortably hot, and the mornings and evenings are actually quite cold, so we generally don't have any problems sleeping etc. Anyway, my settings for this image were ISO 800 for a 1/1600 of a second exposure at f/11, and a focal length of 400 mm.
Our Galactic Core
OK, so that's our ten photos Etosha National Park wildlife photos, but I wanted to share one last bonus image that I shot on our last night in the park before heading back to Windhoek to fly home. One of the great things about being in the desert is when there is no moon, the Milky Way looks spectacular. Before I went to bed, I decided to shoot a few frames of the sky, and although I shot some wide angle images with my 11-24mm f/4 lens, with the lights of the lodges at the base of the frame, I actually much prefer this image, shot with my new Canon 85mm f/1.4 lens, to just singled out a small portion of the Milky Way (below).
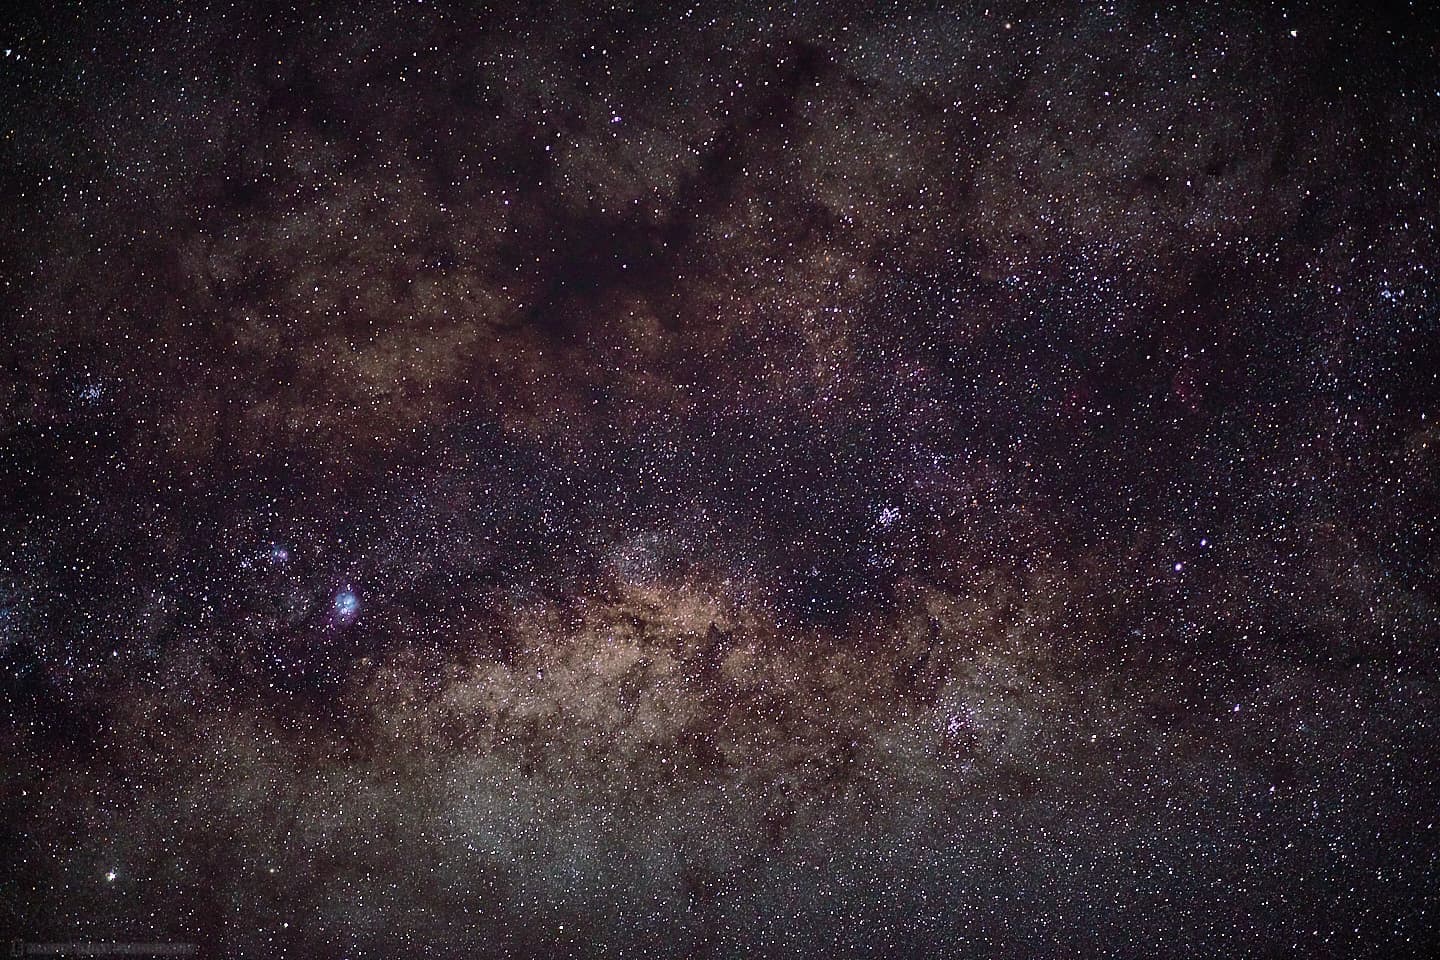
The f/1.4 lens is actually so bright with its wide aperture, that you can see the stars through the viewfinder, which is nice, as I have only ever done astrophotography with f/2.8 and f/4 lenses in the past, and especially at f/4, you just can't do that. I took a few shots as I refined my framing, to show this portion of the Milky Way, and having checked on the NASA website after getting home, it seems that I had actually framed up the center of our galaxy, the Galactic Core, where there is a supermassive black hole called Sagittarius A-star, just slightly below and left of the center in this image.
The 500 Rule
Because I was able to see the points of the stars, I was able to focus manually until they were sharp, and I simply decreased my shutter speed over a few frames until I got to 5 seconds, which was the point where I could see that the stars were almost perfectly round, instead of being elongated by the rotation of the earth. Although I've heard of the 500 Rule I have to admit that I didn't really know what it was, until I spoke about the photo the following day with a member of the group who is into astrophotography, and I learned that to get the shutter speed for an image of the stars without them becoming elongated, you simply divide 500 by your focal length. Some people use 600, but 500 divided by 85, my focal length, is 5.88 seconds, and because I'd actually seen a little bit more elongation of the stars at 6 seconds, I was happy that I'd used 5, and that the calculation gave me confirmation that I was pretty much spot on.
Participants' Comments
As I mentioned, the following day is really a drive back to Windhoek, where we spend one more night, before everyone flies home, so that really brings us to the end of this travelogue series. As usual, though, no trip would be complete without doing a roundtable with my digital recorder, to get a brief comment from each member of the group, which I have embedded into the audio and you can listen with the player at the top of this post.
As I mentioned at the start of this travelogue series, this really was a great group, and it's lovely to hear their comments again now, just over four weeks after the tour finished. Of course, I'm fortunate that I have been able to travel with hundreds of really nice people over the eleven years that I've been running my tours now, but it's not often that everyone gets along quite as well as this group did. It's not just me, but really, everyone seemed to click beautifully, making it a pleasure to travel with these people.
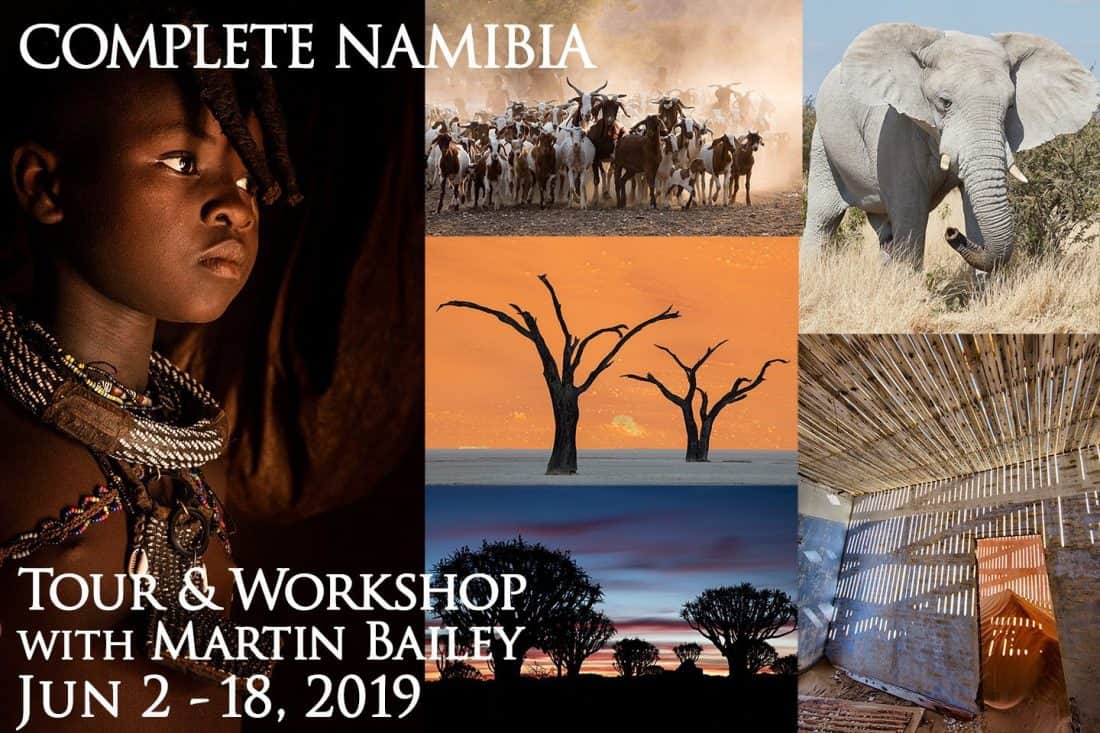
Complete Namibia Tour 2019
If you might be interested in joining the 2019 tour from June 2 to 18, please check out the tour page at mbp.ac/namibia. It really is an amazing tour, so give it some thought and I look forward to getting a chance to travel with you in this beautiful land.
Show Notes
Check out the 2019 (or future) Namibia tour here: https://mbp.ac/namibia
Visit Rich Dyson's website here: http://richdysonphotography.com
Subscribe in iTunes for Enhanced Podcasts delivered automatically to your computer.
Download this Podcast in MP3 format (Audio Only).
Download this Podcast in Enhanced Podcast M4A format. This requires Apple iTunes or Quicktime to view/listen.

Hi Martin! Your astrophotography readers might be interested in the NPF Rule, much more accurate than the 500 Rule today and takes into account pixel density and aperture where the 500 Rule was engineered for really grainy high ISO film. I worked with the developers of PhotoPills and qDslrDashboard to get it added to both those apps to make the calculation easy in the field (without a bunch of complicated formulas or spreadsheets, haha!). The 500 Rule is much simpler for quick figuring in your head of course, so it’s still useful, but it’s considerably off for large size prints. Here is more information and some screenshots of how to use it in PhotoPills: https://galleries.aaronpriestphoto.com/Articles/NPF-Rule-for-Sharp-Stars
Hi Aaron,
Thanks so much for this. I’d not heard of NPR, but your post is great so I’m just about up to speed on it now. My shot above would have needed to be just 2 seconds with the NPR rule, and that seems a little short as my stars were almost round. I’ll be sure to give this a try though the next time I’m under a clear starry sky.
Thanks again!
Martin.
For the galactic center with a 5DS R, I’m not surprised. Although when I went to AR view and used the GPS coordinates of Etosha National Park, other areas of the sky hit 5-7 seconds. The first screen in PhotoPills is a simplified formula and the AR view is an extended formula with a real time estimate that includes GPS coordinates, compass heading, declination, etc. for the area of sky you are looking at. In the end, all photography “rules” are just guidelines anyway of course. A starting point and meant to be broken. 😛
Hello Martin:
Thanks yet again for another interesting post. I am not particularly into animal photography (don’t have a long enough lens and in any case, wouldn’t have the strength to lug it around) but really enjoyed looking at your images. Your lion images are spectacular! The focus (my bug bear) is superb. So glad you told us how you did it. I also love the grasses and think they add to the ambience of the shot.
Hi Janet,
Thanks for commenting and for the kind words. I completely agree about the grasses in the lion photo, and I’m glad you feel that way.
Compared to five years ago, my kit for a trip like this has more than halved in weight, thanks to Canon releasing a Mark II version of the 100-400mm, and thanks to the 11-24mm lens, which replaced two of my old lenses. I now do trips like this with an 18L backpack instead of a 32L one, so it’s much easier to carry now. It’s easier to get on flights with now too! 🙂
Regards,
Martin.
Very interesting post, Martin. It would never have occurred to me to worry about the grass in front of the lion. I actually find that I quite like images of animals where they are partially obstructed by their environment, as long as you can see their eyes. My favorite image, though, is the zebras by the waterhole. That comp is a testimony to your ability to pick out a very pleasing arrangement of elements from what was no doubt chaos!
Hi Tim!
It’s great to see your avatar up there. It probably isn’t, but it seems like it’s been a while.
Thanks for the comment. I’m pleased that the grasses don’t bother you. I also really like that photo, and think the grasses work, and people that mention the grasses negatively are probably overthinking the photo based on what they’ve read etc. Everyone is entitled to their opinion of course, but it’s nice to hear from people that think the same as I do. 🙂
Thanks for the kind words about the zebra shot too. That kind of image is pretty difficult to compose, but a lot of fun.
Regards,
Martin.