
We continue our Complete Namibia Tour travelogue this week, as we relax with the Flamingoes in Walvis Bay, then photograph a shipwreck on the Skeleton Coast before spending some time with the incredibly charming Himba People in Northern Namibia.
Having finished our three days in the majestic Sossusvlei area with the sand dunes and Deadvlei, we drove on to Walvis Bay to another beautiful lodge there. Based on feedback from last year, I had changed our itinerary to give us two days in this lodge, and the idea was to basically give the group a bit of a break, as this was the middle of the tour, and we’d already been working full on for more than a week. Because I realize that not everyone would want to just rest though, I arranged an optional drive in the sand dunes over to Sandwich Harbour.
Flamingoes at Walvis Bay
Over breakfast, looking across the road at the bay, we could see that the light catching the flamingoes was nice, so many of the group finished up quickly and grabbed our cameras. The first photograph that we’ll look at today (below) is from this little post-breakfast shoot, as I captured four flamingoes, still resting, although two of them did have their eyes open with nice catchlights from the morning sun.
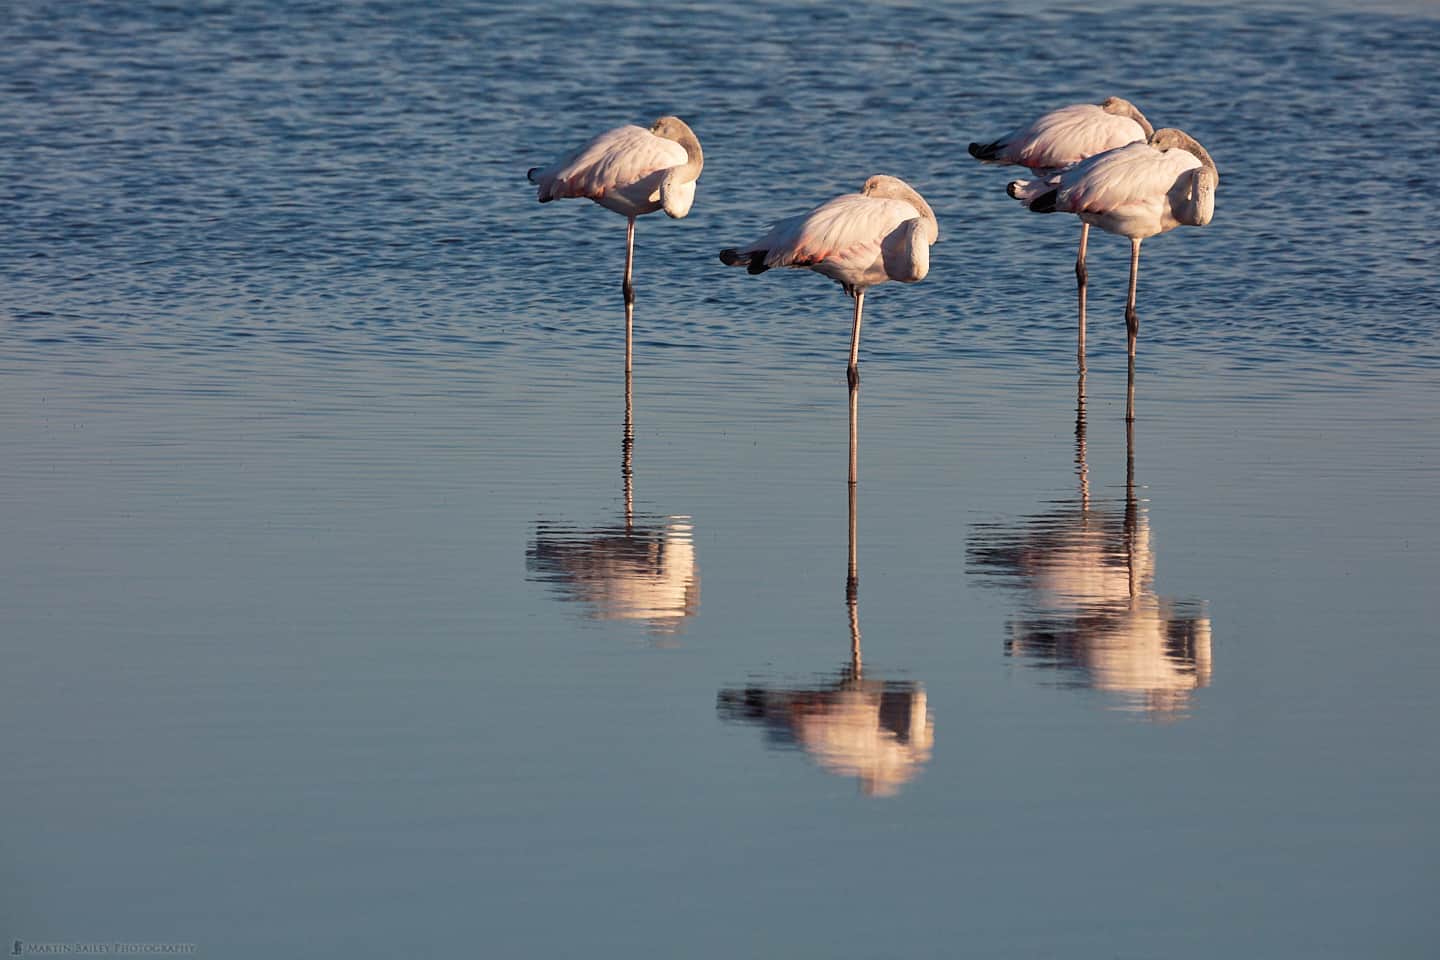
Flamingo Foursome
I was using my Canon 100-400mm Mark II lens at its full extent of 400 mm for this shot. As the sun was just coming over the horizon, I increased my ISO to 800 to give me a 1/1000 of a second shutter speed at f/14. You might wonder why I’m shooting wildlife at f/14, but actually, of this group, only the nearest flamingo that I focussed on is fully sharp. The middle two are a little soft, and the one at the very back is even softer. I also still get some nice blur in the background sea at this aperture, so this works for me.
A Drive in the Dunes
As I suspected would be the case, every member of the group opted to join the excursion to drive out into the dunes, and we were picked up by the company that runs those tours in the middle of the morning. I had hoped for some flamingoes down in the lagoon at Sandwich Harbor, but that didn’t work out. Still, it was an amazing drive, mostly along the beach, with our drivers sometimes timing it so that we’d dart across a patch of the beach as the waves receded, but before they washed back in again. I have some video that I’ll put into a slideshow at some point, hopefully soon, but for now, here’s a bit of a documentary shot (below) to show you the dunes that we drove through to get back out after our champaign lunch in Sandwich Harbour.
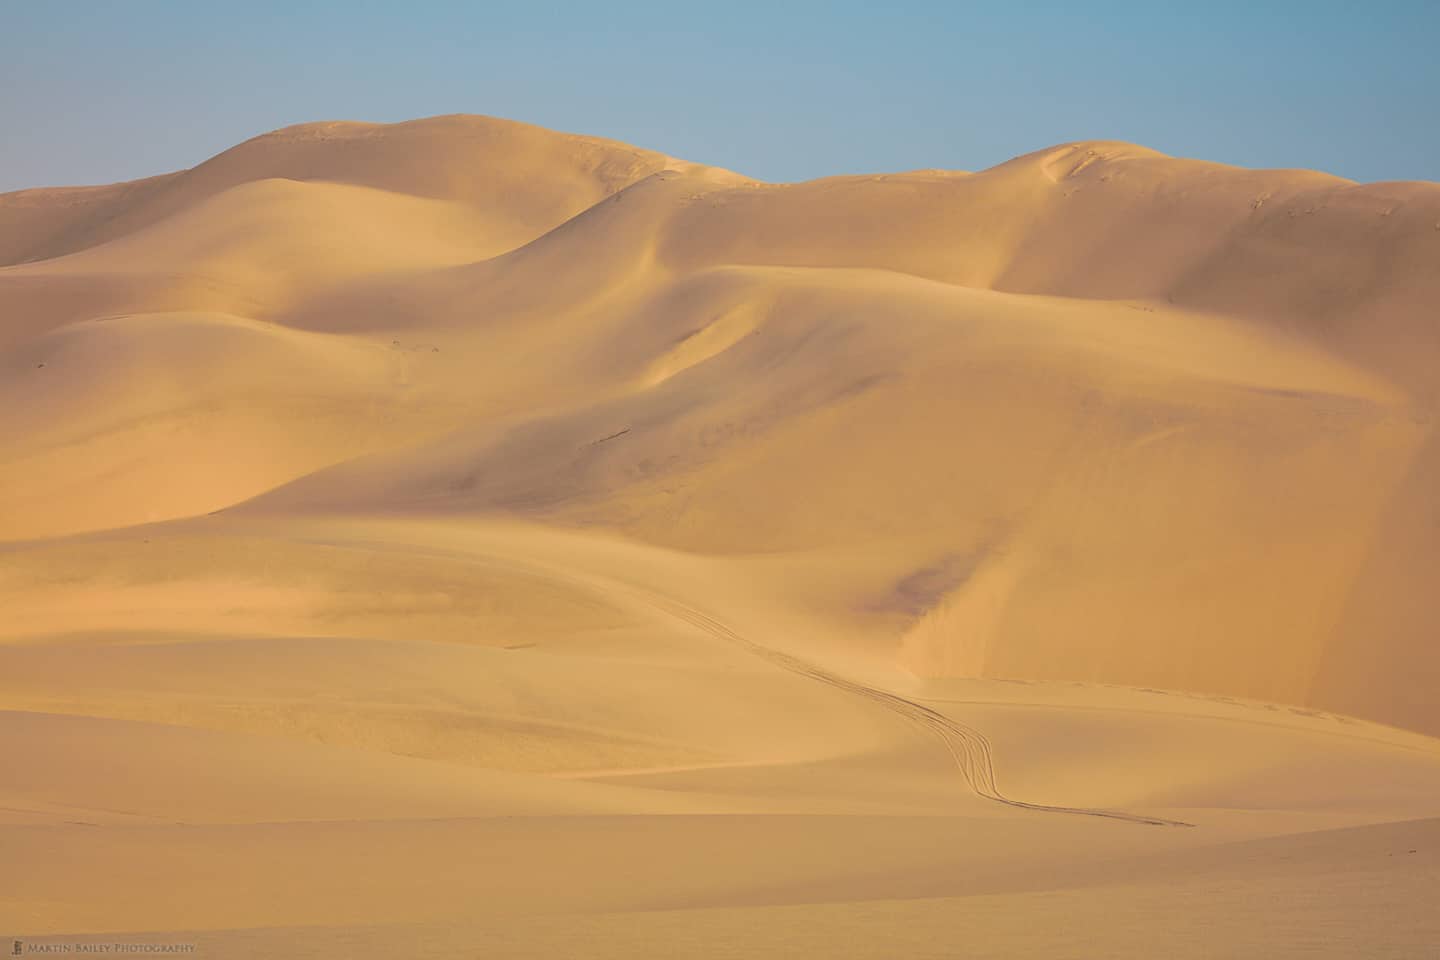
The Dunes Near Sandwich Harbour
The tracks that you can see running through the valley in the dunes here are from our three cars, as we made our way to this point. We had to deflate the tires on the cars to make them spread out, giving us more traction in the sand. There were points where we drove down slopes probably up to 40° inclines, which might sound scary, but it’s actually a lot of fun in the hands of professional drivers, and everyone in the group seemed to have a great time, so it was a nice way to spend our R&R day. Plus, we did get some nice shots of the dunes, the beaches, and some close Black-backed Jackal shots, but they’re a bit too documentary to show here.
The Zeila Shipwreck
The following day, we started our drive north with a stop to photograph a ship called Zeila that ran aground in 2008 just south of Henties Bay. As is often the case on the Skeleton Coast, we were treated with some big waves that looked great in a well-timed long exposure of the wreck, as you can see in this photograph (below).
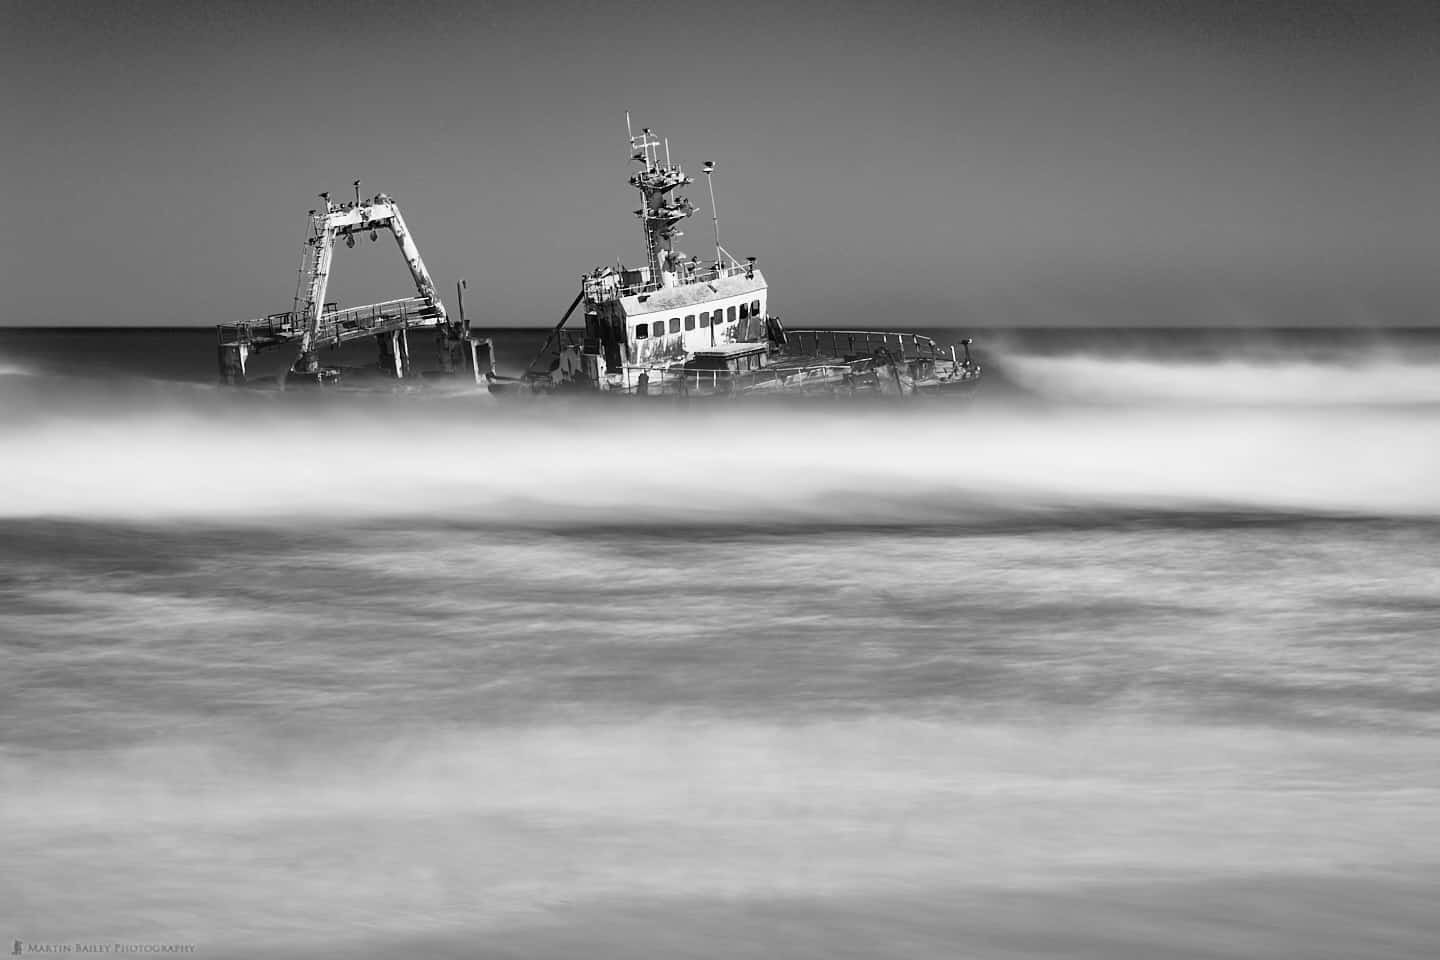
The Zeila Shipwreck
It was quite windy as we photographed Zeila, so there was some risk doing long exposures, and a few of my shots were indeed a bit shaky, but many of them worked out, thanks to my sturdy Really Right Stuff tripod and ball head. I used a neutral density filter from Breakthrough Photography for a five-second exposure at f/16, ISO 100.
I usually use a two-second timer when doing landscape work, so that I can move my hands away from the camera to avoid introducing camera shake, but for shots like this, when I need to time my exposure perfectly for the waves, I use a cable release instead, with no timer. That enabled me to time this shot for when there were two waves, one main one across the entire frame, and a second breaking on the right of the frame. I also time this so that the sea was washing fully up the beach too, as I prefer to see that as opposed to the darker sand.
The Himba People
As spectacular as the landscape and wildlife of Namibia is, one of the highlights of the trip is our visit to a Himba Settlement, and that’s what we had in store for day 11. We started out in the dark and shot a little wildlife along the way, and then arrived at the Himba Settlement mid-morning, as they started to warm up after the chilly night. As usual, we arranged a few shoots inside the huts, so that we could capture these wonderful people out of the harsh sunlight. I have a number of images that I like, but one of my main goals was to find and photograph the young girl that I’ve been photographing for a number of years now, as you can see in this image (below).
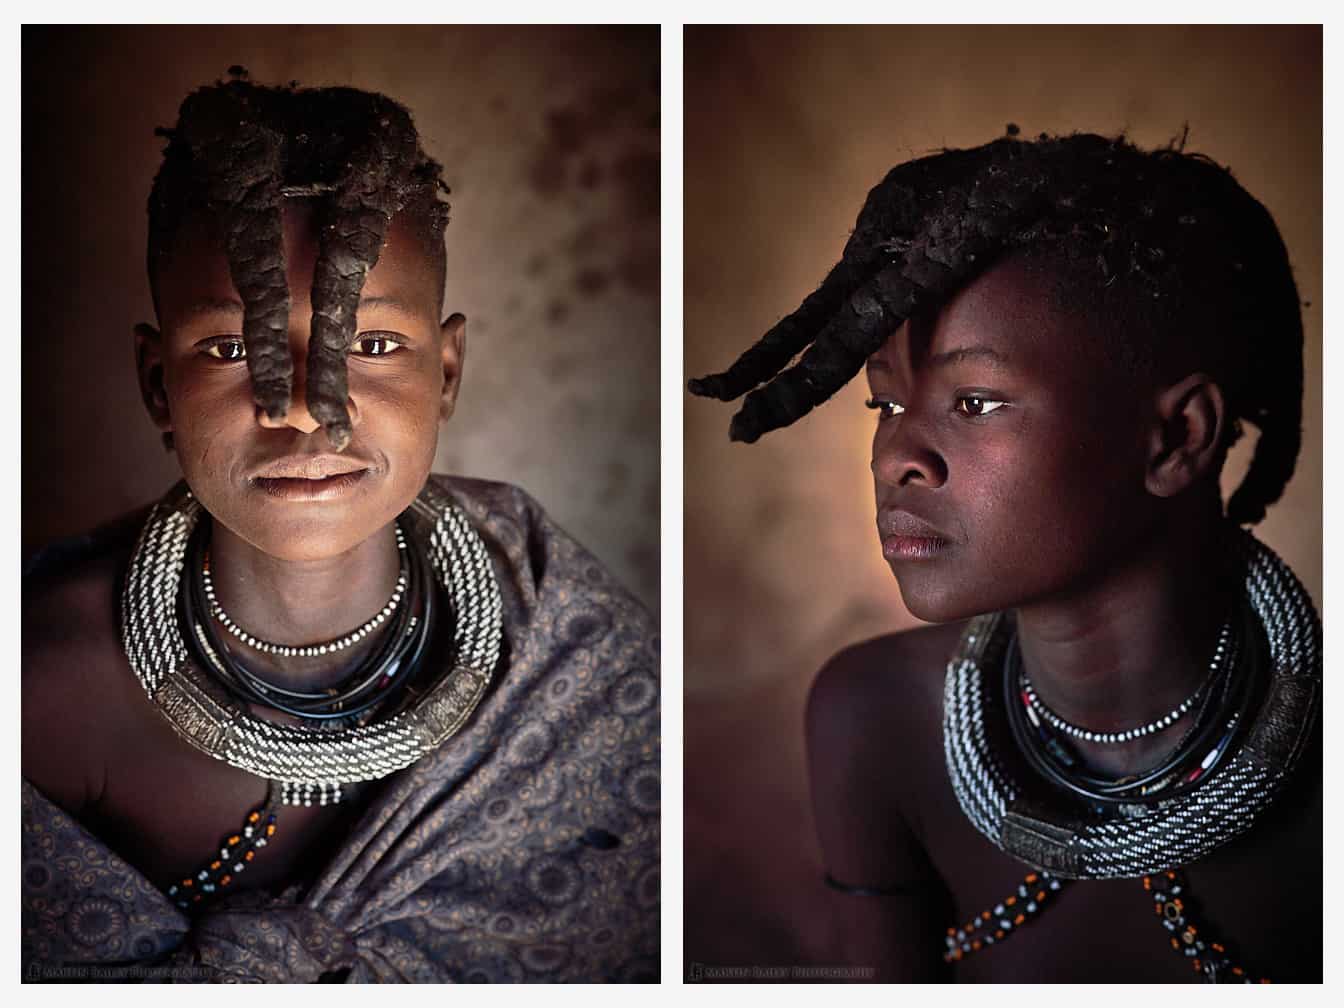
Himba Young Girl Portraits
The first of the two shots of the girl that I want to share was from a hut close to the fire where she was cooking some broth for the village breakfast when we arrived. Sitting out working as the sun came up, she had initially been wearing a beautifully patterned shawl, and the light coming through the door in this first hut was much strong than the hut that I’ve shot her in before because it was facing the sun more.
My settings for the first image were ISO 5000 for an 1/80 of a second at f/5, with the new Canon 85mm f/1.4 L lens now with Image Stabilization. I’ll talk more about this lens in a review that I’ll work on now that I have a few images with it, but I was very impressed with it. It’s smaller and lighter than the f/1.2 version that I have been using for years, and it is nice to have that image stabilization now. The focus mechanism is much faster now too, and the image quality is amazing. I need to do some more tests first, but I hope to release more on this lens in the coming weeks.
The second image (above right) of the young Himba girl is from the same hut that I’ve photographed her in before. Although we try not to each spend too much time with the subjects, I do have a number of nice shots of this girl again. In this image I had her look towards the doorway so that we get a nice view of her beautiful hair, as well as nice highlights across her face. With both images, I’ve actually darkened them down a little around the edges to create a bit of a vignette and draw our attention to her face more. My settings for the second image were the same as the first, except I’d opened up the aperture a little more to f/4.
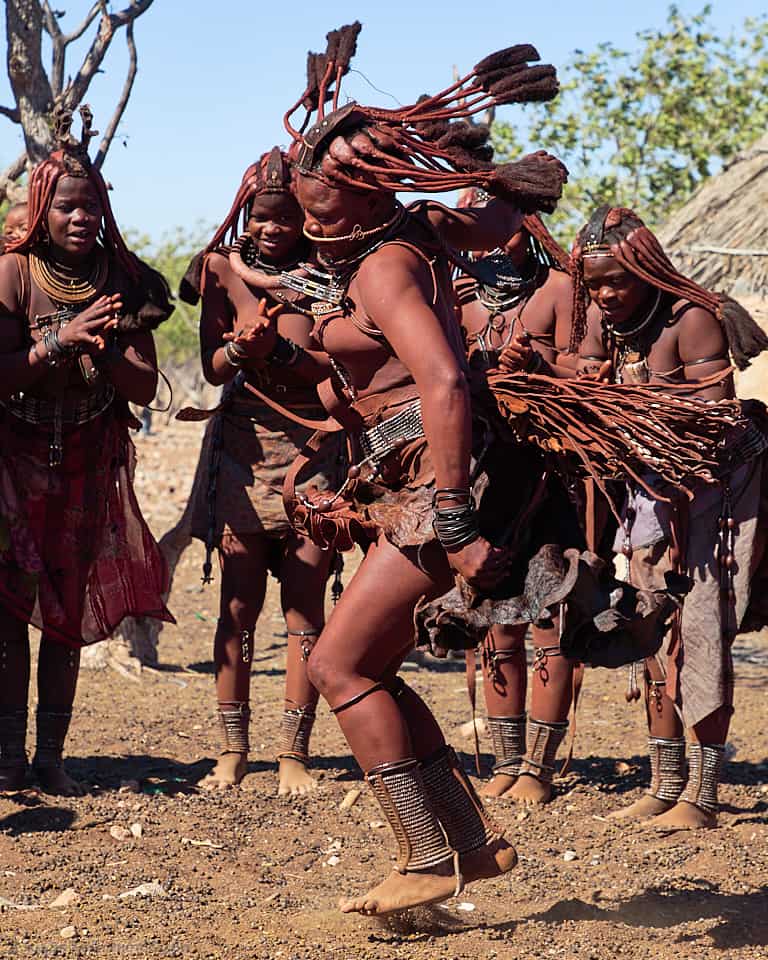
Himba Dancing
Himba Dancing
After photographing them in the huts for a while, the Himba people sat in a circle and set up their shop, so that we could buy some trinkets from them, which is part of how we thank them for letting us invade their privacy. We also take them provisions, which our guides give them discretely. Usually, after the shop, we leave, but this year, they also treated us by dancing. They started off a little bit apprehensive, but once they got started, they danced for what was probably well over thirty minutes, so it was a wonderful experience.
I like this particular shot because I was able to capture the motion of the Himba lady as she threw herself around causing her hair and leather tassels on her dress to fly outwards from the centrifugal force.
I also like how the lady to the left has a baby on her back. Some of them actually danced around like this with babies on their backs, which is a tribute to how hardy these people are.
Because I wanted to freeze this motion, I selected ISO 1000 and a shutter speed of 1/2000 of a second, at f/8. I was shooting now with my Canon 24-105mm lens, so that I could zoom in and out as necessary to frame the shots how I wanted, and my focal length for this was 105 mm, so zoomed in as far as possible.
There were three young men that joined the group to dance, only one at a time mind, and in this next image (below) we see one of them strutting his stuff with one of the ladies and the rest of the group looking on. I’ve also left a little space to the right of the group in this shot, so that you can see the entrance to the hut. That’s the hut that we mostly use to photograph people in during our visits, so this photo should give you an idea of the size of the light source and show you the direction of the sun that we’re working with.
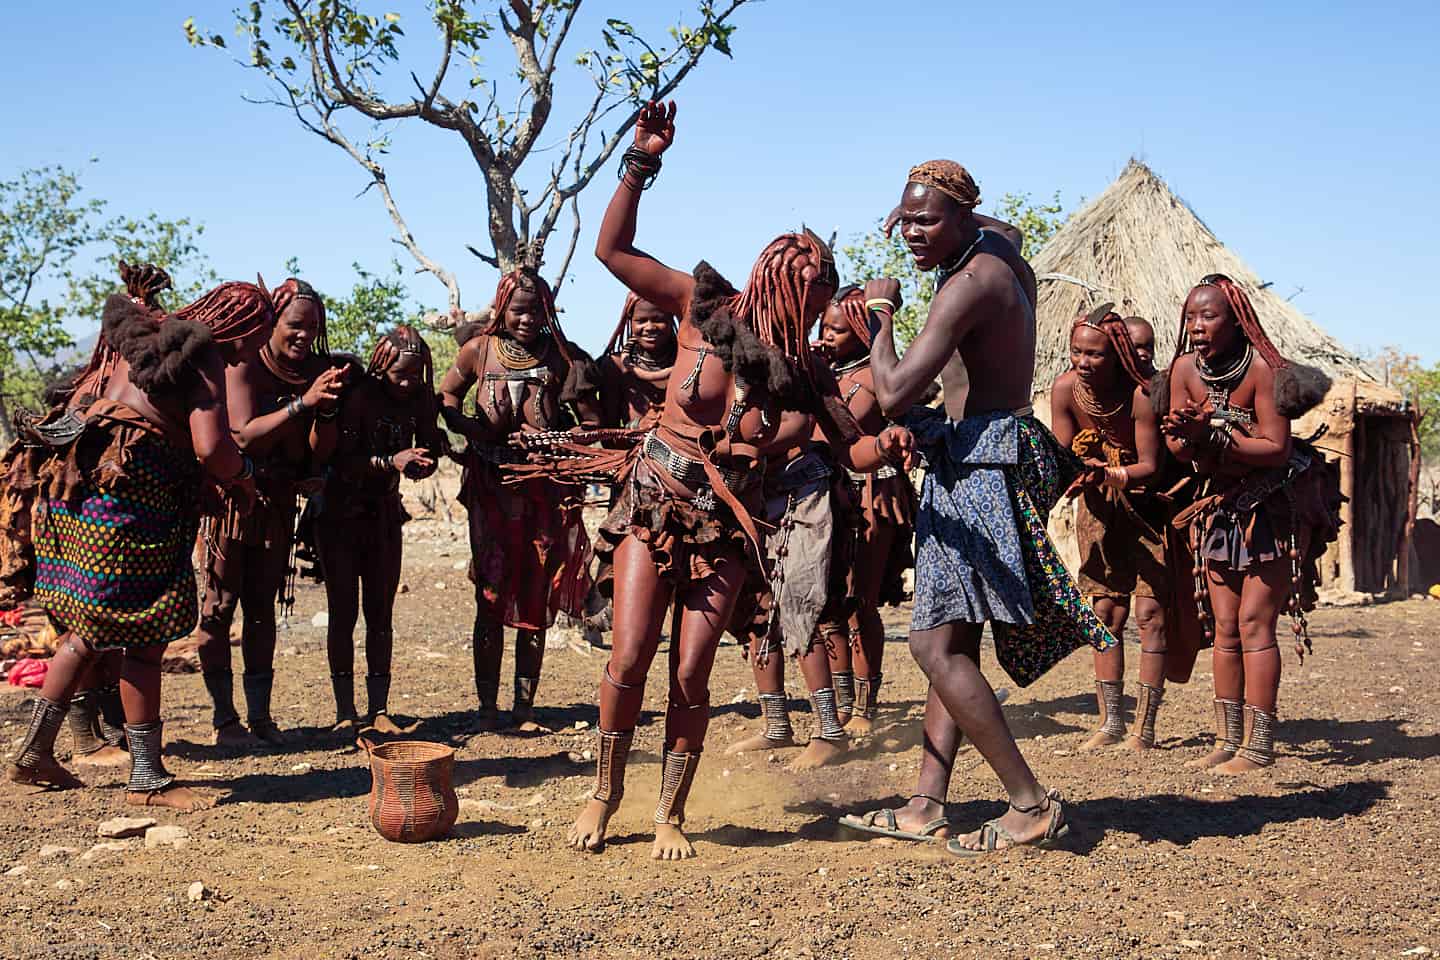
Himba Dancing in Group
I also have lots of iPhone video of the group dancing like this, and I’ll play a bit of the audio at this point in the audio which you can listen to with the player at the top of this post. Again, I’ll drop some of the video into a slideshow at some point, so I hope you’ll check that out later. My settings for this image were the same as the previous image except that I’d zoomed out to 56 mm to show the entire group.
Goat Herding
After our morning session with the Himba, we ate lunch in the mountains nearby, and then drove to town and had a coffee and piece of cake, before heading back to the Himba Settlement later in the afternoon as I’d arranged for us to go back and photograph them herding their goats back into the corral. This next image (below) is one of my favorites, with the goats all marching towards their goal, with just one looking over at the crazy photographers wondering what we’re doing, and the Himba ladies in the background, almost, but not quite, in silhouette, with the shafts of sunlight catching the dust kicked up by the goats.
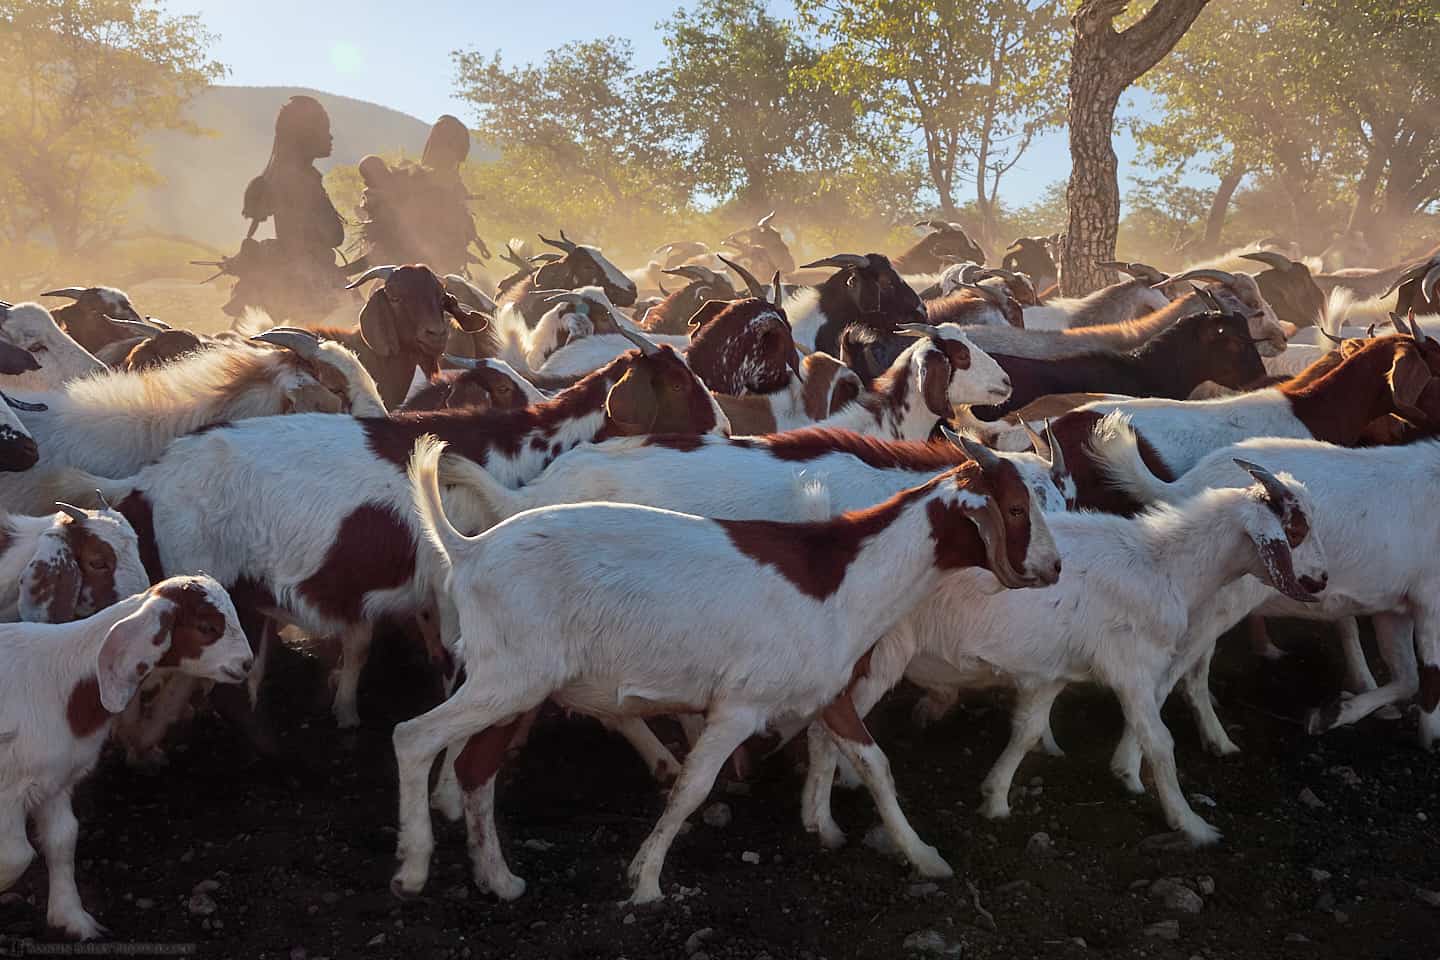
Himba Goat Herding
I’ve actually drawn an Adjustment mask over all of the dirt in the foreground on this image in Capture One Pro, and darkened it down a little, to better ground the image, but I also selectively desaturated a patch of orange that was caused by flare from the sun hitting the front of the lens as I shot this. With selective coloring, I was able to just use the same mask for both adjustments, without one really affecting the other very much, so it was a quick adjustment, exactly how I like them. My settings for this image were ISO 800 for a 1/1000 of a second at f/11, and a focal length of 35 mm.
Hardy People
Another shot that I like from the Himba settlement is this last one that we’ll look at (below) again from the goat herding session. The goats are all walking back out, as we actually ask them to drive the herd a second time to give us more opportunities, and this shot just does something for me. I love how the hardy babies are strapped to their mothers’ backs, but with both seem totally alert, looking around to take in what they can of the activity. It almost feels to me as though they are already checking out the work that they’ll do as part of the community in later life. In reality, it won’t be too many years until they really do start driving the goats and playing their part in the daily routines of the settlement.
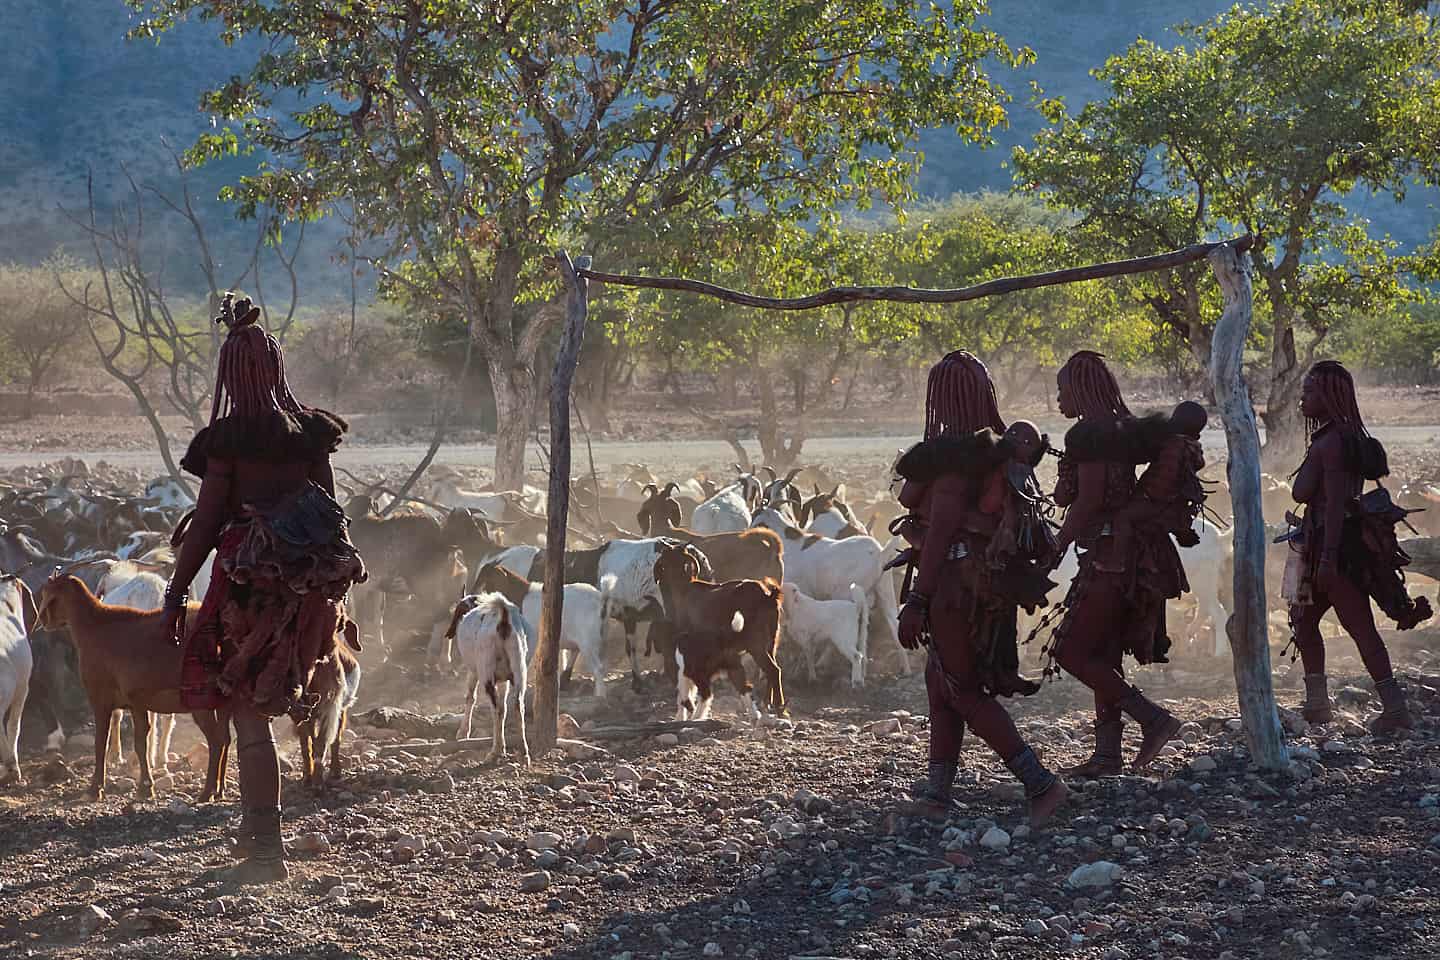
Himba with Babies
I also like how this image gives us a bit of context, with the road that runs by the settlement visible, as is the small mountain further in the distance. Most Himba settlements that I’ve visited are at the foot of mountains, and I’m guessing that this is because they provide a slightly earlier respite from the heat of the sun in the summer months. My settings for this photograph were the same as the previous image but at 95 mm this time.
I really do enjoy these visits to the Himba people. It’s incredible to see how they live, and even just for the few hours that we get to spend with them, it’s really nice to get some insight into both the hardships and the beauty that I feel lies within their way of life. Again, it’s a humbling experience for both me and my guests to be able to interact so closely with these wonderful people.
3D Lioness
To finish today, I want to have a bit of fun with a photo that I shot purely by chance. The day after we visited the Himba settlement, we drove through the morning to the first lodge that we would stay in for the first two of our four nights at the Etosha National Park. After lunch, we went for a game drive in the private reserve owned by the people that run the lodge and were presented with some amazing wildlife opportunities to kick off our Etosha experience.
I’ll share more images next week as we finish with a wildlife extravaganza, but I really want to share this image that I shot as we came across a pride of lions, with one lioness standing proudly on a dirt mound. I shot a few frames as our safari vehicle drew to a halt, and because we were still moving, I quite by luck captured two frames that had enough parallax shift in them to create a three-dimensional image, as if I’d shot it with two cameras slightly apart, simulating our two eyes.
I took the two images into Photoshop and aligned the layers perfectly, and cropped them slightly, then moved the two images so that they are side-by-side, as you can see in this photograph (below). I’ve uploaded this really large, so click on the image and open up your browser window as wide as it will go, or even go full-screen, then look at the images while going cross-eyed. It takes some people more time than others to see it, but you should see two images moving closer together as you go cross-eyed, and if you can adjust the amount that your eyes are crossed to match the parallax, you will see the two images perfectly align. Once they align, you’ll see an incredible three-dimensional image.

Proud Lioness in 3D
Once it clicks, you should not only be able to see the lioness standing in front of the background, but the mound and the trees at various depths all have their own layer in the photograph. I also drew a line from the background to the foreground, to get the positioning for my company logo, so that it sits on its own layer too in the closest foreground. That’s really just a watermark, as I’m putting this out there pretty large.
Anyway, I hope you can adjust your eyes to see it. If like me your eyes are set at a slightly different height you might also have to just tilt your neck to one side a little as well, but once you get used to it, you can snap your eyes in pretty quickly. The photo itself was shot at ISO 1000 for a 1/1000 of a second at f/11, and a focal length of 400 mm.
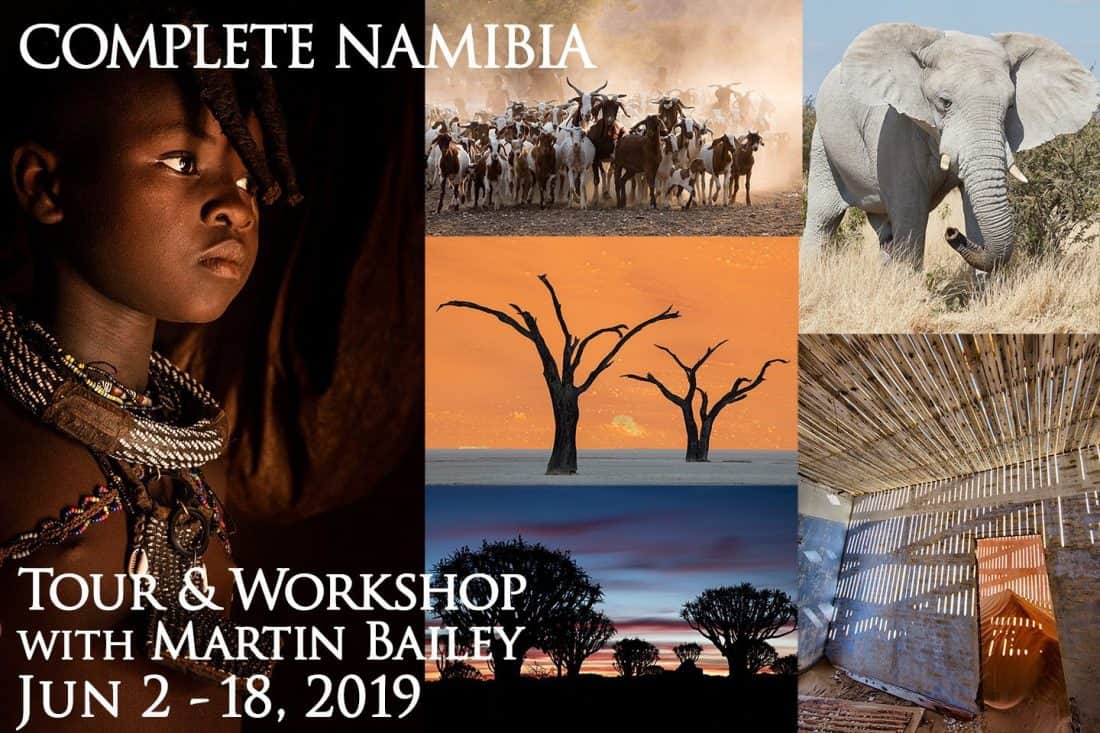
Complete Namibia Tour 2019
OK, so we’ll wrap up there for this episode, and conclude our journey in part five next week, as I pack the last three days of shooting in the Etosha National park into one last episode. If you might be interested in joining the 2019 tour from June 2 to 18, please check out the tour page at mbp.ac/namibia. Note that I’ve also updated the tour page over the last week, so it now contains some lovely comments from this year’s guests. It really is an amazing tour, so give it some thought. I’d love to travel with you in this beautiful land.
Show Notes
Check out the 2019 (or future) Namibia tour here: https://mbp.ac/namibia
Subscribe in iTunes for Enhanced Podcasts delivered automatically to your computer.
Download this Podcast in MP3 format (Audio Only).
Download this Podcast in Enhanced Podcast M4A format. This requires Apple iTunes or Quicktime to view/listen.


That 3D trick with the lion images is COOL! I’ve never heard of this before but it is fun. 🙂 Nice shot.
Hi Tim,
Yes, that is a cool trick. It was lucky that I got two frames just slightly different to do that.
Cheers,
Martin.