I hope you love to print as much as I do, but when you print a lot, you pretty soon run into the problem of storing your prints safely and efficiently. I solve this in a number of ways, which I’ll share with you today.
I recently received a question about print storage from listener Mark Friedman, from Hartsdale, New York, that I had not really covered here on the blog, so I figured now is as good a time as any to do this. Mark wrote…
Like you, I like to print, but there is only so much wall space in my home and that has long been filled. I currently store my prints (I usually print either on 13 x 19 or 17 x 25 inch paper) in archival boxes but I am wondering if you have found a better solution. These boxes are expensive, heavy when filled, and the prints are not easily accessible. It is also a nuisance finding which prints are where. Any suggestions?
My reply to Mark was initially just that in the main part, I don’t have a much better strategy, except that I use polypropylene folders that I can flick through the images easily with, and we’ll look at these shortly. I’m also going to explore a possible indexing system that I thought through a little to talk about today, although I don’t have a need to implement such a system at this point in time.
Archival Storage
Many of my prints are in just archival boxes, like Mark, and yes, these might seem expensive for what they are, but they do hold a lot of prints, and the materials have to be acid free to make them fully archival, so I think it’s safe to assume they are going to cost a bit. Personally at $30 to $50 a pop for larger boxes, I’ve never really felt them to be overly expensive.
The weight issue is pretty much a moot point, because it’s the prints themselves weigh a lot, not the boxes. We’re not going to overcome that until someone invents archival storage with its own antigravity field built-in. I use a number of different boxes that I’ve bought over the years, but they are pretty much all imported from the US, so I’ll include links from B&H so that you can jump straight to some of the products that I’ll mention.
One of the easiest options that I use is the simple archival clamshell or museum box, most of which are from a company called Archival Methods. The main problem I find when looking for these boxes is getting a size that I like to print in, although digital printing sheet sizes are now available in one box style or another if you look around. Years ago, for example it was really difficult to find something in 13 x 19″, but now it’s a pretty common size.
The smallest I ever print is 8.5 x 11″, then 13 x 19″, but more often I like to use 17 x 24″ or 18 x 24″ and the largest standard sheet size that I can make on my printer is 24 x 36″. I actually don’t make that many 24 x 36″ prints for myself, so I don’t have a folder this large, but I do have boxes in 8.5 x 11″ and 13 x 19″. I generally just drop the prints into these boxes loose, but for a while, I got into the habit of putting the prints into individual polypropylene clear sleeves as you can see in this old photograph to illustrate this type of storage (below).
I have never actually had problems with prints just put into this kind of storage loose, so I don’t bother with the sleeves now, although these sleeves do add an extra level of protection, especially if you pass the prints around or flick through them often. On that point, another thing that I sometimes do is just use cotton gloves when handling prints.
Although I like clamshell boxes and the museum drop front boxes, you do have to lift each print up or take prints out altogether to view each print, which can take time when you are looking for a specific print, and this also causes you to handle them more.
Itoya Art Profolios
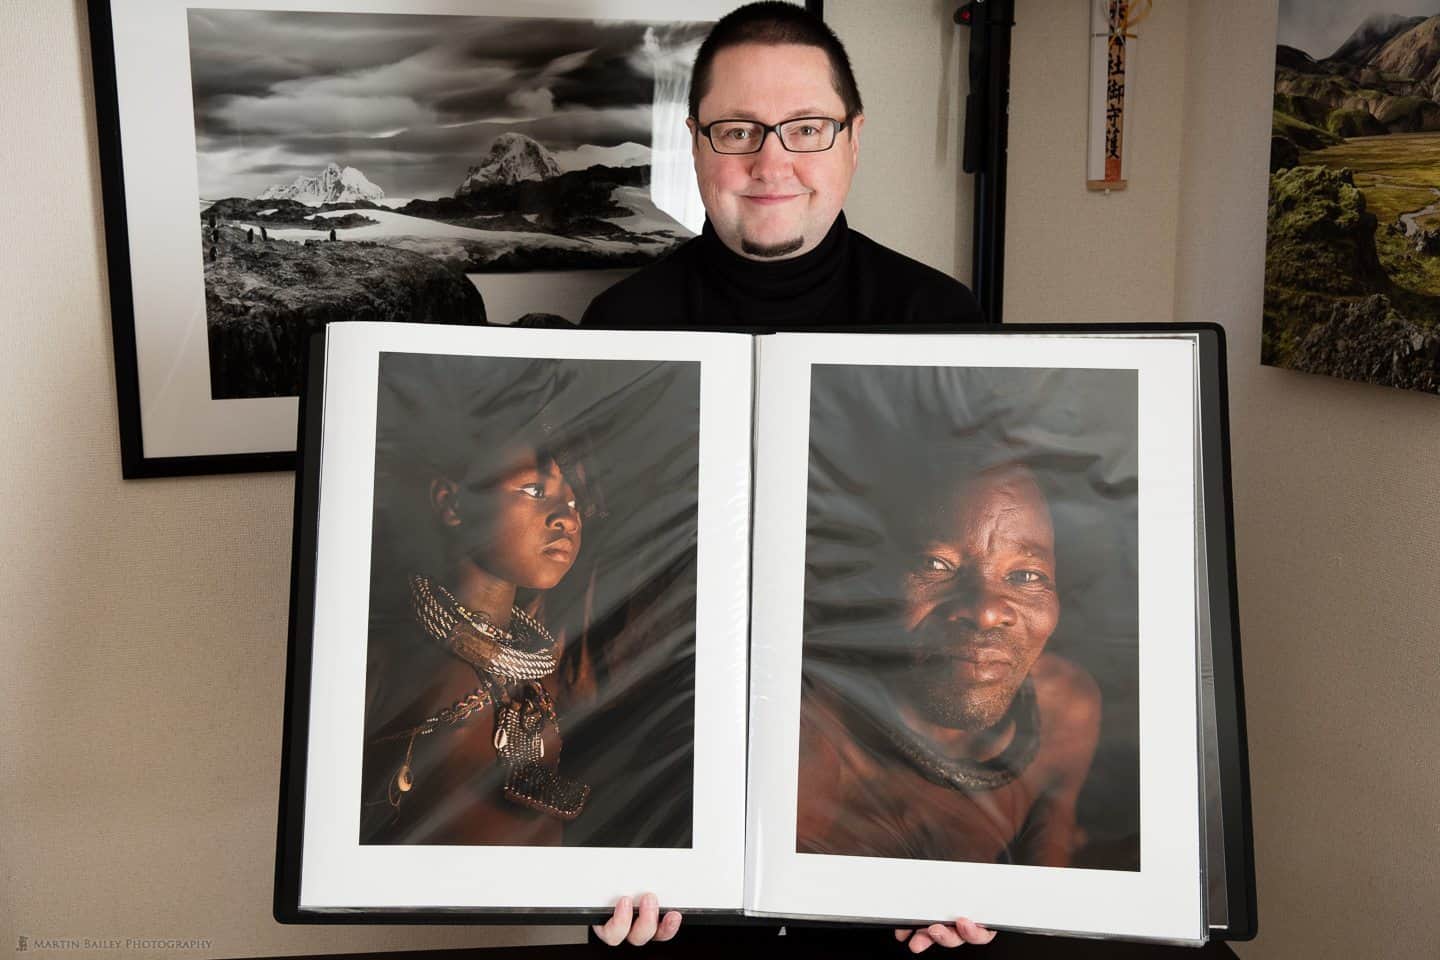
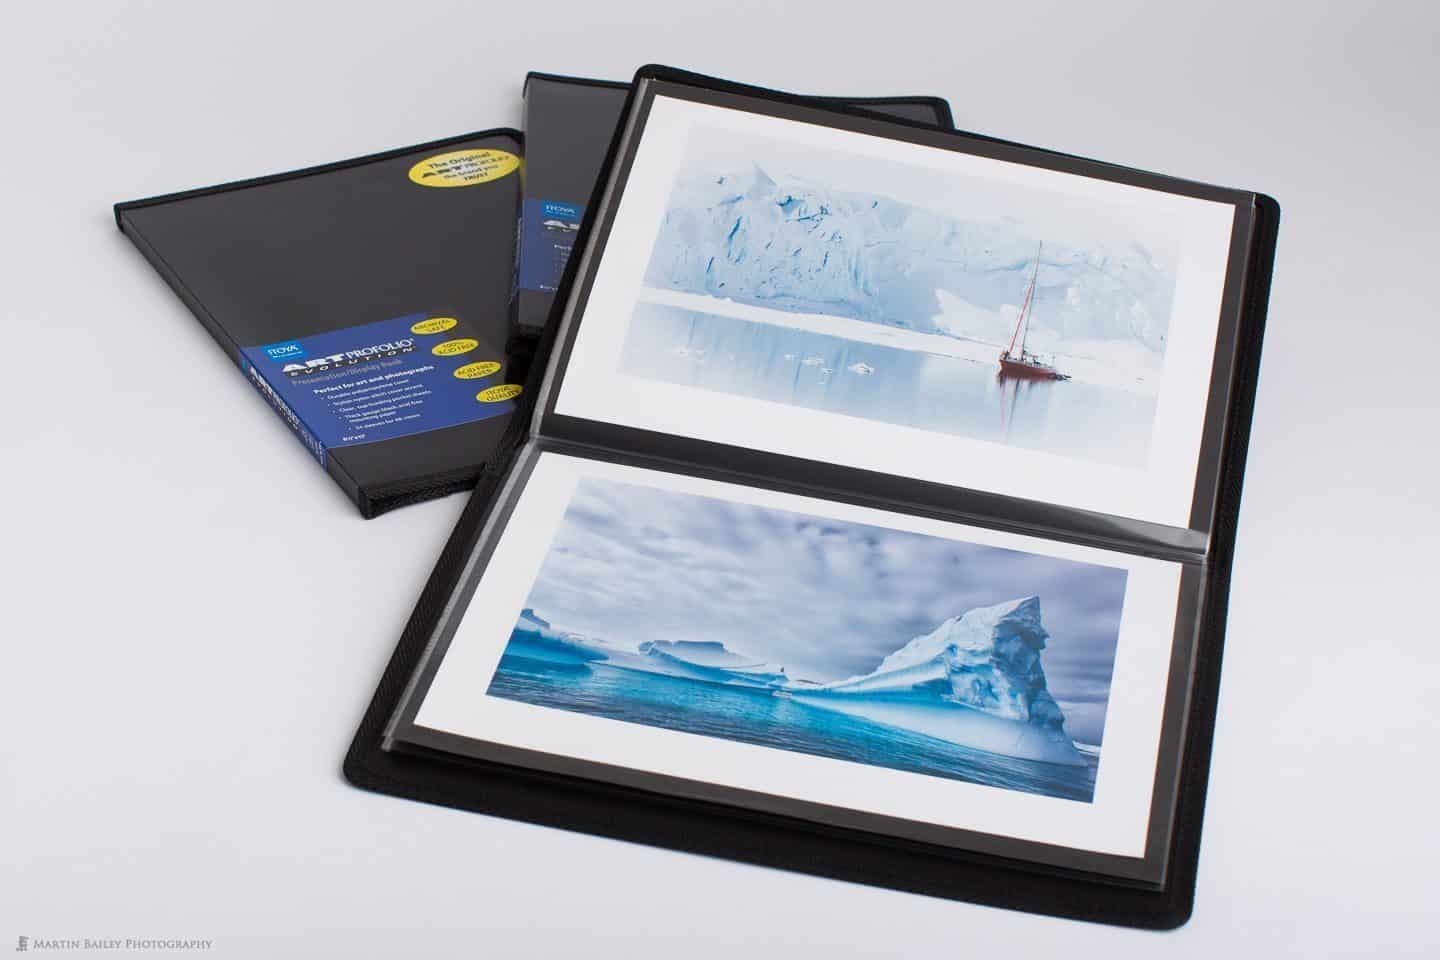
To help avoid touching the prints, the other storage I use a lot is Itoya Art Profolios. I like these because you can flick through the pages like a book, so this is what I recommended to Mark, to help find prints easily. These are relatively inexpensive, but they are acid-free and archival safe storage for prints, with Polypropylene sleeves into which you drop your prints, and they have a black paper insert in each sleeve to sit between your prints as you load both sides of the 24 sleeves, so you can fit 48 prints in a single folder. To show you this type of folder, I shot this photo of me with the 18 x 24″ Itoya Art Profolio folder open showing two portraits from my recent Namibia Tour (below).
These Itoya folders come in lots of common sizes, but again the ones I generally use are 8.5 x 11″, 13 x 19″ and 18 x 24″. These are also available in 19 x 13″ size for landscape orientation A3+ prints. As you can see in the above photo, the polypropylene sleeves do reflect light a little, although it looks worse in this photo because I’m holding up a large folder. When you lay them flat you don’t see this, and the smaller folders don’t ripple like this either, as you can see in the below photo showing an 8.5 x 11″ folder laid flat, so I’m sure you can see that these are fine for casual presentation as well.
Old Sheet Media Boxes
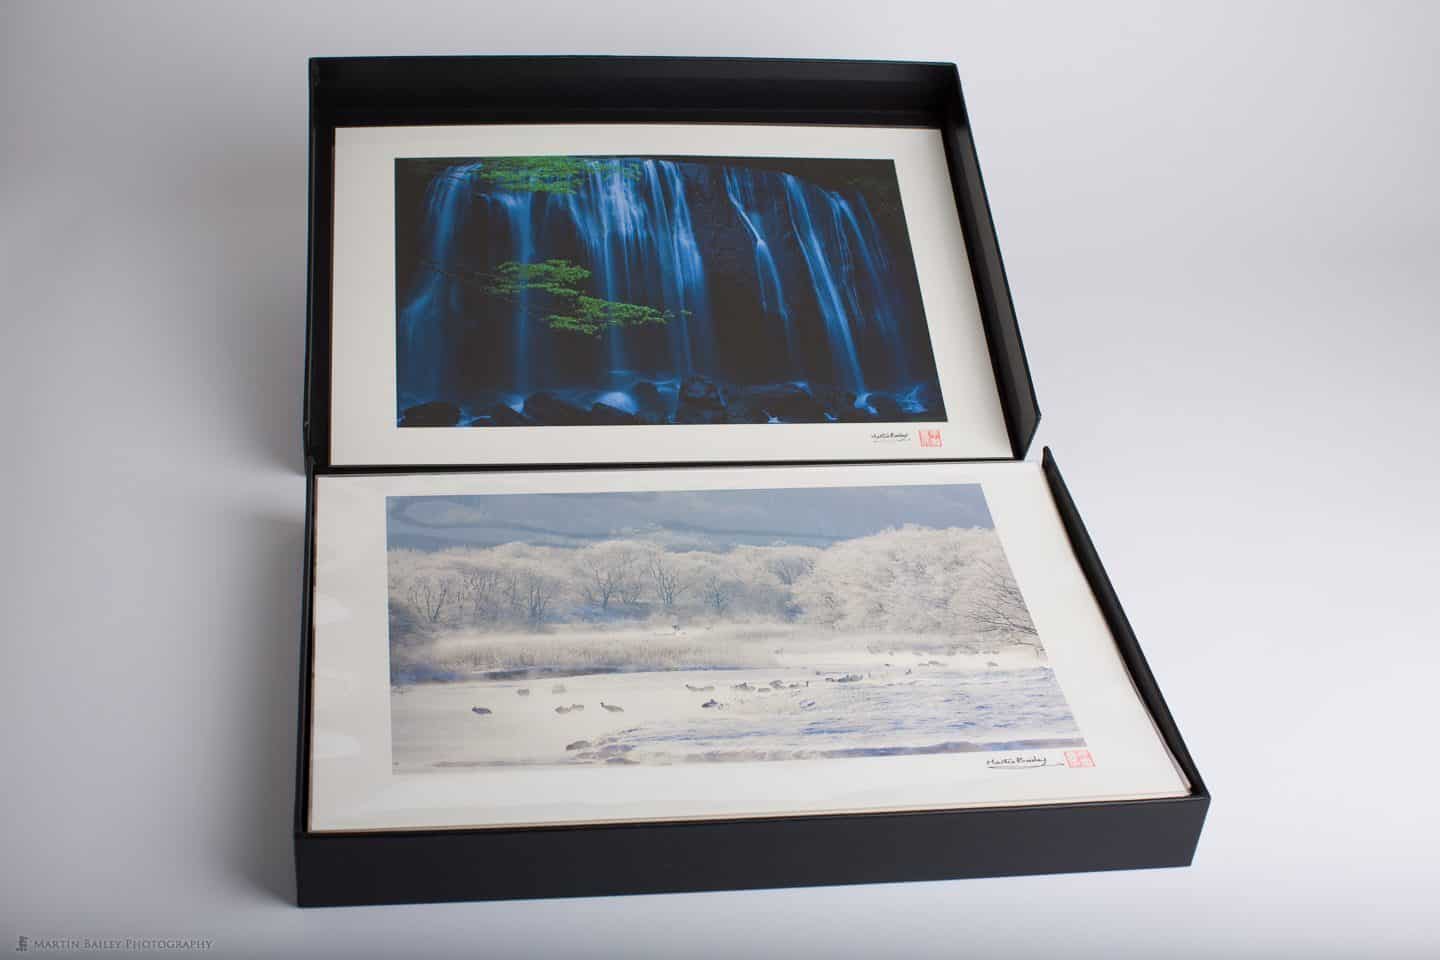
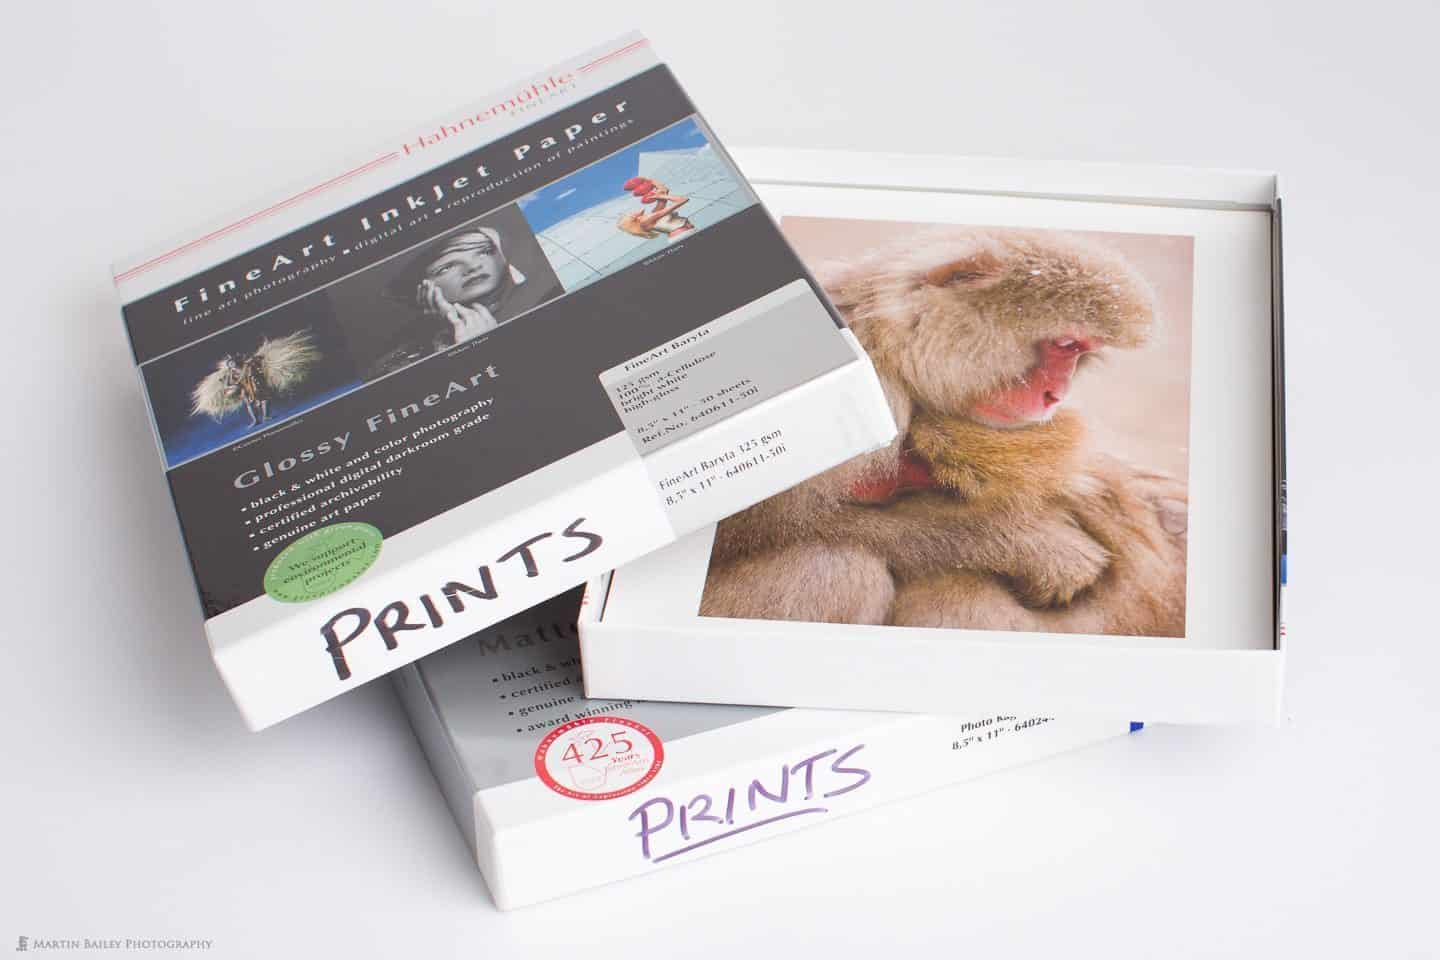
One of the easiest and definitely cheapest storage options, is so obvious you will probably already be doing this, and that’s just using the box that your sheet media comes in. It doesn’t look great presentation-wise, but if you print on sheet media that comes in boxes rather than on rolls, this is a great way to store your prints, although you will ideally already have an empty box before you start to put printed photographs back into it.
Of course, if you print on roll media, you don’t have old boxes like this to store prints in, and this is why I started to explore other methods. Whatever option you use, it’s important to let your prints fully dry and degas before putting them into your archival storage. I generally leave the prints out overnight, and put them into storage the following morning, after giving them one last look over under the morning sunlight pouring into my studio.
Indexing A Print Archive
OK, so as I mentioned briefly earlier, let’s talk a little about how one might devise a system to manage your prints in such a way that you could easily find a particular print, which is part of Mark’s original question. Because I fulfill all of my print orders as the order comes in, I don’t really need an indexing system, so this is total conjecture on my part though. I’m just thinking about what I would do if I needed such a system.
At the base of an index, I would use my image file names. I have the location or subject, the full date, and the image file suffix in the filename. Even if I should end up with two images with the same suffix shot on the same day, Lightroom adds a number to ensure that each file name is unique, so I never have two images with the same filename. I actually use the file name as the base SKU for each image in my online store, so when an order comes in, I just copy the file name, which is part of the order, to my clipboard, and go to Lightroom, and search for that with the Text search, and up comes my image.
Let’s imagine then that I need this indexing system because I’ve become so well known that I am selling so many prints each month that I can’t keep up with orders by creating each print as the order comes in. (I wish!) I would probably invest in a series of cabinets, with relatively shallow draws, into which I could drop prints either loosely, or in archival boxes for extra protection, and I would number each of these shallow draws.
I don’t want to move prints around once I’ve decided on which draw they will live in, as that would break my system as I added new prints, so I am not going to organize the prints alphabetically or anything like that. Plus, there’s no need to have my prints in alphabetical order to find them, because the system I’m imagining here will take me straight to each drawer.
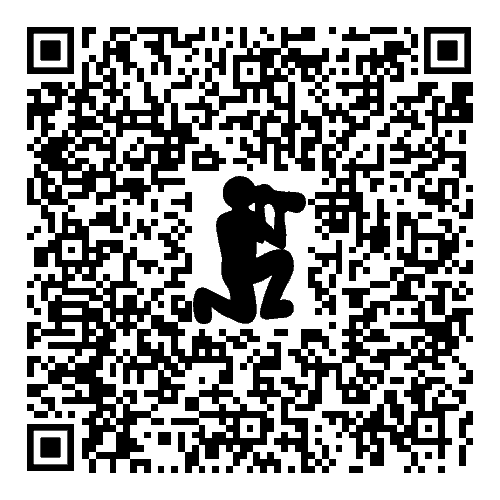
I’d then create a QR code for each image that I have up for sale on my Web site. There is plenty of software to do this, but if you want to give this a try yourself, go to a site like QR-Code Generator.com and use their tool.
They actually have a membership system that enables you to embed your logo into codes if you were really going to use this as a marketing tool as well as for indexing images. I can imagine building a print catalogue and embedding a QR code in the corner of each page, and this would take people directly to the print in our store.
To demonstrate this, I’ve created a code to one of my prints from Iceland, Jewel on the Shore. There are many QR code readers available for the iPhone and Android phones, but I use an app called Scanbot, and this feature is built in to the app.
Scanning a QR Code
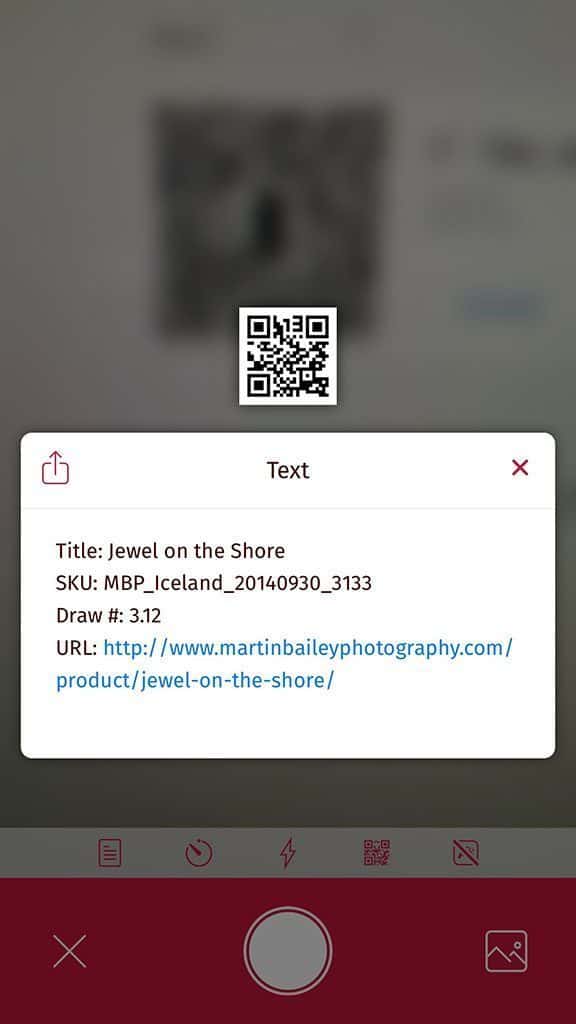
If you have a similar reader or download Scanbot, try scanning the code and you will see the information embedded in the code on your screen, like this (right).
As you can see, the code includes the title of the print, the SKU, or filename, the URL to the image in my store, and most importantly for this exercise, I included a Draw #. This is just made up, but I called it Draw 3.12, which I’m imagining would be draw number 12 in cabinet number 3.
That means that I could scan this code and get all the information I’d need to find out exactly where the prints of this image are. I actually use another SKU for the print sizes and finishes, for example I might have received an order for a 13 x 19 inch matte print. I could get that granular, if I literally needed to be able to simply hire someone to pick stock from these drawers to ship, but I think you get the picture with what I’ve explained so far.
Of course, I need a mechanism to store these codes, which I haven’t really looked into, but there are inventory management software products out there, that including the production and management of barcodes and QR code with stock, which I’m sure you could use.
You could also build a simple Excel spreadsheet and include the information I entered into the QR code, and the QR code image itself. I actually named the QR code image files with the same file name as the image, with _QR _Code appended to the end, so you could just save these files with your images, and even import them into Lightroom so that you could easily see which images you have indexed.
Believe it or not, there is even a Lightroom plugin to store QR codes with prints and it adds custom fields for barcode numbers, and comes with suggested methods to filter out your code images from you Library view.
Of course we’d need to print and fix the QR code to each drawer of the cabinets, and I’m thinking some simple Avery square labels would do the job, or you could perhaps have little holders to drop printed card in.
I haven’t spent a lot of time thinking this through, so I’m sure you could come up with something more sophisticated if you really wanted to put some kind of indexing in place, but I hope this points you in the right direction if you do have a need for something like this. If you already do something like this, by all means share your methods in the comments for this blog post (below).
I actually think the idea of having these codes in a printed catalog might have legs, so I’m not going to forget about this myself either. I can also imagine printing postcards of photos that I sell and giving them out at trade shows etc. People could scan the code later and maybe pick up a copy of the print, although it would be better to encourage impulse buys to just have the prints there for them to buy and take home with them.
I hope this was useful, and thanks to Mark Friedman for the question that sparked this episode. If you have any questions yourself, you can now record them by clicking the sidebar on the Web site that says Send a Comment or Question, or visit our Voicemail page. I’d love to hear from you, and I’ll include your recording in the audio. If you don’t want me to use your recording, you can still use the Contact form to drop me a line as usual.
500th Episode Party Hangout!
You may have noticed that next week we celebrate our 500th Episode! As we did with the 400th episode, I’m thinking that it would be fun to do a Google Hangout and invite you along too! What I’d like to suggest is if you have a story about how this podcast has influenced you or your photography over the years, I’d love to hear that story during the hangout.
To help me to gauge involvement, please leave a comment either below or on the hangout page if you intend to join us, and write a sentence or two to let me know how I’ve helped. You’re story doesn’t need to be a life changer. I’d love to hear about any way I’ve inspired or helped you or your photography.
We’ll start at 11AM Japan time on Dec 5, which is 6PM PST on Dec 4. If this is too late for you (sorry UK folks!) I would still love to hear from you. If you can’t make it, please leave your message/story via our Voicemail system (https://mbp.ac/voicemail) or click the red sidebar on our Web site (right) to leave a comment. You can record up to five minutes, so no need to rush.
If you are going to join us, ensure that you have earphones and a working mic beforehand.
I hope to see you there!
Show Notes
Itoya 8.5 x 11″ folder: https://mbp.ac/ItoyaLetter
Itoya 13 x 19″ folder: https://mbp.ac/Itoya13x19
Itoya 19 x 13″ folder: https://mbp.ac/Itoya19x13
Itoya 18 x 24″ folder: https://mbp.ac/Itoya18x24
Search for other sizes on B&H: https://mbp.ac/ItoyaBHSearch
Archival Methods 8.5 x 11″ Proof Box: https://mbp.ac/am85x11
Archival Methods 13 x 19″ Proof Box: https://mbp.ac/am13x19
Archival Methods 18 x 24″ Museum Drop Front Box: https://mbp.ac/am18x24
Archival Methods 24 x 36″ Museum Drop Front Box: https://mbp.ac/am24x36
8.5 x 11″ Polypropylene Clear Sleeve: https://mbp.ac/cf85x11
13 x 19″ Polypropylene Clear Sleeve: https://mbp.ac/cf13x19
QR Code Generator Web site: http://www.qr-code-generator.com/
Scanbot QR Code Reader: https://itunes.apple.com/us/app/scanner-qr-code-reader-app/id834854351?mt=8
500th Episode Party Hangout! https://plus.google.com/events/c20d20ads9r8s9slif5nqbhuc0o
Subscribe in iTunes for Enhanced Podcasts delivered automatically to your computer.
Download this Podcast in MP3 format (Audio Only).
Download this Podcast in Enhanced Podcast M4A format. This requires Apple iTunes or Quicktime to view/listen.


Dear Martin,
Congratulations on making it to episode 500! I won’t be able to join the hangout but wanted to say how much I’ve appreciated your podcast as a place from which I’ve gained a ton of knowledge. Also, as I said in an email to you, thanks to you introducing me to Offset Images I applied to and was accepted as a member, attended a fun hangout in central London (where I got to eat plenty of free canapes and get a lovely Offset pen) and have made, to this day, $771 from selling my images. None of this would have happened without your podcast!
Here’s to 500 more episodes!
Best wishes,
Steve
Hi Steve,
That’s all great to hear. I am over the moon that Offset has worked out well for you, and I am always grateful and humbled to hear that the podcast has helped others like this.
Thanks for taking the time to comment, and continued success for the future Steve!
Regards,
Martin.
Thank you so much for all the information you share with the photographic community. This podcast was so timely for me as I have just purchased a printer – Epson SureColour P600. I have only printed a few images (learning about printing – your ebook ‘Making the Print’ has been most helpful) but was beginning to wonder about storage. I do like the idea of the Itoya folders. As I live in northern Canada (Yukon), I really appreciate the links you provided to B&H.
Congratulations on reaching 500. Before you know it, you will be up to 1000!!
You’re very welcome Janet. Thank you for stopping by and for commenting.
I’m pleased this information and the links are useful for you. Thanks for picking up my Making the Print book too!
It took me 10 years to do the first 500 episode, but I imagine when I look back in 10 years time when we hit 1,000 it probably will have gone pretty quickly. 🙂
All the best!
Martin.
The Itoya Art Profolios look like a great idea!
I’ve been happy with them for a number of years now Murray. I’m sure you’d be happy with them for storage and casual presentation if necessary. I use a beautiful portfolio case for full presentations, but these are nice to whip out and show friends stuff.
Hi,
Any chance you have or will look at the new Canon printer “imagePROGRAF PRO-1000” ?
I know you have a larger printer, so it might not interest you much, but I would be curious to get your opinion.
Thanks.
Luc
Hi Luc,
Unless Canon send me one to test, I personally won’t be getting a Pro-1000, but they look like a great printer. If I was getting something smaller, this would probably be what I’d buy now.
https://mbp.ac/pro1000
Cheers,
Martin.
Hello Martin. As I don’t have access to a private place to record a message I thought I would comment instead.
First of all, congratulations on Episode 500 what an accomplishment! Listening to you over the years has been such a great learning experience for me. I particularly love hearing the approach and thought process you go through when working on photos and shoots. Hearing how methodically and with care you approach things really has helped me with how I approach my images both during editing and shooting. Looking at the nuances and the details with much more care then I did before listening to you.
Thank you again for all the effort and time you put in. Congratulations, and here’s to many more episodes to come.
Nick
Thanks so much for the message Nick! I really appreciate this, and I’m so happy to have helped with your process.
I hope you continue to enjoy the blogcast as we work towards the 1,000 mark!
Cheers,
Martin.
Thanks again for spending so much time on these podcasts Martin! Great Stuff. I have one question that’s slightly off topic. What is your opinion on Dry mounting large photos? To some up what I’ve found after hours of reading is Dry mounting means hurting the prints longevity but not dry mounting means waves will eventually form in a large print.
Hi Charlie,
You’re very welcome for the podcasts.
I have only ever seen large prints form waves when they were printed on cheap media. Years ago I had an old photo on my office wall made with cheap media that rippled, but that’s the only one I’ve ever seen it happen with. I put this down to the fact that I have since only used heavy fine art media.
My advice would then of course be, use heavy fine art media, and you shouldn’t have to dry mount to prevent the print from rippling.
I hope this helps some.
Cheers,
Martin.
Very nice to hear you experience in the matter. Thanks Martin 🙂