
From August 25 to September 5, 2013, I ran my first Iceland Photography Tour with Tim Vollmer. From today for a few weeks, I’m going to walk you through the tour with the aid of photographs selected from my final edit, which is 50 images. It was a tight edit as usual, so I may well only be able to remove a further 10 or so, so we’re probably looking at this becoming a four part series.
This episode is brought to you by Squarespace, the all-in-one platform that makes it fast and easy to create your own professional website or online portfolio. For a free trial and 20% off, go to squarespace.com and use offer code MBP9.
We’ll hear more about our sponsors Squarespace later, but I want to start our main topic today by telling you that Iceland was a bucket-list country for me. When I found out that I had that brain tumor just over two years ago now, I had just come back from Antarctica, one of my bucket list countries. Africa was another, and I was able to visit in May this year, and Iceland was the third. I’m starting to add other countries now, but both Iceland and Africa, in addition to Antarctica lived up to and surpassed my expectations.
Photography is all about light of course, and Iceland has simply amazing light pretty much all day. In August, the days are still quite long, with sunrise at 6:15 and sunset at 8:40, but civil twilight starts at 5:20am and ends at 9:30pm. When you are watching for Aurora Borealis, it’s also important to note nautical twilight, which ends at 10:45pm at the end of August, start of September. Of course, this is because we are so far north with Reykjavik at 64.8°, so the sun never really rises that far in the sky. Because of this, we’re never far from Golden Hour, so the light is beautiful the entire time.
We started with a day of people arriving, but as many of the group were already in town, we went out for a walk into Reykjavik, which is a beautiful town. One of the most striking features is the amazing stone church Hallgrímskirkja. Now, before we move on, I need to tell you that I found pronouncing Icelandic words very difficult, as you can probably tell.
The dilemma here is that although I’ve tried to learn how to pronounce the various Icelandic characters, they don’t sound much like you would think they do if you read them as a western alphabet, so if I try too hard here, you probably won’t recognize the names either. Anyway, I’ll try to be somewhat authentic in my pronunciation, without going too far, and hope that works for you. I’ll also link the words that are available to a recorded pronunciation guide, so if you want to hear the proper Icelandic pronunciation, click on the links on the blog.

Hallgrímskirkja Church
Anyway, this church was a magnificent structure, sitting proudly on the hill in Reykjavik, visible from most parts of the city. Inside it feels almost like you are looking up at an alien spaceship, or maybe an upturned viking ship. There’s a beautiful pipe organ too, and one of the most amazing things that we found here, and pretty much everywhere else, is that the Icelandic people are not very big on regulations. We used tripods inside the church, and no one stopped us, and there were a number of places where most other countries would have had security guards frogmarching you out of the building, but in Iceland, there was nothing like that. We found it to be a very photographer friendly country.
In this photo, I had obviously done a long exposure to capture the cloud movement. I used an ND8 for three stops and an ND400 for nine stops, giving me a total of 12 stops of darkness, for an exposure of 75 seconds at f/16. Although I got a number of exposures with no people in them, in the end, I went for this shot with the ghostly looking figures of moving people barely recorded in the frame. I feel it adds a nice extra element to the shot, and I really liked the sky in this one too. Apart from a Silver Efex Pro black and white conversion, I didn’t do anything to this in post, except for a little dust removal of course. Long exposures at small apertures and black and white conversion usually make every bit of dust show up in the final image.
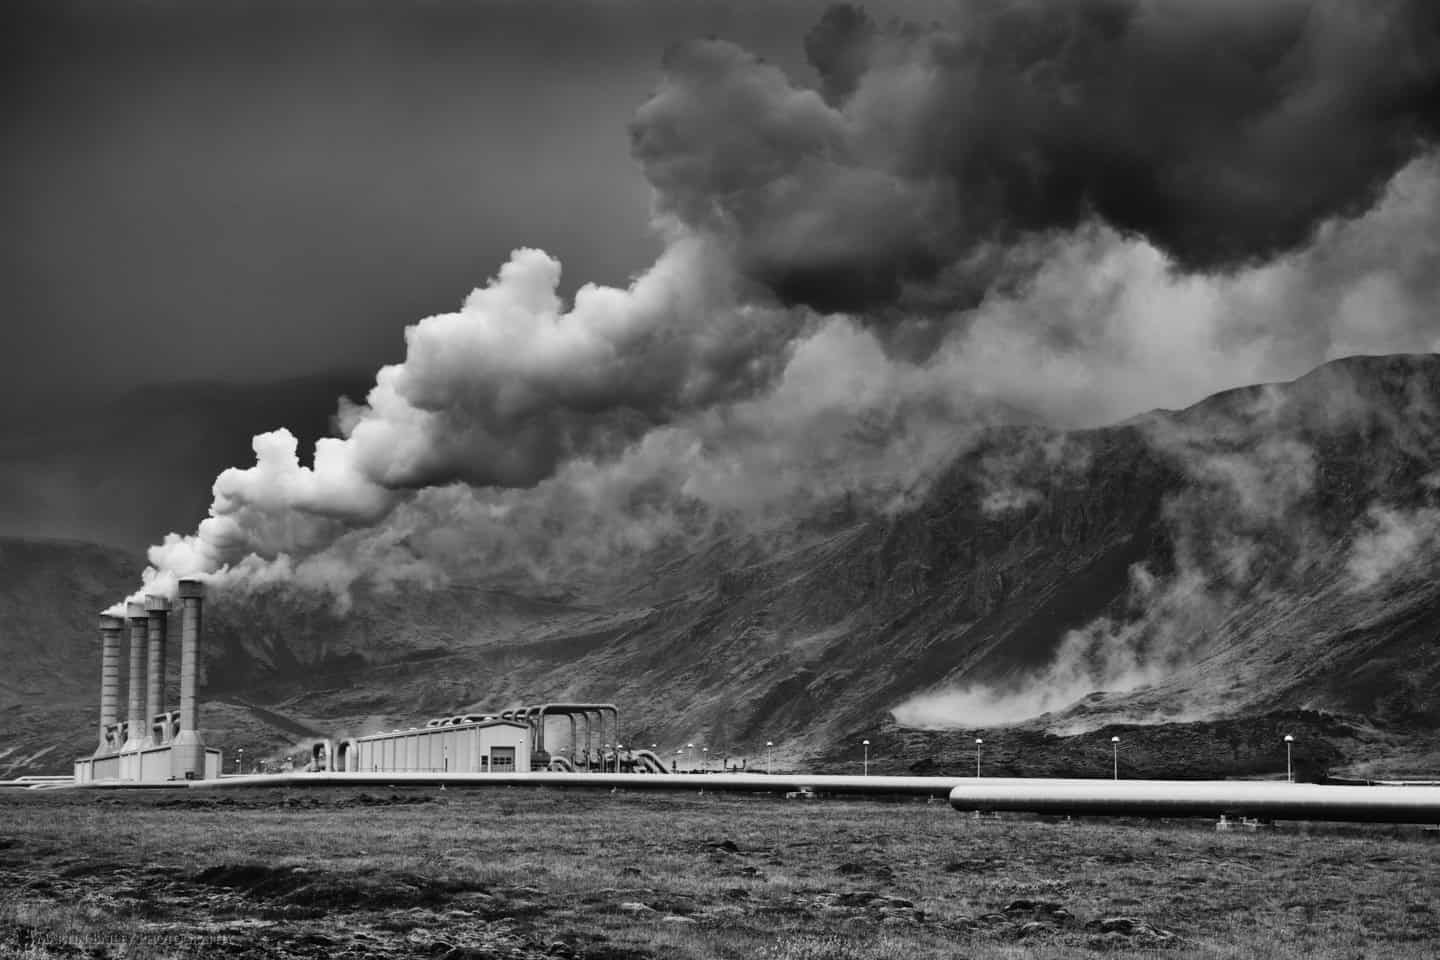
We worked out of Reykjavik for the first four days, and on the second day found ourselves out on the Reykjanes Peninsula. Although there are beautiful moss beds and lagoons out there, I found myself most excited by the dramatic view of the geothermal power plant that we see here (below). The trick behind this shot of course, was waiting for the sun to catch the steam from the foreground towers while leaving the background in shade, which allowed me to process this into a very dramatic, industrial looking shot. It also feels like a nasty shot of the industrial revolution, but understand that all that is being spewed out into the atmosphere here is steam, not polluting smoke.
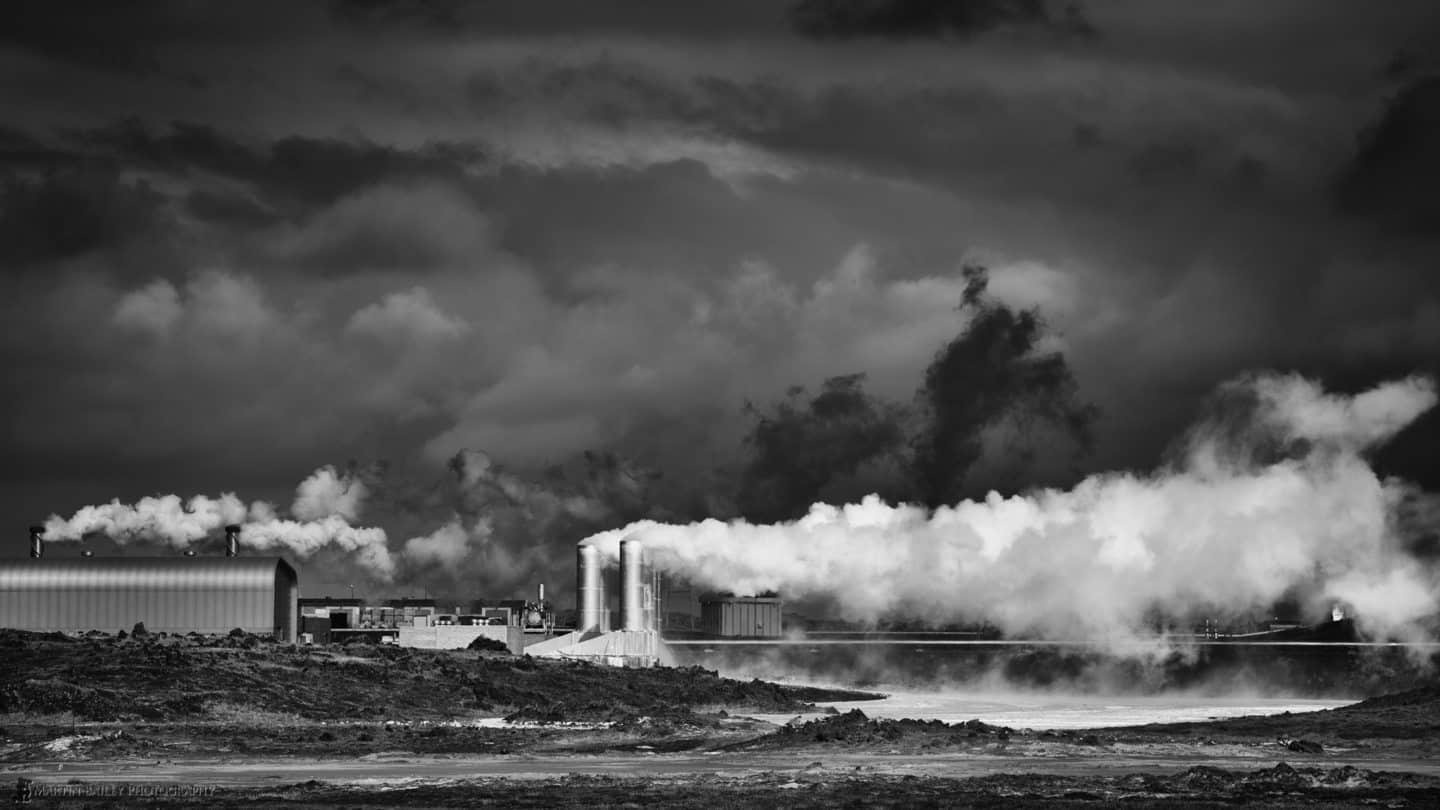
Geothermal Power Plant
Just across from the power station, were some beautiful rocks in the ocean, as we can see in this next photograph (below). Although I did some much longer exposures here too, as I found doing some of my seascapes in Okinawa last year, when there is dynamism like the breaking waves that we see here, I found that between 0.6 and 1 second exposure works better. I started out at this location telling the group 1 second, but we found that slightly short 0.8 seconds worked better here, as in this shot. The longer exposures were nice, but I preferred this approach, so that we can see the full motion of the waves.
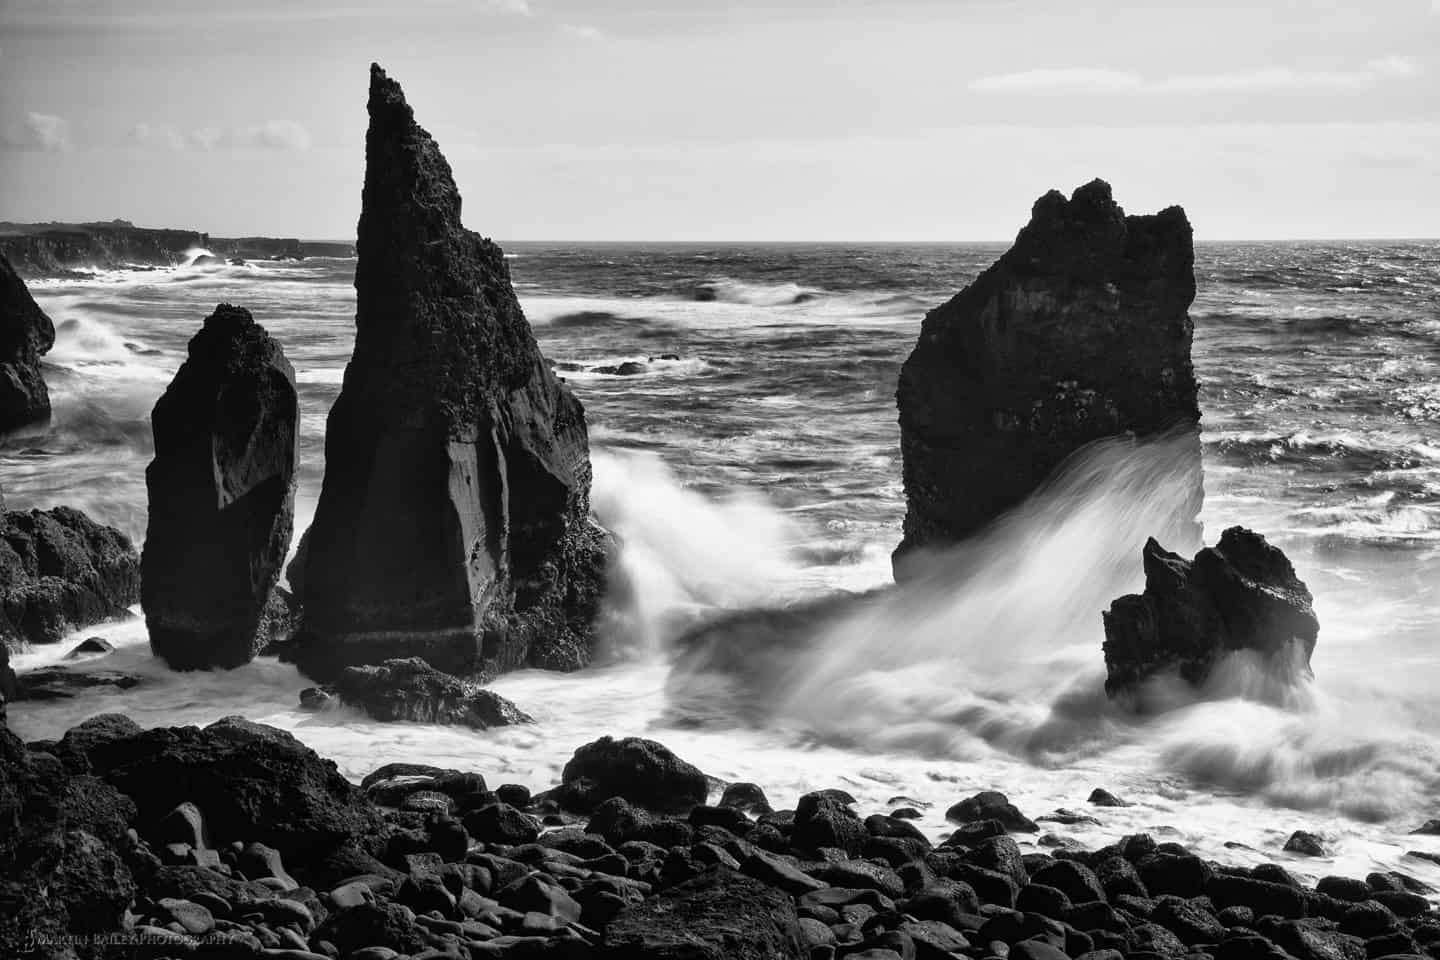
Rocks at Reykjanes Peninsula
There are two photos from this scene in my final selection. The first being slightly wider, with a couple of people on top of a rock outcrop to the left, but I feel this is a tighter composition. A reminder that we don’t need to include everything in our images. It’s often as much if not more about what we leave out, than what we include.
After leaving the Reykjanes Peninsula, we drove to a nearby church, but as we arrived, most of the group were more attracted to an old abandoned boat across the way, so we took a walk over there. Again, I posted two shots of the boat, this time the first was in color, with the boat almost sailing on its sea of green grass, but I probably prefer this one, a black and white version with the sky seeming to radiate from the boat, almost like the scenes we sometimes see in Japanese Manga comic books.
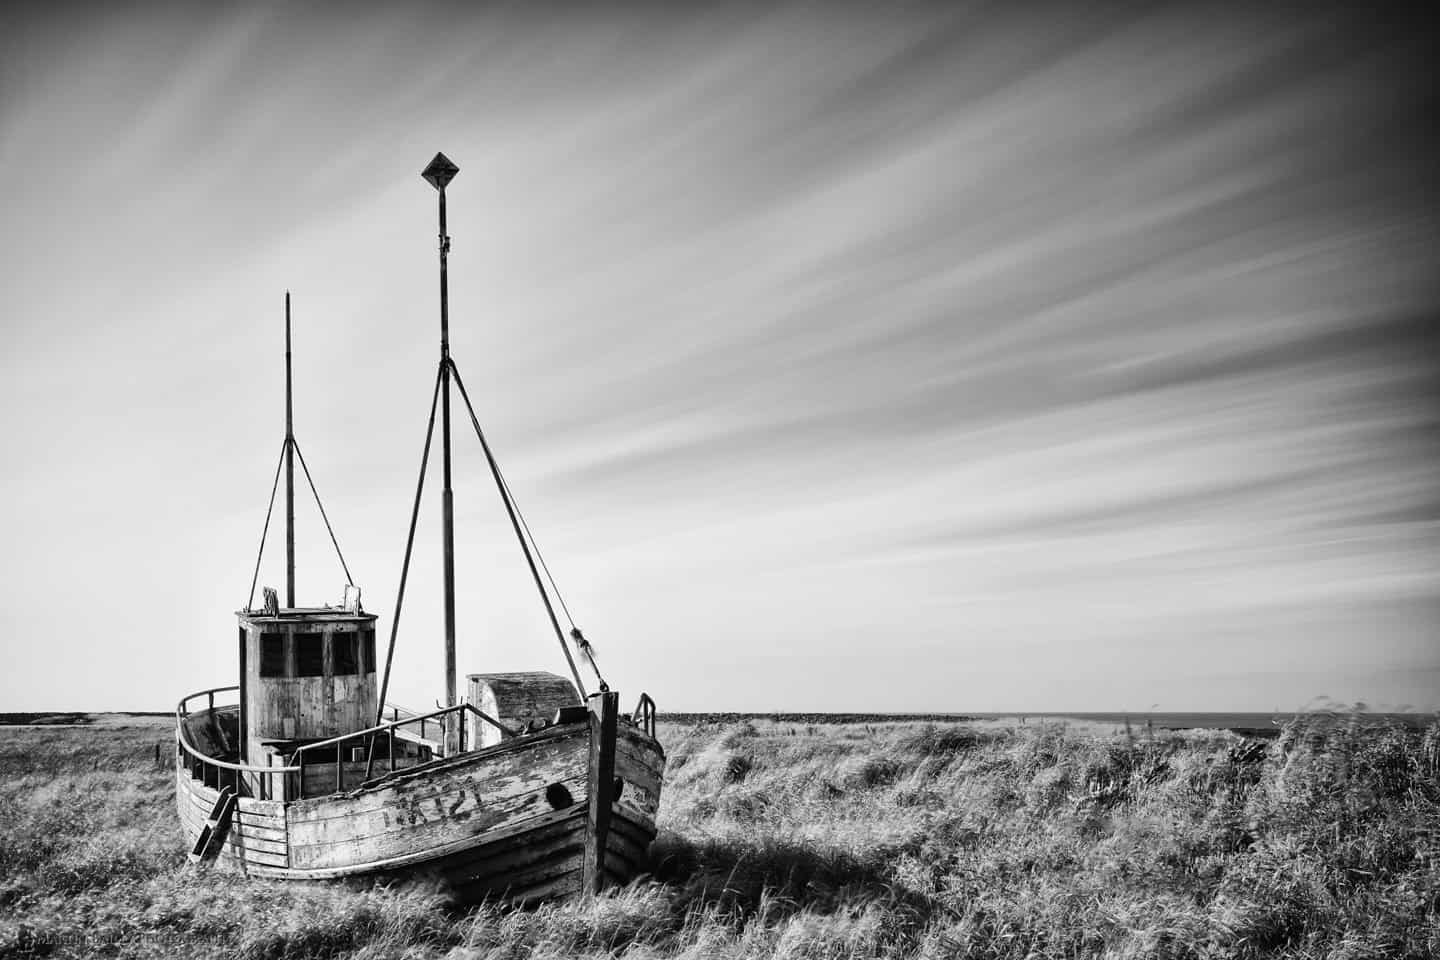
Abandoned Boat
This is one of the two locations where I shot a few bracketed shots towards the end for an HDR, but I didn’t process them. I just don’t find that I need HDR with the dynamic range that our cameras have now, and the software, such as Lightroom, Silver Efex Pro and Color Efex Pro, bring out so much in the image, that there seems no point. Of course, if you like the HDR effect, then I’m not saying you shouldn’t do HDR, but I personally continue to use single frames for pretty much all of my work. This was a 60 second exposure at f/14 by the way.
The following day, we got into the green mountains a little more, and this photo is from our second stop of the day. I’ll share a technique with you here, that I was asked about and discussed when shooting this image. The question was, do I use a Depth-of-Field calculator to find the hyperfocal distance when I want to achieve pan-focus, where everything in the scene is totally sharp.
Although I do sometimes use a calculator, more often than not, if I’m using a wide lens, say 24mm or wider, I simply focus on something in the foreground, and stop down to around f/11 to f/16, and I know that everything will be in focus unless I am shooting at a very low angle with stuff closer than a few feet that also need to sharp.
As in this shot though, which I shot at 50mm, I use Live View to check the extent of my focus. To do this, frame the scene and get your composition set up for your final image, and then while in Live View, move the square over the foreground that you want in focus, here it’s the edge of the rocks at the bottom of the frame, and then hit the zoom button to zoom in to 5X magnification. Then, hold down the Depth-of-Field Preview button, which is usually found on the camera body near the lens-mount, and manually push your focus out until you can see the foreground just start to go out of focus, and then bring it back into focus. This ensures that your foreground focus is on the edge of the depth-of-field. If you have your shutter button set to the default, it will autofocus again when you press the shutter to take the shot, so you might need to switch your lens into Manual focus for this.
Then, shift the magnified area up so that you can see the mountains in the distance, and hit the Depth-of-Field Preview button again. If the distant objects are also in focus, you are fine to go ahead and make your exposure. If you want to double check, you can again, while holding down the Depth-of-Field Preview button pull the focus back, until the distant objects start to go out of focus, and move them back into focus. If you can pull back very far and things are still in focus, you could consider using a wider aperture, especially if you are down past f/16, which is where diffraction starts to kick in, making everything softer, because the light is being pushed through too small a whole.
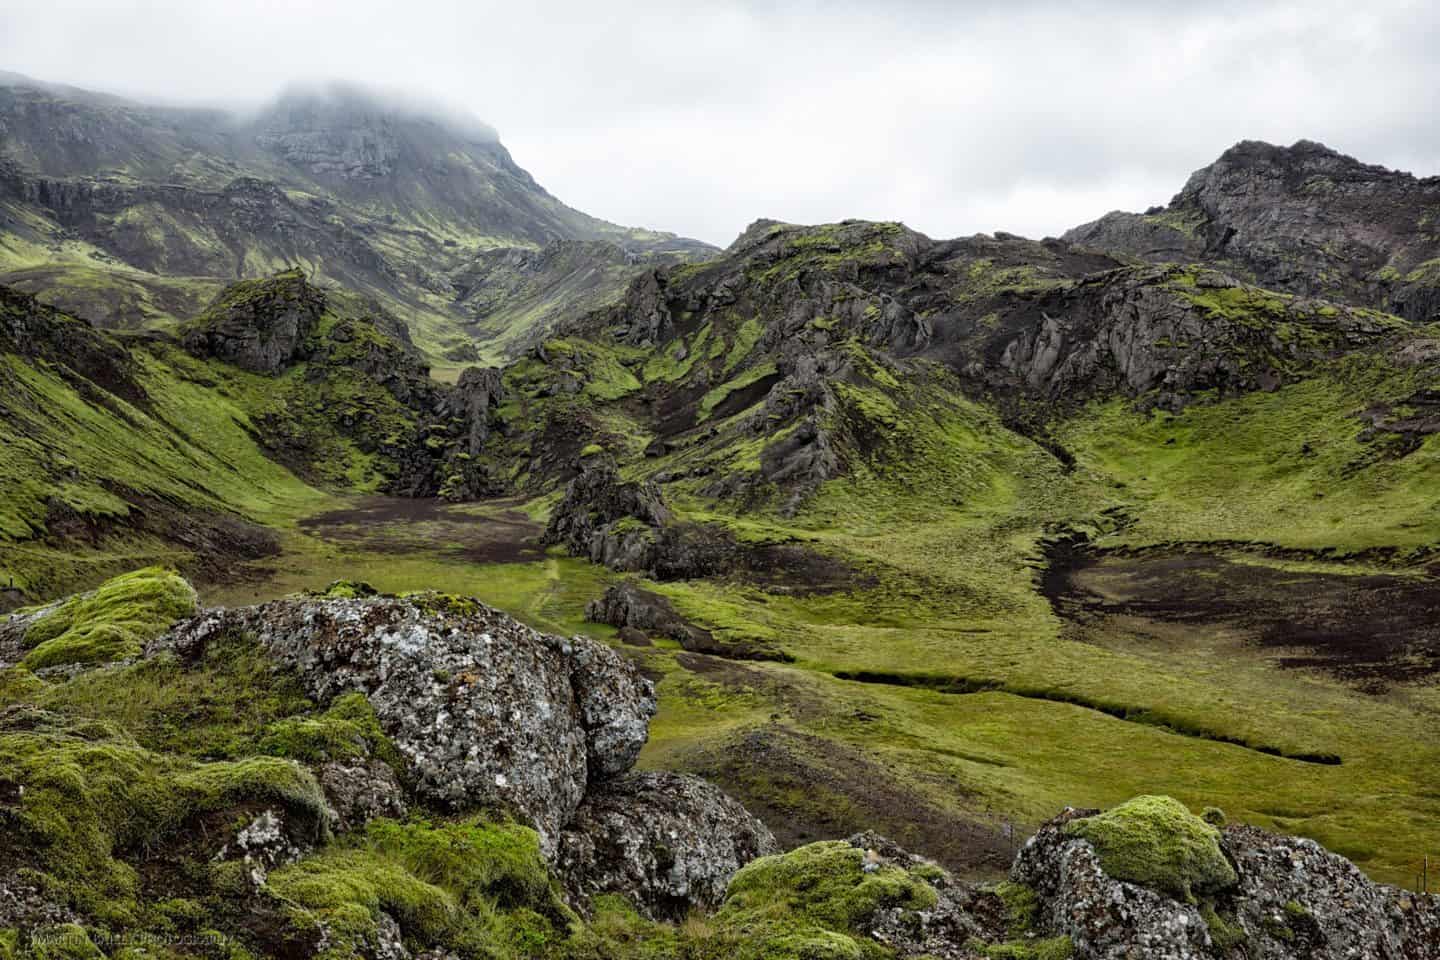
Icelandic Landscape
Another thing to note here is that in some scenes, if you get everything in sharp focus, you can end up not really being able to tell where the foreground ends, and where the distant scene starts. This photograph was very much like that, so I opened it in Photoshop, duplicated the image, and made one image just a little bit blurred, then I masked in a very thin line of blur between the foreground and the distant scene, to give us just a little bit more separation. You can probably see this if you view the image large, but hopefully you won’t have noticed this until I told you about it. It should have just been obvious where the foreground and background were separated, if I’ve done this properly of course.
Next, here’s another Geothermal Power Plant that we visited. The weather is so changeable in Iceland, it seems that you only have to wait a few minutes for the gap in the clouds to brighten up just the right part of the scene for this kind of dramatic effect. Of course, I’m bringing much of this out in Silver Efex Pro, but without a difference in the brightness of the steam, you can’t just create these layers or dark and light from nothing.
Geothermal Power Plant
This power station was once again a tribute to the lack of regulations in Iceland. There was a barrier across the entrance, but we just walked right into the facility grounds and shot away for a while. Of course, with a lack of regulations to protect you, you have to exercise a little common sense yourself, so you probably don’t want to be wandering over and hugging the pipes full of steam, but as they are very well insulated, you could probably do that too. I’m just trying to make a point though. I’m sure if you go too far with this, you could get into trouble.
By this time, it was August 28, and after the power plant, we headed over to a small woods where Tim had told us there was a possibility of seeing some Amanita Mushrooms. He’d told us they were the little red mushroom with white spots that you see in fairy tails, but this didn’t really prepare the group for what we found. When we arrived the forest floor had scores of these cute little fungal friends, and they were all around 6 to 8 inches tall, and looked perfectly capable of supporting a small gnome as he rested on his way through the forest.

Amanita Mushrooms
I shot a whole bunch of images here, as many of the group did, but my favorite turned out to be this shot (above) where the mushrooms are shown more in their environment, with the light at the edge of the woods behind them. You can also see here that the white spots are actually like this white thorns on top of the red mushroom head, as opposed to just spots of white which I’d kind of expected.
A short walk from the woods with the mushrooms, was Öxarárfoss, a beautiful waterfall, that is actually water flowing from the American tectonic plate to the Eurasian plate. This is part of the actual rift between the two continents, with America being slightly higher than Eurasia.
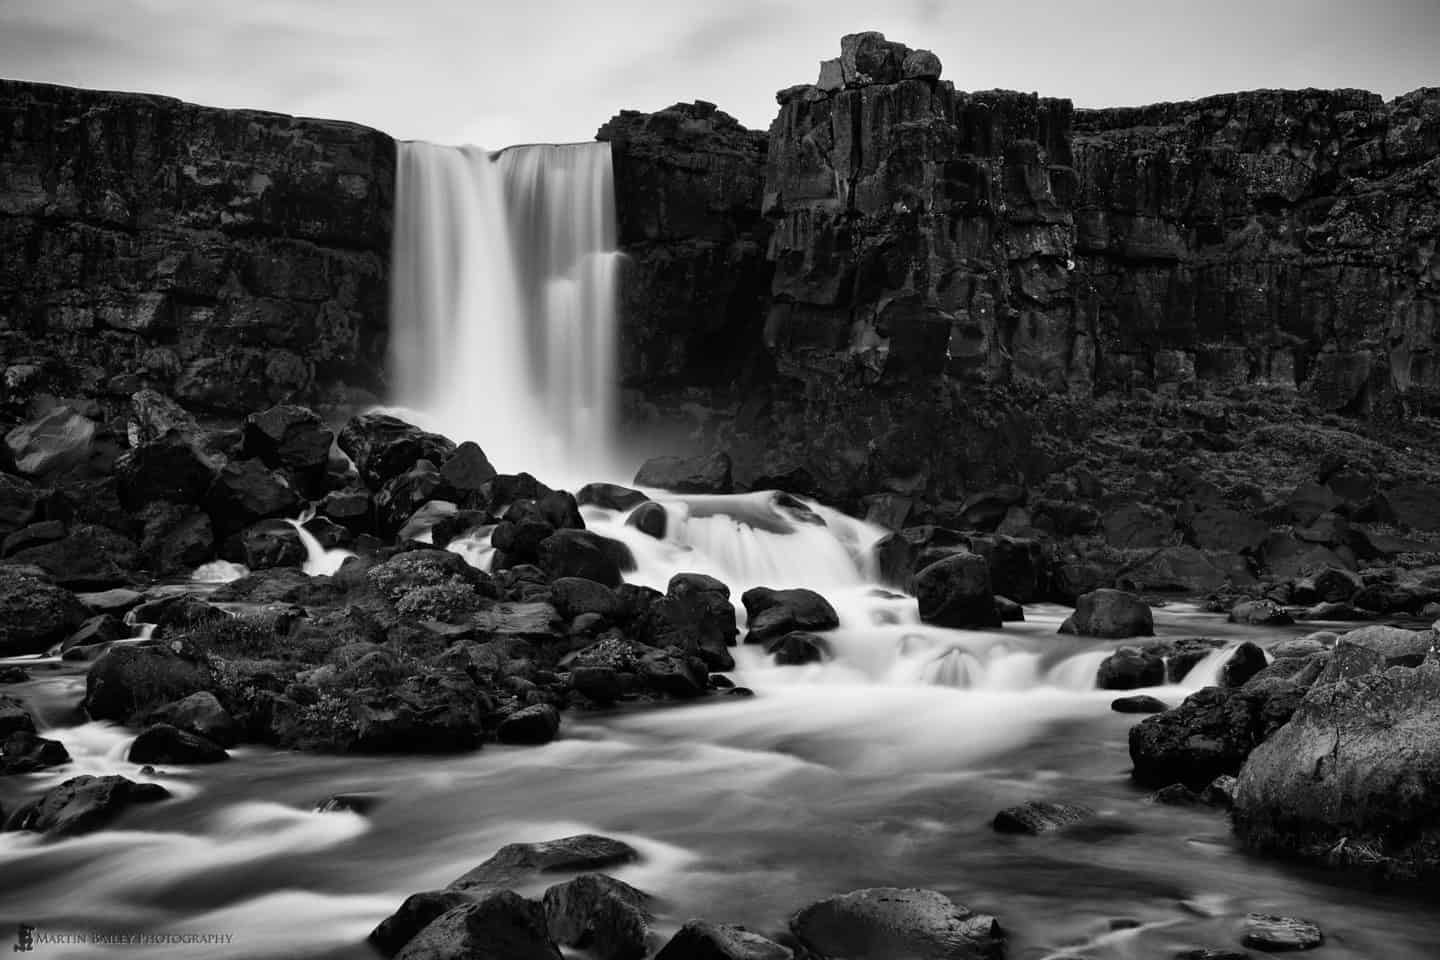
Öxarárfoss (Falls)
This is an 8 second exposure, using the ND400, for 9 stops of darkness, and again, a Silver Efex Pro black and white conversion. I’ve darkened the rocks considerably here, preferring this dramatic look, and I dropped a few controls points over the sky as well, to bring out some of the texture in the clouds. Sometimes when you do this, you get a bit of a white line between the black of the rocks here, and the grey of the sky, but this is easily removed in Photoshop. I’ve already done that on some images, but others, like this one, will need to wait until I print them. I never print anything with a white line like that, as it becomes very obvious in print.
A little back from where I shot the last image, there is an outcrop on which you can stand and get a shot like this (below) of the falls, and the river that hangs a sharp right, and runs along the rift between the continents for a while. Tim showed his impressive knowledge of the locations he was guiding us to by telling us that you can include both the falls and the river with a 24mm focal length from this spot, and that is exactly what I shot this with.

Öxarárfoss (Falls)
In fact, I should probably mention that a few months ago I traded in my version 1 24-70mm f/2.8 L lens for the new Mark II version. I was never really displeased with the old version, but it was a bit of a brick, and could be a little soft around the edges sometimes. This little baby though, is sharp as tacks into the corners, and smaller and lighter than the original lens. I’m really enjoying shooting with the new version.

Þingvellir Church
About a kilometer from the falls, is the Þhingvellir Church that we see here (right). I had my eye on this sky as we approached the church, and was happy to find an angle where it looked like the sky is radiating out of the church steeple.
Some people like to use Tilt/Shift lenses to correct warped perspective like this, but generally I reach for my rectilinear 14mm lens and enhance it even further. I love this look, and I knew that the sky would pop beautifully in black and white.
It wasn’t an obvious sky unless you think in black and white. Sometimes I decide to convert into black and white because the color isn’t adding anything, or even getting in the way, but sometimes, as in this case, I just know from the start that the image is going to be converted.
Note too that unless I’ve got a pretty good reason to go askew, I usually use the digital level in my camera to ensure that my horizon is straight. In this case, that meant that the lines in the center of the frame, leading up to and including the steeple, are all perfectly straight, and everything else is leaning in a little bit, or a lot maybe. Without the level, it’s difficult to get this kind of shot looking as natural as it can for such an intentionally warped perspective.
OK, so that’s our ten shots for today. We’ll pick up the trail on August 29 for a brief visit to Geysir, where we shot the impressive geyser, sometimes known as The Great Geysir, that spouts water 70m high every 5 to 8 minutes. It was a nasty grey day when we were there, but with a little bit of processing, the images are still quite impressive, as we’ll see next week, and after all, those nasty grey skies are what I was after most of the time anyway, so no complaints.
If you’d like a sneak preview of the entire Iceland Portfolio though, it’s now under the Portfolios menu, as part of the work I’m doing to bring everything under one roof, I’ve now started putting my portfolios here too.
 This Podcast is Sponsored by Squarespace
The Martin Bailey Photography Podcast is proud to have Squarespace on board as our current sponsor.
Visit www.squarespace.com and use the code MBP9 for a free trial and 20% off new accounts.
Show Notes
Iceland Portfolio: https://martinbaileyphotography.com/portfolio/iceland/
Music by UniqueTracks
Subscribe in iTunes for Enhanced Podcasts delivered automatically to your computer.
Download this Podcast in MP3 format (Audio Only).
Download this Podcast in Enhanced Podcast M4A format. This requires Apple iTunes or Quicktime to view/listen.

Beautiful work Martin. I loved Iceland and hope to go back there again. My favorite images from the set are the boat and the 2nd Öxarárfoss Falls image. Looks like a fantastic trip.
Thanks Nick! As you know, it is a very special place.
Martin, listening to you speak and pronounce the Icelandic words along side your photos was one of the best, photographic experiences I have had on the web. I attended 9th grade in Keflavik, but unfortunately was not into photography then. I hope to return someday and capture some of those incredible oportunities. Very nicely done.
Thanks Jamie! I had a really hard time with the written Icelandic and the pronunciation, but as the tour leader this isn’t a good thing, so I decided to learn how to read the Icelandic characters, and try my best with the pronunciation. I know it isn’t perfect, but I like to try. 🙂