
Back in Iceland this week, with the second part of a travelogue series to cover my first tour there a few weeks ago, from August 25 to September 5, 2013. We had an amazing time, with beautiful light and beautiful scenery, and a great group to travel with. It turned out to be a very special two weeks.

Geysir
We pick up the trail at the start of August 29 with a brief visit to Geysir, to photograph the geyser from which the English language took its name. Every 5 to 8 minutes it spouts water up to 70m high, and is really quite impressive. It was a grey day when we were there, but with a little bit of processing, the images are still quite impressive, especially in black and white, as we see here (right).
I shot this at ISO 1600 to get a shutter speed of 1/800 sec at f/5.6. I tried longer exposures here too, but they lacked the impact of the fast exposure with the water frozen in the air. I used a focal length of 26mm for this shot, which I thought would be enough to get the entire burst in, but as you can see, this particularly high eruption went out of the frame at the top. That doesn’t bother me too much, though I would have preferred it to not have. The crop does show the power and height of the water though.
You can also see here that there is a second smaller spurt starting as well. This and a couple of surrounding frames are the only ones on which I saw this. I used the Canon EOS 1D X body for this shoot, as it was raining heavily, and I didn’t know if we’d end up getting splashed with the water from the geyser too. I also though wanted the faster frame rate, so that I could get more frames of the burst, to select the best one from the series.
Note too that when you’re just standing waiting for the water to spout, there are people standing on the other side of the geyser, but once it erupts, the water hides them all, so it’s not a big deal. The black and white conversion here with Silver Efex Pro 2, also enabled me to create more separation between the water of the geyser and the grey sky behind.
After Geysir, we drove over to Gullfoss, the largest waterfall that we’d photograph on the tour. We started off shooting from the angle that you can see here (below). From this point, you can’t really see the gorge that runs between the rocks to the right of this frame, so it almost looks like the water is just disappearing into a giant whole in the ground.
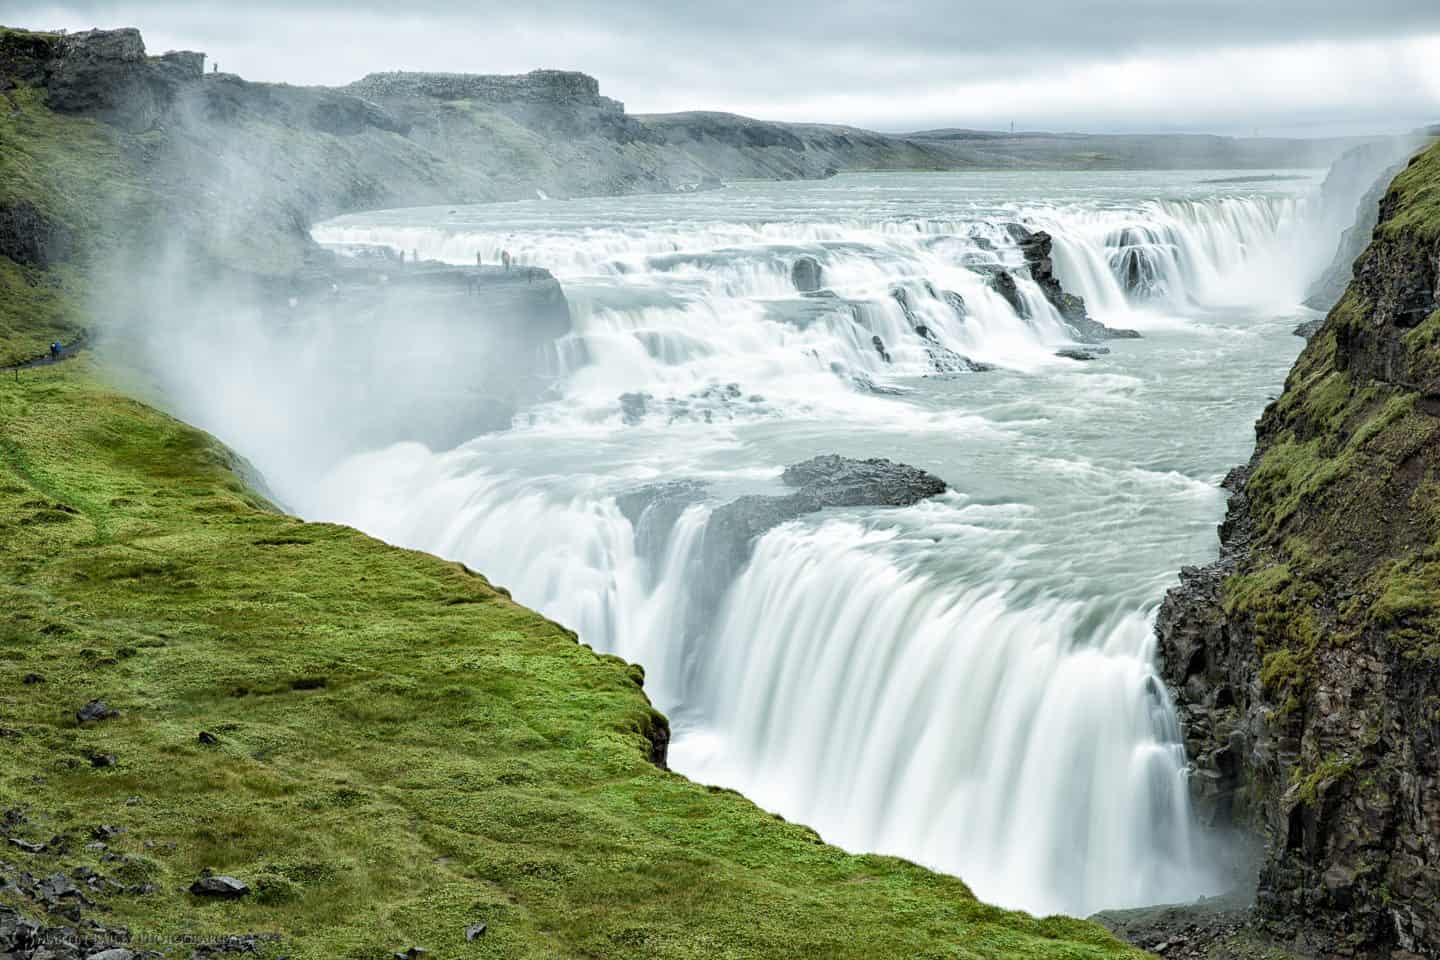
Gullfoss (Falls)
As I’ve mentioned in the past, I don’t research the locations that I’m going to visit for the first time, unless it’s a scouting trip. For the Iceland Tours, I’ve teamed up with photographer Tim Vollmer, who would guide us to each location, so I could turn up with zero preconceptions as to what I wanted to shoot. This can be a good and a bad thing. I can of course miss the best spots to shoot if I’m not attentive enough, but I risk that when possible so that I can start with a clean canvas as it were. At Gullfoss, I was totally in awe of the size and power of these falls, as I had no idea what we were going to see on this day.
This was a 1.3 second exposure at f/16, ISO 100. The slightly long exposure causes the water to blur nicely, giving the water that beautiful dreamy, silky effect that I like. To bring out the texture in the rocks and sky, as with most of the color shots we’ll look at, I used Nik Software’s Color Efex Pro. Generally I apply a small amount of the Detail Extractor and Tonal Contrast filters, stacked together. Because the greens don’t usually come out as vibrant as they were in real life, I was also applying the Foliage filter, between 5 and 30 on the slider, depending on how much green I needed to pull out.
This next frame I converted to black and white in Silver Efex Pro, as I cropped much closer, meaning there was no lush green grass to lament the loss of. For this shot, I increased the ISO to 200, still at f/16, for a 0.8 sec exposure. I wanted a slightly faster exposure here so that the people that were moving around didn’t blur too much. I like a bit of movement, or a lot, depending on the image, but here, I only wanted about this much. I wanted the people in the frame for scale.
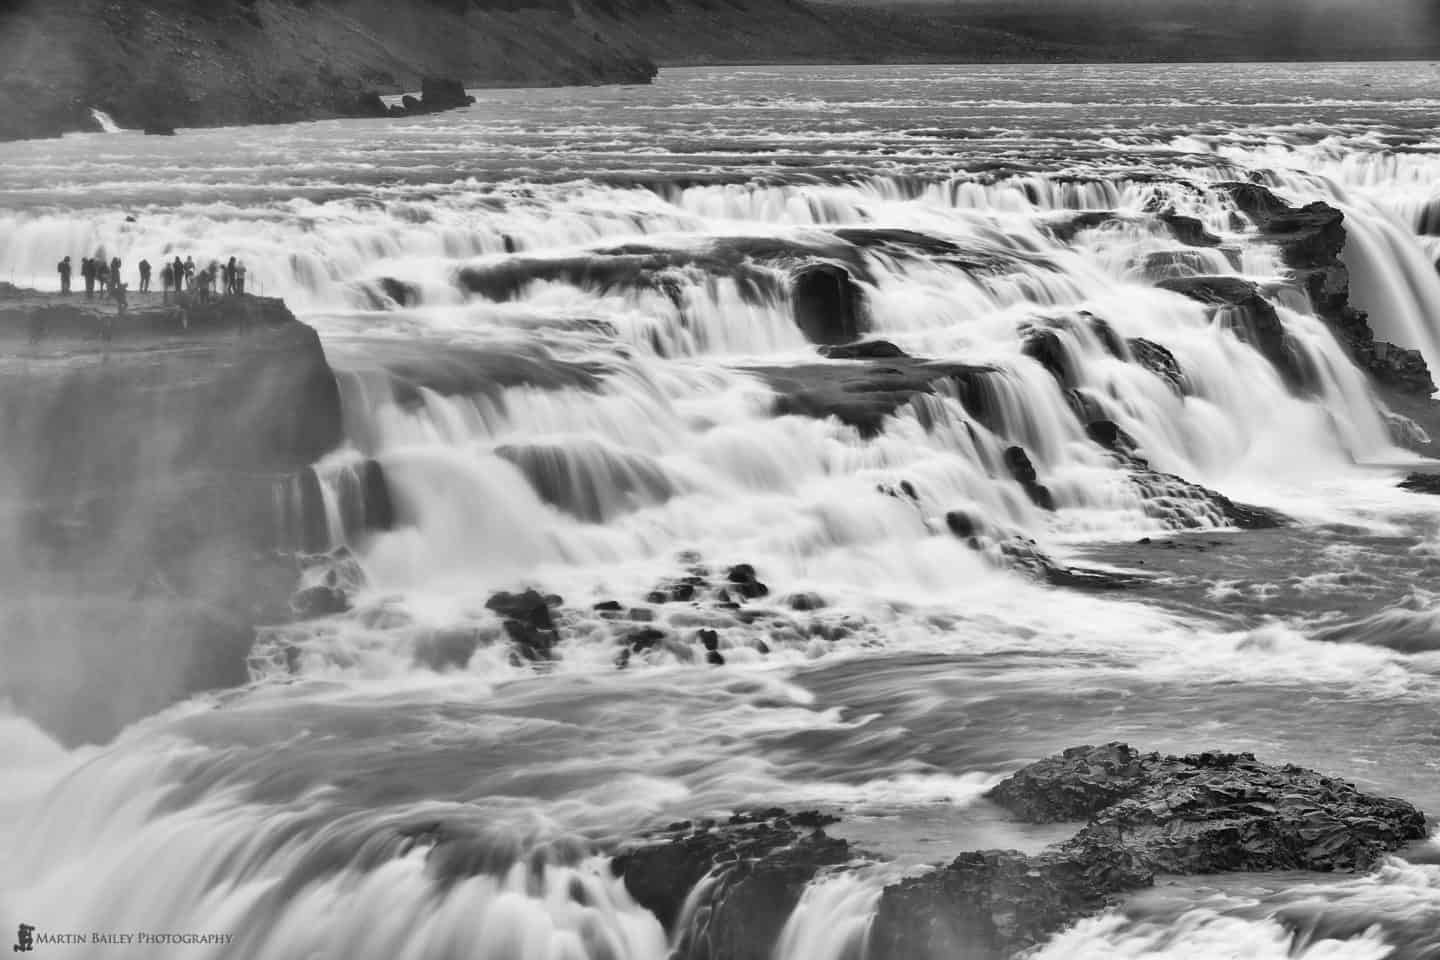
Gullfoss (Falls)
And this next shot (below) was from the back of that small plateau that the people were standing on in the last shot. At this point, I left the shutter speed at 0.8 sec at f/14, ISO 200, because there was a fair amount of wind, and the slightly shorter exposure gave me a better chance of getting my shots between the gusts of wind that can make the shot soft. I was using my Series 2 Really Right Stuff tripod with the BH-40 ball-head, which is the little brother of the BH-55. The BH-40 is still exceptionally sturdy, but just slightly more susceptible to a gust of wind in long exposures. It’s still better than any other ball head I’ve used from other manufacturers mind.
Gullfoss (Falls)
")
Gullfoss (Falls)
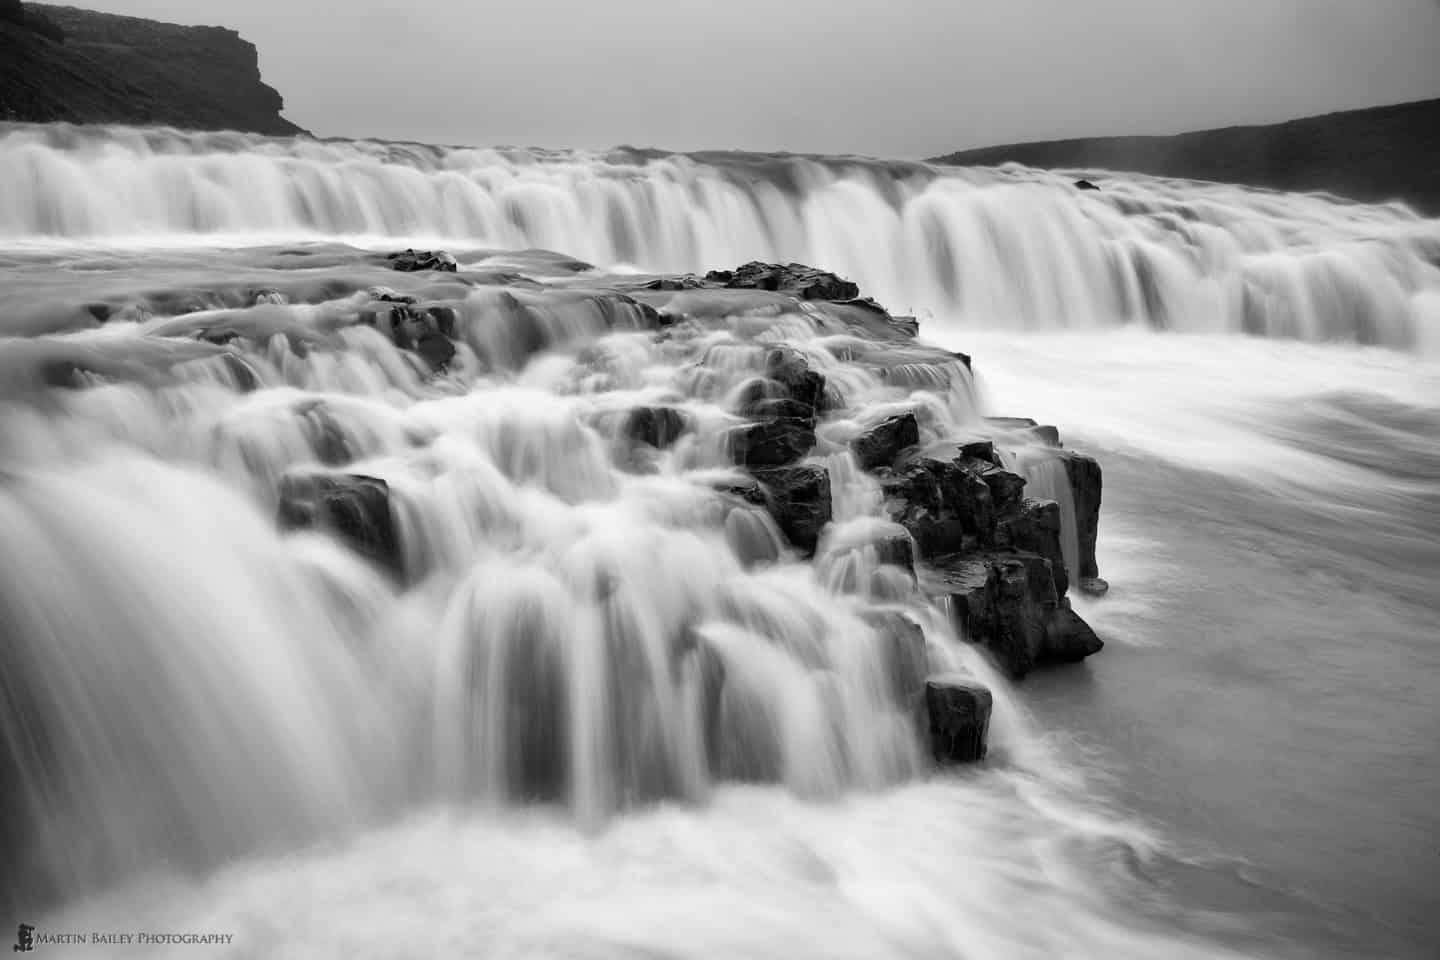
On the way along the track between the plateau and the first vantage point I shot from, there is an area, probably 30m or so, where the water from the falls was blowing relentlessly across the track. It’s the point where you just want to hunker down and walk through the cold spray, but it’s also the point where I shot this image (right).
This is probably one of my favorite shots from the trip. Of course, the trick with a shot like this, is keeping the water off the filter. I was using a three stop ND8 neutral density filter for the slow shutter speed.
A tip for keeping the filter dry, is to use your air blower, and not a lens cloth. A lens cloth just smears the water, and gets wet itself quite quickly. A blower will just blow the beads of water to the edges of the filter, where they won’t be in the shot, and doesn’t leave any smearing.
Even so, in the split second after blowing the water off the front of the lens and then during the 0.8 seconds of the exposure, a spray can still start to build up on the filter again, and a few drops made their way into this exposure, but I was able to remove them in Photoshop with Content Aware Fill.
Note too here that this is one of the few angles where you can actually see that gorge where the water from the falls is running off. I think this is probably one of the best views of the falls, despite the fact that the majority of the cascades are not even included.
The following day, on August 30, after a good drive and fording a couple of rivers in our bus, we arrived at the awe inspiring Landmannalaugar. This is a beautiful area in the highlands, with a lava field and a view of some of the most magnificent and colorful mountains I’ve ever seen. We did about a 5km hike up into and around the lava field, and on the way, I shot this first image, which shows the lava field covered in the thick luxurious moss that gives much of this landscape its lush green color.

Landmannalaugar
I shot this particular frame because my eyes were drawn by the jagged line of lava that outlined the slightly lower level of moss, which leads our eyes into the scene, towards the steam from the volcanic vents and mountain in the distance.
Shortly after the last photograph, we came to the edge of the lava field, and looked out across the valley to the colorful mountains that we see in the distance in this photo (below). The light was ever changing on this day. We had bursts of sunlight, cloudy, rain, and even snow by this point. The winds kept the clouds moving quickly, so sometimes the valley would be in cloud, and if you wait a while, it would be flooded with sunlight again, like this.
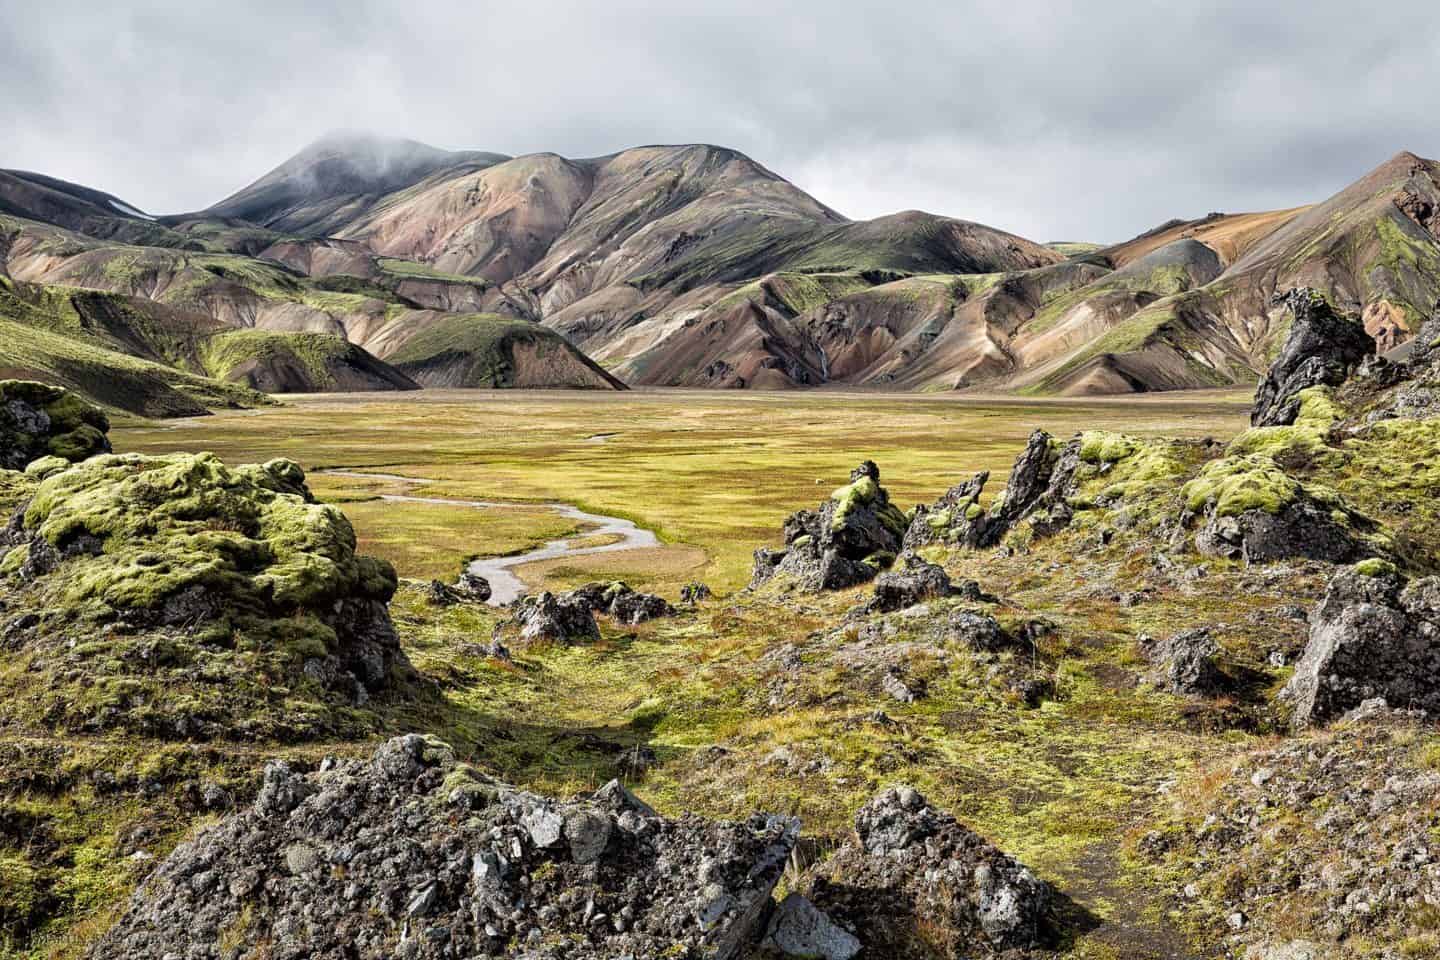
Landmannalaugar
You can see how I aligned the dip in the lava foreground with the river running through the valley. There’s a sheep visible just to the right of center. The mountains are punctuated with patches of moss and a waterfall. I filled almost half of the frame with foreground, so that we can see we’re in a lava field, and let the top half of the image speak for itself.
Kind of following on from the advice I gave last week about using LiveView to check your focus throughout the frame rather than using a calculated hyperfocal distance, note that this is the sort of location where I instinctively just focus about a third of the way into the frame, and stop down the aperture a little, and all is good. Here I recall focusing manually on the moss covered mound in the left of the frame, and knew that because there wasn’t anything really close to the camera, that everything in the frame would be tack sharp, and it is. And that was at 50mm at f/16.
In this next image (below) I included the bright, almost white, featureless sky in a full half of the frame. I used this composition to show that I was looking back towards the sun, and we get extra visual clues from the rim-light outlining the moss on the lava in the foreground. Exposing to the right as usual, this also enabled me to capture the shadow side of the lava brightly enough to be able to still see the detail. This is one of those times when leaving the exposure up to the camera would have made the foreground almost a silhouette. I also shot this because there is that trail leading us towards the steam from the volcanic vents, and into the light.

Landmannalaugar
5D Mark III “Improved” Weatherproofing
Allow me a little side-track here, as I want to talk a little about the weatherproofing on the Canon EOS 5D Mark III. I generally use my 1 series Canon bodies when working in weather like this, as they are totally weatherproof. You can’t dunk them in water, but otherwise, they will handle a full day outside in torrential rain, without batting an eyelid.
When Canon released the 5D Mark III, they explained that it had “improved” weatherproofing over the 5D Mark II, and at the launch event that I attended in Tokyo explained how the enclosure for the main dial behind the shutter button for example, would now prevent water from entering the camera as the dial is turned. But still, the only actually weatherproof Canon camera bodies, are the 1 series bodies, and I decided to put the 5D Mark III to the test.
I’ll give it its due, it held up pretty well in worse weather than I expected, but shortly after the last shot, it died. I switched to the 1D X for the last few frames that we’ll look at today, and the 5D Mark III didn’t come back to life the following day, which I had hoped it would. I wrapped it in some dry clothes and put it in my suitcase as we moved to the next location the following day, and I’d started to resign myself to shooting the rest of the trip with the 1D X, but two days after it died, I took the 5D Mark III out of the case and turned it on again, and it had come back to life!
It got wet again, and was OK, so I think I pushed it too far out on the lava fields, but one take away for you here is if you are going to Iceland, with only one camera, if it isn’t fully weatherproof, make sure you keep a cover on the camera. I personally hate using covers, which is one of the reasons I also buy 1 series bodies. When I go to Antarctica, where the cameras get wet a lot, I have been taking my 1Ds and 1D X, but I sold the 1Ds recently to put the money towards another purchase. I’d have taken the 5D anyway, as I love that camera, but without a backup option, I’d perhaps have been a bit kinder to it.
Having shifted to the 1D X, I started down the track that would lead us to the edge of the lava field, and long the valley back to our bus. This was still about the furthest point from the bus, so there were around 2km to go, but as I started to walk I turned to see the volcanic vents and steam from the moss as the sun hit it, giving me this dramatic view (below).

Landmannalaugar
Despite the lush green moss, this just works better in black and white, with a contrasty sky. Some people don’t like to see skies this dark, but I personally love this look, and because it’s my art, I can do what I want with it. This feels much more like the almost apocalyptic scene that I feasted my eyes upon.
In this last shot for today, we see the sprinkling of snow that had just fallen on the mountain, and the mist coming out of the valley between me and the mountain. A friend on Google Plus had asked why I didn’t go wider on this shot, but I really think people go wide on landscapes too often. When I look at a scene, the first thing I ask myself is what is it about the scene that has caught my attention? Here it was the snow on the mountain and the mist. I shot it at 45mm, but had I gone wider, all we’d gain is more foreground and rocks, but the mountain and mist would be much, smaller in the frame, and the impact would be lost. It’s your call of course, but don’t just automatically go wide for landscapes. What I call “intimate landscapes” are often much more compelling.
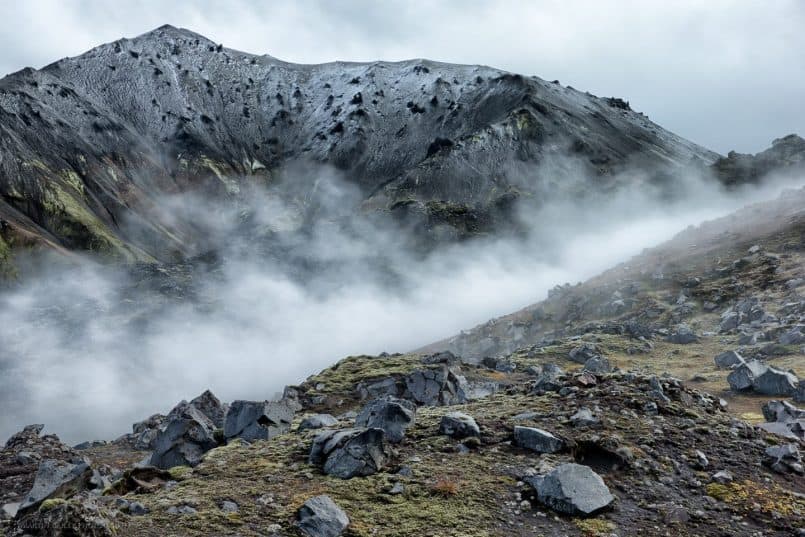
Landmannalaugar After the Snow
So, that’s it for this episode. If you’d like a sneak preview of the entire Iceland Portfolio it’s viewable under the Portfolios menu on my site (above).
Show Notes
Iceland Portfolio: https://martinbaileyphotography.com/portfolio/iceland/
Music by UniqueTracks
Subscribe in iTunes for Enhanced Podcasts delivered automatically to your computer.
Download this Podcast in MP3 format (Audio Only).
Download this Podcast in Enhanced Podcast M4A format. This requires Apple iTunes or Quicktime to view/listen.


0 Comments