It’s sometimes necessary to create prints on media sizes different to that of the final print. For example, you might need to print an 11 x 17″ print but only have 13 x 19″ media. Or you might use a large format printer and roll media, and don’t want to foot the cost of stocking lots of different sheet sizes.
If you are like me, you also like to print with your photograph offset, with smaller borders at the top than the bottom of the page, and if you print from Lightroom or Photoshop, there is no easy way to layout your print like this, and then print a stroke border and cut guides on the outside of that border, to allow for easy trimming.
To overcome this limitation, I wrote some Photoshop scripts to apply that border and add a small silver stroke line around the frame to help with trimming. The scripts sit in your Edit > Script menu, and can be inserted into Actions or just clicked whenever you need to add a border before printing. The script checks the orientation of your image, and aligns your image with the top or side borders, depending on their aspect ratio, including cropped or panoramic aspect ratios.
The scripts are available now for just $12, and this week’s Podcast is to show you how to use the scripts, as well as show you the problem that I’ve overcome by creating and using these scripts.
Check out the video, but also take a look at the product page which has the latest information on the scripts. For example, I now know that the scripts work on both Mac and Windows without issue, but I’ll continue to build a list of supported Photoshop versions on the product page too, right here: https://mbp.ac/borderscripts
Here are a few screenshots too, but like I say, the main place to look is the product page…
Printing from Lightroom
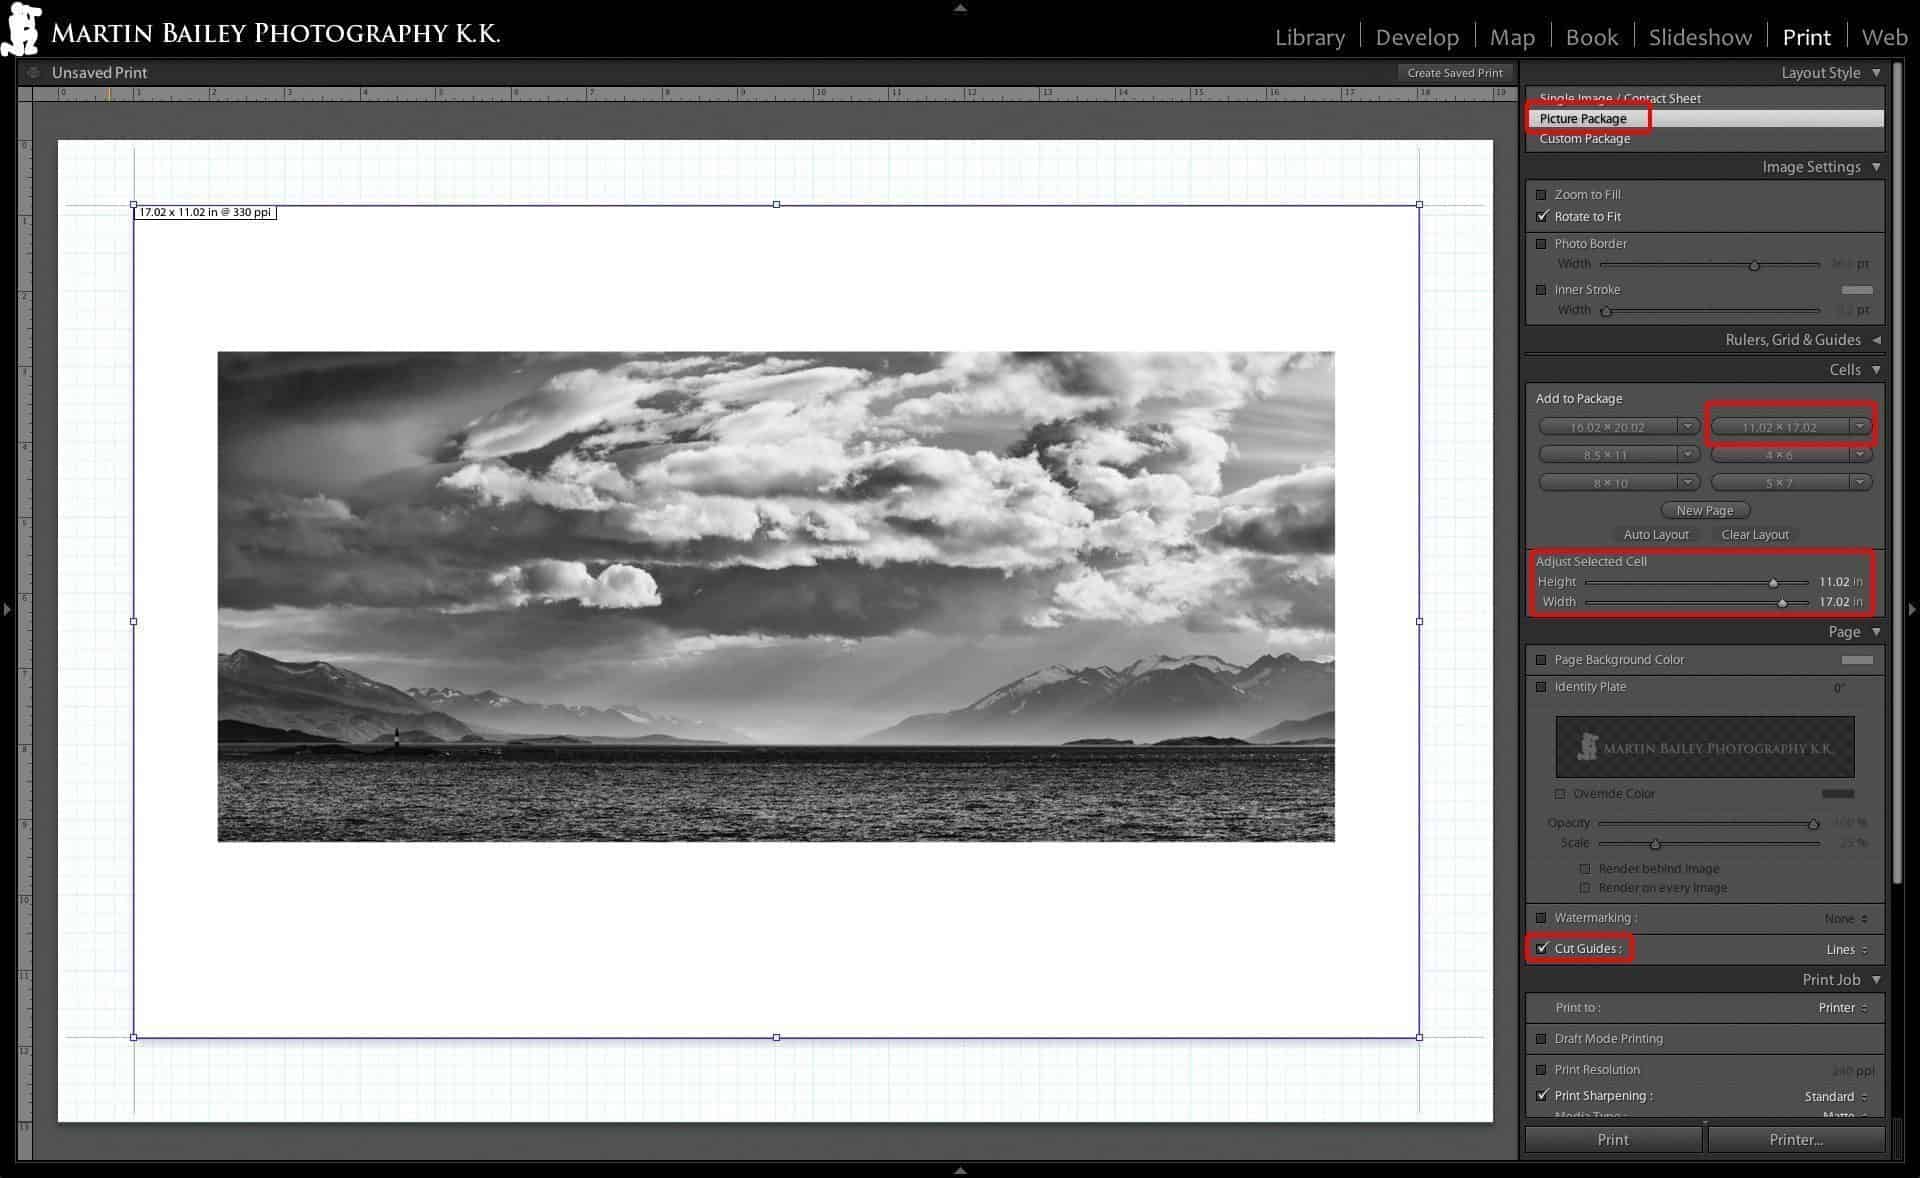
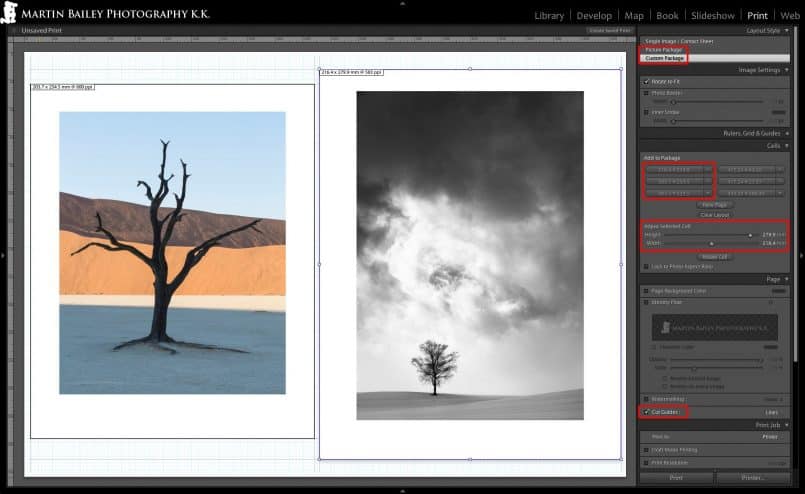
To print your images in Lightroom, all you need to do is open the image you saved in Photoshop, and go to the Print Module. Select “Picture Package” under the Layout Style (top right) to print a single image, or Custom Package to print multiple different images.
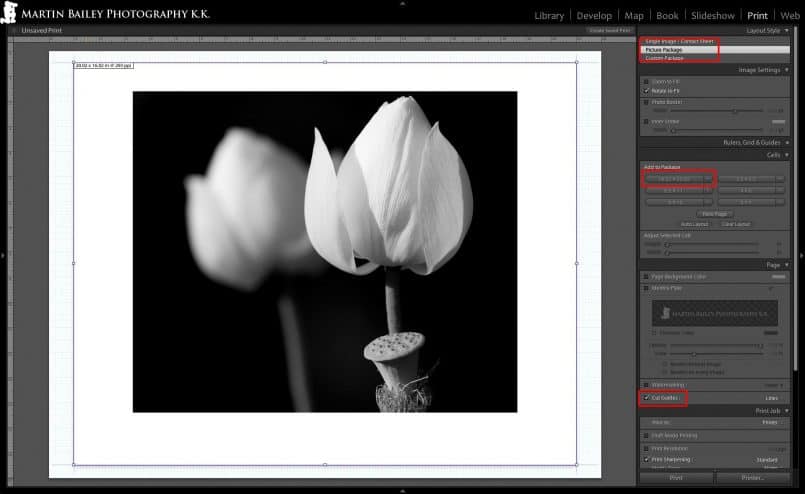
Under Cells, adjust the size to the paper size that you created, plus 0.5mm or 0.02 inches added to each dimension. For example, an 8.5 x 11″ print would be 216.4 x 279.9mm. If you prefer to work in inches, right click the ruler and select inches if they aren’t already selected. Then just add 0.02 to the size of the page in inches. For example 8.52 x 11.02″. As most papers sizes are specified in inches, this is the easier way to work.
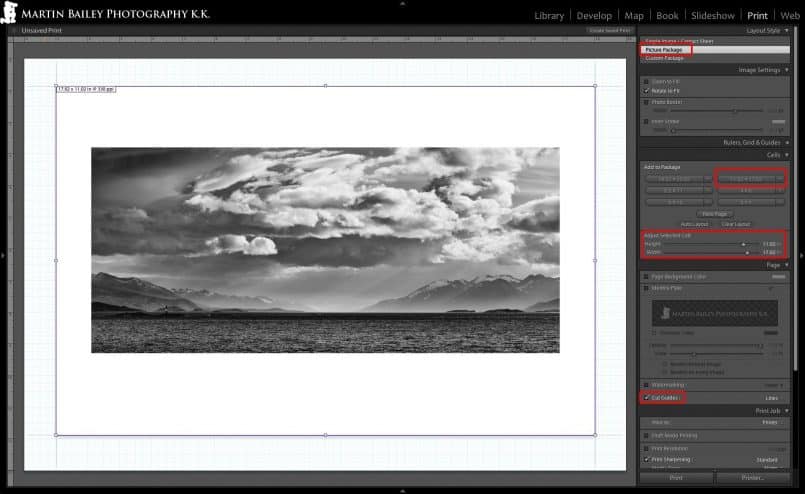
Here’s an example of an 11 x 17″ print laid out on a sheet of 13 x 19″ media. Click on the image to view larger, and note the important settings circled in red. Also note the cut lines are added by Lightroom to aid in trimming.
Here’s an example in inches. This is a 16 x 20″ print laid out on 17″ roll media, custom page size 17 x 22″. Click on the image to view larger, and note the important settings circled in red. Also note the cut lines are added by Lightroom to aid in trimming.
You can save these sizes as one of the six presets available in the Cells panel for easy recall, and you can also save custom layouts as Print Presets, that will also save cell sizes etc. Presets make printing with the Fine Art Borders a breeze.
The image will be printed with a 0.25mm stroke line around the border, added by the script, but if you want to also print guides to help you trim the paper, just select “Cut Guides” under the Page panel to the right.
Multiple Prints on One Page
If you are printing more than one image on large sheet or roll media, you can layout multiple images on the same page, using the Custom Package option. Here you can see I laid out an 8 x 10″ in print and an 8.5 x 11″ print side-by-side on 17″ roll paper, with a custom page size of 12 x 17″ set. Click on the image to view larger, and note the important settings circled in red. Also note the cut lines are added for each print, and do not get in the way of each other.
Printing from Photoshop
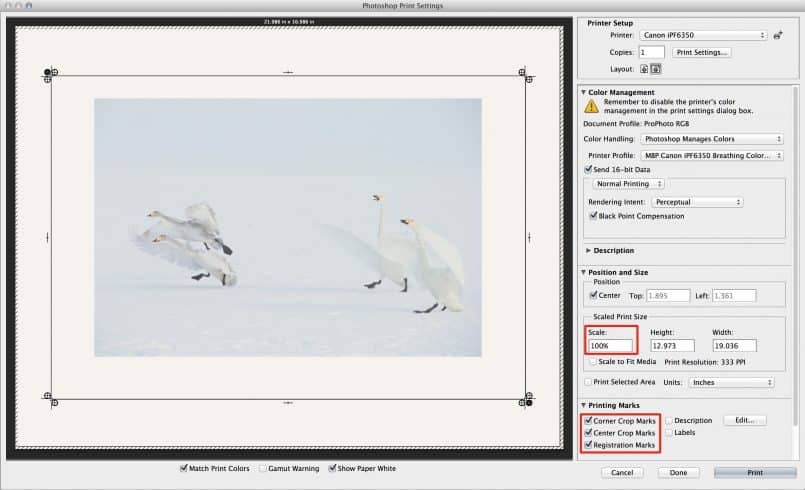
If you print from Photoshop, the scripts are equally, if not more useful, because you have better crop mark options, as you can see in this screenshot. Ensure you leave Scale at 100% for a perfectly sized print. You can select add crop marks, center crop marks and registration marks, which really help with trimming.
Show Notes
Main Product Page: https://mbp.ac/borderscripts
The full sized video is above, and also on YouTube here: http://youtu.be/hu1hnPIW4-8
Subscribe in iTunes for Enhanced Podcasts and Videos delivered automatically to your computer.
Download this Podcast for iPhone/iPod in MP4 format (Video).


These look like very usable scripts. One question though is can they be used in photoshop alone or must they be used in Lightroom. I only print from photoshop at the present time.
Hi Jeff,
These scripts would be equally useful when printing from Photoshop. In fact, there are a few more options that you can choose that makes it better than Lightroom in some respects. I’ll update the post above to reflect this.
I hope you find the scripts useful!
Cheers,
Martin.
So impressed with the smoothness of your video podcasting Martin! Have you considered doing any more general Lightroom techniques video podcasts?
Thanks Steven! I do the occasional screenshot style episode, but not that many. My rule of thumb is if it’s easier to show than the talk about with screenshot, then I screen-capture. I’ll consider doing some general workflow or other topic vidcasts too though. Thanks for asking!
Awesome podcast Martin! Thanks!
Thanks Patricia!
I can see how these scripts will be really useful. I am hesitating because I have lots of frames with mats I have put together for exhibits, and they have standard spacing. Do you cut your own mats to accommodate the photograph offset or do you find that this can be easily done by a frame shop?
Aah, I see Dudley. So, two things…
Firstly, there are three editable strings in the script files, page width and length, to create new page sizes, and topBorderPercentage, which is set to 7 to align the image with a 7% border at the top, and automatically calculate a 13% border at the bottom based on that. If you change that 7 to 10, your images will be aligned in the middle of the frame. Do make copies of the prints though, with useful names, so that you know you changed them. The file name will be used in the Photoshop Scripts menu.
Secondly, this space is often left for signatures, in addition to just looking aesthetically more pleasing than a centered image. Framers are used to leaving space at the bottom to show the artist’s signature, and can generally work to your requirements when cutting the matte. If you don’t sign a print, they could still cut the matte above center to display the print as printed.
I hope this helps!
Martin –
I did purchase your scripts and they are easy to use in Photoshop. When you make a fine art print using the offset, and sign the print, is it your intention that it be framed as is without a mat?
Thanks –
Martin,
Do you know if these scripts will work in Photoshop Elements as well? I use Elements 10 and LR5 currently.
Hi Glenn,
I haven’t had anyone tell me that it does work, or does not work at this point. I’ll send you the scripts offline. If they work, come back and buy them. If not, we’ll know that they don’t work. 🙂
Cheers,
Martin.