Visit Library for MBP Pro eBooks |
When I went mirrorless with the Canon EOS R and then got my second mirrorless camera, the Canon EOS R5, I said that I was going to try to use them without the battery grip to keep the size and weight of my system down. During the pandemic, when I wasn’t shooting so much, and my tours all had to be postponed, I didn’t miss the grip, but when shooting in Namibia this year, I was reminded how much I dislike having to crank my hand around to the shutter button when using the camera in portrait orientation without a battery grip. So, with my Japan winter tours coming up in January and February next year, I decided it was time to bite the bullet and get myself a battery grip for the Canon EOS R5.
The BG-R10 is the grip that fits both the EOS R5 and R6 and has a cradle that holds two batteries, giving double the battery life, but more importantly, and the thing that I’ve been missing, is the ability to flip the camera into the portrait orientation and still have access to all of the shooting controls, as you can see in this photo. The AF-ON button is slightly higher than on the R5 body, so it takes a little bit of getting used to, but all of the buttons from the camera body are replicated on the vertical grip, with the exclusion of the video record button, the light button for the LED display, the Lock button and the Mode button.
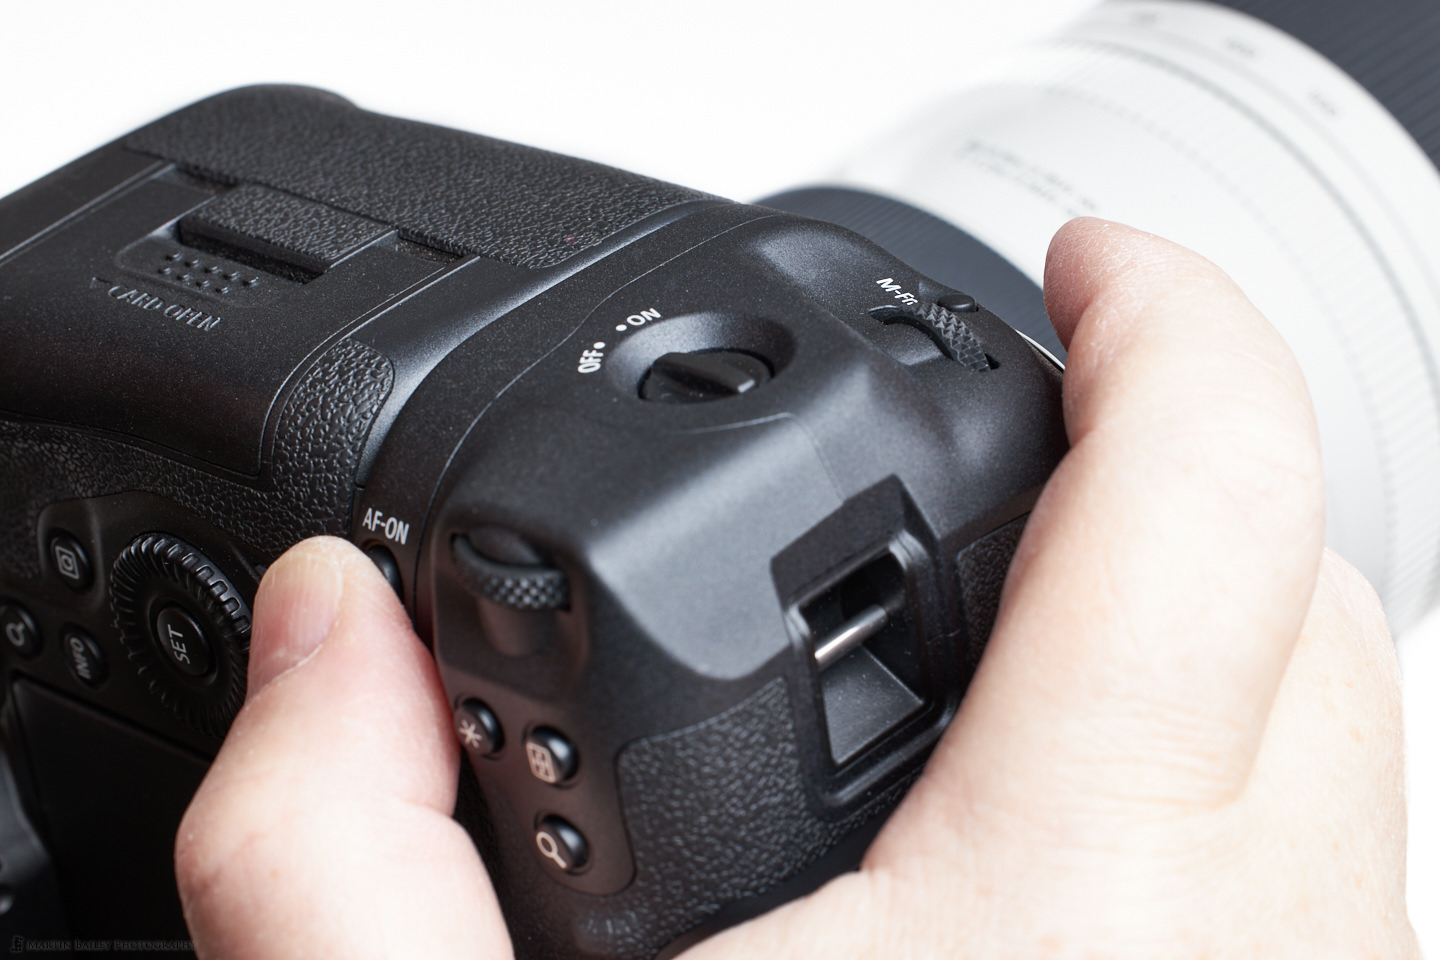
Without the LED, there is no use for the Light button, and as I generally will be in landscape orientation when shooting video, I can live without the video button and mode button, too, as my main use for the Mode button is to switch between stills and video. There is a lock switch on the battery grip, but that essentially turns off all buttons on the grip, so it does not replicate the Lock button, so ultimately, that is the only button I miss.
I can reach up with my left hand and press the lock button with my thumb, though, so I can live without the lock button too I guess. Apart from that and the price of the BG-R10 Battery Grip, which is almost 1.5X more than previous grips, I’m very happy with it and pleased that I picked it up. The other related expense, of course, is that the battery grip made it necessary to replace my Really Right Stuff L-Bracket. I really dislike shooting with a camera without the L-Bracket, and I was using the smaller version for the R5 without the battery grip but had to spring for the BGR10-L bracket as well so that I’m covered with my tripod plates in both the landscape and portrait orientations. I also like the extra protection that having the bracket along the side and bottom of the camera provides.
Let’s take a step back, though, and take a look at the BGR10-L bracket itself in this photo. It has that signature Really Right Stuff engineered finish and a wide mouth in the corner to allow the battery cradle to be removed to change batteries without removing the L-Bracket. As you can see, the screw that attaches the bracket to the camera slides along so that you can loosen that screw and slide the bracket away from the camera if you need more access to the cable ports on the camera, although you can access them without sliding the bracket out. I only slide it out when attaching the wire holder for video use.
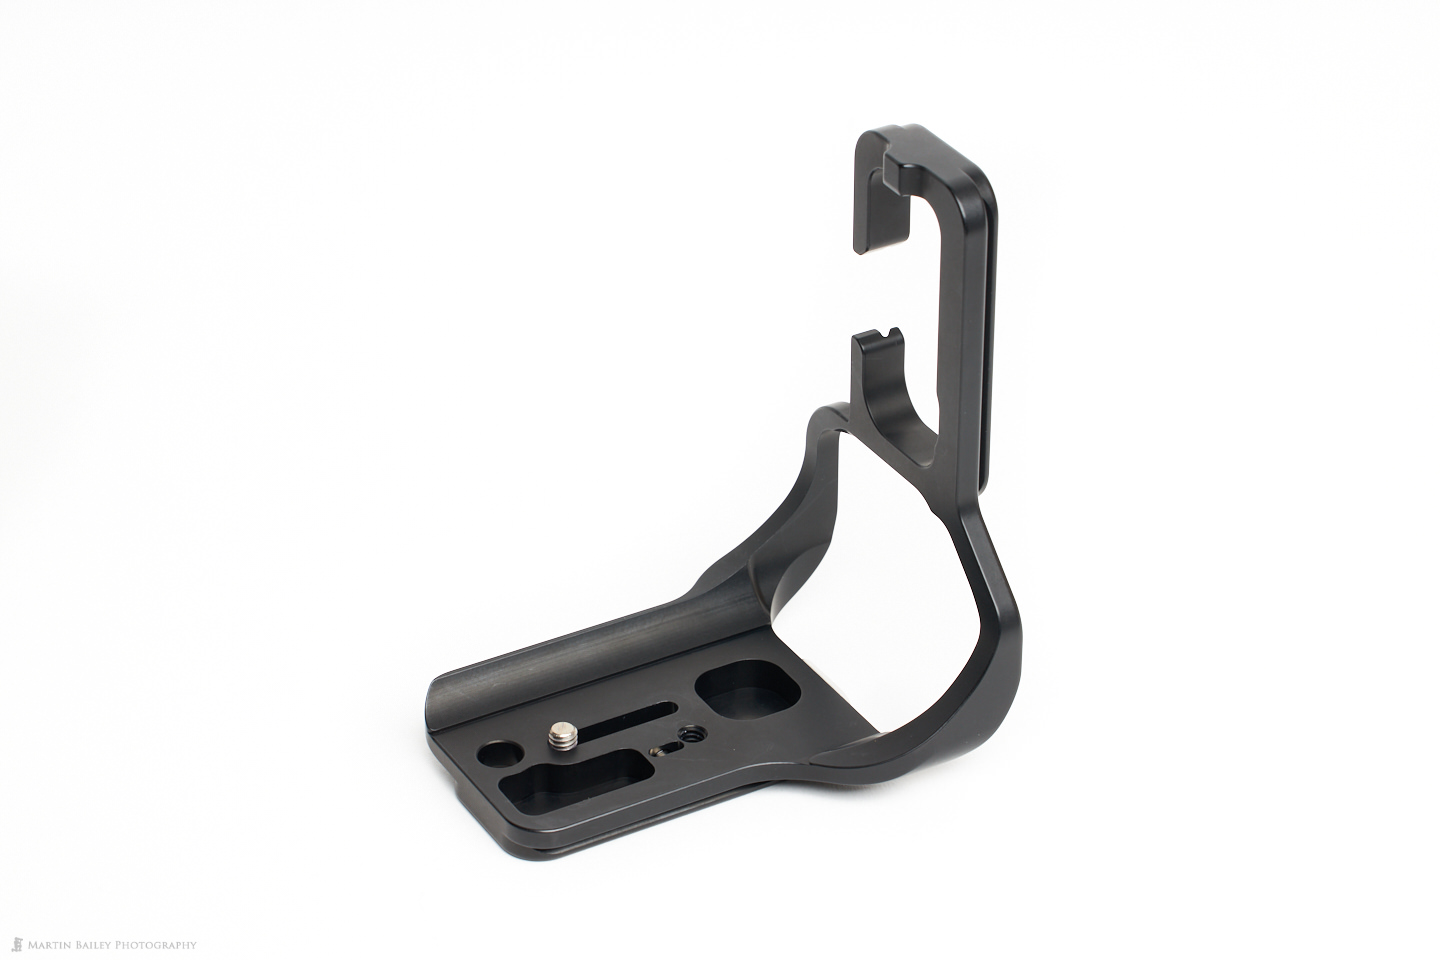
So that you are never left searching for the hex wrench to loosen that screw, there is a hole in the base of the L-Bracket to slide the wrench into and a magnet to keep it securely stuck to the bracket. It’s nice that this is a full-sized hex key on this bracket, as the sawn-off version that comes with the smaller non-battery grip bracket can be difficult to turn, especially in cold conditions when your hands are naturally cold too.
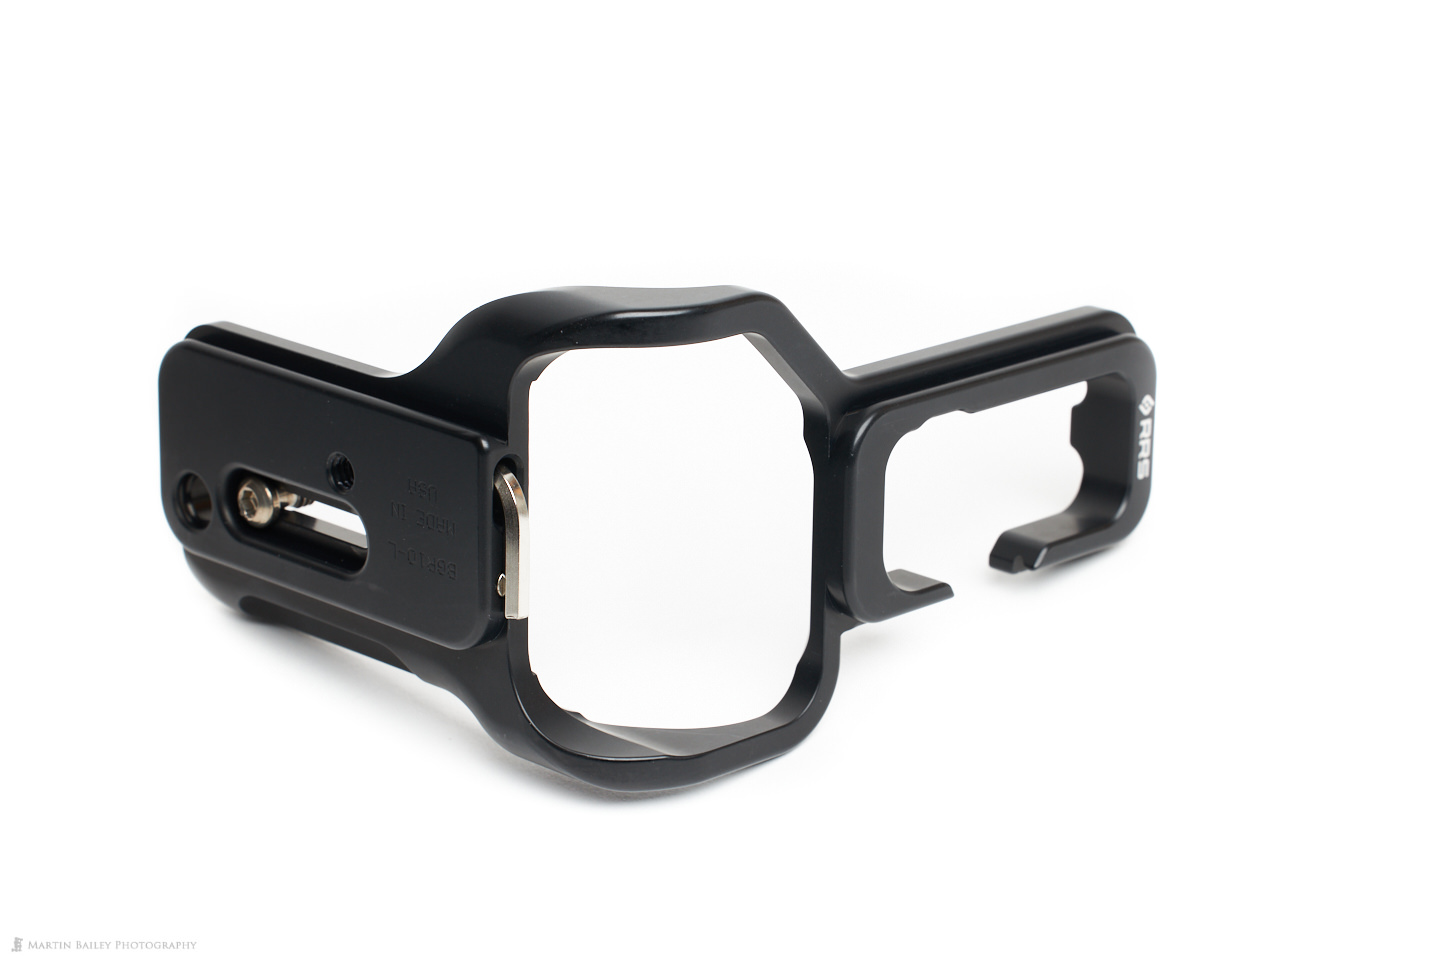
Here’s another photo to show the battery cradle clearance of the Battery Grip, and you can also see how the side of the bracket provides access to the cable ports.
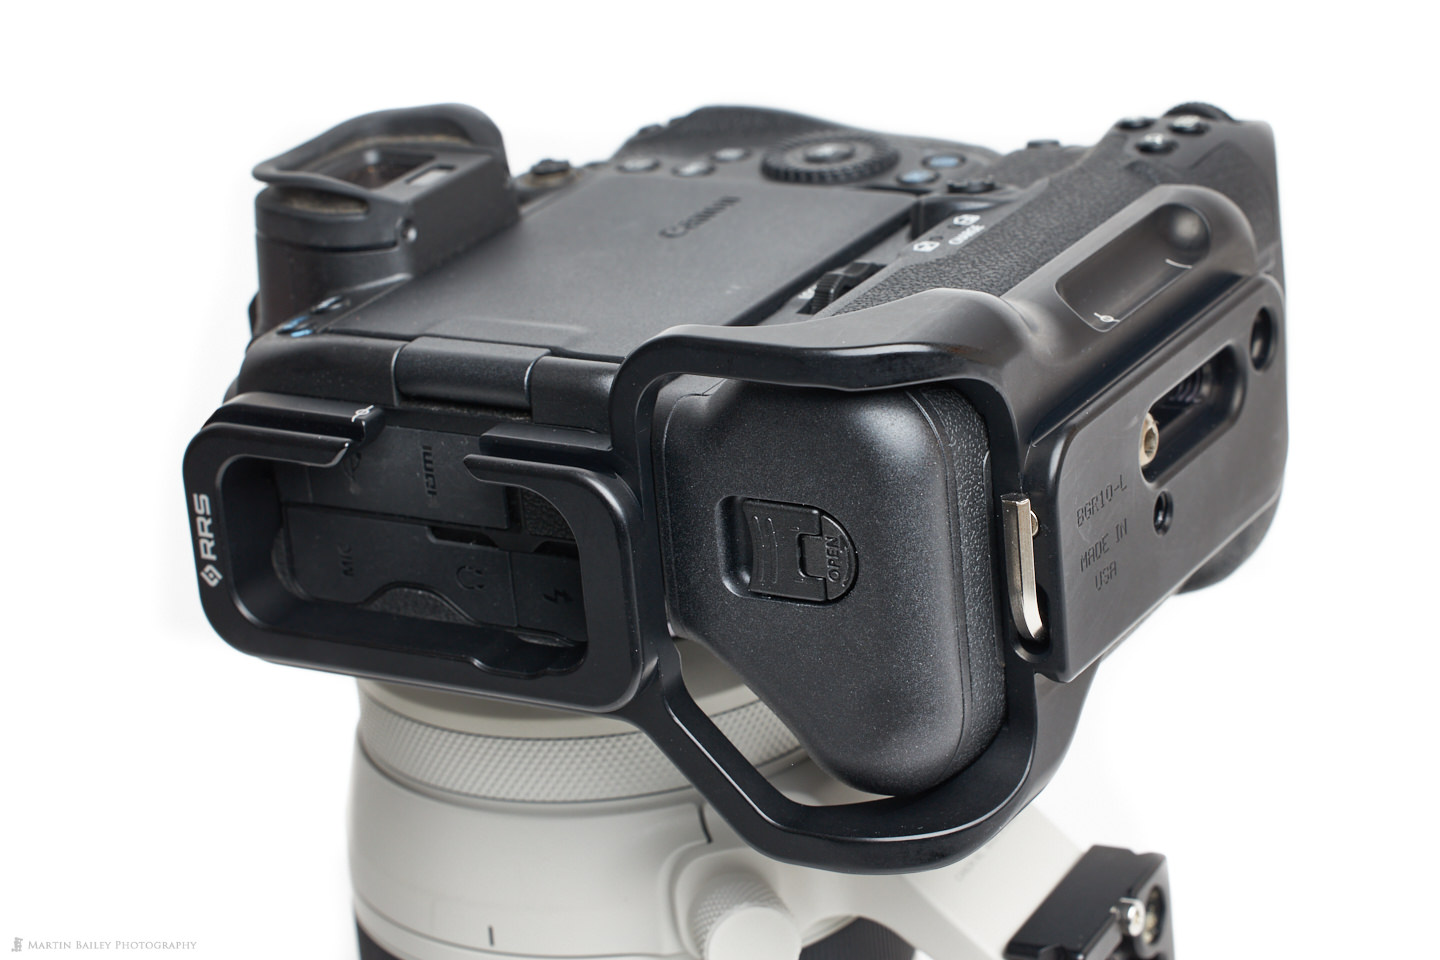
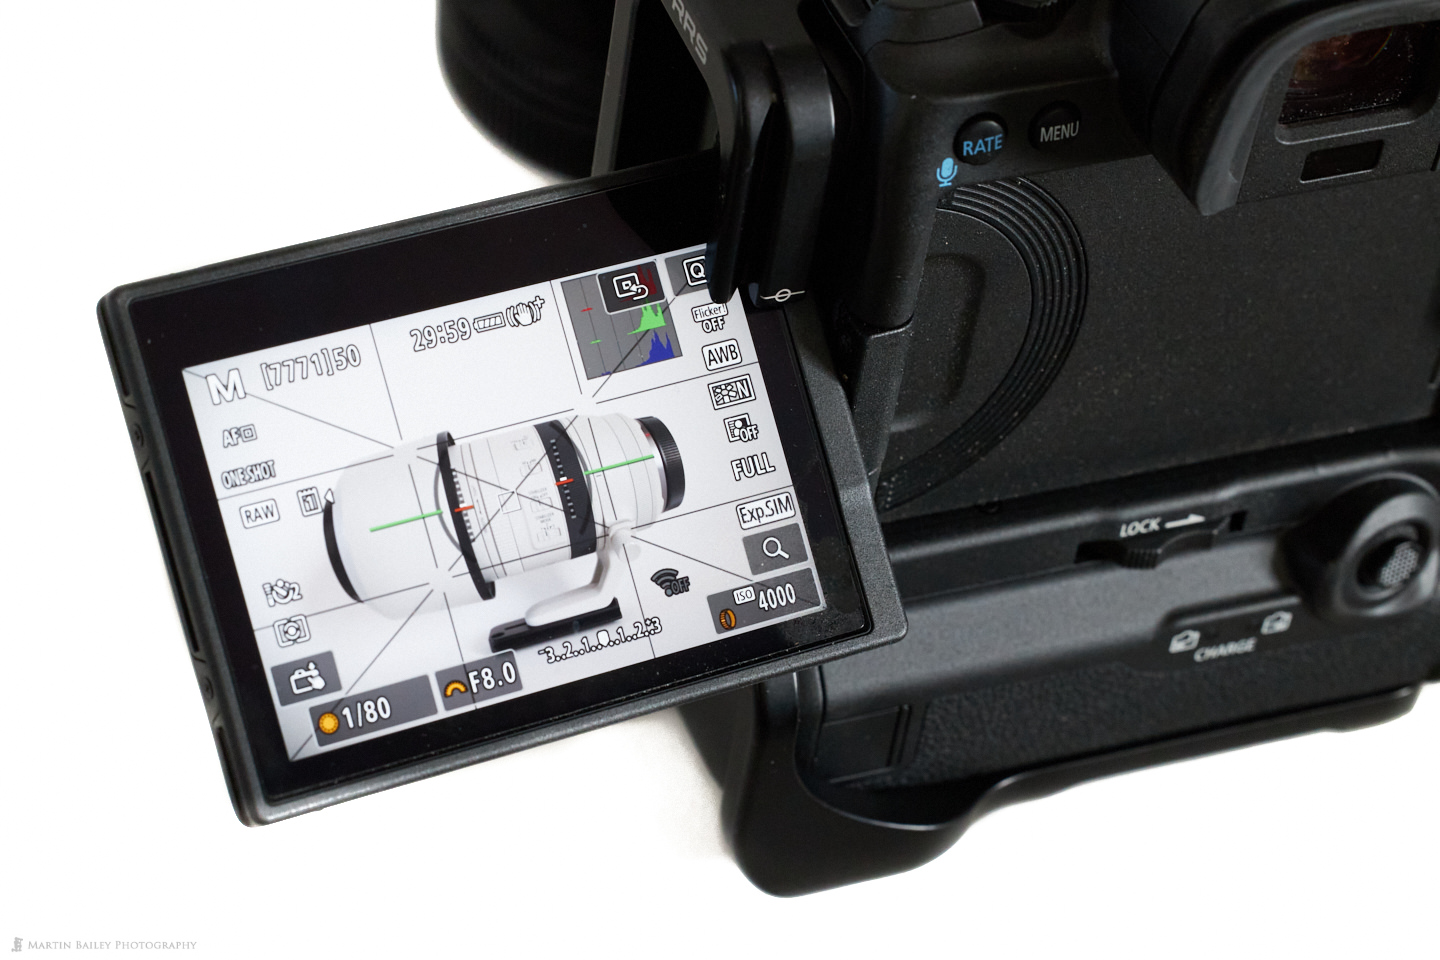
The gap in the side dovetail plate allows up to 70 degrees of swivel of the articulated screen on the camera, as you can see in the following image. This might look difficult to work with, but in practical use, I’ve never really found it much of a limitation to not be able to rotate the articulated display fully.
The other huge benefit of the L-Bracket is visible in this next image, where I show the R5 mounted on a tripod in landscape and portrait orientations. I haven’t moved the nodal point to the exact center of the tripod quick-release bracket for the shot on the left, but the bracket has these markings if you need to adjust to keep the lens axis in the same location as you switch orientations.
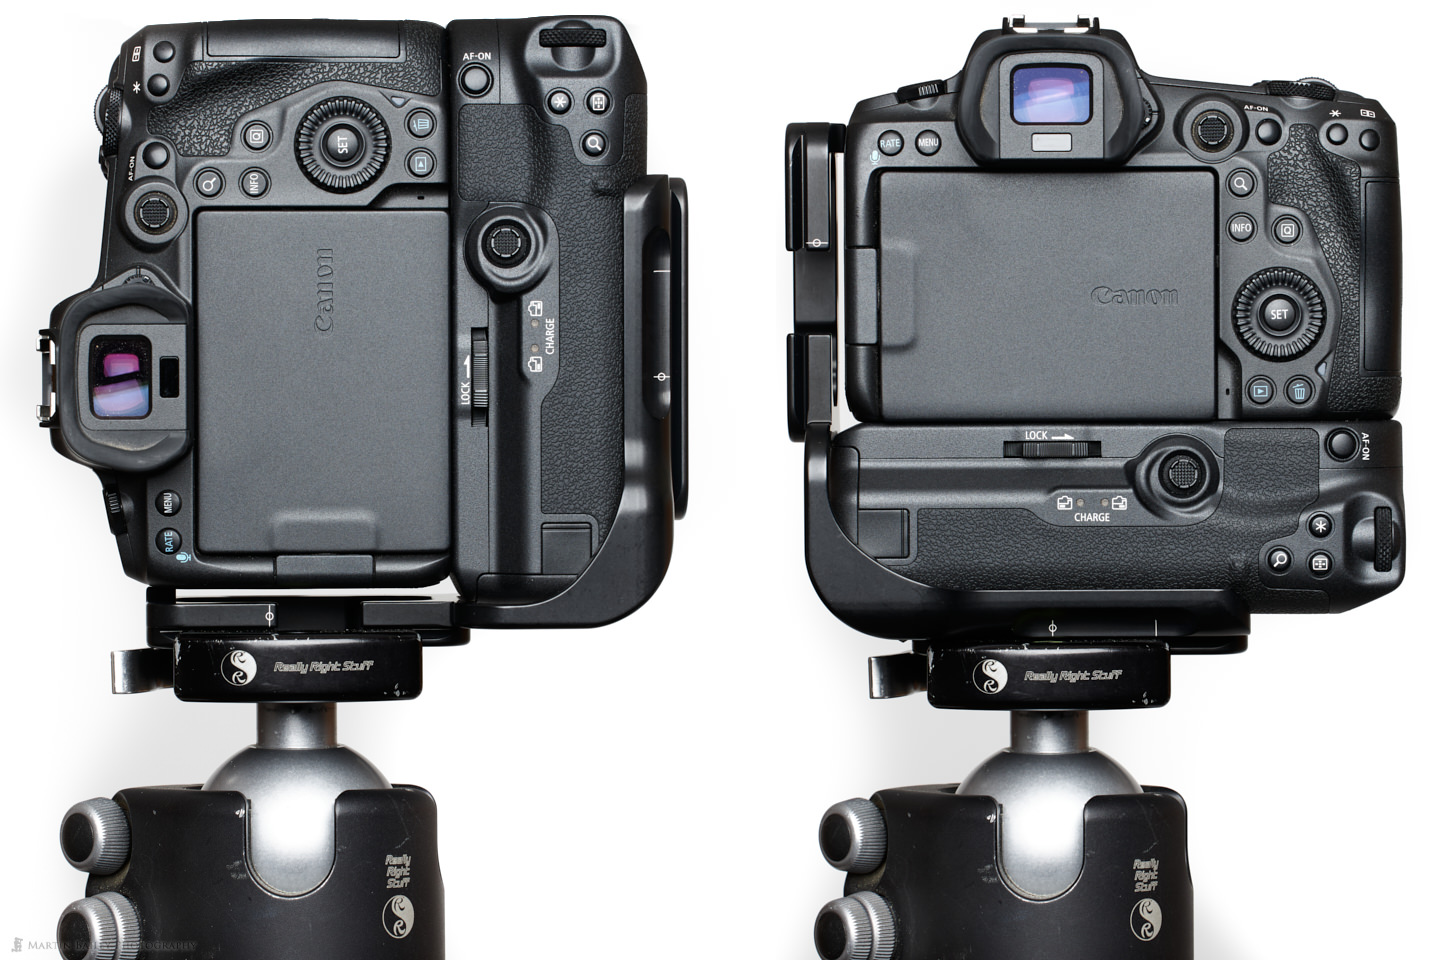
Mounting the camera on the side dovetail plate like this will keep the center of gravity above the tripod, reducing the risk of introducing camera shake. If you flop the camera over to the side, you lose that center of gravity, and the camera is more susceptible to shaking in the wind or even due to the movement of the shutter, although this isn’t such a problem with mirrorless as there are fewer moving parts.
One thing I’ve seen a few reviewers complain about is the fact that the BG-R10 battery grip sticks out about 5mm past the side of the camera, and I did find that a little bit annoying, but as you can see in this photo, the L-Bracket masks that to a degree, so that’s a bonus.
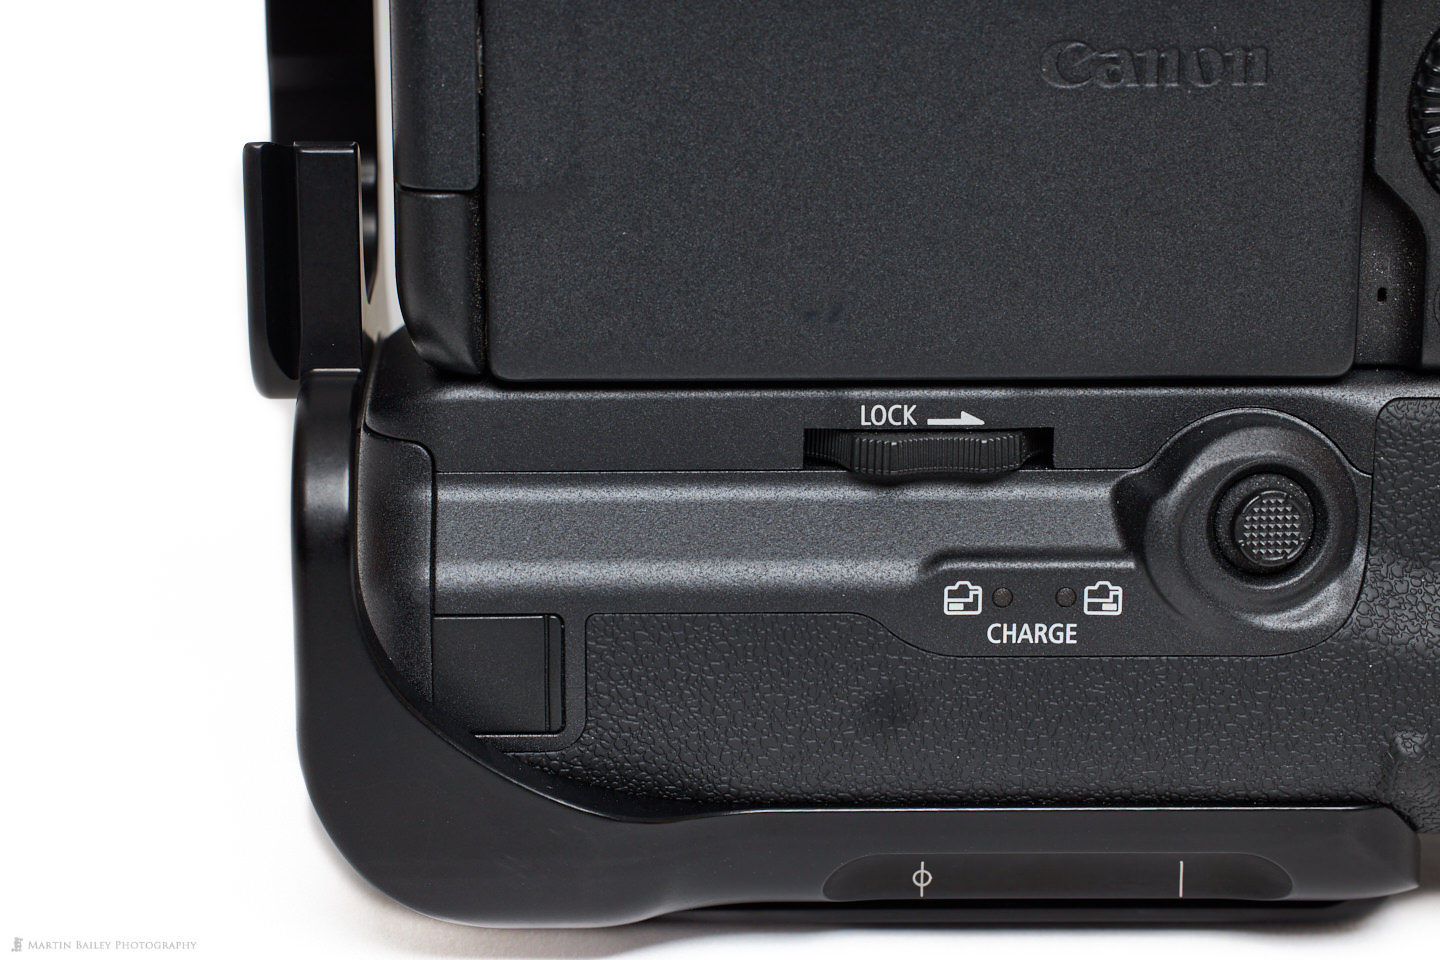
You can also see the Multi-Controller on the back of the grip, which is a very nice addition, enabling us to move the focus point around while shooting in portrait orientation. Also, notice the charge indicators that show the status of charging the batteries in the grip if you plug the camera into a power source. Unfortunately, this will only charge one battery at a time.
Even more unfortunate is that you cannot provide just any USB power to charge the batteries in the grip. You have to use the Canon PD-E1 power adapter to charge the batteries. I own a PD-E1 to power my camera when using it as a Webcam and for some microscope imagery work, but I will never take this on the road to enable charging the batteries in the grip. I can’t help thinking that Canon could have designed this to use a wider range of USB power, especially when you consider I have a third-party double battery charger that charges two batteries simultaneously and works with just about any USB power you can throw at it.
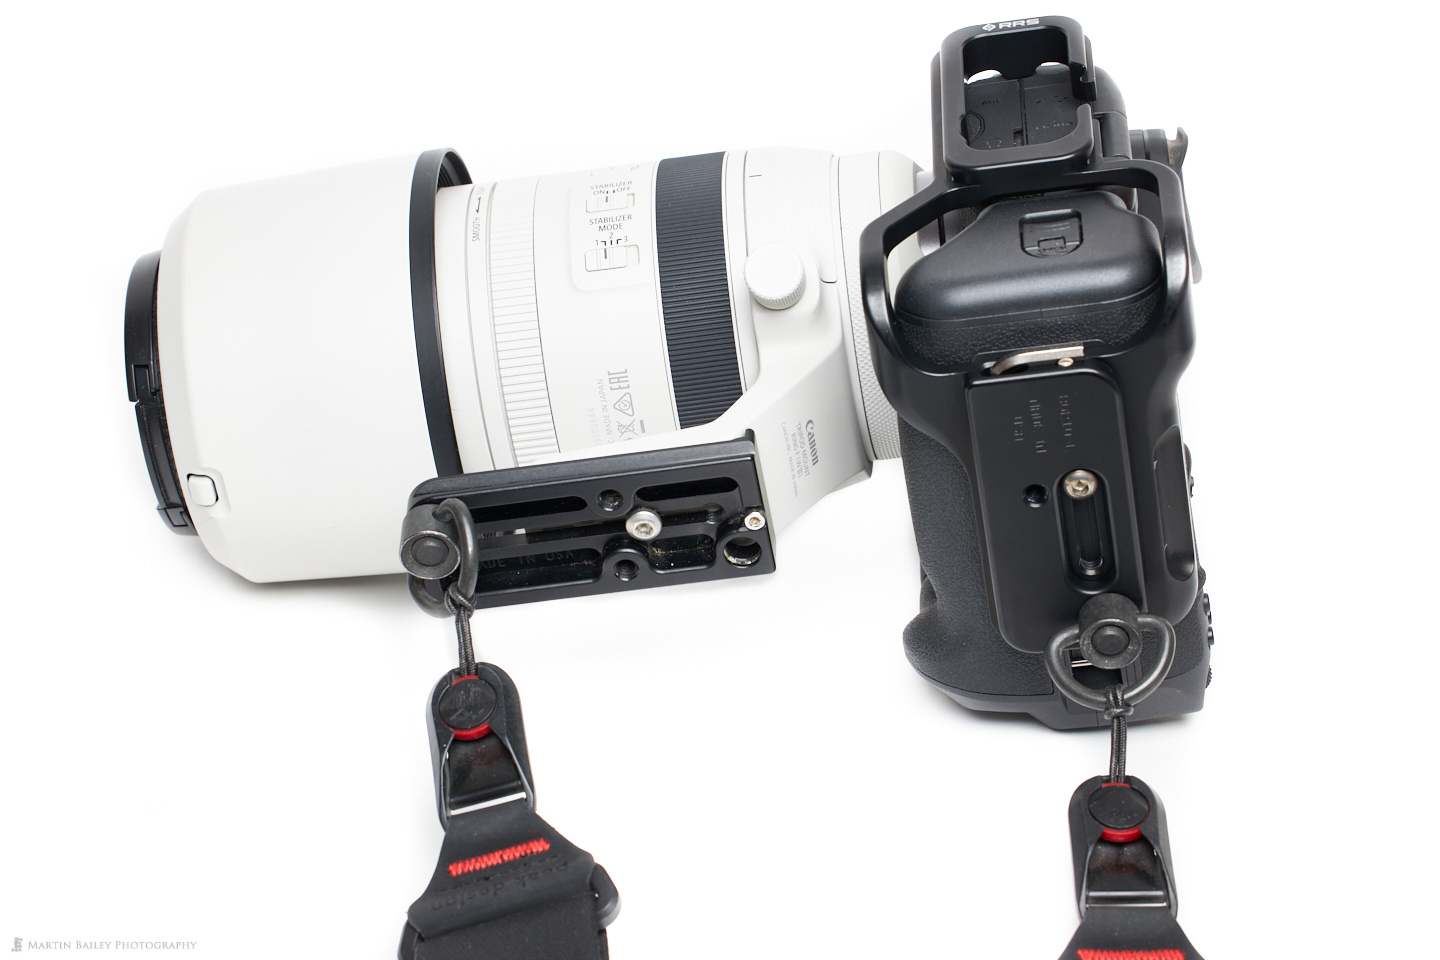
Another thing I’d like to cover before we finish is the addition of the QD socket in the bottom of the RRS bracket. I attach a D Loop QD Strap Swivel to the Peak Design camera strap loops, as you can see in this next image. This makes it possible to easily and securely connect a strap to the base plate and remove it quickly by pressing the button at the top of the QD connector.

As I also have a socket in the base of the lens plate on my Canon RF 100-500mm lens, as you see here, I can attach the strap with a QD connector, and I can then sling the camera with the strap over my left shoulder, allowing the camera to hang upside-down on my right, which puts the camera in a perfect position to quickly grab the grip, and swing it up to my eye to start shooting.
So, although I tried to avoid going this route, it’s nice to have this system back in my shooting workflow. I find it much easier to shoot in portrait mode with the vertical grip on the battery grip, and the Really Right Stuff L-Bracket completes the system.
Affiliate Links
The Canon BG-R10 Battery Grip is available from our friends at B&H Photo (https://mbp.ac/bg-r10) and Amazon (https://amzn.to/3V3ho6K). These are both affiliate links, so you help the show out by buying with these links.
Show Notes
Get your Really Right Stuff gear here: https://www.reallyrightstuff.com
The Canon BG-R10 Battery Grip is available from our friends at B&H Photo (https://mbp.ac/bg-r10) and Amazon (https://amzn.to/3V3ho6K). These are both affiliate links, so you help the show out by buying with these links.
Subscribe in iTunes to get Podcasts delivered automatically to your computer.
Download this Podcast as an MP3 with Chapters.
Visit this page for help on how to view the images in MP3 files.


I’ve always been a big fan of battery grips and L-brackets on my Canon and Sony cameras. Have used them on almost everyone. And I enjoy the product from Really Right Stuff but I also use brackets and lens feet from Kirk Photo another fine provider. Some of the Kirk modular plates provide the ability to use it without the L portion. RRS offered this capability for non battery grip L-brackets which can be useful. My biggest issue is that in portrait mode the thickness of the plate on the bottom makes holding the camera vertically more difficult and even uncomfortable at times. If I’m doing a lot of shooting in portrait orientation I just might end up taking the bracket off. By the way I use a handgrip strap a lot to secure holding the camera when in landscape mode. Thank you for the podcasts.
Hi Steven,
Thanks for the comment.
I also used a battery grip on my cameras before going mirrorless. I agree that sometimes they do get in the way a little when shooting in portrait orientation. When I know I’m not going to use a tripod, or when I don’t need the extra protection against knocks, I also sometimes remove the bracket.
Regards,
Martin.
I’ve been using the battery grip for many months and find it convenient for verticals, although it is rather large and heavy.
I have been using two different USB charging systems for the camera with the battery grip and both seem to work well for me. The first is an Amazon Basics 100W Four-Port GaN Wall Charger with 2 USB-C Ports (65W + 18W) and 2 USB-A Ports (17W). I use this when I am near an AC mains and it will sequentially charge both batteries in the grip, albeit somewhat slowly. Then when I am away from home, I use an Iniu INIU Portable Charger, 22.5W 10000mAh Small USB C Power Bank. From what I have read, you need USB-C charging with PD 3.0, 45 watt, minimum 3A at 9V (but please don’t ask me to explain what any of this means….). Here are links to these devices I have been using for about a year. I don’t know if either is still available.
https://www.amazon.com/gp/product/B087MFJY22/ref=ppx_yo_dt_b_search_asin_title?ie=UTF8&th=1
https://www.amazon.com/gp/product/B09176JCKZ/ref=ppx_yo_dt_b_search_asin_title?ie=UTF8&th=1
Hi Karl,
That’s interesting that the other power options you mention work.
I don’t have anything that powerful, other than the Canon adapter, and as they cost about the same as an adapter, I’ll be sticking with my tiny little charger, but it’s good to have this information. Thanks for letting me know!
Regards,
Martin.