
Visit Library for MBP Pro eBooks |
In August 2021 we took a look at ON1 Software’s NoNoise AI software, and I was relatively impressed with the results. As I mentioned at the time though, I was pretty unimpressed with the performance of ON1 Photo Raw, finding it slow and clunky, despite wanting to like it. I was asked at the time what I thought of Topaz Labs noise reduction software and intended to take a look, but it dropped off my radar until this week, a member of the MBP Pro Community showed some samples of his tests comparing ON1 NoNoiseAI with the Topaz DeNoiseAI software. Today I’ve put some time aside to sit down and check out Topaz DeNoise and Sharpen and will make notes and share my thoughts as usual.
I’m starting with the trial version, with the intention of buying this and a few other Topaz plugins if I like them. There’s a sale until May 6, 2022, which provides Topaz DeNoise, Sharpen, and Gigapixel for $160, a saving of $100 over the list price, so it’s probably a good time to pick these up if I am impressed. I haven’t contacted Topaz about this review and will buy the plugins myself if I like them, and not liking them would save me $160, so you can rest assured that you are getting my full and honest opinion here. You always can, but I think you already know that.
OK, so let’s crank up Topaz DeNoise and see what we think. Oh, and I think I’m going to stop adding the AI after the plugin names, as it’s a pointless marketing suffix. Unless, of course, it surprises me with some obvious artificial intelligence, but I doubt that. OK, so I opened a micrography image that I cleaned up in my ON1 NoNoise review and quickly realized that the reason for the noise in that shot was the sharpening, as the original DNG file doesn’t actually have a lot of noise, but it’s quite soft because of the camera adapter I used for the shot, so rather than jumping to another photo, I’m going to switch to Topaz Sharpen as there is work for it here.
Wow! OK! So, I’m impressed with the sharpening! Here’s a screenshot of the first image I’ve tried, with the original on the left and the sharpened version on the right. I think the results are very natural, without any halos, despite cranking up the sharpening to 50 on a 100 scale. I’m not so impressed that the Trial version will not let me save a copy without a watermark until I buy it. That’s a very 90’s technique for selling software. If you are going to provide a trial version it should be fully functional but time-limited. I clicked to accept the watermark initially, but on the next screen I was able to confirm that I can save my images in DNG format, maintaining much of the raw processing capability that I want, so rather than spending time processing images that I have to reprocess later, I’m going to go ahead and buy this three plugin bundle and continue with a licensed copy.

Back in Capture One Pro, I quickly found that the base processing that Capture One does to bring out detail on images made it necessary to dial back the sharpening in Topaz Sharpen a little, and also turn off the default sharpening in Capture One to avoid overdoing it. But, I am pleased with the results, although perhaps still a little too sharp. I’ll upload 1920 pixel-wide examples so that you can see a fair amount of the detail. Remember to click on the images to open them in the lightbox and open up your browser as much as you can too.

Here too is the ON1 NoNoise Version from my 2021 review, so that you can compare the two. I enhanced both of these a little more in Capture One before exporting them, but the detail in the Topaz Sharpen version is much closer to what I saw before my old camera adapter for my microscope stole most of the detail from me. Keep in mind that this is not an apples to apples comparison, because we’re comparing the results of a noise reduction plugin with a sharpening plugin, but still, I think you’ll agree that the results from the Topaz plugin are more natural, although we are looking at a microscope photo which doesn’t necessarily give us an everyday scene as a reference.

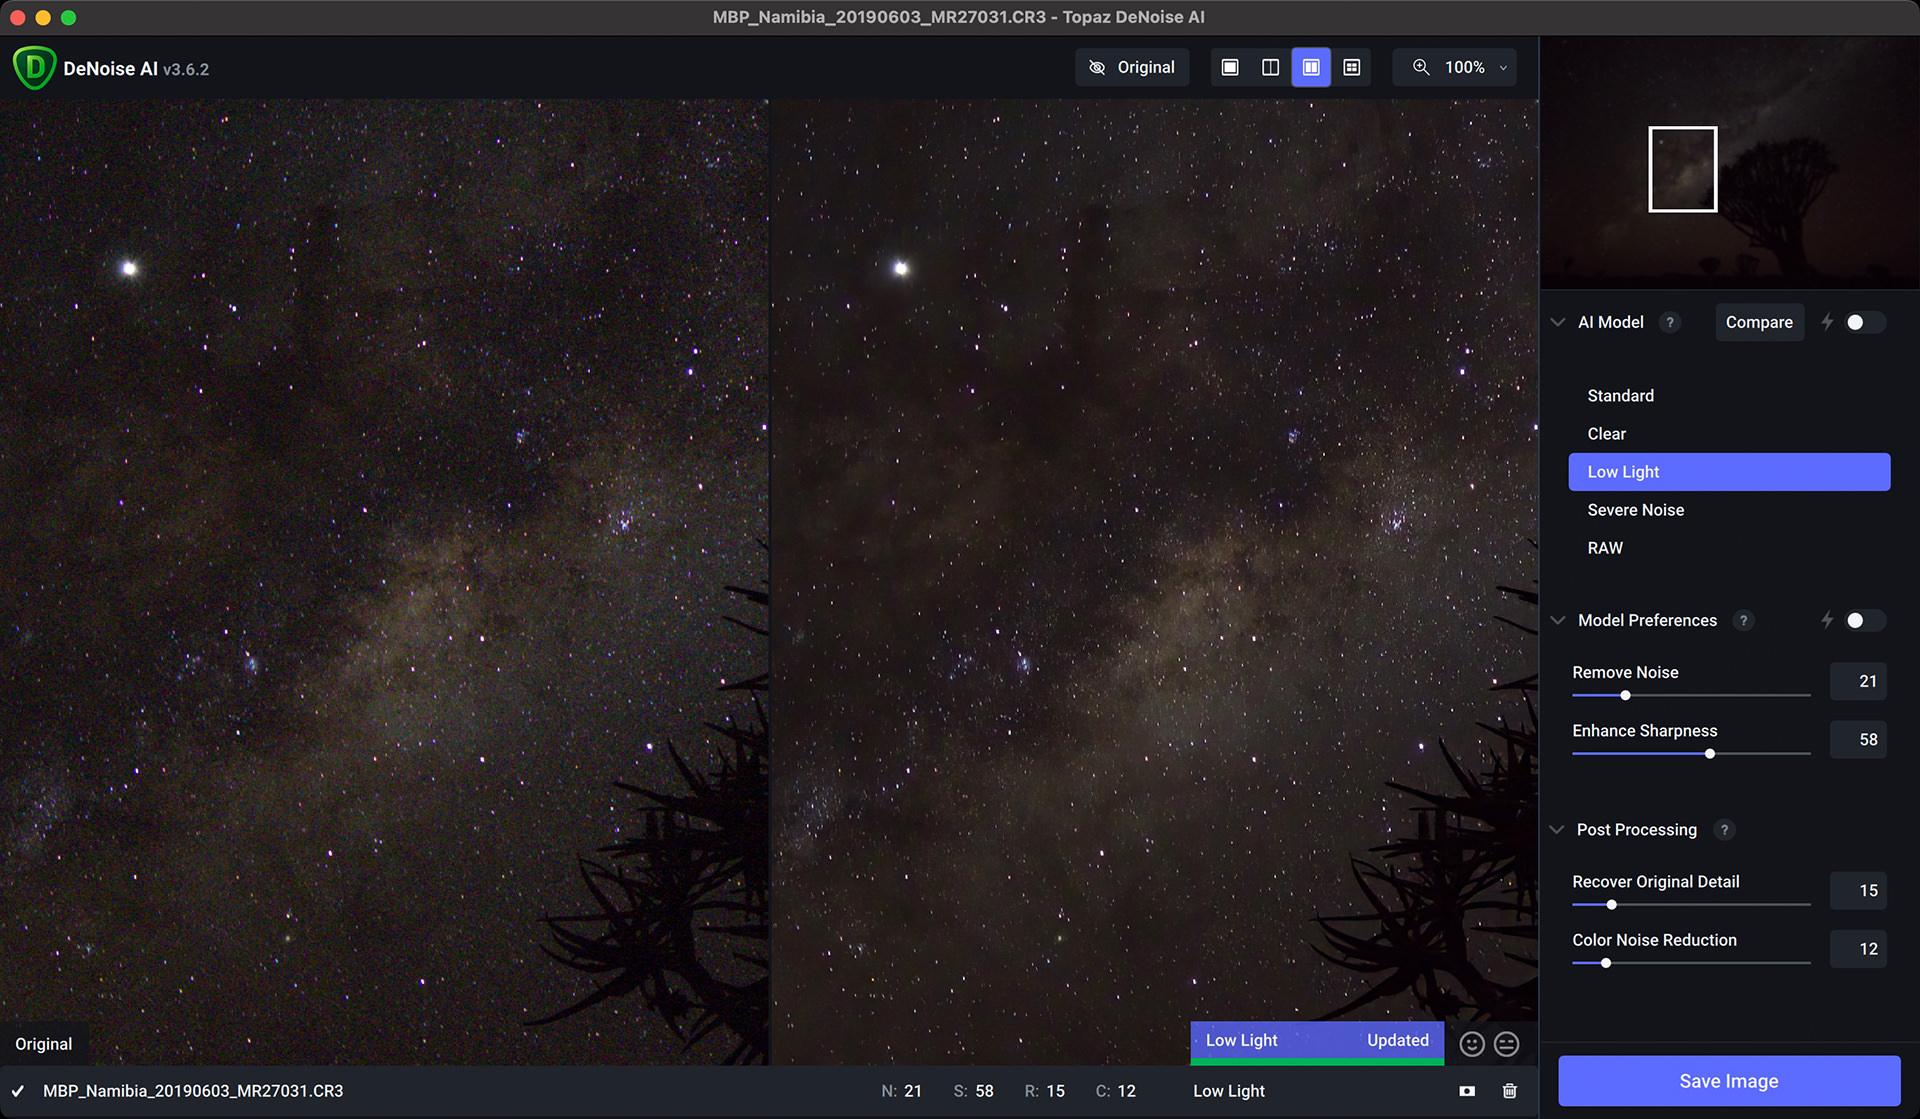
I also revisited the milky way shot from my August 2021 review, so first, here is a screenshot from Topaz DeNoise which again provided very good results. Night sky shots are difficult for these programs because they contain so many tiny points of light, but you can see that Topaz has accurately identified areas of the sky that have no stars and cleaned up the noise while leaving every point of light intact.
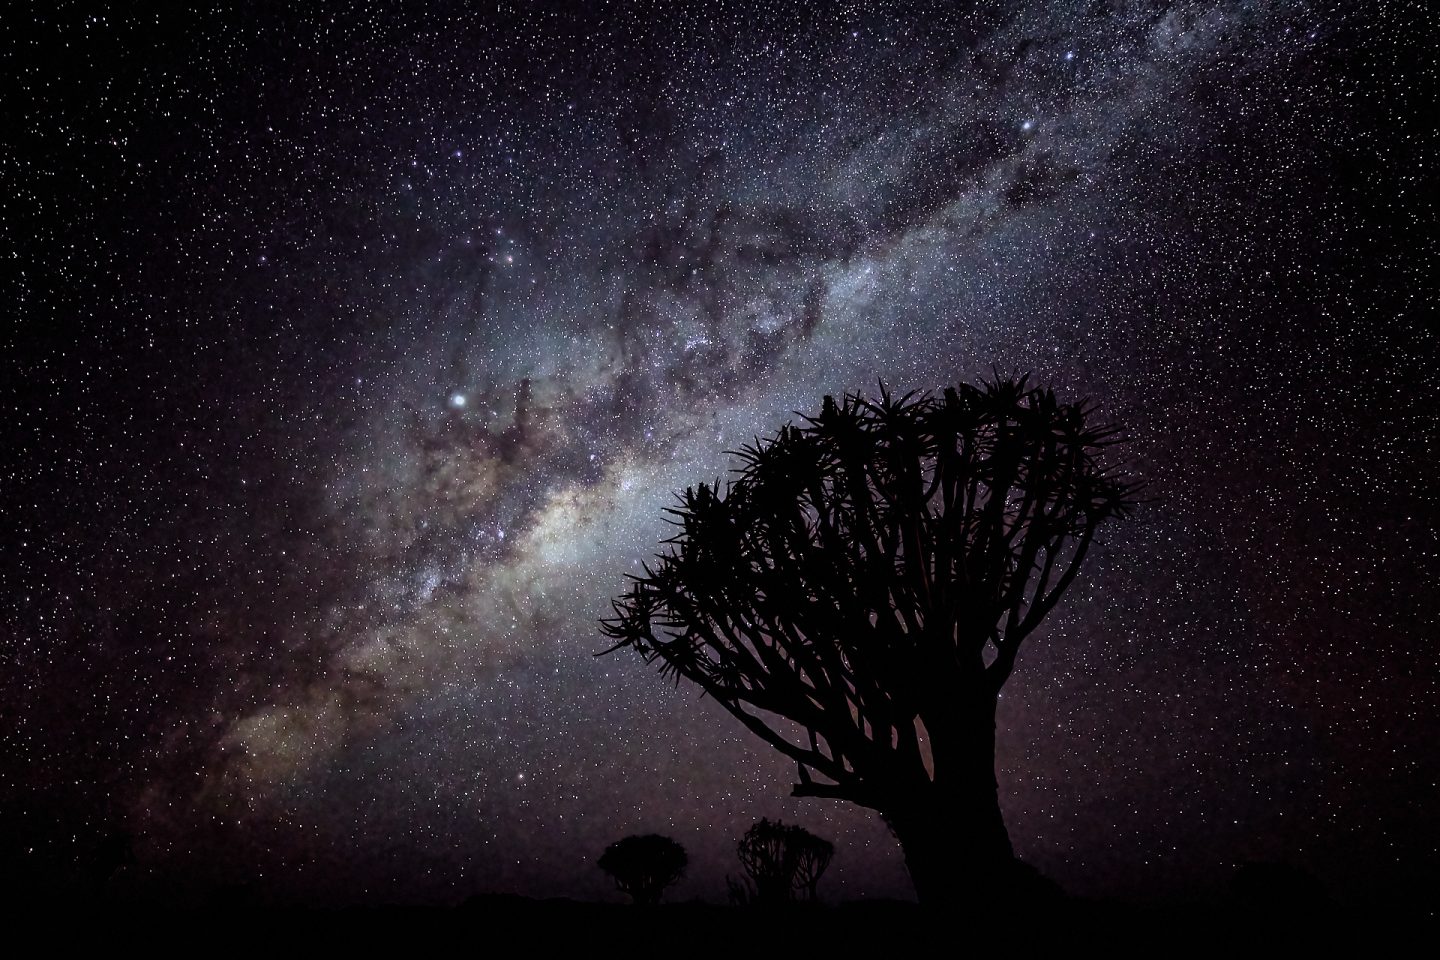
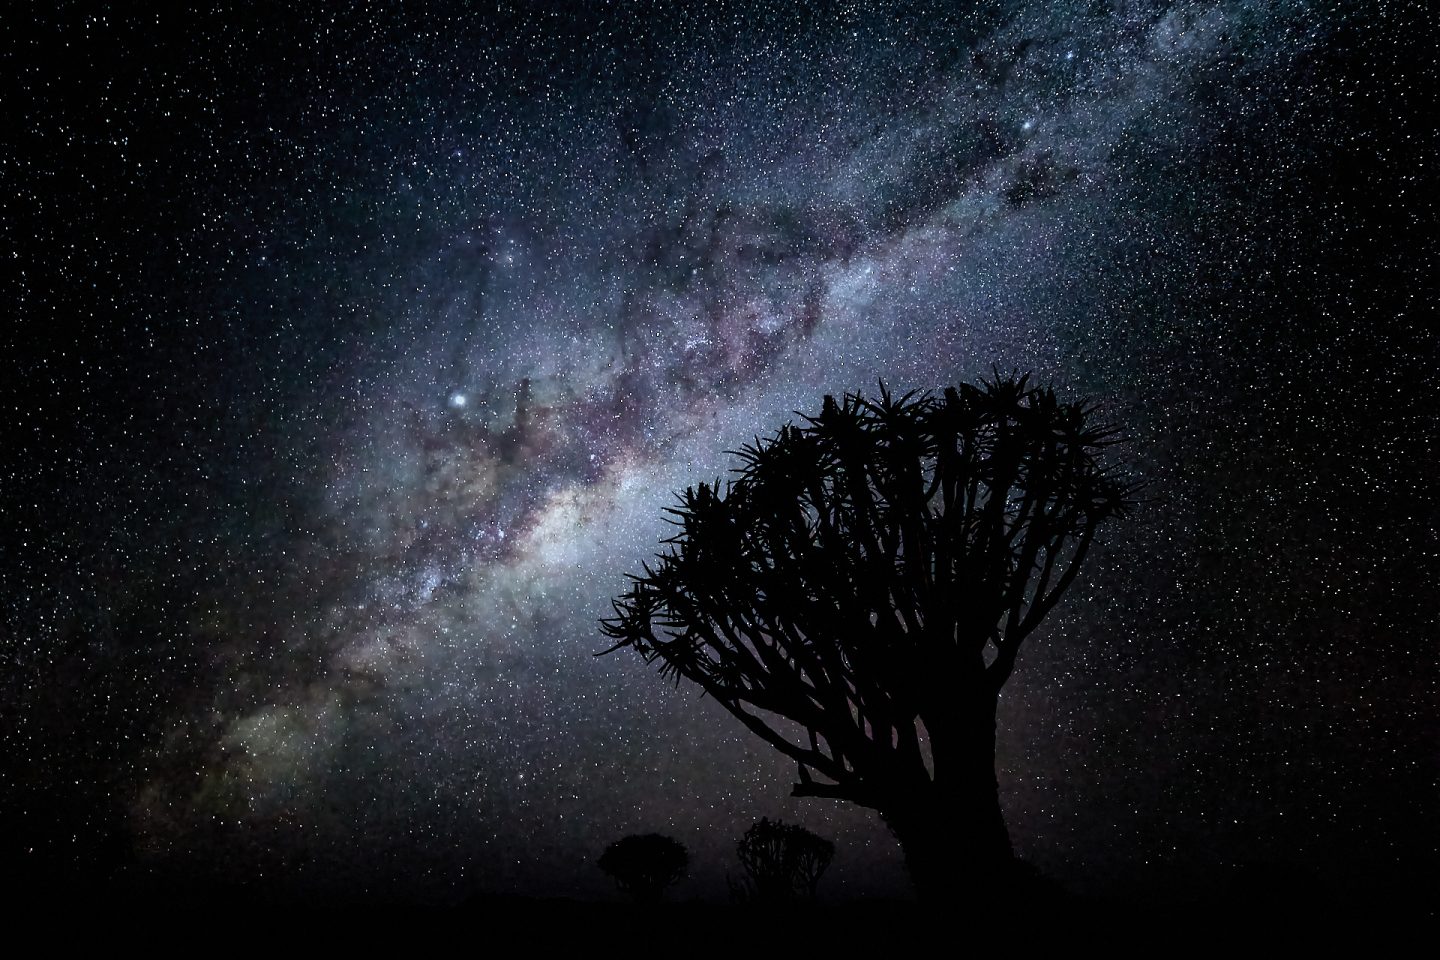
Here also is the Topaz DeNoise version, followed by the ON1 NoNoise version from last year. The Topaz version has it again in my opinion, with simply more stars preserved while smoothing the noisy areas much more successfully.
To this point, I was relatively happy with these new plugins, but after this something cropped up that completely confused me. I searched for a wildlife photo that could use some sharpening, and I found a photo from 2015, shot with my old 7D Mark II. It was a young snow monkey tearing down a snowbank and he caught me by surprise, so my shutter speed was slightly slow at 1/800 of a second, and for the closeness of the subject, I should probably have used a slightly smaller aperture than ƒ/8, so the result is a slightly soft image.
Here is a screenshot to share both the great results and the problem that I stumbled across. On the left, at the top, you’ll see the original raw file, and below that, the Topaz Sharpen version which is a huge improvement, so I’m happy with the software, but look at the shot on the bottom right, with that nasty yellow cast. That is what happens sometimes when I save my processed image as DNG and then import it back into Capture One Pro.
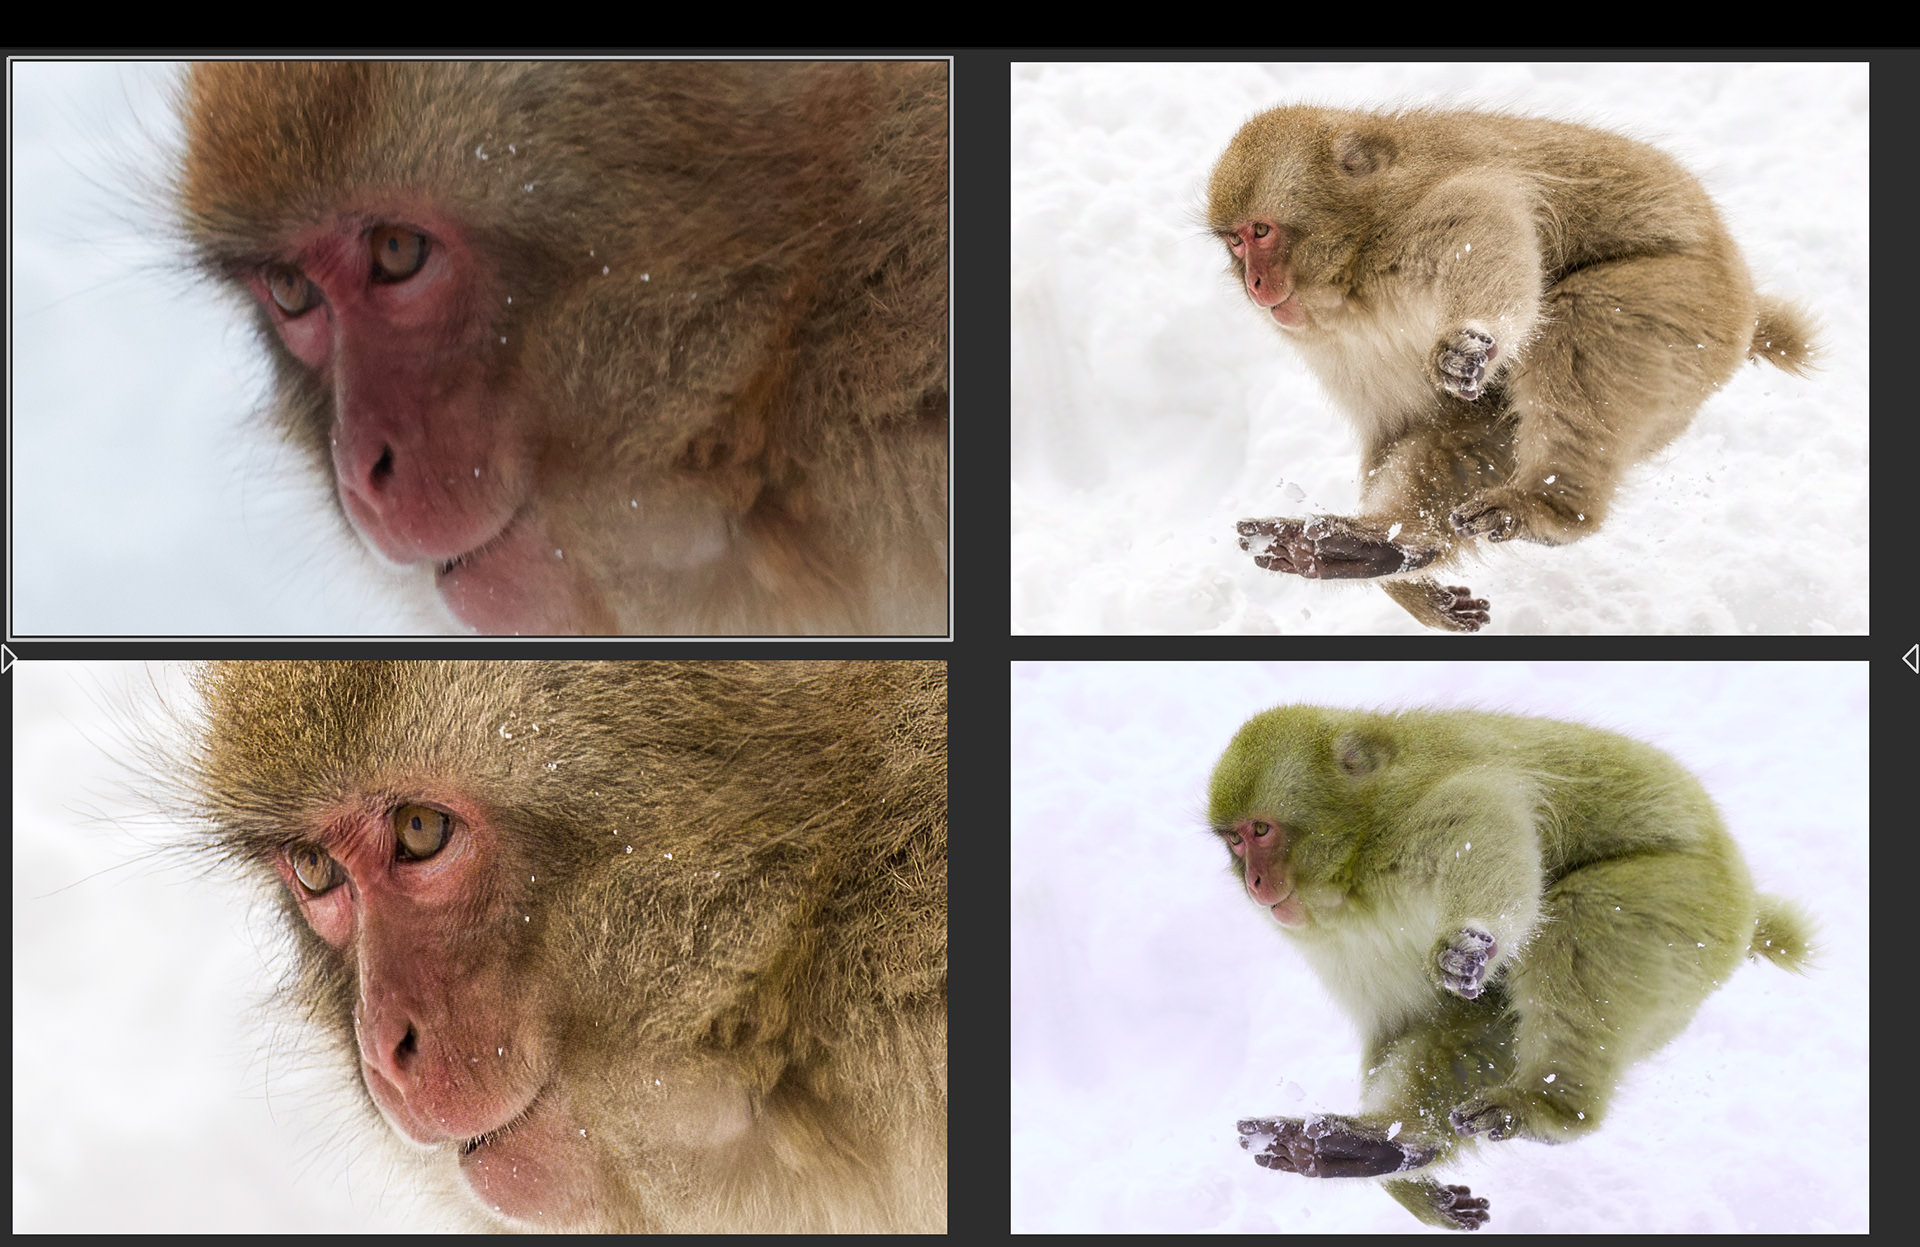
I can remove that yellow cast to a degree, but not completely, and it takes too much time and should not be necessary. The shot above it and the 100% crop in the bottom left are the same image but opened in Photoshop as opposed to Capture One Pro, so there is nothing wrong with the DNG as such, but I have to save it as a PSD or TIFF to get it back into Capture One Pro and I do not want to do that when I can keep the image in DNG format.
I’ve tried a number of other relatively bright images and they all have a cast, so at this point, I have to get in touch with the Topaz support team. I haven’t been able to find a cause or solution online yet, so if Topaz can’t provide a magic bullet, I’ll be returning this software, and that would be a shame because I was looking forward to using it on my microphotography work, which needs the most help. I’ll let you know how this pans out probably in next week’s episode. If I keep the software, I intend to compare Topaz Gigapixel with ON1 Perfect Resize as well, because Perfect Resize has been my goto software for enlarging for large prints for many years, so it will be good to see how it fares against Gigapixel. Either way, I’ll let you know next week how I get on.
UPDATE: OK, so I wanted to leave a note here to let you know that I returned the Topaz Plugins. Topaz Labs were not able to provide a solution for the cast in DNG files in Capture One Pro. They just recommended that I use TIFF files instead, but I do not want to use TIFF when the product supports DNG. I want to remain in a raw workflow, and not bake all of my changes into a TIFF file. It’s a shame, as the plugins do a great job otherwise.
Show Notes
See the Topaz software here: https://www.topazlabs.com/shop
Subscribe in iTunes to get Podcasts delivered automatically to your computer.
Download this Podcast as an MP3 with Chapters.
Visit this page for help on how to view the images in MP3 files.

Hello Martin,
I had a similar issue importing a DxO generated DNG file into Capture 1. The exact same file imports fine into LR. I believe the issue is with C1 and I saw some comments on the web suggesting the same.
Hi Donald,
It’s quite possibly a Capture One issue, but it’s hard to say for sure. I’ve opened a ticket with Topaz to see what they say. If necessary I’ll contact the Capture One team as well. I’d like to get to the bottom of this, but I’m not sure it will be possible.
I should mention that I have no problem importing DNG files created with other applications. This is why I’m not sure that it’s a Capture One issue. Personally, I only see this issue with Topaz-generated DNG files.
I’ll keep you posted via the Podcast.
Regards,
Martin.
Martin,
Can you please elaborate on your workflow when using the 3rd party plugins? In this case, where in the workflow do you apply Topaz DeNoise? Have you done any edits within CP1 before submitting to Topaz? I’ve seen that some create a new variant in CP1, apply denoise on that variant, use another variant (without DeNoise) to do raw edits and apply those edits on the denoised file. Is this a path you would consider?
Good question Einar, thanks!
Because Topaz works on the raw file, it knows nothing of the changes made in Capture One or any other program, so there is no point in doing anything before opening the file. In fact, because Capture One tries to make a copy of the raw file, I generally just right click the image and select Show in Finder, then open the images in the plugin from Finder or via drag and drop into the plugin. Once I have finished working in the plugin, I’ll save the file, hopefully in DNG format that works, and then back in Capture One Pro I right click the enclosing folder and Synchronize it to pick up the newly saved file from the plugin.
If you didn’t see last week’s post yet, I just started using Topaz Photo AI and the problems with color casts in Capture One Pro seem to be fixed!
Regards,
Martin.