
Visit Library for MBP Pro eBooks |
I've recently been using my Canon EOS R and EOS R5 for Zoom meetings as the image quality is so much better with the shallow depth of field, but as there are a few steps required to get this working, I figured I'd share what I do with you today. I do have a good Webcam, as well as the camera in my iMac Pro, which are both suitable for zoom, but sometimes I feel that it's worth going a little further and using my Canon cameras. We'll talk about the key components necessary to get started and move on to a few nice-to-haves as well.
Canon Webcam Utility
Of course, we're going to assume that you already have a Canon camera, and I'll center this discussion around what I know. If you own a different system and use different software, feel free to share that in the comments for the benefit of any other non-Canon users. To get started with a Canon camera though, you are going to need the EOS Webcam Utility which is available for both Mac and Windows. You can do this without the software, and we'll touch on that, but there is an important reason for using the Canon software, and that is because it's the only method I've found that completely stops the camera from falling asleep while you broadcast.
Once installed, there is no configuration, you'll just find the EOS Webcam Utility listed as a camera for selection in Zoom or whatever system you are using. If you don't see it, ensure that your camera is on and connected to the computer via USB. The Utility works with over 40 Canon cameras, and according to Canon also allows you to record your video internally in the camera while broadcasting. I've never needed to do this, but there are situations where that would be very useful.
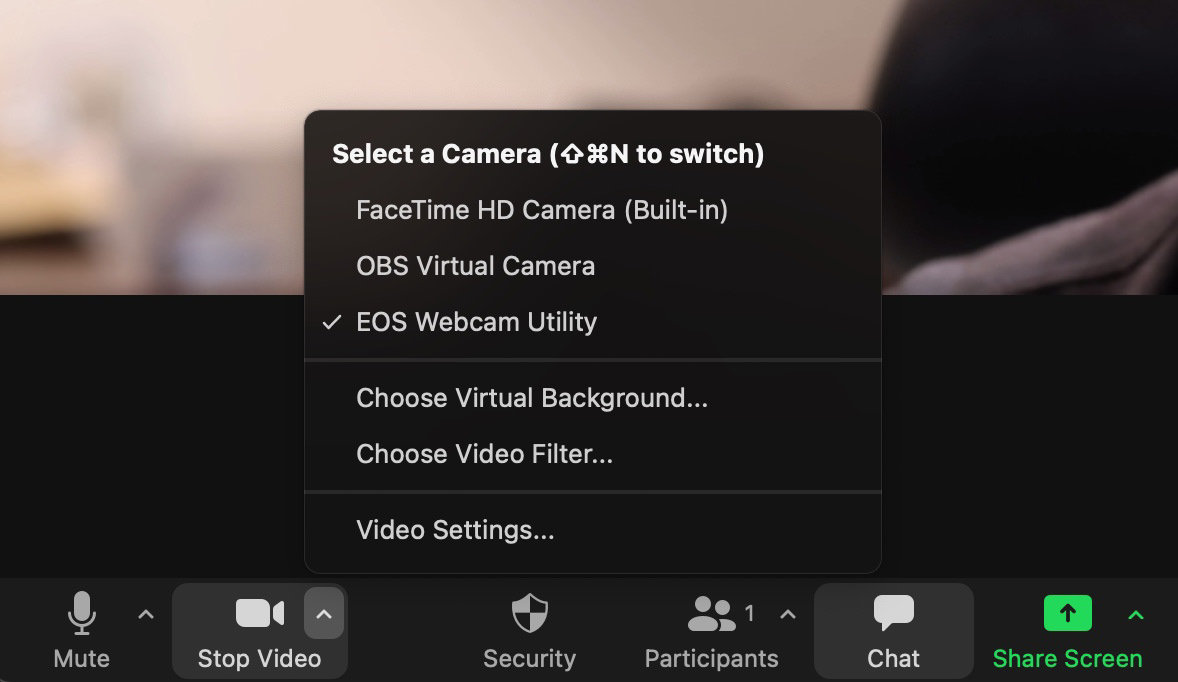
Unfortunately, there seems to be no mechanism to switch between two EOS cameras. If you connect two cameras, the EOS Webcam Utility uses the first camera detected and ignores the second. If you switch the first camera off and select a different camera, then go back to the EOS Webcam Utility, you will be able to use the second camera, but it's not exactly what I would consider a smooth switch.
Using Straight HDMI Signal
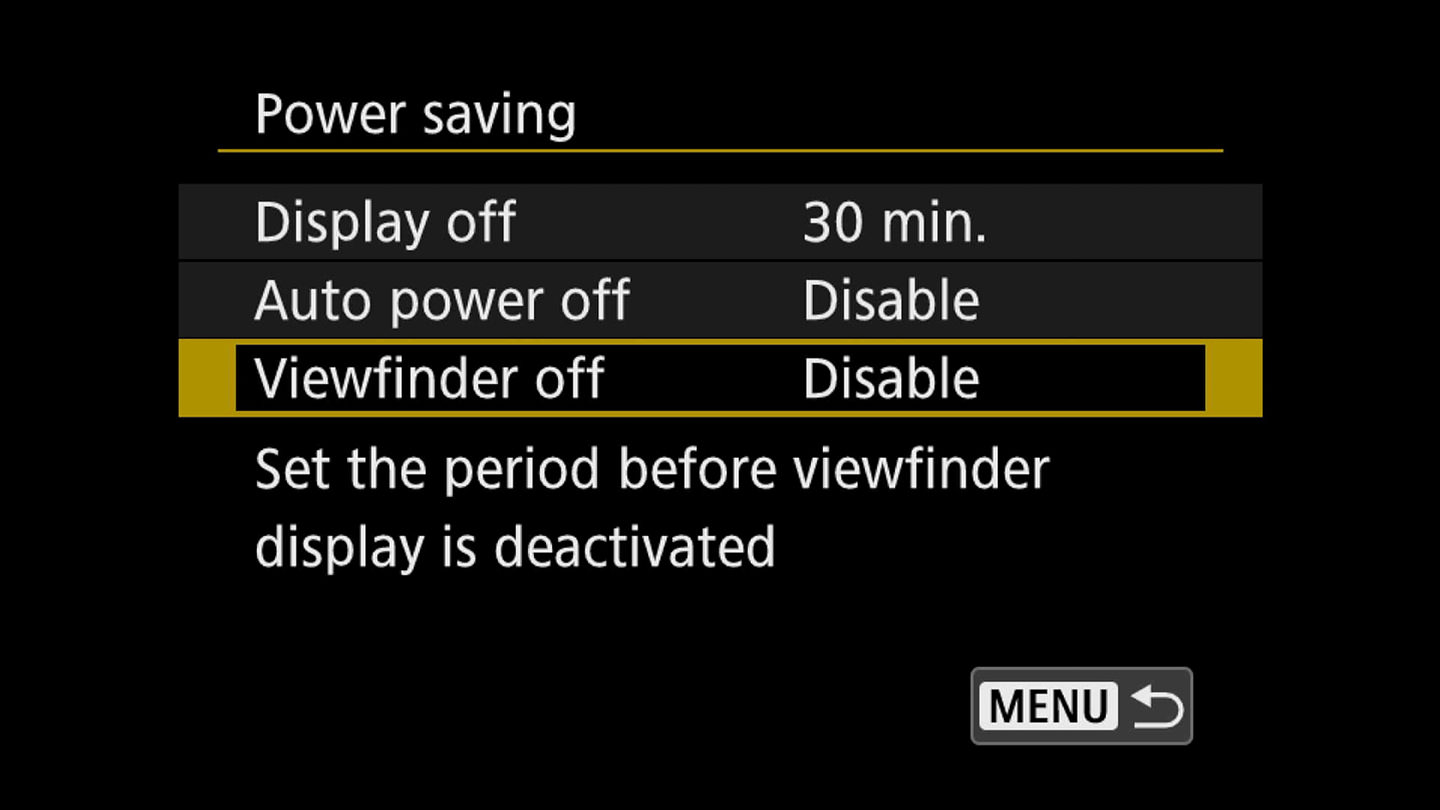
Before we move on, you can also see the option for the OBS Virtual Camera in this screenshot, which is what I would choose if I was using my video capture card that accepts HDMI signal and feeds it to my computer. This does enable me to use the HDMI signal from the camera, and if necessary, you can put an HDMI switcher between the camera and the video capture device, and that allows you to switch between multiple cameras, but this only really works if you are not going to use either camera without touching it for more than 30 minutes. There is no way that I've found to stop the camera from going to sleep while feeding out HDMI. The longest you can set the Power Off timer to is 30 minutes, so even if you disable the options to turn off the display after a certain time, the camera will go to sleep after 30 minutes.
Now, you can, of course, reach over and press the shutter button every so often to keep it awake, but I generally find that I forget to do that, and my video turns off, usually when I'm not looking. For this reason, I only use direct HDMI when I'm actually handling at least one of the cameras, such as when I'm showing a technique through the camera. Another important thing to note there as well, is that if you use the HDMI feed from the camera, you can set the camera up so that it includes the screen overlay in the HDMI feed as well, which is very useful in a teaching situation.
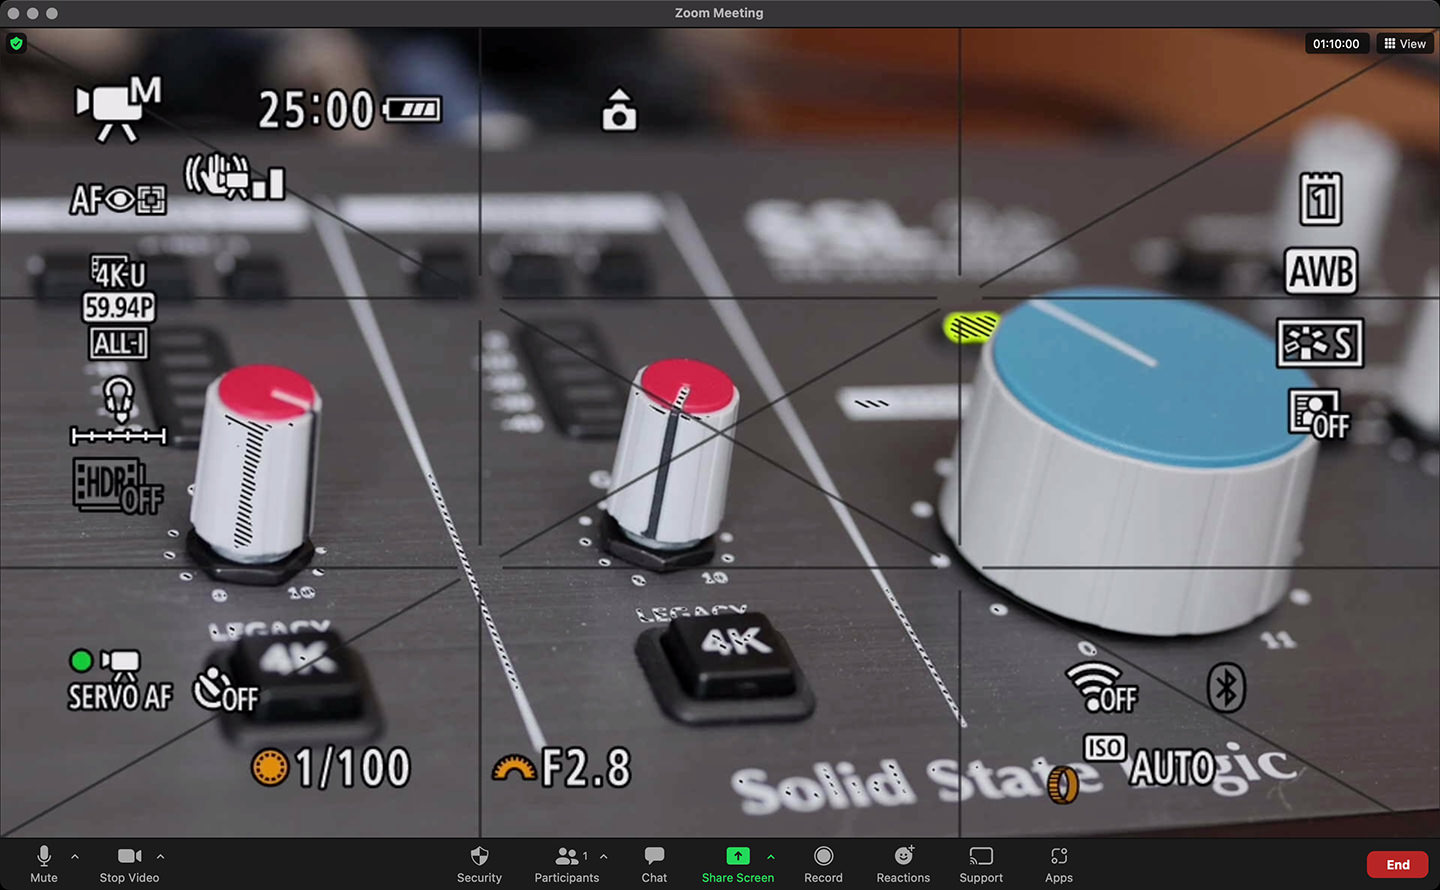
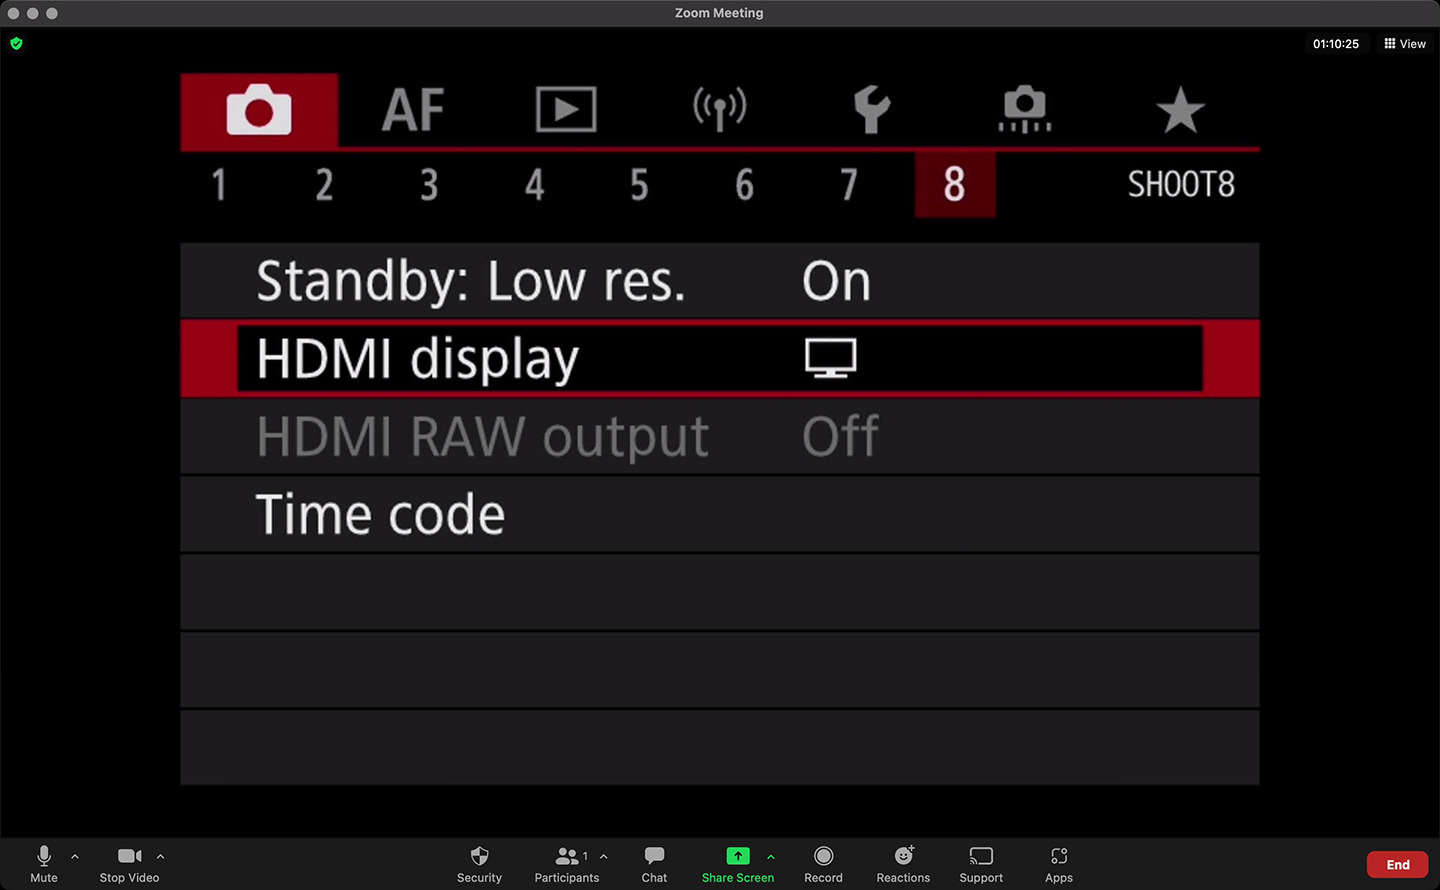
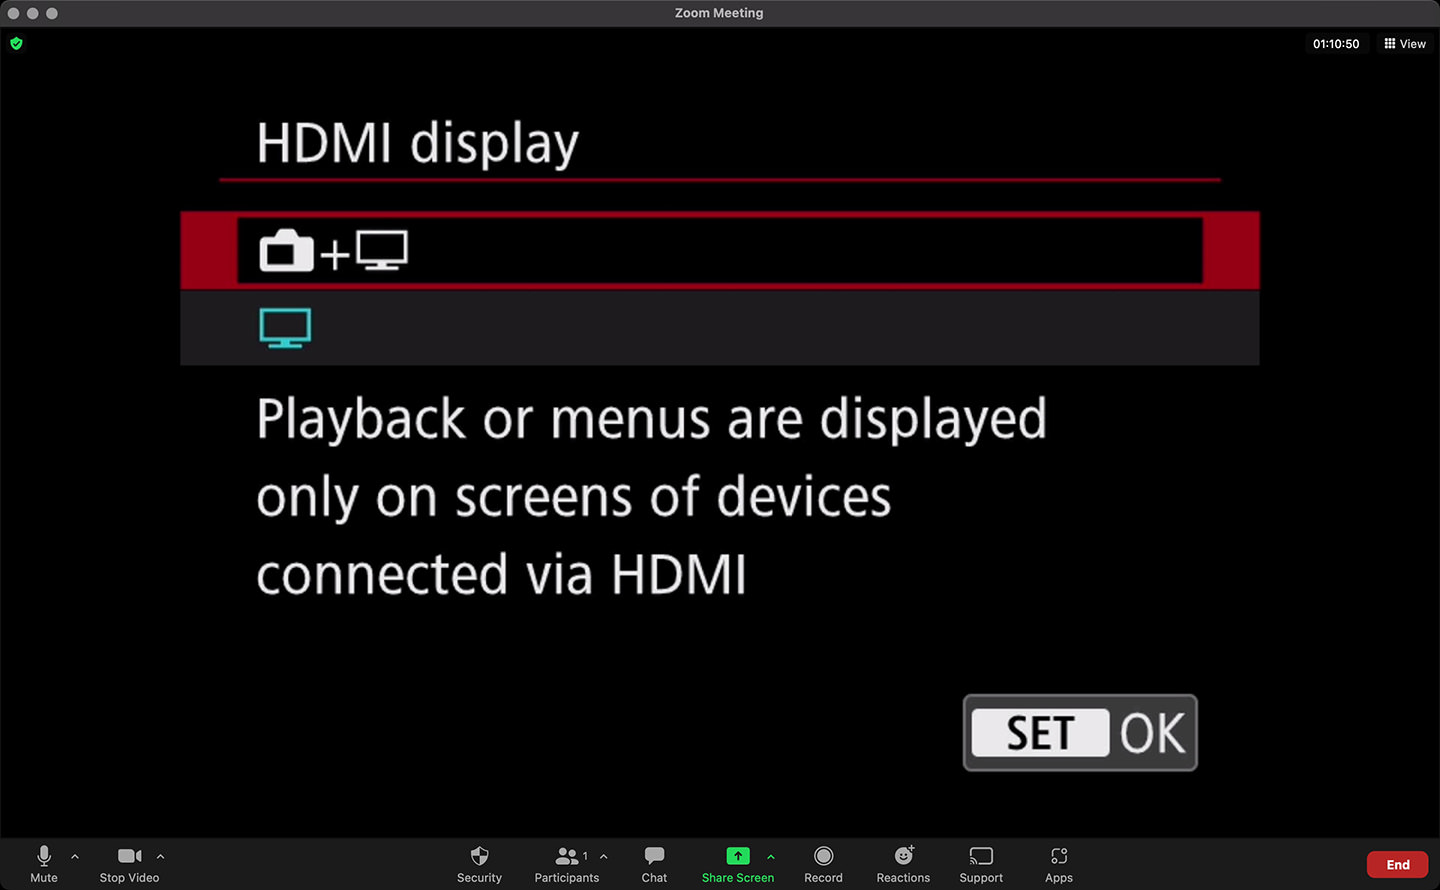
Note that to get the overlay displayed on your output HDMI, on the Canon EOS R5, you'll need to go to the Shoot menu 8 and select HDMI display, then the next option seems a little confusing to me. The icon that shows both a camera and a computer display will prevent the camera's settings from being displayed on the computer over HDMI. They are only displayed on the camera. If you select just the computer display icon though, the menus are displayed on both and are included in your HDMI feed.
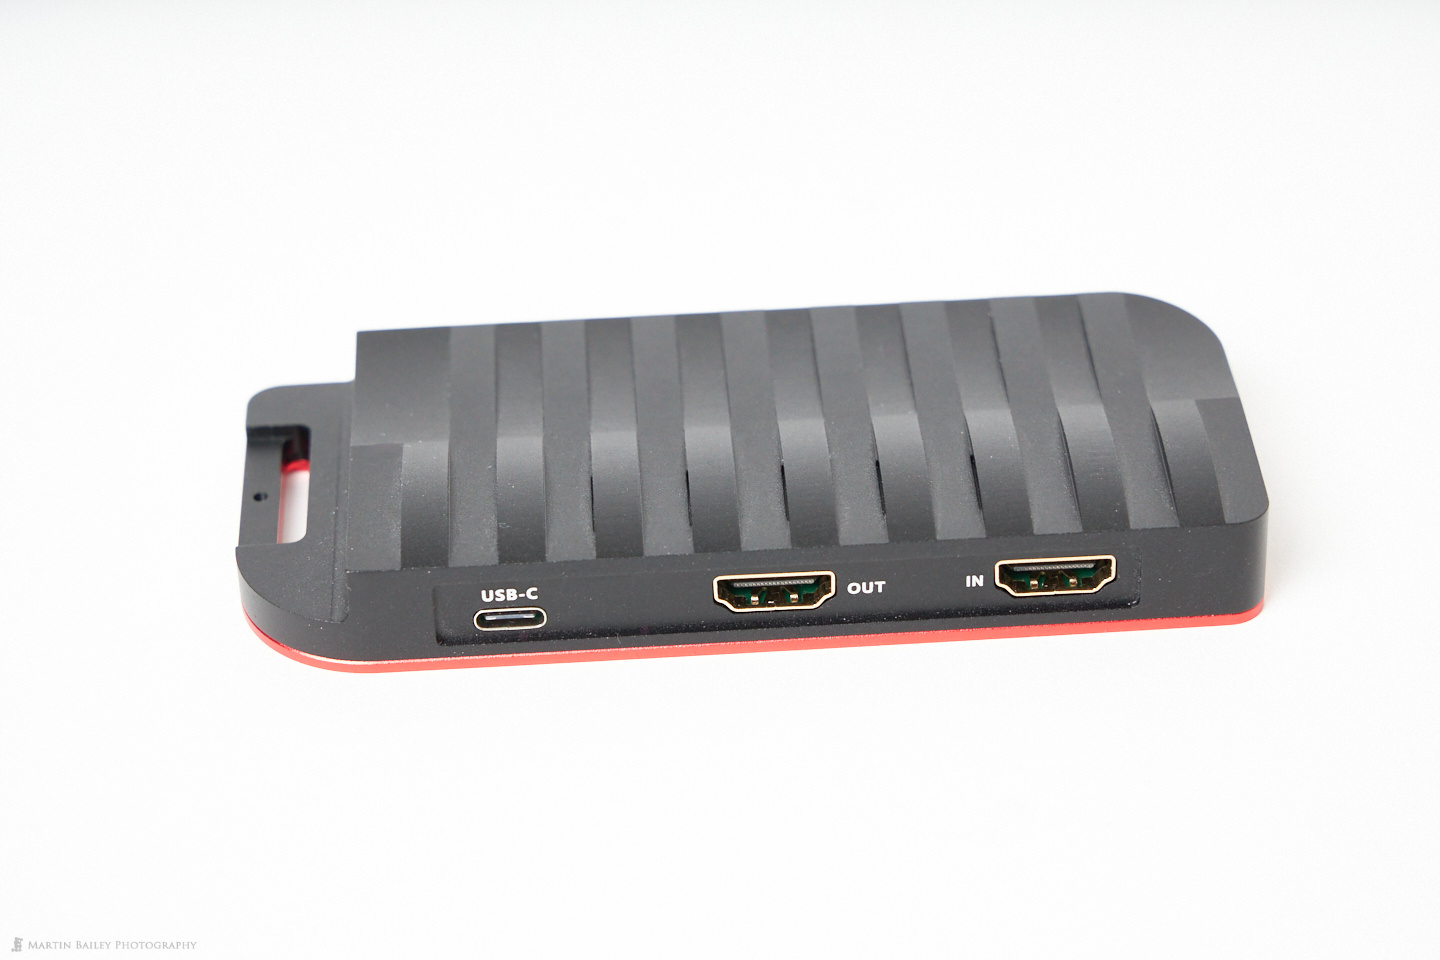
I'm not aware of any combination of setting that will enable you to record the screen with controls when connected directly to the computer over USB. If you want to record the controls you'll need a video capture device. The device I chose is from Basicolor and it seems they make a variety of these video capture devices. The price range is pretty wide, and generally increases with the resolution that the device is capable of passing through and feeding to the computer, and these are not always the same. They may be capable of passing through 4K video but only send 1080p resolution to the computer over USB. If you buy one of these ensure that you check the specs before you make your final decision.
Use a Power Adapter
Another consideration is power supply. I generally get about 50 minutes to an hour from a single battery when it's constantly providing a video signal, so rather than interrupting your call or broadcast to pop your battery out, it's better to use a power supply. I have two. One that provides power through the USB port, which is a Canon adapter and costs over $100. The second is virtually the same as the Canon ACK-E6 Adapter Kit which also retails for more than $100 but I broke down and grabbed a $20 adapter from Amazon.co.jp which seems at this point in time to do just as good a job. As you can see in this image, the ACK-E6 basically provides power through a mockup battery that is wired to the power supply.
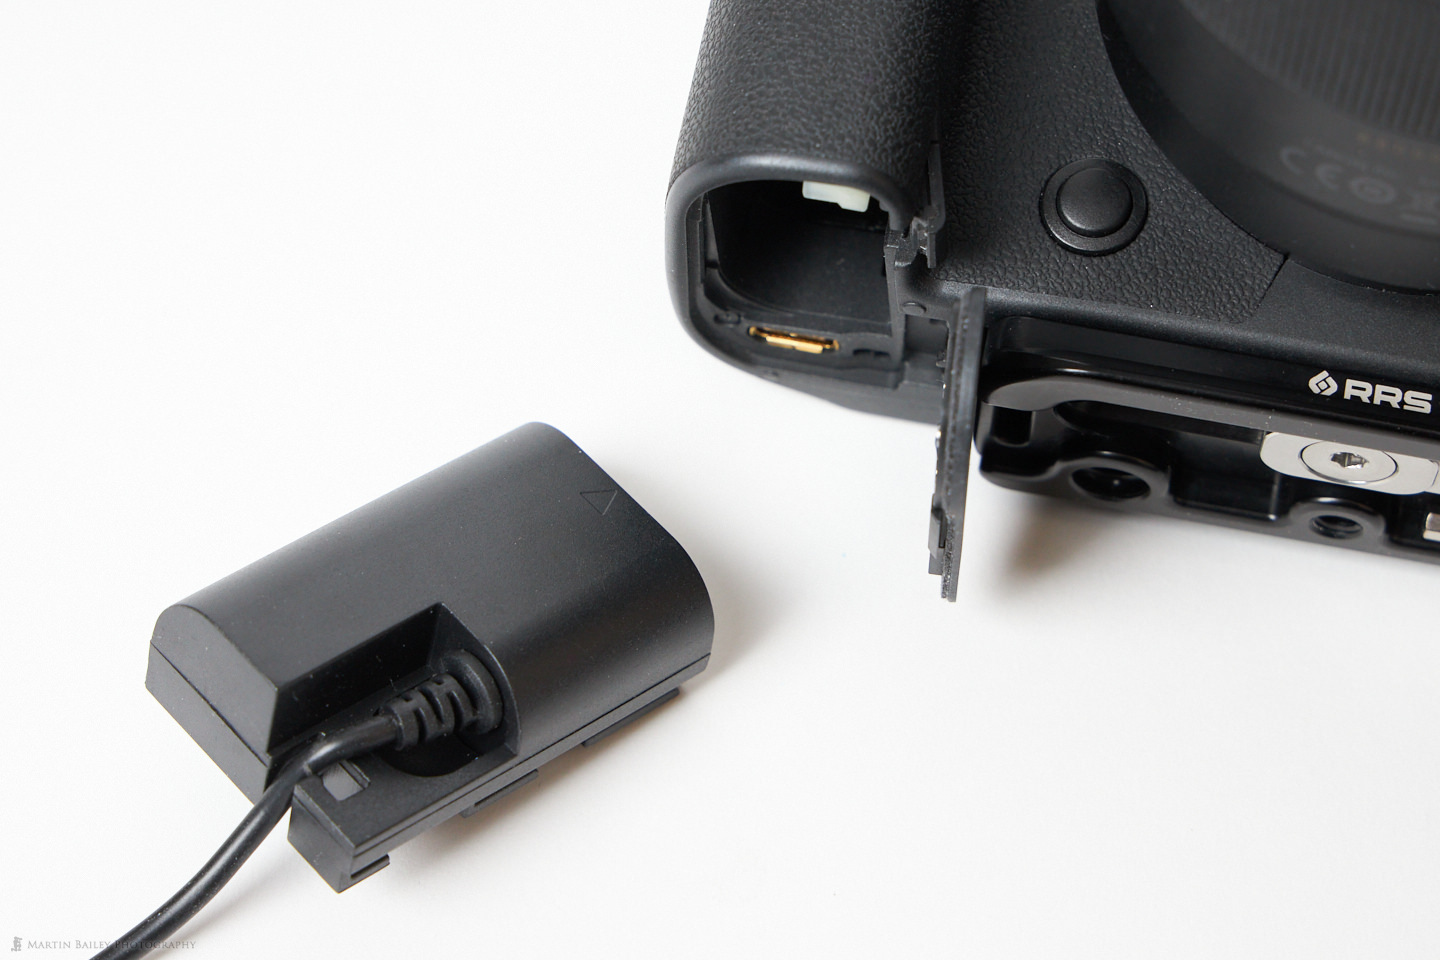
There is a small rubber flap on the side of the battery compartment that you can bend outwards to feed the cable through so that you can go ahead and close the battery compartment while you're using the camera.
Autofocus with Face Detection On
You'll need to put the camera into video mode, which you do on the Canon EOS R5 by pressing the Mode button followed by the Info button, and by default, this will put the EOS R5 into Movie Servo AF mode. I also like to check that Face Detection mode is selected, so that the camera will follow you as you move around the screen. This is especially important when you select a wide aperture as the depth of field is so shallow that you'll quickly go out of focus if you move away from the plane of focus. On the EOS R5 the easiest way to get into Face Detection autofocus mode is to his the Focus Point Selection button in the top right corner on the back of the camera, and then hit the M-Fn button next to the shutter button until the Face icon is selected, as you see in this screenshot. In this mode, the camera will do a great job of keeping your eyes in focus as you move around.

Auto-ISO
I also find it useful to turn on Auto-ISO while shooting video for streaming as this will keep you relatively well exposed, even if the light changes. I sometimes use an LED video light if I'm streaming after dark, but during the day, if I have my curtains open, the camera still does a great job of getting my face bright. My other dedicated webcams can't do this. They just go supernova on the light from the window and I go into silhouette. This is another reason why I like to use the EOS Webcam instead of my regular webcams.
Using an External Monitor
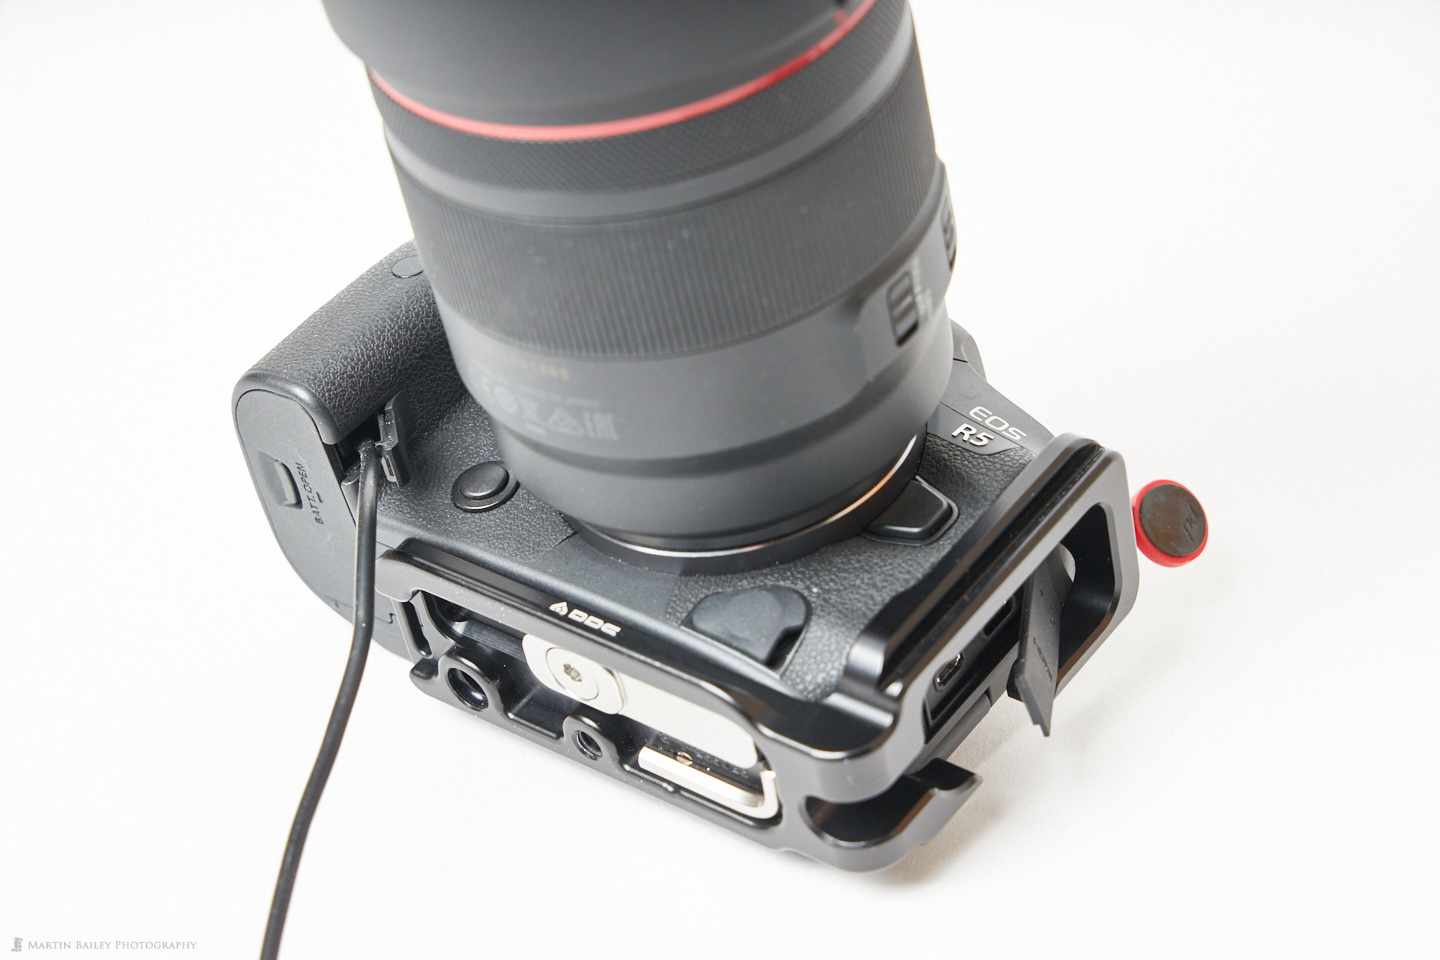
You can also use an external monitor if you have one, and I find this especially useful as it forces you to look towards the camera as you check your appearance, and that is good for staying engaged with the people on the other end of the call or meeting. Here I shot a quick photo of my setup with my video monitor attached to the flash shoe of the EOS R5 but pointing forwards so that I can see myself as I stream.
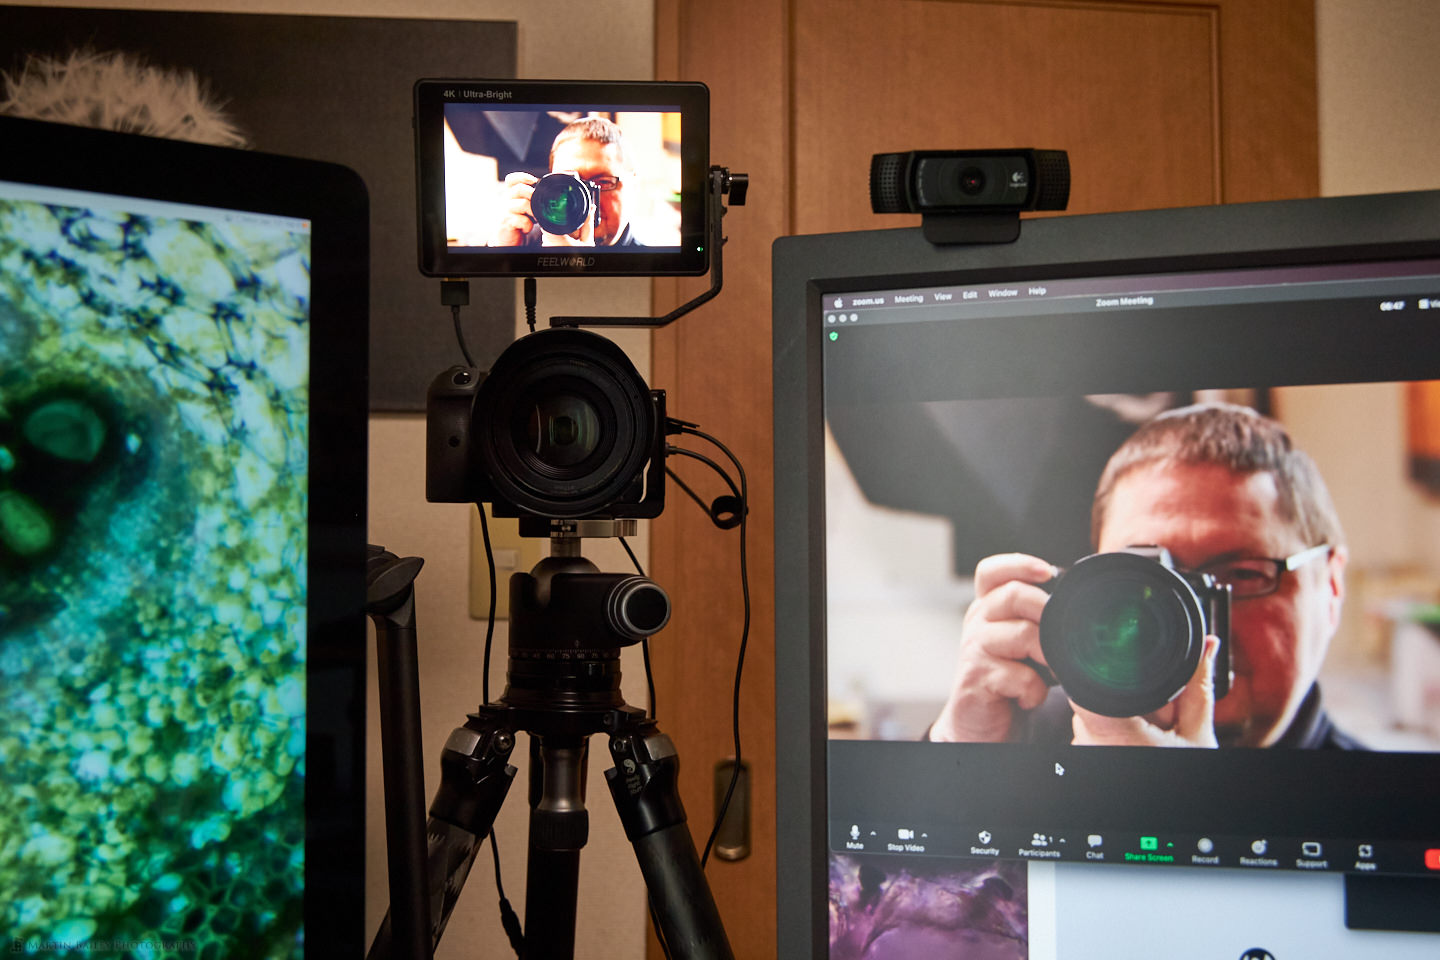
Another thing that I generally do is move my display as close to the line of sight of the camera as possible, and then put my zoom screen in the corner of the computer display, and make it as small as possible, so that I am forced to look close to the camera while speaking. Your line of sight still goes away from the viewer though, so when I want to virtually make eye contact, I look directly at the lens of the camera.
It's not a great photo, but you can also see that the background of my video is significantly out of focus due to the shallow depth of field of the camera. When using my 50mm F/1.2 lens I like to open it up completely for super-shallow depth of field. This looks so much better in a streamed event than having everything tack-sharp, which is, of course, what happens when using the small sensors in regular webcams.
There are benefits to dedicated webcams, of course. They are easy to set up and because they are so small or even embedded into the computer just above the screen, it's easier to get close to the line of sight of your viewers. There are also some high-end webcams that will follow you around if you stand up and move around, as you might in a product demonstration or presentation. I still use my regular webcams for casual calls and meetings, but when I want to provide professional-looking video, like when teaching at events and camera clubs, I take a few minutes to set up a Canon camera, or two, to make a good impression. We'll wrap it up there for today. I hope you find this useful. If you do, please consider supporting the podcast as well as gaining access to a range of other benefits by joining our Patreon community. Thanks very much to Christian and Blazej, our latest contributors, and to the others that are already helping to keep the wheels on the MBP Wagon.
Show Notes
EOS Webcam Utility for Mac and Windows: https://www.usa.canon.com/internet/portal/us/home/support/self-help-center/eos-webcam-utility
Subscribe in iTunes to get Podcasts delivered automatically to your computer.
Download this Podcast as an MP3 with Chapters.
Visit this page for help on how to view the images in MP3 files.


What type of cable do you use to connect camera to computer HDMI?
I’m looking to do it but I have a really small port in the camera (Rebel XT) and the only port in my surface 9 is USB-C.