
Today we continue our travelogue series covering my recent Hokkaido Winter Landscape Photography Adventure. I’d like to start by answering a question to last week’s post from Paulo Silva. Thanks for the great questions Paulo! Although I’ve answered in the comments for last week’s post, I’m going to include my answers here too as this is probably useful for others as well.
Why do you use apertures so small as F/16 with such wide focal length as 22mm? For the longer I understand if you want to keep everything in focus but as wider than 22mm or 35mm, wouldn’t you get the lens best performance (keeping everything in focus) and using a little bit wider aperture (say f/8 to f/11), having in mind that diffraction usually starts to show with f/11 and smaller? I know that it depends on the lens you’re using, and my experience is only with APS-C sensors in which diffraction happens sooner than with Full Frame sensors.
Another question, if I may, is where did you put your focal plane? At the trees or did you use some kind of hyperfocal distance?
Question from Paulo Silva
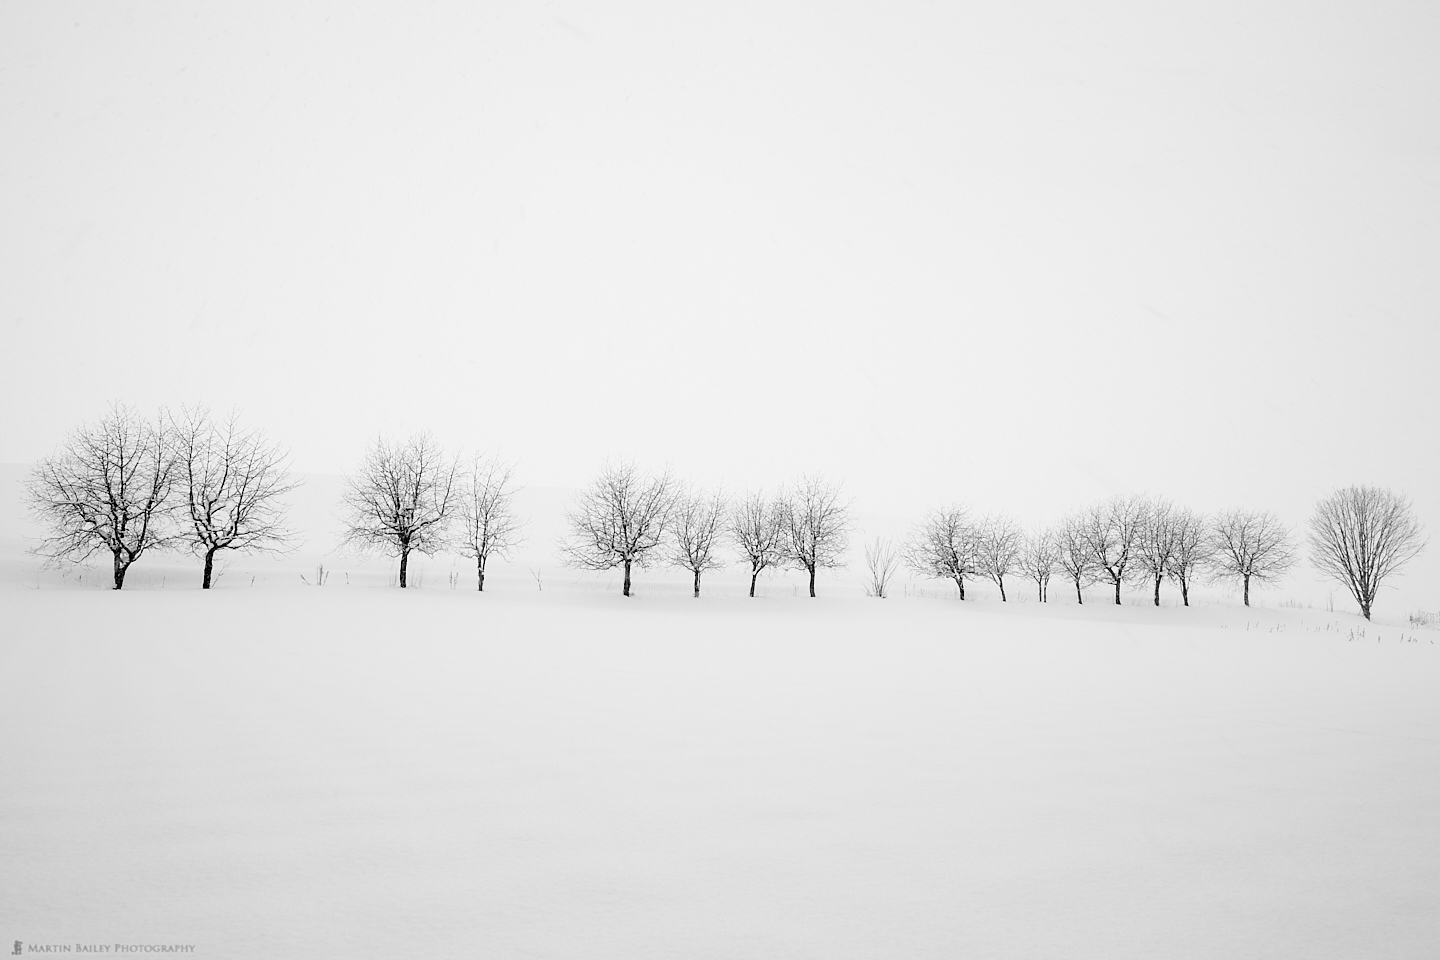
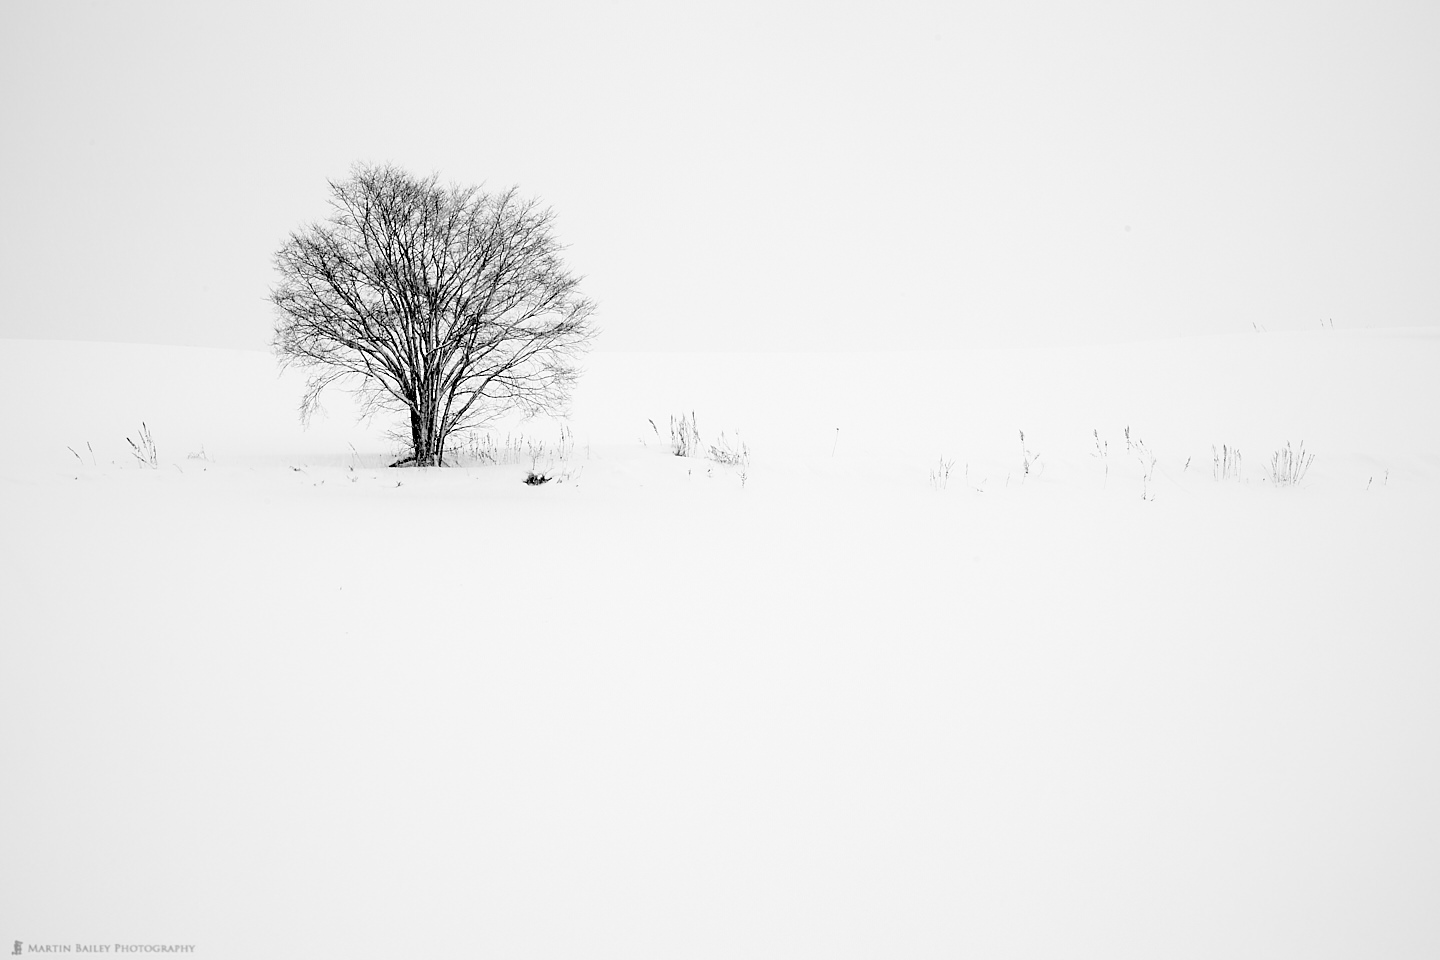
OK, so my settings are usually the result of thinking through what I want to do with the elements of the image, and also based on testing my gear to understand what it is capable of. There is also a hint in the text for last week’s post with regard to those particular scenes. Here too is a gallery of the images, to save you going back to the previous post:
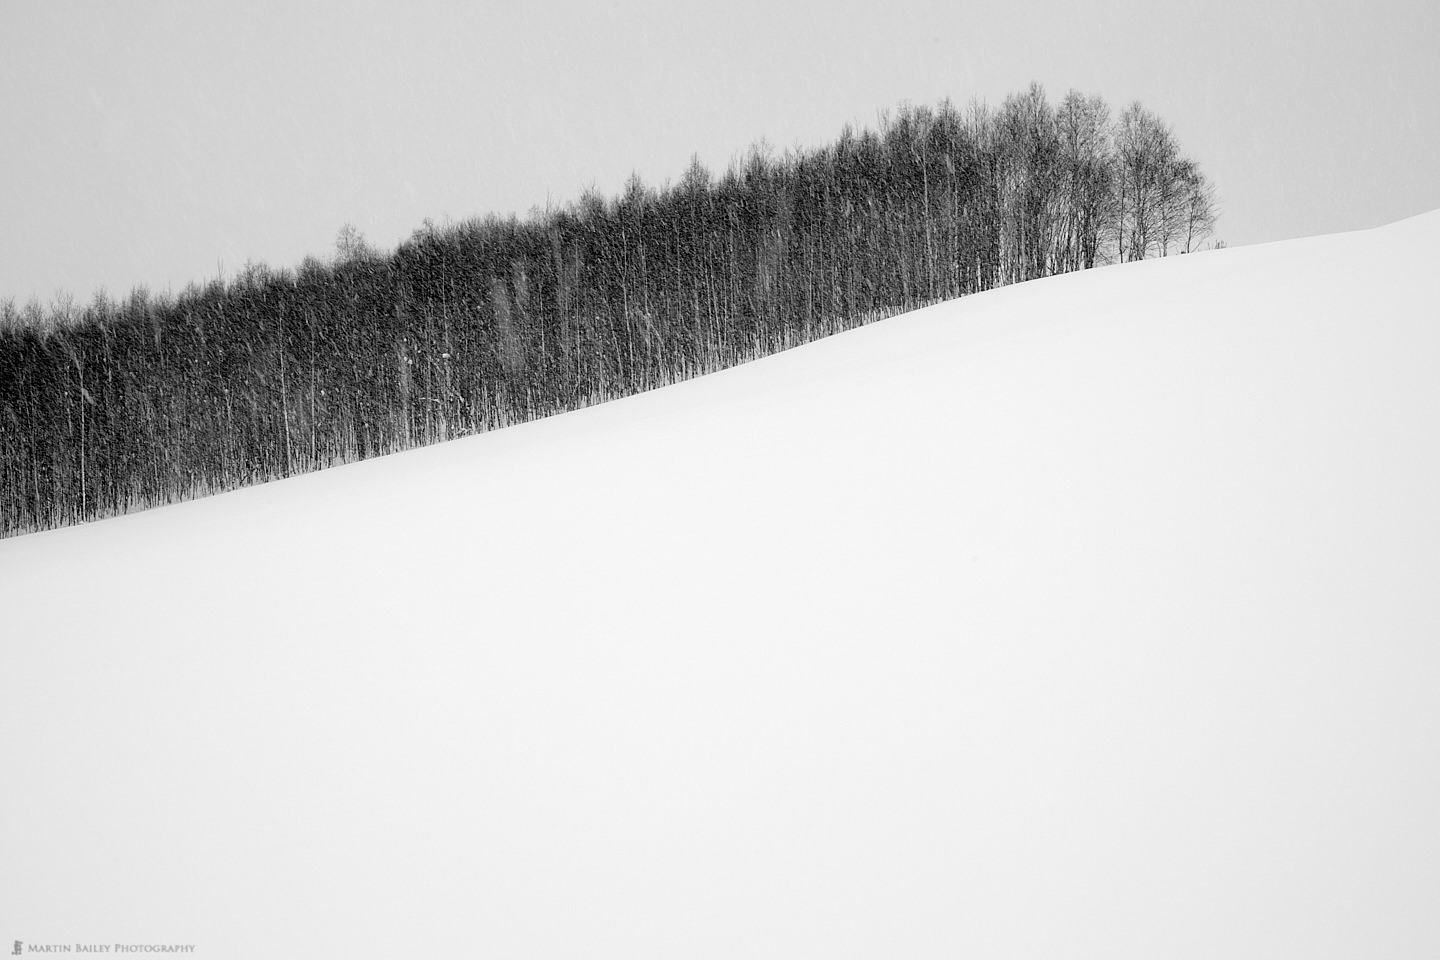
The main reason for those particular images is because I wanted to get a shutter speed of between 1/20 and 1/40 of a second to cause the snow to streak slightly. It’s hard to see in the web versions, but it makes a beautiful pattern over the trees at these shutter speeds. If that requires me to stop down to f/16, I’m fine with that, because I test my lenses as described here https://mbp.ac/594 to see where diffraction starts to kick in. I built the functionality into my Photographer’s Friend app to also display diffraction warnings when calculating depth-of-field, which I also reference, but I’ve found that my gear does not start to visibly show the effect of diffraction until I stop down to f/22, but the depth-of-field does increase.
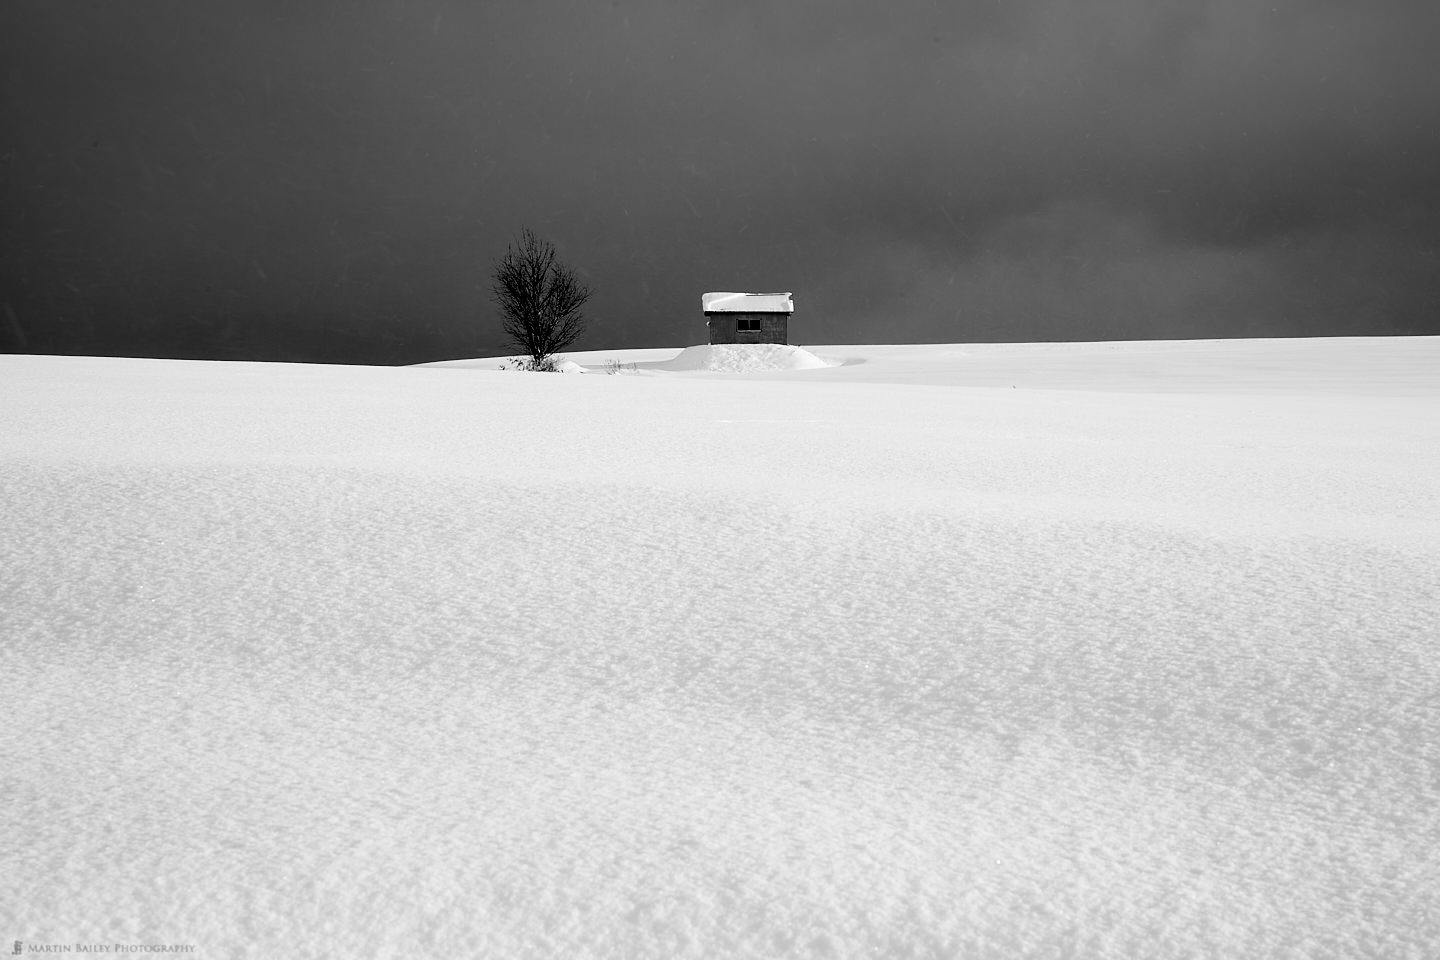
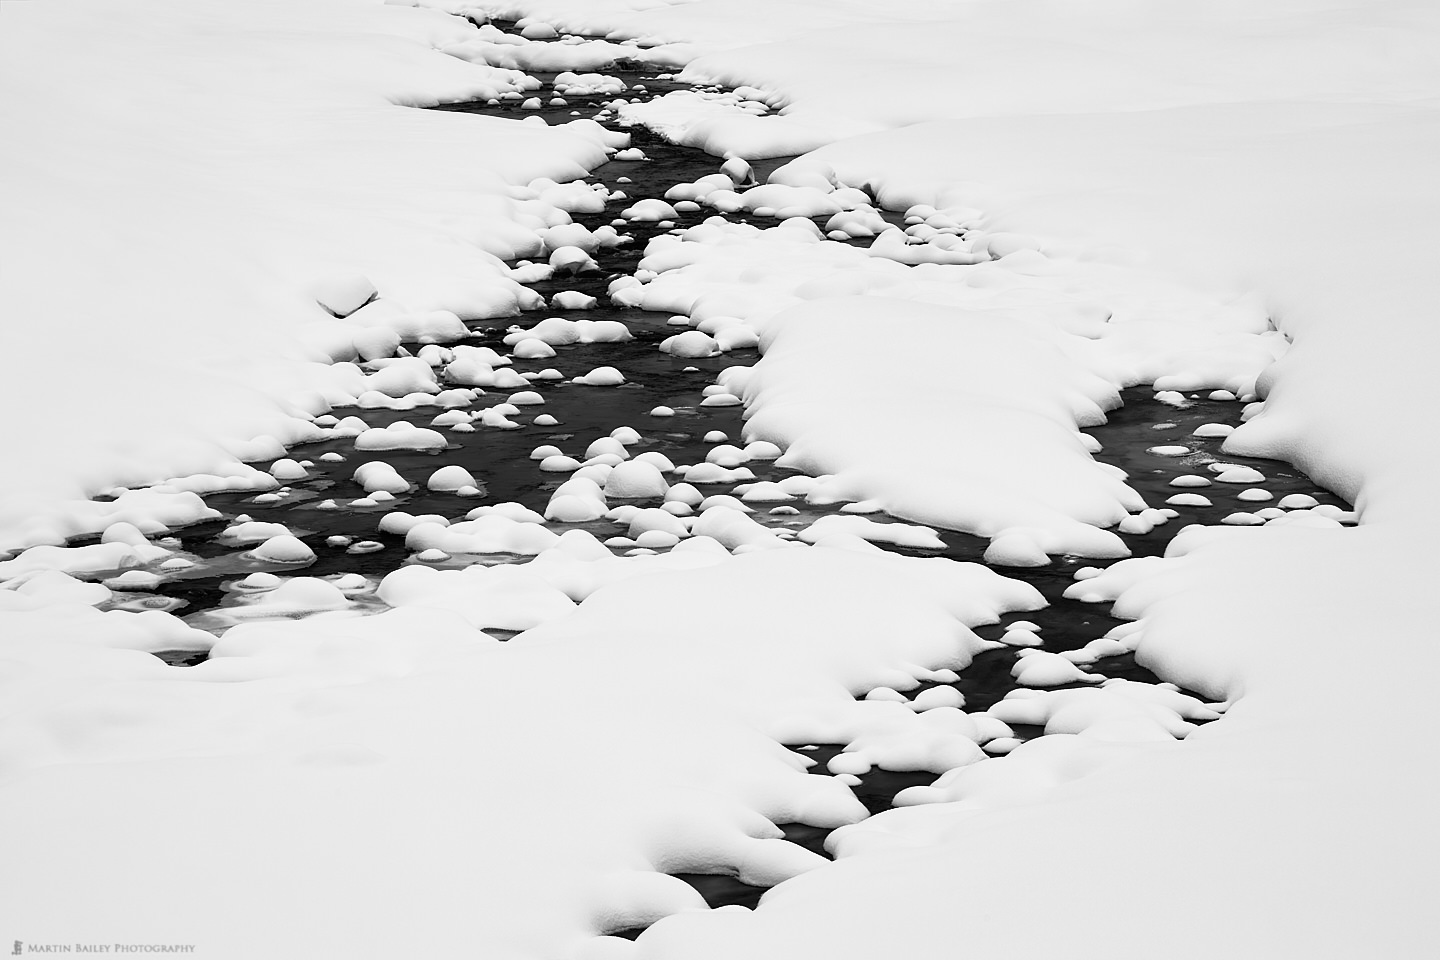
For example, the hut and tree shot with the dark sky was shot at 91mm, and at f/16 the close foreground snow is starting to come out of the depth-of-field. For the snow pillows shot, I was trying to get a slow shutter speed to record the water movement.
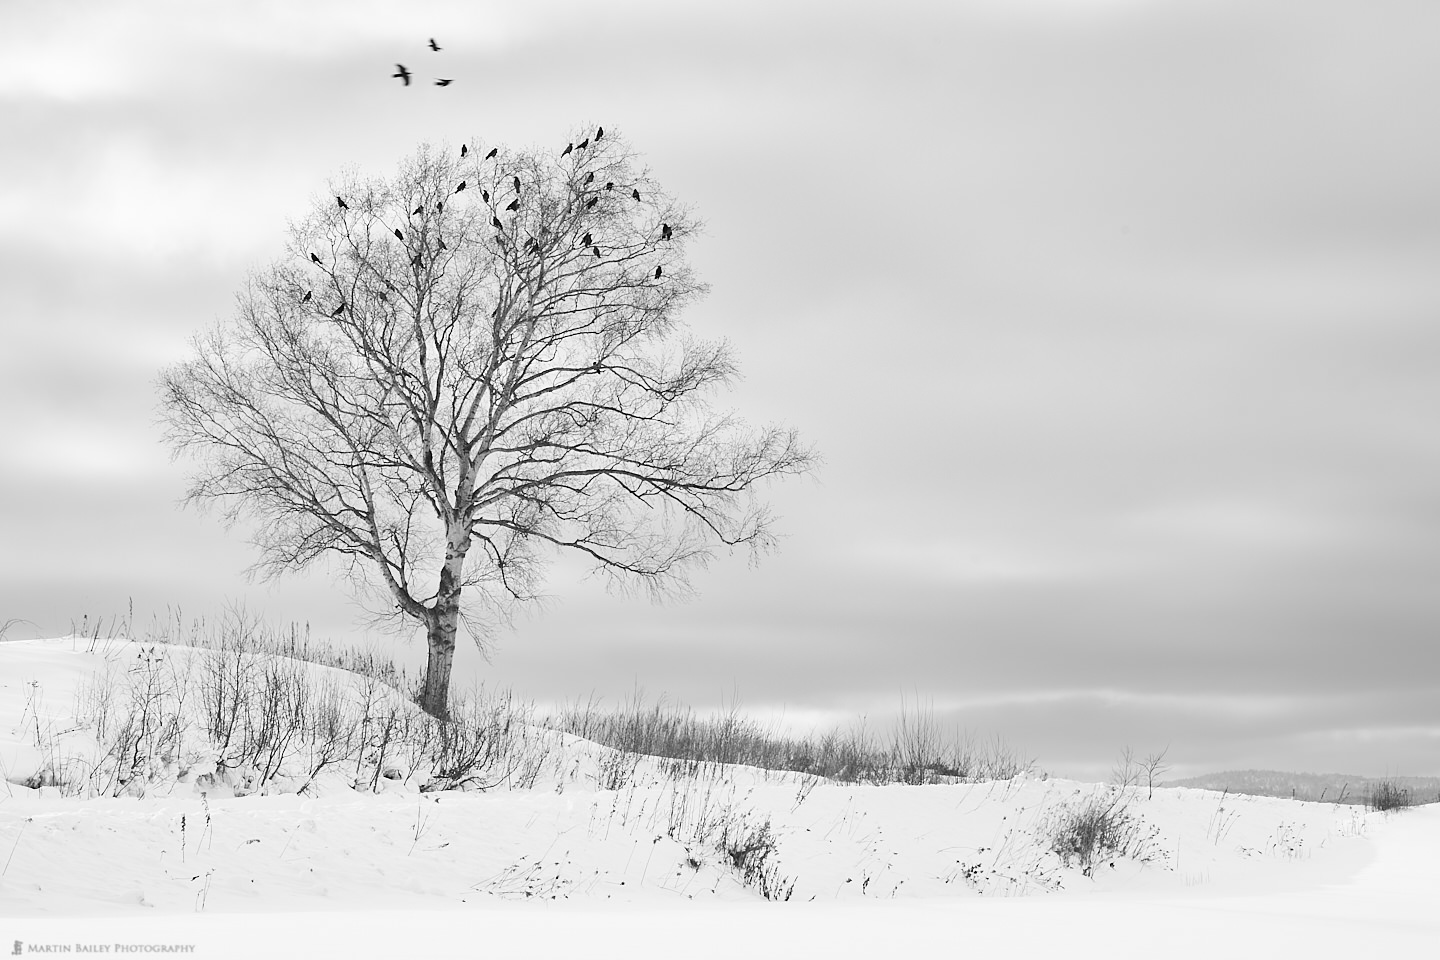
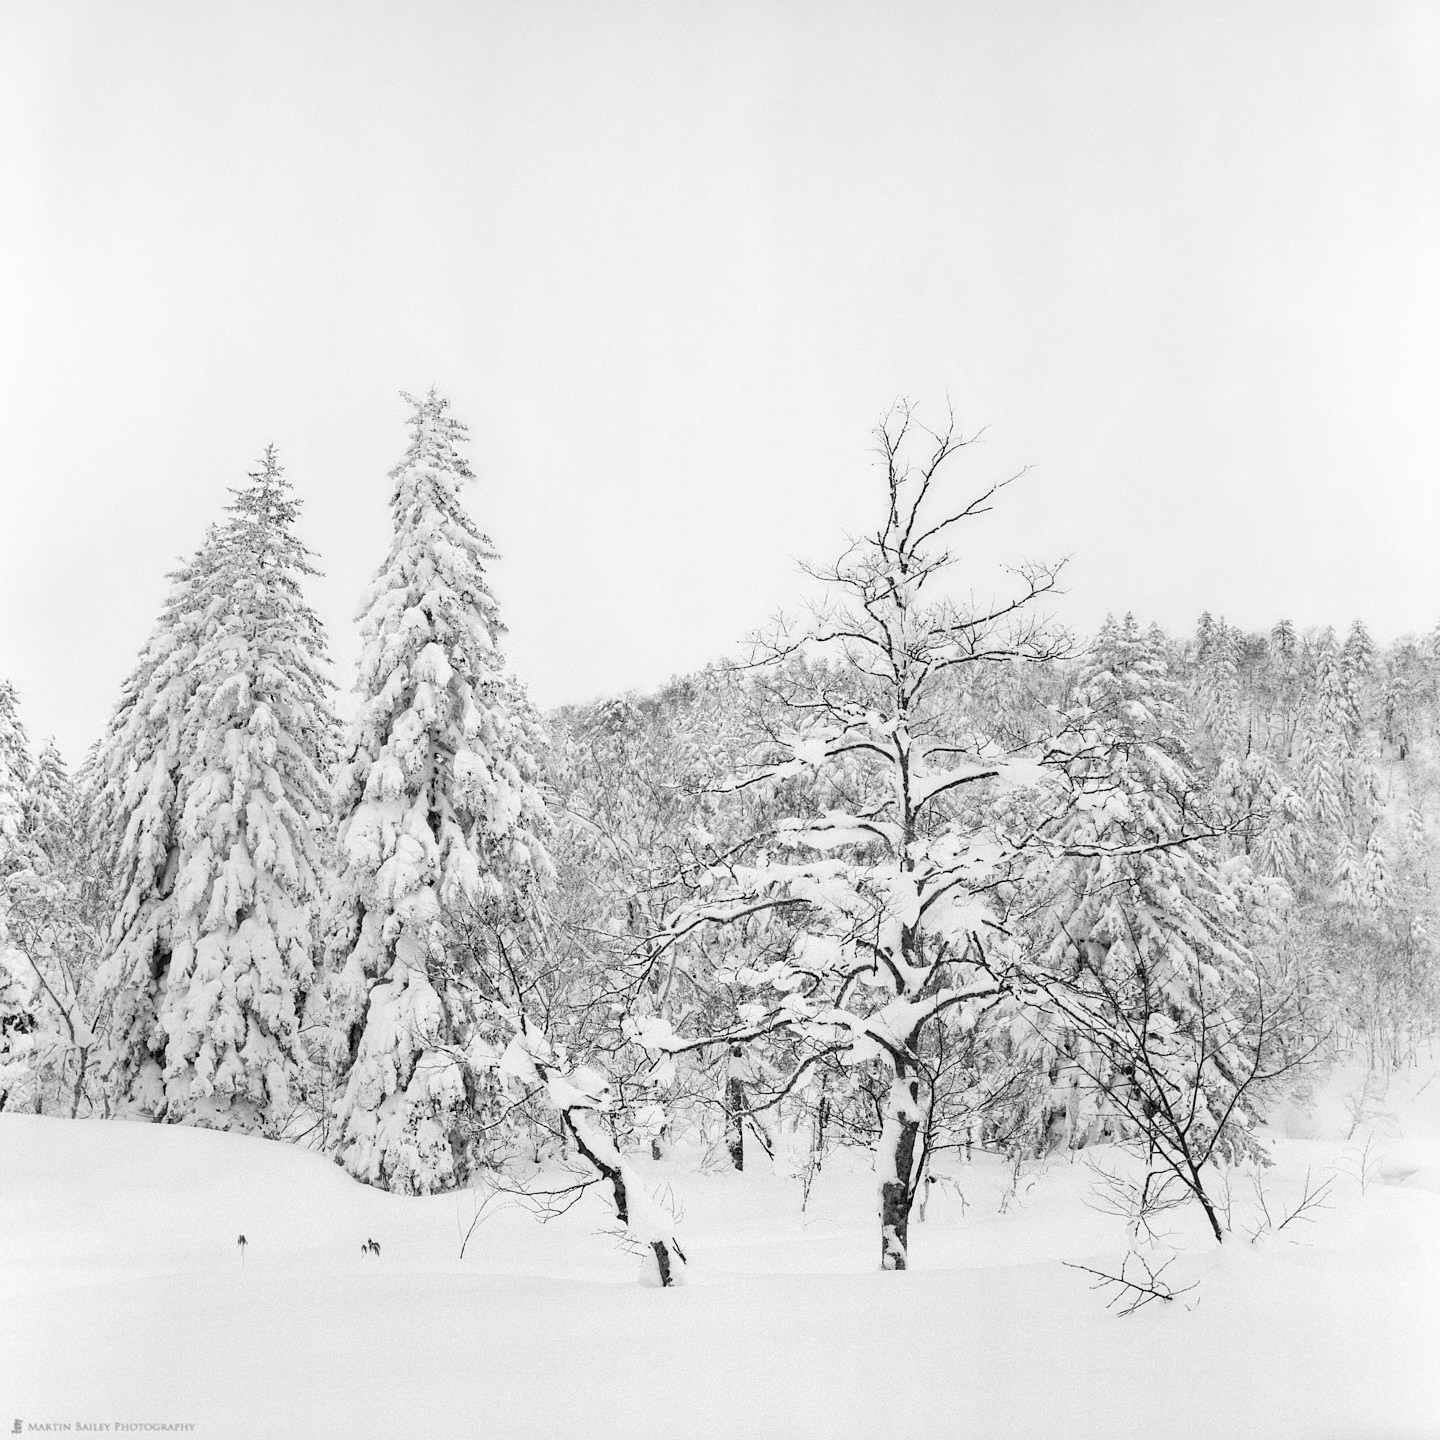
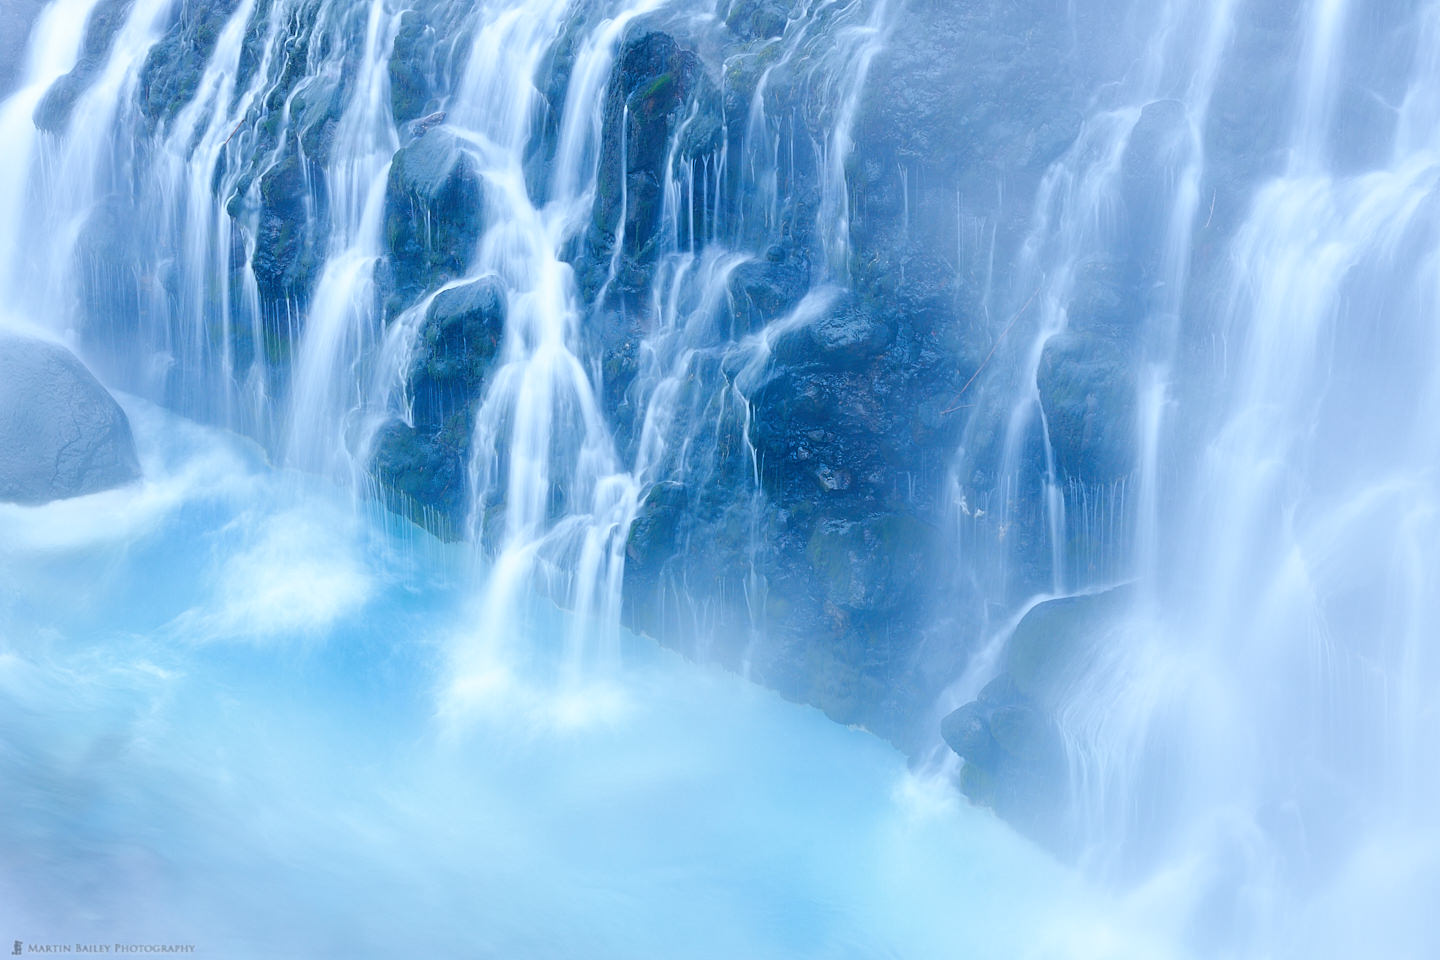
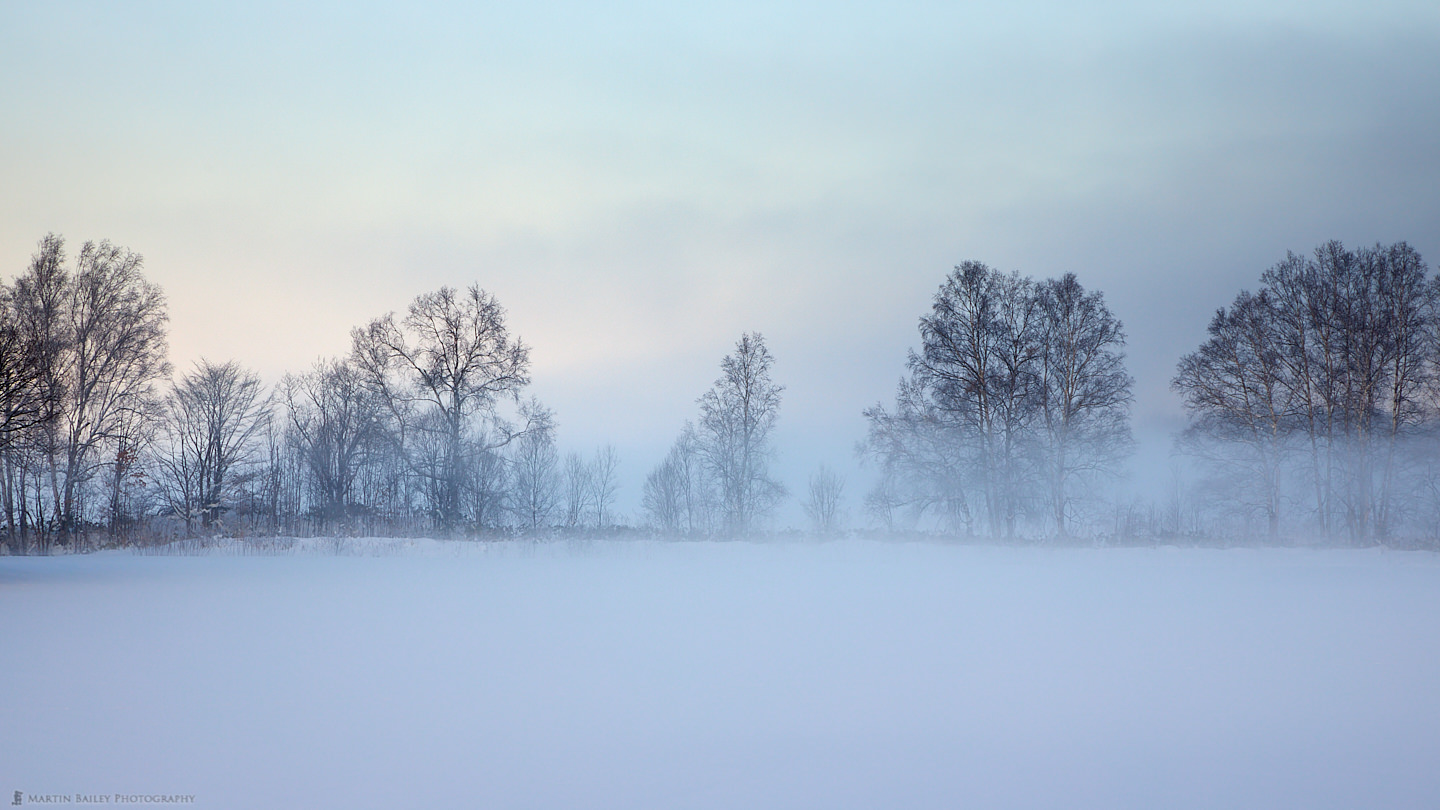
For the dawn mist in Biei shot, you’ll see that I opened it up to f/11, because, firstly, I was hand-holding, but also because the foreground snow was not going to be important, so I didn’t need to stop down so much. For the blue waterfall, I opened up to f/11 and adjusted my ISO to get a 1-second shutter speed, again, so make the water look the way it does. For the raven’s in the tree shot, I opened up to f/11 to get a shutter speed of 1/100 of a second, but I didn’t want to go any faster, because I wanted the flying birds to blur slightly when flying.
I have to admit, that these are perhaps better examples of my thought process because the low light causes me to decide where the trade-offs will be played out. With brighter scenes, I generally just shoot pretty much everything at f/14, but this is more out of habit. Before I really tested my lenses I used f/14 as my soft-ceiling, and f/16 was pretty much the highest I would go, but that is no longer the case.
I am aware that some people like to shoot at f/8, mostly because they’ve read somewhere that this is the sweet spot for the lens, but this in my experience is generally completely unnecessary, and often causes them to have to focus stack, etc. I rarely focus stack, and I mean like, almost never, and the thought of having to do that to overcome an obstacle that does not exist turns me completely cold. Before anyone makes a decision like that, they need to test their lenses and find out where diffraction starts to become visible for all of their lenses.
Also, as you said, crop factor cameras will start to see diffraction at wider apertures, so you do need to test, but my app also shows the warnings accordingly when crop factor sensor sizes are selected. In case you haven’t seen it, you can check out Photographer’s Friend here.
People also, in my experience, have a very poor understanding of depth-of-field, and very few people understand that depth-of-field is directly affected by the megapixels (resolution) of the sensor in the camera. You get shallower depth-of-field with higher resolution cameras, if, as I do, you check critical focus at 100%. This is what I enabled with the Pixel Peeper mode that I built into my Photographer’s Friend app. When enabled you can clearly see the difference in depth-of-field as the sensor resolution increases.
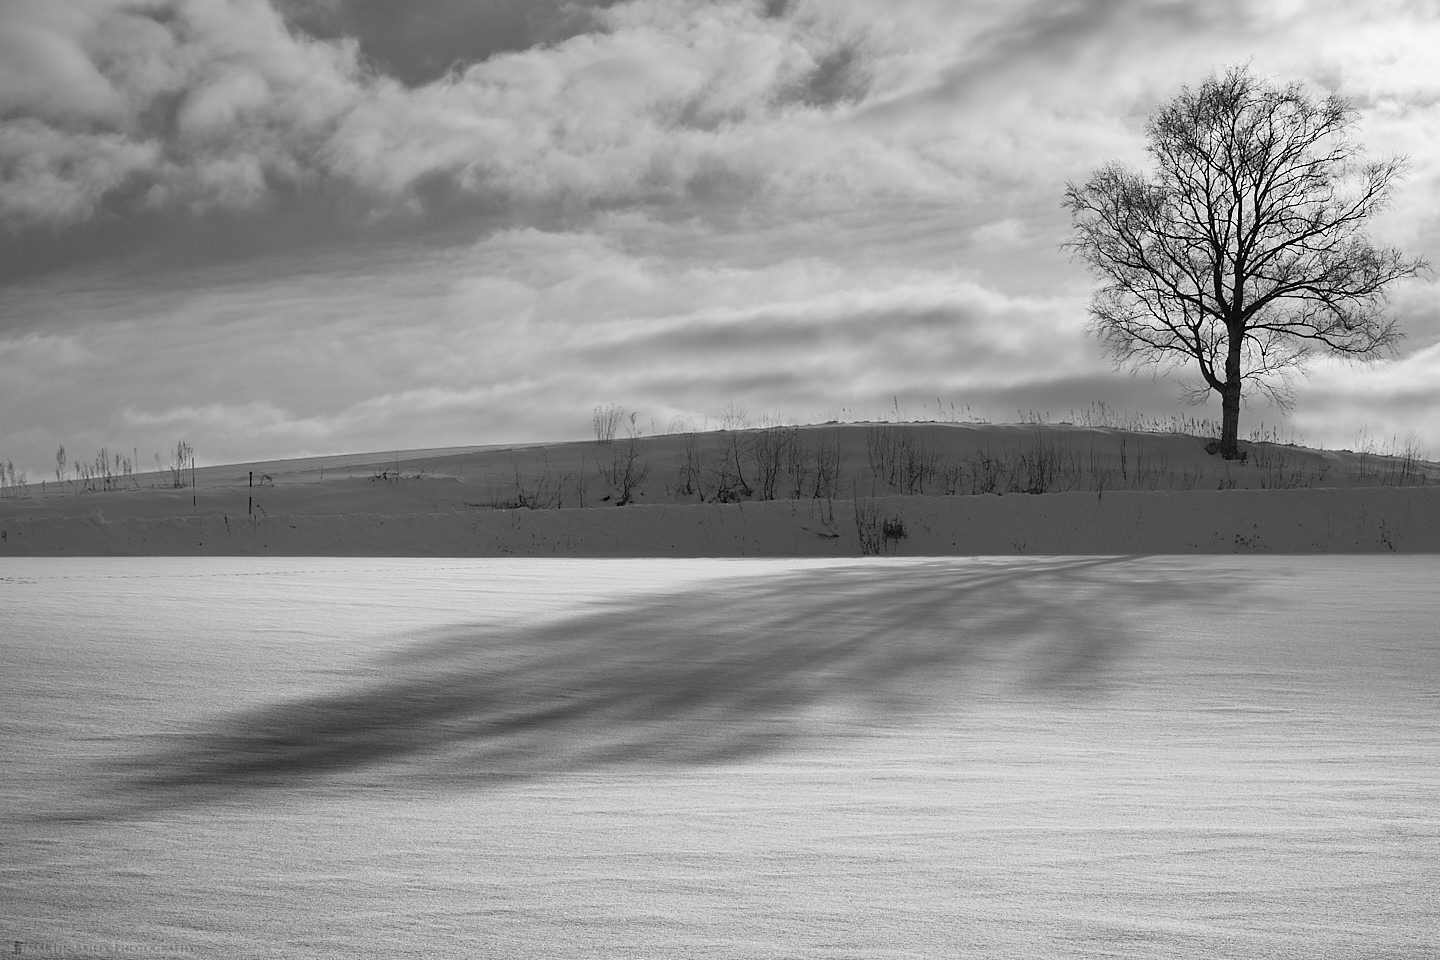
Regarding Paulo’s question about where I focus, most of the time I am focusing on the main subject, to give it the clearest pixels. I occasionally focus around a third into the screen when I need more depth-of-field, but I generally feel that the main subject is best. With the shadow of the tree shot, for example, I recall focusing on the middle of the shadow, as it was about one third into the scene, but also because the shadow was the main subject of this image, not the tree itself. This also helped me to get more focus on the foreground snow.
The Coast
OK, so let’s continue to discuss the next ten images from this trip. After leaving Biei we headed over to the coast, which is a relatively long drive, so after our morning shoots before we leave, the next opportunity is usually the Shinto Torii gate that you see in this image. I had been excited about the fact that it was going to be a high tide on both evenings that we’d be able to visit this Torii, but as you can see from the sky, it was relatively clear, and I’ve found over the years that a clear sky, which indicates high atmospheric pressure, has more effect on the sea that the tides at this particular location. If it was overcast, meaning low pressure, the sea would have been up over the concrete base and the sky much more interesting.
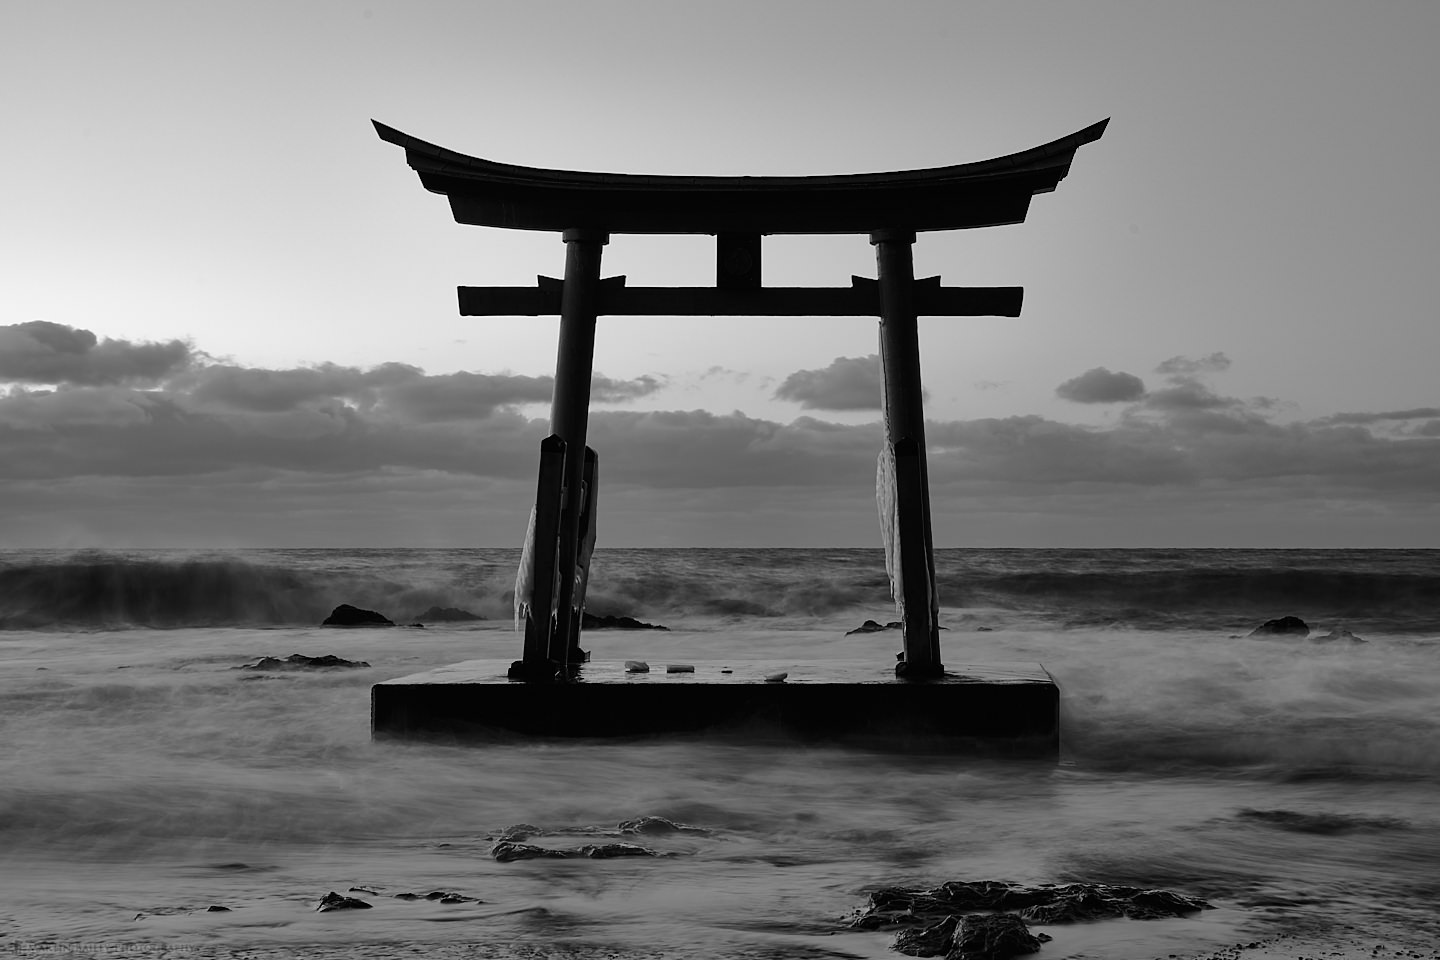
Some members of the group got some really nice shots with the sunset reflecting in the pools between the rocks in front of the gate, which was great! We’d come back here the following evening, but once again despite it being high-tide, there was a clear sky, so it didn’t really work again.
We also spend a lot of time at some other locations in this area while we are there though, and one of them you can see in this next image. I like this spot because there are tetrapods lined up along the shore, often covered in ice like this, and then there is a line of tetrapods out in the sea, which add an element of interest to break-up the otherwise somewhat monotonous sea.
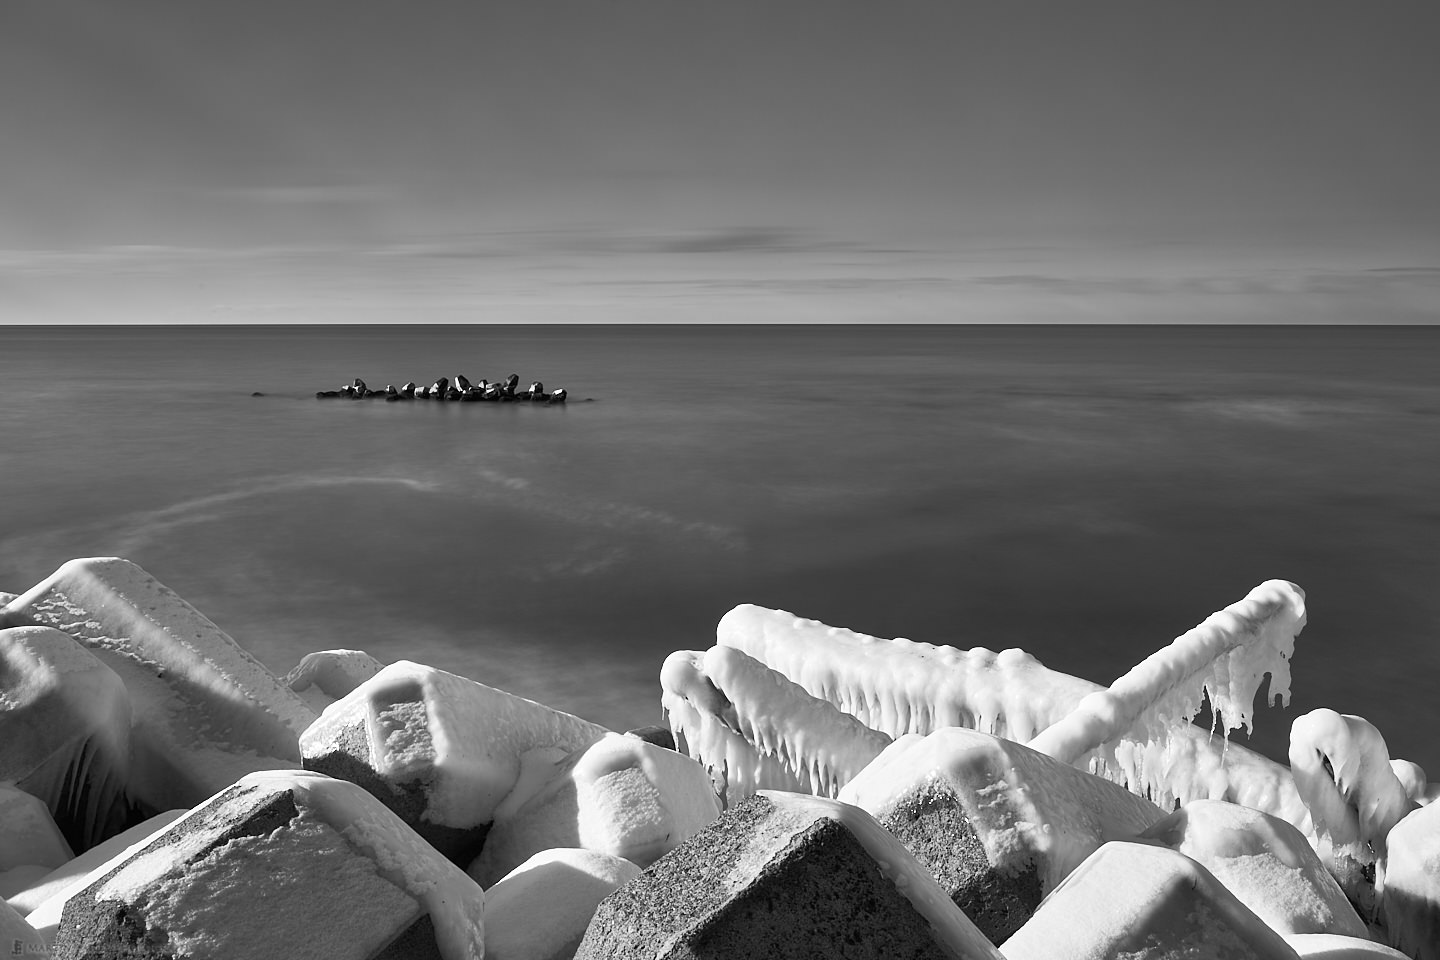
One thing that came up as we shot here, is how do I focus to get both the foreground icy tetrapods and the distant tetrapods sharp, and this is also related to Paulo’s earlier questions, so I’ll explain. Now that I’m using the EOS R with the electronic viewfinder, I can do this directly in the viewfinder, but in the past, I would do this same thing in LiveView. Basically, I zoom in on one of the extremes in the focus, either the foreground or the distant objects. Then, having set my aperture to something hopefully small enough to get both subjects in focus, I hold down the depth-of-field preview button, which I have mapped to the exposure lock or asterisk button on the back of my EOS R.
Then, say if I’m looking at the near subject, I physically move the focus out with the focus ring, until I see the near subject start to go soft, then pull back a little again, so that it’s still in the near end of the depth-of-field. Then I zoom in on the distant subject and check that it’s also in focus. Sometimes I have to pull the focus back a little to check that it does out of focus when I do, as it’s easier to then see when it comes back into focus. There is also focus peaking indication in the EOS R which helps, as everything that is highlighted has a sharp, in focus, edge.
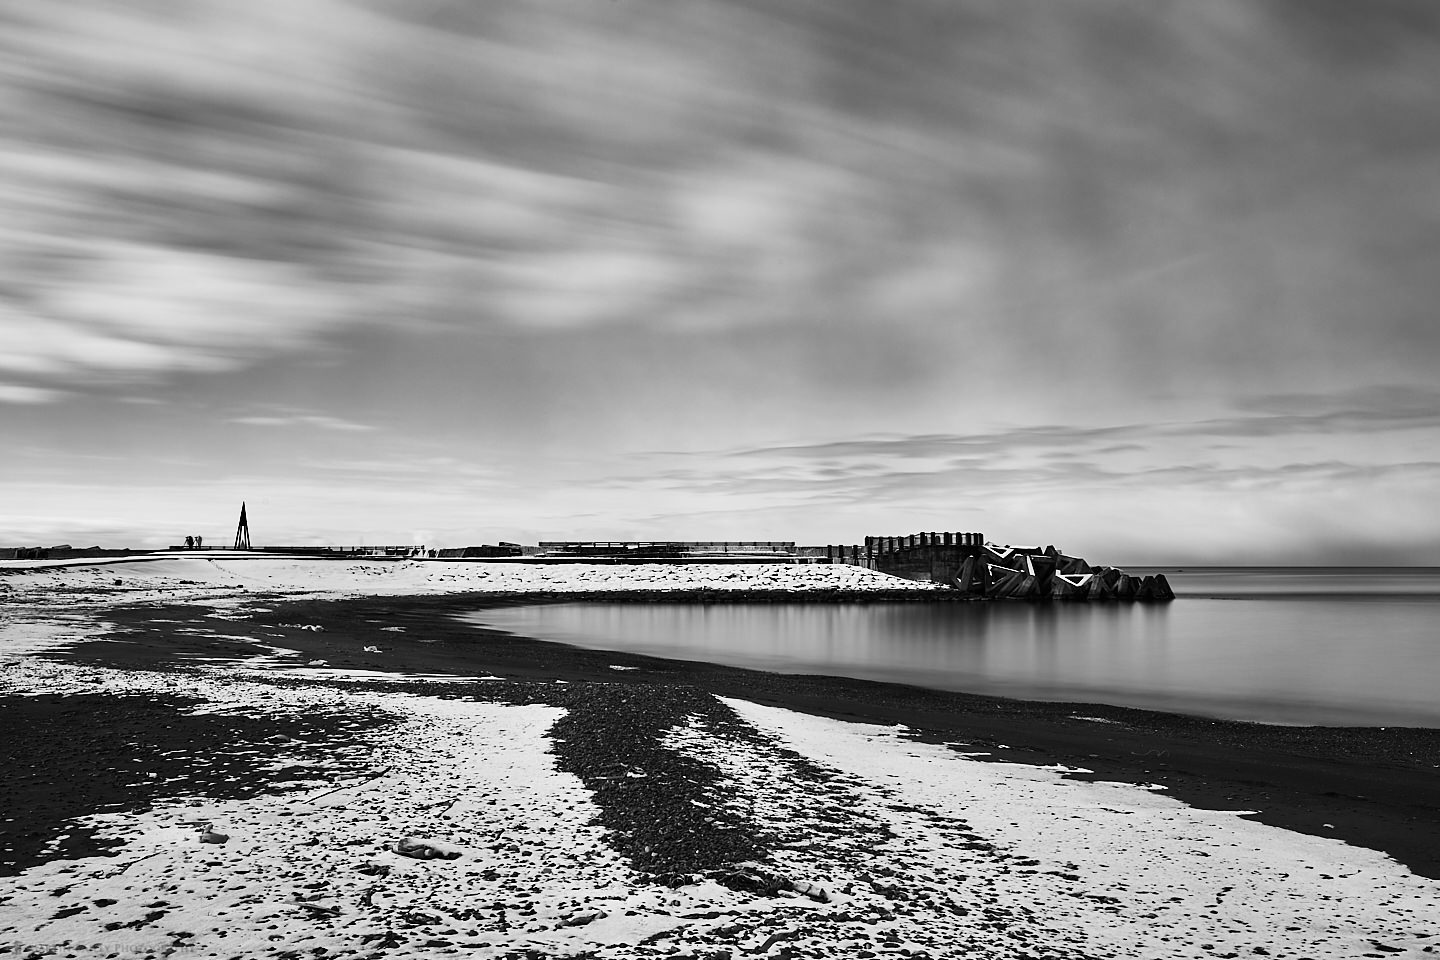
You can see how little snow we had this year in this next image. Normally this beach has around 50 cm of snow and is difficult to walk on, but this year we were able to walk around quite freely. Rather than fighting it, I used the sparse snow as part of the composition for this shot, using it as leading lines towards the outcrop of land and the tip of triangular tetrapods.
Just in case, we swung by the Torii Shinto Gate one last time on the way out of town for on the last day in this area, but with the lower tide and clear sky the water was so far back that I found out for the first time that there is a second concrete base under the one you see in the earlier photo, which was also visible, so I had the group stay on the bus, and we started our journey to the next location, shooting some of my favorite spots along the way, the first of which, you can see in this next image.
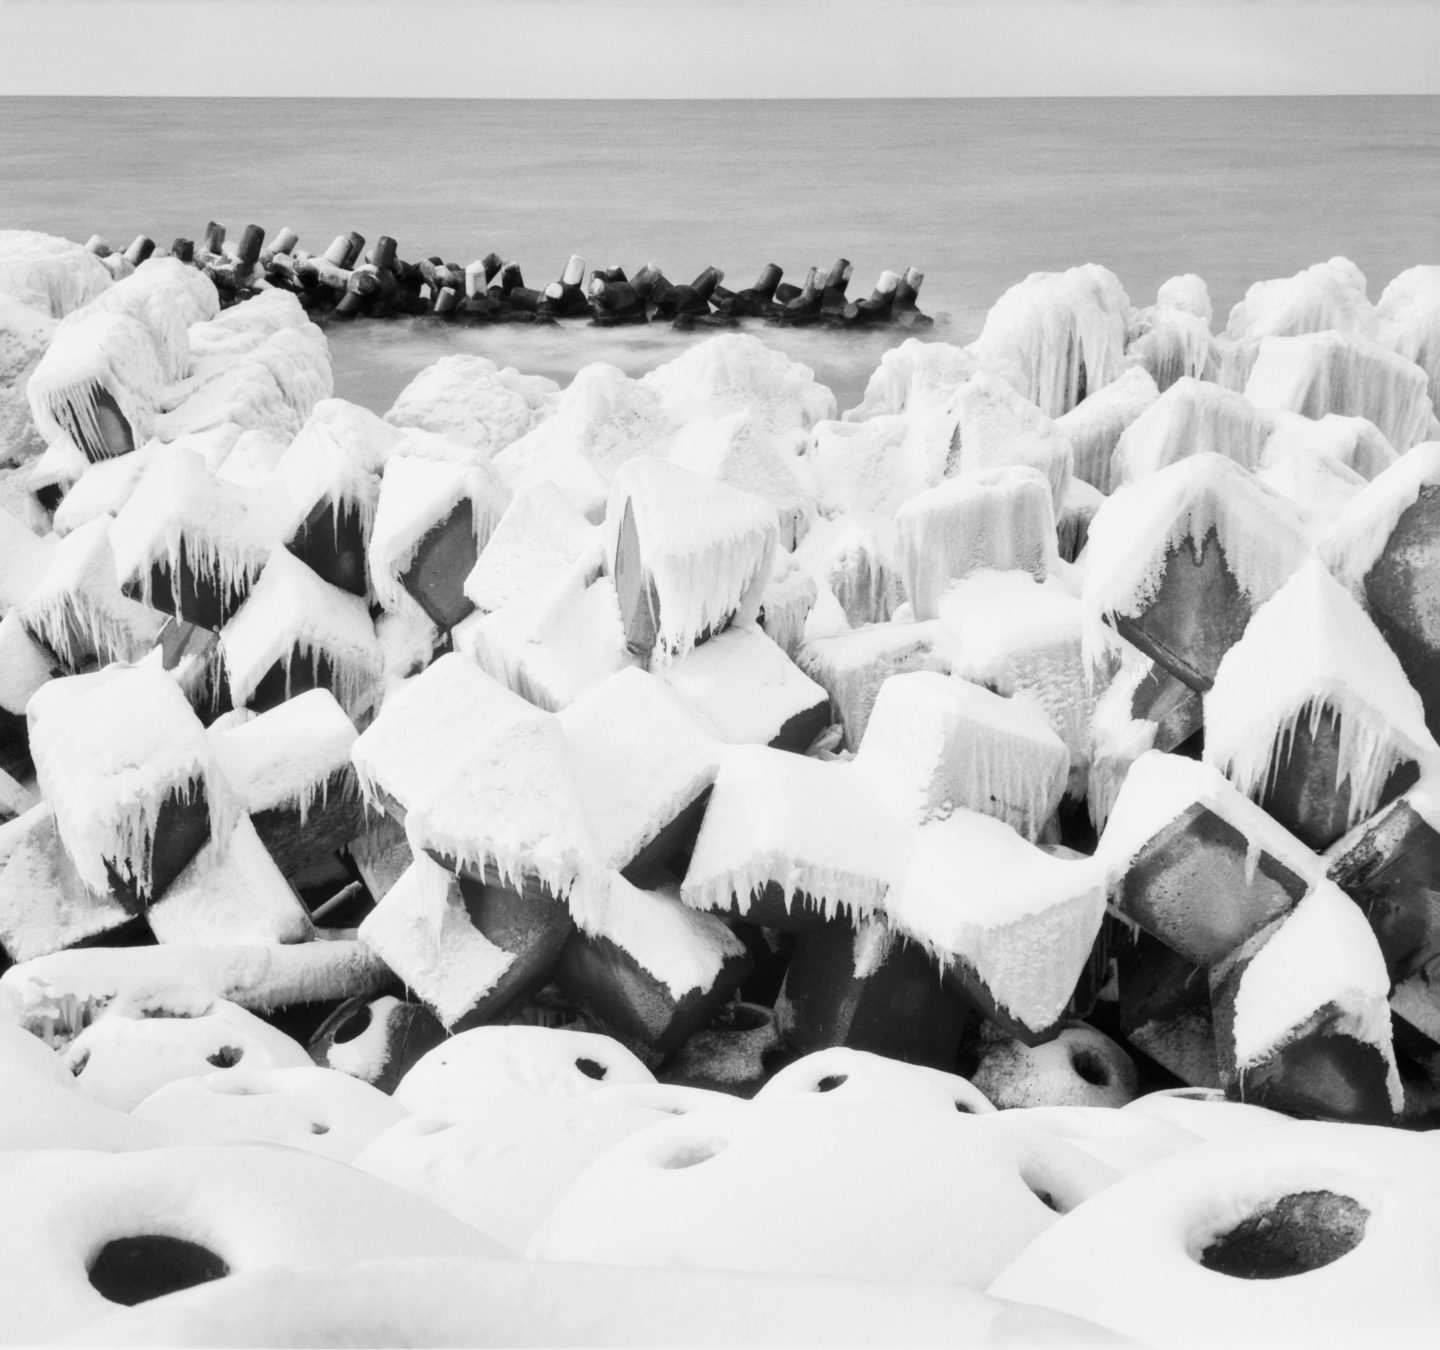
I shot this with my medium format film camera, the Rolleiflex, and I’m pleased that I did because my EOS R had mysteriously switched to 12-megapixel mode without any warning the frame after the previous image of the beach. I noticed it around fifty frames later, and have no idea why it switched. This happens when you put an EF-S or crop-factor lens on the EOS R, but looking at when it switched, I had not even taken the lens off the camera, and I don’t own an EF-S lens, so nothing should have caused this to happen. I tell you, in general, I’m very happy with my Canon gear, and I love the EOS R, but when I found out that this had happened I felt like throwing my camera into the sea. Luckily the Rollei came to the rescue, and I still have some high-resolution images from this part of the trip.
I really like how we have the three distinctly different types of tetrapods at this location. The practice golf-balls in the foreground, the angular tetrapods in the middle, and then the rounder-legged tetrapods out in the sea. The word Tetrapod actually means four-legged and is a trademark for the original company that made them, but I just call all of these wave-breakers tetrapods.
We swung by the boat graveyard that I also love to shoot on the way to the next location, but again the lack of snow didn’t make it look very pretty. Luckily we had some snow while we were there, so we were able to get some nice shots the following day. On the first day in this area, we continued on to the Noshappu Fishing Port and photographed the boats there, and as we got settled into our shooting, the snow started, giving us a nice clean white foreground in the most part.
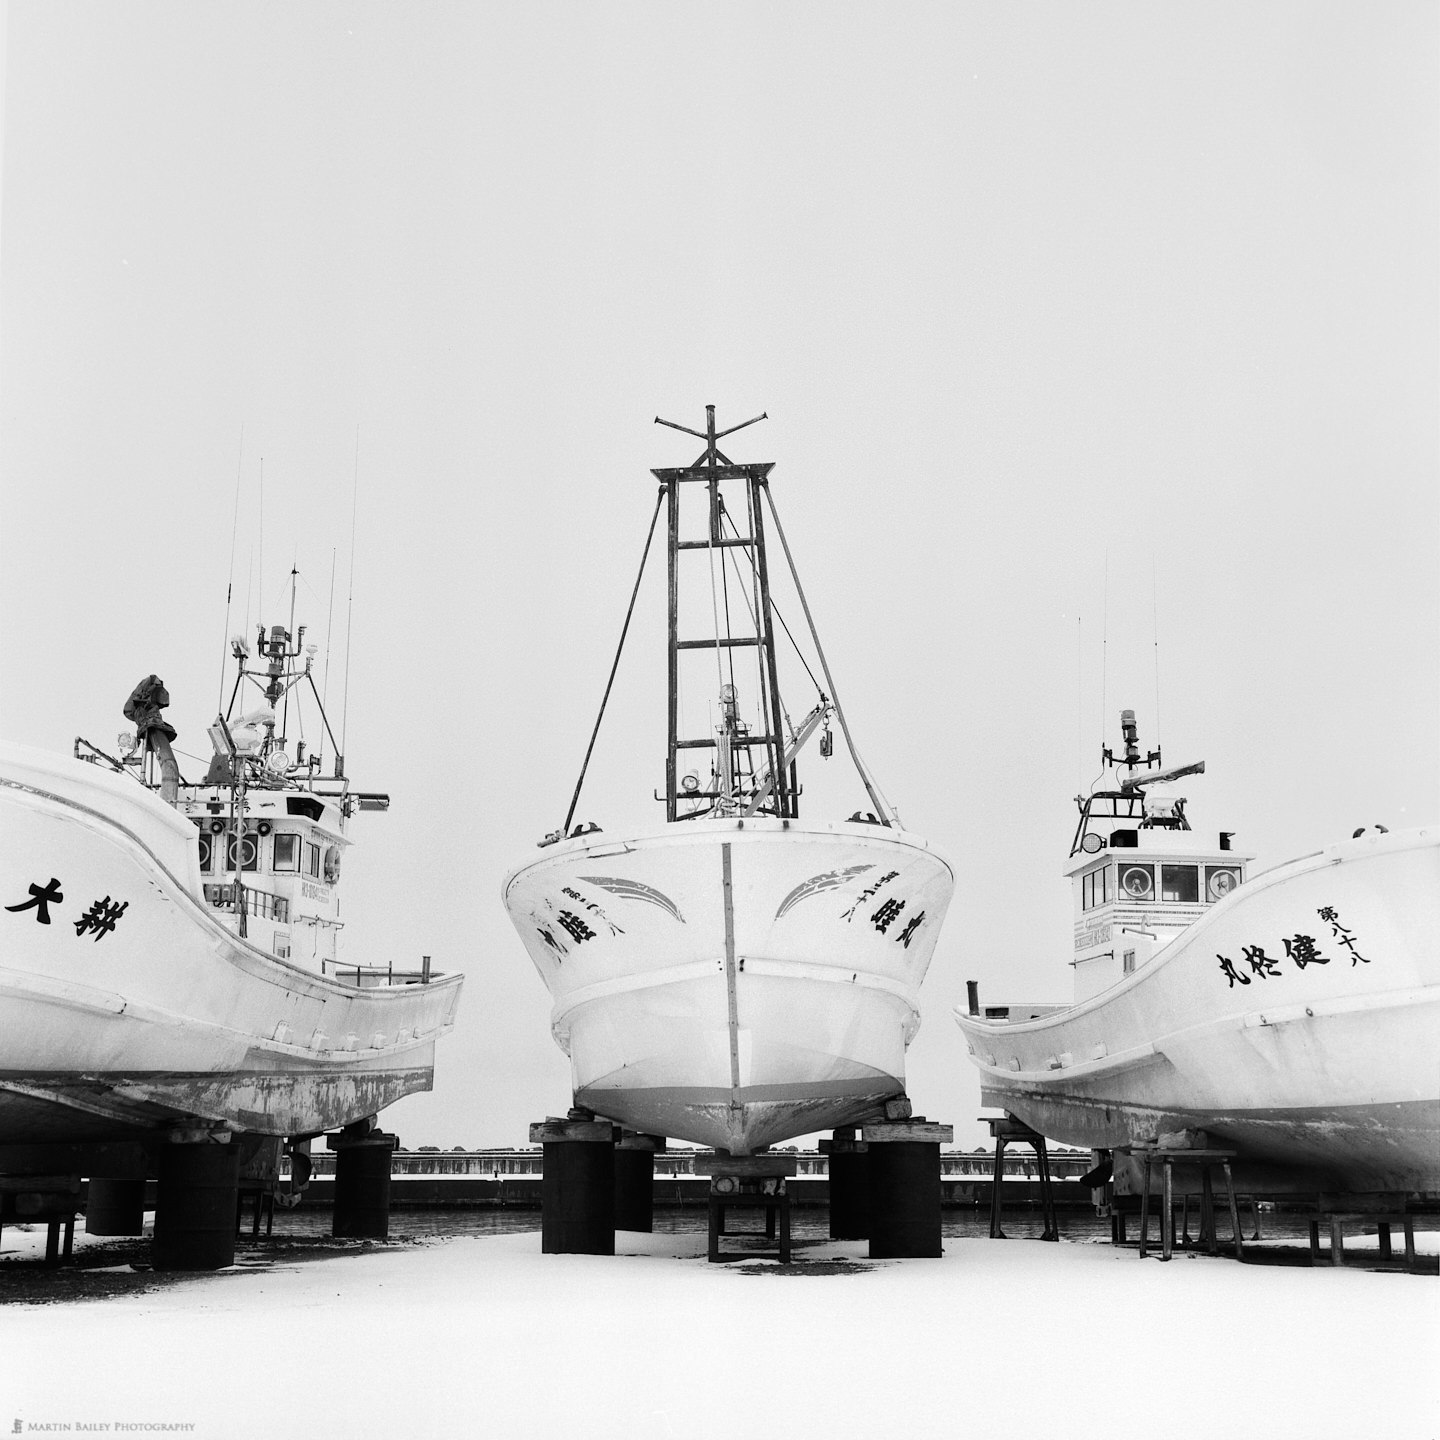
This is another shot from my Rolleiflex that I was quite happy with. I actually had a few problems developing my film from this trip, as I tried different developing chemicals, based on a recommendation from a previous post about developing my own film. The original Ilford DD-X that I was using gave great results every time, but I found that I needed to tweak the Adox Rodinal development process quite a lot before I could get results I was happy with from the Lab-Box that I shared with you in Episode 682.
The main problem was that I started out diluting it at 25:1 as that gives faster development times, and I was also agitating every thirty seconds based on advice from the Lab-Box folks, but it turns out that both of these things resulting in very grainy negatives when working with Rodinal. I started diluting at 50:1 for almost double the development time and also reduced the agitation to 10 seconds every minute, and also not turning the handle on the Lab-Box as fast, and I’ve found that this gives me much better results.
Here’s another shot from the Noshappu Port, this time shot with my EOS R. I’m really pleased that I’m able to get very similar looking images from both cameras in many cases, obviously when I’m converting my EOS R images to black and white, that is.
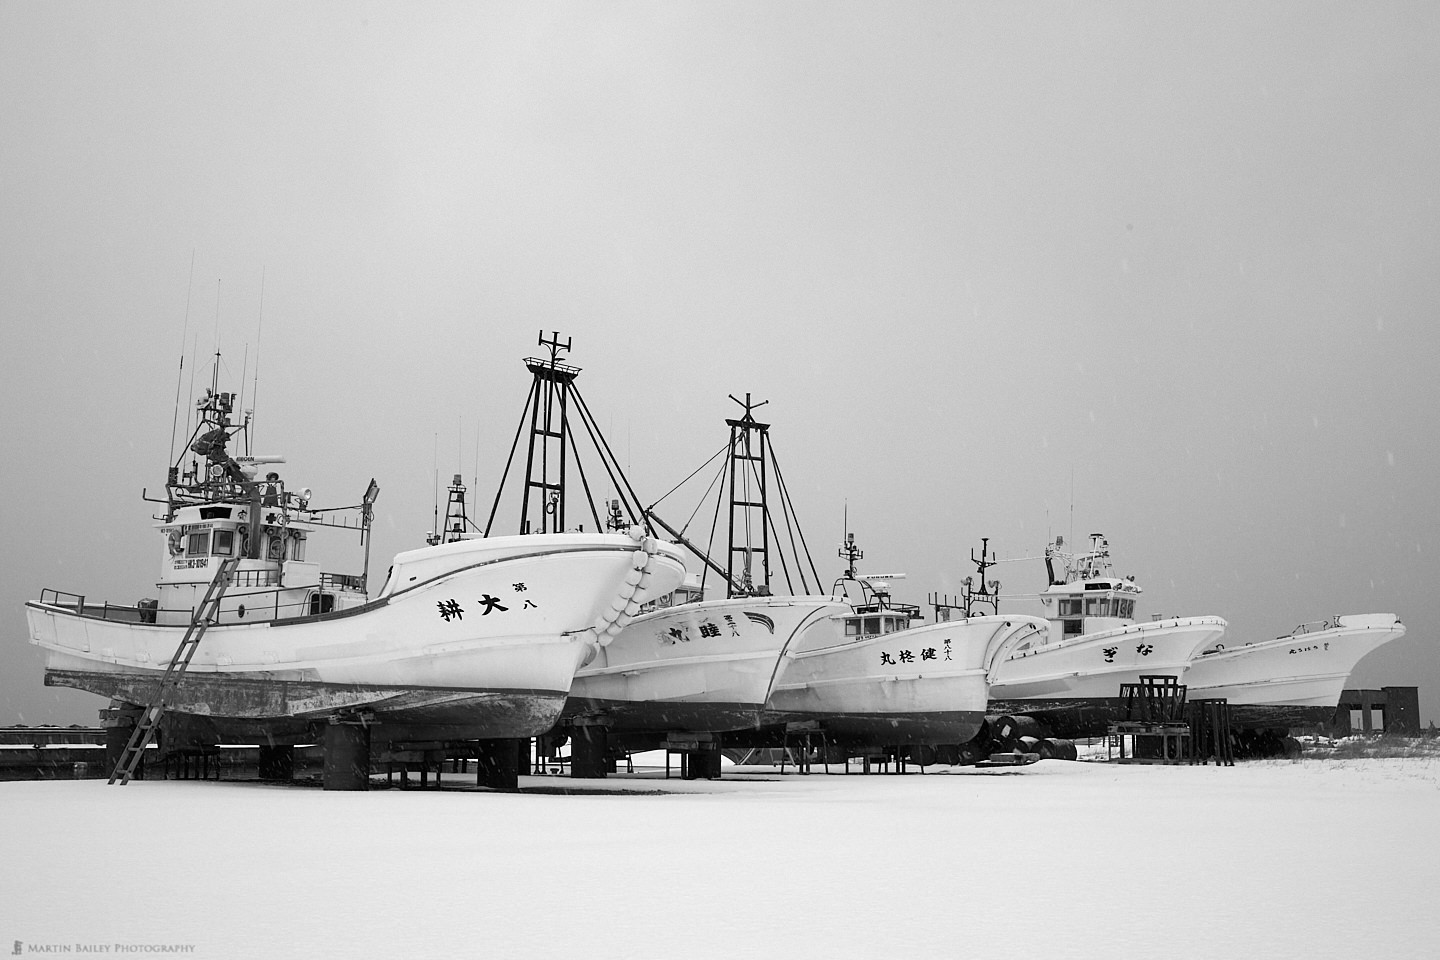
I found myself looking at my focal length quite regularly as we shot, and whenever I was around 50 millimeters focal length, I reached for the Rollei to get a film shot, as it’s a 75mm lens, which is about 50mm in 35mm sensor terms.
It snowed some overnight, so the next morning we revisited the boat graveyard for much better-looking scenes than the previous day. We also had a great sky at times, with the low sun illuminating the clouds from the side adding some nice texture, enhanced a little in Capture One Pro mind.
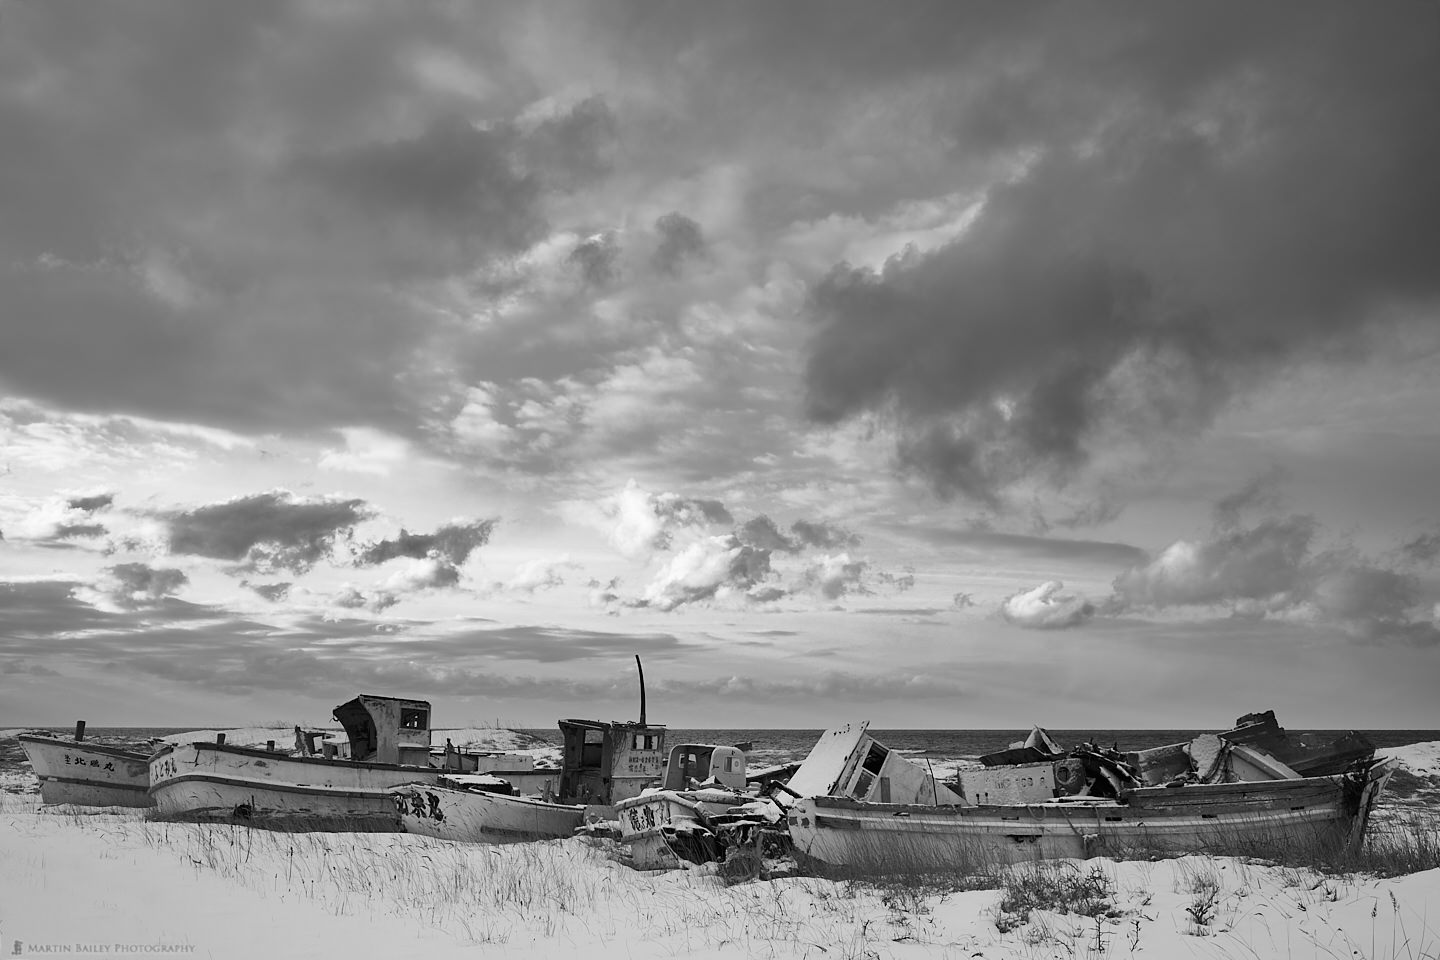
I feel somewhat privileged to watch these boats slowly decay over the years, and this year was no exception. More of the cabins seem to have collapsed and more bits are falling off as these boats succumb to the elements.
This next photo is a secondary Boat Graveyard further into the port than the first and was pretty nice this year because of the lack of snow. There’s a rugged feel to this shot that I find appealing, helped, once again, by the sky detail that I pulled out using Capture One Pro.
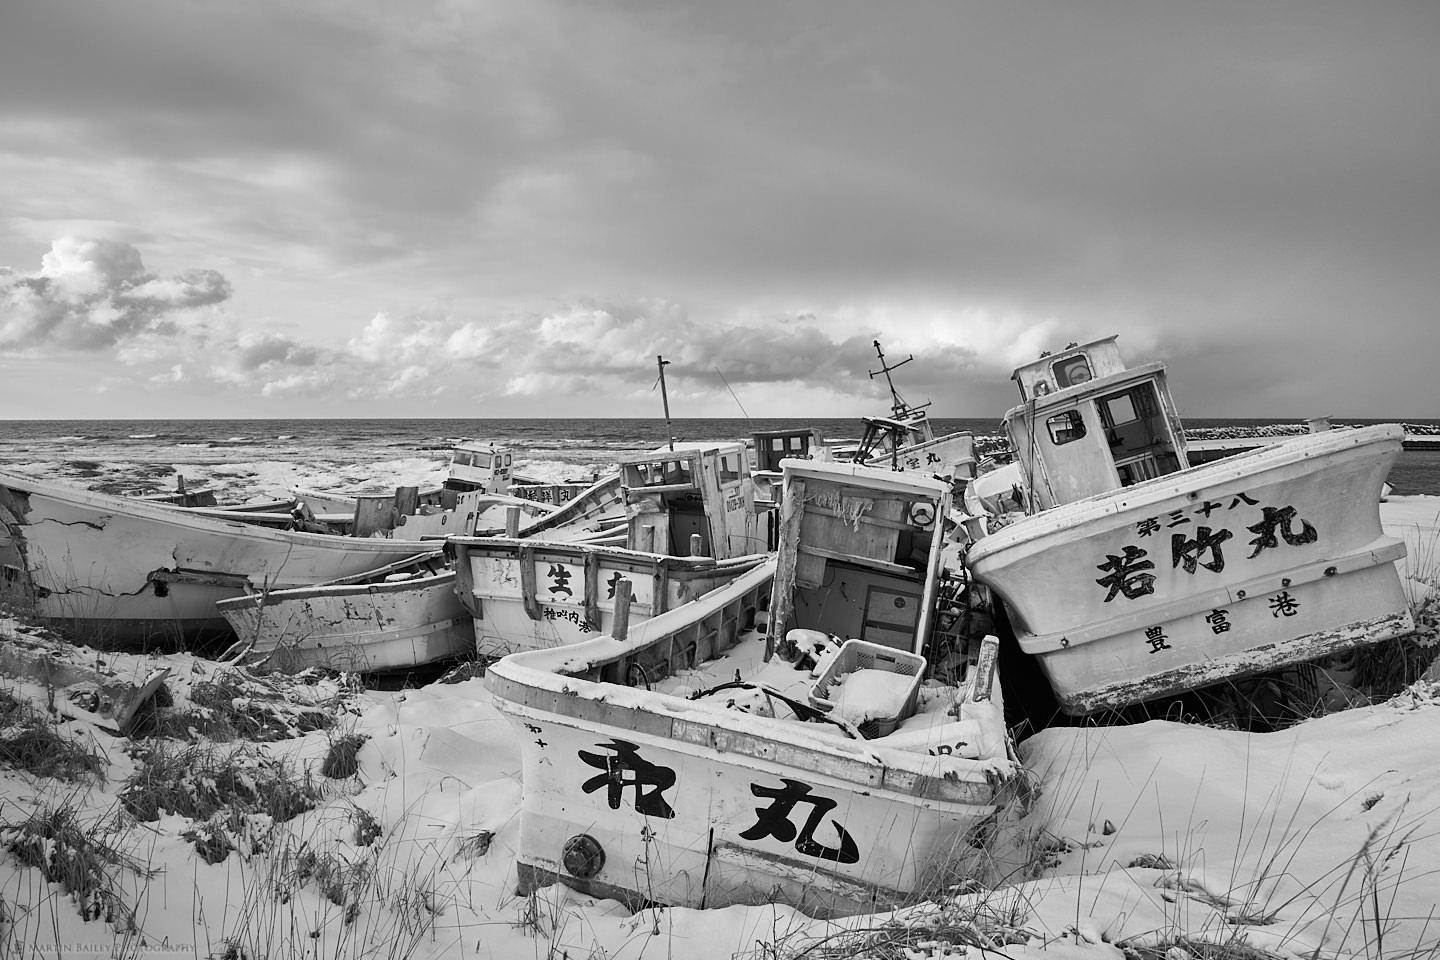
There’s a little more grass and dirt showing through than I’d like, but I think that just adds to the overall grungy feel, so I’m pretty happy with the results of our visits.
I’m generally a glass-half-full sort of person, so rather than concentrating on what we lost through the lack of snow, I really enjoyed getting into the stuff that we gained. The next image is usually out of bounds because the snow is too deep to get to this part of the port, but that wasn’t the case this year.
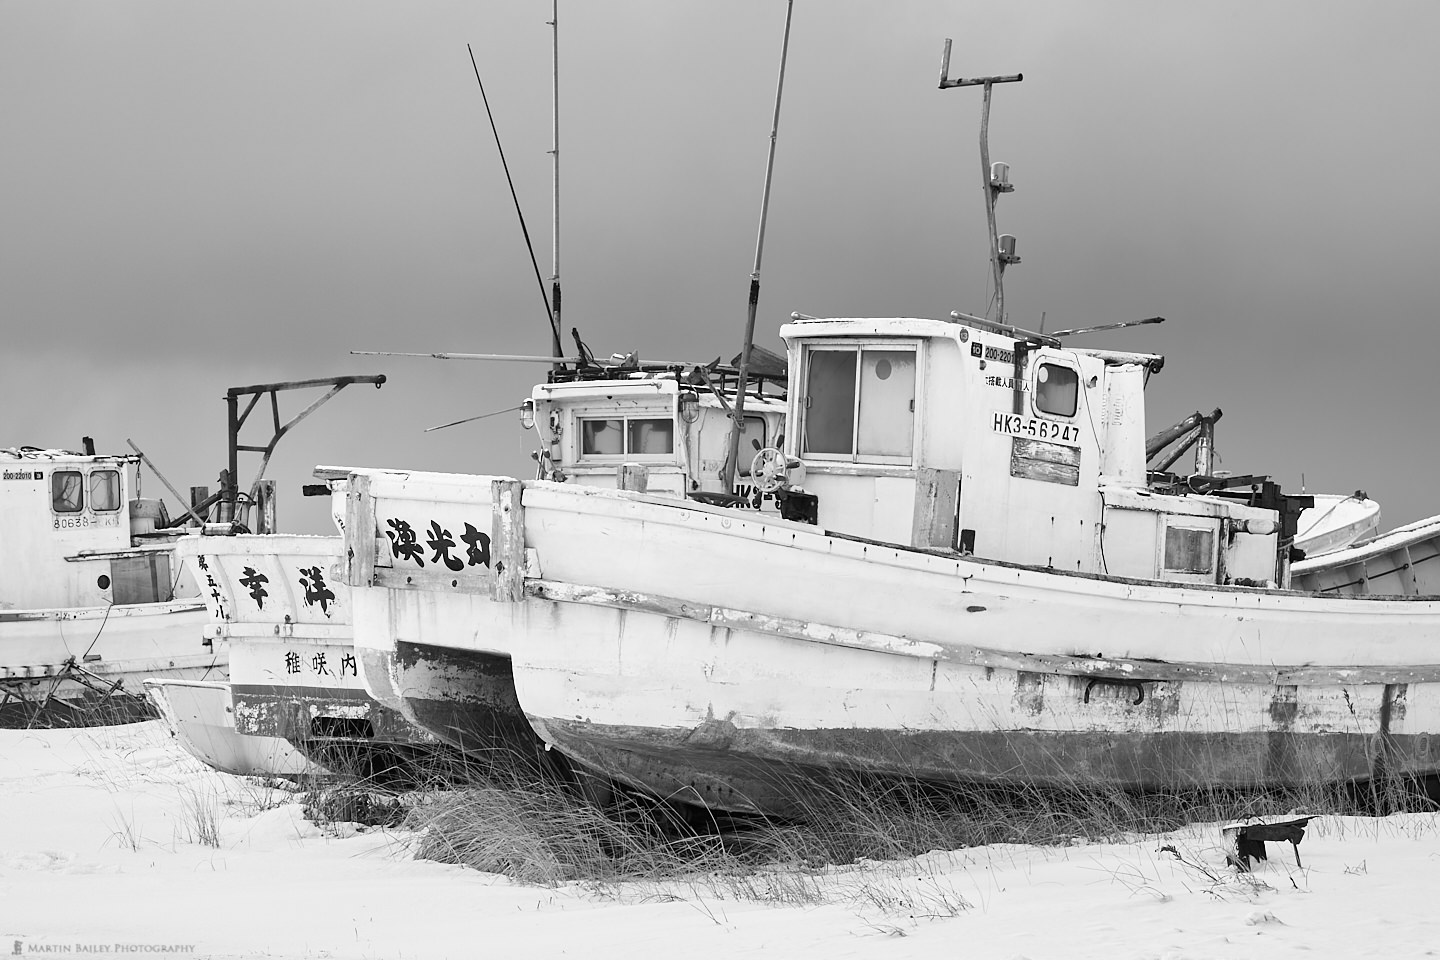
I believe these boats are still sea-worthy and in use, so this isn’t a graveyard, as such, but I still like the overall rugged feel and mood of these shots, and all in all, I was very happy with what we got this year.
In the afternoon, we swung by the fish drying frames, and once again I shot them with my Rolleiflex as well as my EOS R. I like both shots, but I think the square format suits this shot, so I’ll go with the Rollei version.
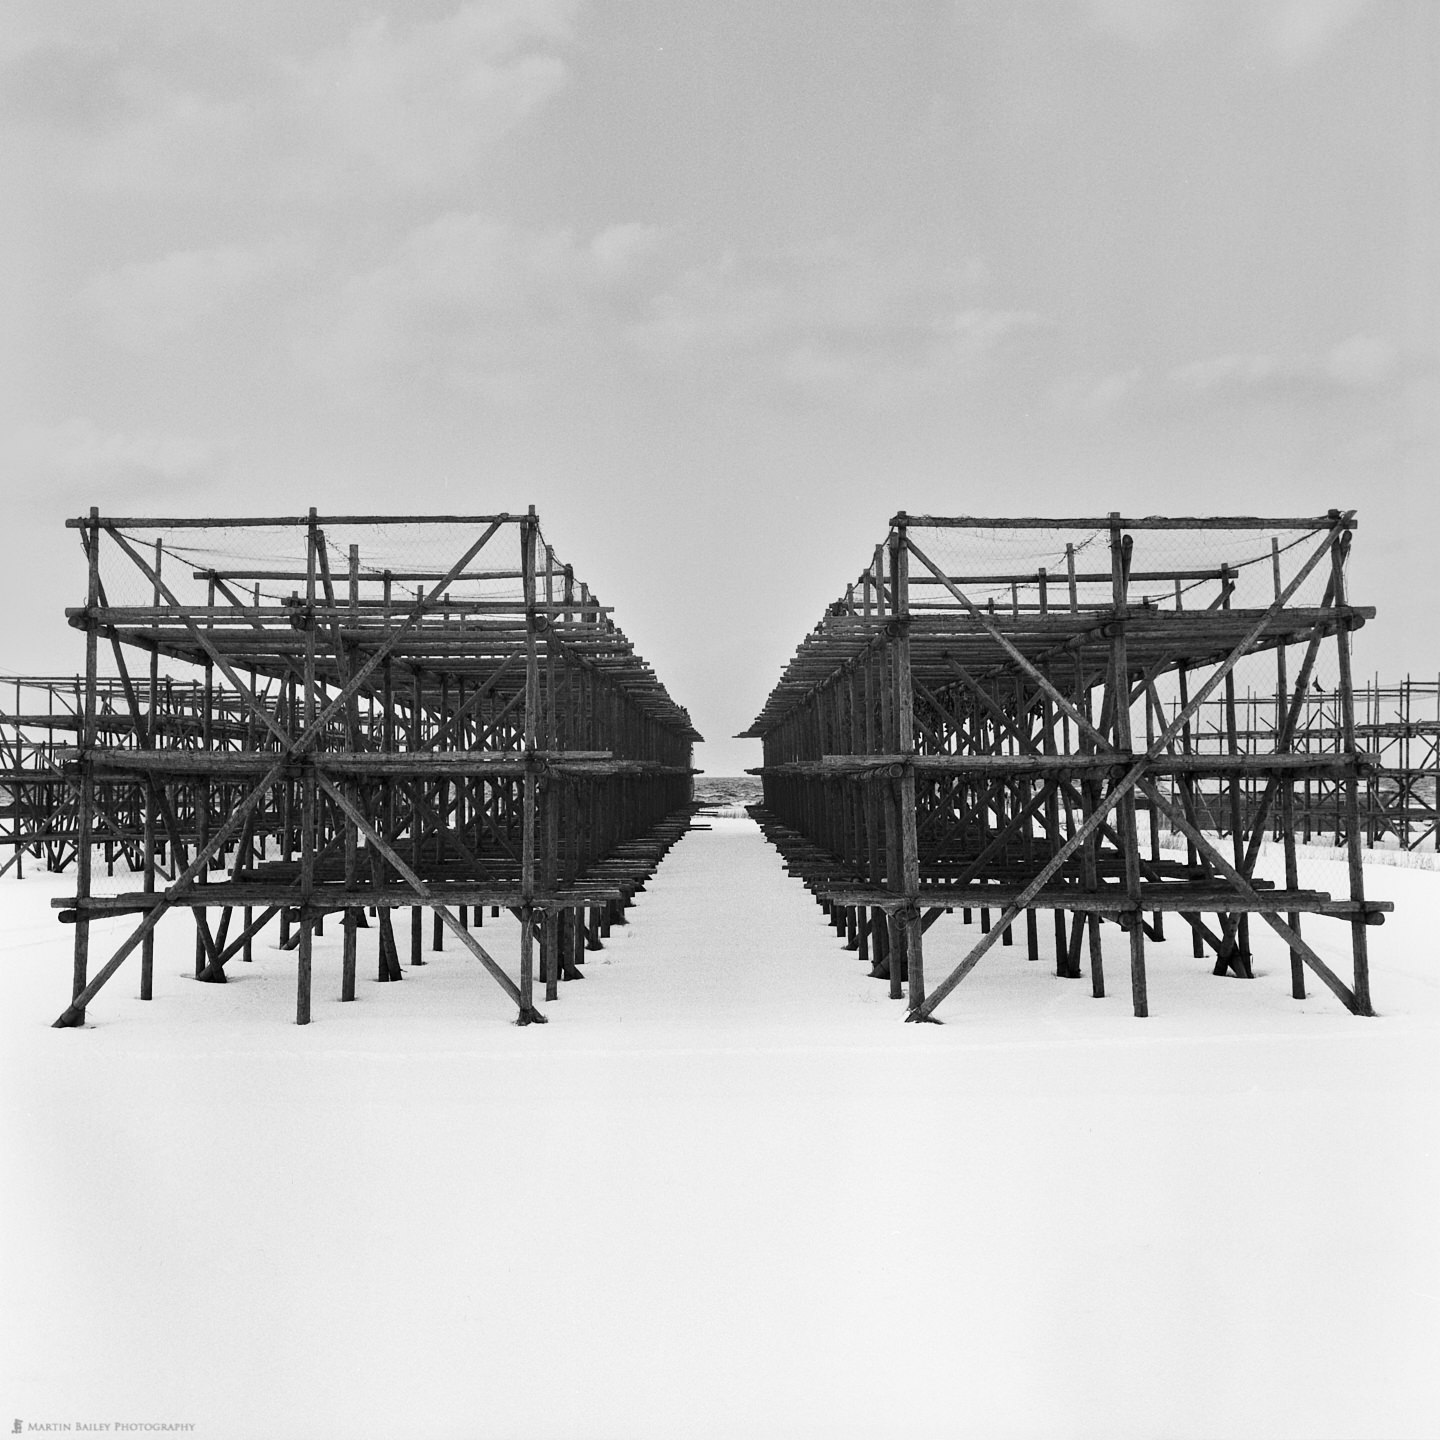
We were lucky again here, as we’d been told when we spoke with the people that own these frames a few days earlier that there was no snow on the ground. There were only a few centimeters of snow when we got there, but that is enough to clean up the scene like this, so once again we were very fortunate.
We’ll finish there for this episode, as we’ve reached our ten photos. I have not had time to create an extra episode for next week, and I am leaving for the first of this year’s two Japan Wildlife trips tonight, so we’ll be skipping next week, but I’ll be back in two weeks time to conclude this travelogue series and start to update you on the wildlife tours.
Hokkaido Winter Landscape Photography Adventure Tour
If you are interested in joining the Landscape tour in 2021 or future years, check out the tour page at https://mbp.ac/hlpa.
Show Notes
Check out details of future Hokkaido Winter Landscape Photography Adventures here: https://mbp.ac/hlpa
Audio
Subscribe in iTunes to get Podcasts delivered automatically to your computer.
Download this Podcast as an MP3 with Chapters.
Visit this page for help on how to view the images in MP3 files.

Japan is a place I have always wanted to go to, being self employed and just starting out its a destination that’s a little out the reach at the moment. Hopefully I will get to go soon. These pictures make me more determined to go.
Thanks Paul. When you can make it, it will be great to travel with you. You’d love this tour!
Regards,
Martin.