I recently received the wonderful opportunity to display my work in a gallery at the new showroom and museum at Canon’s headquarters in Shimomaruko here in Tokyo, and today I’m going to share details including the creation of my prints, how they were treated in preparation for the show, and offer you a chance to visit the Canon campus to view the exhibit and the showroom and museum yourself.
While I was in the middle of my Japan winter tours, I received an email from a friend in Canon asking if I would be interested in working with Canon to prepare and display a selection of my fine art prints in an exhibition space in a new building with a number of floors showcasing Canon’s products. Specifically, the gallery space is on the floor where there is a camera and lens showroom, alongside a museum of Canon’s cameras and other products over the decades, including their very first camera from 1934. Yesterday I was able to take some photos which I’ll share with you shortly.
Of course, I jumped at the opportunity to share my work in such a prestigious location and presented a few options. I initially considered a somewhat subdued selection of winter landscapes, but that idea didn’t fly very well, so I proposed a more colorful selection of images that showed off the potential of both Canon’s camera equipment and their large format printer capabilities. Although I’d been given a blank canvas, it’s not really surprising that Canon went for the more colorful proposal.
Select Media: Breathing Color Signa Smooth 270
The idea was to not only showcase my work as a photographer but also as a fine art printer, as Canon value my ability to make high-quality prints. I was also given a free rein with regards to which print media I would use for the project, so it was not a difficult decision to go with Breathing Color’s incredible Signa Smooth 270 inkjet media. The prints were to be finished by making them into Alpolic panels, so the fact that Signa is not an incredibly heavy paper was not a problem. In fact, it probably helped, as there would be less push-back from the natural curl of heavier papers.
As we negotiated the terms of the job, I had a business decision to make. I didn’t have the go-ahead to start making the prints yet, but we were running on a tight schedule, and I didn’t have enough stock of any single media to make 10 very large format prints, which is what I was proposing. Feeling pretty confident that we could close the deal, I went ahead and contacted my friend’s at Breathing Color, and they kindly rushed my order through, and literally just three days later FedEx delivered three 44-inch rolls of Signa Smooth, one 36-inch roll, and one 24-inch roll. All the way from the US to my door in Japan, in just three days.
I was going to need two rolls of 44-inch, but I ordered an extra roll in case I had to do more than a few reprints. My proposal also included two 36-inch roll prints, and I was running short of 24-inch anyway, as Signa Smooth has become my go-to media when I just feel like printing something out for fun. Now that it’s archival certified, I’m actually leaning towards Signa for print orders as well. You may recall from my review of Signa that it has an incredibly wide color gamut, as well as performing beautifully with black and white prints.
The Printing Process
Having received the go-ahead from Canon, I started working on my prints in March and basically had five days to complete my 10 prints. As far as the actual time to make the prints is concerned, I could make that many in one long day if I had enough room to lay them all out to dry, but although I live in a relatively large apartment by Tokyo standards, using both my office space and living space, there isn’t enough room to lay out more than two 44 x 66-inch prints and give them enough time to degas before stacking them on top of earlier prints.
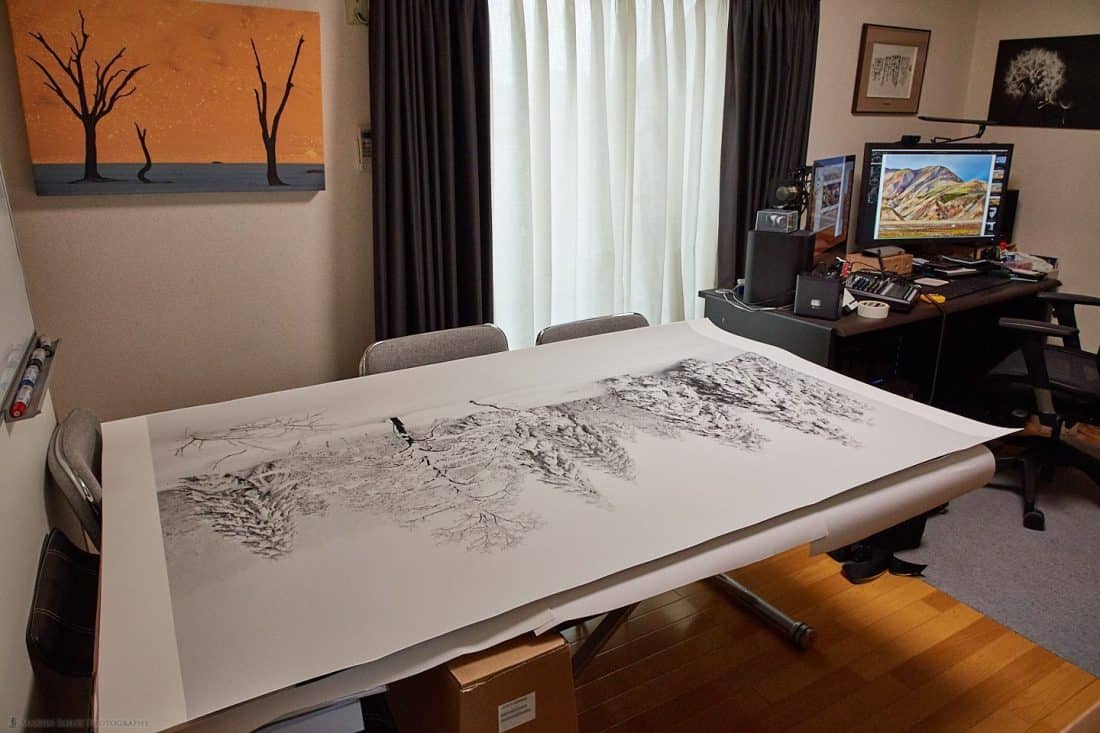
When I print this size for customers, so far all of my orders have been for single prints, so I extend the table in my studio to create a surface wide enough for them to sit and fully degas for a day before I roll and ship them. As you can see in this photo (below) that is pretty much all of the space that I can use for drying prints used up.
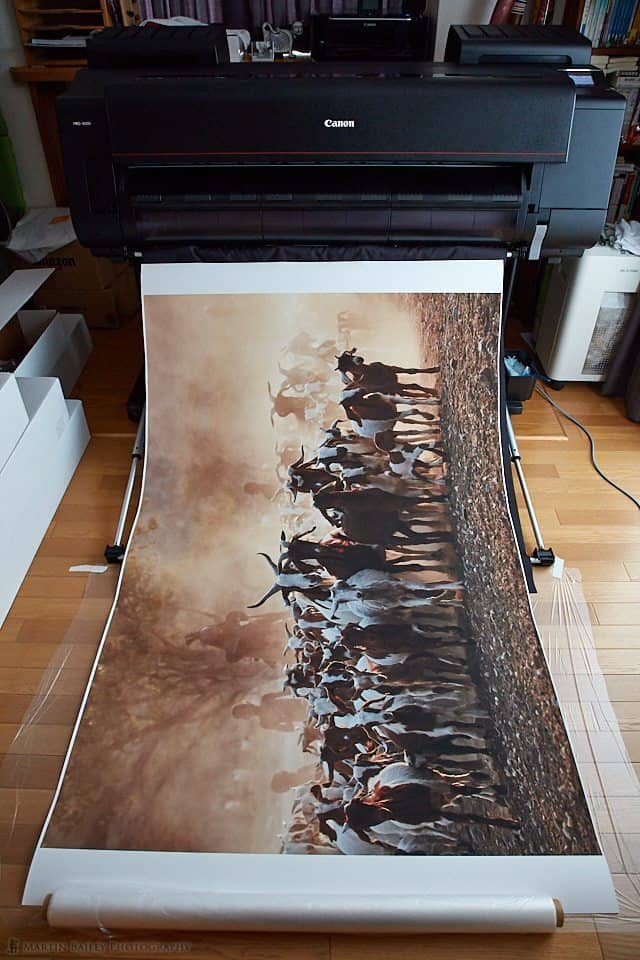
The second place that I can potentially leave prints to dry is literally in front of the printer, with half of the print still resting on the cloth basket that can be used for catching prints, but I configured it to simply feed the print away from the printer by forming a gentle slope down to the floor, as you can see in this photograph (right).
Drying Schedule
Ideally, prints should be left to degas for 24 hours being stacking or rolling them, but if necessary, especially when humidity is relatively low as it’s been for the last few weeks here, we can reduce this a little without causing problems.
I formulated a drying schedule which basically allowed me to make three prints each day. I would end the previous day with one print drying in my studio, and one drying in front of the printer. By the following morning, the print in front of the printer would have been degassed for at least 12 hours, so I took that upstairs and laid it on top of the last print in the stack.
That allowed me to then make the first print of the day. which I’d leave in front of the printer until after lunch, giving it a few hours to dry. Then, after lunch, I took that first print of the day up to the studio and laid it on top of the last print from the previous day, so that print had about 18 or 19 hours to degas.
Then after taking that first print of the day upstairs, I made the second print of the day and left that in front of the printer until around 6 pm. When I took the second print up to the studio the first print had been degassing for around 8 hours which is just about the shortest amount of time I want to give a print. I then created the third print before finishing my main working day at 7 pm. This third print then sat in front of the printer overnight, as the second print dried on top of the first print for the day until the following morning and the process started again.
Reprints
Of course, if I’d done three prints per day for five days, that would give me 15 prints, but I always calculate in the time to do reprints. Although prints of this size cost quite a lot just in materials to make, there are almost always times when you have to do a reprint.
One of my biggest concerns is getting little spots on the print where there is dust on the surface of the print that falls away after it dries taking the ink with it, leaving a white spot. To help avoid this I keep the printer covered when not in use and I literally dust it off completely before printing. Also, the new design of the Canon imagePROGRAF PRO series printers means the media is fed into the paper upside-down, so any loose dust on the surface of the paper has a chance to fall away before it gets printed on. All of these things contributed to me having just one dust spot in over 200 square feet of print.
This led to me having to do one reprint, and the second was my fault. As I printed one of my Iceland photos I noticed something that I couldn’t quite figure out. There were a few areas of the image that looked as though it had been oversharpened, but the rest of the image looked fine. I checked all of the settings that I usually tweak and couldn’t find any reason for this, so I gave myself a pat on the back for shooting such an amazingly sharp image and sent the image to the printer anyway.
Sure enough, though, having poured over the print, I still couldn’t help thinking that something was wrong, so I went back and inspected all of the modifications that I’d made, and found that I’d cranked up the Structure slider. I had just started using Capture One when I visited Iceland in 2016 and made that photograph, and I still didn’t quite understand what the Structure slider was doing. Basically, it had made certain areas of the photograph a little too sharp and crunchy. I actually learned pretty much straight after that trip that doing this is generally not a good idea, and I’d stopped applying Structure to my images, so this one had slipped past me.
Although the print looked great, knowing that it could be better I couldn’t resist reprinting that photo. The third reprint was of the Dovercourt Lighthouse photo, as despite going over the image with a fine-toothed comb before making the first print, I found a very faint dust spot on the image that I could only see when printed at 3 x 4.5 feet. This is one reason why I love printing so much. It really helps to find imperfections in our work, and I believe that printing large like this even helps to make us better photographers. Large prints are totally unforgiving and will soon let us know about any technical imperfections in our images.
Upsizing
When I’m ready to print, I do go through and check each image at 100% for dust spots and any other imperfections that I ideally don’t want to find after making the print, then when making such large prints, I upsize them as a final step.
All of the images I printed were shot with my Canon EOS 5Ds R cameras, so although I could probably get away with printing the 50-megapixel images without enlarging them, to ensure that they remained as tack sharp as the originals, I use ON1 Perfect Resize to upsize each image the exact size of my prints at 300 PPI.
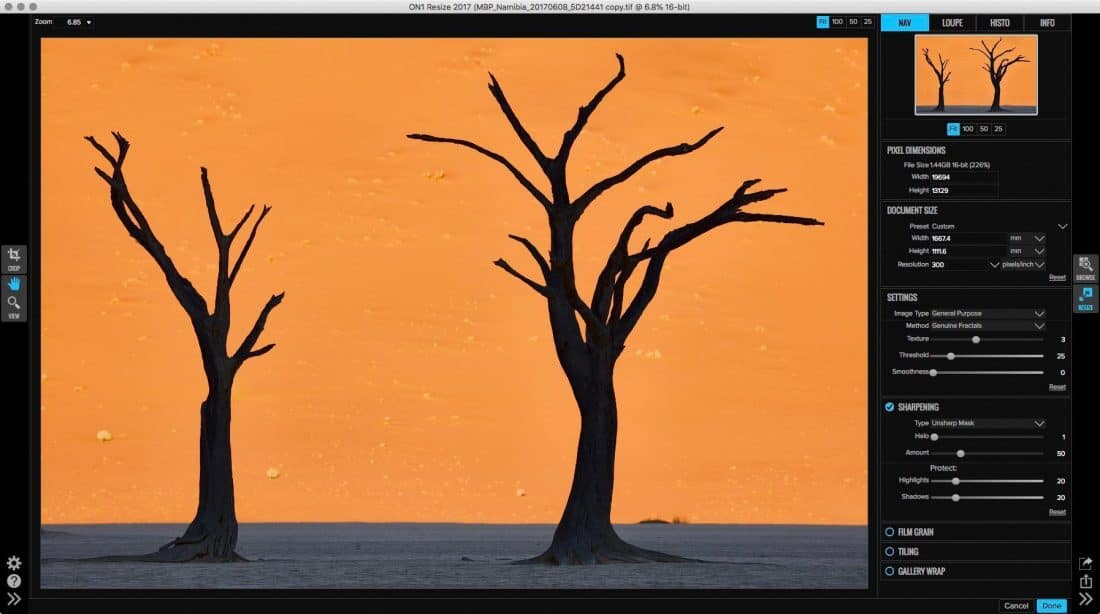
Here’s a screenshot of Perfect Resize to show my settings (below). The prints actually needed a 3 mm border around the edges so I set my print size for the 44-inch wide prints to 1111.6 mm wide and 1667.4 mm long, which is just the width multiplied by 1.5, as my images are all 3:2 aspect ratio. Of course, once you have your size and settings dials in, it’s a good idea to save a preset so that you can get to the same settings for the rest of the prints.
This is why I rarely use an arbitrary crop in my images too. If you don’t know the aspect ratio of your photos it takes more time to calculate print sizes and makes it difficult to create a uniform selection of images like the ones I’m presenting for this exhibition. You can see the other settings I used in ON1 Perfect Resize in the screenshot.
Printing
Once I have the image enlarged to the exact size that I want to print at, at 300 PPI I’m ready to print. I printed the first few images from Capture One Pro, but then I started to get some funky remnants appearing on the print preview, so I tried printing from Photoshop and got the same results. To avoid this, I printed that rest of the images using Canon’s Print Studio Pro from within Photoshop.
To make this process fluid, I created a Process Recipe in Capture One Pro to create a 16bit TIFF with the ProPhoto RGB color space and then just open it in Photoshop, then I launched ON1 Perfect Resize from Photoshop, and changed the settings so that Perfect Resize just modified the original layer, and not create a new one. If you create a new layer at this size it makes the file too big to save without flattening, so this helps to avoid an extra step.
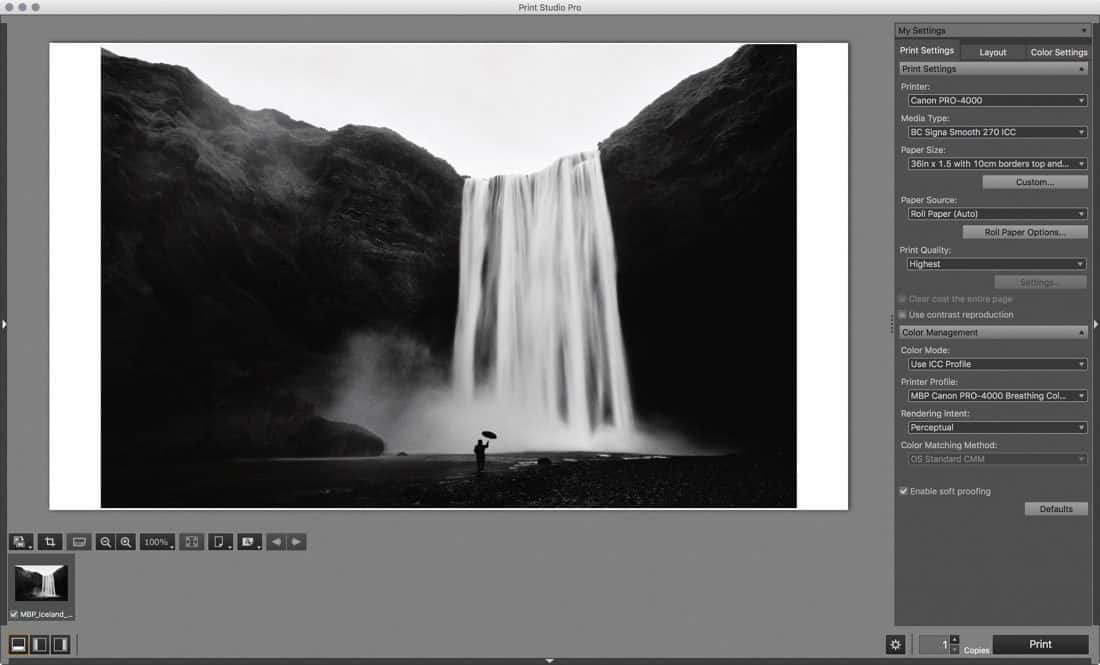
As you can see from this screenshot of Print Studio Pro I also had to leave a 10 cm border on each end of the print to make handling easier facilitate the creation of the Alpolic panels. With prints this large, if you don’t leave yourself something to hold onto as you move the print around, you’ll almost certainly damage the face of the print.
Again, if you are interested in the settings, check out the screenshot of Print Studio Pro (below). One thing to note here is that although I resized to 300 PPI, I still print with the Print Quality set to Highest, which is purported to be 2400 x 1200 dpi, although it’s hard to say what actual print resolution is used.
I do like to print directly from Capture One Pro when possible, and I generally dislike printing from Photoshop, but Canon’s Print Studio Pro that comes with the PRO series printers is actually very nice, so especially as I needed to roundtrip to Photoshop to do the enlarging, this made for a very slick workflow. At the highest print quality, these 44 x 66-inch prints took 34 minutes each, which is amazingly fast for prints of such size and quality.
Preparation
As I mentioned, Canon had arranged to have the prints treated to create what’s called an Alpolic panel out of them. This was to be carried out by a company here in Tokyo called Frameman. From what I can gather, Alpolic is an Aluminum Composite Material, abbreviated as ACM and Frameman are one of the few companies that can make photographic panels as large as the prints I’d made.
I had requested permission to watch the process of creating the Alpolic panels but was told that it’s performed under very strict conditions to prevent any dust getting into the system. I did arrange to go and take my dusty self to have a look at the panels after the creation, but I got stuck in Tokyo traffic and although I allowed more than double the time necessary to get there, I was still at least 30 minutes out when my arranged time arrived, and the head of the company had to leave for another appointment before I’d get there, so I lost that opportunity.
Setting Up the Exhibition Space
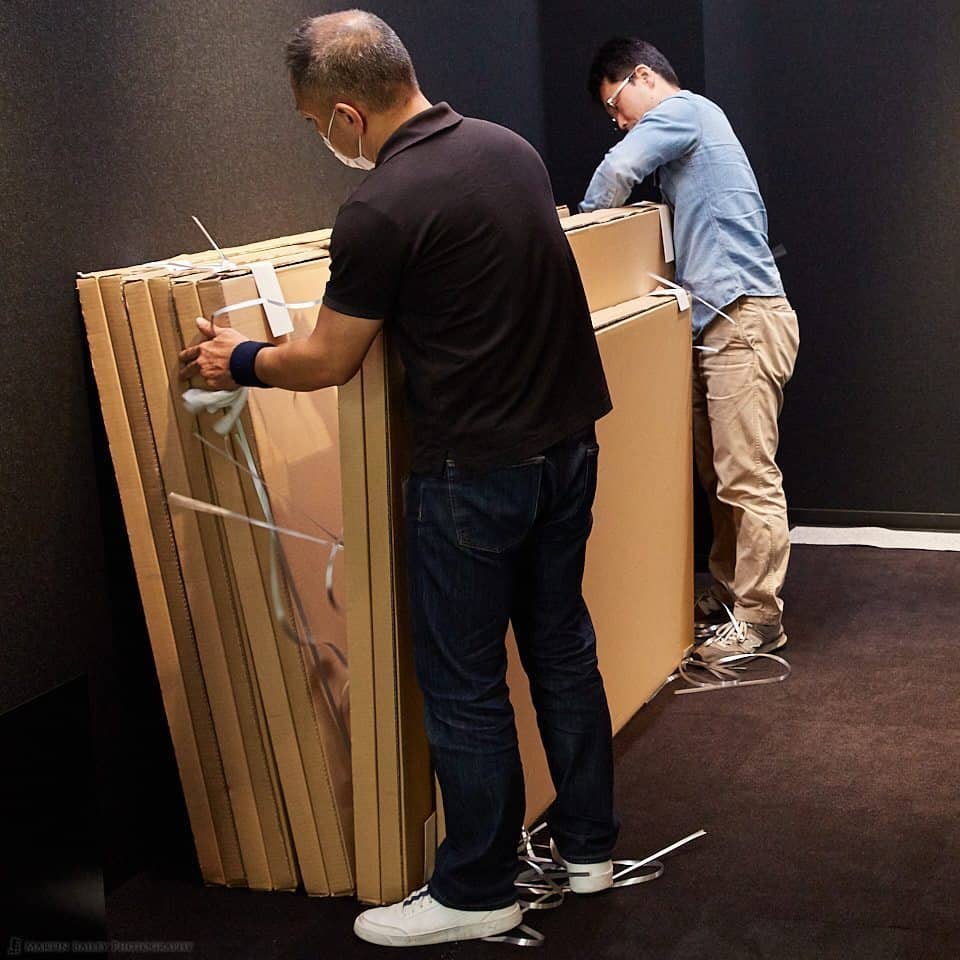
I was able to take some photographs as the people from Frameman hung the prints yesterday, so let’s take a look at a few of those photos. The prints were carefully packaged in individual boxes, which was nice to see (below).
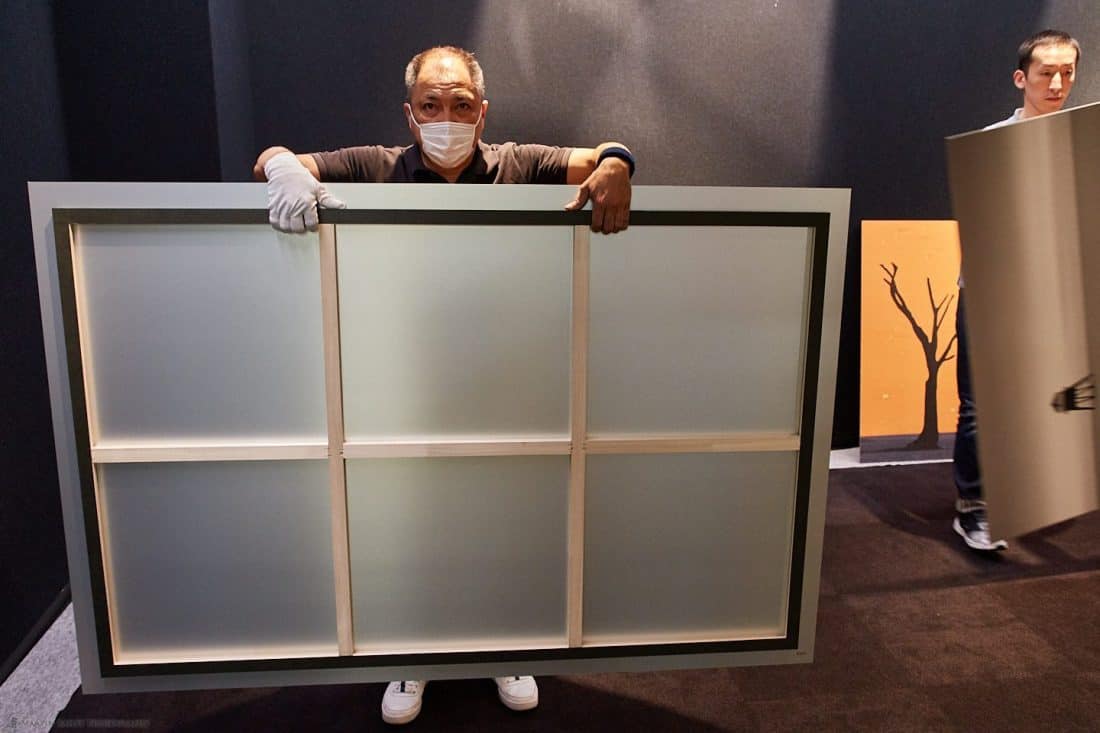
There is a wooden frame attached to the back of the Alpolic Panels, as you can see in this image (below). We can also see the aluminum color here, and the print is basically fused to the front of this panel, so it retains its beautiful matte finish. I was really happy to have chosen Signa Smooth for this because it really suited the space and looked great on those panels.
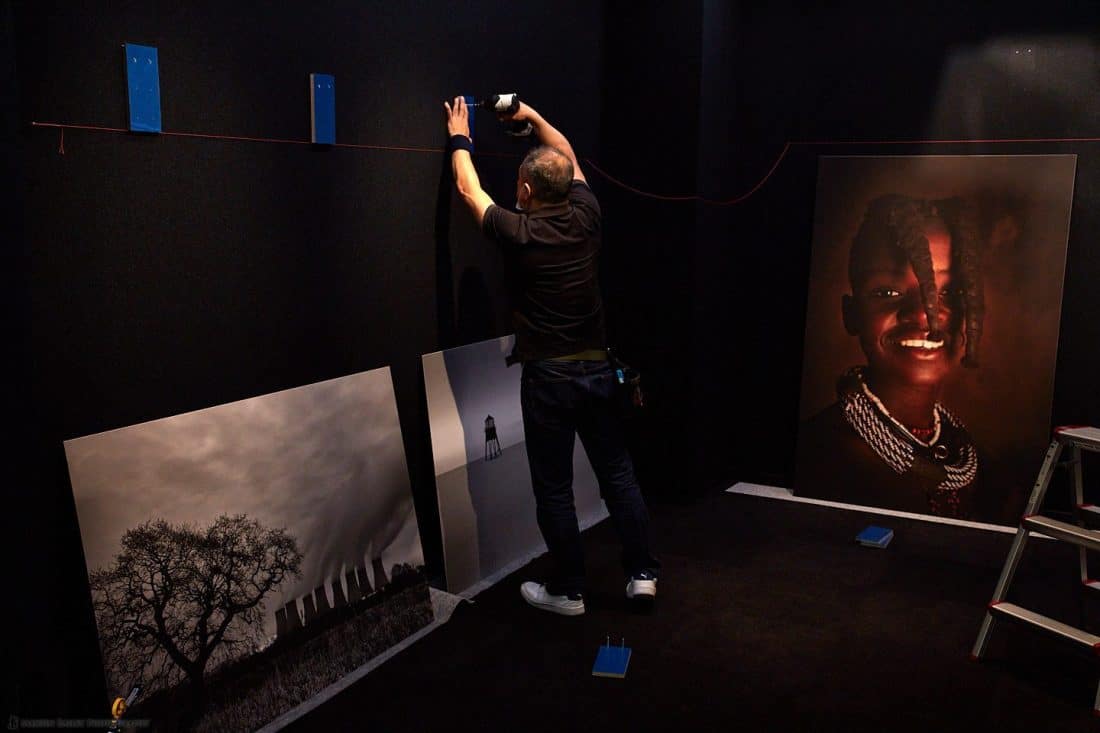
It was great watching these professionals do their job hanging the panels. After I’d told them the position that each print would be hung, they conferred with me on the height of the prints and then proceeded to measure and affix a red line to the wall to mark the height of the top of each of the landscape orientation prints. I thought it was quite fitting to see a red line running across the black walls. Canon users will understand that.
The crew then screwed wooden plates to the wall at the height of the line, and each panel was hung on these plates. The Frameman people are true professionals, taking great care in the creation of the panels and the hanging, and they also adjusted the lighting in the exhibition space to ensure that each photo was evenly lit, and they hoovered the floor before they left leaving it spotless, and all this in one hour flat.
Exhibition Concept
I’d decided to show off the capabilities of Canon’s large format printers and camera equipment by doing these huge prints, but the downside was that it left me with room to only display ten images. Because of this, I made my selection based on two loosely related concepts. The first is the actual title of the exhibit, which is “Silence & Life”. We created a large panel to place in the entrance to the exhibition space which explains my concept in both Japanese and English, but I’ll leave that to people that actually visit the space to read.
In short, though, I talk about how I feel alive when I’m photographing and being in the zone in the field often places me in a Silence from which I recall the work, but I also get a sense of Silence from much of this work. I also gain a heightened sense of Life through the various people and places that I’ve been fortunate enough to experience as a result of my work as a photographer, and I truly feel that much of what I’ve been able to do is to a certain degree, made possible because of the excellent equipment that Canon creates.
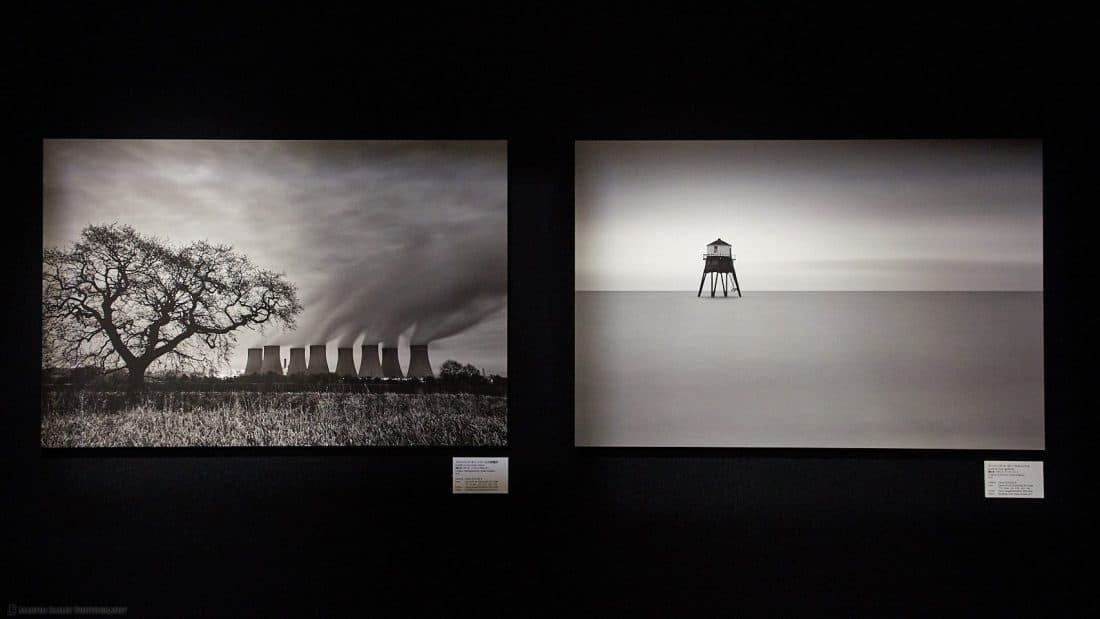
The other concept which is kind of responsible for the order and flow of the exhibit is that we start with my roots, in England. Here are the first two prints, shot during my December 2016 visit. The first print is Ratcliffe-on-Soar Power Station. This power station plays a part in pretty much every memory I have from when I played outside as a kid, because it’s visible from just about everywhere in the town where I grew up.
I proceed with a photo of the Dovercourt Low Lighthouse, which is something that I learned about from Phil Newberry, a wonderfully talented photographer, who I believe still has the best photo of this lighthouse that I’ve seen. Another loose part of my concept here is that I am kind of looping back from my roots to present day Martin doing the sort of work in England that I’d love to be doing if I’d stayed.
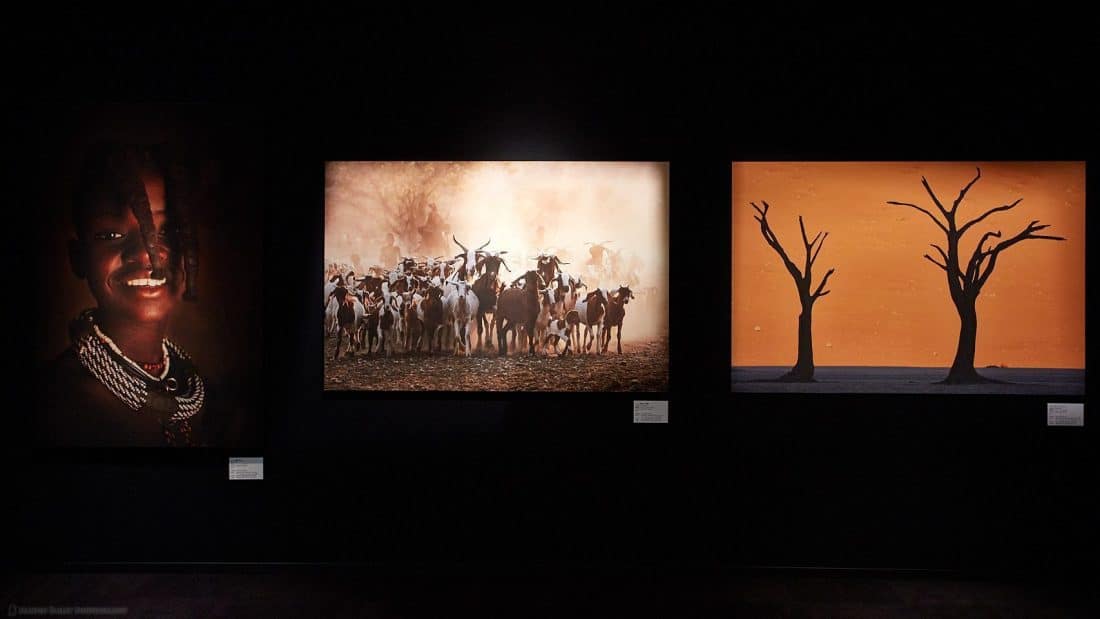
The second wall is three photos from Namibia. I feel so fortunate to be able to visit places like this as part of my work, and I’m eternally grateful to my friend Jeremy Woodhouse for giving me the opportunity to take make my first couple of visits there with him.
Namibia now holds a very special place in my heart as I revisit each year with my own tours and workshops, and the photographs that I make there are incredibly important to me.
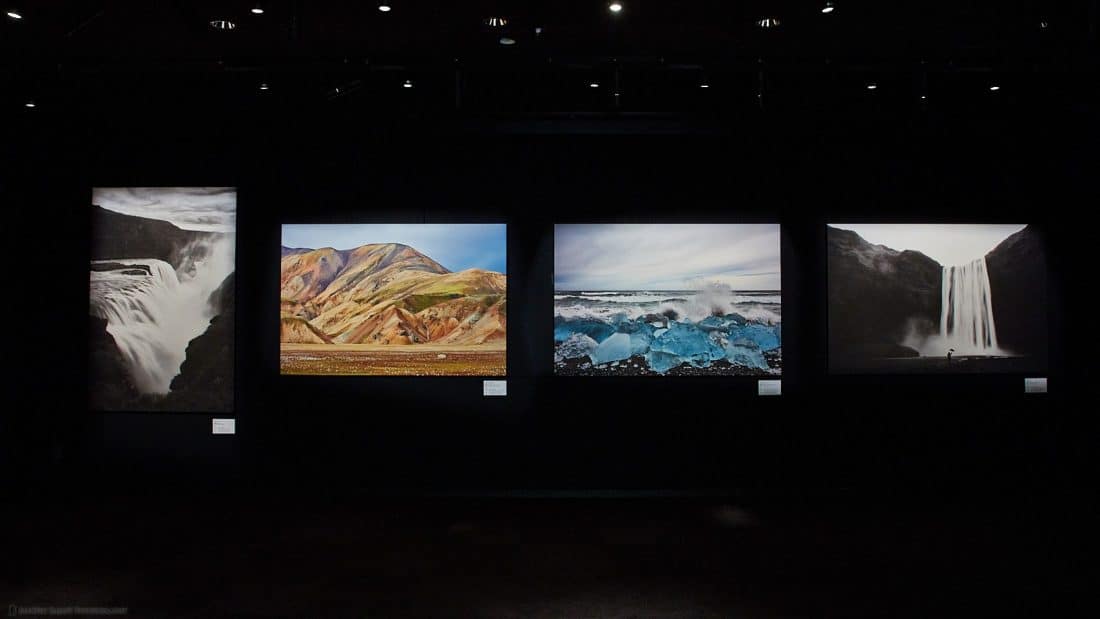
The same goes for my Iceland work, and again, I owe a debt of gratitude to my friend Tim Vollmer for similarly giving me the chance to work with him there for a total of four years from 2013 to 2016. The price increases in Iceland have kept me away for a while, although I’ve just started talking with a new company about setting something up again for next year. Tim has also since branched out and is doing amazing tours around the world, as does Jeremy, so do check out their websites.
The third and largest wall of the Exhibit is dedicated to Iceland work, as again Iceland is a very special place to me. I had originally wanted to do all black and white images, but this wasn’t colorful enough. My final selection for Iceland though really sums up how I feel about this beautiful country. Much of my Iceland work ends up being quite high contrast black and white, and the rest seems to be very vibrant color work. I have very little that is in-between.
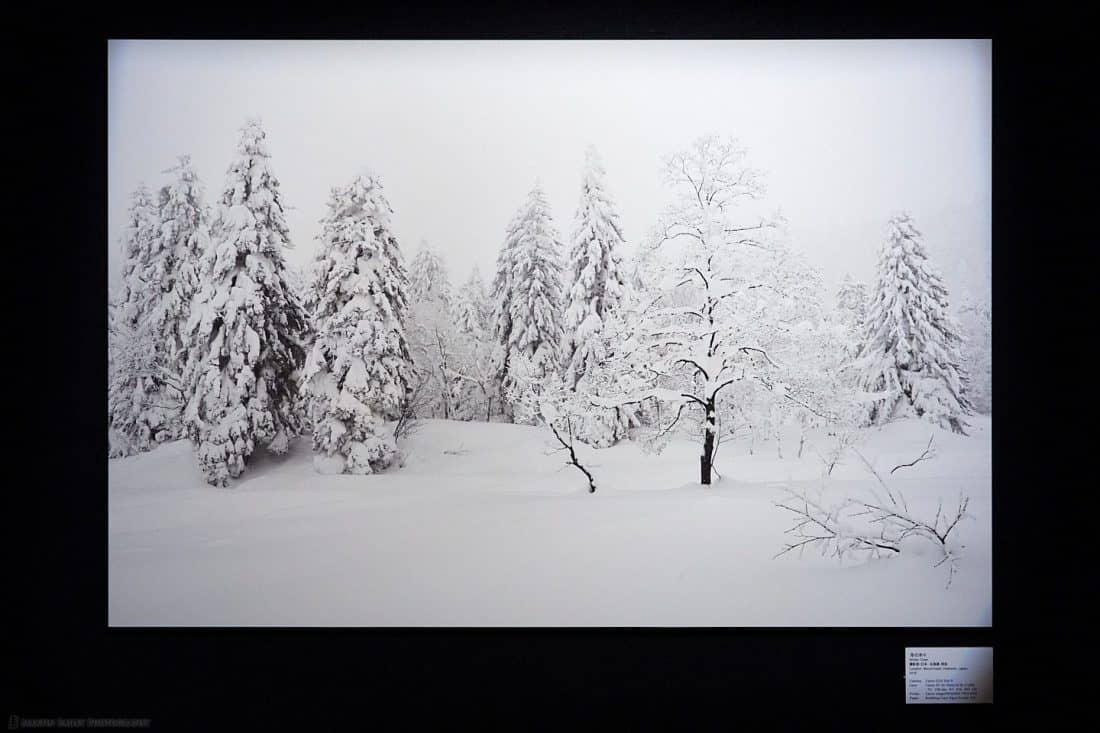
If I had another two or three walls, I’d have loved to share some of my Antarctica, Greenland and Morocco work as well, but with space left for just one photo, I brought it all full circle with this last image from my new home, Japan. Having lived here for 27 years now, Japan is more home to me than England, so I wanted to finish with a Japan shot, and because I love the winter landscape so much, this was kind of my obvious choice.
The final wall next to the door has a panel with my profile on it, and two QR codes which are my digital business cards, so if you get a chance to visit while the exhibition is on, scan the codes and drop me a line to let me know what you think.
Canon Showroom and Museum
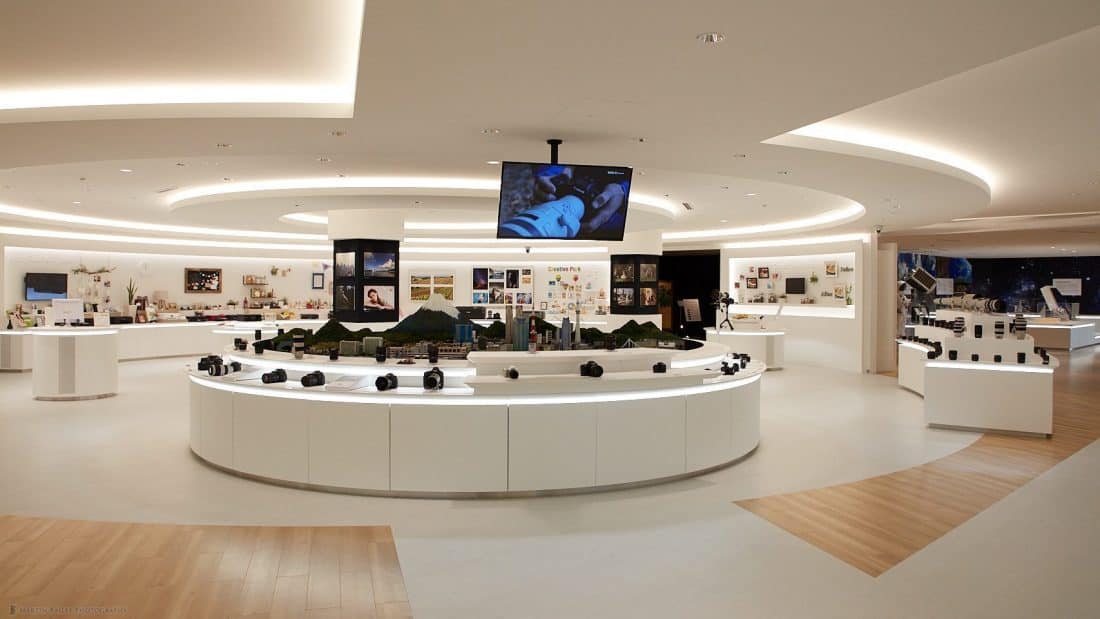
Because the exhibition is on Canon’s campus in Shimomaruko, it’s not open to the general public, but I am going to arrange a few visits over the next couple of months to enable anyone that is in Tokyo a chance to not only see the prints but also take a look at the incredible showroom and museum that Canon has put together, which are on the same floor.
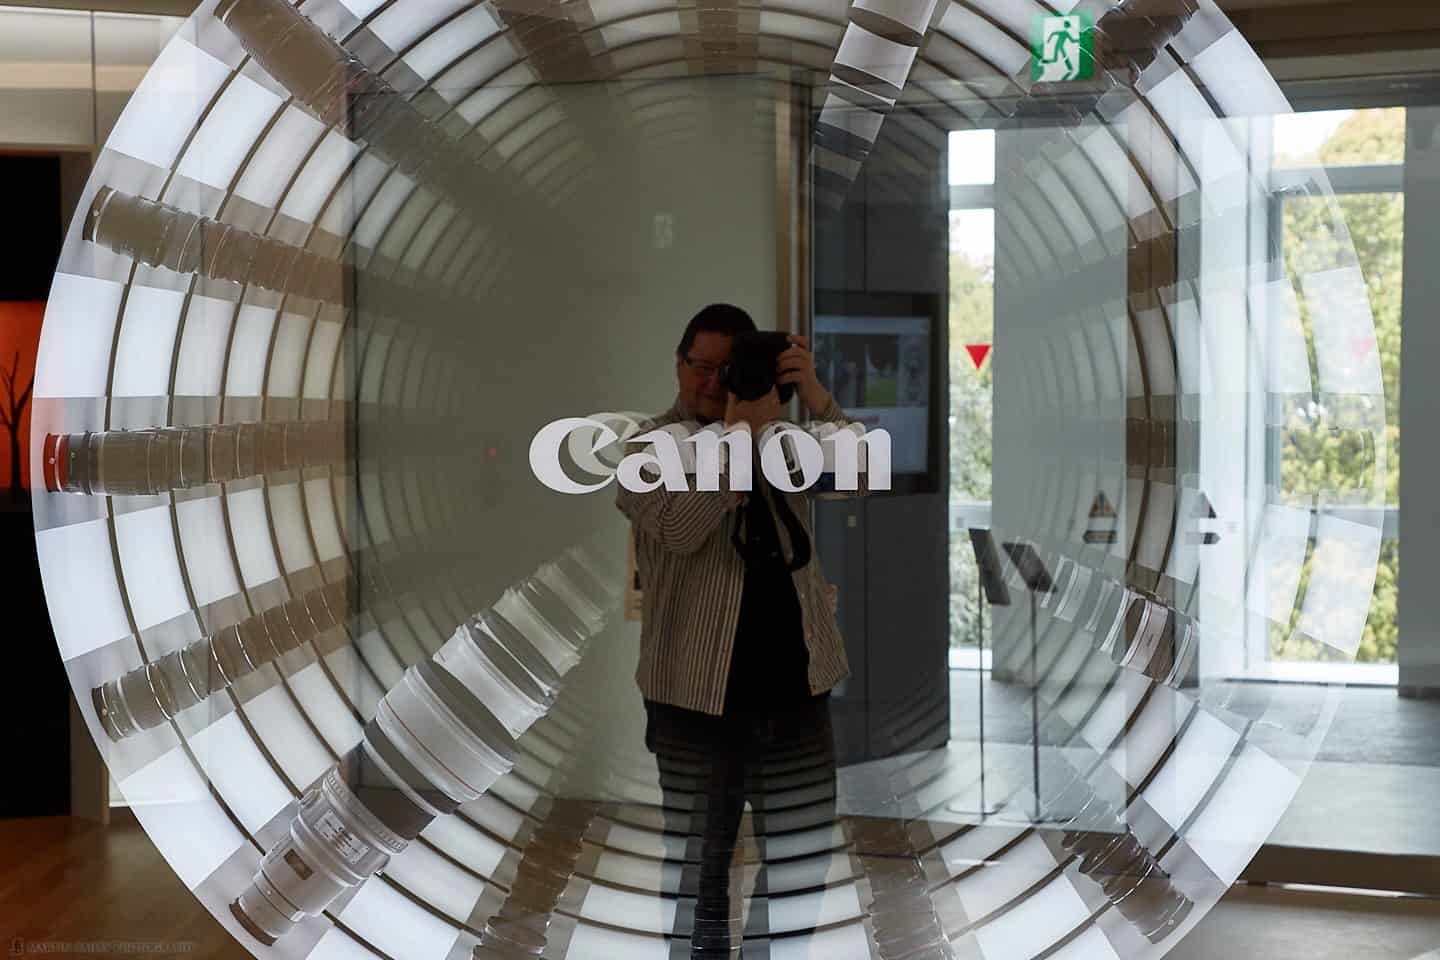
Their current line-up of camera bodies are all placed around the center island that you can see in this photo (above) and all of their lenses, right up to the 1200 mm super-telephoto are on display over to the right there.
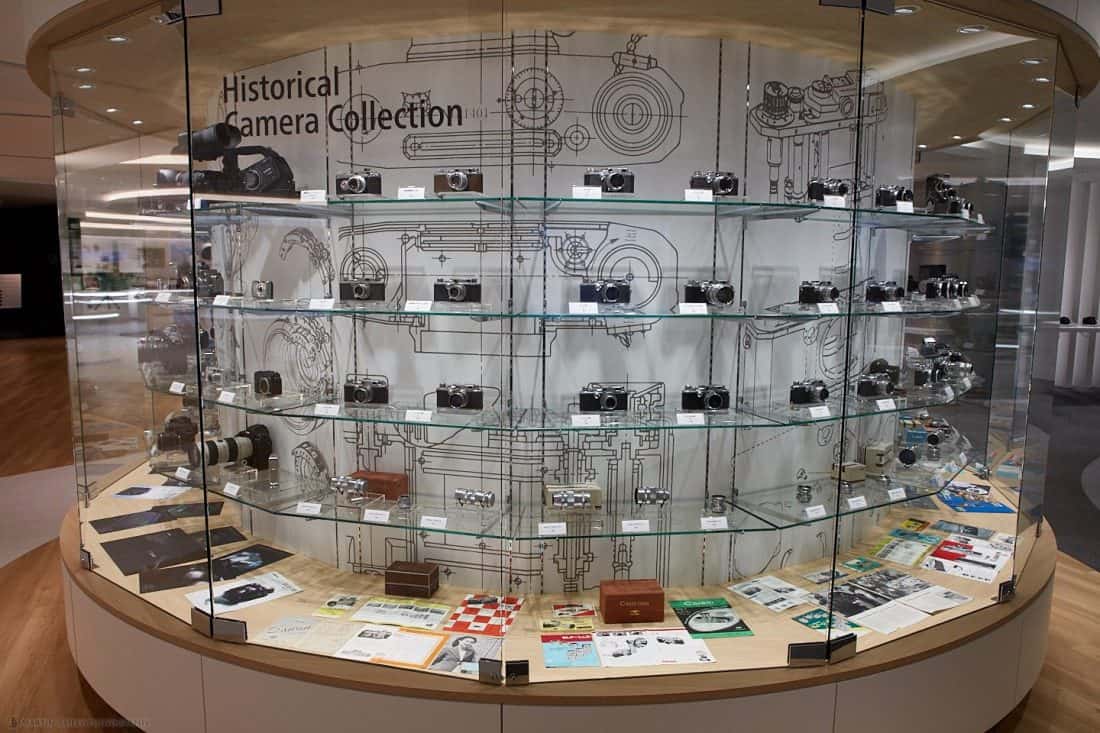
There is also a circular cabinet with pretty much every camera that Canon has made over the decades (below). It was great to find my old cameras in this cabinet, especially the ones that I’ve had to part company with to fund upgrades etc.
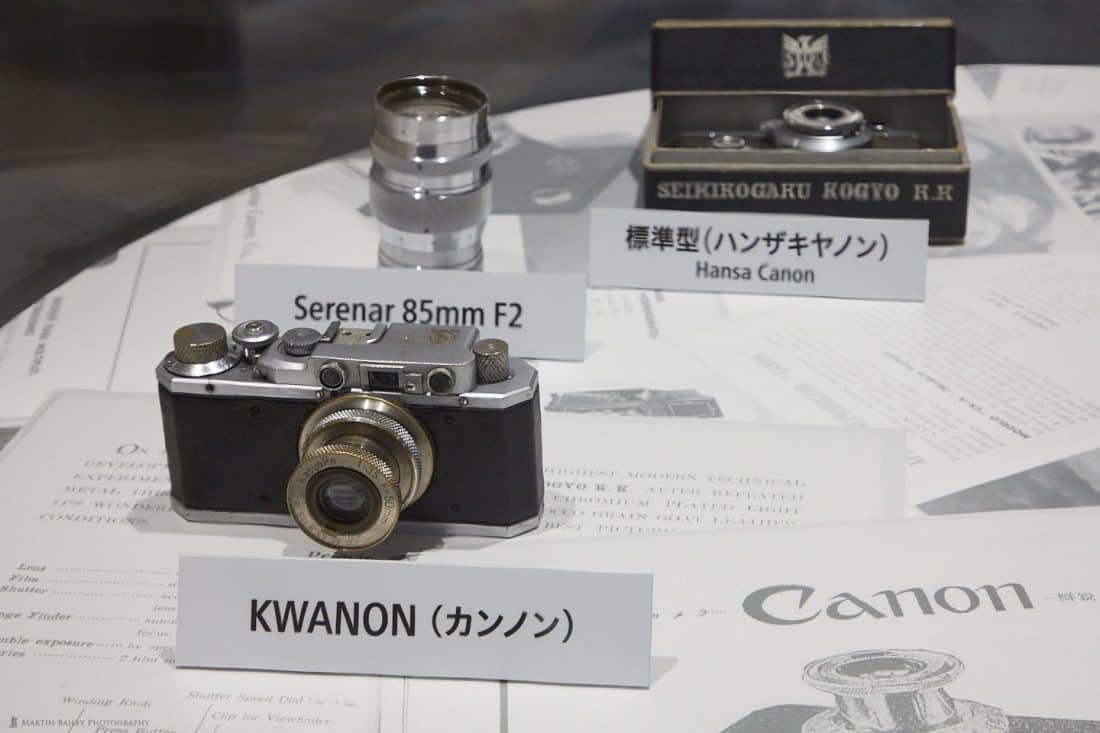
They also have their very first camera with the original name spelled “KWANON” from I believe 1934, and the Hansa Canon from 1936 (below).
Visit on April 16?
Because the exhibition, showroom, and museum are all at Canon’s headquarters, and because a Canon employee has to accompany us, we can only visit on a weekday. I’ve provisionally booked a slot on Monday, April 16 from 2 pm, if you are in or can get to Tokyo and of course, if you are interested in taking a look.
For security reasons, I will need your full name, your company name if you work, and the department name that you work for within your company. If you are not comfortable giving me this information to report to Canon ahead of time, you can’t come. 🙂
If you are happy to share that information though, and you can get to Shimomaruko in Tokyo by say 1:45 pm on April 16, then please drop me a line using our contact form. Just select the General Message category but clearly state that you are interested in joining us for this first visit.
The exhibit will be open until the end of June 2018, so if you will be in Tokyo after April 16 and would like to visit, let me know and I’ll see if we can get a small group together again. We can’t go too many times, maybe once or twice more, so I can’t promise to take lots of people over many days. I’ll certainly see what I can do though.
Thank You!
In finishing, I’d like to thank Breathing Color for making such amazing inkjet media and for rushing my order through so that I could complete this job on time. And of course a huge thank you to Canon for the opportunity to display my work in this beautiful space, and for enabling me to create that work with your camera gear and printers.
[UPDATE: Video]
A week after this post, I released a video including footage of the setting up process and a walk around the showroom and camera museum.
Craft & Vision eBooks Now Available on MBP!
Before we wrap-up, I’d like to also announce that with Craft & Vision closing their shop doors last year, I am now able to sell my three ebooks directly. If you’d like to read my best selling printing ebook Making the Print, or my other two books Sharp Shooter and Striking Landscapes, you can now get them all here. We also have a three book bundle available with a $5 discount over the individual prices.
Show Notes
Contact us here if you’d like to visit the exhibit: https://mbp.ac/contact
Subscribe in iTunes for Enhanced Podcasts delivered automatically to your computer.
Download this Podcast in MP3 format (Audio Only).
Download this Podcast in Enhanced Podcast M4A format. This requires Apple iTunes or Quicktime to view/listen.



Congratulations on a beautiful exhibit!
Thanks, Mark!
Martin, I found this blog post extremely interesting. I’ve followed you for a number of years now and enjoy each and every post. I wish I could be in Tokyo to see your images in person but that’s not possible. I also own all three of your ebooks that I purchased through Craft and Vision. I was disappointed to see it discontinue offering books and also for the end of PHOTOGRAPH Magazine. Thanks for your efforts.
Hi Ron,
Thanks so much for the lovely comment! I really appreciate you following my antics over the years.
Thanks also for picking up my ebooks through Craft & Vision. It’s a shame that they decided to discontinue the majority of their services, but I hugely applaud their decision to give the right to sell these books back to the authors. This was hugely generous of them.
Sorry you can’t see the prints in person, but I’m pleased you enjoyed the post. Hopefully, someday we’ll figure out a way to get these or similar prints to your part of the world.
Regards,
Martin.
Hi Martin
So does ON1 Perfect Resize do a better job of resizing than Capture One’s own resizing output?
Thanks,
Hi Greg,
Capture One and Photoshop don’t really do anything to help the image look good when enlarged. ON1 Resize contains the Genuine Fractals algorithm that in my opinion does a great job of actually increasing the resolution.
Regards,
Martin.
Hello Martin and thank you for a very interesting (as usual) post. First off, congratulations on your exhibit. I bet it is stunning.and wish I was able to visit Tokyo to see it. It was interesting to read about how you made the prints. (Your ebook – Making the Print – really helped me as I started learning to print). I am just starting to have some work printed on aluminum and would like to know more about the panels your prints were affixed to – the process involved etc and how this differs from printing directly on metal.. Any chance you could do a blog post on this?
Hope your exhibition is a great success. And thanks for all your work.
Cheers, Janet
Hi Janet,
Thanks very much for your lovely comment and congrats!
The process of creating the Alpolic panels is a little bit of a grey box. I tried to get access to the actual process and was refused. As it is not a process that cannot be carried out without space consuming equipment, not to mention very expensive, it’s always going to be something that we outsource.
If I can get more information on what actually happens to the prints, I’ll certainly post that, but the head of Frameman seems to always be too busy to spend much time explaining this stuff. I’ll see what I can do though.
Cheers,
Martin.
Thanks Martin. I have had some images printed on aluminum dibond and was very pleased. Then I became aware that there are other processes of placing images on metal. Am hoping to learn more about this. As I live in Whitehorse, Yukon Territory, I don’t have the opportunity to pop out and explore this stuff in galleries or printing places! I think any information you can dig up would be very useful not only for me but for other photographers. Thanks, Janet
Martin – Well deserved recognition to be displayed at Canon HQ! The images look wonderful and I think you made the right decision to print large, even if it limited the number of photographs you could display. Images such as you chose are, IMO, more impactful when printed large. And where in Japan could you otherwise display 10 photographs as large?! LOL. Hope all is well with you.
Regards,
David
Thanks, Dave!
It’s nice to have my decision affirmed. I love large immersive prints, so I wanted to do something like this anyway, and this was a great chance to do that. As you say, there aren’t many places here in Japan that I could hang such large prints.
All’s well here, thanks! I hope all is well with you too!
Regards,
Martin.
This was an immensely interesting read. Congratulations on your exhibition and good luck!
Cheers,
C.
Thanks, Christian!
I’m pleased you enjoyed the read!
Cheers,
Martin.
Congratulations Martin! Canon made a great decision in choosing to use your art and printing expertise.
Fascinating article taking us through your process. I imagine picking just 10 images must have been challenging. I hope your tours of the exhibition go well. I’m sure it will be fascinating to see the Canon equipment as well awesome to see your big prints.
Thanks Andy!
I’m pleased you found this interesting.
I’m looking forward to visiting on the 16th with some guests. It should be fun.
I hope all is well!
Regards,
Martin.
Congratulations – looks fantastic!
Thanks Paul!