When you first get started in digital photography, it's much easier to just leave your camera in JPEG shooting mode. Sooner or later though, most people decide that it's time to switch to raw, and once we switch, we usually wish we'd switched much sooner. Today we're going to look at a the reasons why it makes sense to switch.
This episode is brought to you by Squarespace, the all-in-one platform that makes it fast and easy to create your own professional website, portfolio or online store. For a free trial and 10% off, go to squarespace.com and use offer code MBP.
A few months ago, long time listener Steve Martin asked me a few questions about the main differences between raw and JPEG, which got me thinking that it might help some people just getting started, or even long time shooters that still haven't yet switched, if I talk a little bit about this today.
Lossless vs. Lossy Compression
To start with, let's consider the differences between raw and JPEG. The first, and major difference, is that raw files are not compressed the way JPEG files are. Raw files are usually compressed, but in such a way that the image does not suffer from the process. This is known as lossless compression.
JPEG files on the other hand, are lossy compression, which means that information is thrown away in the compression process. If you care about the quality of your work, that right there should be enough to get you thinking, but here is an example to show you what I mean.
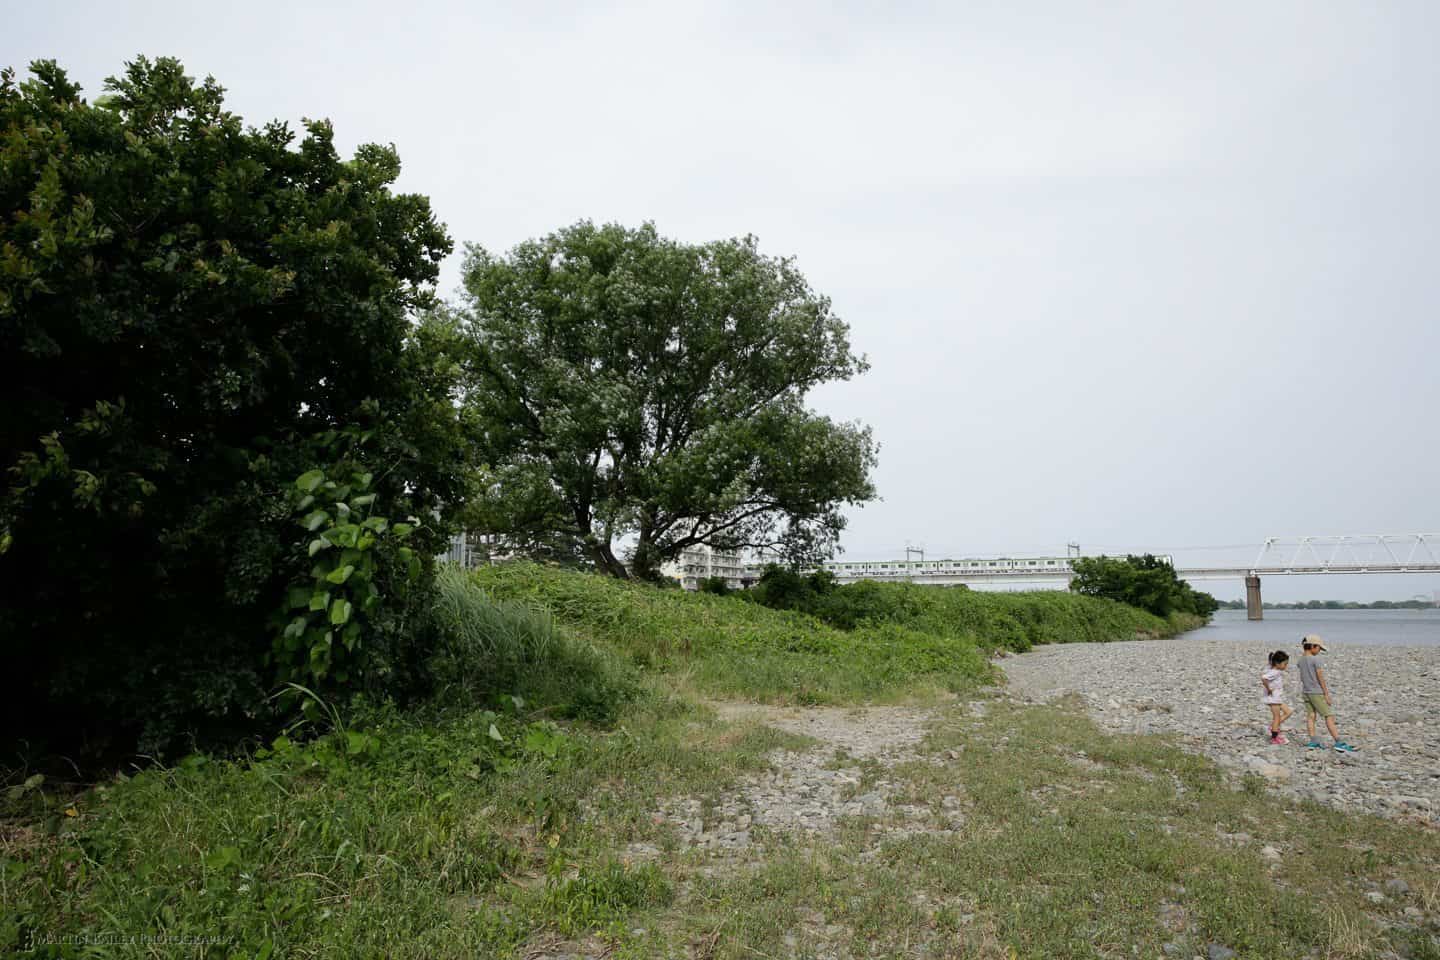
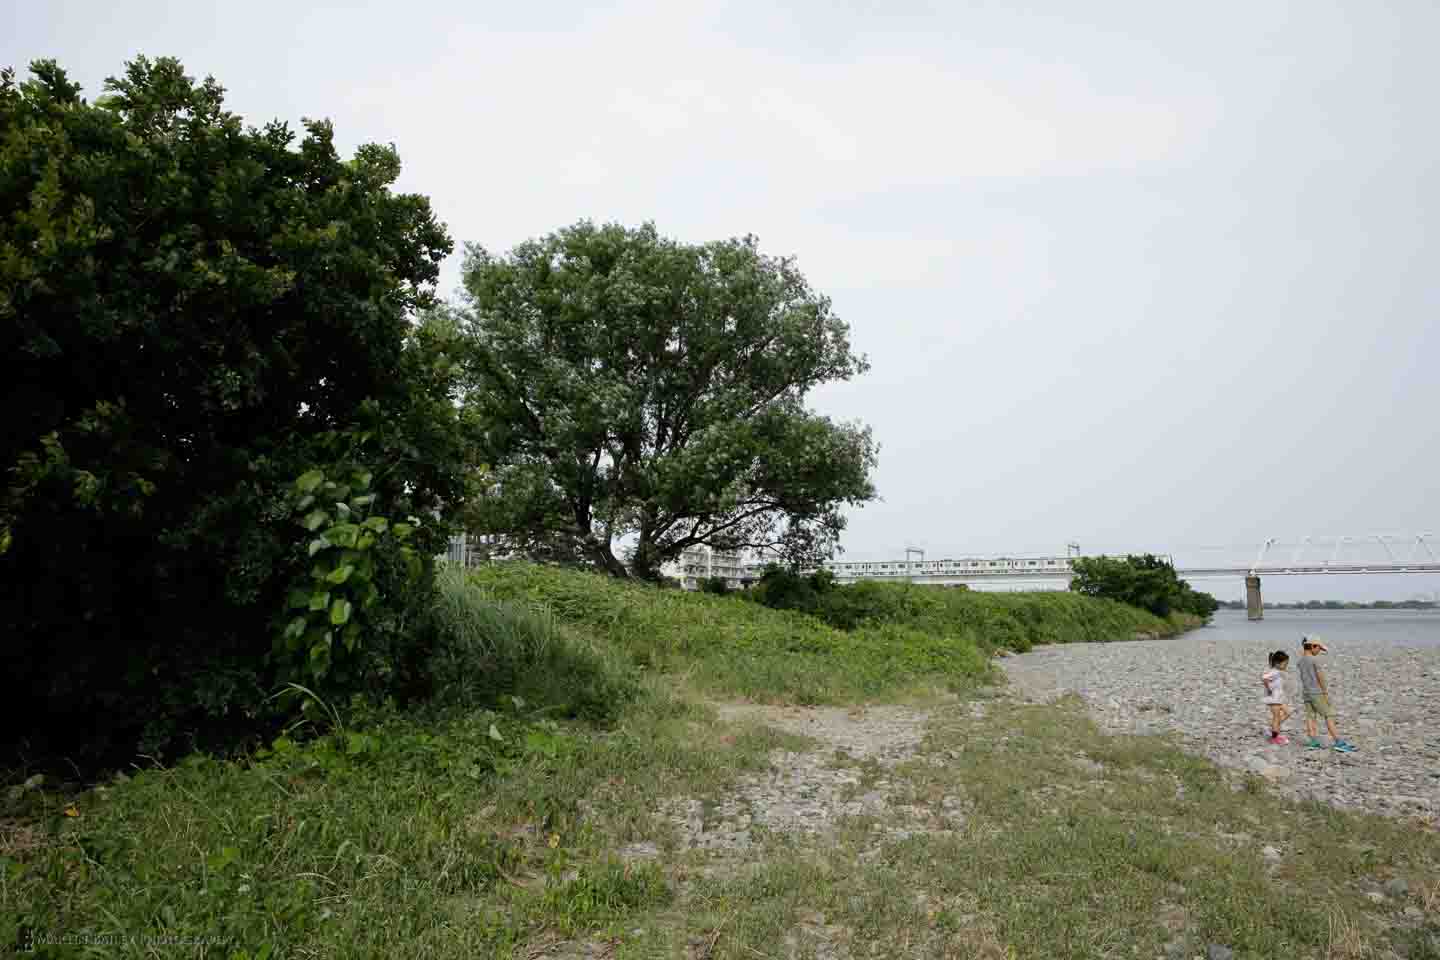
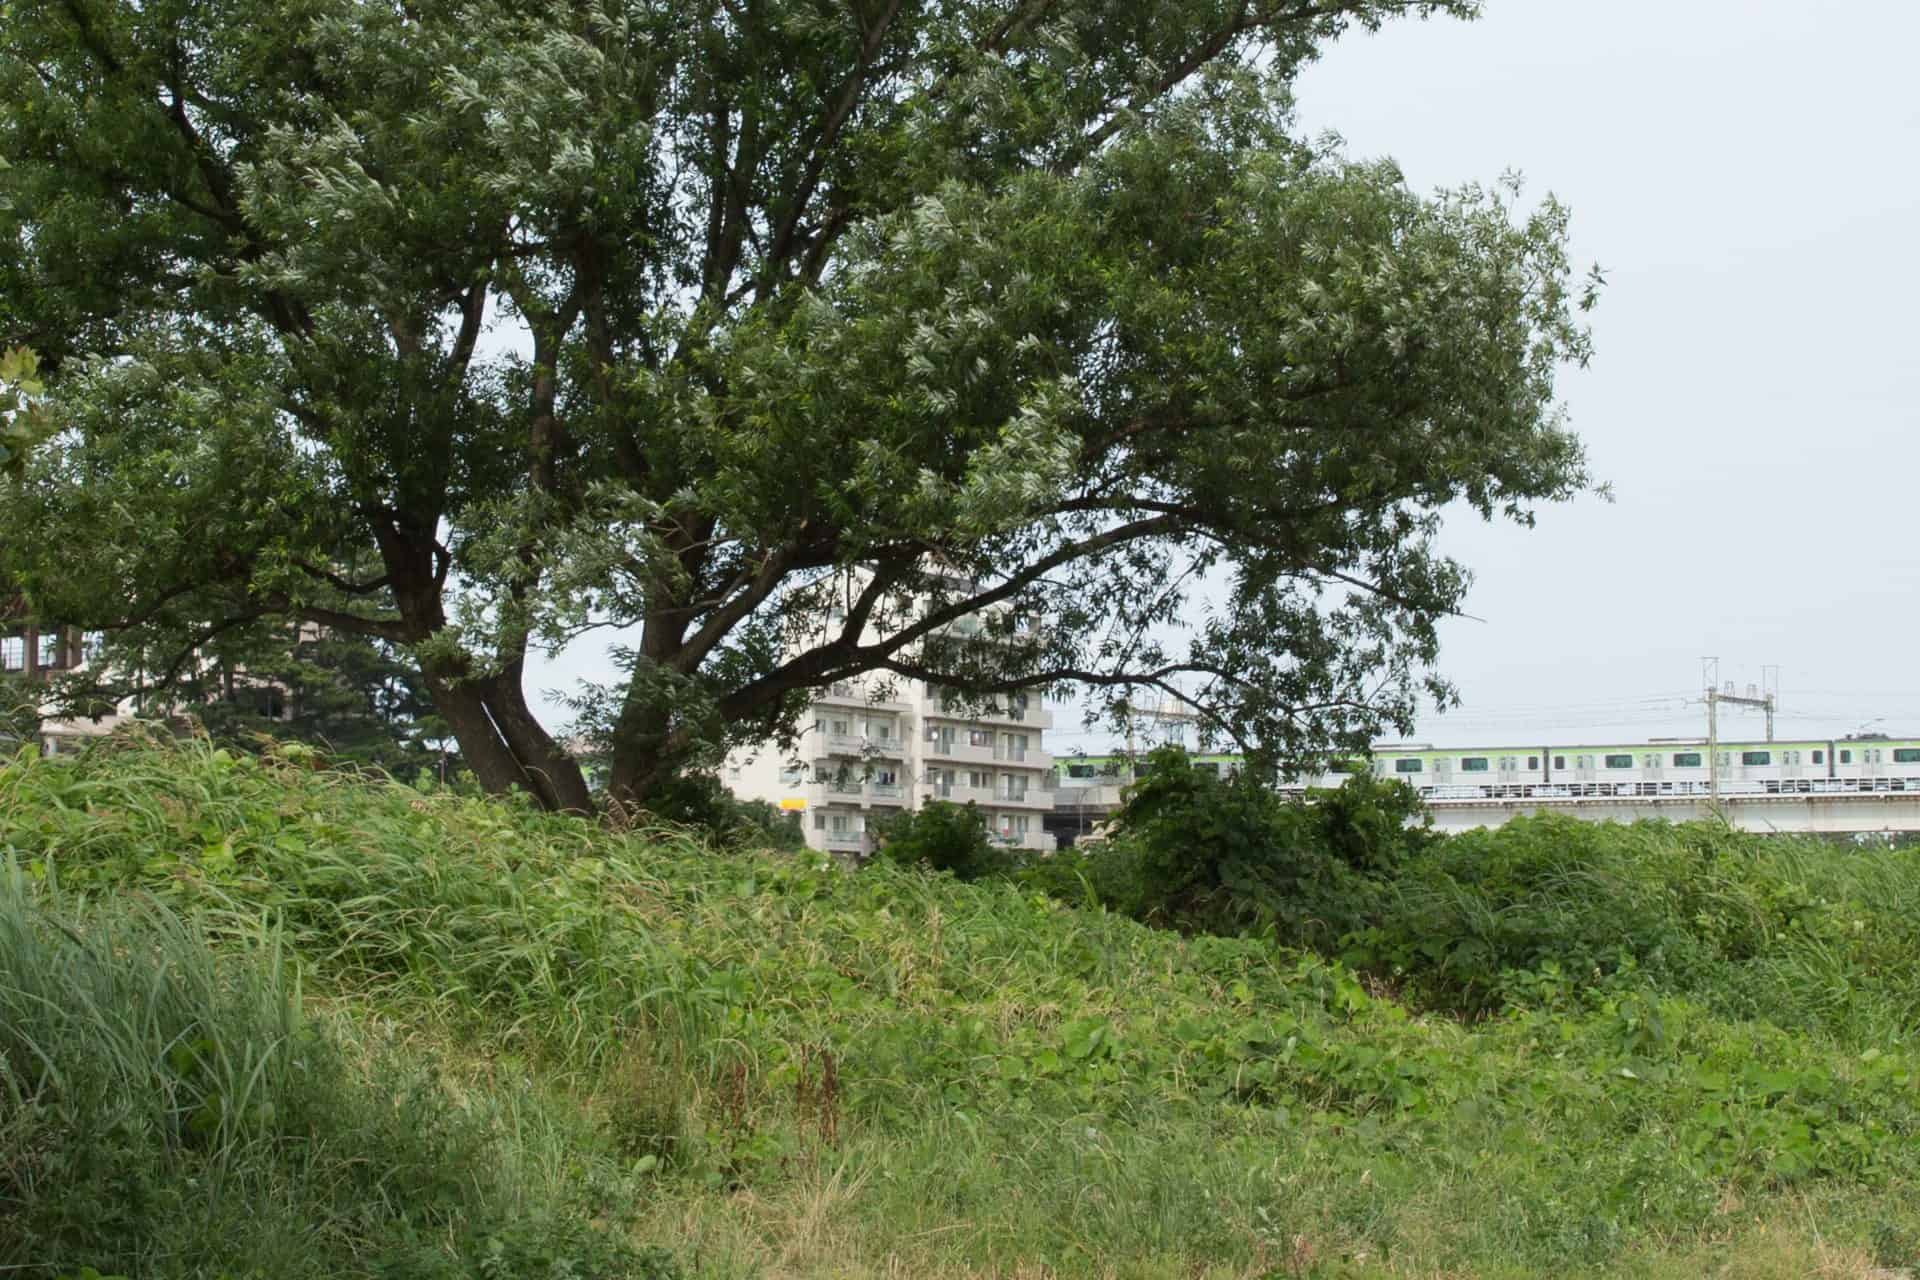
Yesterday, I took a walk down to the river near my Tokyo apartment, and took one photograph, with the camera set up to record both a raw file, and a JPEG file, with the least possible compression applied. It's essentially exactly the same photo, but saved in both formats.
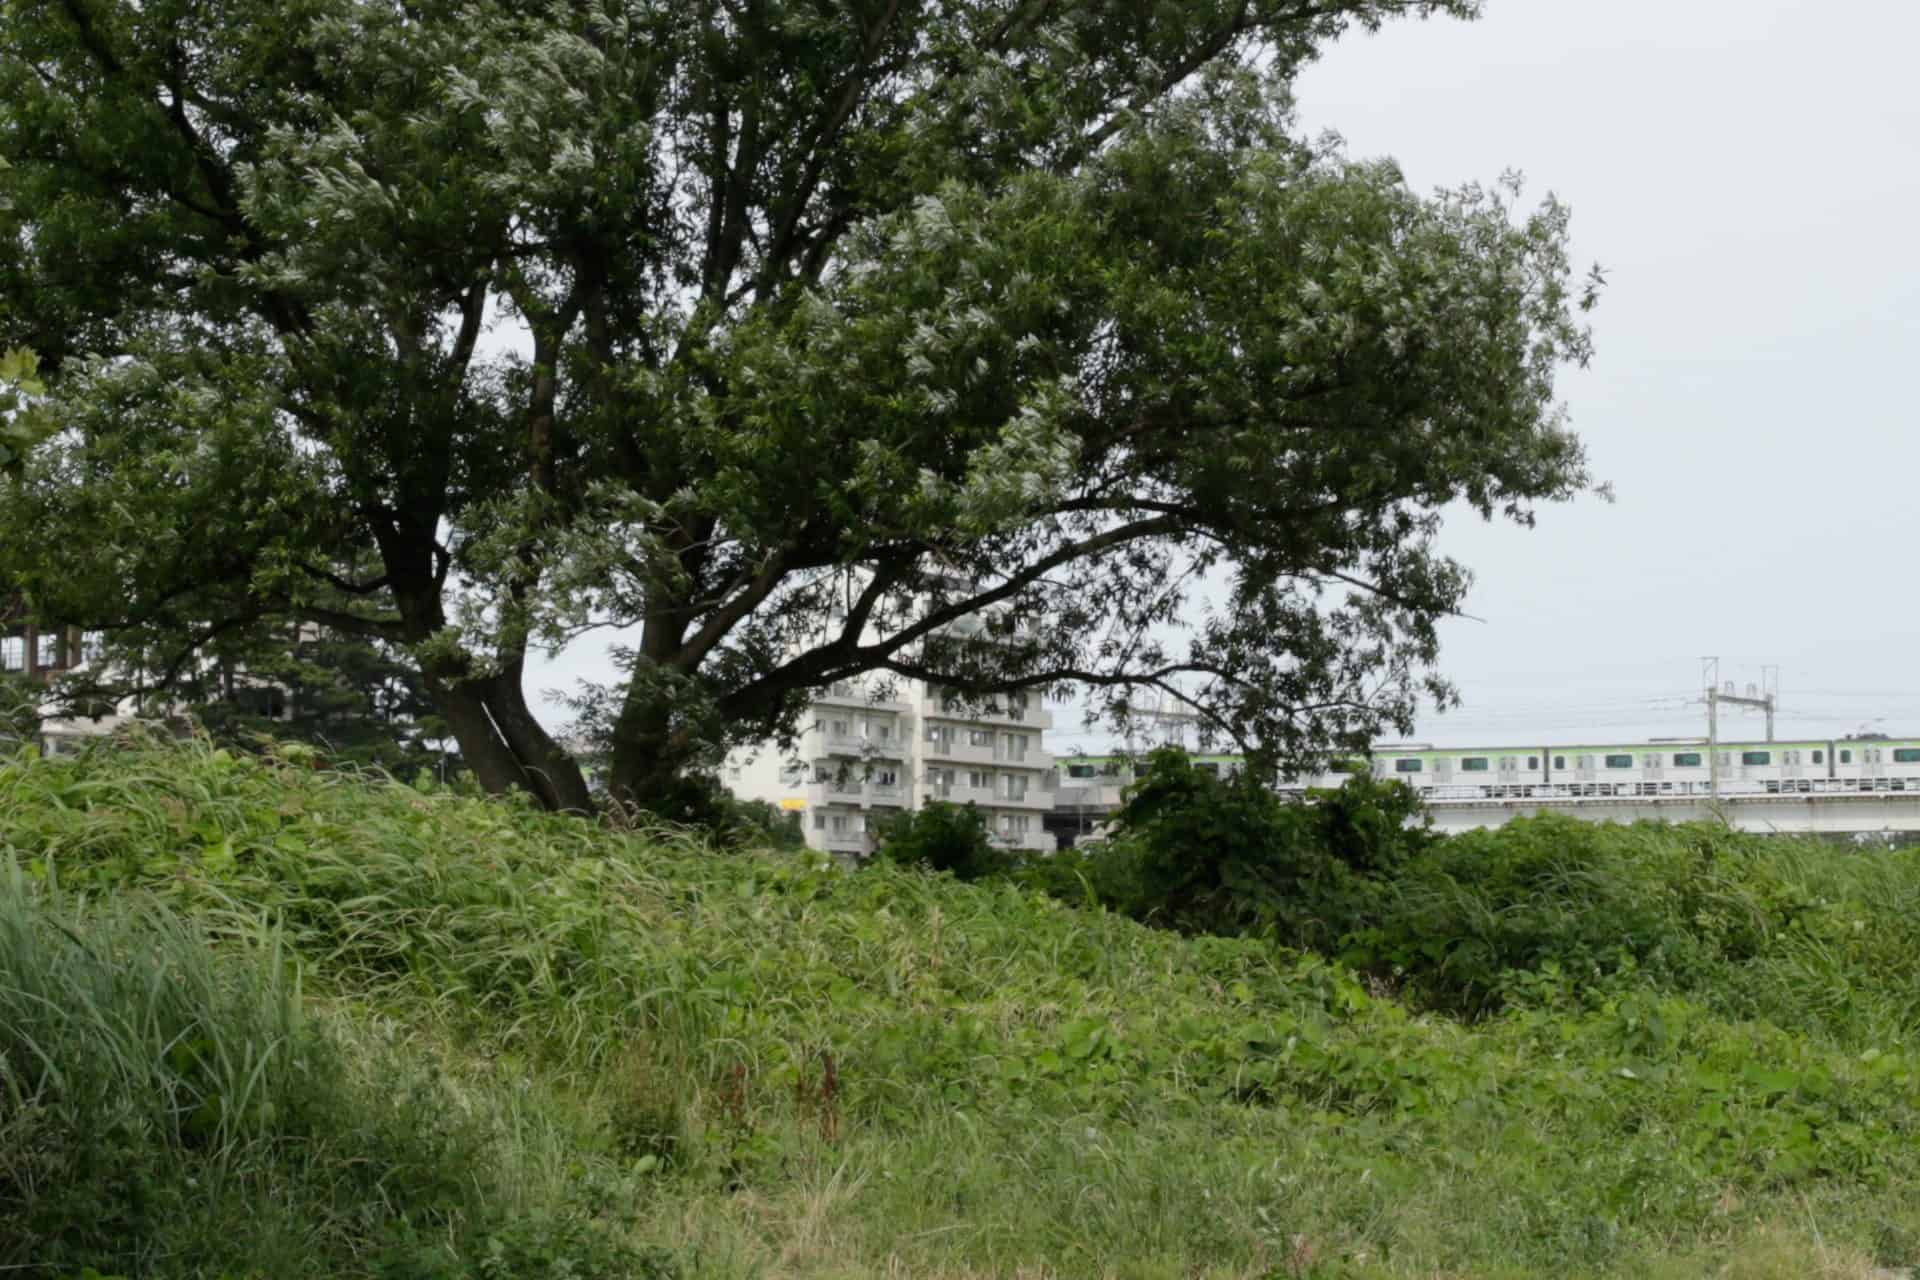
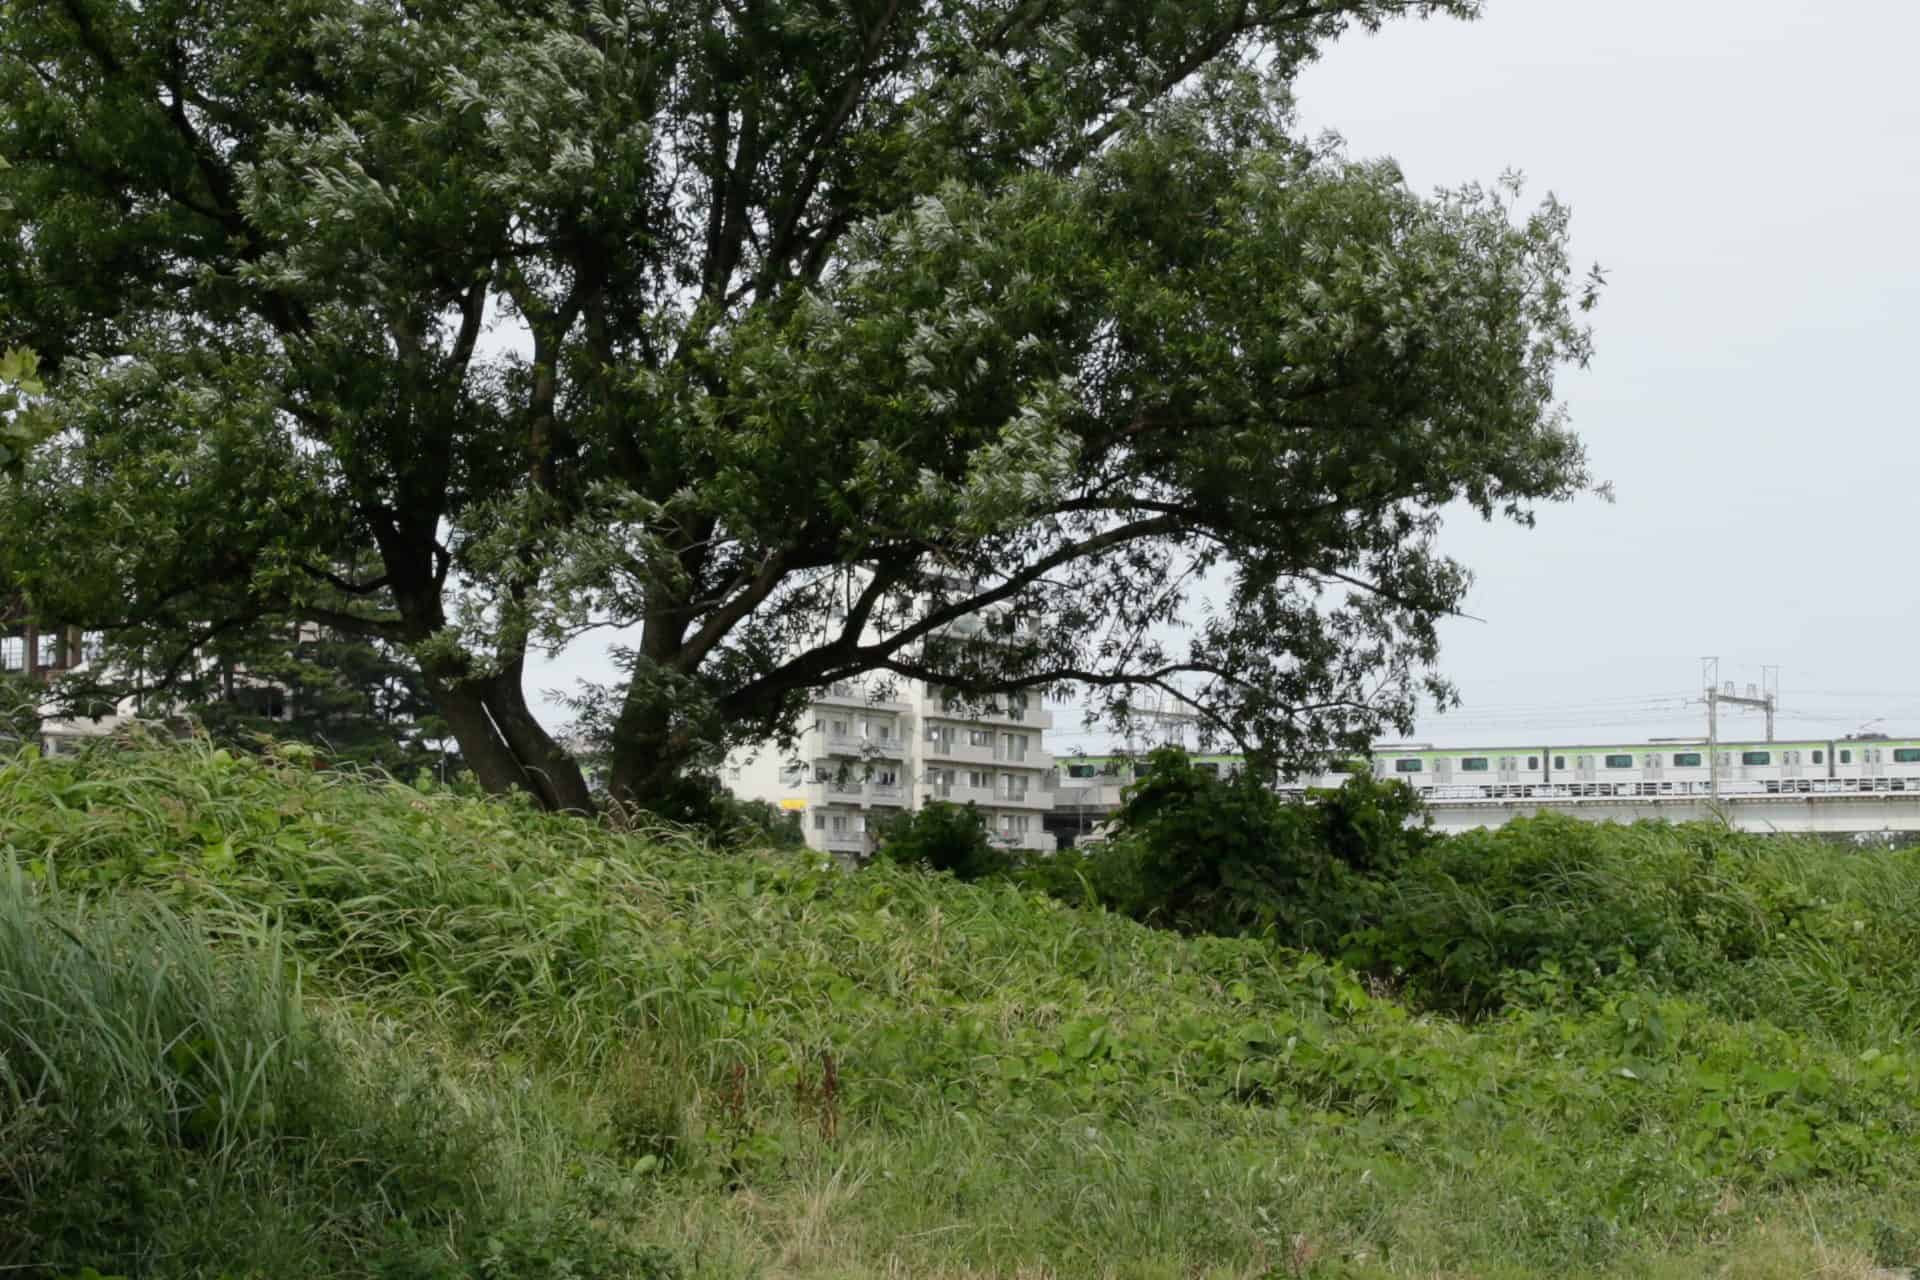
First, here's the JPEG, just to give you an idea, and then following is the raw file. You might have problems seeing the difference, but try clicking on the first image, then go back and forth with your mouse or keyboard arrow keys, and see if you can tell that the raw image is much brighter and crisper than the JPEG file.
Raw vs JPEG Example - JPEG
Raw vs JPEG Example - Raw
Of course, a part of this, is what Lightroom is doing to the file, but you need to bear in mind that the camera has also done a number of things to the file before saving it to a JPEG, plus, Lightroom does this initial processing as soon as you import the file, so there's literally nothing that you have to do to gain this improvement in image quality.
Still not convinced? Here's a 100% crop of the foliage in the center of the frame. These are 1920 x 1280 pixel crops at 100 percent, so either make sure your browser window is large enough to show them at 100 percent, or after you've clicked the image, drag them to your desktop, so that you can open them on your own computer to take a look at.
Raw vs JPEG Example - Raw 100% Crop
Raw vs JPEG Example - JPEG 100% Crop
What you'll see if you open and look at this at 100%, is that the JPEG is not only less vibrant, it's less sharp. The compression applied in the camera has made the image much softer than the same image saved as a raw file.
Now, if you do a similar test, you would probably pretty quickly find that Lightroom adds 25 clicks on the sharpness slider to all raw files on import, because raw images are not sharpened in the camera, but it doesn't do this with JPEG. OK, so here's a JPEG with the same sharpening that Lightroom does to the raw file applied, just for the sake of thoroughness.
Raw vs JPEG Example - JPEG Sharpened
You'll see that sharpened file gets a little bit better, but still much software than the raw file. Also, note that this is isn't really a moot point to begin with, because raw files are not sharpened in the camera, and so require some sharpening anyway. JPEGs should already be sharpened in camera. Now, I know that probably 99 percent of the listeners/readers of this Podcast already get this, but I hope even if you already shoot raw, you're thinking right now, "Wow! I didn't realize there was such a difference!" 🙂
JPEG Compression in Simple Terms
OK, so in simple terms, for my sake more than yours, when an image is saved and compressed as a JPEG file, during the conversion, the software responsible for the process looks for areas of the image that are similar in color and tone, and saves that entire area as a certain value, up to the point where the color or tone is different enough that it needs to start a new area. To illustrate this, take a look at this image, which is the same as the JPEG that we looked at earlier, but saves at maximum compression.
Raw vs JPEG Example - JPEG Heavy Compression
You can easily see here how the sky is now heavily banded, as the compression algorithm looked for areas of colors and tones of a much greater range than those used when applying lower compression. The details in the foliage and the rest of the image are really nastily crunched up too.
Another reason that JPEGs are inferior to raw files after the lossy compression, is because they are saved in 8 bit, as opposed to 12, 14 or 16 bit that is used for raw files. Most DSLRs at this point are saving raw images in 14 bit, which basically means that they can record much higher quality image data than an 8 bit JPEG created in-camera. You can actually get pretty good quality 8 bit JPEGs from raw files, as we'll see in a moment, but when you save an image in JPEG right there in your camera, it basically throws out a huge amount of data at the same time as scrunching up your image, and there's no way to get that back without the raw file.
Optimal Compression
If you shoot raw, and then export your images in JPEG format on your computer, for optimal compression with no visible digital artifacts or banding, select 92 on the Quality slider in Lightroom, or 10 or 11 if you are exporting your images from Photoshop.
From Lightroom, I exported the raw file that we looked at earlier as a full sized JPEG using both 92 and 100, the maximum Quality, and the file size differs greatly. The 100 Quality JPEG is 14.2 MB and the 92 Quality JPEG was 8.8 MB, which is almost half the size, but there is no visible drop in quality. In fact, a JPEG saved from the raw file at 92 Quality looks identical to the raw file, so there really isn't much point in showing you a comparison, but here is another 100% crop for you to take a look at.
Raw Crop Exported at Photoshop Quality 10 JPEG
Actually, because I needed to crop this in Photoshop, I saved it at a Quality of 10, as opposed to 92 from Lightroom. I don't know how these scales are supposed to relate to each other, but 11 in Photoshop on a scale of 0 to 12 gives a slightly larger file, and 10 gives a slightly smaller file, so neither directly maps to 92 in Lightroom, but I find that the slightly heavier compression of 10 in Photoshop still doesn't show any kind of digital artifacts or banding.
By the way, if you are wondering at this point how big the original JPEG from the camera was, it was exactly 8 MB, so it has roughly the same amount of compression as I use in my Lightroom or Photoshop exports. In fact, I'd say that the difference in size probably comes from the file being softer overall compared to a JPEG created in Lightroom from the raw file. The harder lines in a sharper image cause the JPEG file information to be more complex, increasing the image size.
JPEG as an Output Format
So before we move on, I'd like to impress on you that a JPEG file exported from a raw file is actually very acceptable in quality. You are still reducing it to 8 bit, but because this seems to be done much more intelligently by Lightroom or Photoshop, and probably pretty much any software that you might use to export your JPEGs, so I'm not necessarily saying that JPEGs are evil. They're just not the best way to save your images in camera, as you shoot them.
What Else Do You Lose by Shooting JPEG?
OK, so a few other things to bear in mind is that when you shoot JPEG, you can't easily change the White balance on the computer. If you shoot raw, you can select any of the typical presets, such as Daylight, Cloudy, Shade, Tungsten etc. but if you shoot JPEG, you can only select Auto or Custom. Basically your options are to let Lightroom adjust your White Balance by averaging out the red, green and blue color information in your image, or take a guess at what the White Balance should have been.
Of course, you could shoot a grey card and use that to set the white balance, but if your images are important enough to you to do that, I can't imagine you'd be shooting in JPEG anyway. You can't apply Lightroom or Adobe Camera Raw Lens Correction profiles or Camera Calibration profiles to JPEGs either. These can only be applied to raw files. Even if you don't need to change any of these values, you are basically starting any editing that you might do to your image in Photoshop, Lightroom or any other imaging software, with a sub-standard photograph.
Don't Be Afraid of the Switch!
I understand that the reason most people stick with JPEG is because working with raw files can seem a little bit daunting. After all, if you shoot JPEG, all you have to do is copy the photos to your computer, and they're there, ready to use. If you never do more with your images than stick them on Facebook or share them with your family, you never print them large or maybe never print them at all, then you may well be fine to stick with JPEG.
If however, you know that you want to create better quality images, but you're sticking with JPEG because you don't know what extra steps that is going to mean for your photography, then it might not be as bad as you think. If you already use Adobe Lightroom or Bridge and Photoshop, or Apple Aperture or iPhoto, you have absolutely nothing extra to do, to switch to a raw workflow. You just change your camera to raw, and carry on as you have so far. All of these programs handle raw files without skipping a beat. There are times when new camera bodies are released, and you have to wait a little while for these programs to be updated, and that can be a pain, but unless your camera has just been released, there is nothing to worry about.
Also note that all cameras come with software that will enable you to process your raw files. The downside is that they're usually crap, but these can at least be a stop-gap until the main image workflow applications I just mentioned catch up with the latest camera releases.
The only time that you will find you have to do extra steps if you use a digital photo workflow application like Lightroom or Aperture, is when you want to share images. Instead of just copying the file from your hard drive, you have to export them. Of course, if you are resizing and exporting for the Web, you'd have to do this anyway, so again, the workflow is no different, but for full sized images, you have to export them as a JPEG or Photoshop PSD or TIFF etc. to take them for example to get prints made. Most online print services require JPEG, so they'd need to be exported. But as we saw earlier, you'll get better quality JPEGs if you shoot in raw, then export just for any special requirements you might have.
Of course, Photoshop, Lightroom and Aperture etc. cost money. You might consider Photoshop Elements if you don't intend to do a lot of editing, and even Elements is a pretty capable editor anyway. Personally, my preference is Adobe Lightroom, with occasional jumps into Photoshop and a number of plugins that I use regularly, but nothing that I do in my workflow would be easier if I shot JPEG.
More Memory and Hard Disk Space Required
Actually, I guess I should mention that because raw files are larger than JPEG, you might find that you need more memory for your camera, and you'll fill your computer hard drive more quickly. This also means backups will be slower too. These are just things that most photographers feel are small prices to pay for the better quality images and freedom that shooting in raw give us.
Times When JPEG Can Be a Benefit
OK, so just for the sake of thoroughness, let's think about a few examples of when you might find it beneficial to shoot JPEG over raw files. If for example though, you should find yourself in a situation where you only have a tiny bit of space left on your memory cards, and it's a toss-up between shooting JPEG, or not getting any photos at all, then sure, consider shooting JPEG, but memory cards are cheap enough these days, that hopefully, you won't find yourself in that situation.
Also, there are times when a photographer might need to very quickly view or hand-off images to people and literally there will not be time to import the images to a program like Lightroom, then export them as JPEGs. I can imagine that super-rushed sports photographers or photojournalists sometimes have to fall back on this. In a situation like this though, I'm sure, that they would have their cameras set up to shoot both raw and JPEG, so that they at least have the full quality version of their prized shots on hand, and can maybe replace the JPEGs that were sent at a later time. Also, we need to bear in mind that small newspapers are generally quite low resolution anyway, so people really wouldn't be able to tell the difference in this case.
OK, so that's it for the JPEG and raw thing, but I hope you found that useful, even if you already shoot raw. Many people think that the JPEGs that come out of the camera is much better, but in most cases, it's really poor.
New Print Giveaway!
If you recall, a few weeks ago, I announced a Fine Art Print Giveaway, and today I drew a winner! Mason Higa, will soon be the hopefully proud owner of my waterfall shot from Iceland. Thanks to all of you that entered!
I also wanted to let you know, that I've now set up a Fine Art Print Giveaway page on my Web site, and will be giving a print away periodically for a while. The next draw will be August 1, 2014, and you can enter at https://mbp.ac/giveaway. This time I'm giving away a 17 x 24 inch print of my Deadvlei Silhouettes image.
Deadvlei Silhouettes
You can enter as many times as you like, and each time I draw a winner, your details will be migrated to our main newsletter mailing list. You'll only be included once though, so you won't receive multiple copies of our email etc. and we won't be spamming you. I only mail this list occasionally, and it's hopefully usually information that you're interested in. If you decide you don't want the newsletter any more, there's an unsubscribe link in each email.
Good luck!
This Podcast is Sponsored by Squarespace
The Martin Bailey Photography Podcast is proud to have Squarespace on board as our current sponsor.
Visit www.squarespace.com and use the code MBP for a free trial and 10% off new accounts.
Show Notes
Music by UniqueTracks
Audio
Subscribe in iTunes for Enhanced Podcasts delivered automatically to your computer.
Do I get a fine art print for inspiring this week’s episode Martin? 😛
Just kidding, but glad you covered this topic. I’m keen to return to it myself in the near future, as I never got a satisfactory answer from various online forums and experts as to why my JPEGs processed in Lightroom look so much better than my RAW files processed in Lightroom.
I think this is down to the in-camera Nikon processing, but despite trying Camera Profiles in Lightroom (Standard, Vivid etc.) I can’t seem to replicate these with the RAW files – and I don’t want to switch to Capture NX!
Anyway, I don’t want to go into this again without all the necessary evidence (100% crops) to back it up, so perhaps I’ll focus on five example photos from stevenjamesmartin.com/burma and write a blog post about it soon (if you’re interested!)
I haven’t a clue why you’re seeing that. It’s probably due to some of the settings that you have turned on in the camera, but you’ll certainly get better quality images in raw once you’ve figured it out. How about Dropboxing me an raw and JPEG file of the same scene for me to see if I can find out what’s going off?
Yeah that’d be super, if you don’t mind – I didn’t want to bother you too much with it! I’ll send you direct links to some files. But if you don’t have time no worries.
Another major reason for RAW is highlight and shadow recovery. Under/overexposed JPEGs have little scope for improvement without banding but RAW files do much better.
I first decided to switch while I was still learning about photography and found this http://www.paintshoppro.com/en/pages/camera-raw/ I realized the big difference between a JPEG and a RAW file, and a big difference in editing a RAW file. Thanks for the article, it’s very useful and informative for beginners who don’t know that much about RAW files and editing 🙂


Do I get a fine art print for inspiring this week’s episode Martin? 😛
Just kidding, but glad you covered this topic. I’m keen to return to it myself in the near future, as I never got a satisfactory answer from various online forums and experts as to why my JPEGs processed in Lightroom look so much better than my RAW files processed in Lightroom.
I think this is down to the in-camera Nikon processing, but despite trying Camera Profiles in Lightroom (Standard, Vivid etc.) I can’t seem to replicate these with the RAW files – and I don’t want to switch to Capture NX!
Anyway, I don’t want to go into this again without all the necessary evidence (100% crops) to back it up, so perhaps I’ll focus on five example photos from stevenjamesmartin.com/burma and write a blog post about it soon (if you’re interested!)
Cheers
🙂
I haven’t a clue why you’re seeing that. It’s probably due to some of the settings that you have turned on in the camera, but you’ll certainly get better quality images in raw once you’ve figured it out. How about Dropboxing me an raw and JPEG file of the same scene for me to see if I can find out what’s going off?
Yeah that’d be super, if you don’t mind – I didn’t want to bother you too much with it! I’ll send you direct links to some files. But if you don’t have time no worries.
I don’t mind at all Steve. Send away!
Another major reason for RAW is highlight and shadow recovery. Under/overexposed JPEGs have little scope for improvement without banding but RAW files do much better.
I first decided to switch while I was still learning about photography and found this http://www.paintshoppro.com/en/pages/camera-raw/ I realized the big difference between a JPEG and a RAW file, and a big difference in editing a RAW file. Thanks for the article, it’s very useful and informative for beginners who don’t know that much about RAW files and editing 🙂
Thank you so much! I’ve just started using Camera Plus on the iPhone 7 and trying to understand RAW. This article helped immensely.