This week I’ve had the absolute pleasure of being able to test and review a Drobo, which as most of you already know is an external storage device that takes multiple hard drives, even of different size and creates one or more large volumes or drives with redundancy so even if one of the drives fails, as they eventually all do, your data is safe.
 I’m really happy to tell you that we are also going to give away a drobo courtesy of Drobo, so stay tuned to see how you can be in with a chance to get your own four bay drobo, to protect your precious images and other data! First here’s my review of the Drobo.
First Impressions – Excellent!
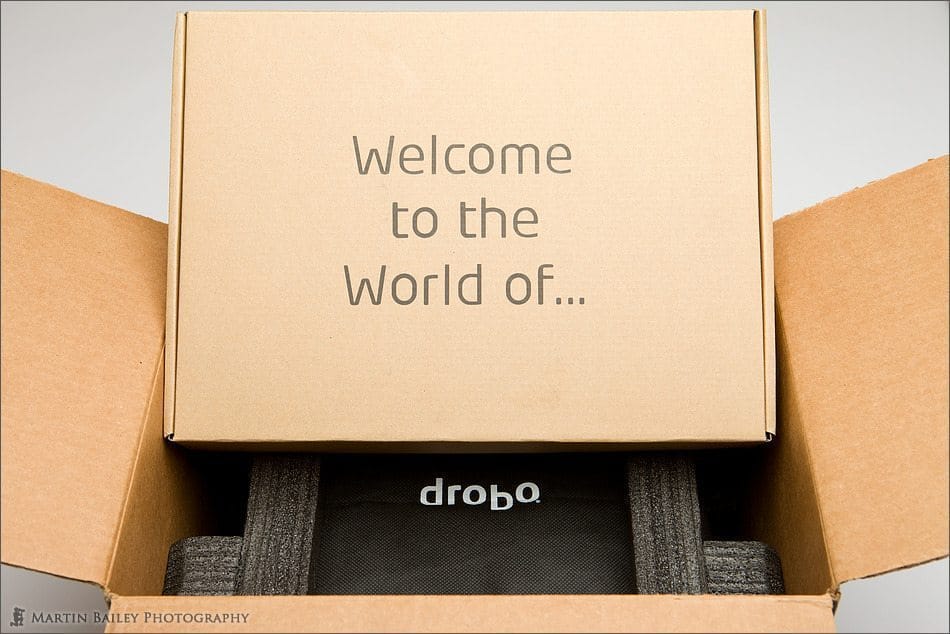
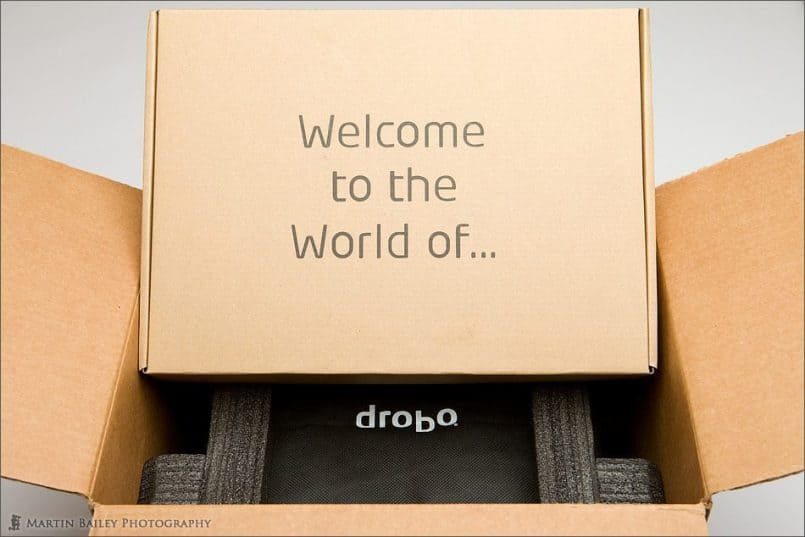
When I unboxed the Drobo, I was immediately reminded of how it felt when I first opened my MacBook Pro box in January. I haven’t come across many companies that get packaging like Apple does but Drobo are very close. You’re greeted with “Welcome to the World of…” on the box as you open the outer box, then as you lift that first box out, the Drobo is in a nice black cloth bag with the word “drobo” on top in white. Very nice.
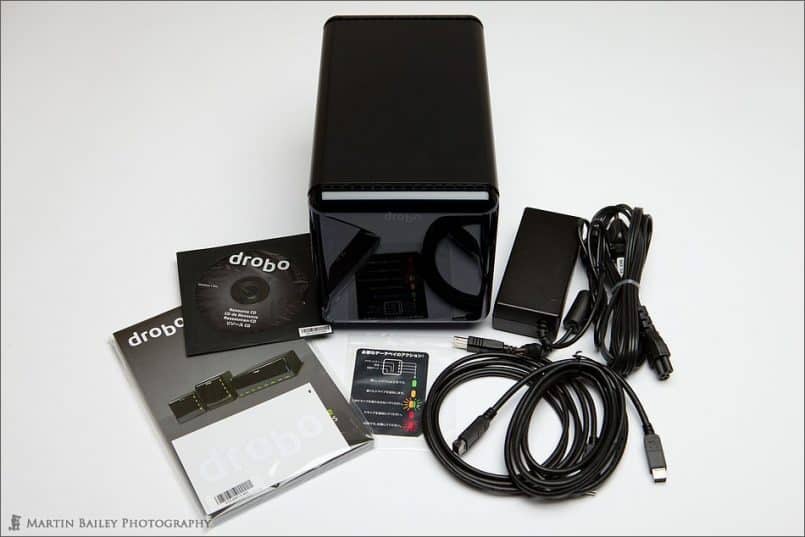
The top box contains all you need to connect the Drobo to your computer, including both USB and Firewire800 cables. There’s also a nice printed manual. I was surprised to see this at first, and most companies now put their manuals on the CD along with the drivers, but on the day I unpacked the Drobo I had already had a busy day, and was ready for a bit of relax time, so I was able to take the manual down to the living room and read through it in front of the TV instead of having to read it on my computer, which was a nice added bonus.
The unit I got was a basic Drobo, with four bays. As 3TB drives are still quite expensive, I decided to use eventually four 2TB Hitachi 7200rpm drives. Drobo suggests either green drives which are slower, or up to 7200rpm drives for this model, but I generally try to buy the fastest drives possible, as this will effect read/write speeds, even if the USB and Firewire interfaces are going to become the bottleneck here. The Drobo does a lot of internal data handling between disks too, which is probably faster with faster drives.
To test how the Drobo automatically expands as you include more drives, I initially loaded just three of the four 2TB drives, and connected the Drobo to my MacMini. As I mentioned in Episode 293 when we discussed Backing Up and Accessing Photos from Laptops, I keep a MacMini turned on and connected to some of my hard drives all the time, so that I can access my images and other data from all around my studio and house, without having to physically be connected to the drives. I don’t use straight Network Storage, as I want to be able to install Backblaze so that whenever I copy anything new to these drives, it automatically gets uploaded into the cloud.
To setup and control your Drobo, you install a cool bit of software called the Drobo Dashboard that comes on the CD. You’re asked if you want to automatically install new software and firmware updates, which Drobo suggest you turn on. I did, as it seems that Drobo release updates to smaller groups of users initially to ensure that there are no problems before carrying out the automatic updates.
(Note: if you can’t read the text on these screenshots, click the thumbnails at the end of the post.)
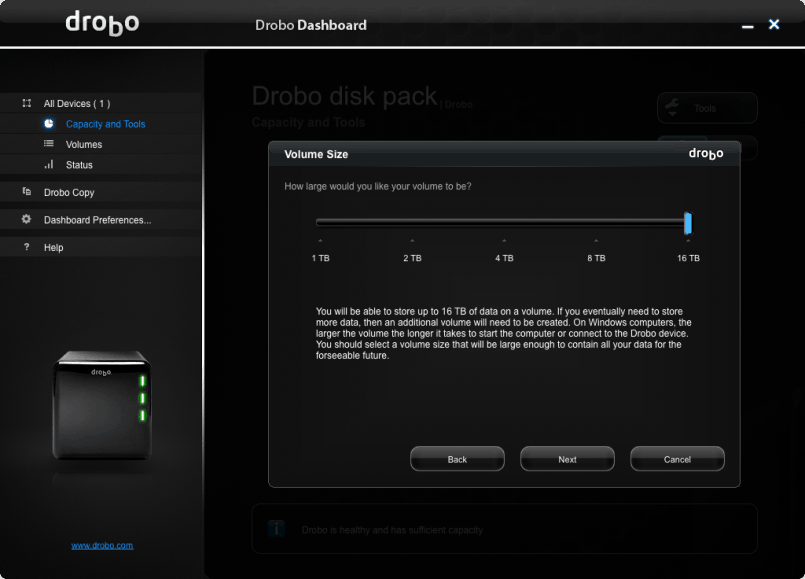
Something that struck me as strange initially, but makes a lot of sense bearing the technology in mind is that Drobo advise you to create your initial volume at the maximum size possible, which is 16TB. This is to allow the drive to expand in the future if you run out of space. If you have all four bays filled and you do run out of space you just pull out one of the drives and put in a new larger one. Of course, you can only do one at a time with this unit because it only protects against one drive failure. By creating a 16TB volume to start with though, this allows you to install up to four 4TB drives in the future, and the drive will be able to grow to that size without having to be reformatted.
Once you put your drives in and select your format and give the volume a name etc. the Drobo takes just a few minutes to format the drives and ready itself to protect your data. Once it was ready, I copied 1.6TB of data to the drive to start some tests.
Relatively Quiet
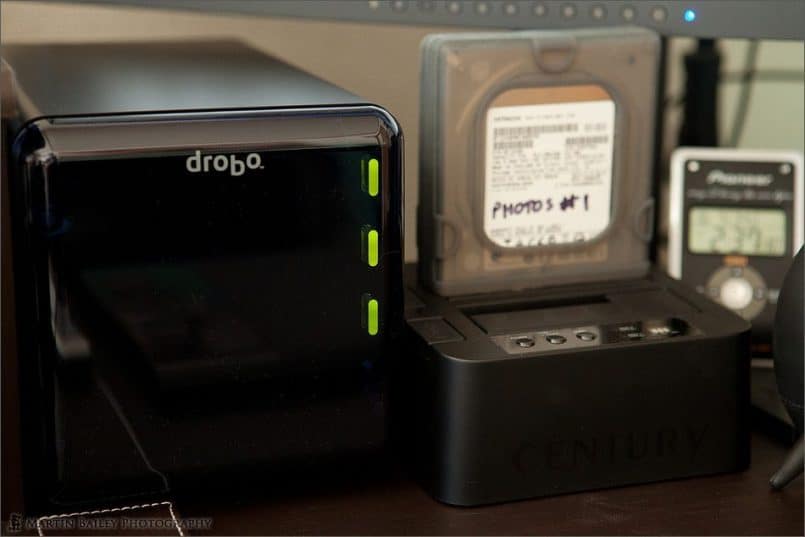
Speed-wise, the drobo is as fast as my other external USB drives, though when connected with Firewire 800, it does get a little faster. The unit isn’t silent, but it’s much quieter than I expected it to be for a unit of this size, even when I installed four hard drives later. Sometimes it did get noticeably louder as it worked hard copying lots of data on a pretty hot afternoon in my studio, but it didn’t get loud enough to annoy me, and it was only when it was working hard. It runs very cool too, never getting warm to the touch, which is pretty impressive, especially when you consider how hot these drives get when they’re spun up. I know this because I use some of my drives just stuck into a device (as you can see in this photo) that allows me to use bare drives, and they get very warm.
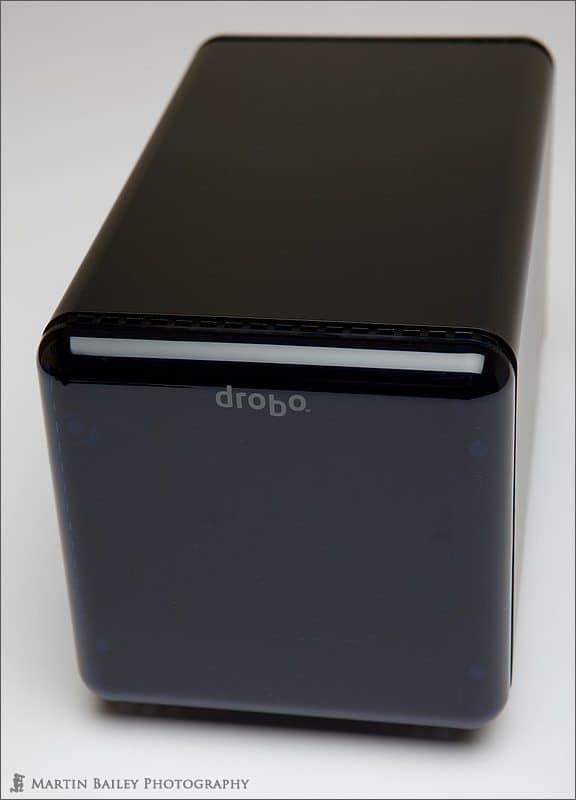
You can also see that the Drobo looks great. All in all I found it to be very well engineered. You don’t need to use a screwdriver at any time either. You drop your drives in and they just click into place, and the front panel is magnetized so that you can just pull it off to get to the drives, and reattach it easily but securely.
Guerrilla Test
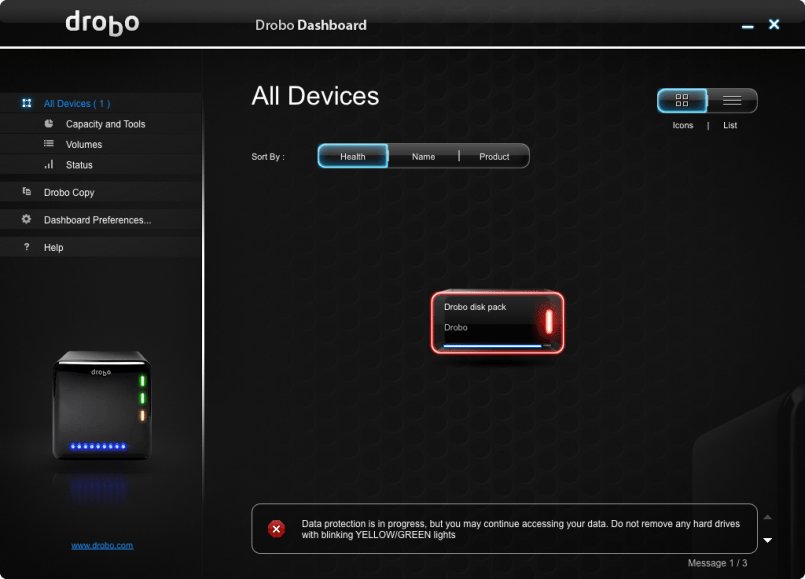
Once the Drobo was set up and had a good amount of data on it, I decided it was time to do a few tests, so at 1:00PM on Oct 9 I pulled out one of the three 2TB drives while the Drobo was running, simulating a drive failure. Once I’d pulled out one of the three drives, I opened the Dashboard, and the drive was now marked with red, and the bottom of the three green lights on the Drobo turned red, indicating the drive failure.
I opened the drop drive in the Finder though, to see that the data on the drive was fine, and I could still access and edit my images from Lightroom, which I tried just a few minutes after pulling out the drive, which I thought was pretty impressive.
This of course though now meant that there was no redundancy, so my data was not protected against one of the remaining two drives failing. To test the rebuilding of the data and getting back to a state where my data would be protected again, I put the fourth 2TB that I’d bought into the third bay on the Drobo.
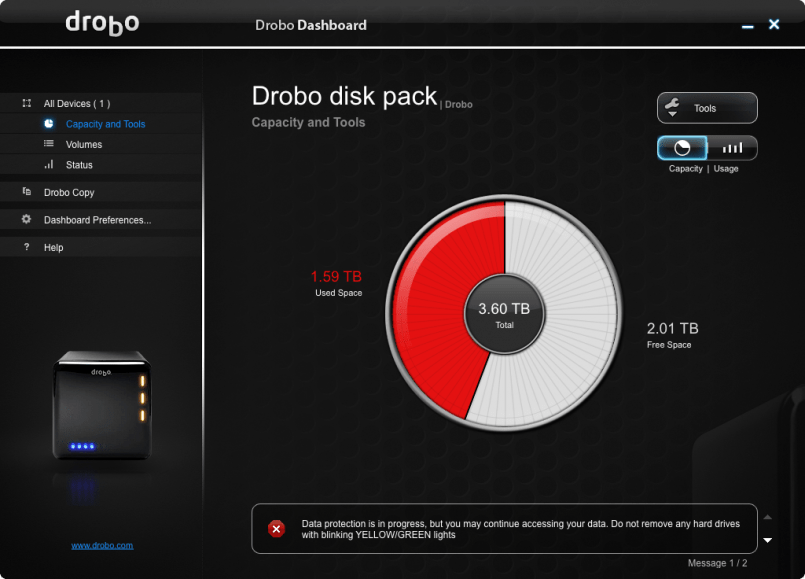
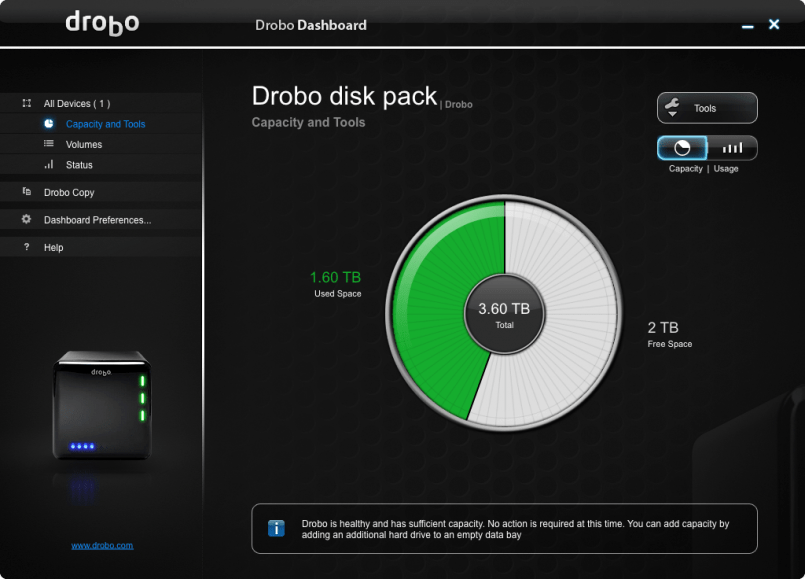
With the new third drive installed, the Drobo took literally just a minute or so to prepare the new drive, and increase the available volume of the drive back to 3.6TB. Note that drive manufacturers count drive capacity differently to how computers calculate it, so a 2TB drive is actually only around 1.8TB to the computer, and because you need to spread the data for redundancy across the other drives in the unit, when you have three 2TB drives installed, this gives you 3.6TB of protected storage.
Although the Drobo increased the volume of my drive almost immediately, it actually took the Drobo about 15 hours to rebuild the redundancy data to once again be able to fully protect my data. I imagine this will also vary with the amount of data you store on your Drobo. I was able to use the Drobo the whole time, and I even copied some new data across while I was waiting for it to rebuild itself.
Once the Drobo was healthy again and able to protect my data, the cool graphic showing the state of my Drobo turned back to green, and a message at the bottom of the screen told me that my Drobo was now healthy again and has sufficient capacity.
Stay Informed
In the Drobo Dashboard Preferences, there’s an option to setup mail alerts, which I did, so as soon as I pulled out the drive, I received an email telling me that the Drobo was in trouble, and then another when I put in a new drive, and the Drobo started to work towards getting back into a data protection state.
I also set up my MacBook Pro to accept Growl updates from my MacMini, so as long as I’m somewhere in my house or studio, if something goes wrong with the Drobo, I’ll see this instantly on my screen, even though I might not have Mail open. I found that both of these ways of being kept up to date with the state of the Drobo give you peace of mind, especially when you’re out and about. Even if I couldn’t get home immediately to correct the problem, I could alert someone at home to take action, such as going out and buying a new drive to replace a failed one, which is pretty comforting to know, especially as my wife is totally non-technical, but although it would freak her out, I know that it would be easy enough for her to be able to do.
Increasing Capacity
Once I’d confirmed that the Drobo was now working normally with the three 2TB drives installed, I did my last test, which was to increase the capacity using the fourth drive I’d bought. Having reformatted the drive, because it was the one that I’d pulled out the previous day to simulate the failure, I inserted the fourth drive while the Drobo was running.
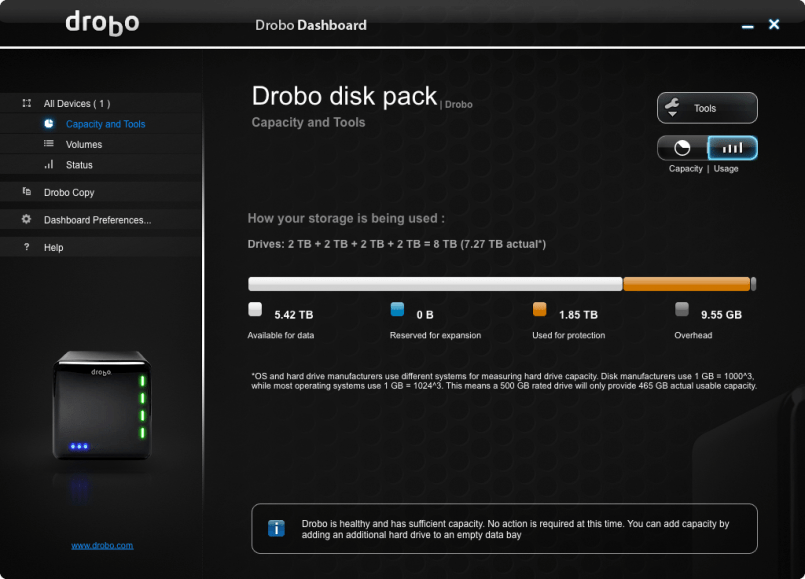
Again, literally within about a minute, the drive was prepared for use, and my available volume jumped from 3.6TB to 5.42TB. When you only have three hard disks in the unit it has to share the redundancy data for each drive across the other two, so for your 5.42TB of disk space, 3.6TB seems quite small as you use one third of the capacity for redundancy. When you have four drives installed though, the redundancy data is spread across three other drives, not just two, so you get to use more of the installed capacity. So for the actual capacity of four 2TB drives, which is 7.27TB, I get to use 75% of that, giving me a nice beefy 5.42TB of protected data.
Still Need a Backup Regime
Even though the Drobo does a great job of protecting your data, as we’ve discussed in the past, your precious images should always exist in three places to be totally safe. You still need to ensure that you have at least one more backup of your images close by, and ideally you’ll have at least one more copy of your data offsite, in case something should happen to your home or office.
I generally have at least two copies of my images in my studio, usually three, and then one that automatically gets uploaded to Backblaze giving me a copy in the cloud. At the end of each year I also send a hard disk with all my images on to my brother in the UK as another off-site storage solution. If you value your images and I know that you do, then do try to ensure that you have a good backup regime in place, and don’t rely just on one device, even the Drobo. You never want to be in a position where a natural disaster or single point of failure could result in you losing all of your work.
Conclusion
I’ve been aware of and secretly lusted after a Drobo for a number of years now. Since shifting to a MacBook Pro as my main computer I’ve been using multiple external drives to store my data on, and although this works, it’s always a bit of a worry to keep them powered up all the time, as most external hard drives are just single drives without any redundancy.
All of my drives run pretty hot too, which will doubtlessly reduce their lifespan, so there’s a contant worry that these drives will fail. The Drobo though removes that worry. With its great engineering and redundancy, as well as a really cool looking full featured Dashboard, it gives you a lot of peace of mind.
With this amount of storage I will be able to copy all of my data, not just my Photo Library which is currently about 2.3TB, and then as the data does grow, I’ll gradually switch out drives to larger ones as they get cheaper. The drives I take out won’t go to waste, as I have to have something to put my off-site backups on to send to my brother in the UK, and I don’t mind those backups being split across multiple drives.
For the studio, I’m seriously considering picking up a second four bay Drobo, and just setting that up to copy anything new from the first drive to the second drive every night, using the scheduled Copy functionality in the Dashboard, then I would be able to do away with all of my external drives, and just run the two Drobos. Just the time I’d save not having to mess around backing up to all of my external drives would probably pay for a second Drobo within a year.
Giveaway!
As I mentioned earlier, the kind folks at Drobo have agreed to giveaway a Drobo to a lucky winner picked at random from the list of people that register using a simple Web form. For your chance to win, just click the link below, and enter your details, and submit your form. That’s all you have to do.
http://info.drobo.com/l/2552/2011-10-10/BI3D8
Here’s the cool thing though. If more than one thousand people register, Drobo will give us two units, not just one, so don’t keep this Giveaway to yourself. Tell all of your friends, and let’s see if we can’t get two Drobos instead of just one.
The offer is open until midnight PST on Nov 1st, 2011. Then on Nov 2nd, Drobo will let me know who the winner or winners are and I’ll drop you a line with the good news.
Whoever wins, I know that you’re going to love your new Drobo, as much as I do mine.
Good luck!
UPDATE: The winner has been drawn! Nat Parnell from the UK will be receiving a nice shiny Drobo! Congratulations Nat! And thanks to everyone else that also registered.
Show Notes
Register for Giveaway: http://info.drobo.com/l/2552/2011-10-10/BI3D8
For more information on Drobo products, visit: http://www.drobo.com/
Music from Music Alley: http://www.musicalley.com/
Audio
Subscribe in iTunes for Enhanced Podcasts delivered automatically to your computer.
Download this Podcast in MP3 format (Audio Only).
Download this Podcast in Enhanced Podcast M4A format. This requires Apple iTunes or Quicktime to view/listen.


Great review of the Drobo… I’ve been secretly lusting after one too.
As always, excellent review Martin. Makes me want to run out and buy one now.
Nice review Martin…listening to the podcast reminded me that I could also connect to my drobo on my wireless network at home.
It was “doh” moment for me when you mentioned it. I recently moved my Aperture gallery from my iMac to my macbook pro and left the drobo attached to my iMac.
Thanks to your reminder, when I got home last night, I set the file sharing preferences on my iMac and now I can relocate and link to my master files on the Drobo from Aperture on my laptop. Perfect, thanks!
Thanks for the comments all!
Bill, I’m pleased that the review helped like that too. It’s maybe not the fastest way to use a Drobo, but it works well, especially when you work from various places around the house. Also, if you really need fast access, you can plug the Drobo directly into your MacBook Pro as well. I like flexibility. 🙂
Martin, like your review! Read more enthusiastic stories and bought a Drobo FS 2 weeks ago. I’m so disappointed because its looks wonderful but a Time machine backup of 60 GB takes 48 hours. The Drobo folks say they are working on this known issue… In the mean time the Drobo is switched off.
Hi Bob,
Sorry to hear that you are having problems.
Personally, I have had a lot of problems with Time Machine since upgrading to Lion. It has slowed down so much that it is no longer a viable backup option, so I’m no longer using Time Machine. This was to a USB drive attached directly to my Mac, not my Drobo, which I am using over the network now.
If the only reason you bought a Drobo was for Time Machine backups, then leaving it off in the meantime might be OK, but otherwise, I would get stuck into using it. Time Machine may be the problem, especially if you upgraded to Lion already.
Cheers,
Martin.