As you just heard, about a month ago, I went to the Showa Memorial Park here in Tokyo to shoot the poppies there. I was going to do just a normal showcase type Podcast on the day, but having thought about it, a lot of what I would have spoken about was related to how I focussed on the subjects in a lot of these shots, and as focusing has come up in the forum a lot recently, I figured I’d adapt this Podcast to concentrate on some of my manual focusing techniques a little. This is not going to be comprehensive, and some of what I will talk about will require specialized or more recent gear to use the techniques but this is what I’m doing right now with regards to focusing in my own photography.
There are a few observations about focusing that I probably should talk about first. For general focusing of larger scenes, or snapshots around town etc I don’t find I have to take any more care with regards to focusing as just using the camera’s autofocus. One thing I do find is that despite having 45 focussing sensors in my 1Ds I often select the center focus point. In fact, I’d say that 95% of my photographs are made with the center focus point. I will sometimes select a different focus point when working with a tripod to focus on a particular part of the image, and also for wildlife, say when tracking birds across the scene, I sometimes select all focus points and allow the camera to select the rights ones, especially when using the AI Servo mode to track moving subjects. This works well most of the time, except when the surroundings are of higher contrast than the main subject, which I find confuses the camera, and focus is moved to the higher contrast background unintentionally. When this happens, I usually find myself back using just the center focus point, even in AI Servo mode.
On the topic of contrast; note that autofocus sensors are really just looking for contrast in the scene. If you use autofocus with multiple sensors and can’t seem to get the camera to lock on to the point you expect it too, one trick is to line up the sensors with lines on the subject. If there are people in the shot, the eyes are always going to be the best place to lock on to. Firstly, you should focus on the eyes in most cases, just for photographic reasons, rather than technical reasons. The eyes should always be sharp, or your subjects will look lifeless. From a technical perspective though, eyes are outlined and have the darker or different coloured iris, so it makes a good contrast to lock in to. Otherwise, just look for lines of contrast in your subject, horizontal or vertical work best, and align one of your active focus points with that. This usually helps your camera to lock in to the part of the scene that you want to focus on.
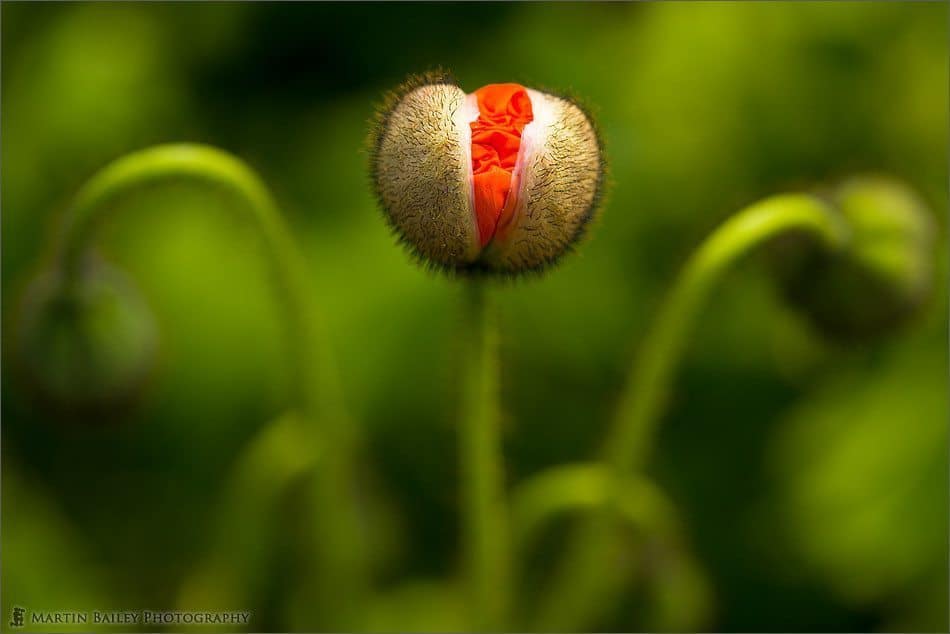
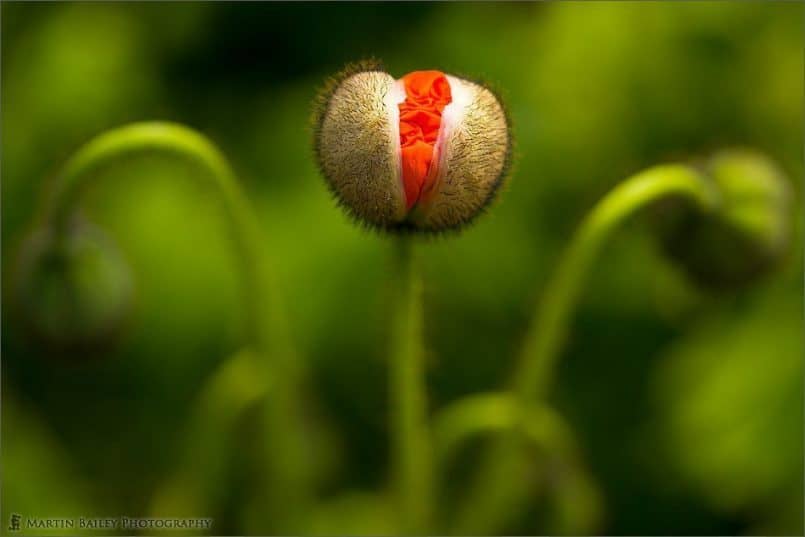
There are some situations though when I simply do not use autofocus, or I use autofocus to get an initial focus quickly, but then tweak it with other methods. Today I’m going to go into a little more detail about these methods. Let’s take a look at the first shot from this series of poppy shots to start the ball rolling. The first image is number 1780. Here we can see a poppy bud that is partially open, with the flower about to bloom. Now I’m going to use a little artistic license here and talk about one technique that I have used for a while, but didn’t actually use here, so bear with me. Quite often, for subject like this, that are pretty low to the ground, I use an Angle Finder C, from Canon. This fits to the viewfinder once you removed the normal plastic and rubber eyecup from the back of the camera, and allows you to look down into the viewfinder from above. You can actually turn it a full 360 degrees, and it locks into place at one quarter and I think also one eighth positions around the entire 360 degrees, as well as being totally free to move to all other angles. This is useful in itself, especially as I say for low work, but the other thing that I sometimes use with this angle finder is the ability to magnify the viewfinder to 2X what you would normally see. For macro work, I always switch to manual focusing. It just isn’t work trying to mess around with autofocus at these distances and with so many parts of a usual macro scene for the sensors to lock into. It can be quite difficult to see if you really do have your focus on the right part of the scene when shooting macro though, and because the depth-of-field is so shallow at these focussing distances, even with a relatively small aperture, getting the focus exactly right can be a challenge. If you switch to the 2X magnification mode though, you will find it much easier to focus, because you can simply see the subject better. I also find the angle finder to be very bright, which really helps too. If you have a camera with a crop factor, or focal length multiplier, then you will almost certainly be working with a darker viewfinder than a 35mm film SLR or a DSLR with a full-sized sensor, so the bright viewfinder the angle finder affords you can be even more useful here. This image was shot at F4 by the way, for 1/500th of a second at ISO 100.
Even when I’m not shooting macro, as I often shoot with wide aperture lenses, and often with the aperture close to or actually wide open, focus accuracy is a very important to me. Especially when I’m shooting at a slower pace, where I can take my time on focusing, I take as much care as possible to get it right. Since upgrading to the 1Ds, there is one tool that I have quickly started to depend on, and that is LiveView. This is available on many of the latest camera releases at all levels and across the spectrum, not just Canon, so I won’t be reducing the audience to 1Ds owners here, but if you don’t have one of the more recent generation cameras just bear with us for a while here. When I first heard about this feature, to be honest, I was not all that interested. I didn’t think it would be useful. I could not imagine myself holding the camera out like a compact digital, and composing the scene on the LCD, and you know what? I still don’t. With the better optics and clear finder on an SLR, I don’t think LiveView will ever replace that. There are reasons to use LiveView for composition and shooting, say when you physically can’t get your eye to the viewfinder, but that’s a different topic.
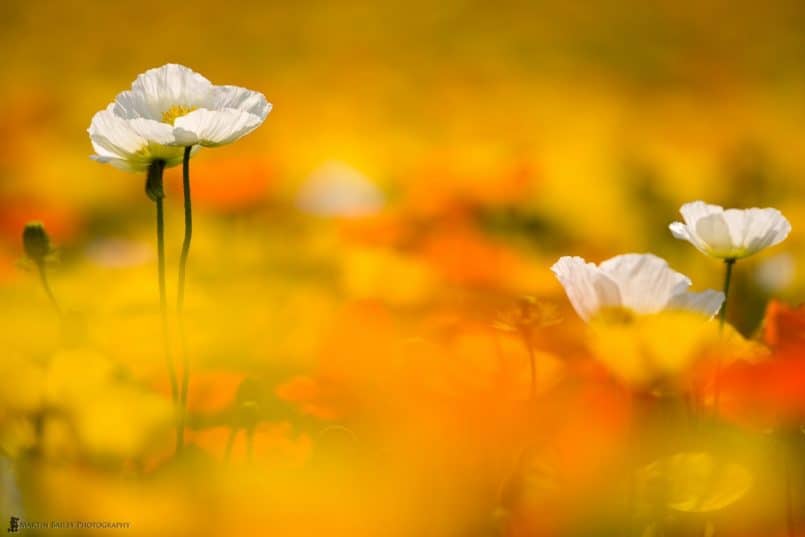
Anyway, although I was not enthused about LiveView to start with, once I found out that you can zoom the image on the LCD to 5 and 10X, I realised there was a tool here that I had not be conscious of until that point. Obviously, if you can zoom in on the subject on your LCD, with the clarity of the LCDs these days, you can tweak the focus to make sure it is exactly where you want it to be. Let’s take a look at image number 1782, and I’ll explain the process a little more. We can see here that I’ve found a patch of poppies with some nice white poppies mingled in, and framed it up so that there are lots of poppies in the foreground, creating some nice foreground bokeh, and there are orange and yellow poppies, with a few more white one in the background, creating a dream backdrop for the image. As the poppies trail off into the distance, the scene gets slightly darker towards the top, adding overall balance to the image. One of the main reasons I bought the 300mm F2.8 lens last year was to enable me to capture this sort of image. I have been looking forward to this field of poppies blooming for the last six months.
To get back to the focusing though, when I first set my camera up I used the center focus point to focus on the stamen of the white flower in front of the pair to the left, then I recomposed the shot as we see here. If you recall from previous episodes, I have set my camera up so that I do not focus with the shutter button. When I press the shutter button, the camera only takes a light reading. I have to press the focus button on the back of the camera with my thumb to actually focus. What this means is that I can leave my lens in autofocus mode, but the focus will remain unchanged until I hit the focus button on the back of the camera again, which saves a little fiddling around flicking the button on the lens barrel to turn off auto-focus, which I really don’t want know because the subject on which I focussed is no longer where the focus sensor is. If you were doing something similar to this, and you are happy with the focus you gained from autofocus, or maybe even tweaked the focus while looking through the viewfinder, then you could just go ahead and take the shot now.
I however, will now use my LiveView tool to check the focus and tweak it as necessary. I have set up my camera to go into LiveView when I hit the Set button in the middle of the Quick Control Dial on the back of the camera. The mirror flops up, and the scene is displayed on the LCD. I have also set up my camera so that it gives me an approximation of the actual exposure that the shutter speed and aperture will give me at my selected ISO, and if you hit the info button on the back of the camera you also get a live histogram, so you can also check that your exposure is where you want it to be at this point. The main reason I’m in LiveView right now though is to focus, so I use the Multi-Controller noggin thingy to move a small white frame around the LCD. When I hit the Magnify button at the top right of the back of the camera, I zoom into to see the part of the image that I selected with the white frame at 5X magnification. You can press again to go to 10X, and then again to go back to viewing the entire image with no magnification, but I find that 5X is plenty to fine tune the focus. If you have a bit of camera shake you might have to half press the shutter button here to turn on your Image Stabilization so that you can see your subject better, but this isn’t always necessary. Once you are in LiveView on the 1Ds you are actually forced to use Manual Focusing, but that’s alright, because you really want to be doing this in Manual anyway. So, you just turn the focus ring on your lens, while viewing the subject in the LCD and you can control exactly where the focus falls on your subject. On this occasion, as I said, I focused on the yellow stamen of the white poppy on the left. I found that the autofocus had actually focussed on the front petals, which is understandable because there is a nice contrasty line there, so I had to move the focus back into the scene very slightly. Another benefit of using LiveView is that the mirror is already up, so then I just have to hit the shutter release button on my cable release, and the image is captured. This image was shot at 1/1600th of a second at F3.2 by the way, with the ISO set to 100. There was plenty of light to work with, as you can see in the resulting image.
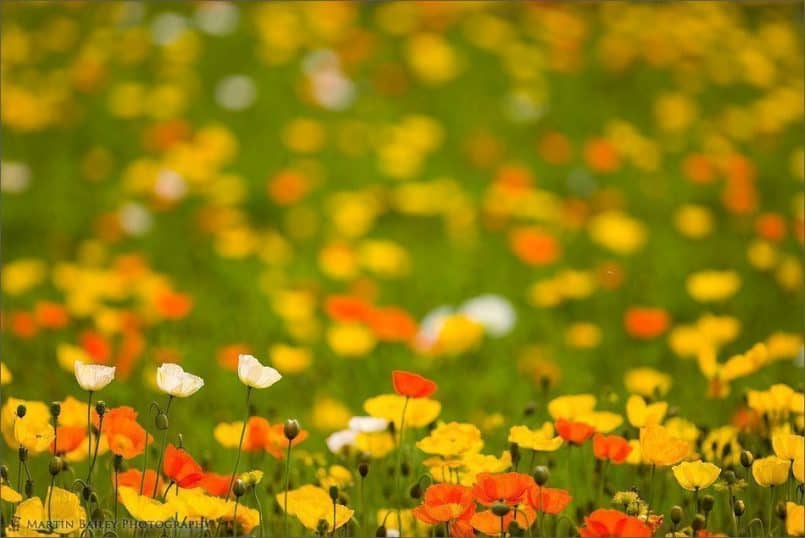
One other thing that can be a challenge when shooting with a very shallow depth of field is paralleling your main subjects, if you intend to focus on multiple objects. The LiveView feature can help here too. Let’s look at image number 1783 and you’ll see what I mean. Here we can see that I have captured three white poppies in a line, to the left of the frame. This is no coincidence of course, as I was looking for this type of detail. To make this work though, they all need to be acceptably sharp. As best as I could, I positioned my camera in a way that appeared to make my film plane, or digital sensor, parallel to the three flower heads. To check that this was really the case though is difficult when the flowers are as small in the frame as this. Again, I used LiveView and zoomed in on one of them, but once you are zoomed, you can use the Multi-Controller to move around the image, to check other areas without coming out of the zoom mode. It’s a little bit juddery, because the camera is processing a lot of data to give you this image, but it works fine. I was able to see that I was not quite square, and adjust my camera position to get more parallel to these subjects because tripping the shutter. Until now, to do this I would have shot multiple images, and zoomed in on the image after capturing it, but this is time consuming and you end up taking home more images than necessary, that will probably just eat up disk space if you aren’t a little ruthless with your deletion policy. This too was shot at F3.2 with a shutter speed of 1/1250th of a second this time, again of course still at ISO 100. Note that this lens can be used totally wide open and still give sharp images, but I just wanted literally just a fraction more depth-of-field than wide open would give me, just to pull things together a tiny bit more.
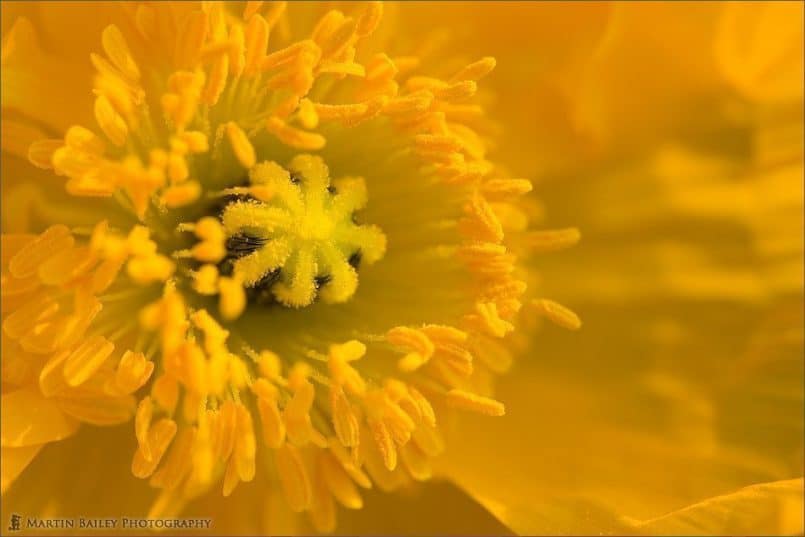
One last image I want to look at is number 1786. Here we can see that I have focussed in very closely on a the center of a yellow poppy. With regards to the composition, I’ve shot this type of image many times, and have often tried to include all the stamen, though not go past the edges of the petals when possible. Having zoomed in on some of my previous shots though, I noticed that I didn’t really need to include all the stamen and it in fact may have given me a more dramatic shot if I didn’t, so I decided to go a little closer here, cutting them off to the left and top of the frame slightly. The light levels had dropped slightly as the sky became a little hazy, but this was acting like a big diffuser, so I was happy enough about that. The thing is though, this flower was blowing around in the wind a little, so I used my Wimberley Plamp, which is a plant clamp, to hold the flower in place just a little. The Plamp clamps onto your tripod leg, and then you have like a large clothes peg that holds the flower steady from its stem. There is a hole in the plamp large enough that it doesn’t apply any pressure, crushing the stem in any way, so no harm is done to the flower.
This doesn’t stop the flower moving altogether though, so I upped the ISO to 200. Still, at F4 this meant that I had to slow my shutter speed down to 1/320th of a second, which is touch and go with a flower that is blowing around in the relatively strong breeze. A number of the shots were blurred, but as I was waiting for the moment the flower stopped moving before rocking back the other way, I got a few nice sharp images as well. So again, back to focusing, I used LiveView again here. This time not to help me focus on a distant subject, but really just to fine tune the focus on in this macro world. Whenever I photograph something, I look for something that is different from the rest of the scene or subject. Here, the black hairs in the center of the flower stood out, in a sea of yellow. With LiveView I could see how much of the surrounding stamen would be within the depth-of-field as I manually changed the focus around those hairs, and it was looking good, so again, I tripped the shutter at this point. The main benefit here is that again I was working low to the ground, and might have usually used the angle finder to zoom in and check the details of this image, but I was actually looking down on the flower from almost above it, and so the angle finder didn’t really make sense. I’d have had to set it up and look into the angle finder from the side, which is a little awkward when you are low down, so again, the LiveView just worked well for me here. Note that there is also a little level on the side of the viewfinder on the 1Ds to put a little shutter across the viewfinder to stop stray light getting in while you don’t have your eye against the view finder. If light gets in through the viewfinder it can affect metering, and also cause ghost images on your photograph as it reflects down into the optics and on to the sensor.
As I say, this is not a comprehensive episode on focusing by any means. Really what I’m doing right now in some areas of my photography, mainly with regards to manual focusing and the fine tuning of. I’ve mentioned some other techniques in the past, like the use of focusing rails for macro work, especially once you magnify at more than 1:1 or life-size. That whole series was episodes 42, 43 and 44, and I think I talked about focusing rails in Episode 43. I’ve talked about using the back focus button a little as well, and also touched on using AI Servo a few of times too. I will though no doubt follow up on this subject again, as I notice other things that I find myself doing, that might be of interest to you.
One last thought about focusing, or the problems some people have before we finish. In the digital age, it is now so much easier for us to just zoom right in to 100% and check pixel for pixel if our images are sharp. Some people say this is going too far, and depending on what you want to use your photographs for, this might be true, but if you ever intend to sell your images commercially, anything that is not tack sharp will rarely make the cut, especially when you are up against other photographers, because they will almost certainly have submitted tack sharp images for consideration. There are always going to be times when you make an artistic decision to include deliverable blur to depict movement or something, but this should be obviously deliberate and add to the image. If a shot that should be sharp is not, you’ll be at a disadvantage, so I myself suggest that you do pixel peep, and check your images for sharpness. When you do so, and find that the image is not sharp, it is not always obvious what caused the lack of sharpness. Focusing errors are much more common than people think.
One way to find out if you have messed up the focusing is to check to see if anything in the image is sharp. Zoom in on your main subject and then start to scroll around the image to see if anything in closer to or further way from the camera is in focus. If you can find something that is, it means your focusing technique was flawed, and you’ll need to improve. If nothing is in focus, assuming that there are things in the frame that should have been, then this could something else, probably camera shake. Subject blur is also a possibility. Was your main subject moving when you took the shot, or were you moving. Image Stabilization technologies will help here, but only to an extent. The longer the lens, the more likely you are to get camera shake, and need to compensate for that with shorter shutter speeds. I’ve been into this a number of times in the past too, so I won’t go into it today. There is of course always the possibility that your lens has problems, and not focusing properly, and cheaper lenses actually can sometimes not produce images as sharp as some of the more expensive professional lenses. If you doubt that your lens may have issues, I suggest you listen to Episode 101 of this Podcast in which I discuss how to test a lens for focusing problems. As long as your lens is OK, then it all comes down to technique. Also note that some camera manufacturers make interchangeable focusing screens for some cameras in their range, and this usually includes one or two that are designed to help you with precise manual focusing, though this is sometimes at the expense of a slight drop off in brightness of the viewfinder. If you do a lot of manual focusing though, this might be worth considering, so check your camera’s manual or your camera makers Web site.
So, as you’ll notice we are a little late this week. The main reason for that is because I finally bit the bullet and bought a new A3+ or 13×19” paper size printer last weekend. I haven’t been able to make much progress with my apartment move plans, which I need to do before I go for the 24” wide printer that I have my eye on, and also, I was nervous about making a jump from Epson, who’s printers I’ve used for many years, to Canon, who’s camera’s I’ve used for many years, but never used their printers. The 24” wide model I’m looking at is from Canon, and I wanted to get a handle on how good their printers really are now, and I figured that it would help me to get a wider colour gamut than my 7 year old Epson printer can give me. After a few teething problems, I’m now making prints of the quality that I expected, with a few other gripes mind. This basically took a fair amount of time though, at the expense of the preparation for this Podcast, so we’re a day or so late. I will be bringing you a review of the Canon Pixma Pro 9500 pigment ink printer in the coming weeks though, so hopefully that will make up for it.
Remember that voting is currently in progress for the Abstract Assignment, and the voting system in the Assignment album at mbpgalleries.com will be on until the end of June 1st or maybe the 2nd as I’m going to be caught up in something around that time. You need to be a member to vote, but please do come along and do so, as the images that have been submitted for this assignment are amazing, as usual. For now though, you just have a great week, what’s left of it and I’ll be back next week with the assignment winners and to set the stage for the next assignment. Bye for now.
Show Notes
The music in this episode is from the PodShow Podsafe Music Network at http://music.podshow.com/
Subscribe in iTunes for Enhanced Podcasts delivered automatically to your computer.
Download this Podcast in MP3 format (Audio Only).
Download this Podcast in Enhanced Podcast M4A format. This requires Apple iTunes or Quicktime to view/listen.


0 Comments