Visit Library for MBP Pro eBooks |
As we say goodbye, or perhaps more aptly, good riddance to 2020, I just took delivery of the L-Plate that I’d had on order with Really Right Stuff, and I also included a few other handy accessories in my order, which I’m going to share with you today, as I build out my system for carrying my cameras as well as supporting them on a tripod. The Really Right Stuff team continues to make excellent products and they definitely aren’t simply sitting on their laurels when it comes to innovation, as you’ll see.
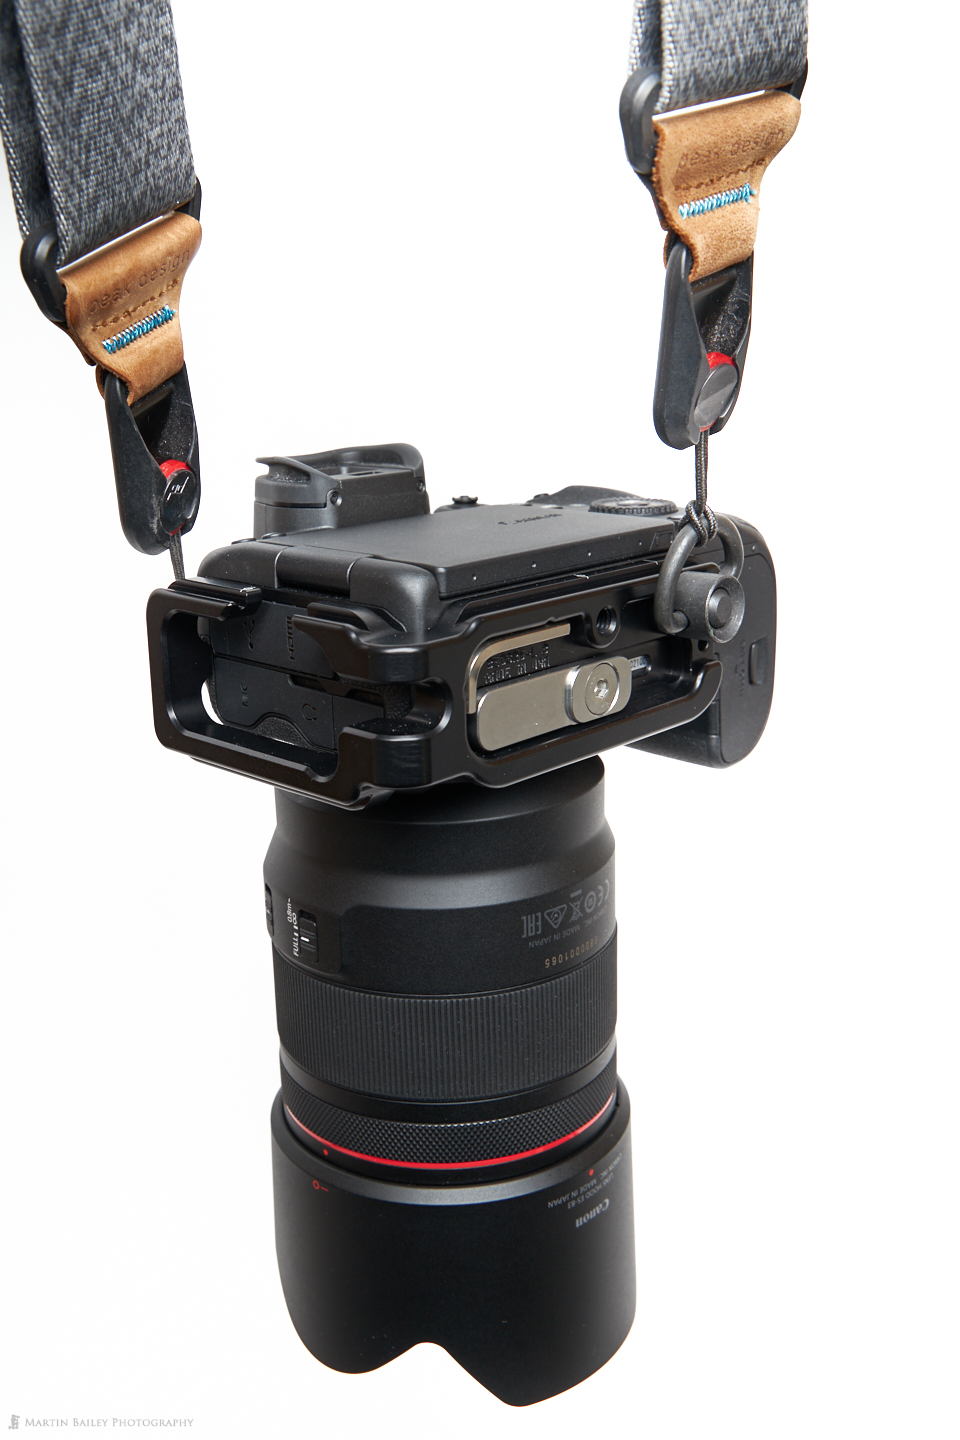
One of the biggest innovations with their current line-up of brackets is the addition of a whole called a QD Socket that houses their Quick Detach Strap Swivel Loops, and they facilitate the quick attachment of a camera strap, which, coupled with the Peak Design straps that I use, enables me to create a sling configuration for both long and short lens scenarios. I love being able to do this so much, that we might as well start with a photo of my EOS R5 with the new L-Plate attached, and a QD Strap Swivel D Loop attached so that you can see how this positions the camera when slung over the shoulder. Having the camera slung in this position puts the camera’s grip straight into the palm of my hand when I’m ready to raise it to my eye.
Click of tap on the image to open it up in the Lightbox to view it larger, but note here that the lens is hanging down, not straight out as it does when you hang the camera around your neck supported by a strap attached to the built-in strap lugs. This is important because it not only means the camera falls more comfortably into your hand, but it also makes it less likely to bang the camera and potentially the front of the lens as you walk around.
I should mention that as I’m paranoid about things potentially going wrong, I do occasionally check to ensure that the lens is not working loose, but I’ve never noticed a lens doing that. I did have the body fall off the lens when using a Black Rapid strap attached only to the lens, a couple of times actually, but that was probably more a design flaw of the older Canon bodies rather than the strap system. Still, it wasn’t great, and that’s why I started to do things like thread a long camera strap base through the Black Rapid Straps, but now that I’m using the Peak Design Straps and their smaller loops, I’m preventing the possibility of this happening by slinging longer lenses how you can see in this next image.
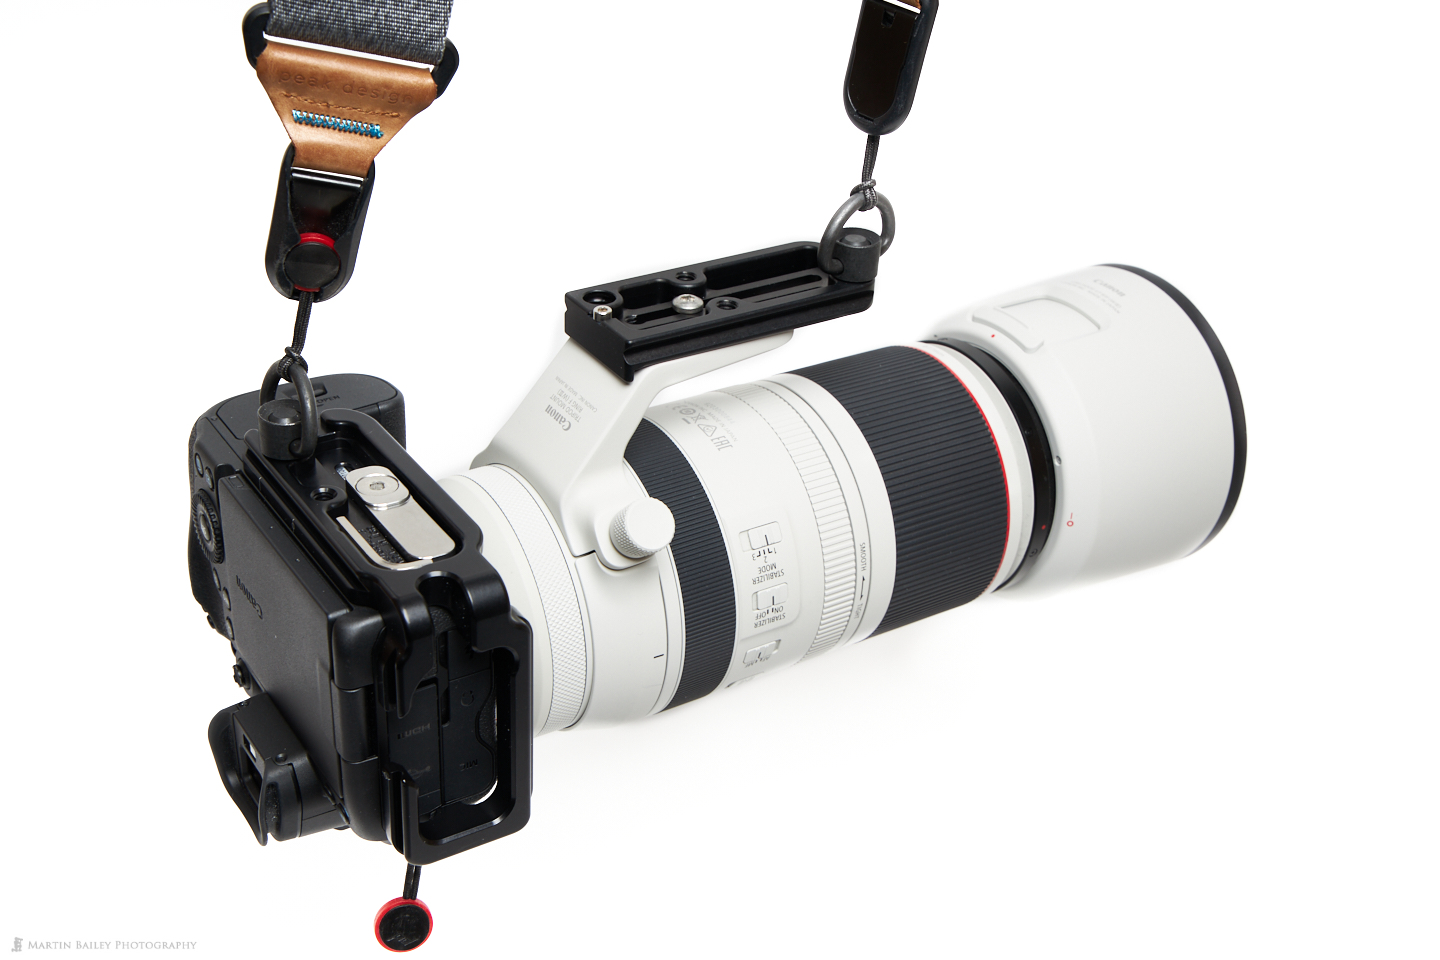
As you can see, I bought two QD Strap loops so that I could create this sling configuration as well, attaching one to the L-Plate, and the second to an L85 Lens Plate, which I also just bought for the Canon RF 100-500mm lens, and that also has the new QD Socket both on the front and back of the plate. I could, of course, put both QD Strap loops into the plate on the lens, but that then leaves my camera free to fall to the ground if it did come loose as my old 1D4 did.
I actually think the RF Mount is probably less susceptible to that kind of rotation, and I recall hearing that Canon had made improvements in this area, but I like to cover my bases, and so I attach one loop to each piece of equipment. That also means that both are being pulled up from their bases, and that removes any force that could potentially cause the camera to rotate anyway. And again, this also puts the camera’s grip in the palm of my hand as I sling this over my body. I generally have the strap over my left shoulder with the camera hanging down on my right side, and it works really well in this configuration.
The D Loop itself is an ingenious little invention and they are incredibly strong. The RRS Website quotes both 450 lbs and 300 lbs of pull pressure for these devices, and although I imagine one number is for the D loop itself and the second for the main attachment, it doesn’t really clarify which it is, but either way, 300 lbs is the lower of the two, and that is more than enough for me to not worry about this coming loose unintentionally. Also, both to insert and release the QD Strap loops, you have to press the central column and there is no way you could do that accidentally while supporting the camera.
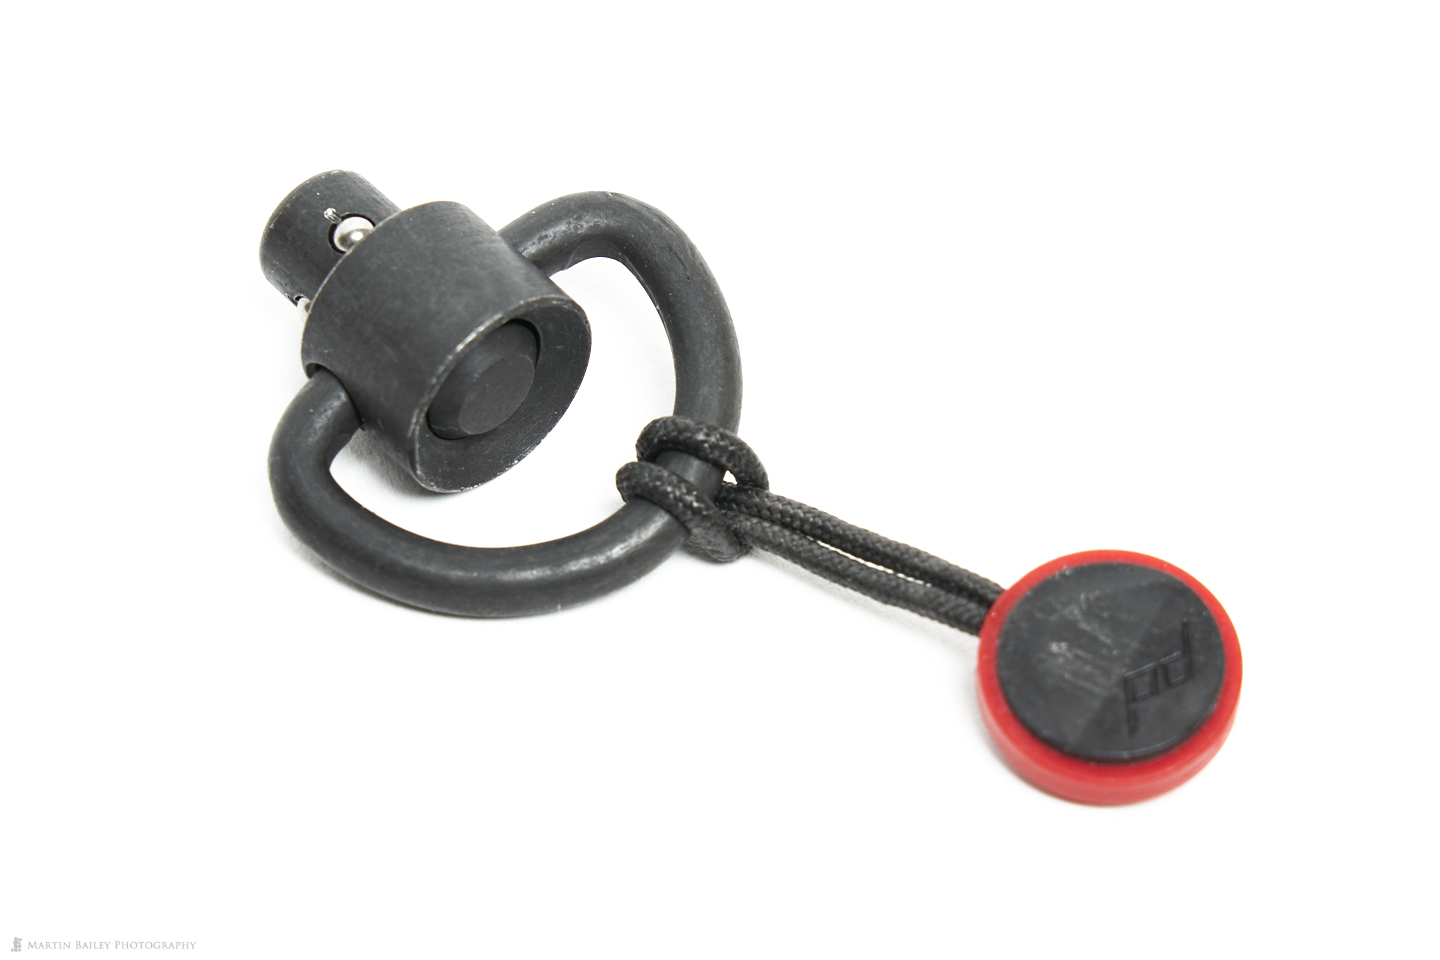
The D Loop is just $12 on B&H Photo, but I should note that if you wanted to feed a flat strap directly through the loop, as opposed to the Peak Design Loop that I’m using, there is a low profile loop also available although that’s $29, but it is more suitable if you’re using a flat strap. As we’ve come this far, we might as well take a closer look at the L85 Lens Plate before going into detail on the L-Plate, so here is a photo of the underside of the L85 Lens Plate.
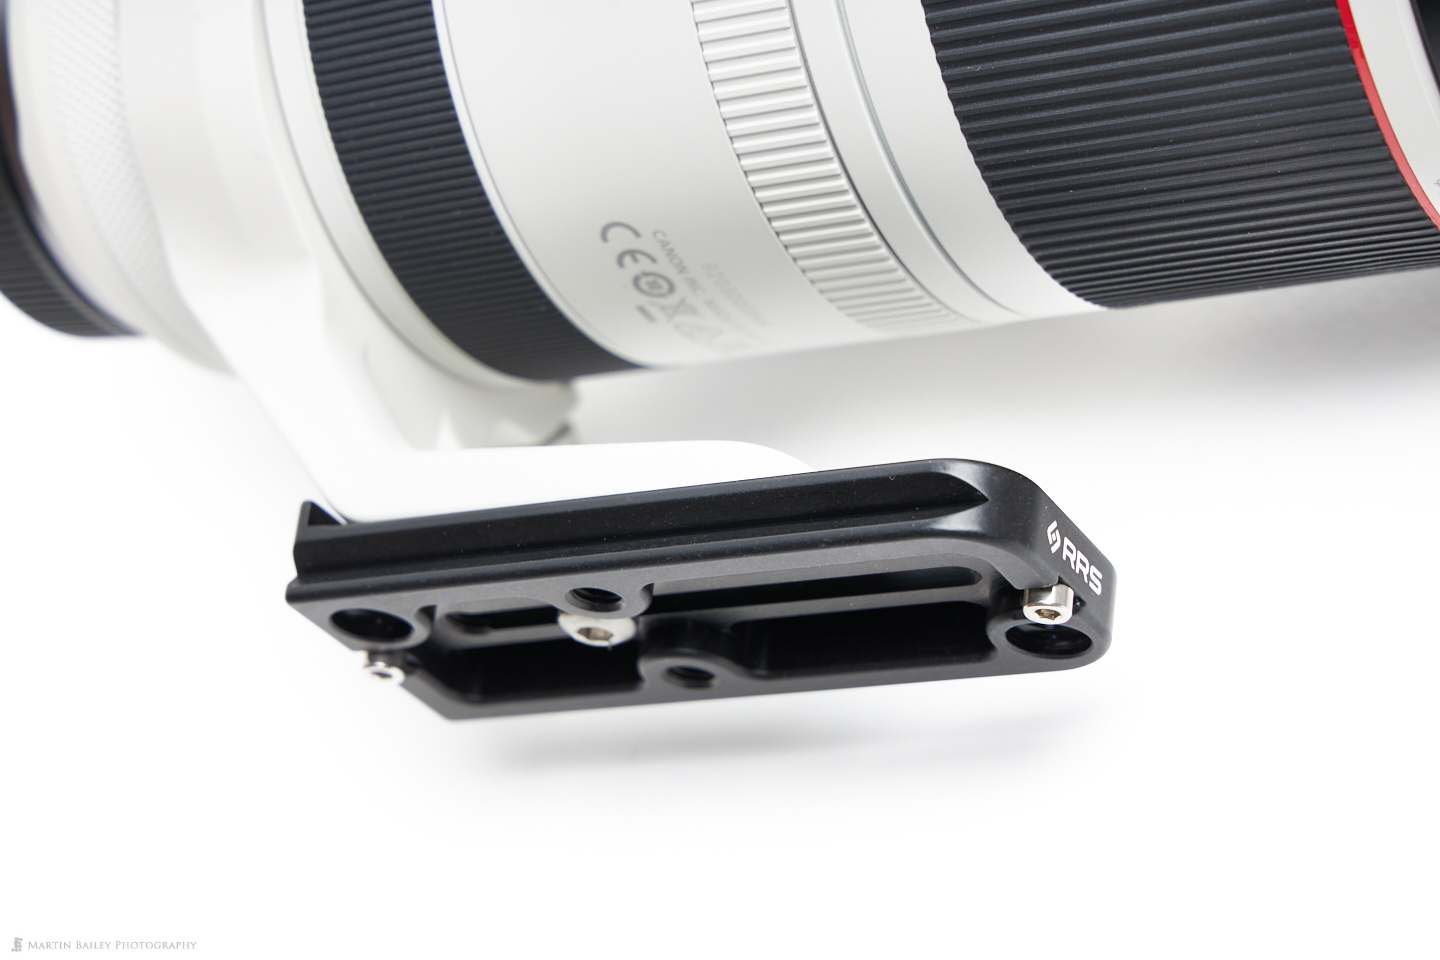
Note the two little grub-screws at the front and back edge of the plate. These are to stop the plate from slipping out of the quick release clamp on the tripod should the lever come loose. They won’t, of course, prevent it from falling out if the lever is completely opened, but a loose lever is covered here. You also get a closer look at those QD Sockets that we mentioned earlier. I am actually more a fan of the complete replacement lens feet that Really Right Stuff usually make, but they don’t have anything for the Canon RF 100-500mm lens yet, and they couldn’t say if there were plans to produce one, so I went for the multi-purpose L85 for now.
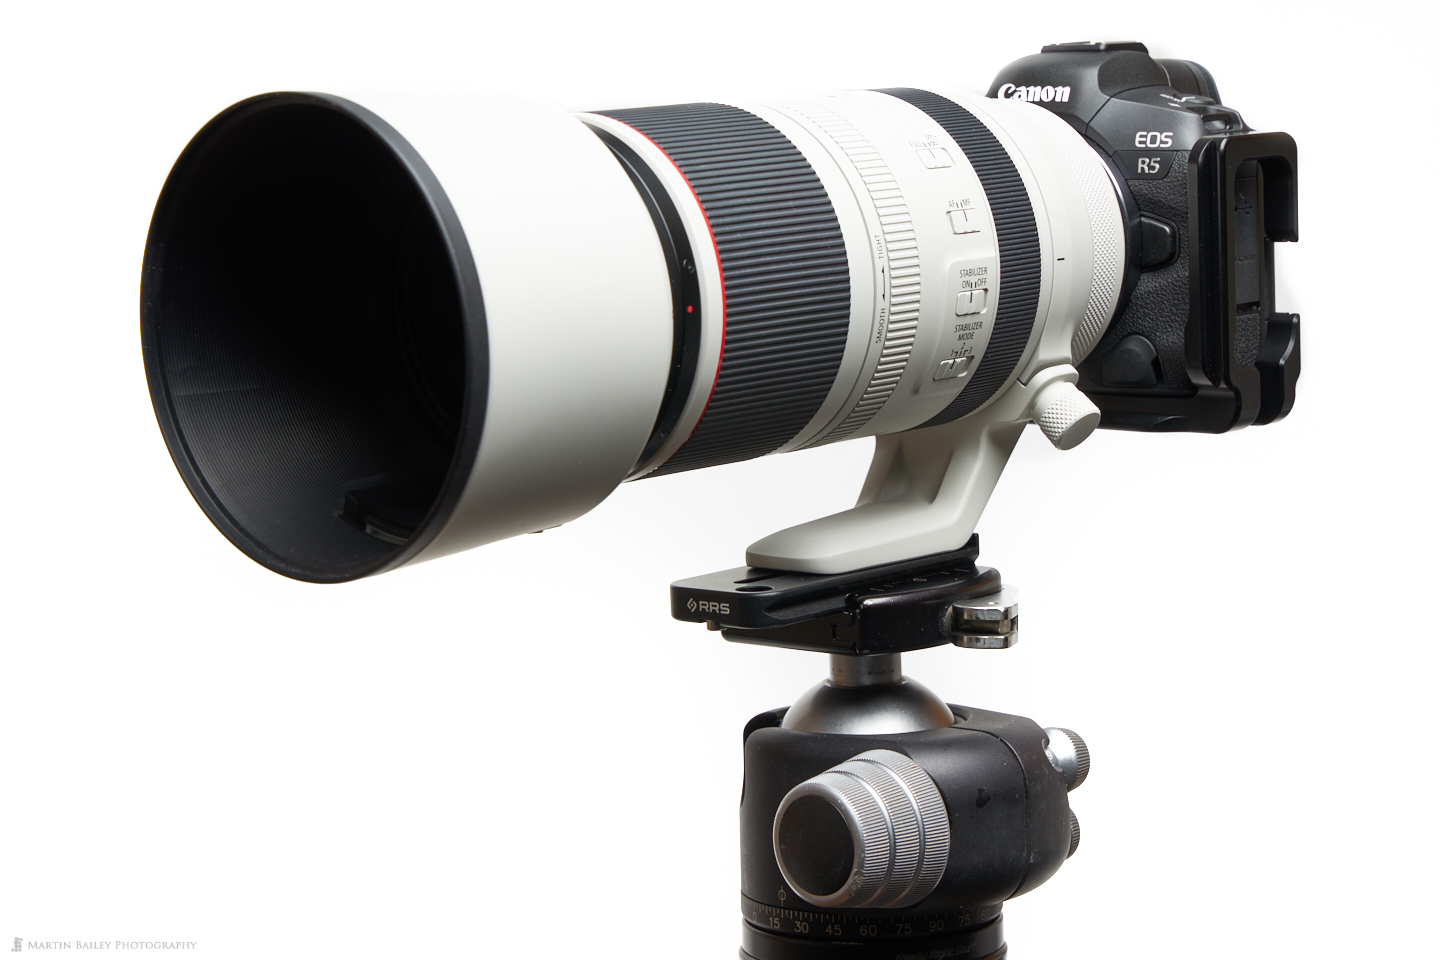
And finally, before we move on, here’s a shot of the 100-500mm lens with the EOS R5 sitting proudly on top of my old and very trusted Really Right Stuff BH-55. It’s a bit beaten up, and I have to admit to cloning out a few scratches in these photos, but after more than 12 years of use I have no reason to replace this workhorse ball-head.
Canon EOS R5 & R6 L-Plate
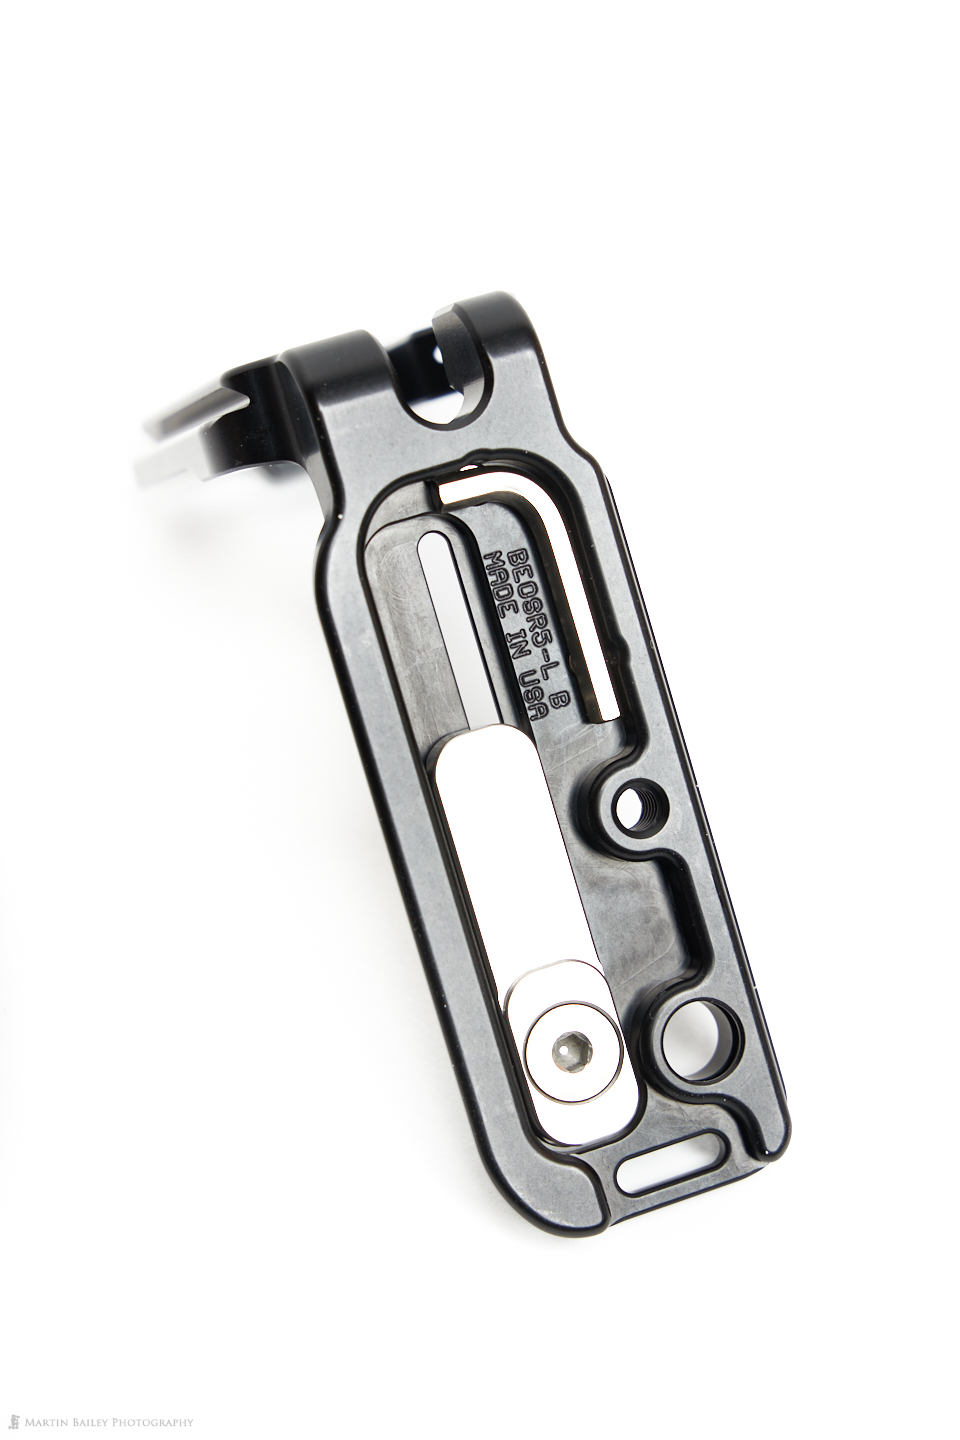
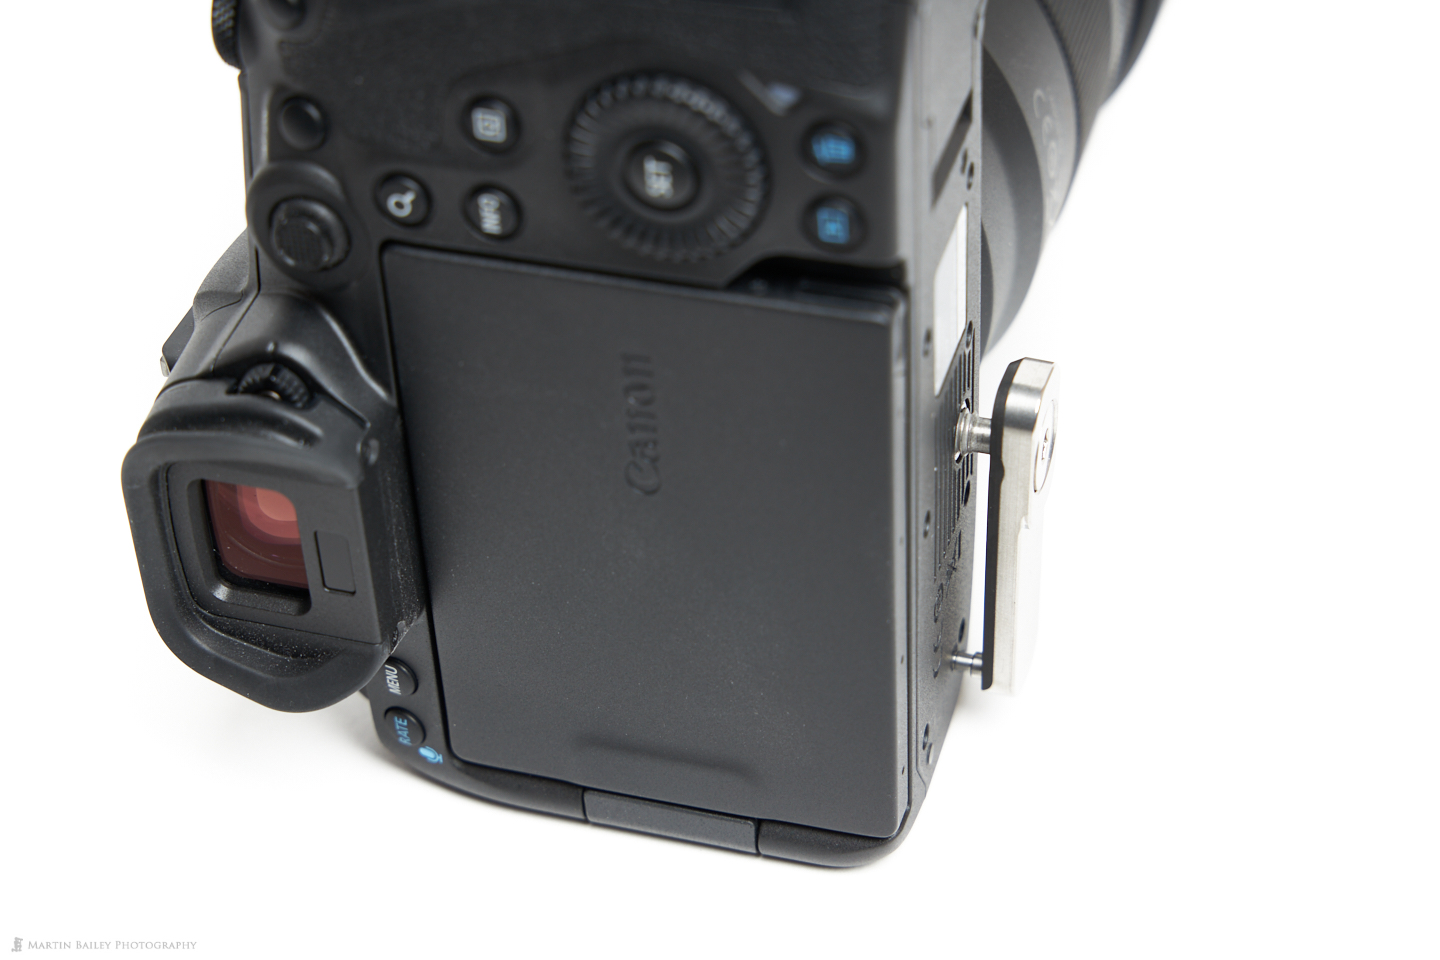
OK, so let’s take a closer look now at the new L-Plate which is designed for use with both the Canon EOS R5 and the R6, and this again has a number of innovative improvements. The first as I’ve mentioned is the QD Socket to enable the attachment of the QD loop, and the other thing is the addition of the sliding plate that you can see in this image of the underside of the L-Plate. In the image to the right below, I aligned just this silver plate with the screw thread and registration hole in the bottom of the EOS R5, so that you can see what’s happening.
The slider is basically prevented from rotating because it’s fixed in two separate locations, so the L-Plate feels really secure when fixed to the camera, even though there is only one locking nut. There is also the inclusion of a short hex key held into place under the L-Plate with two strong magnets, so it’s always there when you need to loosen or remove the Plate. I actually have a hex key on my keyring which is always in my pocket, but this is a nice addition. In fact, I may even now remove the one from my keyring.
As you can see in the next image, the slider mechanism enables us to loosen the L-Plate and slide it out to the left of the camera, allowing for easier access to the cable ports, which is especially useful if you shoot tethered video or stills, and need to put the cable holders into position. You can access the cable ports without doing this, but these larger attachments take a little more room, so it’s nice to have this option.

There is also a gap in the vertical plate for the L-Plate which enables us to rotate the articulated LCD for up to 35 degrees when extended out to the side. You cannot simply rotate it freely though, so I’ve decided to stick with a regular base plate for my second camera, although I do like having an L-Plate of my camera as it also protects it from getting knocked around, especially when shooting on a rocking boat, for example. My L-Plates usually end up with white paint on them from the sides of boats, and I’m always grateful that it’s the plate and not my camera that is taking the knocks.
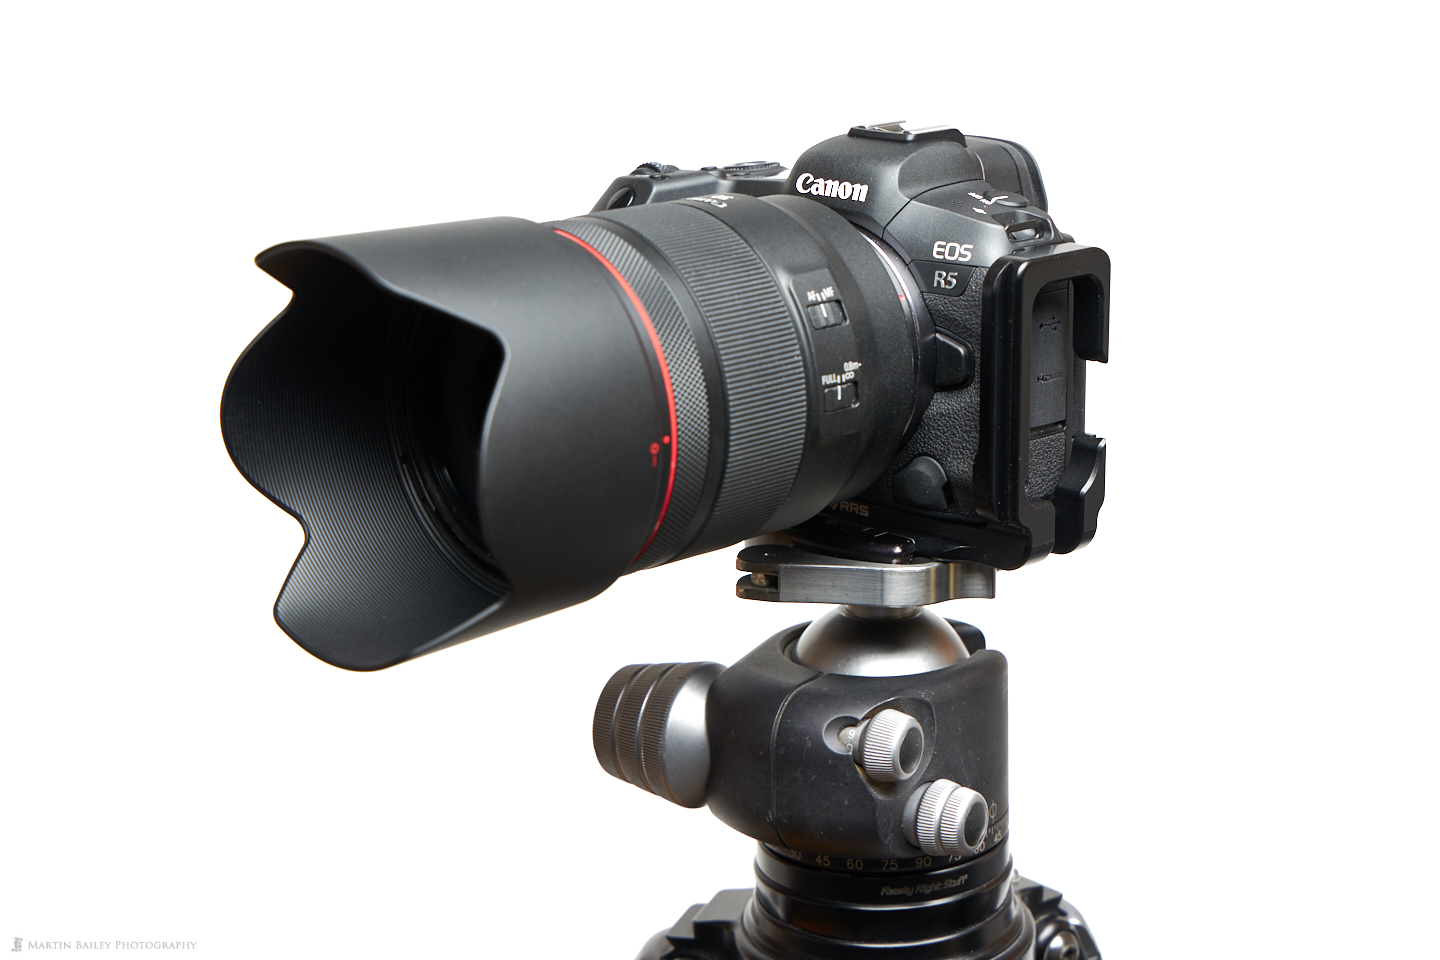
Of course, the major benefit to using an L-Plate is because it provides the ability to flip the camera up into portrait orientation on the tripod and keep the center of gravity in the center of the system, unlike when you flop the camera over on its side in the ball-head, which I really dislike having to do. With the L-Plate you hardly lose any height of the viewfinder and it is simply so much better balanced in portrait orientation.
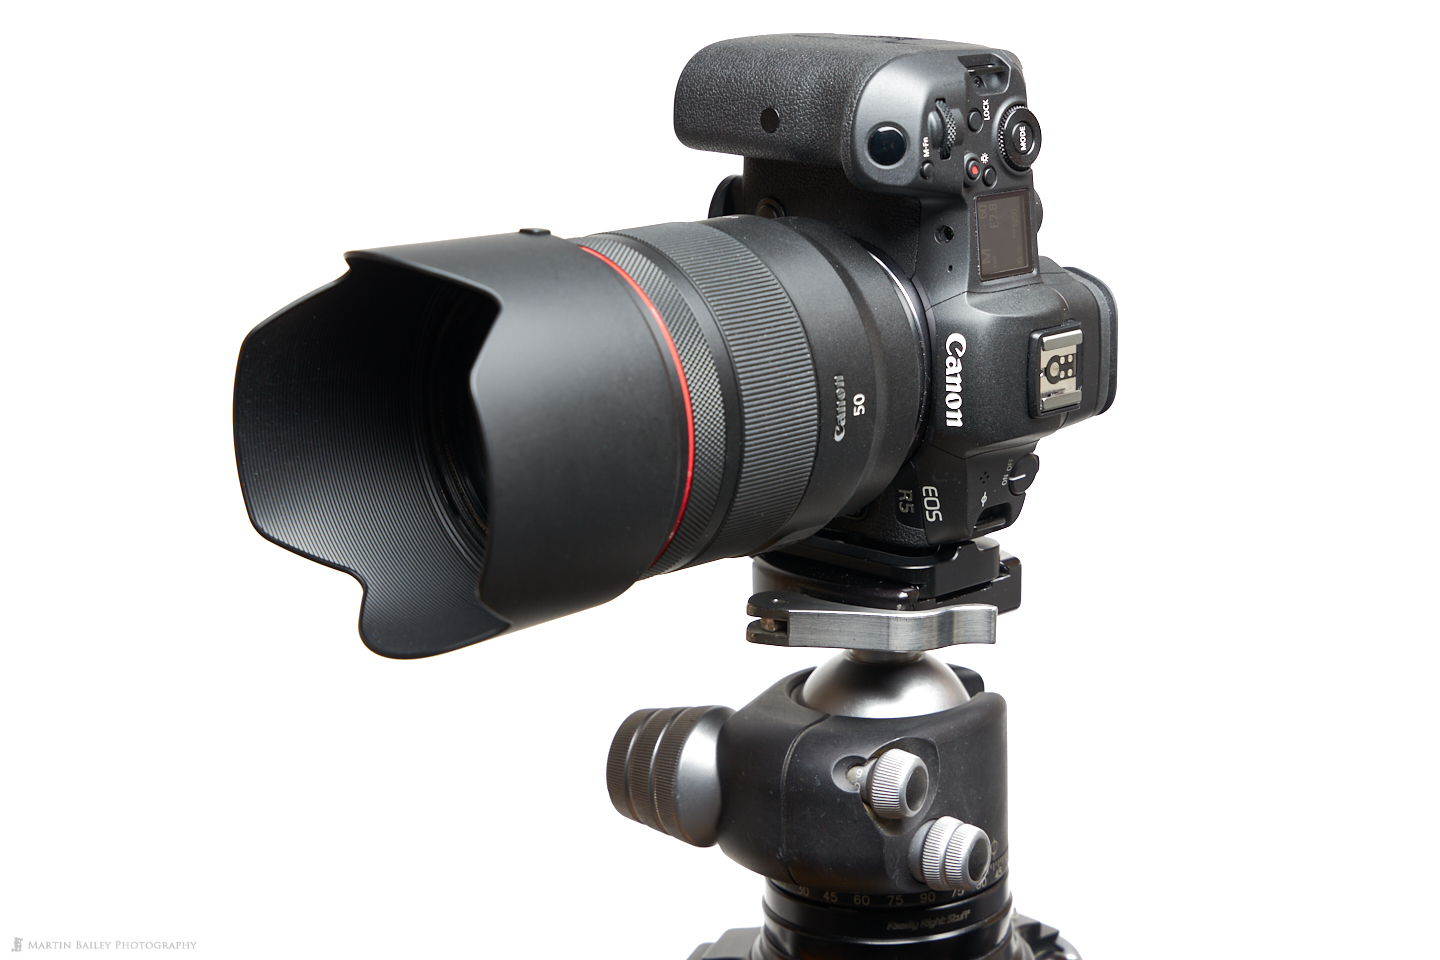
This is only an issue, of course, when using shorter lenses. With longer lenses like the 100-500mm, I simply loosen the tripod ring locking screw and rotate the camera and lens into portrait orientation, because the camera is mounted with the lenses plate not the L-Plate.
B&H Links
OK, so a relatively short episode to end the year with, but I hope you found that useful. As usual, if you did find this useful and would like to help keep a roof over my head, please by with the B&H Affiliate Links in this post and below. The price is unchanged to you, but it does help to keep the lights on, so using these links is very much appreciated. And to end, I’d like to wish you a safe and peaceful 2021.
Show Notes
Really Right Stuff L-Plate Set for Canon EOS R5 & R6: https://mbp.ac/rrsr56lp
Really Right Stuff QD Strap Swivel – D Loop: https://mbp.ac/rrsqdloop
Really Right Stuff QD Strap Swivel (Low Profile): https://mbp.ac/rrsqdlp
Really Right Stuff L85 Multi-use Fore-Aft Plate L85 Plate: https://mbp.ac/rrsl85
Really Right Stuff BH-55 Ball-Head: https://mbp.ac/bh55
Audio
Subscribe in iTunes to get Podcasts delivered automatically to your computer.
Download this Podcast as an MP3 with Chapters.
Visit this page for help on how to view the images in MP3 files.


I opted out of the L-plate on my R6 because it limits the LCD motion as noted to under 35 degrees. That is a real problem when shooting Milky Way. With a wide angle lens, the vertical camera tilt is certainly more than 35 degrees. Had my heart set on an L-plate. Too bad.
Hi Paul,
I’m not sure if you understood the specs correctly, but the tilt you can achieve is not limited to 35 degrees. You pull out the LCD and can rotate it 90 degrees up or down, before opening it out fully into the opening in the L-Plate. Then from there, you have 35 degrees of “play”. This means you are actually rotating the LCD from between 72.5 degrees and 107.5 degrees.
If you rotate the LCD in the opposite direction to start with, let’s say that puts your LCD at 270 degrees, you also have between 252.5 and 287.5 degrees in the opposite direction. This may be obvious, but I wanted to point out that you are not completely limiting the LCD to just 35 degrees of movement.
If that’s your understanding, then it’s too bad that it won’t work for you. Otherwise, I hope this helps.
Regards,
Martin.
This is a really well done and helpful post. I have 2 EOS R5’s that I have RRS plates for – 1 L-Plate for the one with a battery grip and 1 Regular Plate for the one without a battery grip. I am interested in setting up a system for carrying them with a shoulder strap like the one you have devised. Will the RRS QD Loop work with lens plates other than RRS? My lens plates are Wimberley.
Thanks –
Dudley
Hi Dudley,
I believe that the QD standard is not specific to RRS, but any other manufacturer’s plate would require a QD hole at the right size, with a groove a few millimeters deep into the hole, to catch the bearings that cause it to stop in place. You can see the shape of the hole and the groove in the vertical shot of the underside of the plate if you open it in the Lightbox. Hit the download button top right and take a closer look if necessary. Looking at the plates on the Wimberley website it looks like these are not included.
I hope that helps.
Regards,
Martin.
I plan to add a RRS L plate to my Nikon Z7 II. Its really expensive, but once you have it, you have it. Your article describes the utility of the attachments better than anything I have read. There is also a dovetail slide-on for your Joby or Black Rapid tripod socket strap that can attach anywhere along the arca-Swiss brackets. The RRS sliding brackets provide stand-off room for cable access to the side ports.
Hi Lyman,
I’m pleased you found the article useful! I used to use quick release plates on my straps, but they can be a bit cumbersome and with two on a double-strap, the weight starts to add up. I’m really happy with the addition of the QD holes and D-Loops. Lightweight and solid connections. That’s what I’ve always wanted.
Have a great 2021!
Regards,
Martin.
Thanks so much for your reply. Based on your post, I purchased the Slide Strap from Peak Design, and have found ways to attach my cameras to the strap using one QD D-Loop and existing positions on the camera or plates. This strap is perfect and your post made clear how easily it can position your camera and lenses in different orientations.
I’m looking at buying the L bracket for the R5 with battery grip. I was wondering if the QD socket is part of the CNC aluminum or a stainless steel insert. Glad you have no issues. that was a concern I had hanging that much $$ off the socket
Hi Biran,
The socket is usually a hole machined into the bracket, not an insert. The hole seems safer to me, less to break, and as usual, it’s RRS high standards of machining. If you have any questions about the actual process or concerns, drop the guys at RRS a line. They’ll be more than happy to answer any questions you have.
Regards,
Martin.