Visit Library for MBP Pro eBooks |
OK, so three weeks ago I finished our previous episode with a word to let you know that I’d released version 3.5 of our Photographer’s Friend app for iOS. Well, it became obvious as I started to finalize the release that my understanding of how the new Mac OS version would work was a little off. I’d tested Photographer’s Friend on the Mac and from all of the information available to me it looked like it would just be added to the Mac App Store, and maybe when I initially read-up on this, it that was the plan, but it was not the case. As Apple prepared to release Big Sur and the new Silicon Macs, it turned out that although I could release Photographer’s Friend as a separate app for the Mac, based on the work I’d done, it would require additional payment, and I don’t think the demand for a desktop-based version would be great enough to warrant the extra work for me or the additional cost for the end-user, so I decided to just let that slide and only be available for people that have already jumped on to the Silicon Mac platform, and even then, I’ve not been able to confirm that it will be available, so don’t shoot me if it’s not. This is really just a free bonus addition.
Also, as I started to create my tutorials for the new features, I couldn’t help thinking that at least some of the effort I’d put in would be duplicated as I added a few more features that I’d got in mind, and as is often the case, the few days that I thought it would take to add those new features turned into a few weeks. With version 3.5.7 now available on the App Store, I’m now in a position to update the app page and start to create some tutorials. Without an episode of the podcast for three weeks though, I’m going to write this as I work, and drop in a few elements of the tutorials to build out this post. Just as my photography improved from the structure I find that I create as I write my Podcast manuscripts, I’m expecting that writing both this and some of my tutorials at the same time will probably help me to provide more logical structure, essentially killing two birds with one stone, so here we go.
What’s Changed?
First, let me summarize what’s changed in version 3.5 of Photographer’s Friend. In addition to trying to make it available on the Mac, as I just mentioned, here are the main new features, and I’ll go into more detail on some of these features as we work through this.
- The first major change is the addition of Apple Watch Extensions for the DoF Calculator and ND Filter Calculator which are enabled via an In-App Purchase.
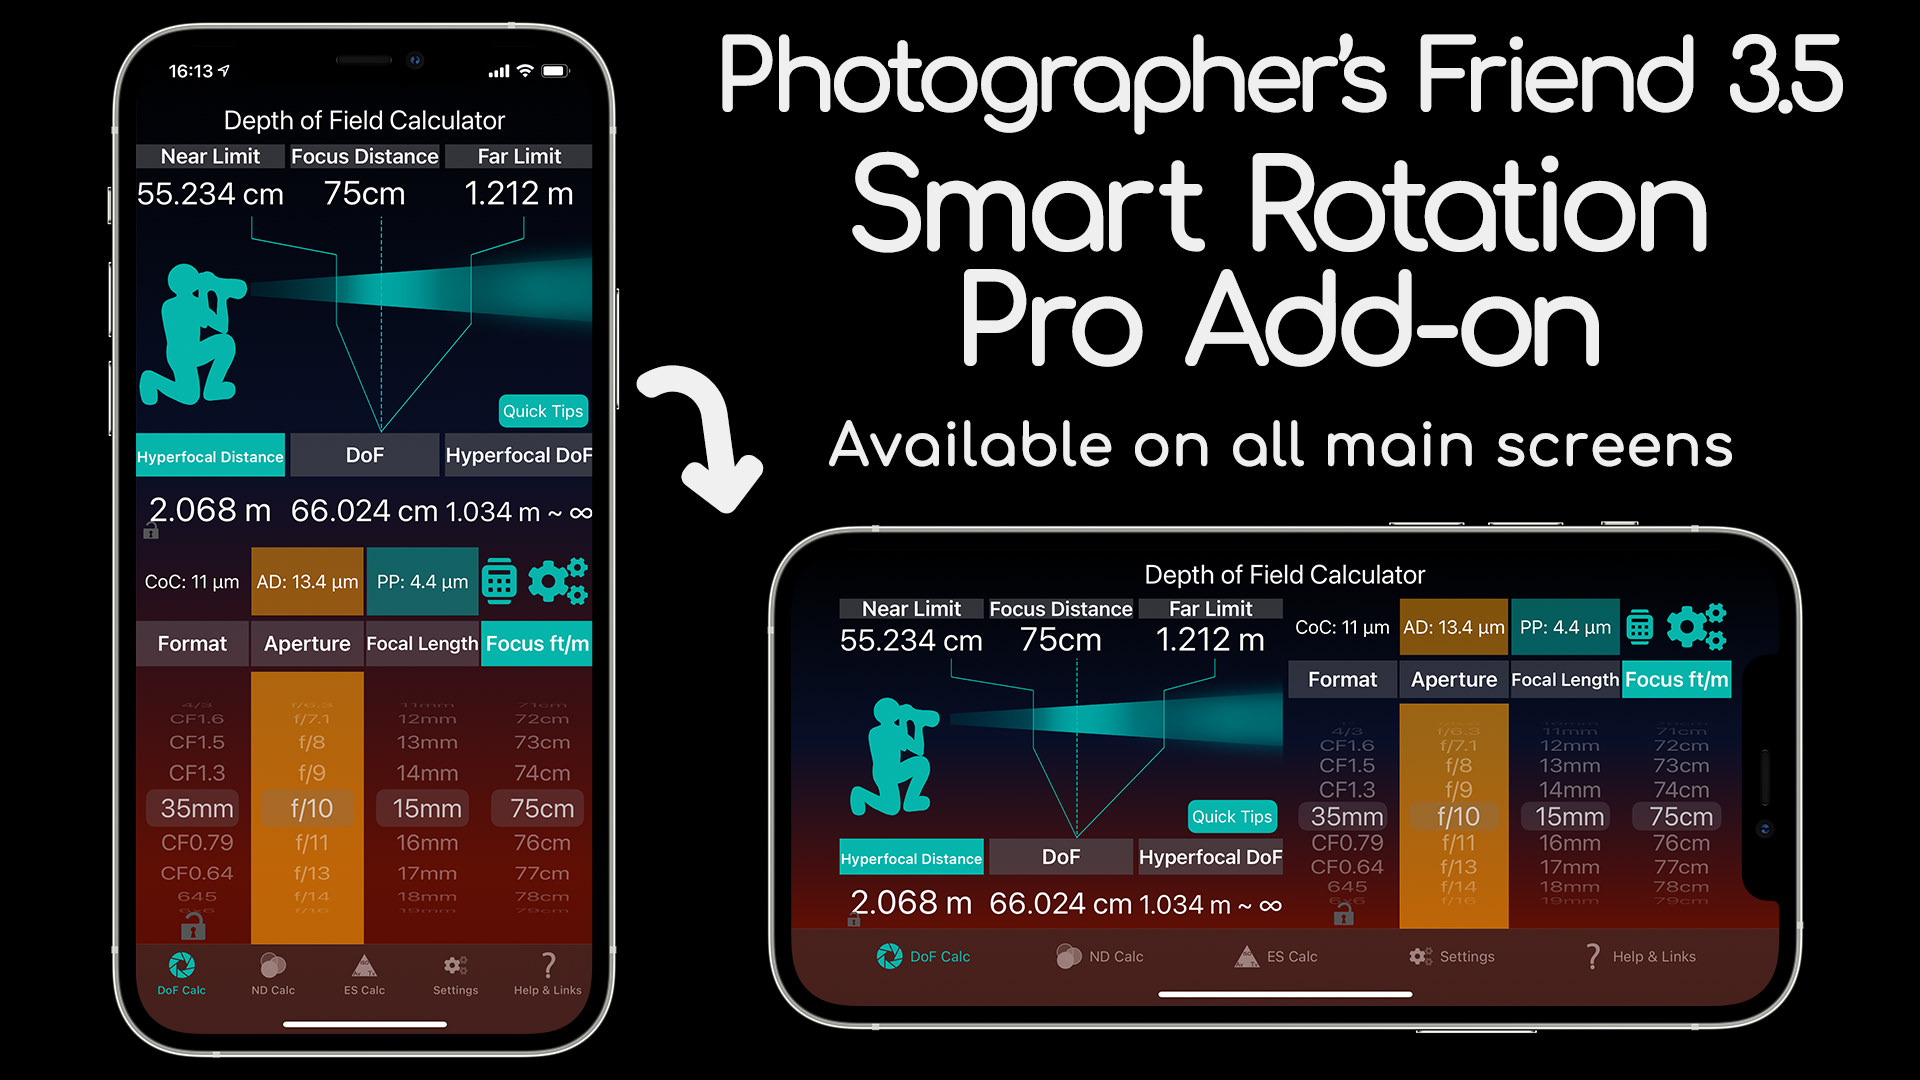
- You can also now Superpower Photographer’s Friend with Smart Rotation and up to eight fully customizable Color Schemes, including Traffic Light colors.
- The Pro Add-on also includes Left/Right Flip in Landscape mode with Smart Rotation, and Topsy-Turvy mode for the ND Filter Calculator, to get the controls closer to your fingers for one-handed operation when necessary.
- I completely reworked the User Interface, making it generally prettier with better resizing of fonts for larger screens like the iPad and Mac OS when it becomes available.
- I reorganized the Tab Bar adding a Settings section with all of the various settings screens for all of the calculators and the appearance settings and In-Add Purchases section.
- Once you are familiar with the app, you can now tap on the Title on most pages to make it disappear, making the most of your screen real estate, especially in Landscape orientation if you don’t have the Pro Add-on with Smart Rotation. I haven’t left you out to dry.
- Swiping down on the screen will bring the title back again. Titles can also be toggled on or off in the Appearance settings.
Apple Watch Extension Activation Video
As the Apple Watch Extensions are a paid upgrade, and because communication between the watch the iPhone is not as free-flowing as it might be, there are a few steps required to activate the extension after buying the In-App Purchase, so the first thing I’ve done is to create a video to walk you through that process. There is help covering this in Photographer’s Friend, but I’ve heard from a number of people needing help, so this was my highest priority. All of the videos I’m putting together are now embedded in the Photographer’s Friend Tutorials page, and some of them will be included in the Photographer’s Friend product page too, but so that you can see what’s happening, I’ll drop these into this post as well.
The key points for activating the Apple Watch Extensions though, are that you first pay for the extension via the In-App Purchase, which you can find under the Configure Pro Add-Ons section of the Settings page. Then open the Extension on your watch, and go to either the Depth of Field Calculator or the Neutral Density Filter Calculator and also open the same calculator open on your iPhone, and tap the Watch icon that becomes visible on each calculator after you add the Extension. Unless you have to reinstall Photographer’s Friend or set up a new device, this should only be necessary once, and only from one of the two calculators. Once it’s activated it should stay activated until you uninstall it.
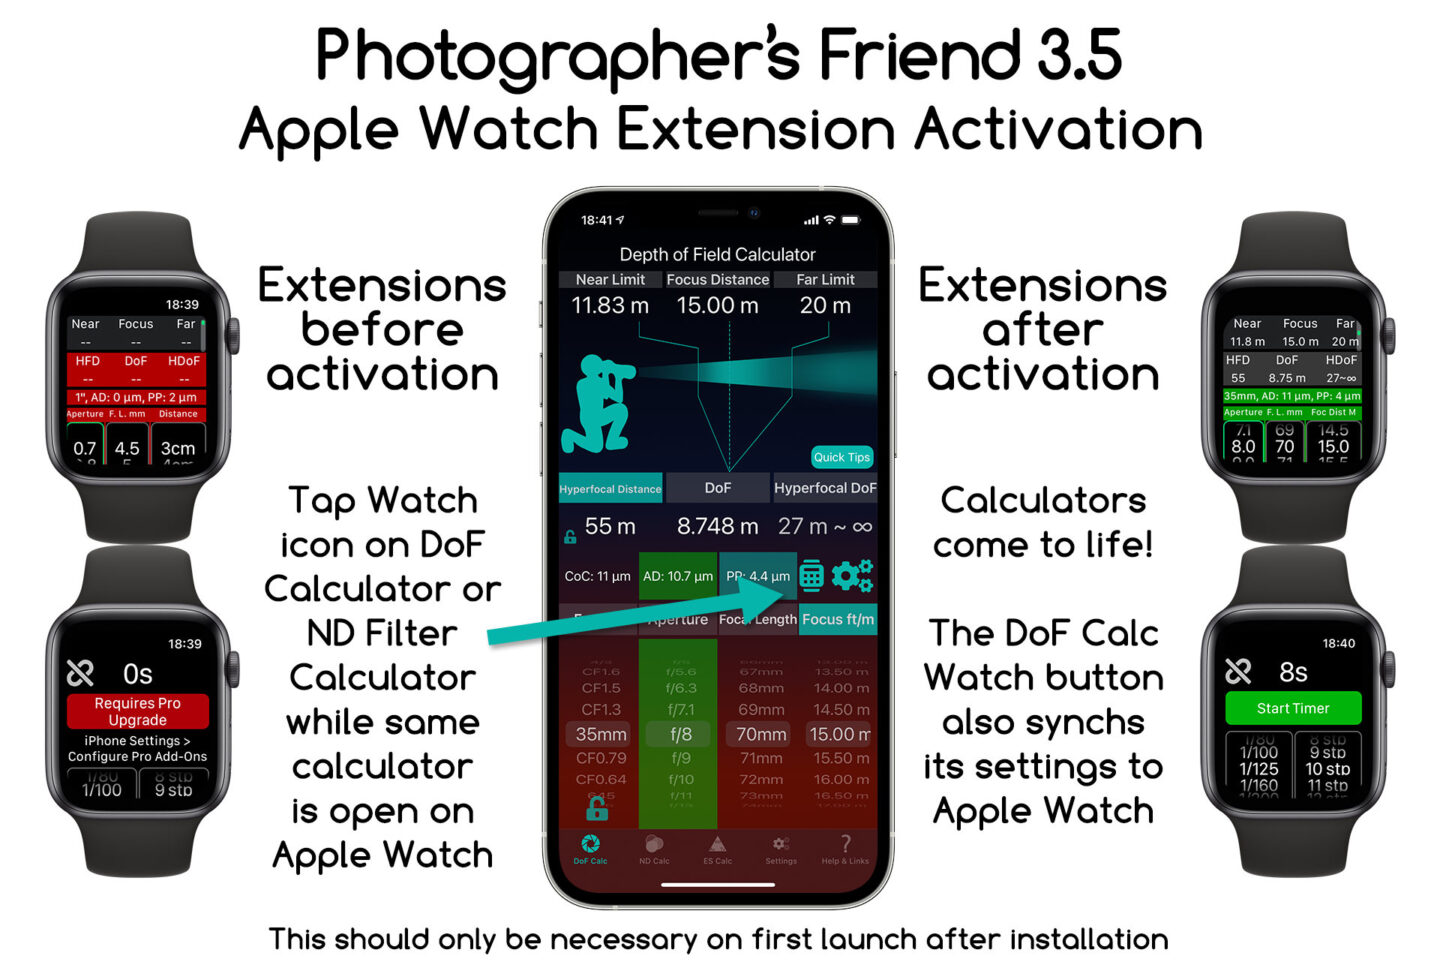
To ensure that everyone gets this information, regardless of where they look, I’ve also created some graphics to put on the product page, to hopefully get people started. I don’t necessarily want to overload anyone that tries to consume all of this information, but I’ve found that some users prefer to simply read through a page, and others jump to the videos. I’m probably more of a video person myself, but for a simple task, a quick infographic generally does the job.
Adding Complications to Your Apple Watch Face
I also created a short video to explain how to add icons to launch Photographer’s Friend from your watch face, by adding what Apple calls a Complication. I’ve created every type available as of November 2020, so there are plenty to choose from, although it’s important to note that the type of Complication is generally restricted to the specific placeholder of each watch face, so you’ll only have one option for each Complication location. You’ll see what I mean if you have a minute to watch the video.
To round out the Apple Watch Extensions Tutorials, for now, I made one more 15-minute video to walk users through how to use the Depth of Field and Neutral Density Filter Calculators on the Apple Watch. This goes into more detail on how to adjust the settings of each calculator and synchronizing with Photographer’s Friend on iOS. With the interface of Apple Watch being so compact, and because I’ve pretty much achieved full feature parity with the iOS version of these calculators, there are a few things that the would probably not figure out without a little help, so I thought it was important to put this one together.
For example, double-tapping the central band adjusts the focus distance dial to achieve hyperlocal distance, and long-pressing the central band turns on Hyperlocal Distance Lock so that the focus distance dial always adjusts to the hyperlocal distance when either of the other two dials is turned. Also, the information band below the central band displays the setting being adjusted as any of the dials is turned, but then returns to displaying the camera sensor format from the settings and the Airy Disk and Pixel Pitch sizes. The secret with this band is that if you double-tap it, it changes to display the values selected on the dials with their units because I had to omit the units on the dials to save space. There are also times when all of the dials contain big numbers causing them to change to ellipses, so it’s important to still be able to see the selected settings.
Another thing to note is that the watch goes to sleep relatively quickly, and rather than using a battery intense mode that keeps it awake, I opted to display a notification when the exposure timer finishes on the Neutral Density Filter Calculator. This is less obvious than the bell ringing and haptic pulses that you’ll feel when the watch is awake, but if you are keeping somewhat alert, it’s easy to notice, with a beep and a single haptic tap on your wrist.
Color Scheme Customization
The key additional feature that I added over the last few weeks is fully customizable Color Schemes as part of the Pro Add-on, available as an In-App Purchase. When I added the new alternative background colors, two for the Light Appearance and two for the Dark Appearance, I figured out how to dynamically generate the backgrounds including the gradation, so that these didn’t have to be added as image files, which slow things down a little and make the install file larger, and therefore take longer to download, and I wanted to avoid that.
As I developed that feature though, I realized that I was creating a foundation for more complex customization, so the first thing I did was add the ability for the user to set their own colors, and because I also found a few bugs as I worked on this first post- 3.5 update, I pushed that out after about a week’s work.
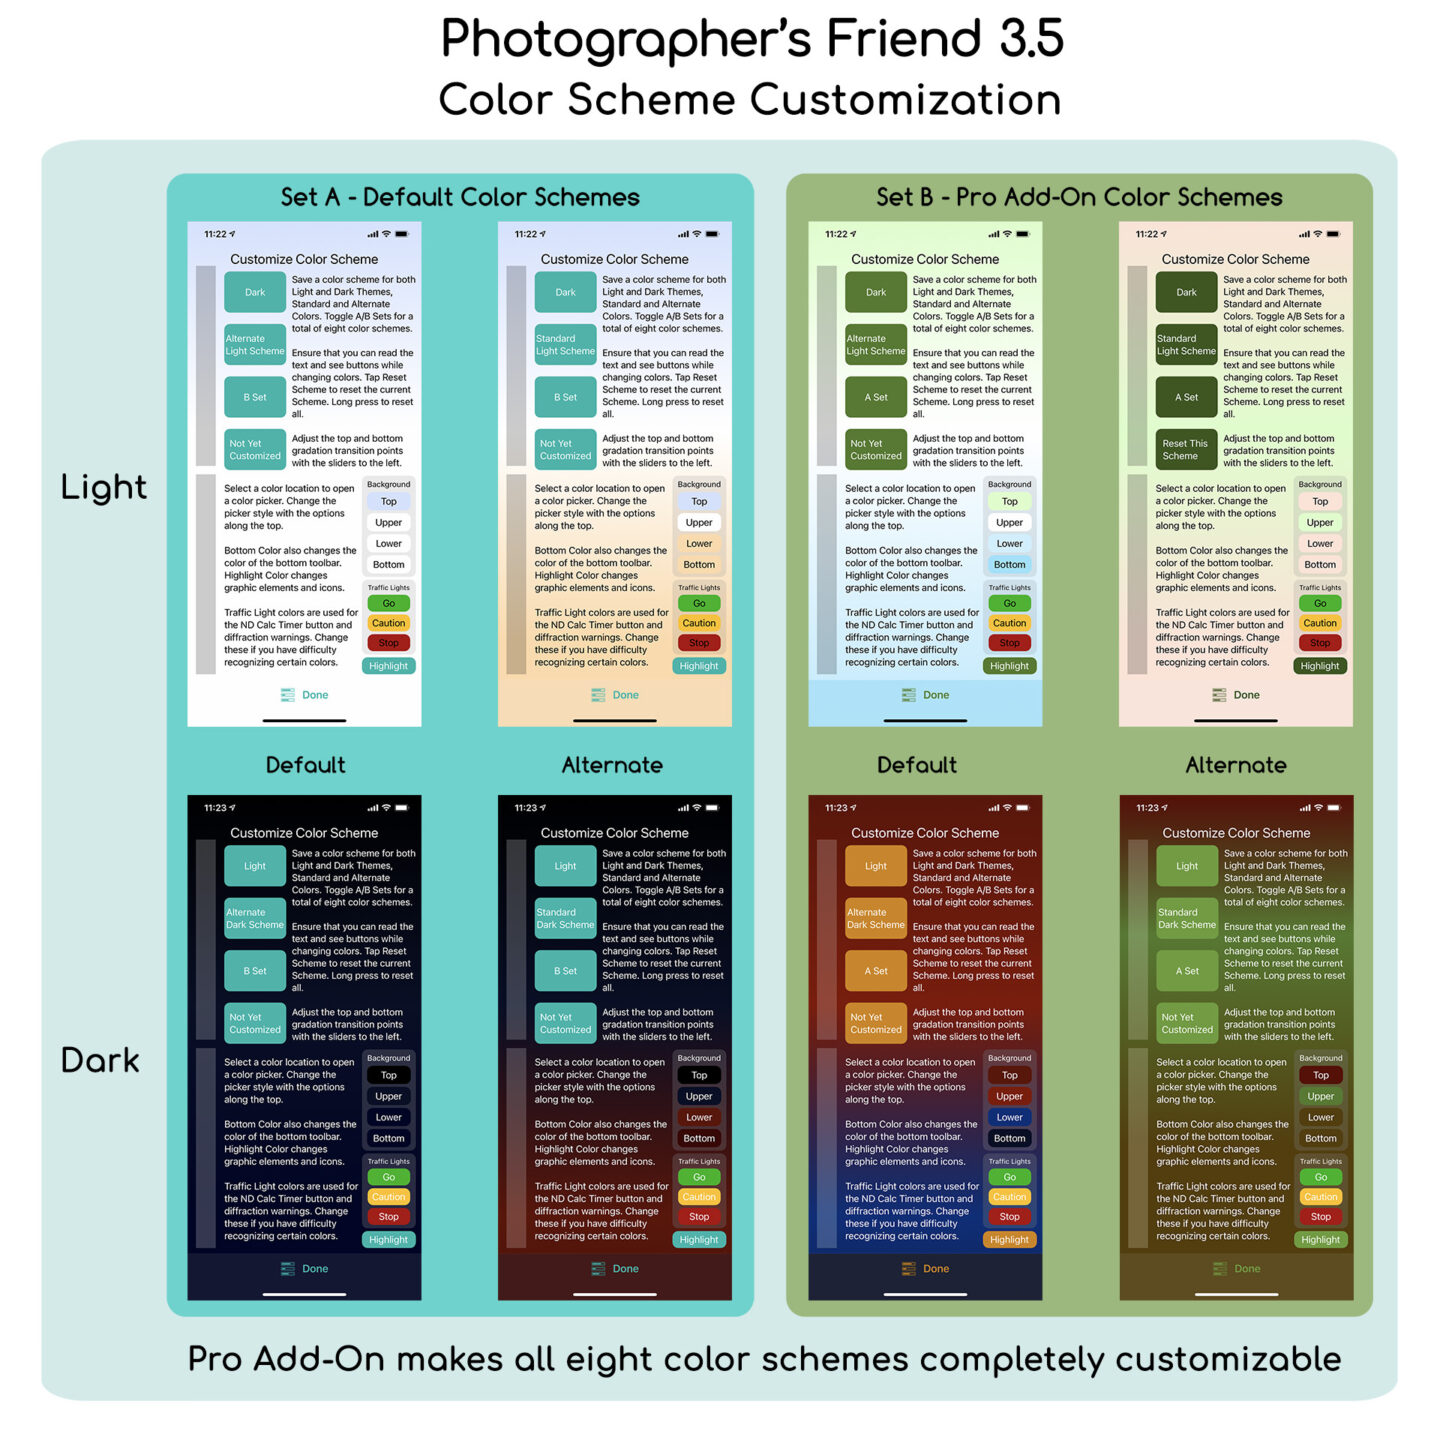
I then went on to implement the next step, which was to give the end-user the ability to change the highlight color, which essentially makes it possible to change the color of all of the main graphic elements in Photographer’s Friend. Finally, I made it possible to change the traffic light colors, red, amber, and green, which are used in things like the Diffraction Warnings in the Depth of Field Calculator, and the Start and Stop buttons of the Neutral Density filter calculator, and the amber warning to show that the exposure is about to finish. This will make Photographer’s Friend more friendly for users that are color-blind, as you essentially simply pick a new color for these elements from a color picker, which is obviously also going to be seen with the same color shift that causes the problem with color recognition.
Once again, I figured I needed an infographic to show the eight color variations and relationship between the Light and Dark, Standard and Alternate, and Set A and Set B modes. I’m not sure that I’ve achieved that, but here it is anyway.
Smart Rotation via the Pro Add-on
Finally, I created one last video, for now, to walk show you how Smart Rotation works. Smart Rotation is the other main feature that gets enabled with the Pro Add-on. Without Smart Rotation Photographer’s Friend does a relatively good job of laying out the screen so that it’s still usable even if you flip your iPhone over into landscape or horizontal orientation. But, doing a relatively good job is not the level of quality that I like to provide. I set about the task of developing Smart Rotation around March this year, and it took quite a long time to get it working how I wanted. This is when I realized that these new features were going to have to be added as In-App Purchases, rather than a free upgrade.
I’d also started to work on the new Watch Extensions, and they weren’t going to be necessary for every user, so it didn’t seem fair to simply bump the price up, so I needed to work on developing the In-App Purchases functionality anyway. The Apple Watch development took way longer than I’d anticipated, mainly because of the difficulty in communicating between the iPhone and Apple Watch, and sharing common information was another challenge. Anyway, here is the Smart Rotation video, rounding out the current series.
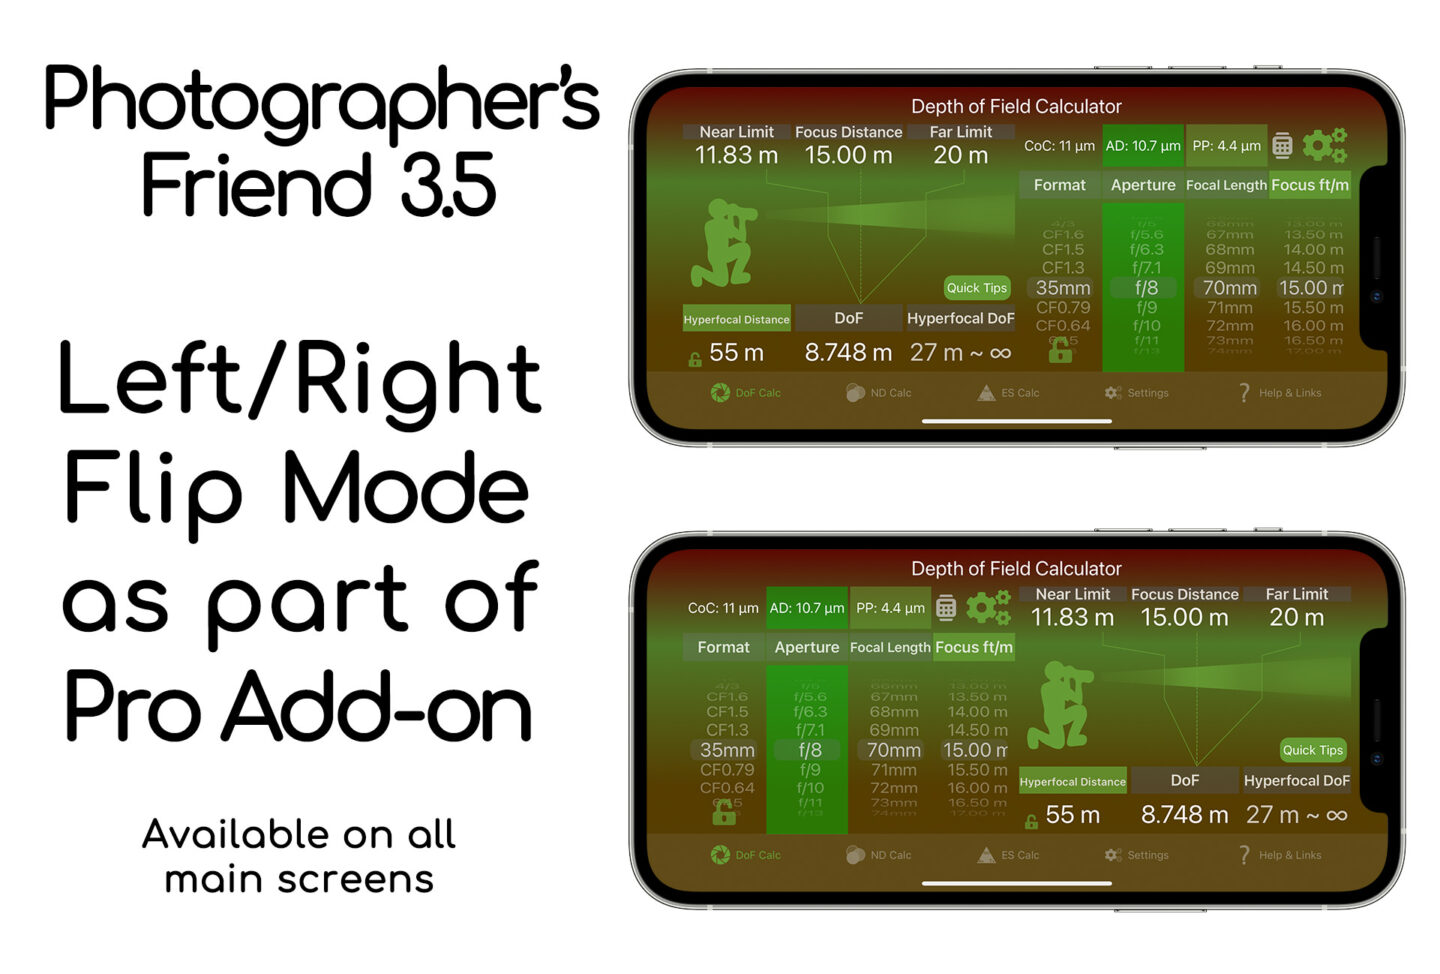
I’ve not seen any other iOS apps that do this kind of Smart Rotation, so I’m pretty proud of the originality of this idea. The other thing that this allowed me to do is to flip the left and right sides of the screen, so that it’s more useful for left-handed users, or even if you generally just use Photographer’s Friend in your left hand while adjusting your camera settings with your right.
Topsy-Turvy Mode
This also led me to another feature that I am happy with, which is the Topsy-Turvy Mode for the Neutral Density Filter Calculator. As I worked with the calculator on a large iPhone, I found that I couldn’t reach the button in the top section, so I added the ability to nudge the top section with two fingers and have it drop down into the bottom half of the screen, where I can access the buttons more easily. Of course, it can be nudged back up to the top in the same way. It’s simply a two-finger swipe.
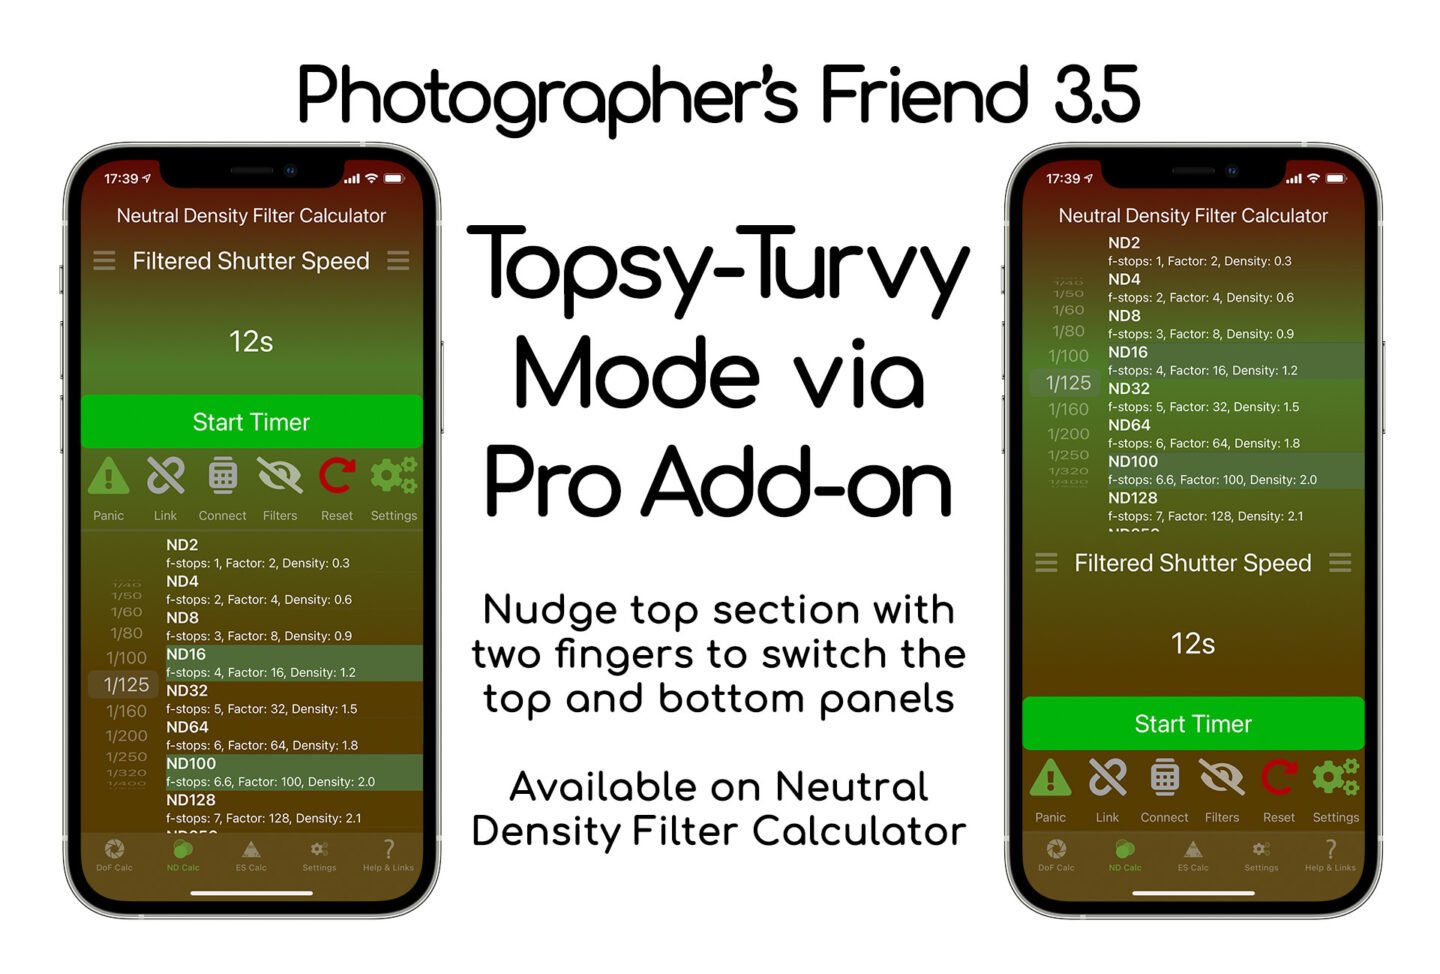
You’ll see that I’ve also used one of my more whacky color schemes in this screenshot, as I’m having a lot of fun with these modes. I received a newsletter from Shutter-Stock yesterday about the fashionable colors for 2021, and promptly copy and pasted the HEX codes into Photographer’s Friend and created a custom color scheme of a number of complementary colors from around the world. It’s not worth sharing, but a lot of fun all the same. And, of course, even if you’ve flipped the top and bottom sections of the Neutral Density Filter Calculator, your left/right flip preference is maintained.
OK, so I started this post on Monday, and it’s now Friday morning, and I’m just coming to the end of creating most of the content that I need to update the Photographer’s Friend product page. I’ve got more work to do, but if I don’t get this recorded this afternoon for a Podcast, we’ll be into next week again, and I want to avoid that. I’ll continue to work the product page over the weekend, as I spend my time downstairs with my wife instead of up in my studio where I work during the week.
Photographer’s Friend 2 End of Life
There is one final piece of housekeeping that we need to do before we finish, and that is that I need to let users of Photographer’s Friend version 2 know that I’ve decided to end of life that product on December 1st, 2020. There has been a note on the product page about this for a while now, but occasionally I notice people still buying version 2, and I heard from one person that hadn’t noticed the verbiage about it being in maintenance mode. I left it available after the 2018 update in which I announced maintenance mode, as I didn’t want to shortchange new users, and I also made an upgrade path via the App Bundle, but without real support for upgrades from Apple, I think this is doing more harm than good, so I’m going to remove version 2 from the App Store on December 1st.
If you own version 2, that gives you another ten days or so to upgrade using the bundle, but otherwise, you’ll be able to continue using version 2 until you have to reinstall your device or set up a new device, but it will not be available to reinstall after December 1st. Any new users will be directed to version 3.5, the latest and greatest version of Photographer’s Friend. I should also mention that I know I’m remiss in not providing an Android version. The idea of the Apple Watch Extensions sidetracked me but I will start working on that in the coming months and hope to provide something in 2021.
Show Notes
Get Photographer’s Friend on the App Store here: https://mbp.ac/pf3
View the product page for more details here: https://mbp.ac/app
Audio
Subscribe in iTunes to get Podcasts delivered automatically to your computer.
Download this Podcast as an MP3 with Chapters.
Visit this page for help on how to view the images in MP3 files.


Argh. I just missed the upgrade bundle. What to do?
Hi Deborah,
I’ll drop you a line via email. Please check your spam folder if you don’t see anything.
Regards,
Martin.