
Visit Library for MBP Pro eBooks |
Almost a month after the Canon EOS R5 hit the streets, and just in time for the R6 release, the Capture One team has released an update for Capture One Pro that adds native support for both of these cameras, and as you'll see, the image quality is a huge improvement over the DNG conversion workaround that many people have been using for the past month. So much so, that I'd recommend anyone that was using that workflow to go back to their original raw files and process them again to get the most out of this amazing new camera.
I am creating this post and podcast today, and although it will be a little on the short side, I want to get it out because the Canon RF 100-500mm f/4.5-7.1 lens release has been brought forward by a month, and I'll be getting mine this Thursday, on August 27, the day of release, and will be trying to get out into the field to start and take this new lens through its paces so that I can report on my findings early next week.
Anyhow, there is generally a bit of a lag between the release of a new camera and Capture One Pro providing full support for it. I've become accustomed to that, and although I would very much prefer it if the camera manufacturers could work better with Phase One to enable earlier releases, in the grand scheme of things, waiting three to four weeks for this support isn't such a bit deal, and when the support is added, it just reinforces one of the main reasons that I'm a Capture One Pro user. The image quality is just so much better. It's sometimes only a subtle difference, and not always obvious until you compare images as we will today. The difference between Canon's Digital Photo Professional and the DNG workaround images is so small that we'll consider it insignificant, and just work through the four images that I wanted to share with you in pairs so that you can open them in the Lightbox, and we'll also try looking at them with a before/after slider. None of these images have any processing done to them, other than the standard raw sharpening applied to all images by default so that you can see the baseline from which any further processing would begin.
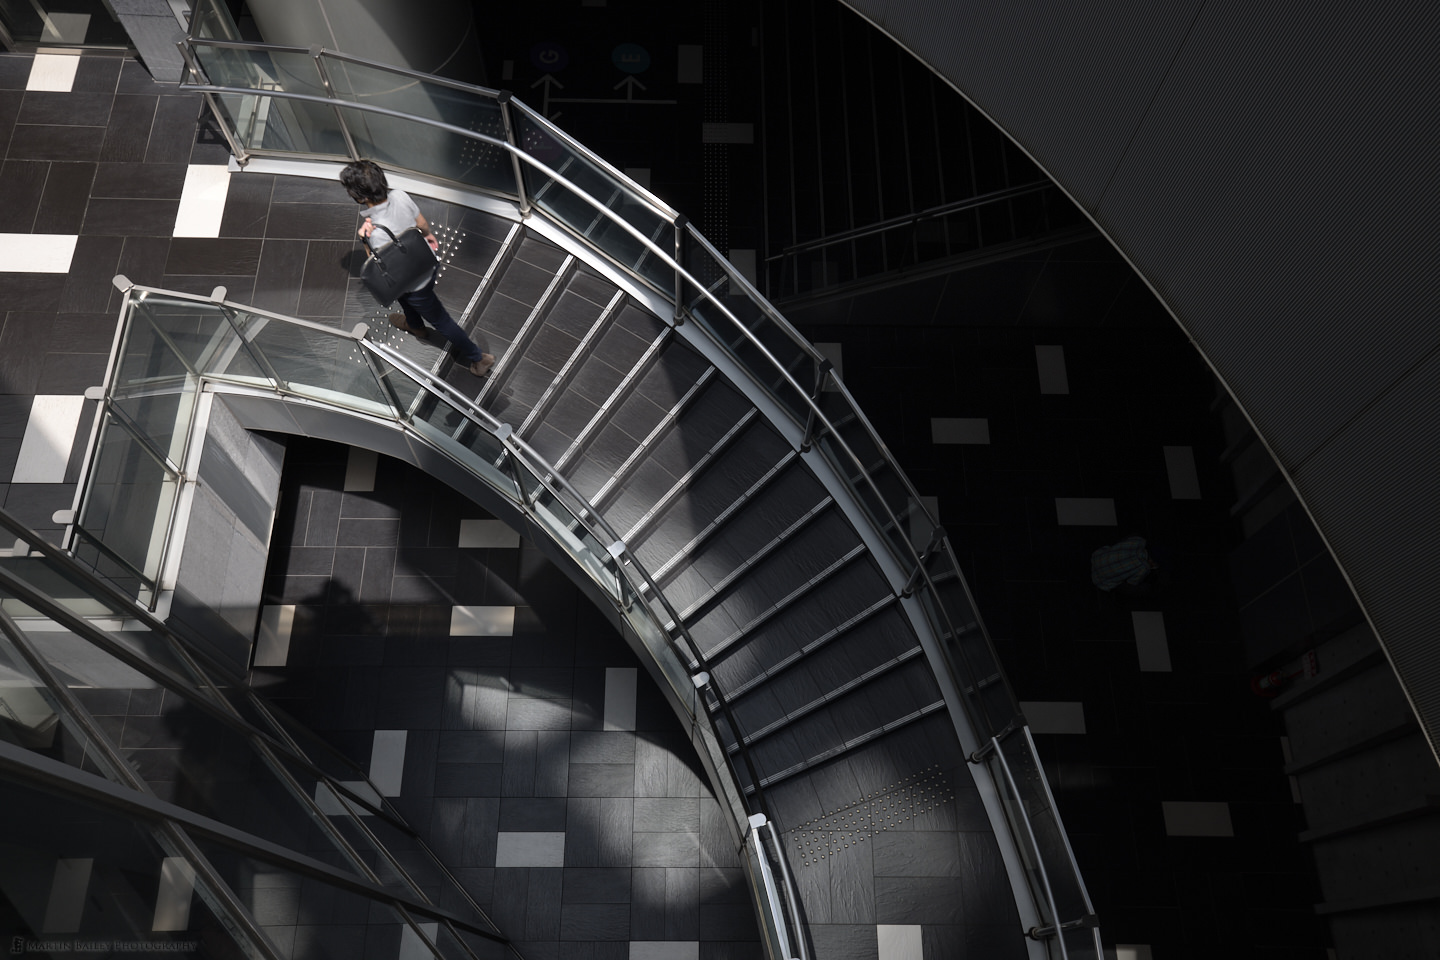
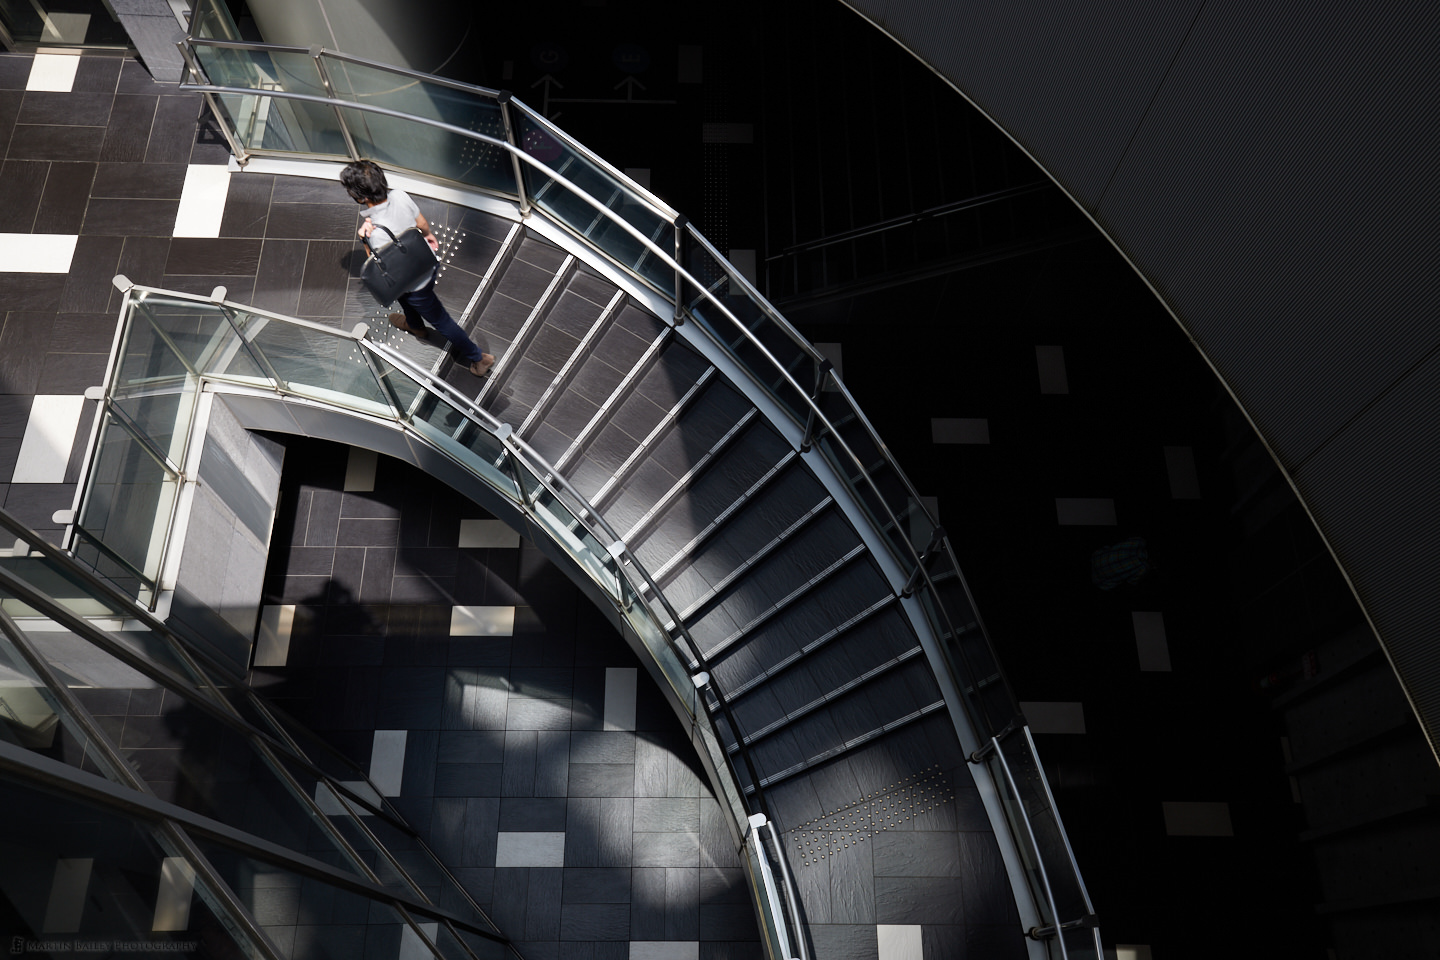
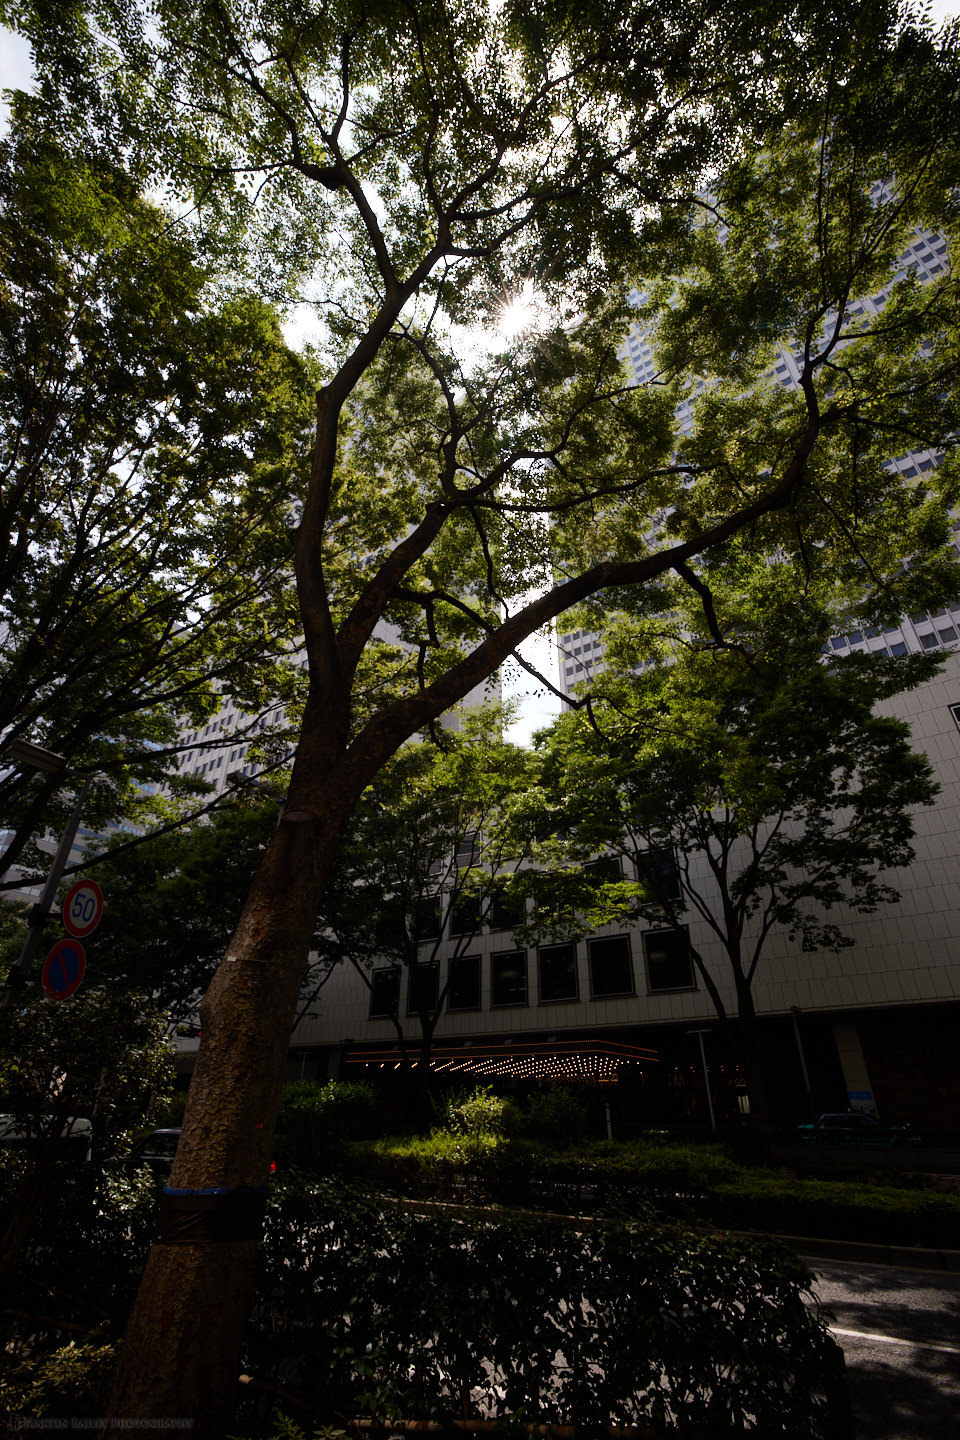
Note too that these images were shot on the day that I got the EOS R5. I parked myself on a bench near the camera shop for a few minutes to put in a battery that I'd charged and brought along, and attach my strap, etc. and also quickly go through most of the important Menu settings before having a quick walk around West Shinjuku to grab these shots. In all of these pairs of images, the DNG Workaround processed image is on the left, and the Capture One Pro processed image is on the right.
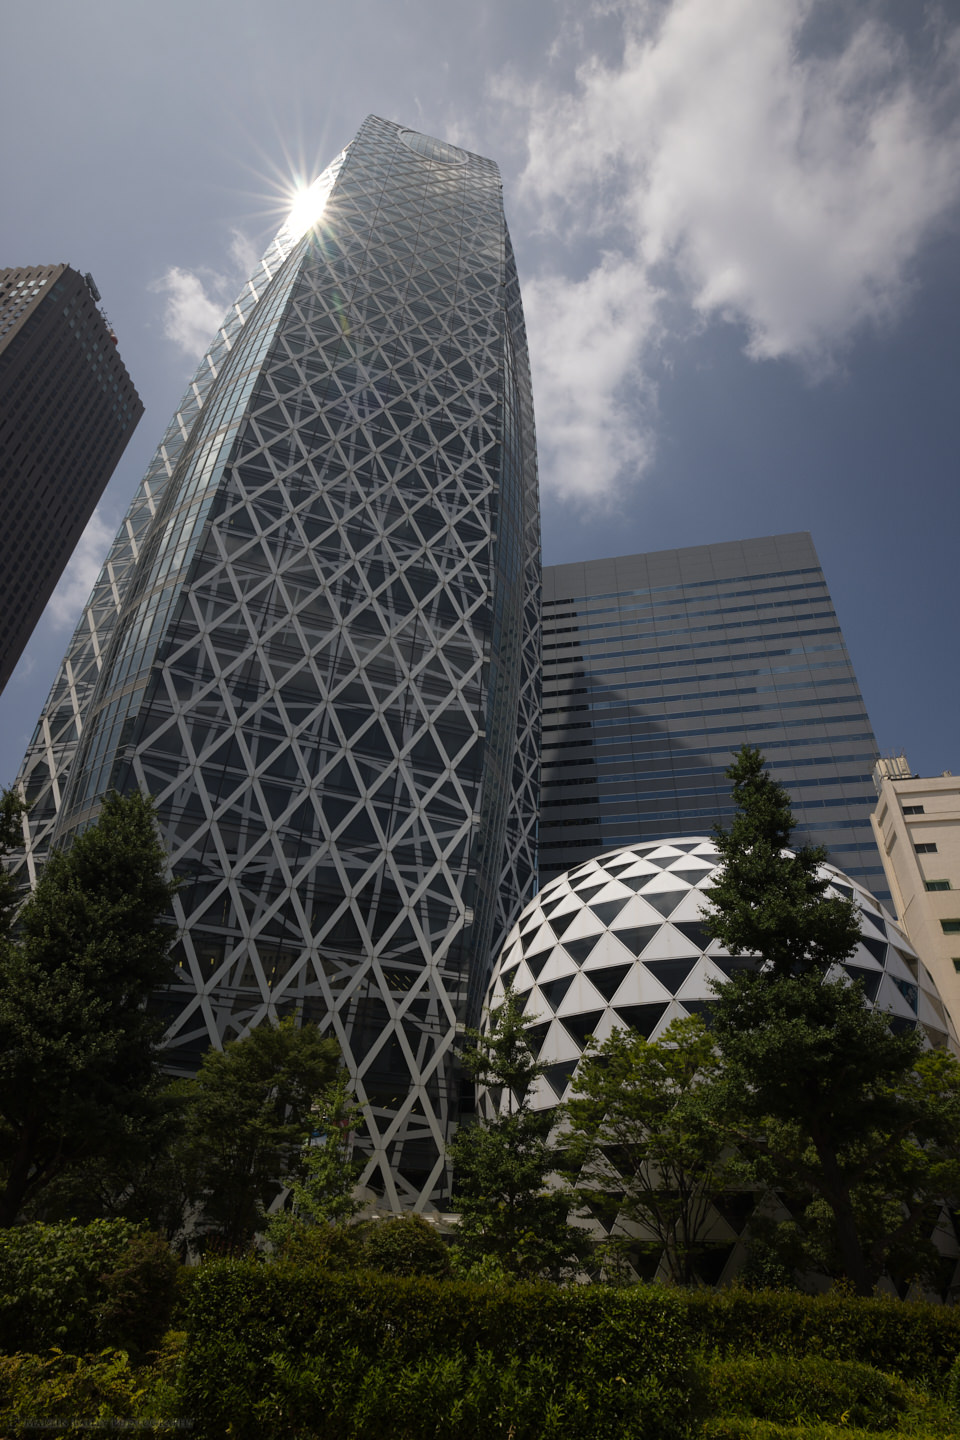
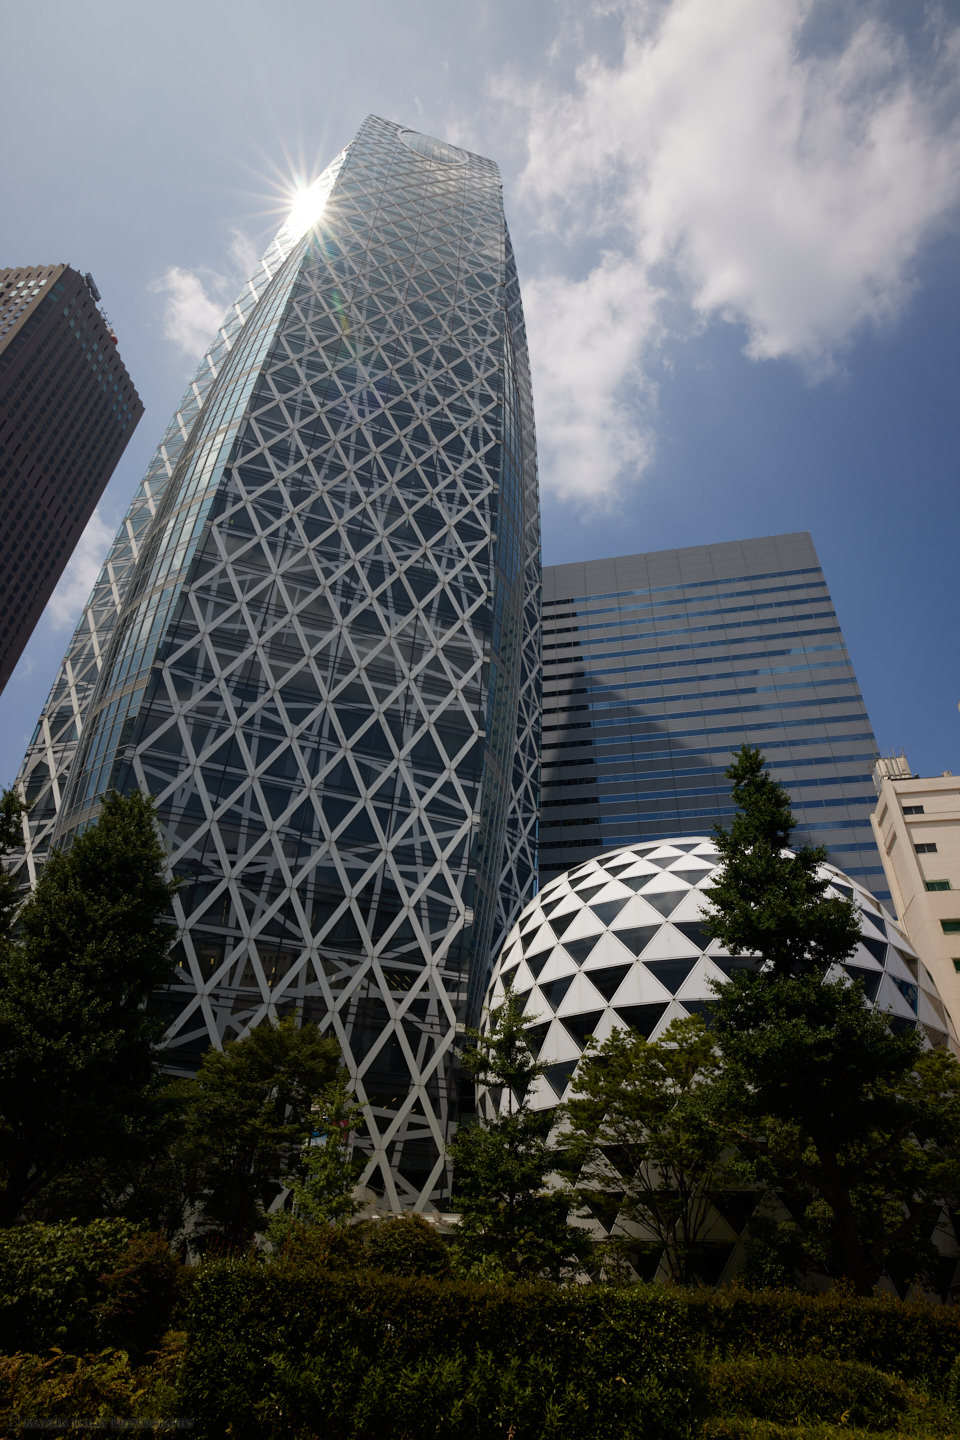
So, you can either click on the images above and then navigate back and forth with your computer arrow keys or swipe in you are on a mobile device, or you can grab the vertical bar on the comparison image below, and compare the differences. Or you can, of course, do both. However, you look at the comparison I'm sure you'll agree that the native Capture One Pro R5 support provides us with much better image quality than the converted DNG workflow produces. The blues are more natural and the building stands out much better than in the DNG image. It looks more like looking at the building than looking at a photograph of the building.


The same goes for the next shot of the same building. The Capture One Pro version is so much more vibrant and crisp, like I'm looking up at the building on the day that I actually shot the image.
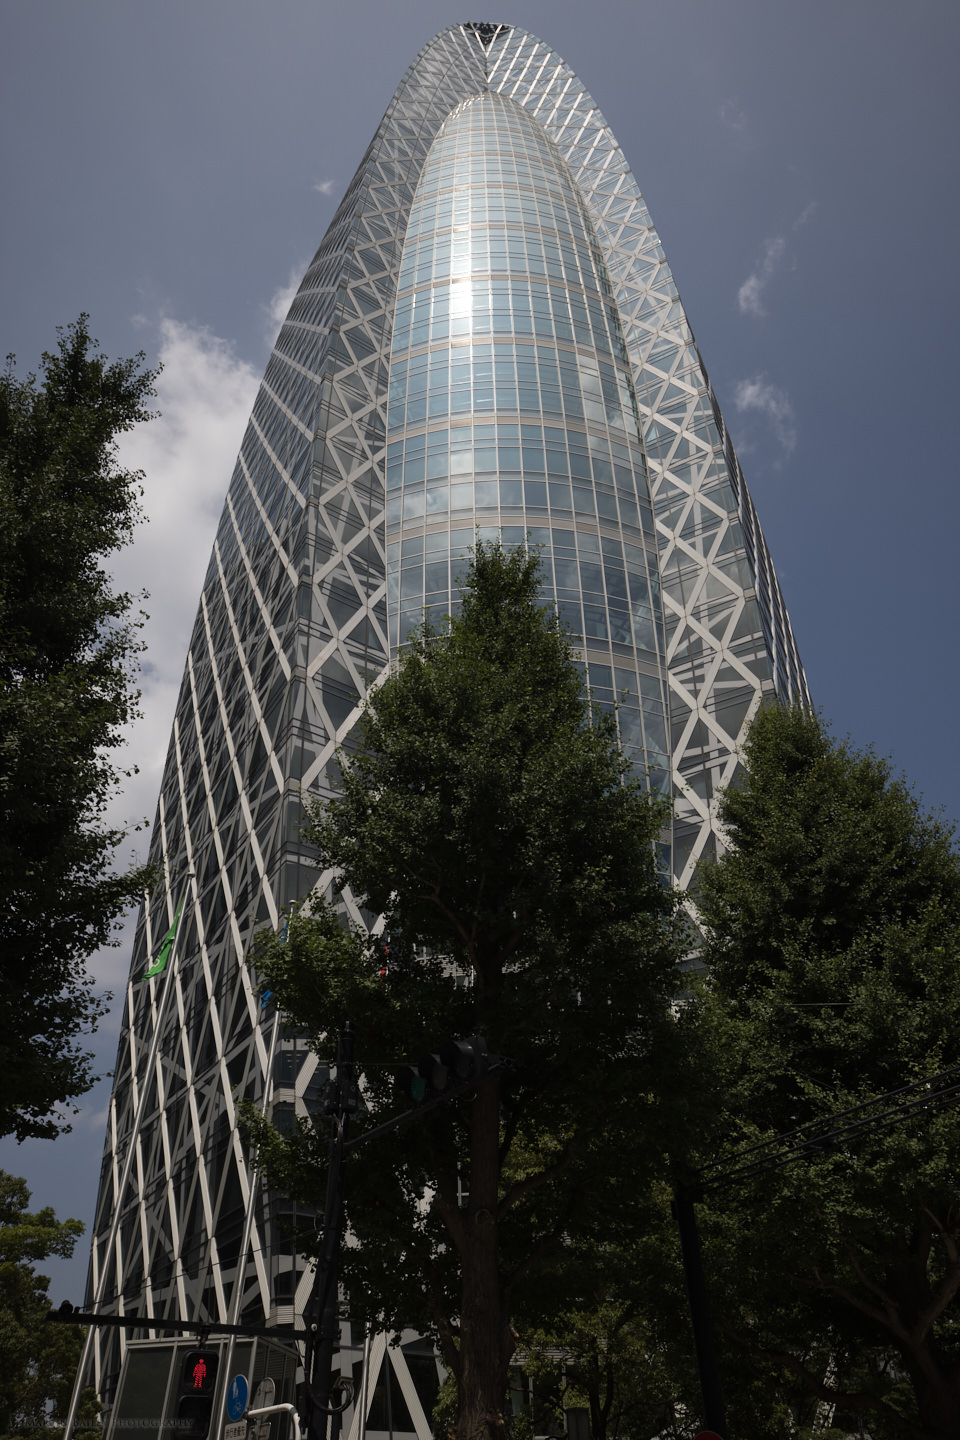
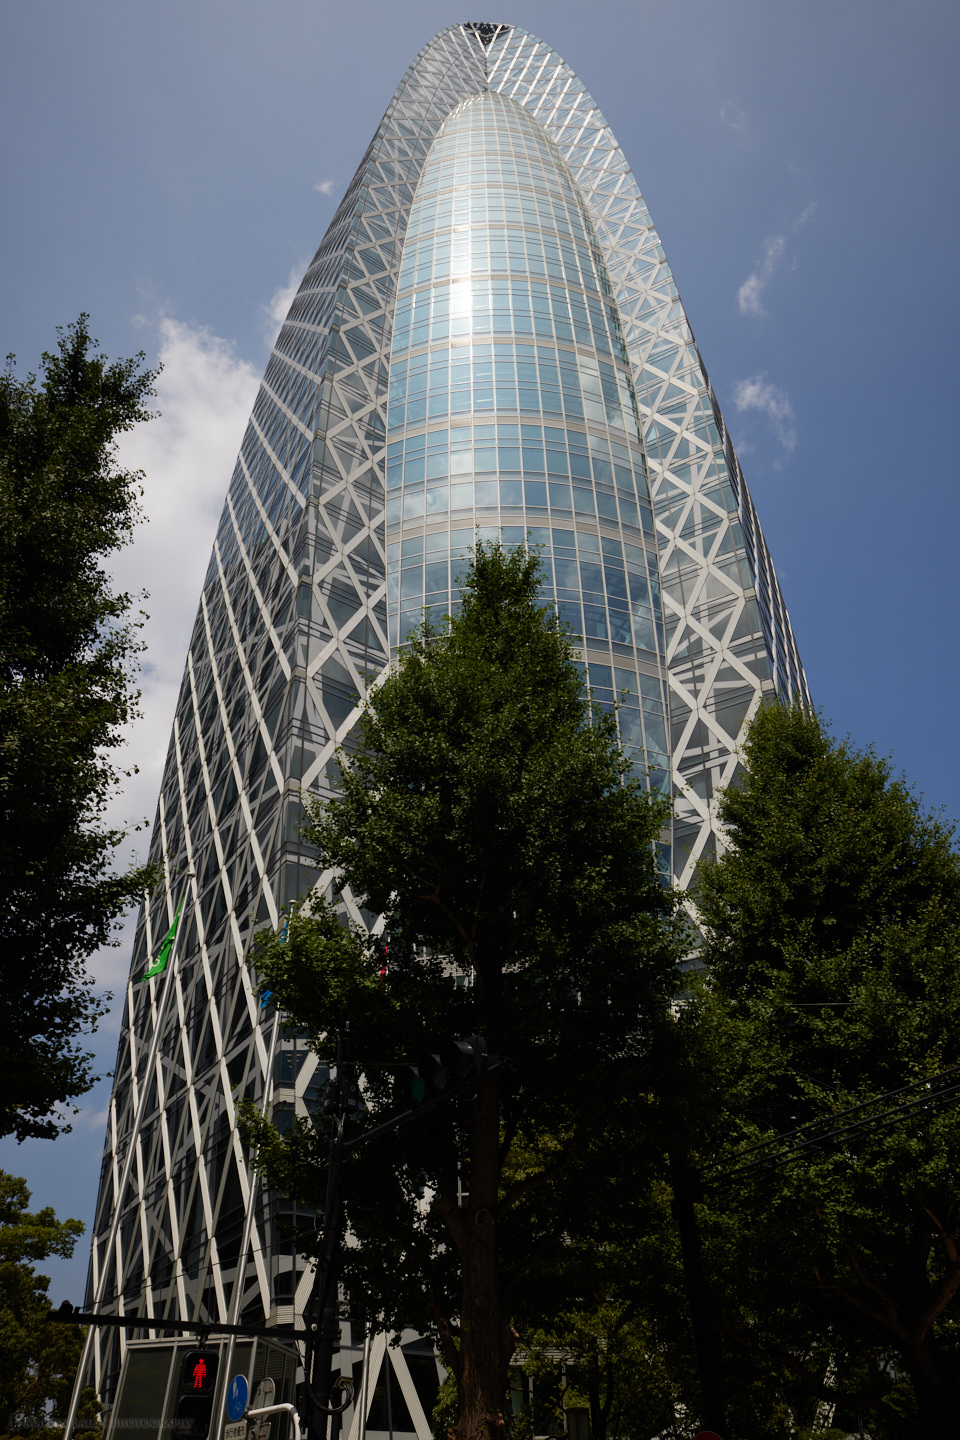


This next pair of images, looking down the staircase of the Cocoon building so much more dynamic, and the texture of the metal is much more realistic. The DNG version is fine if that's all you look at, but when you compare the two they are really worlds apart and keep in mind that this is without any additional processing. I'd probably add a little clarity and perhaps play with the Luma Tone Curve some, to enhance the image further.


This final pair from the first day is just the sunlight stream through the early summer tree foliage, but again, the difference between the two images is quite striking. You get a sense of the sunlight in the Capture One Pro version, but the DNG workaround shot is flat and lifeless in comparison. I couldn't really tell in my initial review. The images looked OK, but now they've come to life, and it really makes me happy that Capture One Pro has now been updated.


Of course, how much of a difference you can see between these pairs of images will depend on your display. If you don't see much difference, try a different computer. A desktop computer will generally be better than a laptop display, for example. If you didn't already check out my EOS R5 Review, you can see that here.
If you are not already a Capture One Pro user, you can try it for a full month by downloading it here from www.captureone.com.
Anyway, I have a few other things to do today, then I'm off to pick-up my RF 100-500mm lens tomorrow, and will be out trying to get some photos that I can share with you hopefully early next week. Stay safe and sane in the meantime.
Show Notes
Canon EOS R5 Body - https://mbp.ac/EOSR5
Canon RF 100-500mm f/4.5-7.1L IS USM Lens - https://mbp.ac/100-500
Capture One Pro: https://www.captureone.com/
Audio
Subscribe in iTunes to get Podcasts delivered automatically to your computer.
Download this Podcast as an MP3 with Chapters.
Visit this page for help on how to view the images in MP3 files.

I’m not sure if this is the best place to post this but figured I would give it a shot. First – I so appreciate all your insight that you provide to all of us. I’m completely redoing my gear, thanks to you ;-). My R5 and lenses are on order. It’s backlogged so I probably won’t see them for a month, but that’s okay. I’m in the process of selling everything I own now to help justify the cost and simplify my overall setup. I’m in the process of trying to learn Capture One, but having been a long time Lightroom user, this is where I’m really struggling. I’m not trying to convert my libary over, just making the switch and leaving what was processed using Lightroom there and starting fresh in Capture One. I spent years “perfecting” my lightroom environment with presets that worked for me. Do you have any recommended starting points for Capture One? I’ve watched a few tutorials and I’m in the middle of the 30 day trial. Do you have presets (or maybe they are styles in Capture One) that you recommend to start with? I have also been using Luminar 4 as a plugin to Lightroom, which I really liked. Do you ever use something like this w/ Capture One or do you do everything in Capture One? I try to minimize my workflow in post processing as much as possible so I like to batch process as much as I can and then fine tune the ones that need additional touch up. I’m struggling with making this quick in Capture One. Any advice? Sorry for all the questions – ha!
Hi Russell,
Thanks for the questions. Posting here is fine.
This link will display the first three tutorials that I did about jumping ship to Capture One Pro. There are also two other pages of tutorials with the 1 and 2 links below the three that will display with this link: https://martinbaileyphotography.com/tag/capture-one-pro-tutorial/page/3/
I actually rarely use presets or Styles in Capture One Pro, and although I initially started to save my modifications as style, I found that over the first few months after jumping ship, I gradually stopped using them. These days I can get to the look that I want so quickly that I just go straight to the sliders and curves etc. Once I have one image processed how I like it, I copy the changes to the clipboard and paste them to similar images as I look through them, so the process is really quick, kind of removing the necessity for Styles.
I also do not use any third-party plugins to modify the look of my images. I can do everything I want in Capture One Pro, and that allows me to keep my raw files in raw format, and benefit from future processing engine updates. The only plugin I do use is the JPEG Mini plugin for minimizing the size of exported JPEGs.
To batch process, you could do what I do, and process your first image, then copy the changes to the clipboard, or use the upwards arrow in the toolbar, then select all other similar images, and paste the changes, or click on the downwards pointing arrow in the toolbar. This speeds things up a lot. You can, of course, also save your modifications as Styles of your own.
I hope that helps some.
Regards,
Martin.
Thank you sir! This was all very helpful. I have made the switch over to Capture One. I did the 30 day trial and reprocessed a few of my recent images to do a good comparison. I found that I got faster and faster with the workflow the more I used it. I need to go out and shoot some new stuff and then start fresh in Capture One. But I’m in the process now of selling all my equipment to get the R5 :-). So I think my photography is on pause right now. Finding one in stock is a VERY tricky and I refuse to pay ebay prices for people that are taking advantage of the situation. Thanks for all your help!
Hi Russell,
You’re very welcome. You do get quicker at processing relatively quickly.
That’s sad that people are taking advantage of the low stock situation, essentially adding to the problem. There was someone here in Japan buying ProGrade Digital CFexpress cards and selling them on Amazon.co.jp at 150% markup. They even got their hiked-price products on the official ProGrade Digital page for a while. I let the team know and it was cleared up quickly, but amazing that this stuff can happen.
Good luck with getting your gear switched over though. All the best!
Regards,
Martin.