

Visit Library for MBP Pro eBooks |
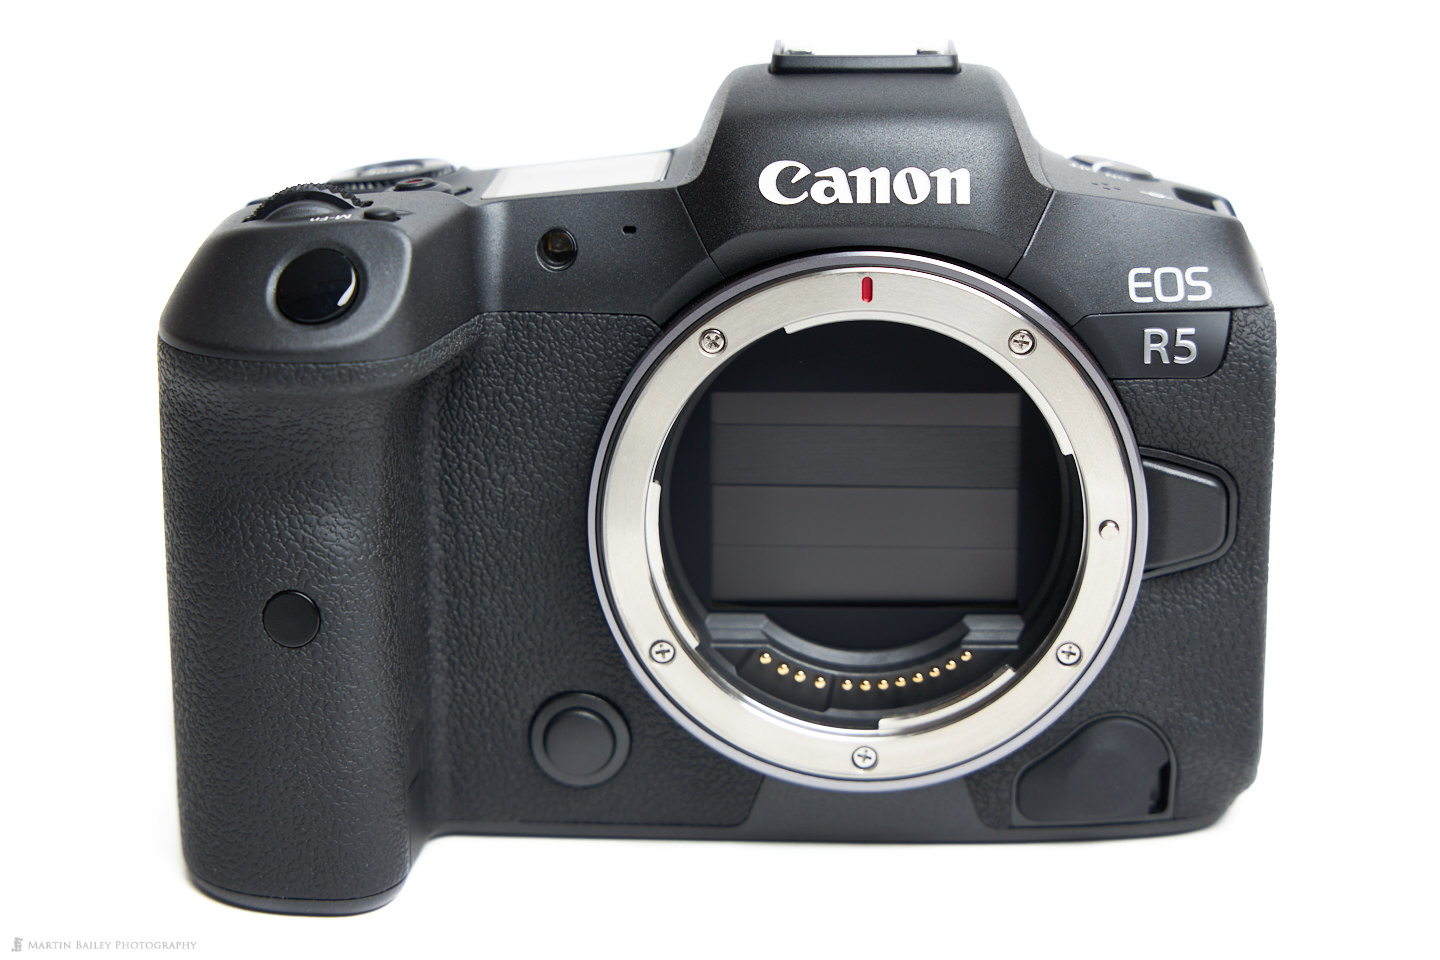
It's Here! On August 6, a week after the initial release, I picked up my new Canon EOS R5! As usual, I have watched with a smile as most of the online photography community has bashed this camera and looked for reasons not to buy it. The video overheating issues we're hearing about is the most common and seems to have somehow been extrapolated out to give people what they feel to be a valid reason to spout negativity about a camera that hardly any of them have even held.
Well, it gives me great pleasure to tell you that this is without a shadow of a doubt, simply the best camera that Canon has ever made, in all respects, including video. If you need an 8K video camera, buy an 8K video camera, but if you need a stills camera that does everything it was designed for, including up to 20 frames per second stills photography at 45 megapixels, you can't go wrong with the EOS R5. The 8K video features are awesome, as is the ability to shoot full-frame 4K video at up to 120 frames per second! But these are, in my opinion, bonus features, and should be treated as such.
If Canon intended the R5 to be a video camera, they would have added fans and vents to keep the sensor and memory card cool, but guess what? Adding vents on a stills camera compromises the weatherproofing, and personally I prefer to own a camera that I can use in bad weather rather than a camera that allows me to shoot unlimited length 8K video. I'm excited about the 8K video and high frame-rate 4K video, but as I said, this is a bonus and I'll use it as it allows.
Main Points
I'm not going to list all of the features of the Canon EOS R5, mostly because you can get a full rundown of this amazing camera on Canon's websites worldwide, but I do want to quickly mention the main points and the reasons why I ordered this camera as soon as it was possible to do so. To me, the two most exciting features of the EOS R5 are the fast frame rate and high-resolution images. These two things never used to come together. For the first two decades of mainstream digital photography, we could have one or the other. Fast frame-rate and lower resolutions, or higher resolution and low frame rate.
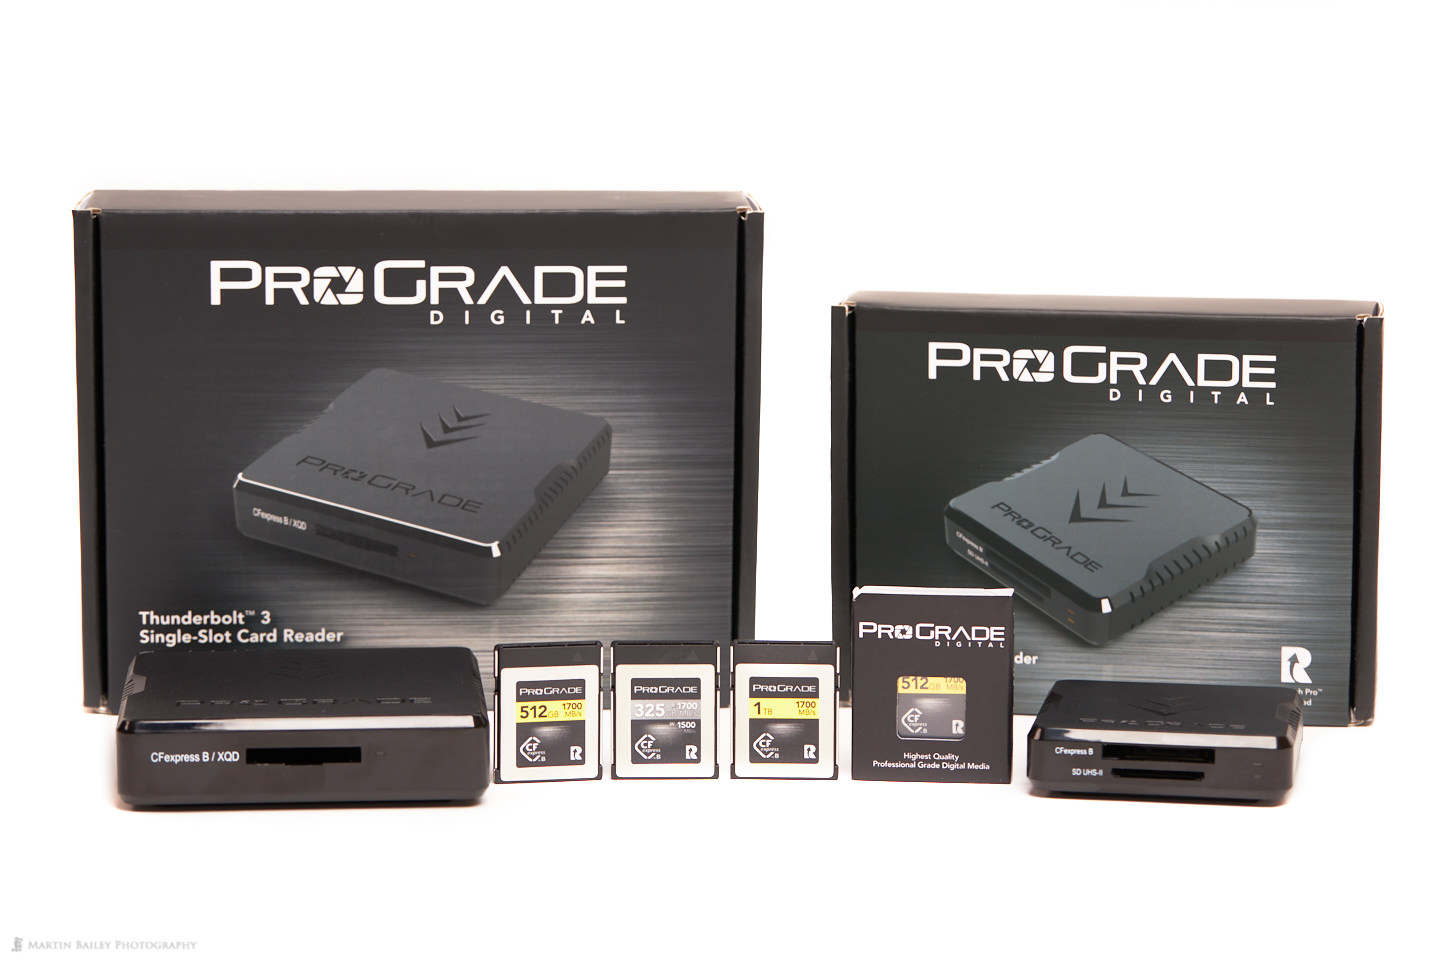
When I saw the specs for the EOS R5 I knew that Canon must have moved to a new card format, but I admit that I did not have my antenna out to catch information on the CFexpress standard until I saw the specs for the R5. It was not much of a surprise for me to learn that ProGrade Digital, the memory card manufacturer that I have been using exclusively for the last few years, was on the bleeding edge of this new technology. In the spirit of full disclosure I would like to mention that although I bought my first 512GB ProGrade Digital CFexpress card and their Thunderbolt 3 card reader, they were kind enough to send me the other cards that I have tested and reported on in the previous post and will also be using for the tests that I report on in this review as well.
Back to my point though, it is completely awesome that the Canon EOS R5 has delivered both high frame rate shooting with high-resolution 45 megapixel images. I wouldn't have thought it possible, but as my test results have showed, it absolutely is, and I'm completely excited about this.
The other thing that I knew would happen, is the improved refresh rate and clarity of the electronic viewfinder. I really enjoyed shooting with the EOS R bodies over the past two years, but it was without doubt a stepping stone camera, and using it to shoot wildlife worked, but it required patience to work with the viewfinder for fast paced shooting, and on occasion would cost me a shot or two as the camera simply wouldn't be able to keep up with the pace of shooting and my often very quickly moving subjects.
I can't share footage of this, but I have had my wife dart around our apartment and disappear behind sofa and doors, and I am completely confident that the improvements that Canon has made to both the viewfinder and the autofocus system are worlds ahead of what we have in the EOS R, and I knew that would be the case.
I have also been highly impressed with the ability of the new autofocus system to track with the eye of not only humans but with animals now. I found that the EOS R worked well with monkeys because they are similar to us, but the EOS R5 now supports tracking of a number of animals, including dogs, cats, and birds, so I'm looking forward to getting out in the field more with the R5 and really putting these new features to the test.
Last, but not least, I was somewhat excited by the addition of In-Body Image Stabilization, and have been blown away to find that this works incredibly well with my RF 50mm f/1.2 L lens, despite it not having IS built into the lens itself, and I'll touch on this more in my review as well.
Note that when I moved to mirrorless with Canon I made a decision to no longer buy the battery grips for my cameras. I sometimes miss not having the vertical grip, and I have found that with the R5 the batteries do run out relatively quickly, probably due to the in-body image stabilization and perhaps also the extra power needed to run the CFexpress cards. I've not checked on this, but the CFexpress cards are generating heat, and that has to come from somewhere, so I assume they are using more power. I'll correct myself later if I'm wrong on this. I decided keep my cameras lower profile from now on though, and initially wondered if this might prevent the camera from reaching the maximum frame rate, but that was not the case, as I'll share with you shortly.
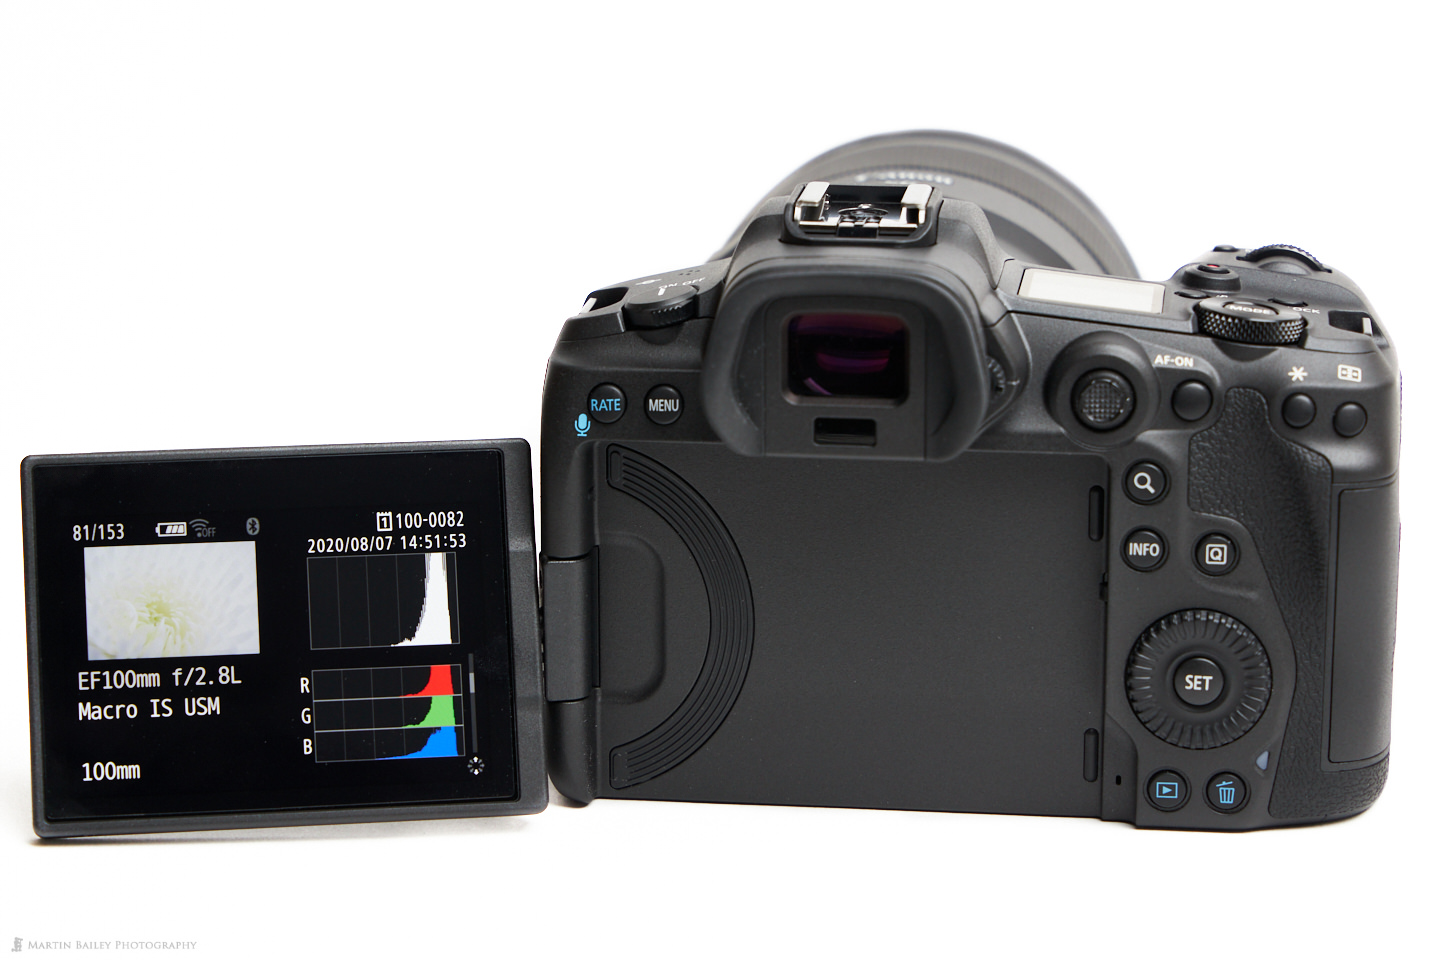
Thinking about it, one other thing to note is that I was at one point concerned that the EOS R5 might not have an articulated LCD, as this somewhat compromises the weatherproofing, and Canon have historically only used an articulated LCD on lower-end cameras, so I was happy to read a while back that the R5 does indeed have an articulated LCD. I have become accustomed to pulling out and using this for low angle shooting, and also for video when I have to see what I'm shooting from the front of the camera, so I didn't want to lose the functionality in the R5. OK, so with those observations out of the way, let's jump deeper into this, as I share some of my findings, having actually used the camera.
Problem with Adobe DNG Workaround at High ISOs
The first thing I noticed and wanted to talk about is the workaround that most people are using to process EOS R5 raw files. Most photo editing software, such as Capture One Pro, my personal choice, does not yet natively support R5 raw files, and I initially used the Adobe DNG Converter software to convert my images to DNG files and they can then be imported into Capture One Pro. However, when I compared the results of my ISO performance test, pitching the R5 against the EOS R, it became obvious that as the ISO increases, the DNG converted files are not being processed correctly in Capture One Pro.
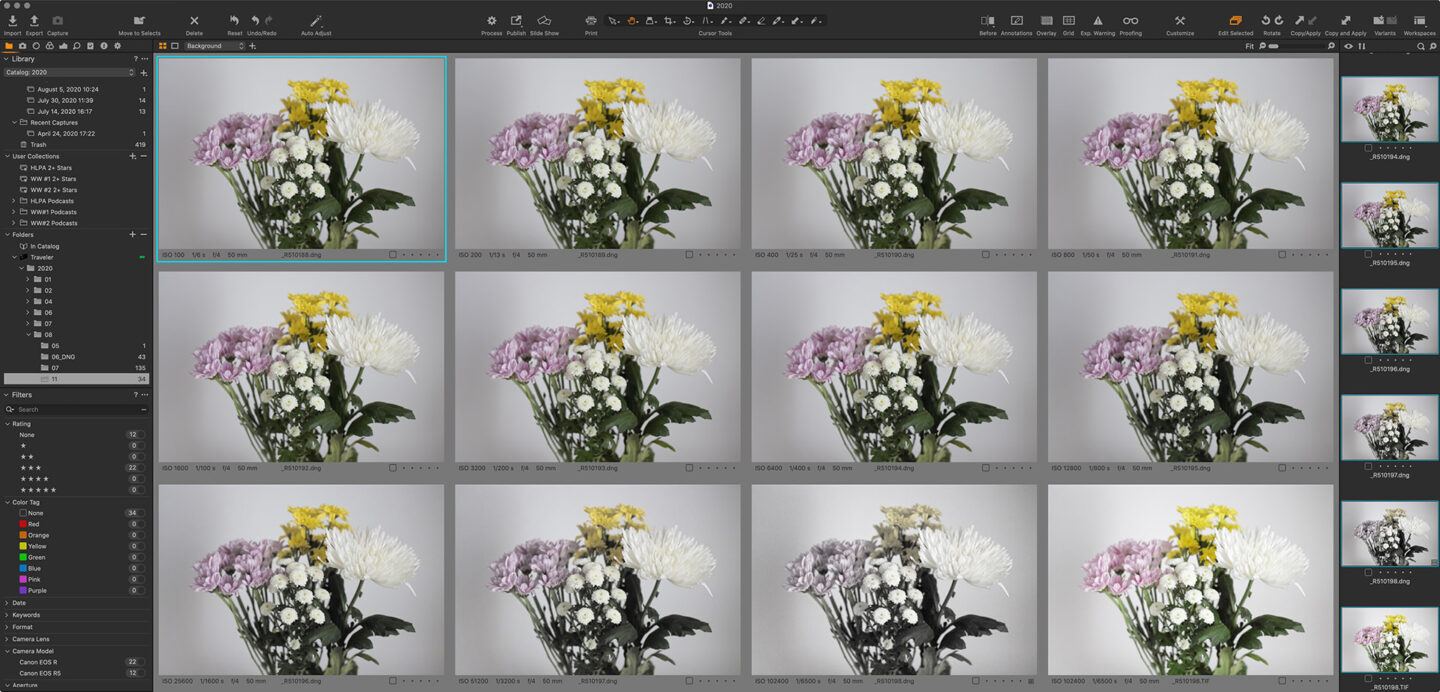
Here is a screenshot of Capture One with a converted DNG file starting at ISO 100 and working up to ISO 102400, which is the second to last image. The final image in the bottom right corner though is the same ISO 102400 image processed in Canon's Digital Photo Professional, and Adobe Bridge and Photoshop display the image with the correct colors too. So, if you use Capture One Pro and high ISOs, be aware that you may not be getting accurate color until Phase One releases an update with official support for the Canon EOS R5.
Image Quality / Resolution
So, as I work on this review, there are a number of things that are really important to me. The first two being image quality and ISO performance, and then I'm going to test the frame rate, as this camera is opening up some very interesting doors for wildlife and sports photographers. I will also test the raw image buffer, and see if it's possible to fill it, and if it is, how long it takes to free up and enable us to continue to shoot. Let's start with a look at image quality.
Because Capture One Pro does not yet support the EOS R5 images and there is a problem with using converted DNG files with Capture One Pro, I'm faced with a bit of a dilemma. I tried outputting TIFF files from Canon's Digital Photo Professional, but the image quality is not as good as Capture One Pro, which is, of course, why I use Capture One Pro, but I need to show you an apples to apples comparison. What I've decided to do for this test, is to share a high-resolution screenshot of four images displayed simultaneously. The top left image is the EOS R5 raw file converted to DNG, and for this test that's not a problem because the image has no color to get messed up.
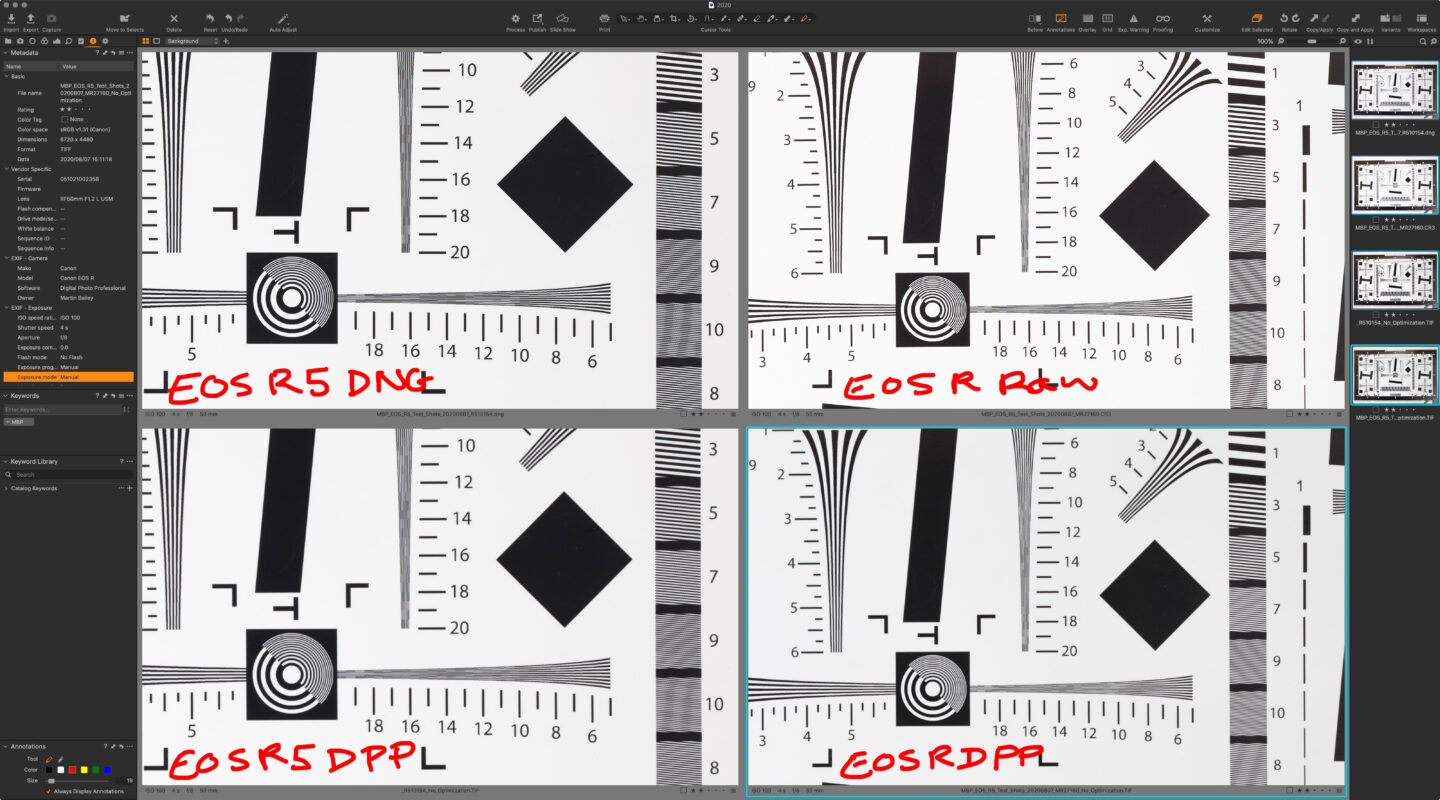
The top right image is the raw image from the EOS R as a direct comparison for the top left image. The bottom two images are TIFF files processed in Digital Photo Professional with no processing except the standard raw sharpening, which is the same processing as Capture One Pro. What I then need you to do is to click on the image to open it in the Lightbox, and then click on the cloud icon with the down arrow in the top right of the Lightbox, and that should enable you to download the image to your computer for closer inspection.
What you'll find is that apart from the EOS R5 image being obviously higher resolution, as in, it is larger than the EOS R image because both are zoomed in to 100%, but apart from that, the image quality as such is pretty much the same. This is to be expected because the EOS R with RF lenses is also incredibly good image quality. I'd also like you to look at the bottom two DPP processed images, and you'll be able to confirm that they are slightly softer. They aren't as sharp, and that is why I could not do an apples to apples comparison using these TIFF files. I think you'll agree though that as far as the resolution is concerned, there is nothing to be concerned about. Both images were shot with the RF 50mm ƒ/1.2L lens at ƒ8, ISO 100.
ISO Performance
My dilemma continues now as I try to show you the ISO Performance Test results. What I've decided to do is to share pairs of images from each camera, the EOS R5, and the EOS R. The first image of each pair is a 100% crop from a TIFF file with both sharpening and noise reduction applied in Canon's Digital Photo Professional software. The second image has only Sharpening applied so that you can get a better idea of the actual amount of grain in the image, as well as seeing how well this can be cleaned up with DPP. Capture One Pro also cleans up the images nicely even with its default settings, but I'd rather not share the images from the DNG converted raw files because of the color issues at high ISOs that I mentioned earlier.
I'm also going to group all of the images by ISO, so as you click through these in the Lightbox, you'll see four ISO 100 images first, starting with a pair from the EOS R5, with one image having had DPP Processing, and a second with just sharpening, and then the same processing options for another pair of images from the EOS R for comparison. I selected the area of the image that I focussed on to zoom in to 100% on because it shows both detail and the noise levels in the shadow and darker areas of the image. Note too that I am exposing to the right for these shots, with almost two stops of exposure compensation to ensure that the whites are white. This is how I shoot everything, and it does result in less grain, and therefore better ISO Performance, which is the hole point of this test.


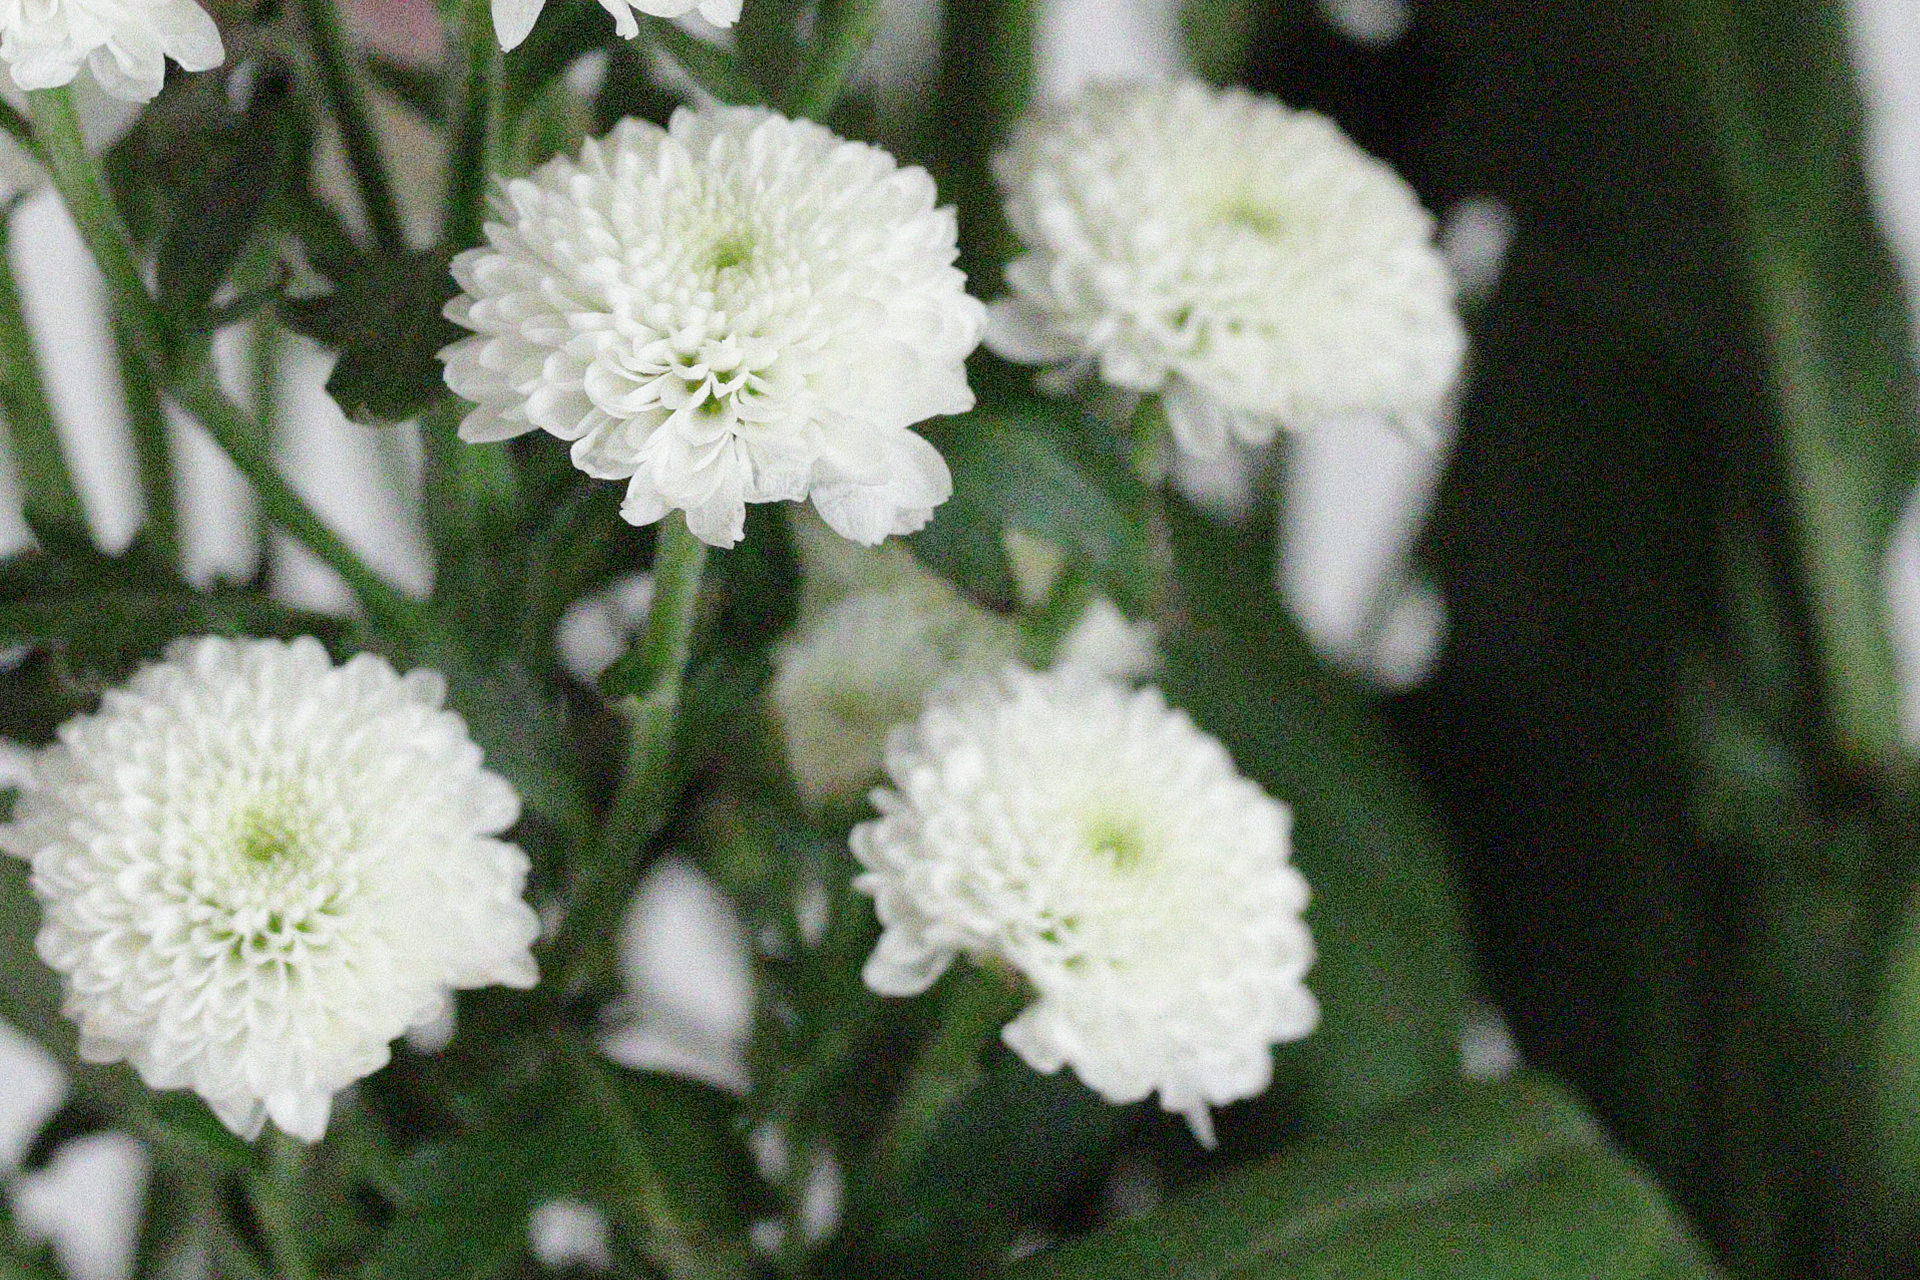


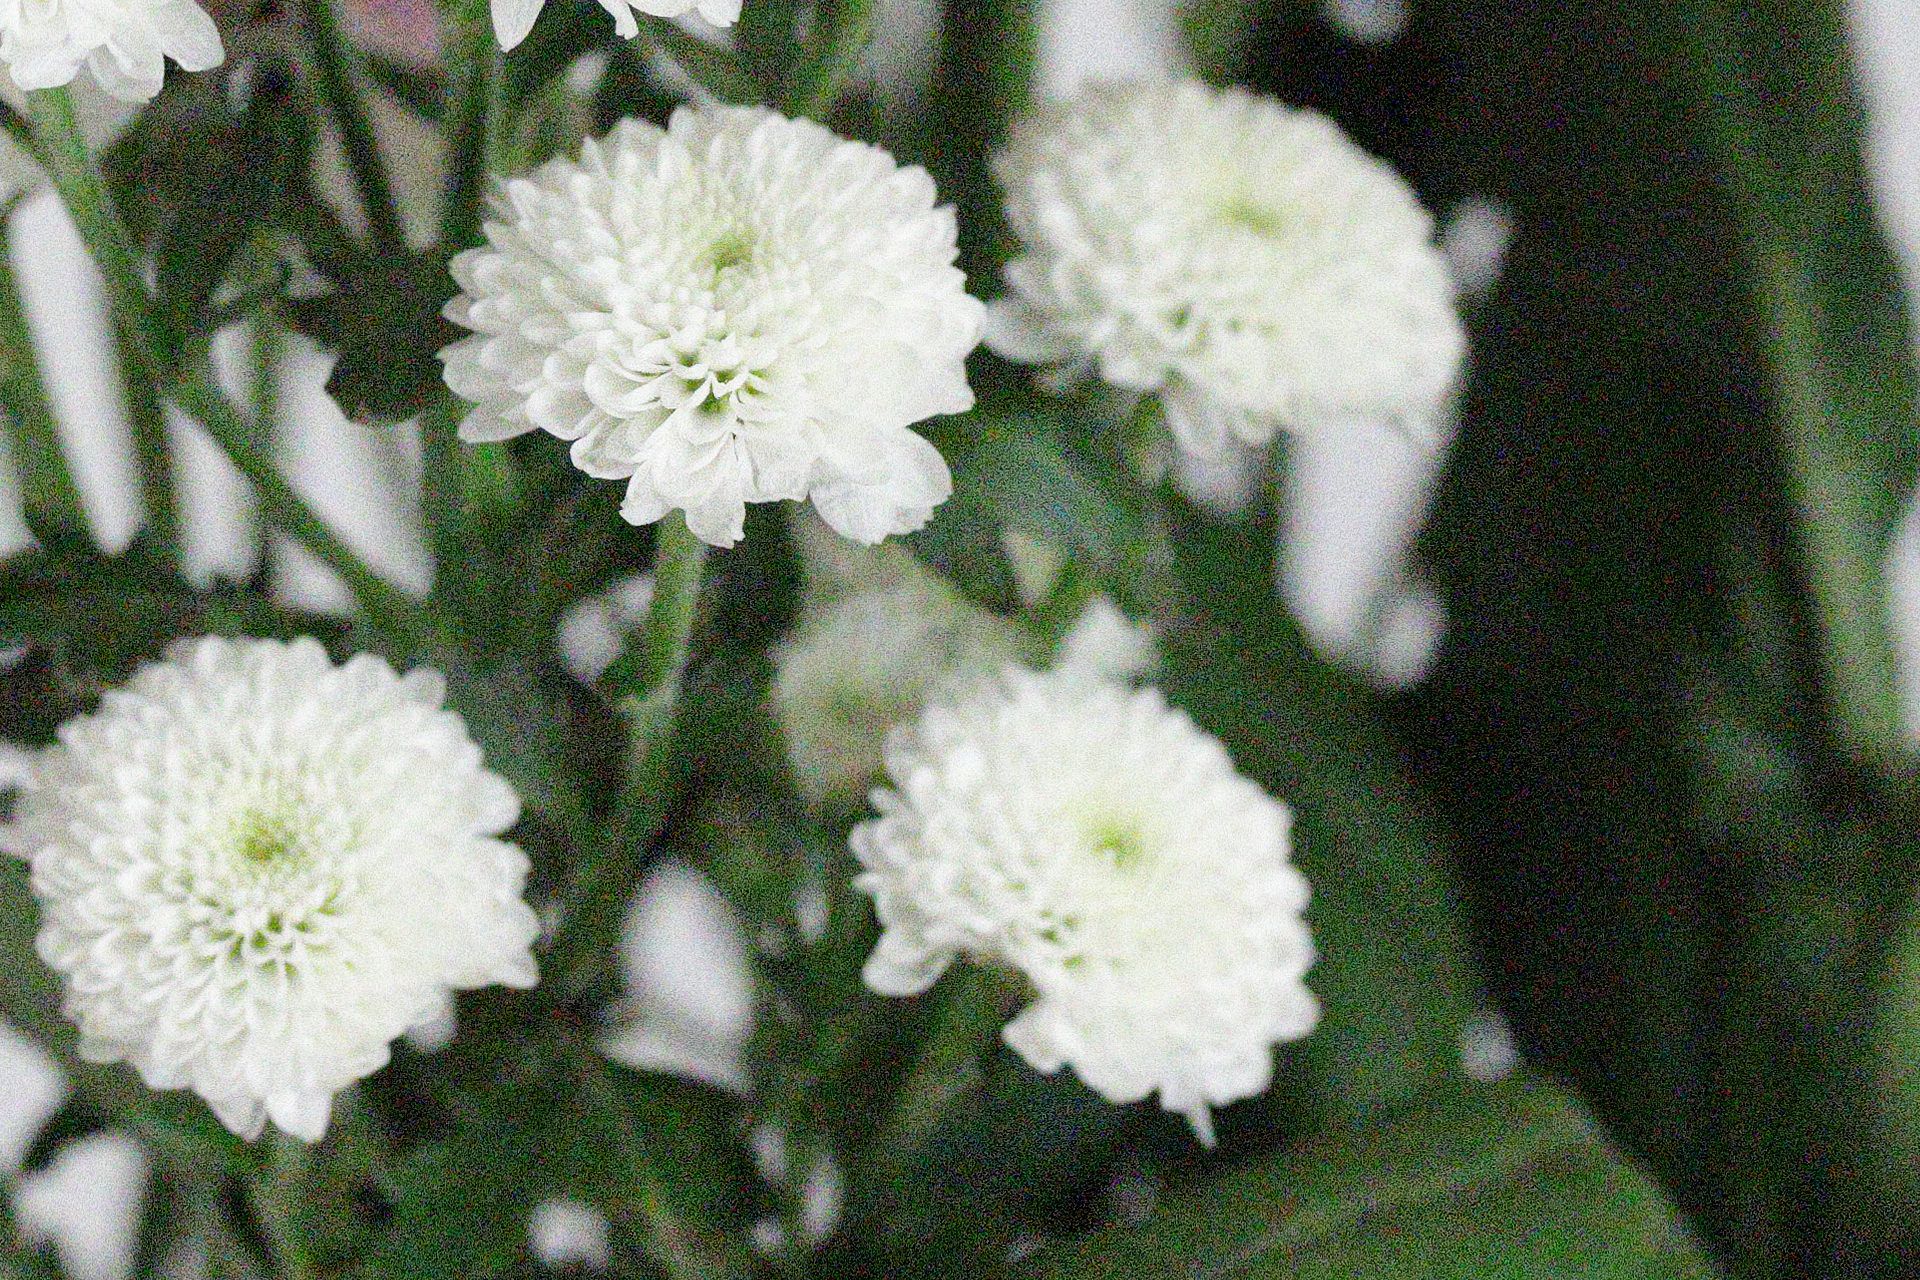


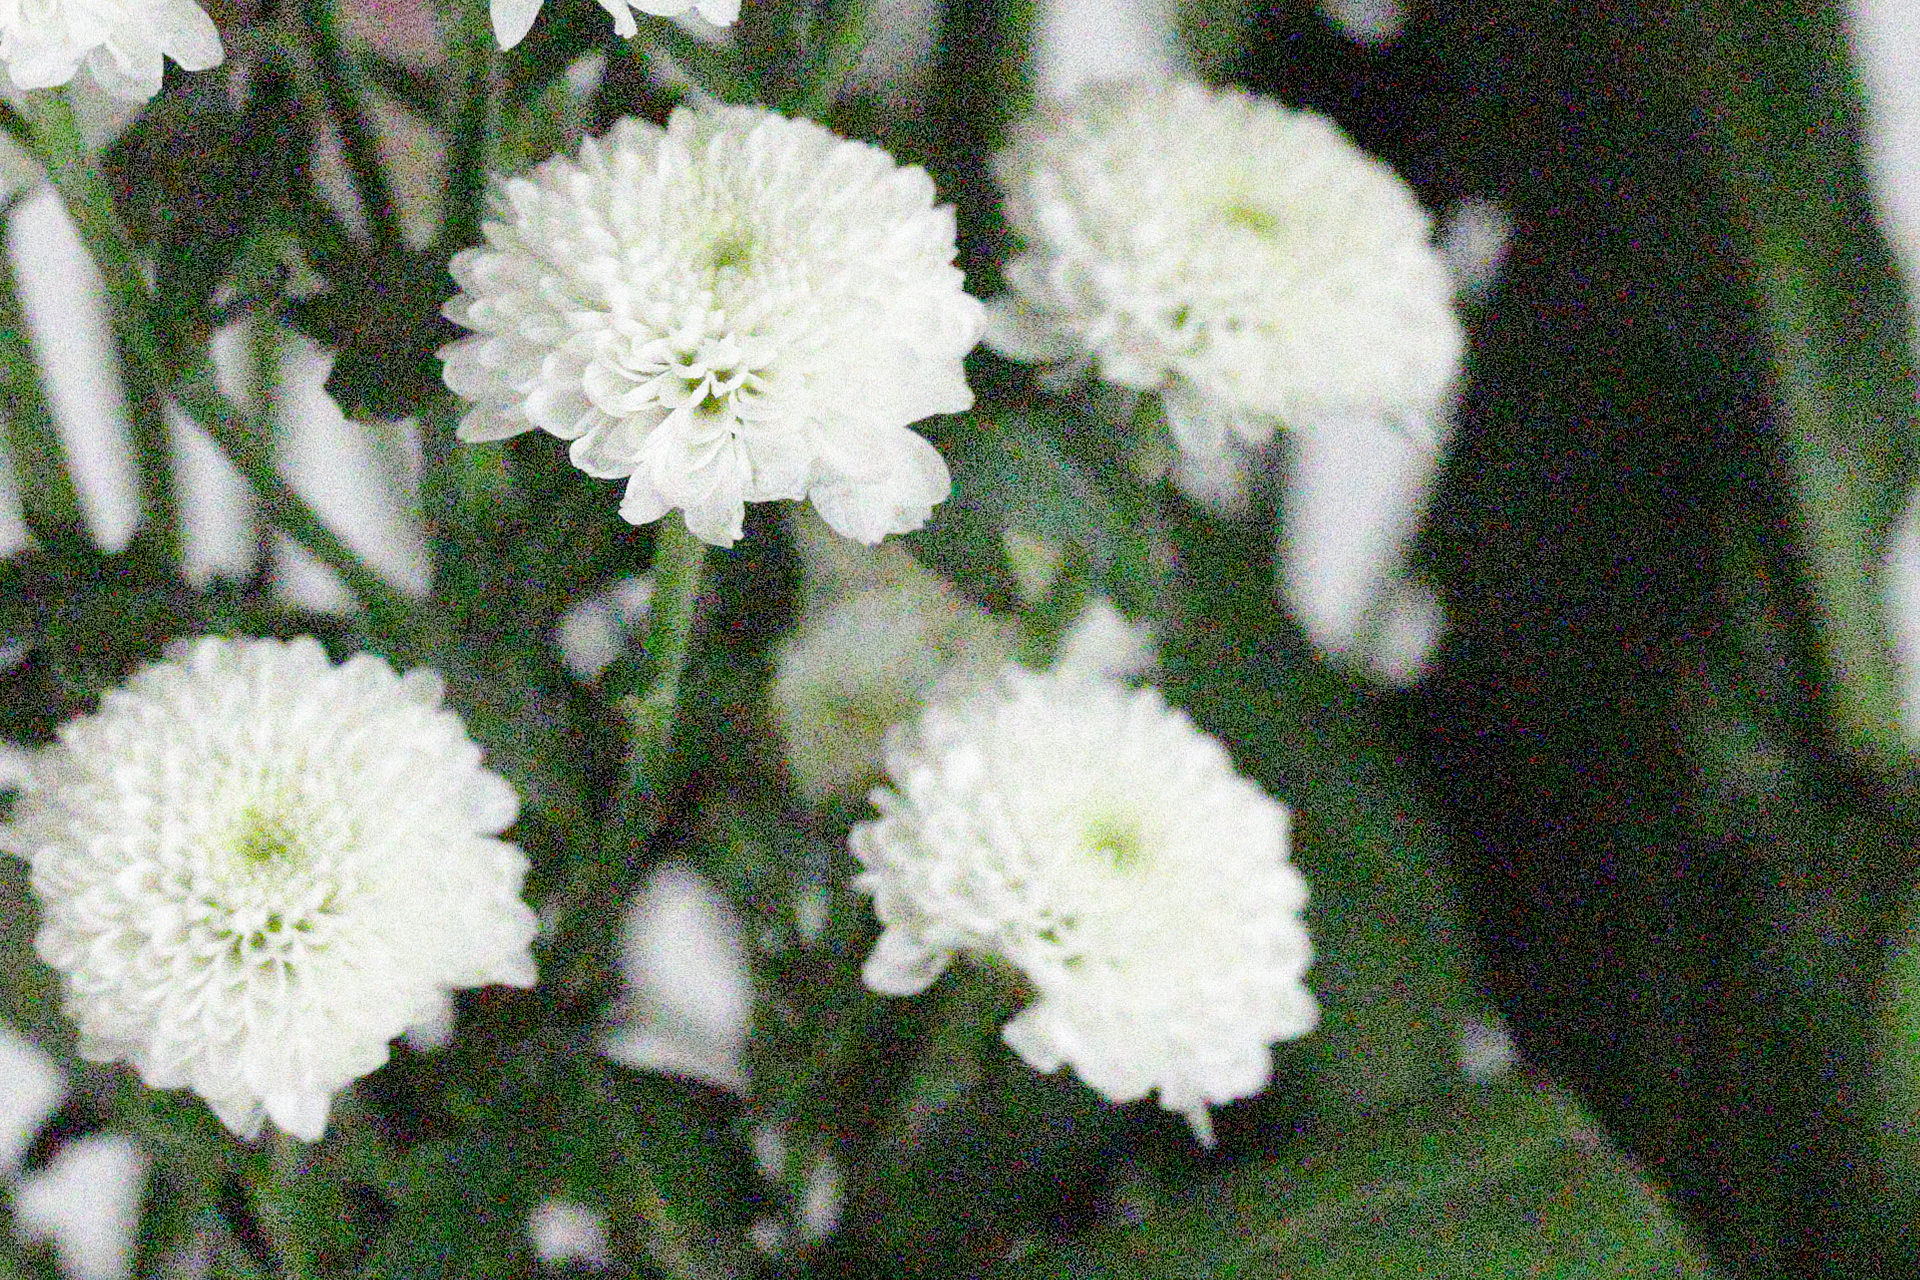


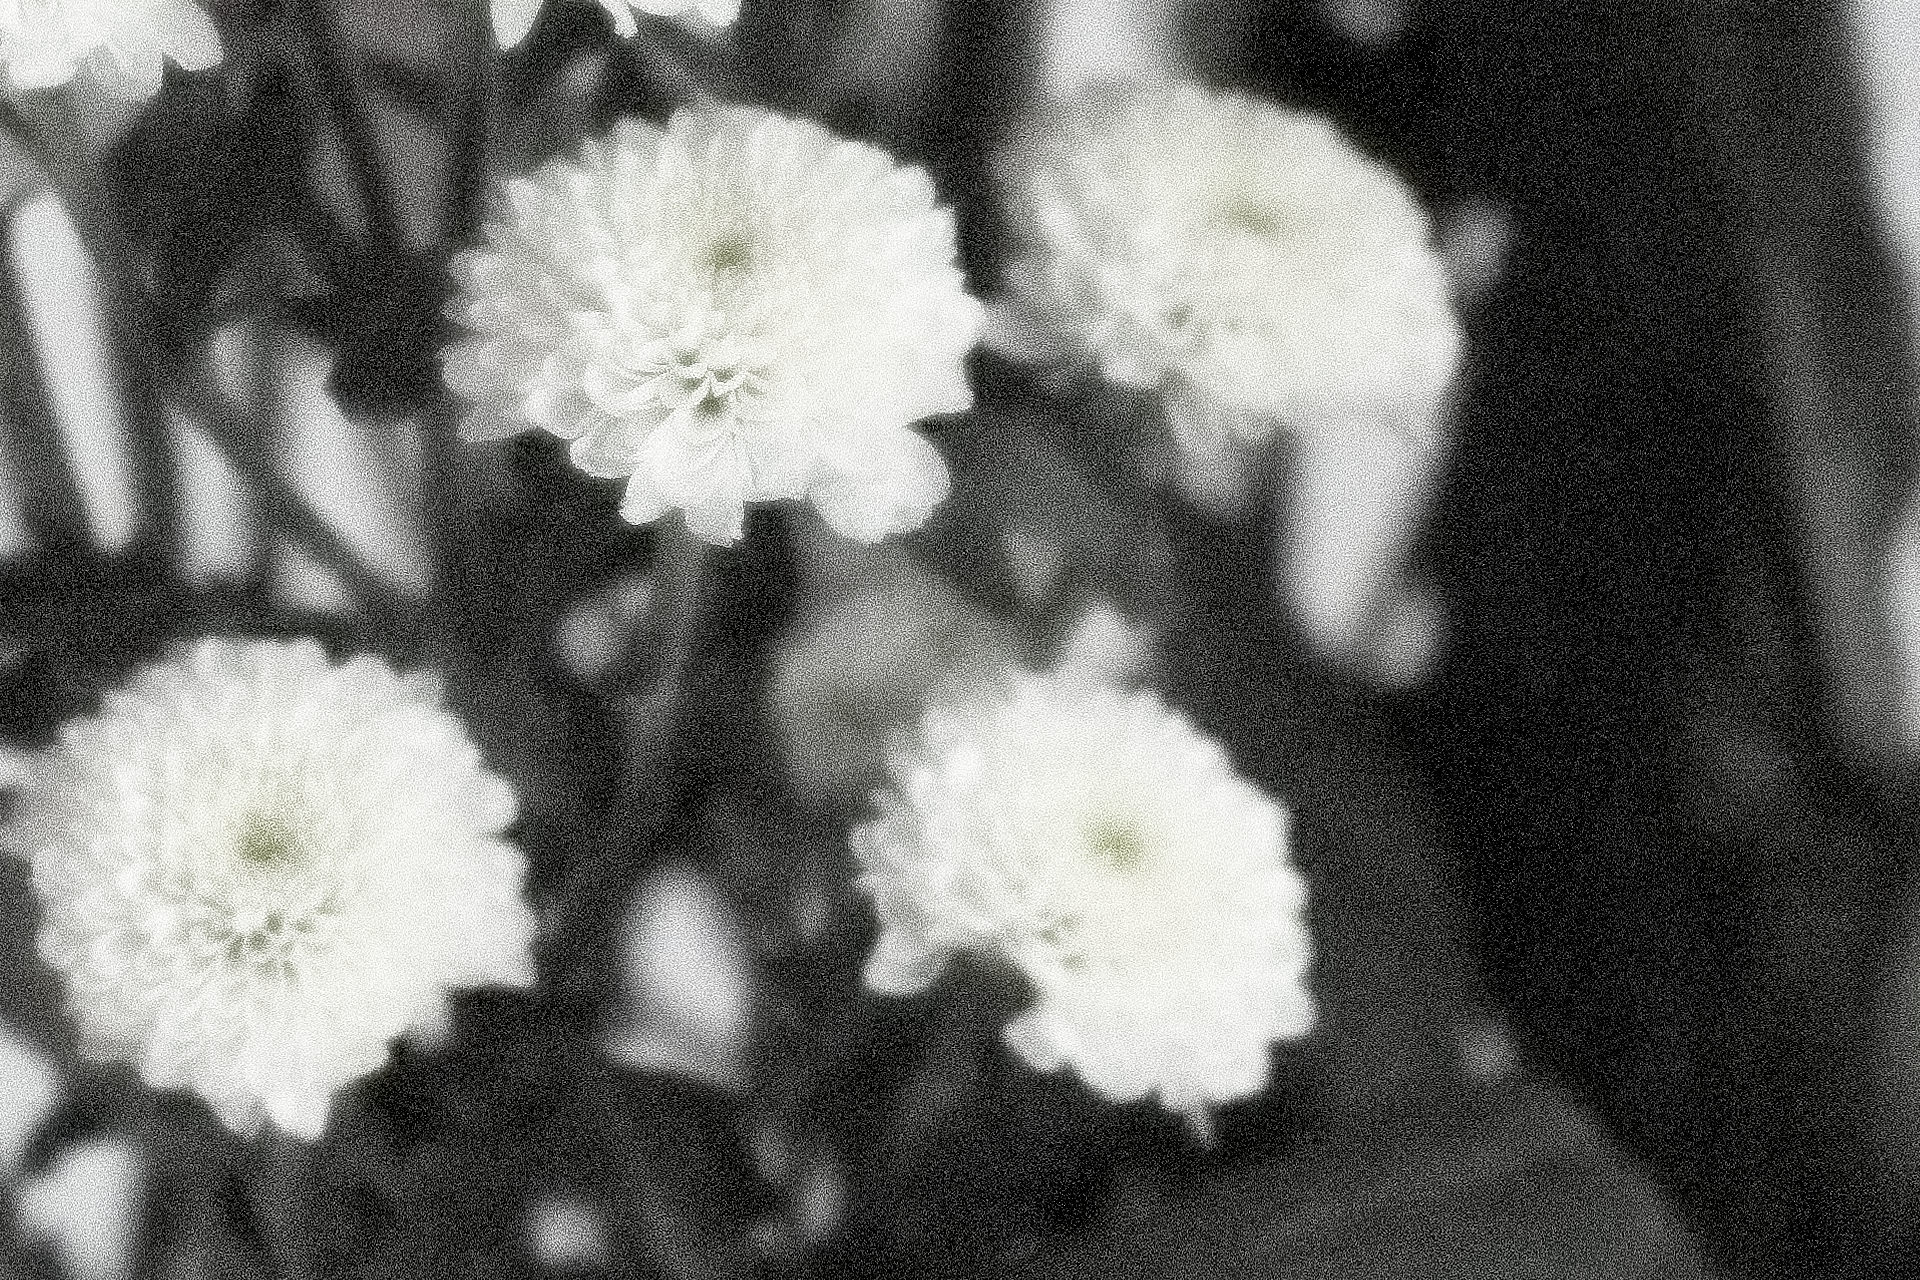
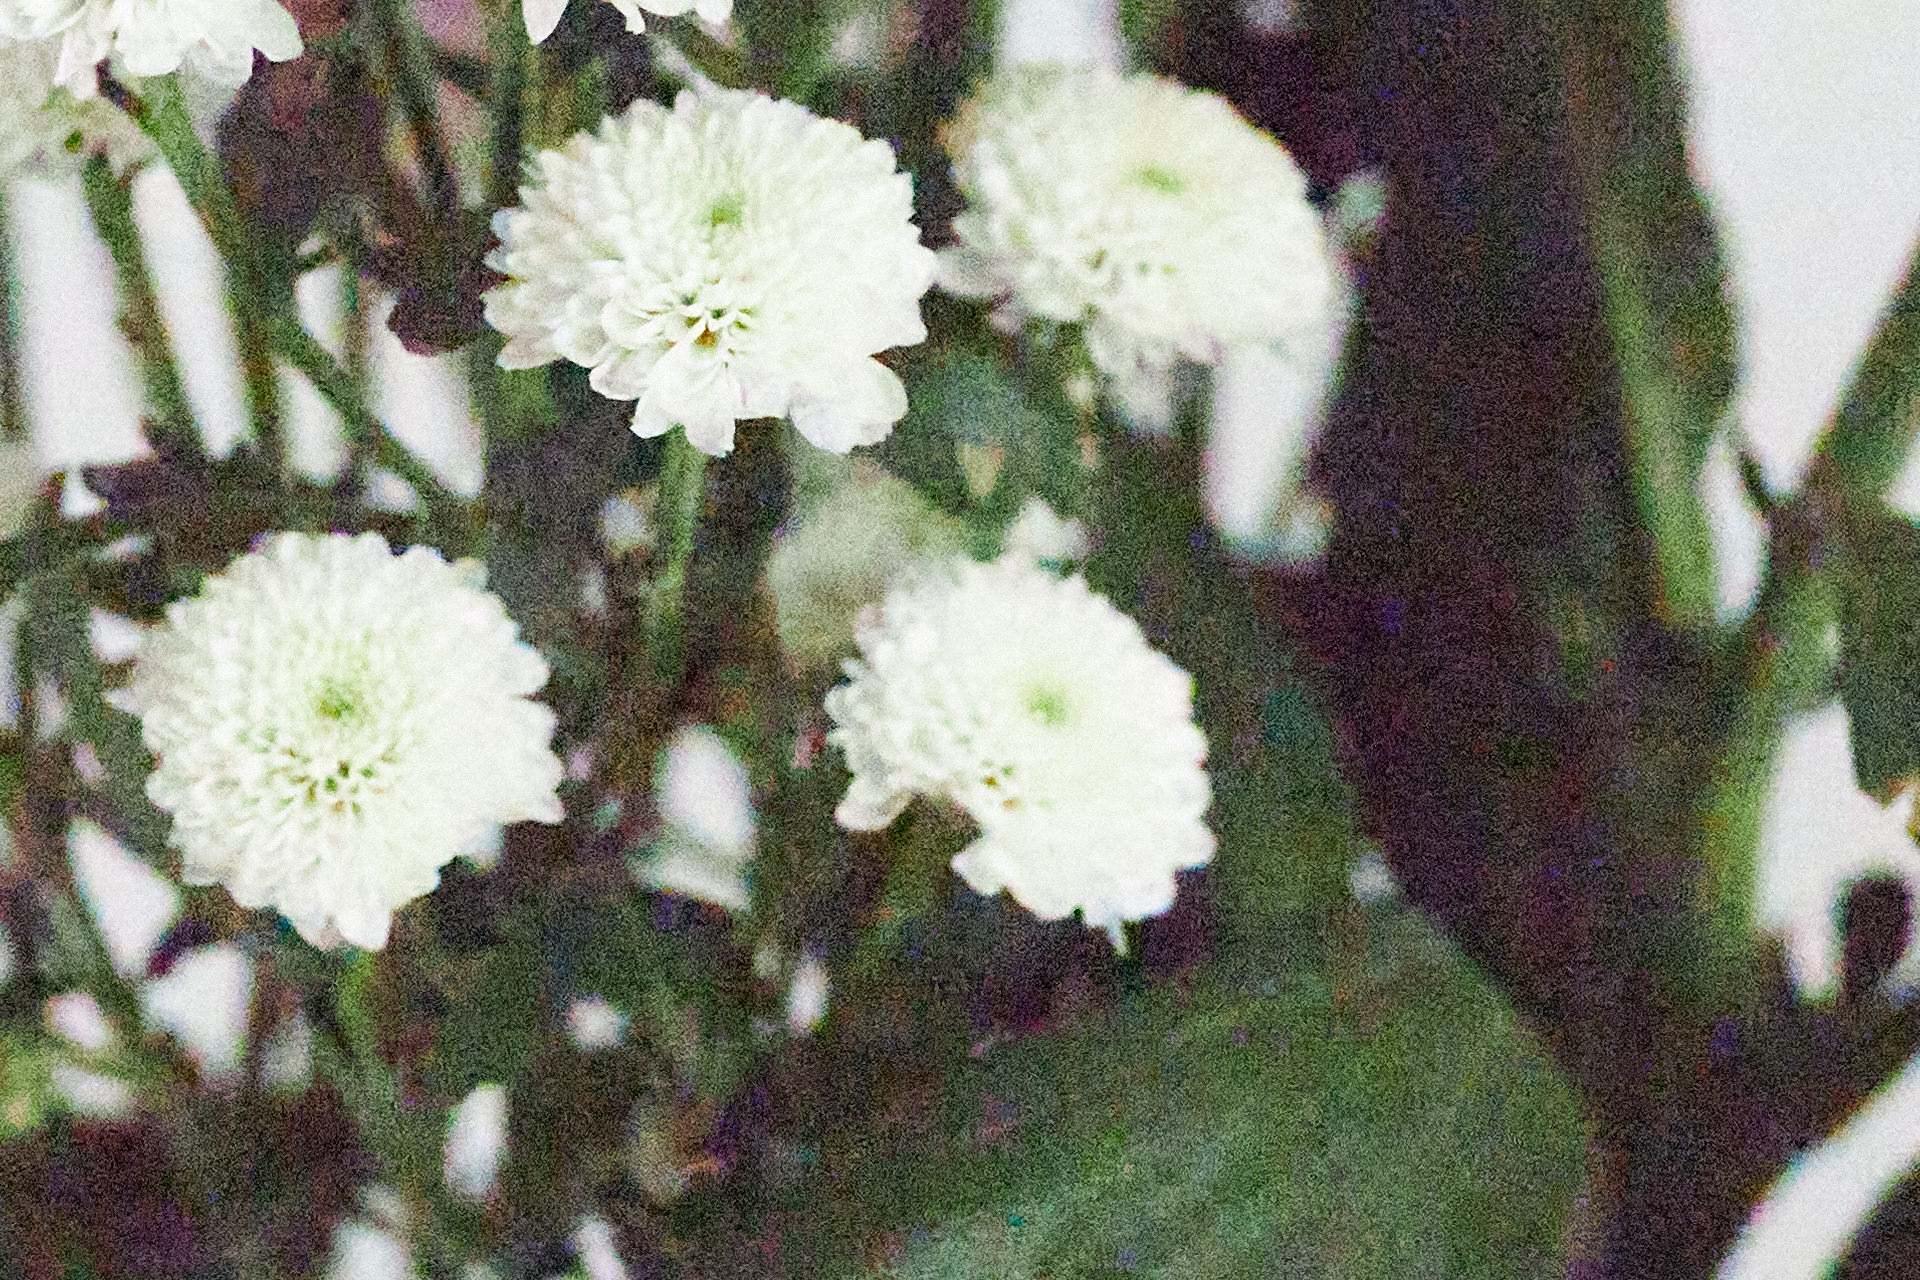
I think you'll probably agree that there is no real visible noise in any of the images up until ISO 6400 with the noise reduction turned off, but in the images that had DPP noise reduction turned on, it doesn't really start to be visible until ISO 12800, and even that is very usable from both cameras. ISO 25600 without noise reduction starts to look pretty nasty, but again, very respectable when noise reduction is applied. At ISO 51200 both cameras start to show a lot of grain, although could arguably be used at a push, and then from the massive 102400 that is the highest ISO that both cameras will shoot at, it seems that the Canon noise reduction is actually a little too heavy-handed on the R5 images, as we start to lose detail in the flowers, and the EOS R actually looks slightly better. For the final set I've also added a Capture One Pro processed version as I think Capture One is slightly kinder on the detail, but keep in mind that the colors are messed up without official support yet for the EOS R5.
The verdict from my ISO Tests is that the ISO performance of the Canon EOS R5 is, pretty much across the board, very similar, even close to identical to the EOS R, but when we consider that the EOS R5 is 45 megapixels compared to the 30 megapixels of the EOS R, keeping the ISO Performance on par with the EOS R is an incredible feat in itself. Based on my tests I always commit to memory a soft and hard ceiling for how high I will take my ISO in the field, and for the EOS R5, as with the EOS R, I'm going to consider going as high as ISO 12800 a no-brainer, and will use ISO 25600 when necessary, and probably also 51200 at a push. I will probably turn off the expandable High ISO of 102400, as I doubt I'll ever use it, but with a usable 51200, who cares!?
Frame Rate and Raw Buffer Observations
I have also tested the Frame Rate and Raw Buffer so let's take a look at the results of these tests now. I haven't had an opportunity to shoot any wildlife yet, so these results are from tests in my studio, but I think you'll still find this useful. The first observation is that using ProGrade Digital's Cobalt cards, with the Electronic 1st Curtain shutter, it is not possible to fill the raw buffer. To simulate some fast-paced shooting settings in conditions that I often work in, I increased my ISO to 800 and I used a shutter speed of 1/250 of a second. That could have been faster, but I didn't have much light and wanted to actually record images rather than black frames so that the camera had some processing to do. When I started to shoot, the raw buffer was displaying as 56, and I mashed down on the shutter button and kept it pressed down for around 200 frames, and with no sign of it slowing down, I released my finger, and the raw buffer still said 56, so the camera was emptying its buffer to the card as quickly as I could shoot them, and that is very impressive.
9 FPS at ISO 800 Electronic 1st Curtain
I counted the number of images that I was able to shoot each second, and for the first burst, shot with Electronic 1st-curtain shutter, I was seeing a constant switching back and forth between 8 and 9 frames, for a fraction over 20 seconds and ended up with a total of 181 images, so my frame rate at ISO 800 was slightly under 9 frames per second, and that is very nice. Just under what Canon claims but with the ISO increased that's to be expected.
Constant 20 fps with Electronic Shutter!
I then switched to the Electronic shutter and found that even at ISO 800, I was able to get 20 frames per second for the first five seconds. The camera didn't skip a beat, giving me more than 100 frames at 20 fps, and then I did hit the full buffer from around frame 113, giving me just 13 frames for sixth consecutive second in a burst. That then dropped to 7 frames for my seventh second, then just one frame during my eighth second, and then back up to six frames for my ninth second.
Basically, the 20 fps is available for bursts of up to 5 to 6 seconds, or just over 100 frames, and that is amazing! What's more, with the CFexpress card, if you give the camera just a second or two, it writes the frames in the buffer to the card, and you are ready to shoot again. I haven't tested this with wildlife yet, and I do not yet know if there will be any problems caused by the rolling shutter, but I imagine with some fast-moving subjects there will be some tracing of movement during the exposure, so we may have to drop to the Electronic 1st-Curtain shutter anyway. I will still give this a try when possible, and report back on my findings.
Honestly though, if I can get around 8 to 9 frames per second with Electronic 1st-Curtain, that is plenty for me to nail my wildlife shots. I've been nailing shots based on good timing and technique with as little as 2 to 3 frames per second for the last five years or so, so anything above that is a bonus for me anyway.
Mechanical Shutter Frame Rate
Finally, I tested the Mechanical Shutter Frame Rate, and I was pleasantly surprised to find that it is pretty much identical to the Electronic 1st-Curtain frame rate, giving me 9 frames per second for 4 out of 5 seconds, and dropping to 8 once every five seconds, so we're talking an average frame rate of 8.8 frames per second. Again, for a mechanical shutter, that is incredible, especially when we consider that the images are 45 megapixels!
ProGrade Digital Gold CFexpress Cards
All of the previous frame rate and buffer tests were performed with the ProGrade Digital 325GB Cobalt CFexpress card, so I ran the same tests with their 512GB and 1TB Gold cards as well, as these are less expensive, but come with slower write speeds, as I mentioned in my recent review. I'm really pleased to report though, that with the Mechanical Shutter, the frame rate was the same as the Cobalt cards, coming in at 9 frames per second for four out of five seconds, and drops to 8 frames for one second out of five, so we're still looking at an average frame rate of 8.8 frames per second.
The buffer did not fill while using the Mechanical shutter, and after shooting a burst of around 80 images, I took my finger off the shutter button and the buffer showed that it was around five frames down from 66, which is my buffer at ISO 100, as I had a little more light for these tests. My shutter speed was still at 1/250 of a second as with my earlier tests. With the Electronic 1st-Curtain shutter, I actually got more seconds at 9 frames per second, and once again, the buffer was just a few frames down after a burst, and replenished almost instantly.
With the Electronic shutter, I continued to get straight 20 frames per second for the full 66 frames of my buffer, but when the buffer filled, the camera pretty much locked up and it took around 12 seconds for the camera to write the full buffer of images to the Gold card, compared to just a few seconds with the Cobalt card. When you consider that this was following a burst of 66 images at 20 frames per second though, in practical terms I really don't think this is a big deal.
It basically means that both the ProGrade Digital Cobalt and Gold cards work incredibly well with the Canon EOS R5. I will use the Cobalt cards for critical frame rate fast-paced wildlife work, but the Gold cards are a chunk of change less than the Cobalt cards, and with these results, I'd say that they are a very good alternative, giving excellent results if you are watching your pennies.
ProGrade Digital Cobalt SDXC Test
Note too that I also tested shooting stills with the ProGrade Digital Cobalt SDXC card, and got 83 frames in a single burst, and once the buffer filled, it took just six seconds to write the images to the card and the camera was ready to shoot again with an empty buffer. That means it took half the time to empty the buffer than the CFexpress Gold card, so if you don't need to shoot 8K video or high frame-rate 4K video, and you want to save even more pennies, then a Cobalt SDXC card is a viable alternative, even compared to a Gold CFexpress card!
This is also good to know if you already have a fast SDXC card, and makes using the SDXC slot a valid option for switching cards, and even as the first choice to store your images to, say for example, if you want to store just your videos on the CFexpress card, and automatically write your stills to the SDXC Card. Under the Record func+card/folder select option on SET UP1 screen in the R5's menu, you can tell the camera to record stills and video to separate cards, or have either stills or video automatically switch cards when one is full. You can also save raw format video on the CFexpress card MP4 compressed video to the SDXC card. I've had video cut-out due to a full card on the EOS R because it only had one slot, so I will be leaving a Cobalt SDXC card in the second slot and allowing at least video to spill over to the second card when necessary, assuming it doesn't overheat first, of course, and we'll get to that in a moment.
Lightening Fast Workflow
I was so impressed with the speed at which I can transfer my images and video to my computer that I created a short video in which I monitor the time required to copy a 107.5GB 8K video file and just short of 200 50MB image files from the ProGrade Digital 325GB Cobalt CFexpress card using the their Thunderbolt 3 card reader. The video is to provide proof rather than for entertainment, so to be a blatant spoiler, the video file takes just 1:07 seconds and just under 200 image files take a hair under 10 seconds to copy across, which is about 20 images per second!
Overheating When Recording Video
Although stills are my main gig, I do shoot video sometimes, and as I mentioned earlier, I am excited about the 8K video and high frame rate 4K video, so I've done limited tests of recording video, to see roughly how bad the overheating issues that everyone is complaining about really are. In my studio with the air-conditioning on, and the temperature still sitting at around 32° C (90° F) and using the fastest ProGrade Digital 325GB Cobalt CFexpress card, I recorded about a minute of 8K-D 29.97 ALL-I video, stopped it, and then recorded another 11 minutes, at which point the overheat icon displayed on the LCD of the EOS R5. I was holding the camera with both hands, so not letting much air circulate around it, but that's all I got.
After letting the camera cool down for an hour or so, I switched to 8K-D 29.97 IPB video, and this time also used the 1TB Gold CFexpress card from ProGrade Digital and was able to shoot for just over 17 minutes before the overheat icon started to flash on my screen. I could probably leave it running a while longer, but the manual says to turn the camera off when that icon is displayed, so I have been doing just that and allowing the camera to cool down for an hour or so.
As a third test, I switched to the 512GB Gold card from ProGrade and started to shoot some 119 frames per second 4K video, which is also very demanding on the camera and memory card, and I was able to record without any problems speed-wise, but I had only given the camera about 10 minutes to cool down this time, so it started to overheat again after just four minutes. Once again, my studio was warm, and I didn't give the camera long to cool down, so this is about what I expected.
I'm going to stop my video tests there because I've found that I can shoot clips that are probably plenty long enough for my usual video work, as it's usually not a big part of my work, and I have also confirmed that I can write to the ProGrade Digital Gold cards pretty much in the same way as I can write to their Cobalt cards. I do still intend to pick up a 650GB Cobalt card, probably in September when I get the 100-500mm RF lens, and sell my EOS R and my 100-400mm EF lens, as they along with what's left on my camera store point card, will cover the cost of a second EOS R5. And, of course, because I do always travel and work with two identical bodies if one overheats for video and I really need to continue shooting, I can always switch bodies while the other cools down.
Overheating Does NOT Prevent Shooting Stills
One thing to note, and this is a very important aspect for me, is that you can always shoot stills. If the camera is in an overheat state from shooting video, and you switch to stills, you can continue to shoot without any problems. The overheating applies to video shooting only and does not hinder the shooting of still photographs.
Example Photos
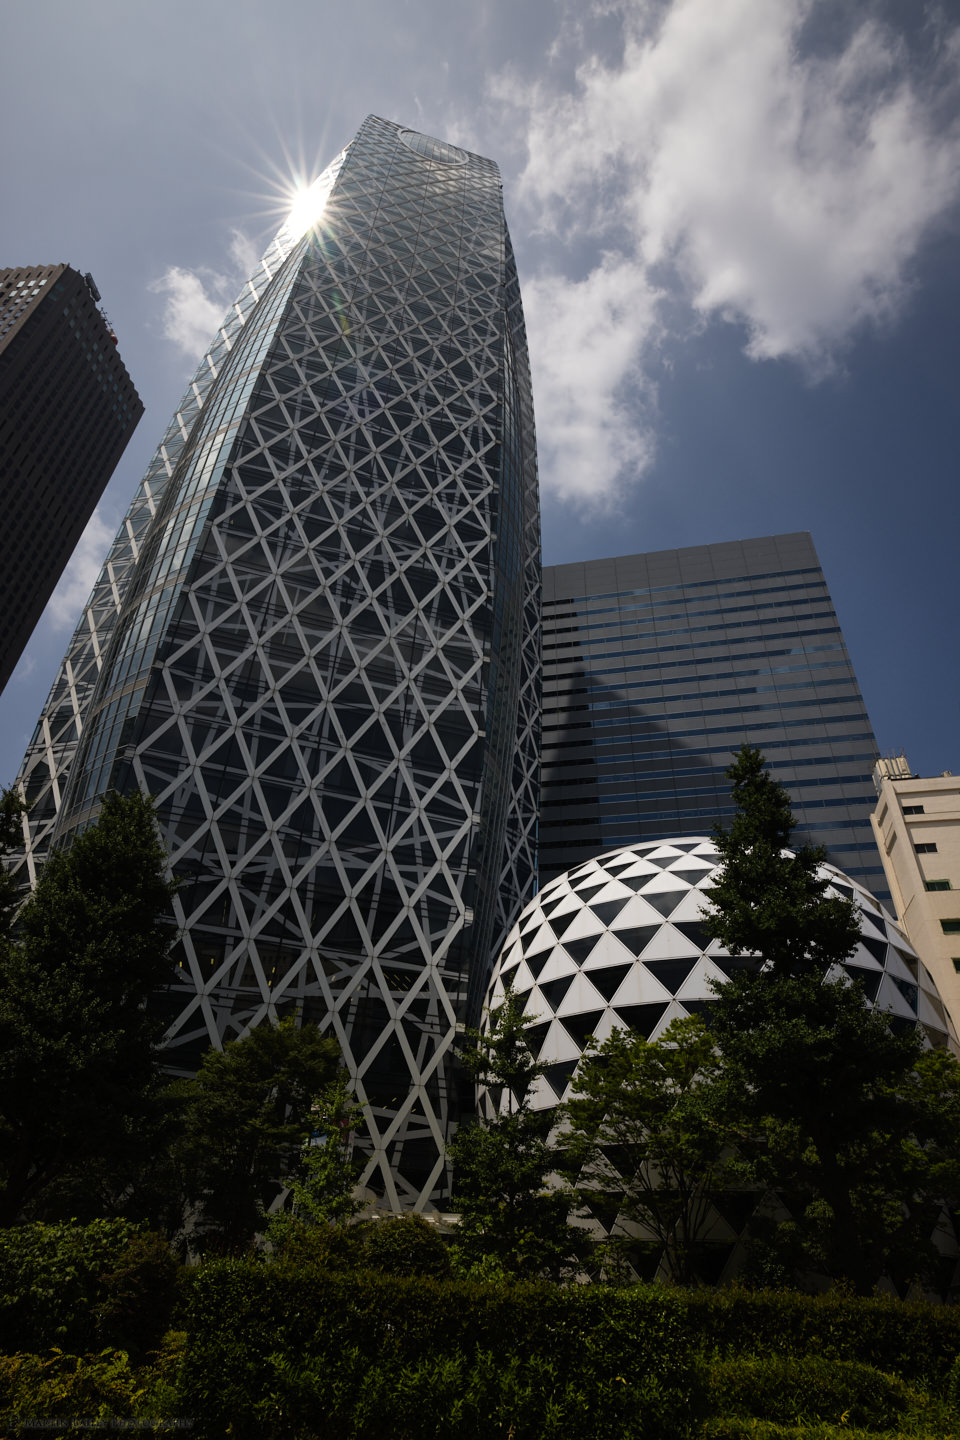
Before we start to wrap this up, I'd like to share a handful of example photos that I shot on the day that I got the camera and the following day, to start to get used to shooting with the Canon EOS R5. Again, these are converted to DNG and processed in Capture One Pro, but the ISO was down at 100, so the colors shouldn't be out of whack.
I would usually make the blues a little more vibrant, as I was shooting towards the sun a little, but I've left this as it was shot so that you can see what we get in these conditions straight out of the camera. I was impressed with how well the EOS R5 handled the contrast, with the starburst on the tower and the shadow side details looks great, as does the detail in the dark green summer leaves.
I was disappointed that Canon decided to leave GPS out of the R5. I know that they've built in the ability to link the camera to a phone and use the GPS data from the phone, but I honestly cannot imagine that this is much better on the camera's battery than simply running an internal GPS unit. I'm honestly tired of attaching the GP-E2 to the top of my camera all the time, and every camera that Canon has released for the last eight years or so that I have not bought, has had GPS built-in, and I find that really annoying. Luckily, that is the only thing that I find annoying about this camera. Everything else is nothing short of amazing!
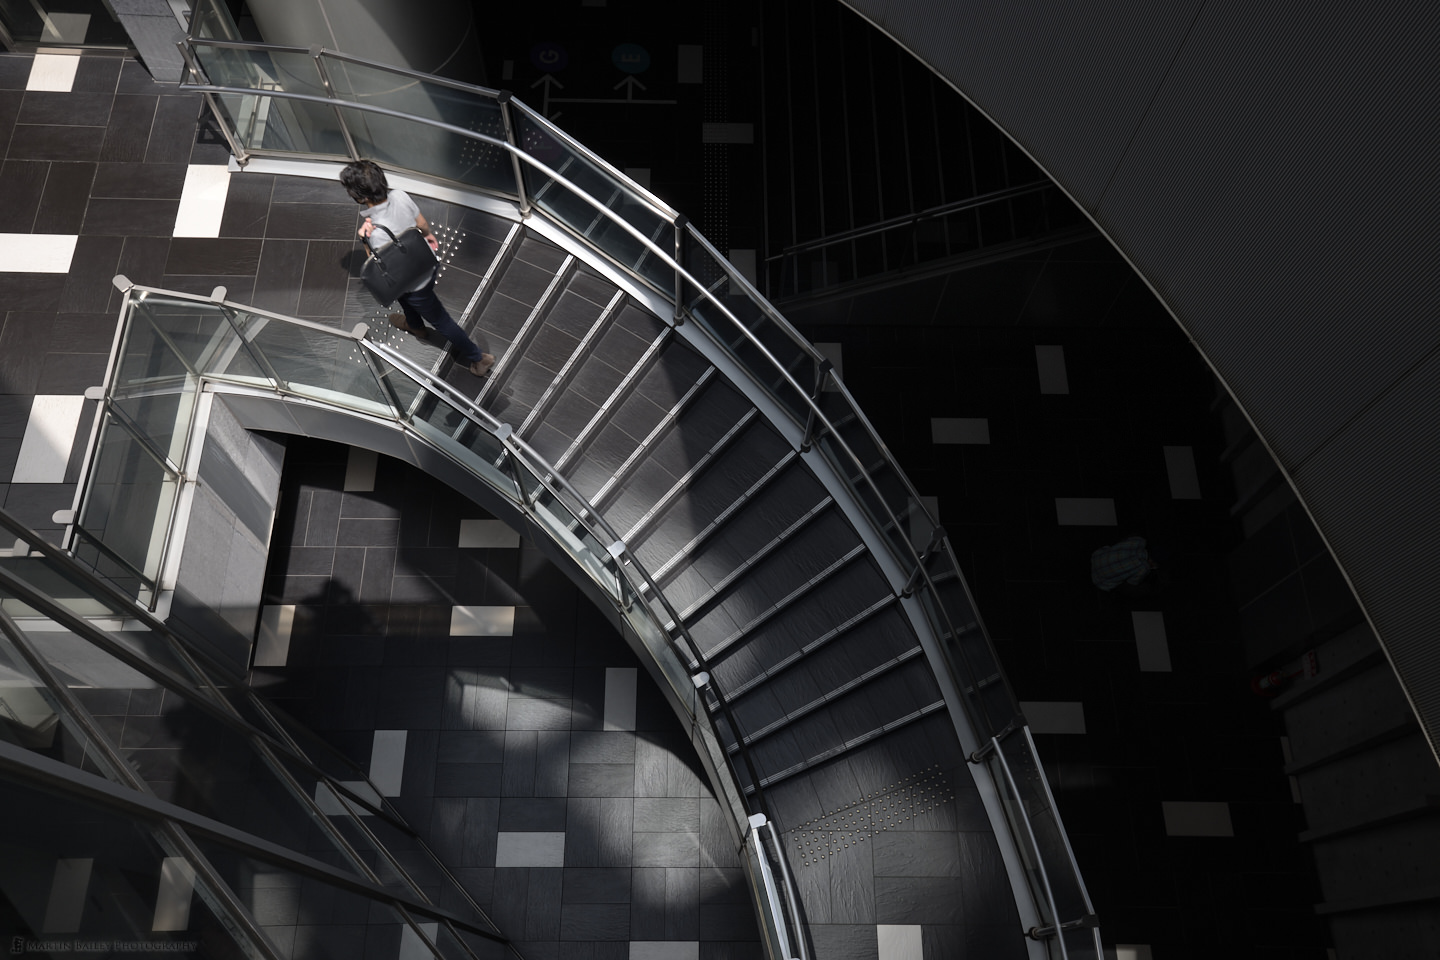
Here (below) is another test shot, this time looking down the stairs of the Cocoon Building. I like to shoot this as a test because it gives me a good idea of how well the camera handles contrast and shadows. I increased my ISO to 160 for this to get a shutter speed of 1/100 of a second. I was using my new RF 15-35mm f/2.8 L lens with IS, which, coupled with the new in-body IS of the R5 gives me a total of 7 stops of image stabilization, but I didn't want the person walking up the stairs to blur more than this.
Incidentally, Canon has announced that the RF 24-105mm f/4 lens gets 8 stops of stabilization, and even my RF 50mm f/1.2 lens gets 7 stops of stabilization despite it not actually having its own internal image stabilization. That's all from the in body image stabilization.
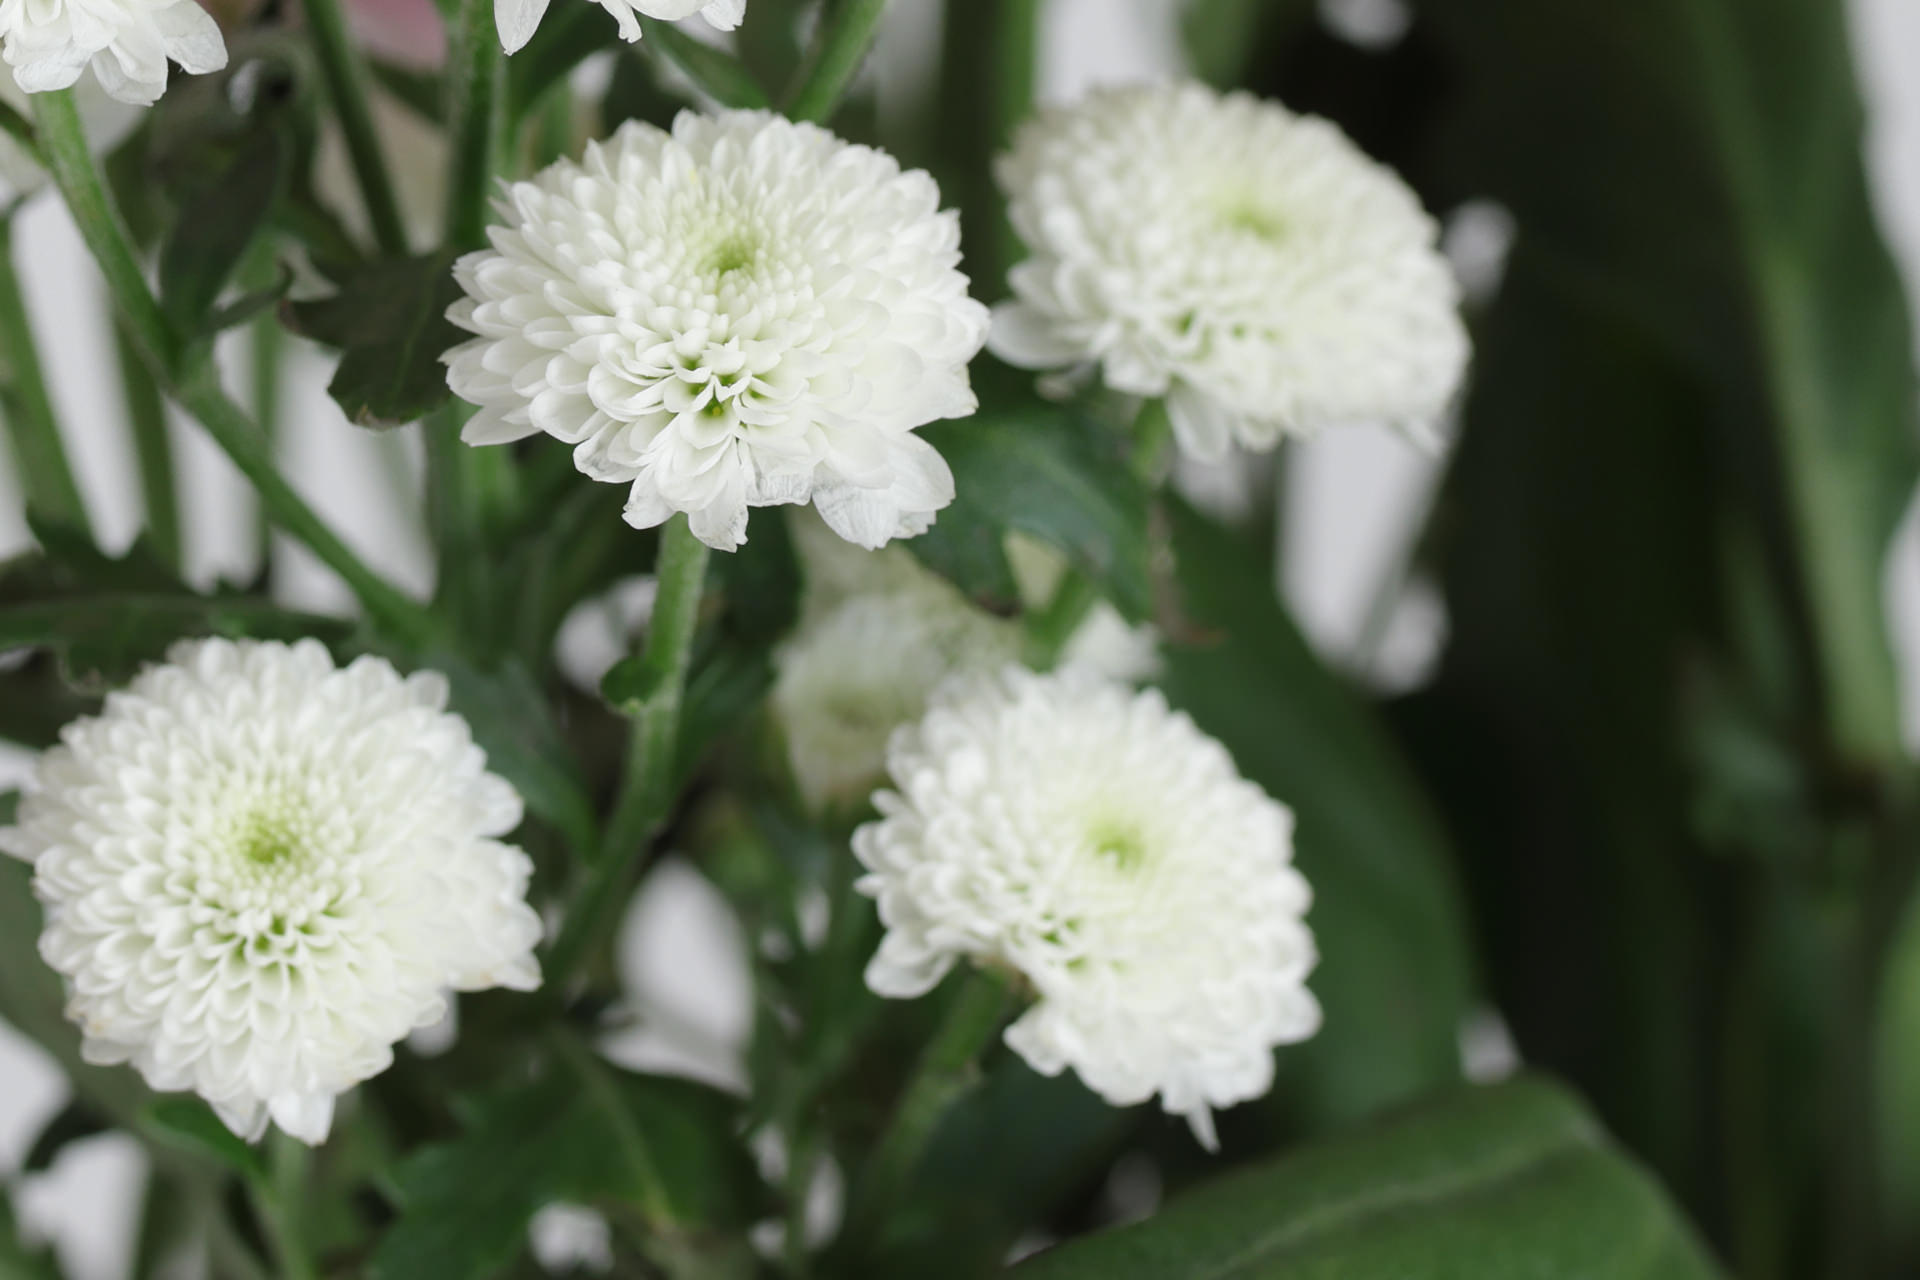
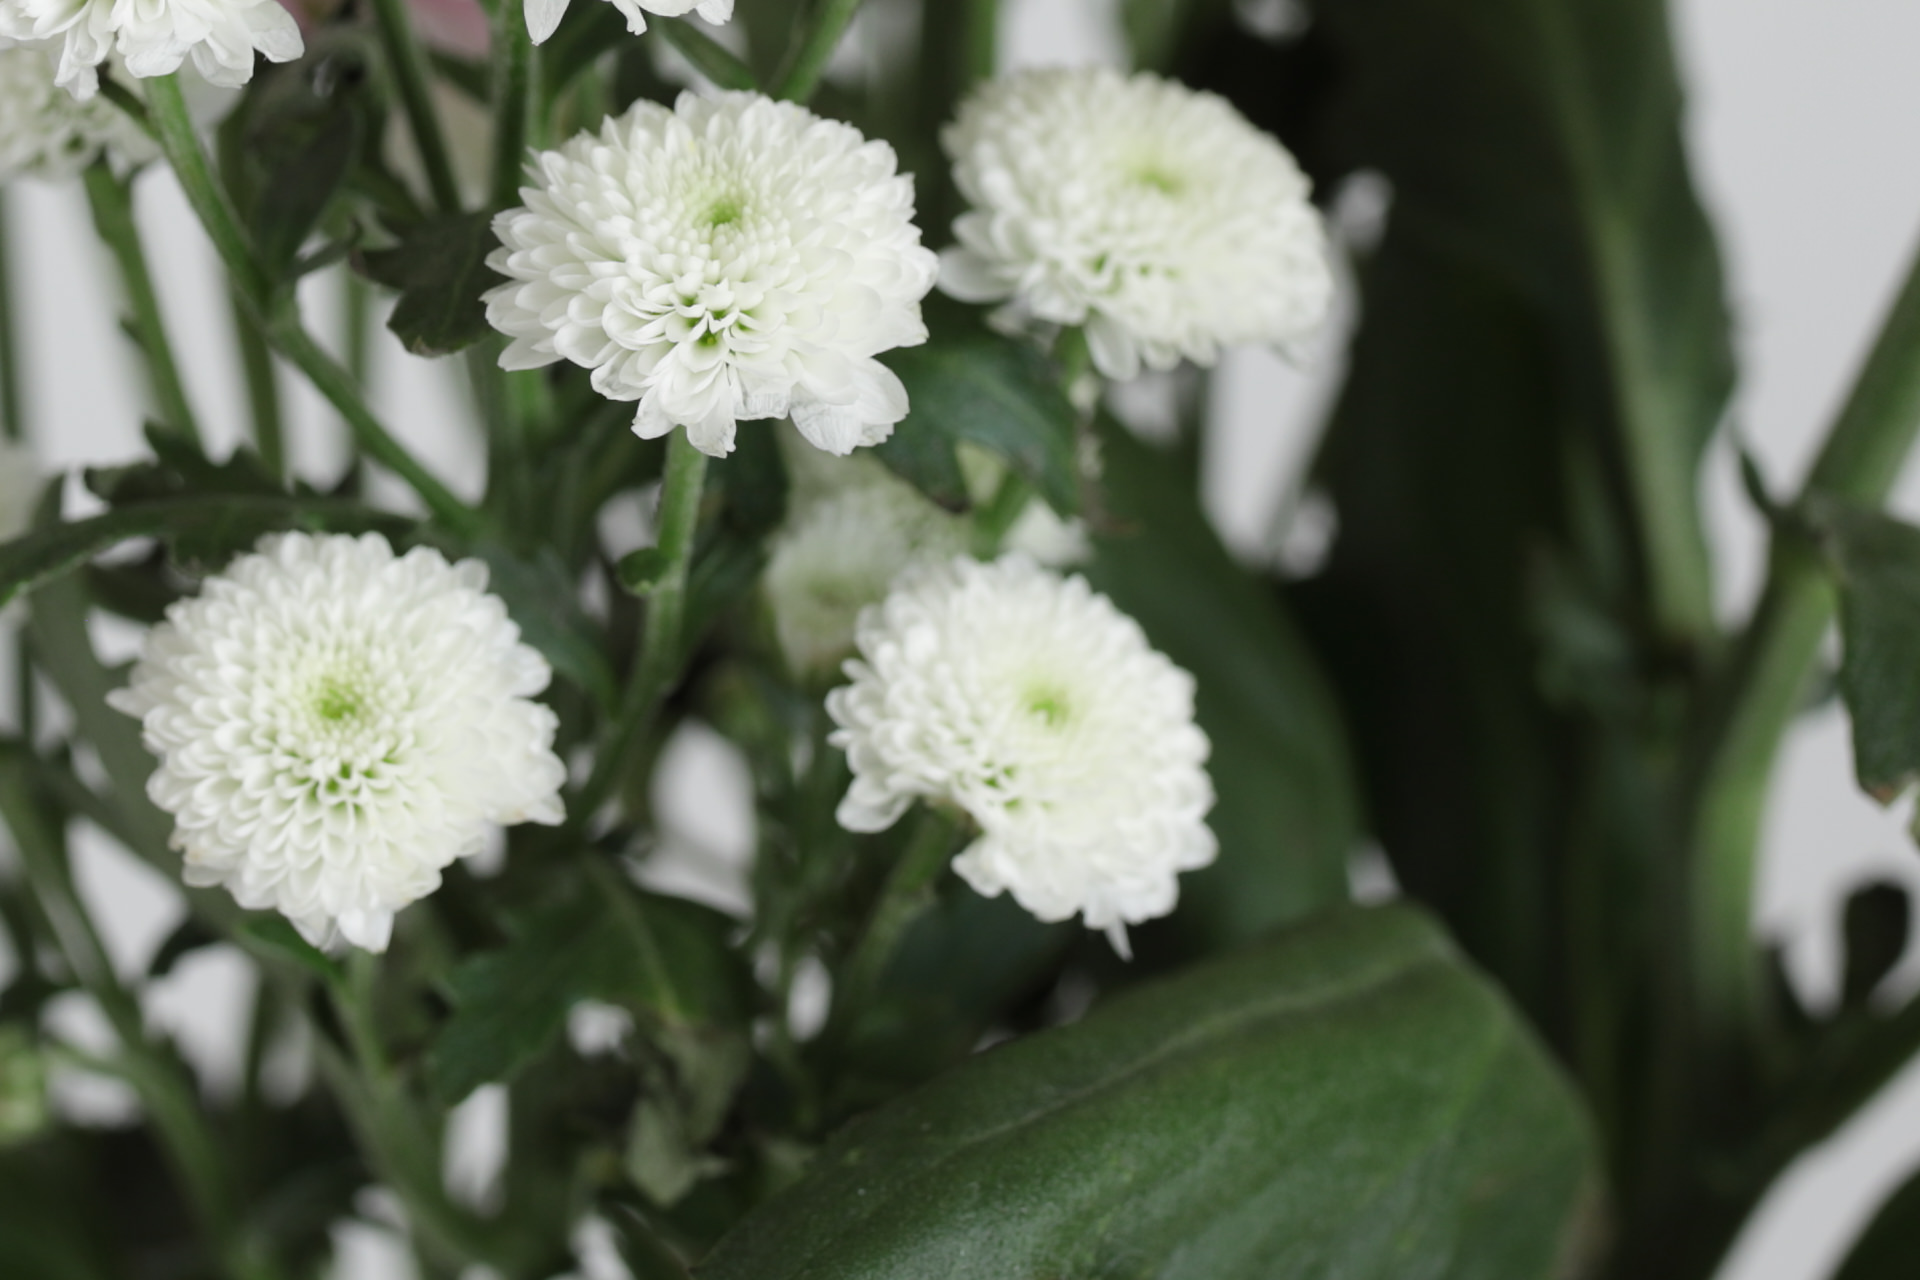
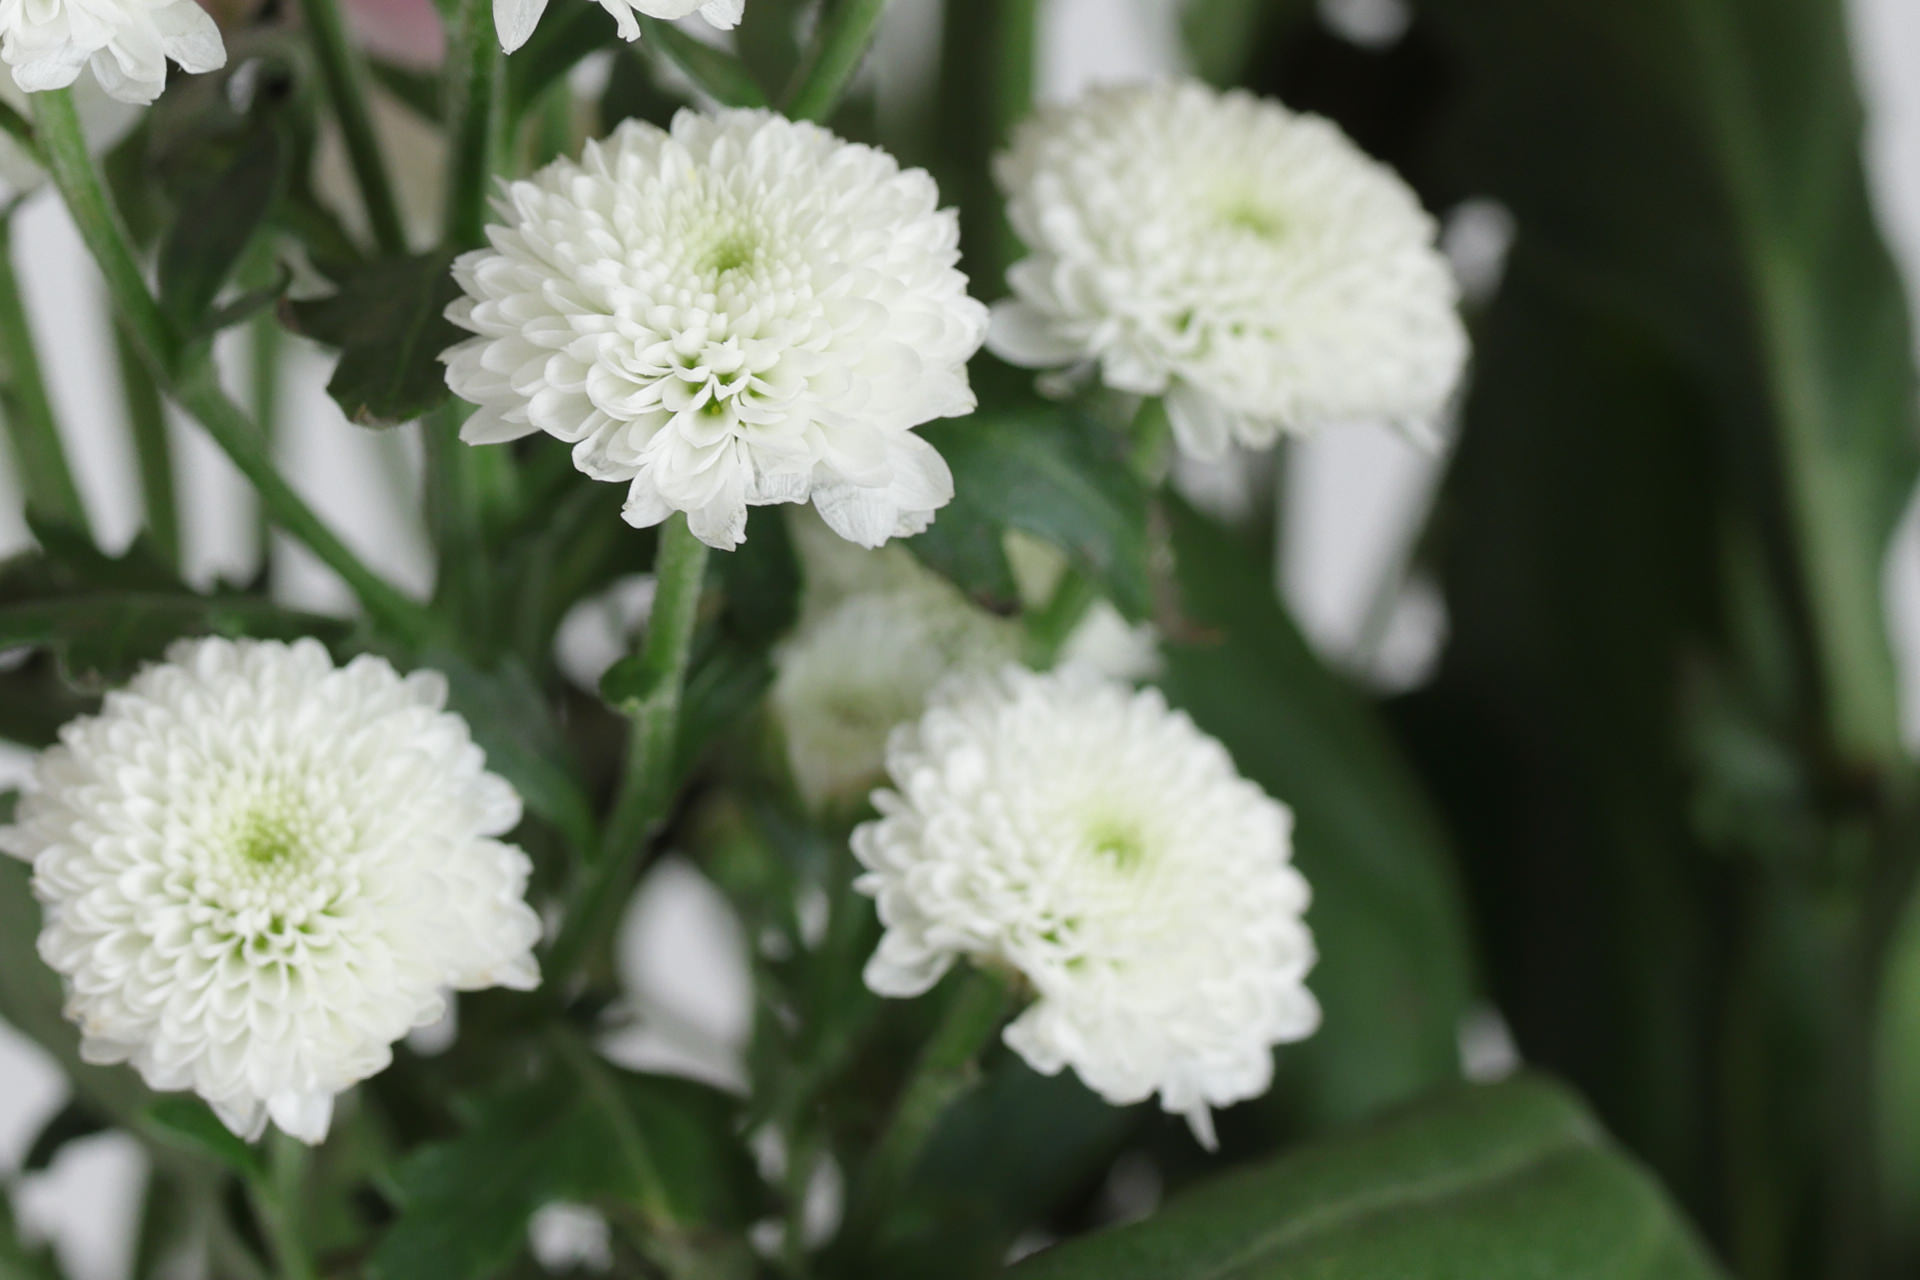
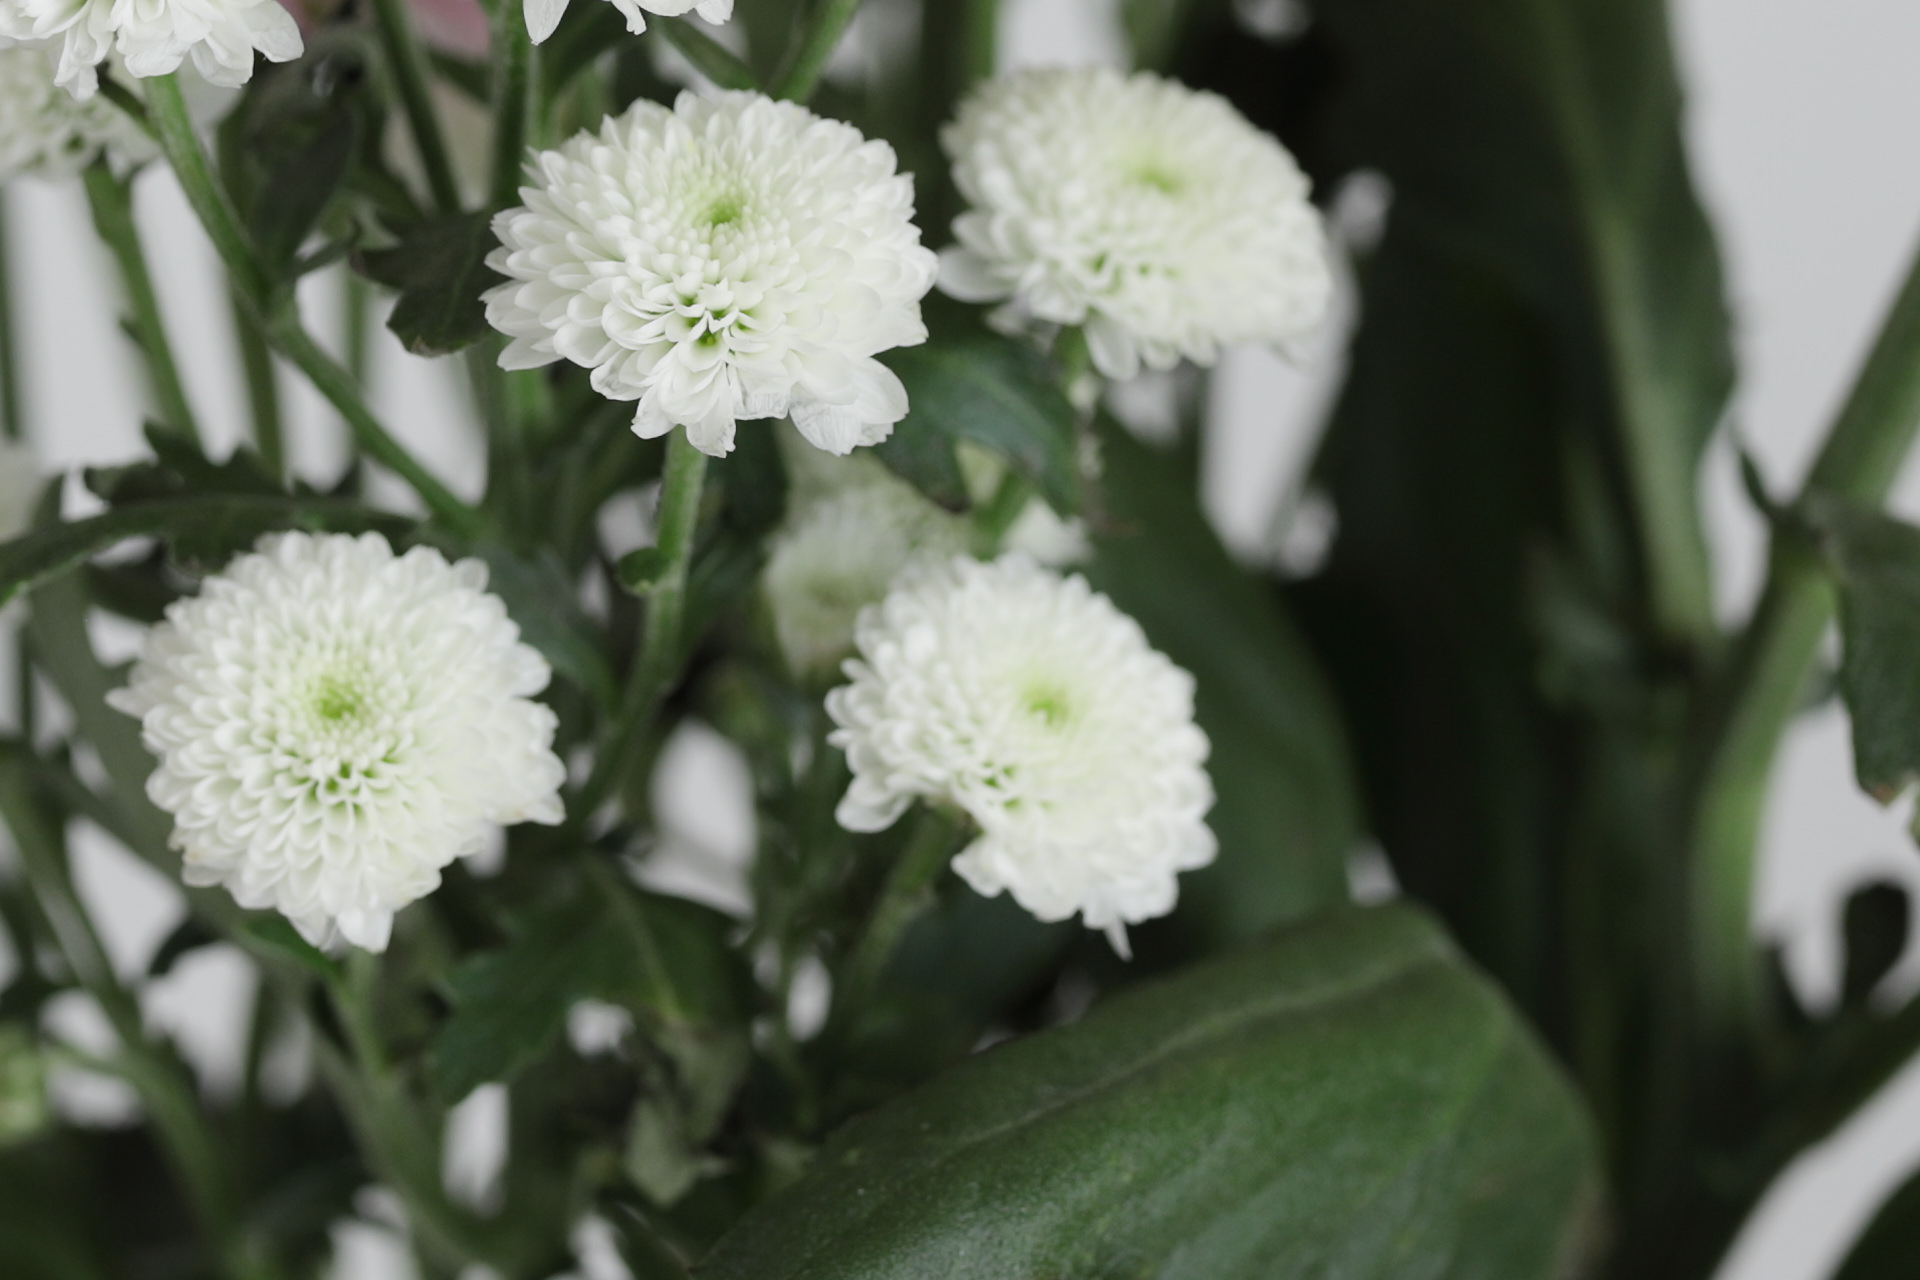
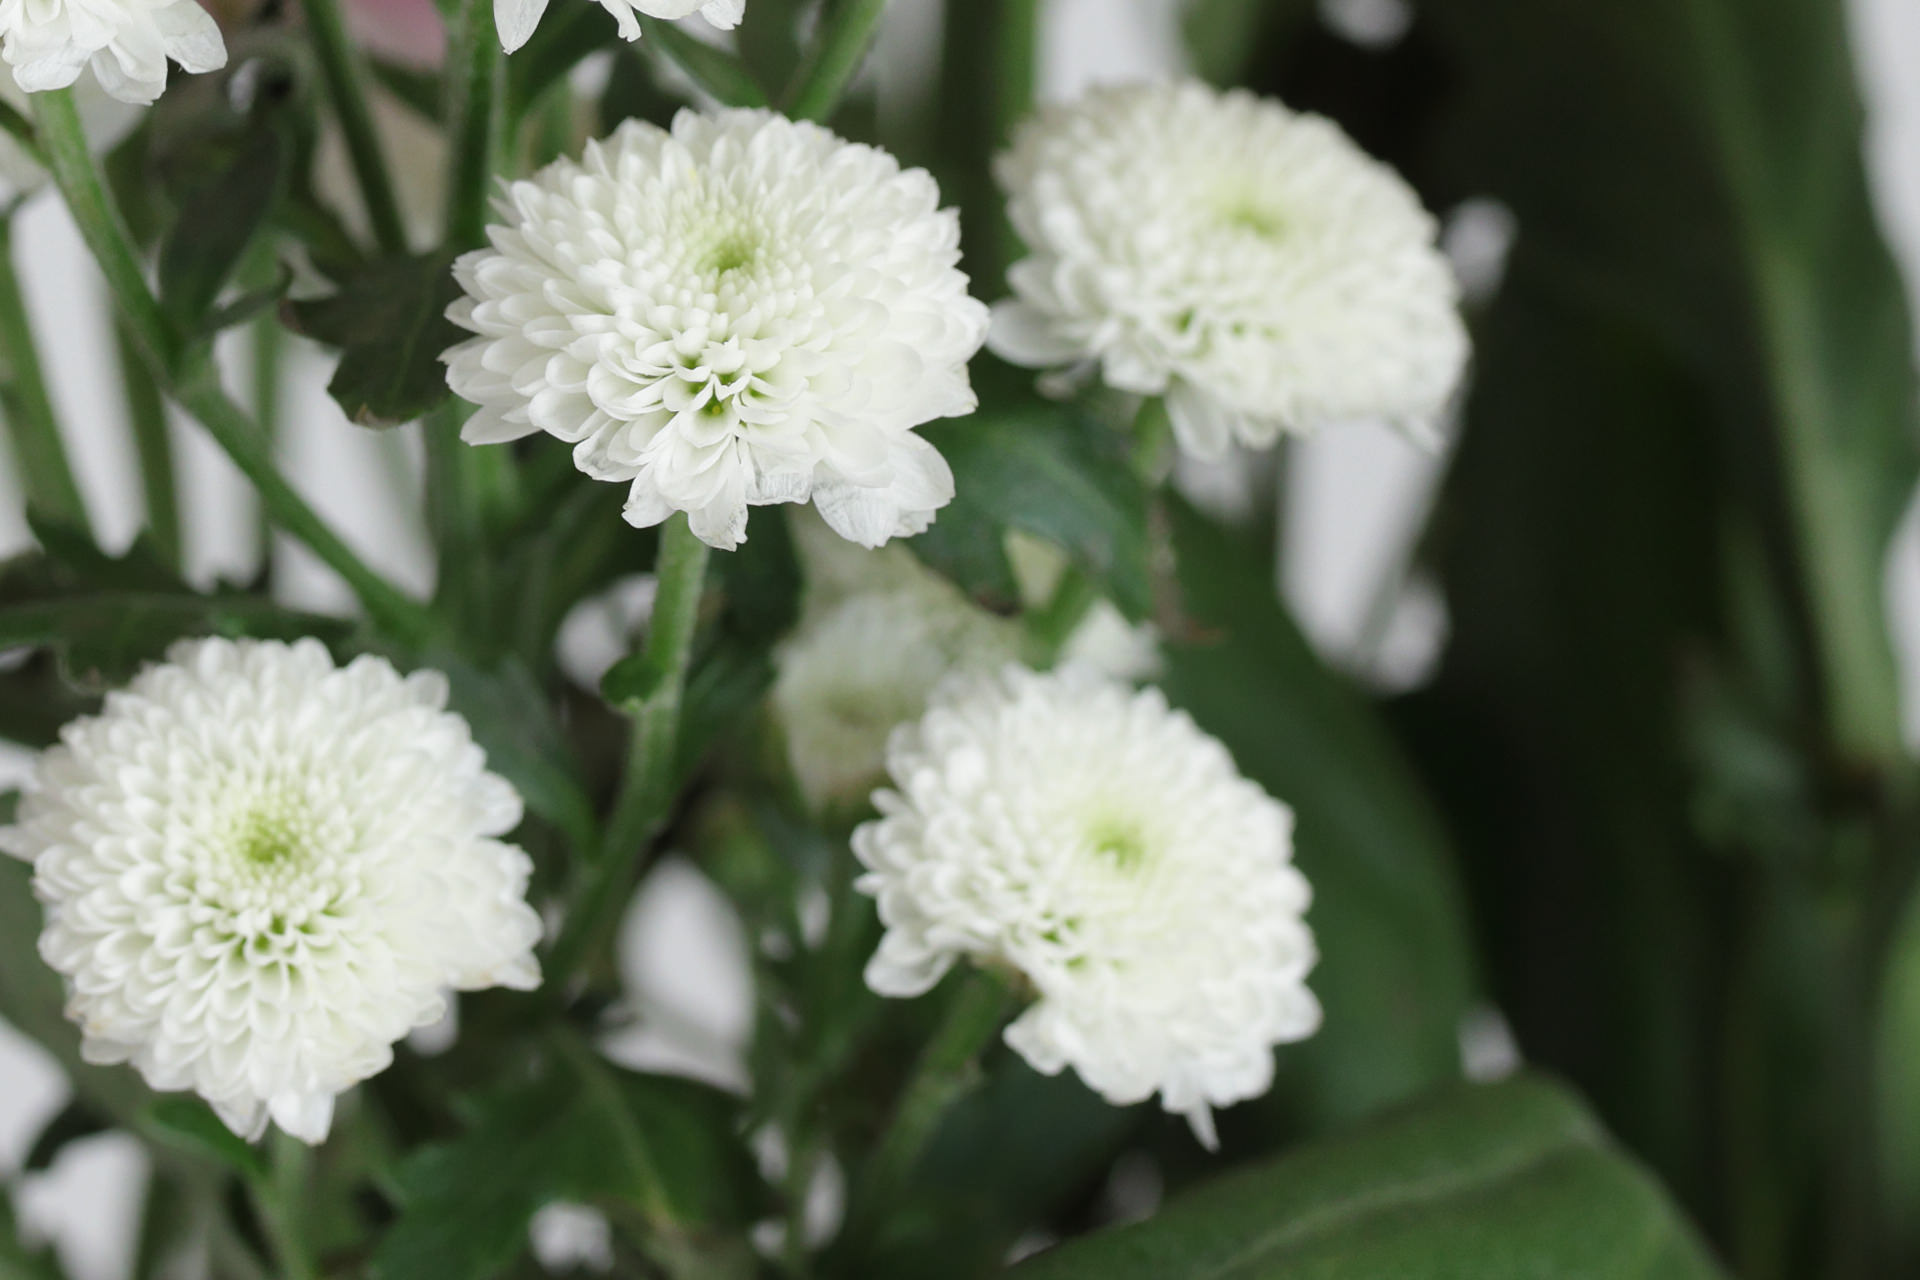
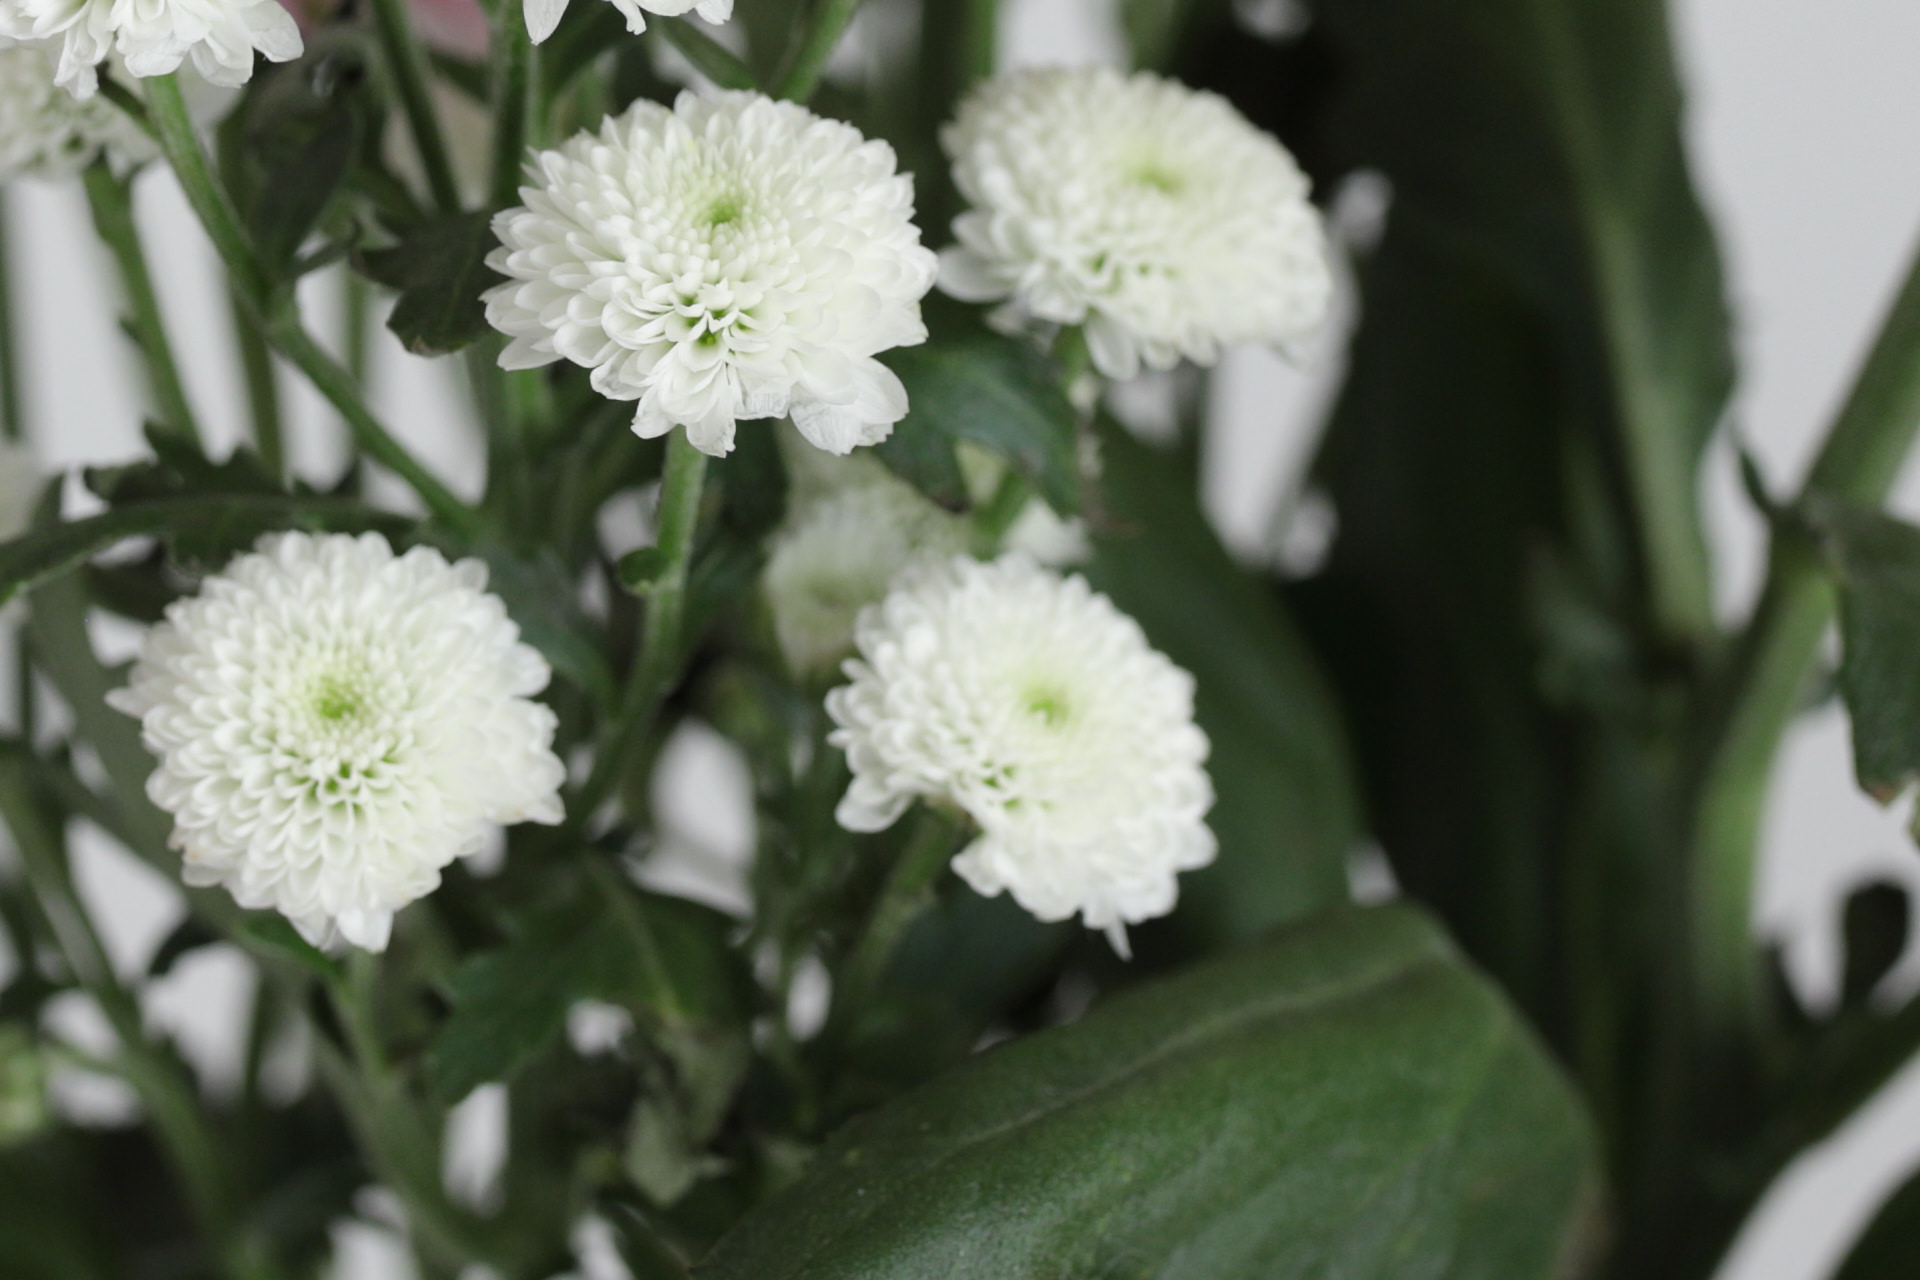
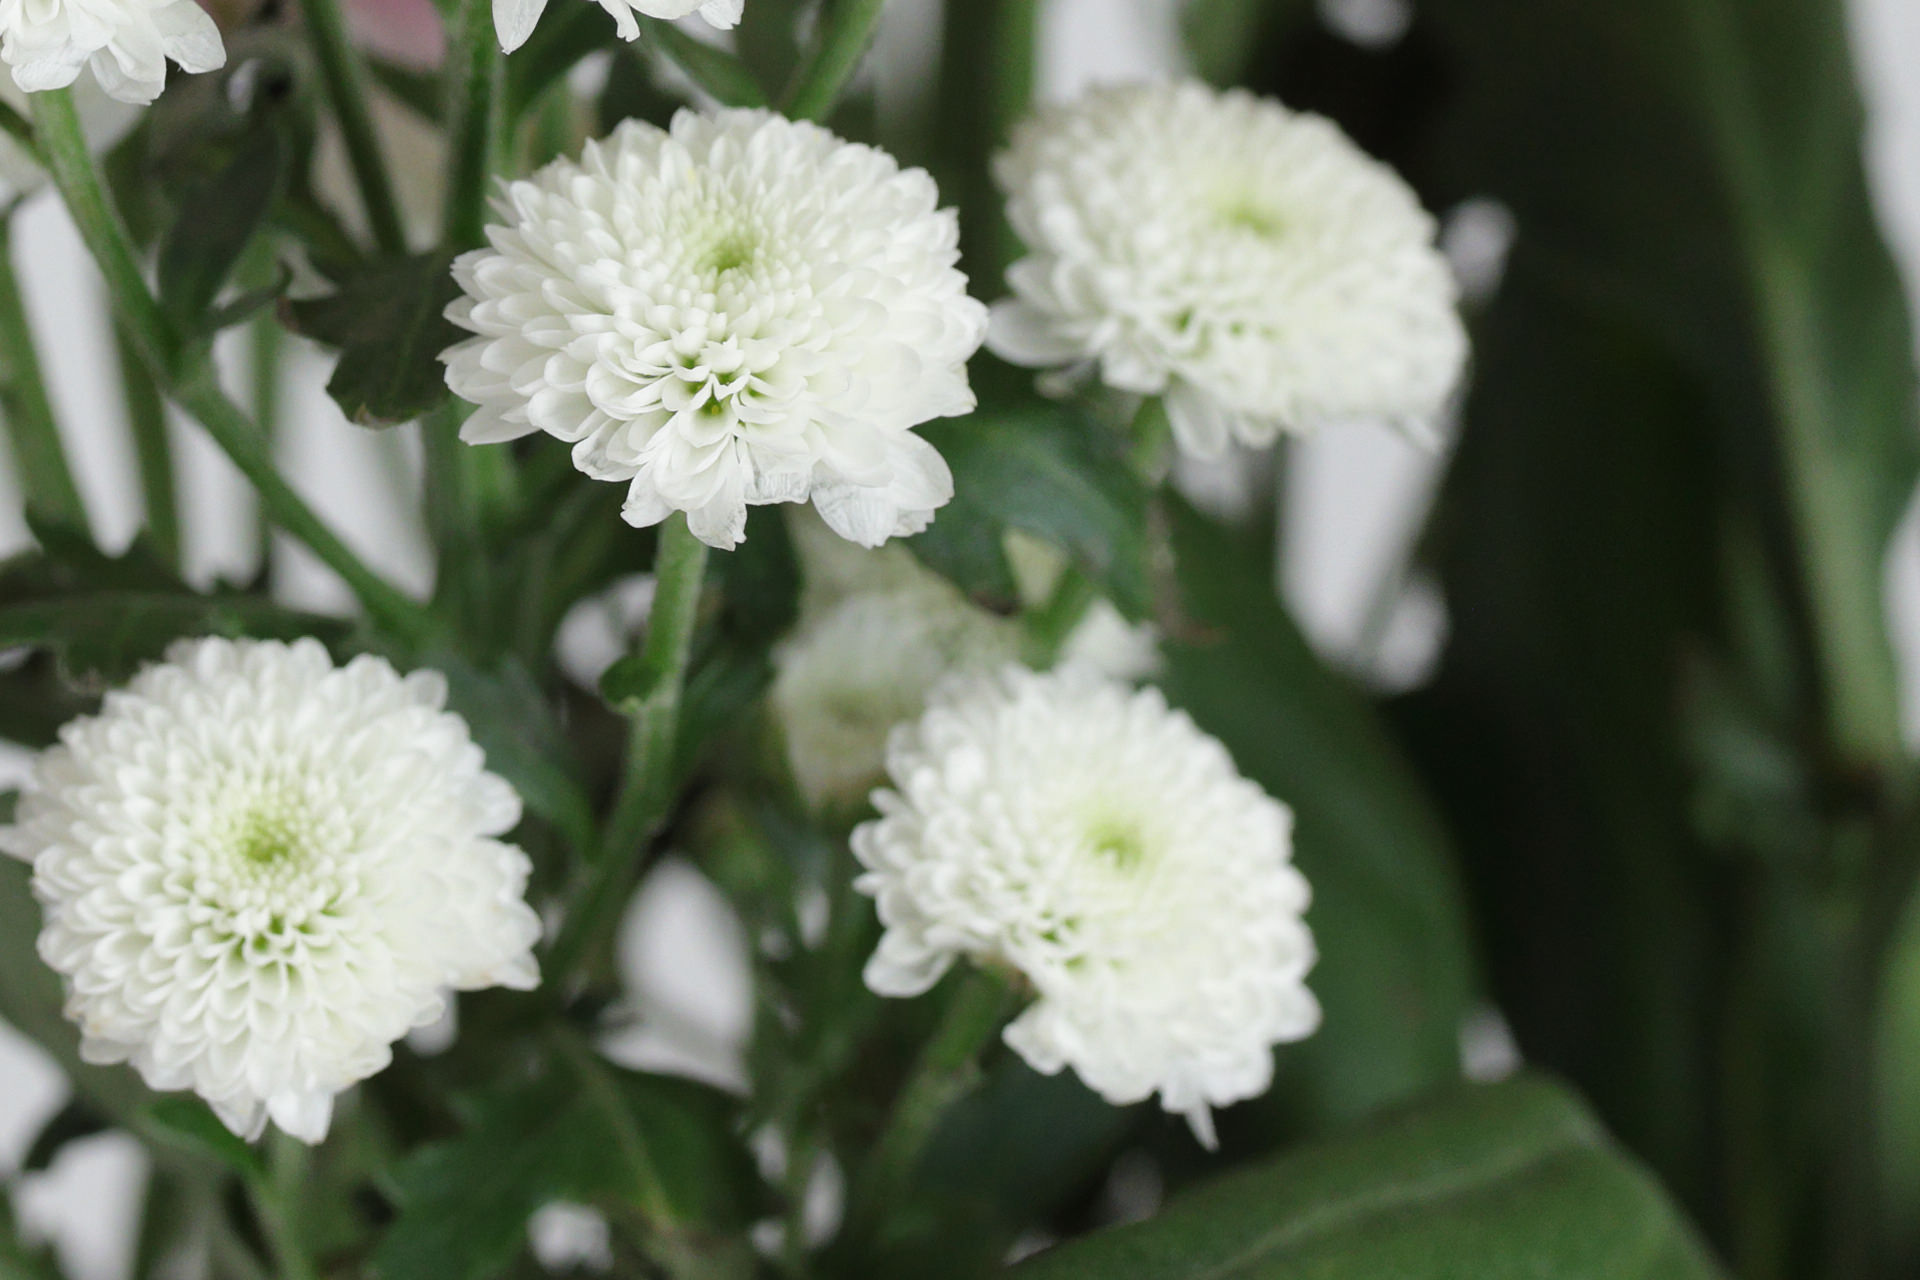
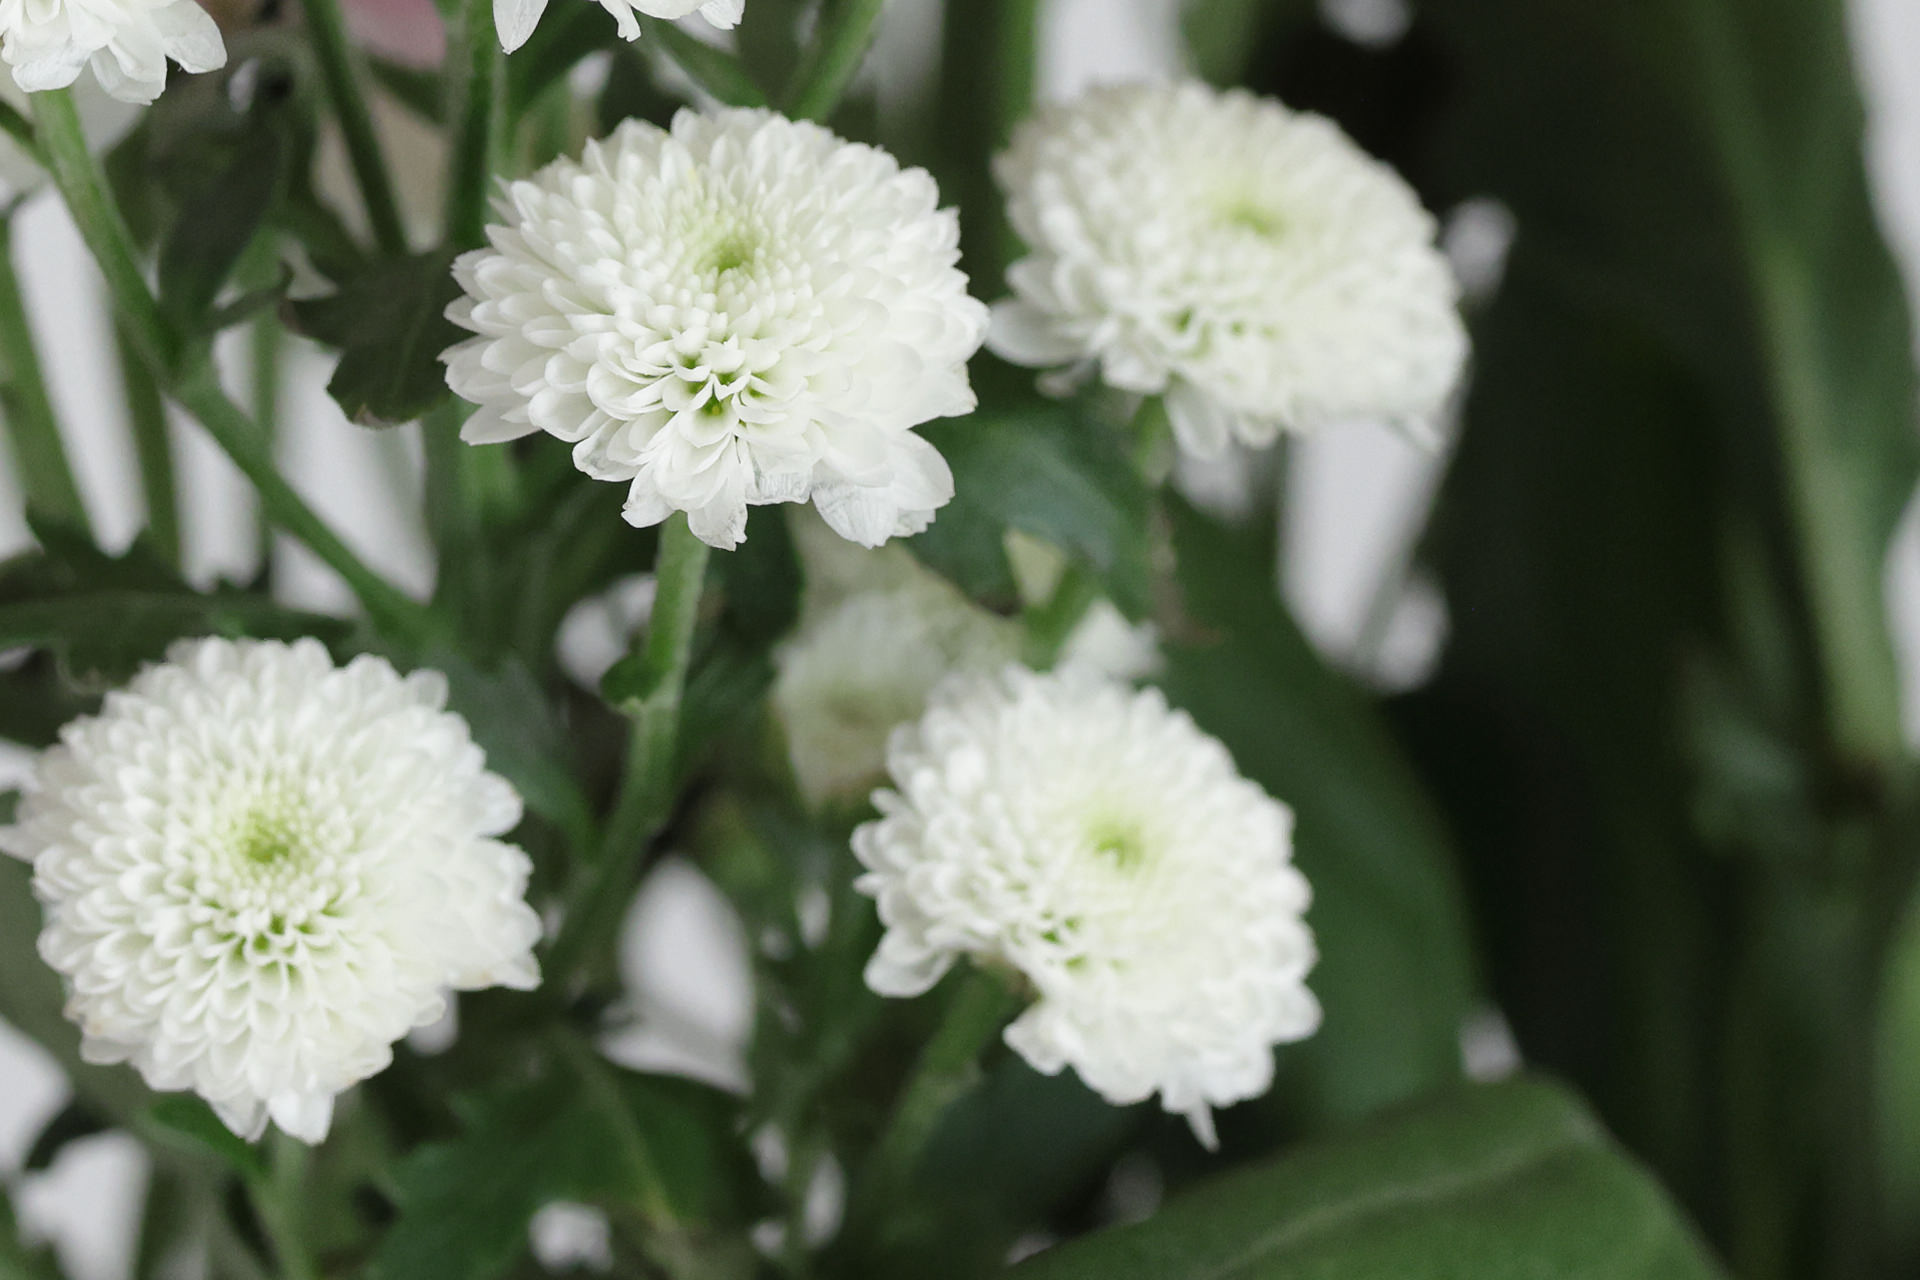
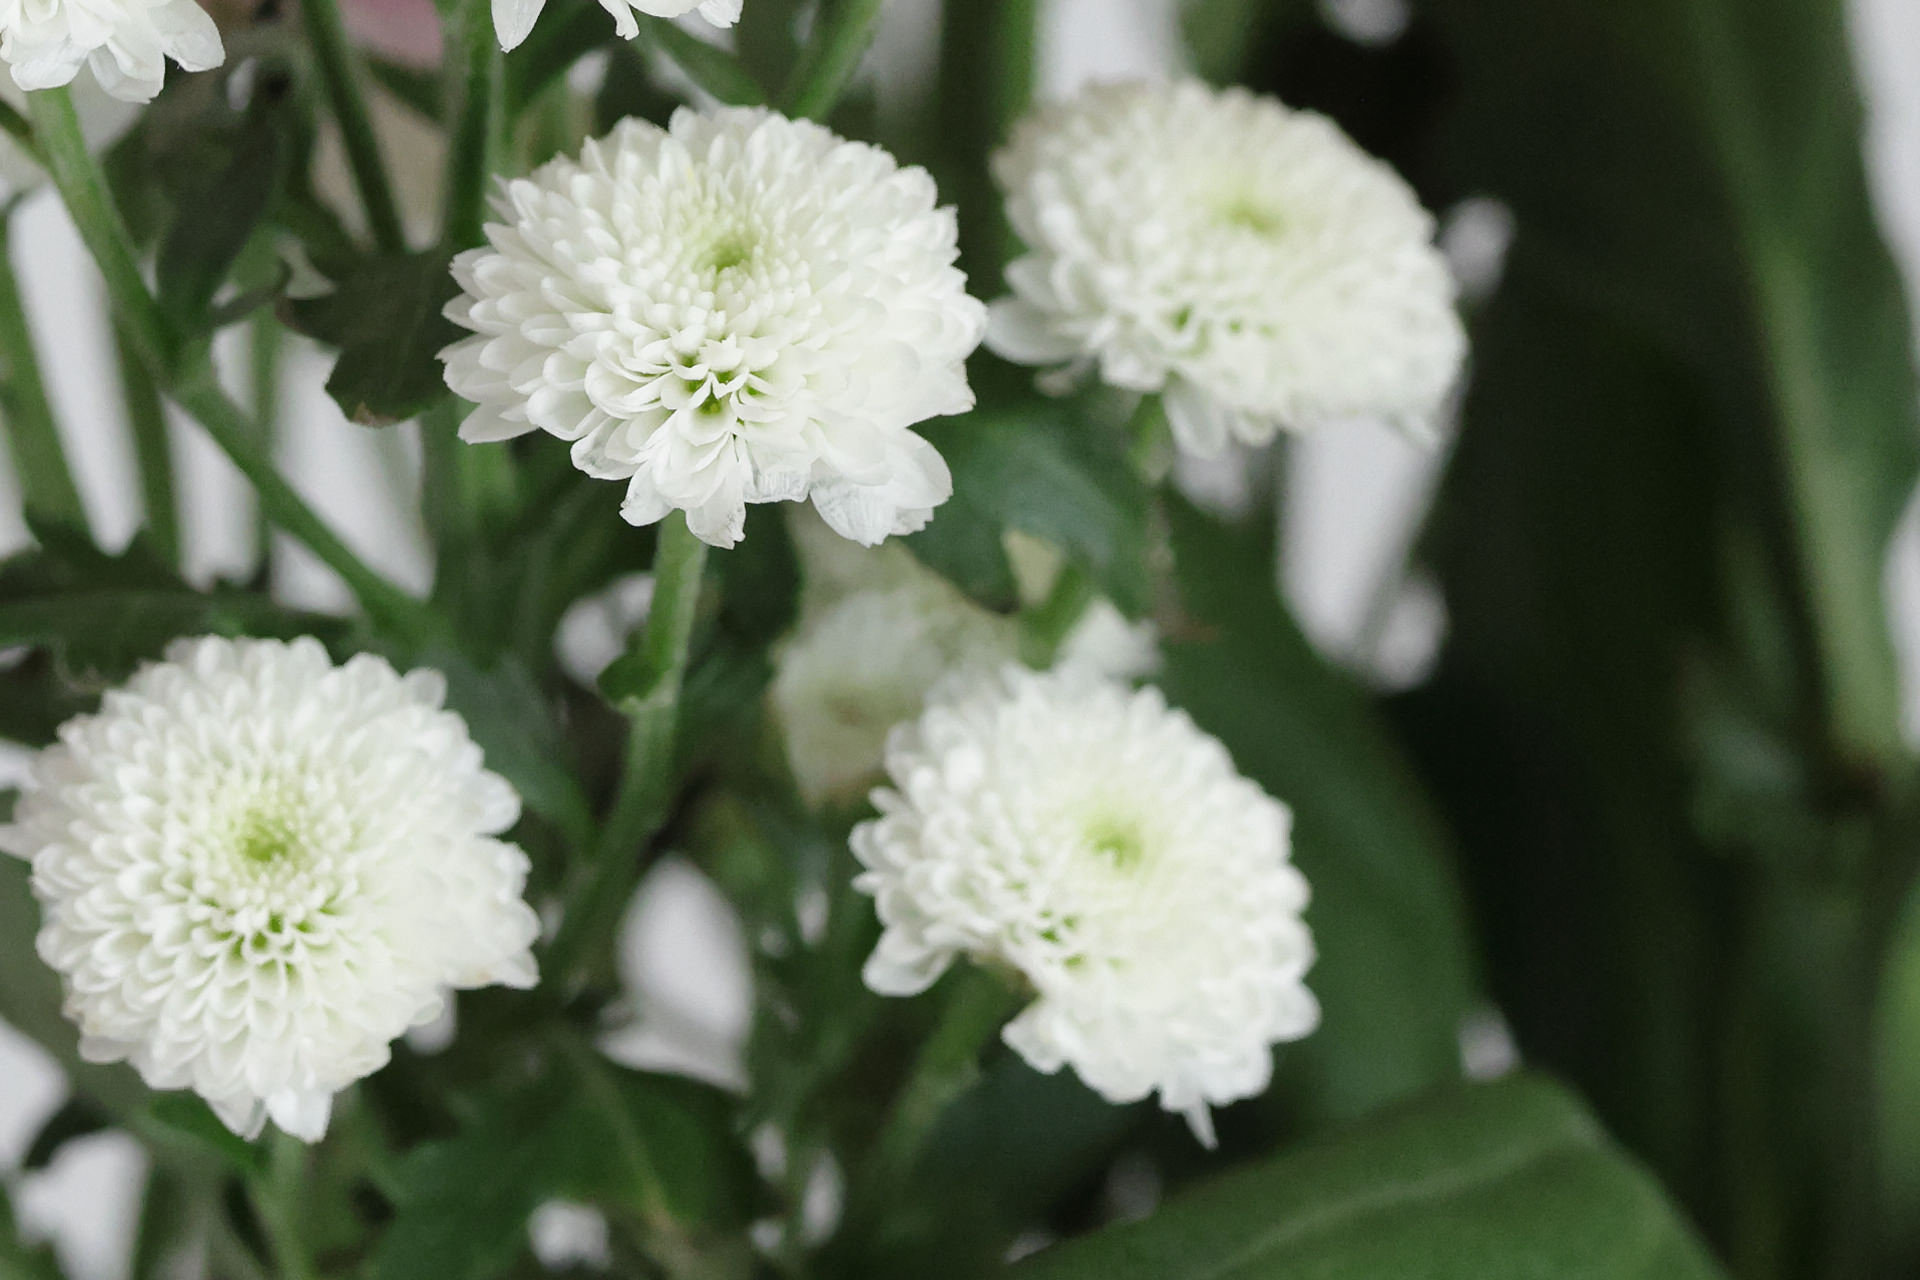
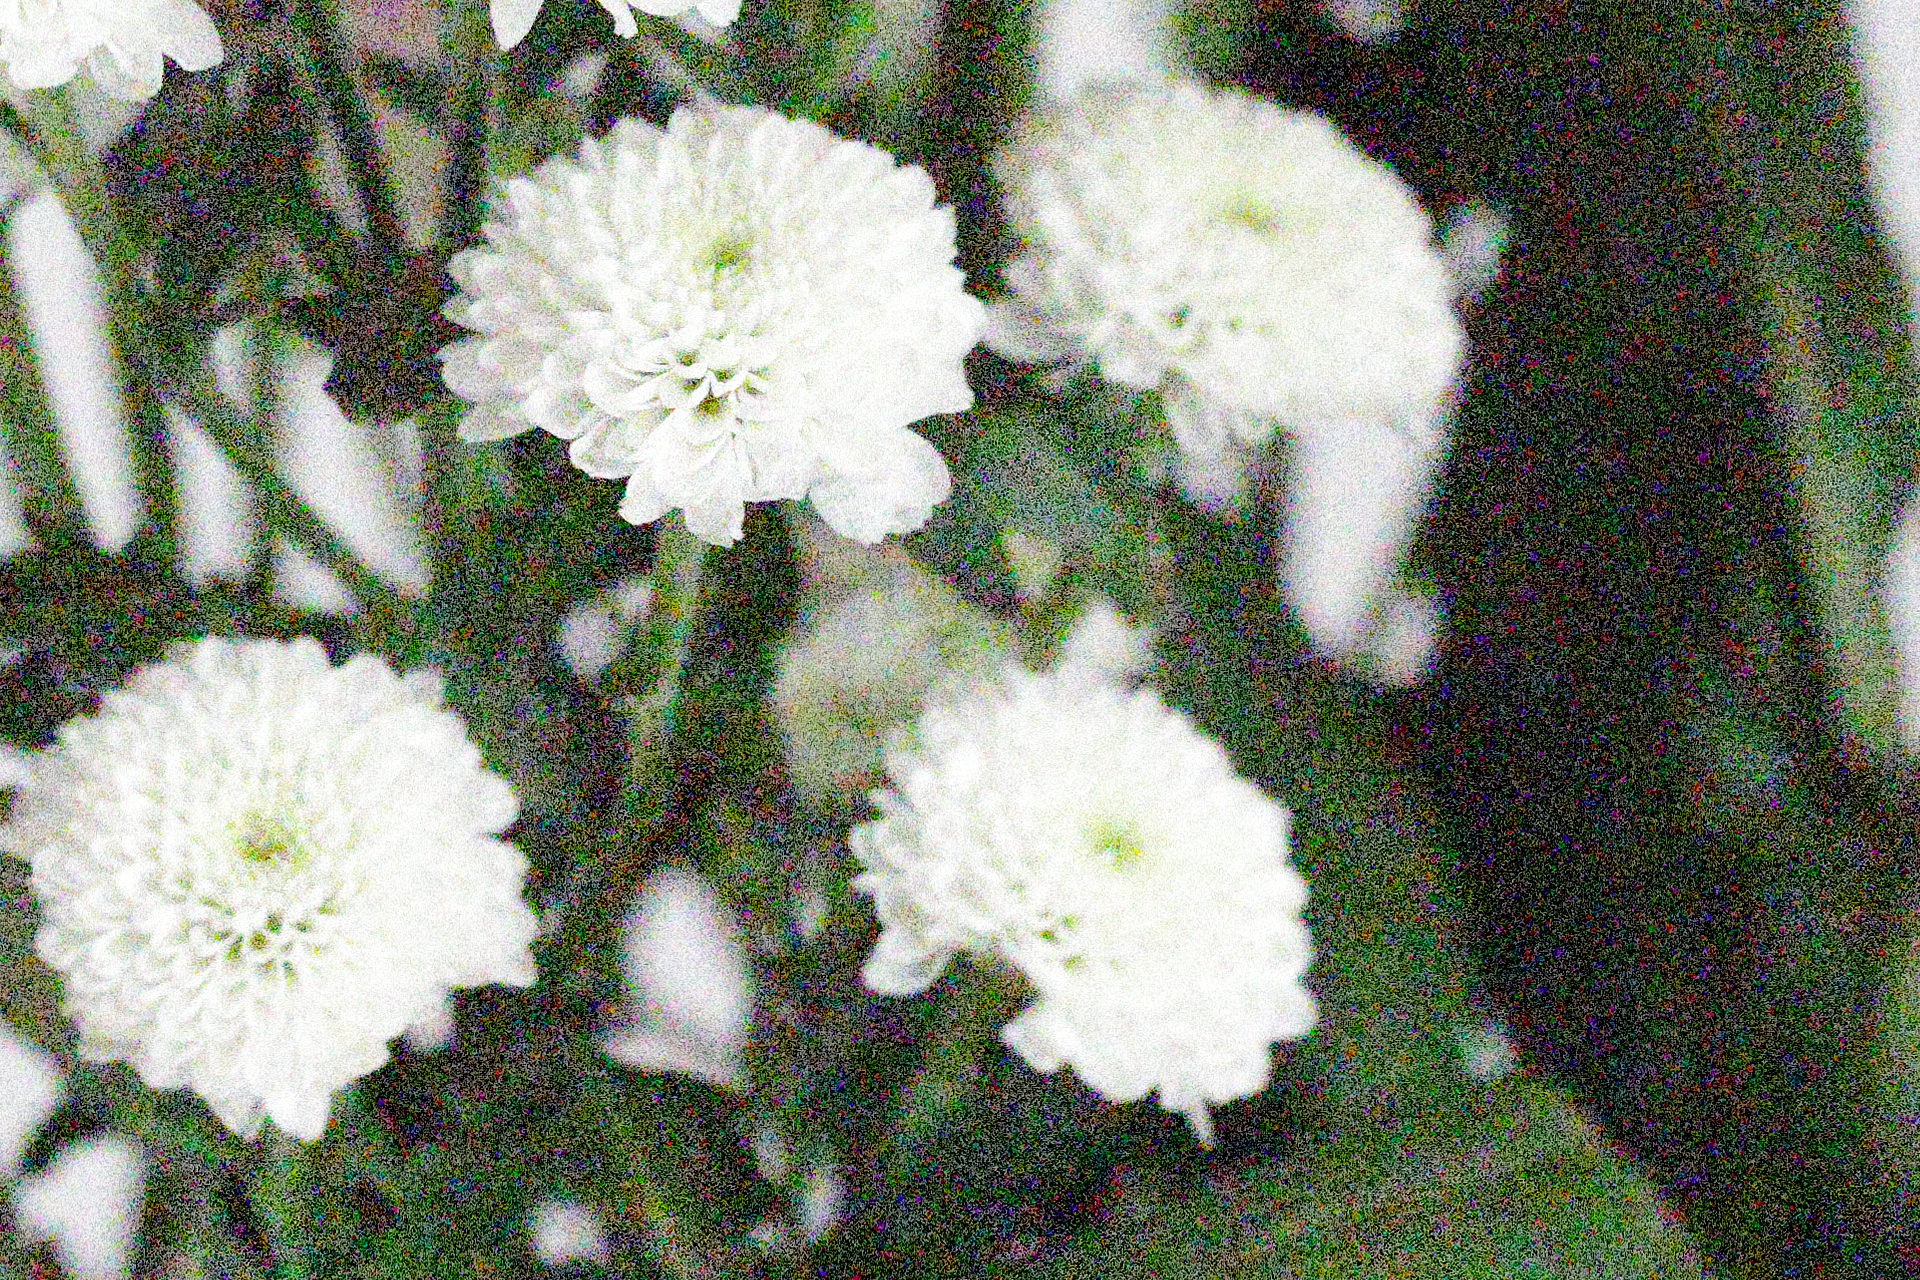
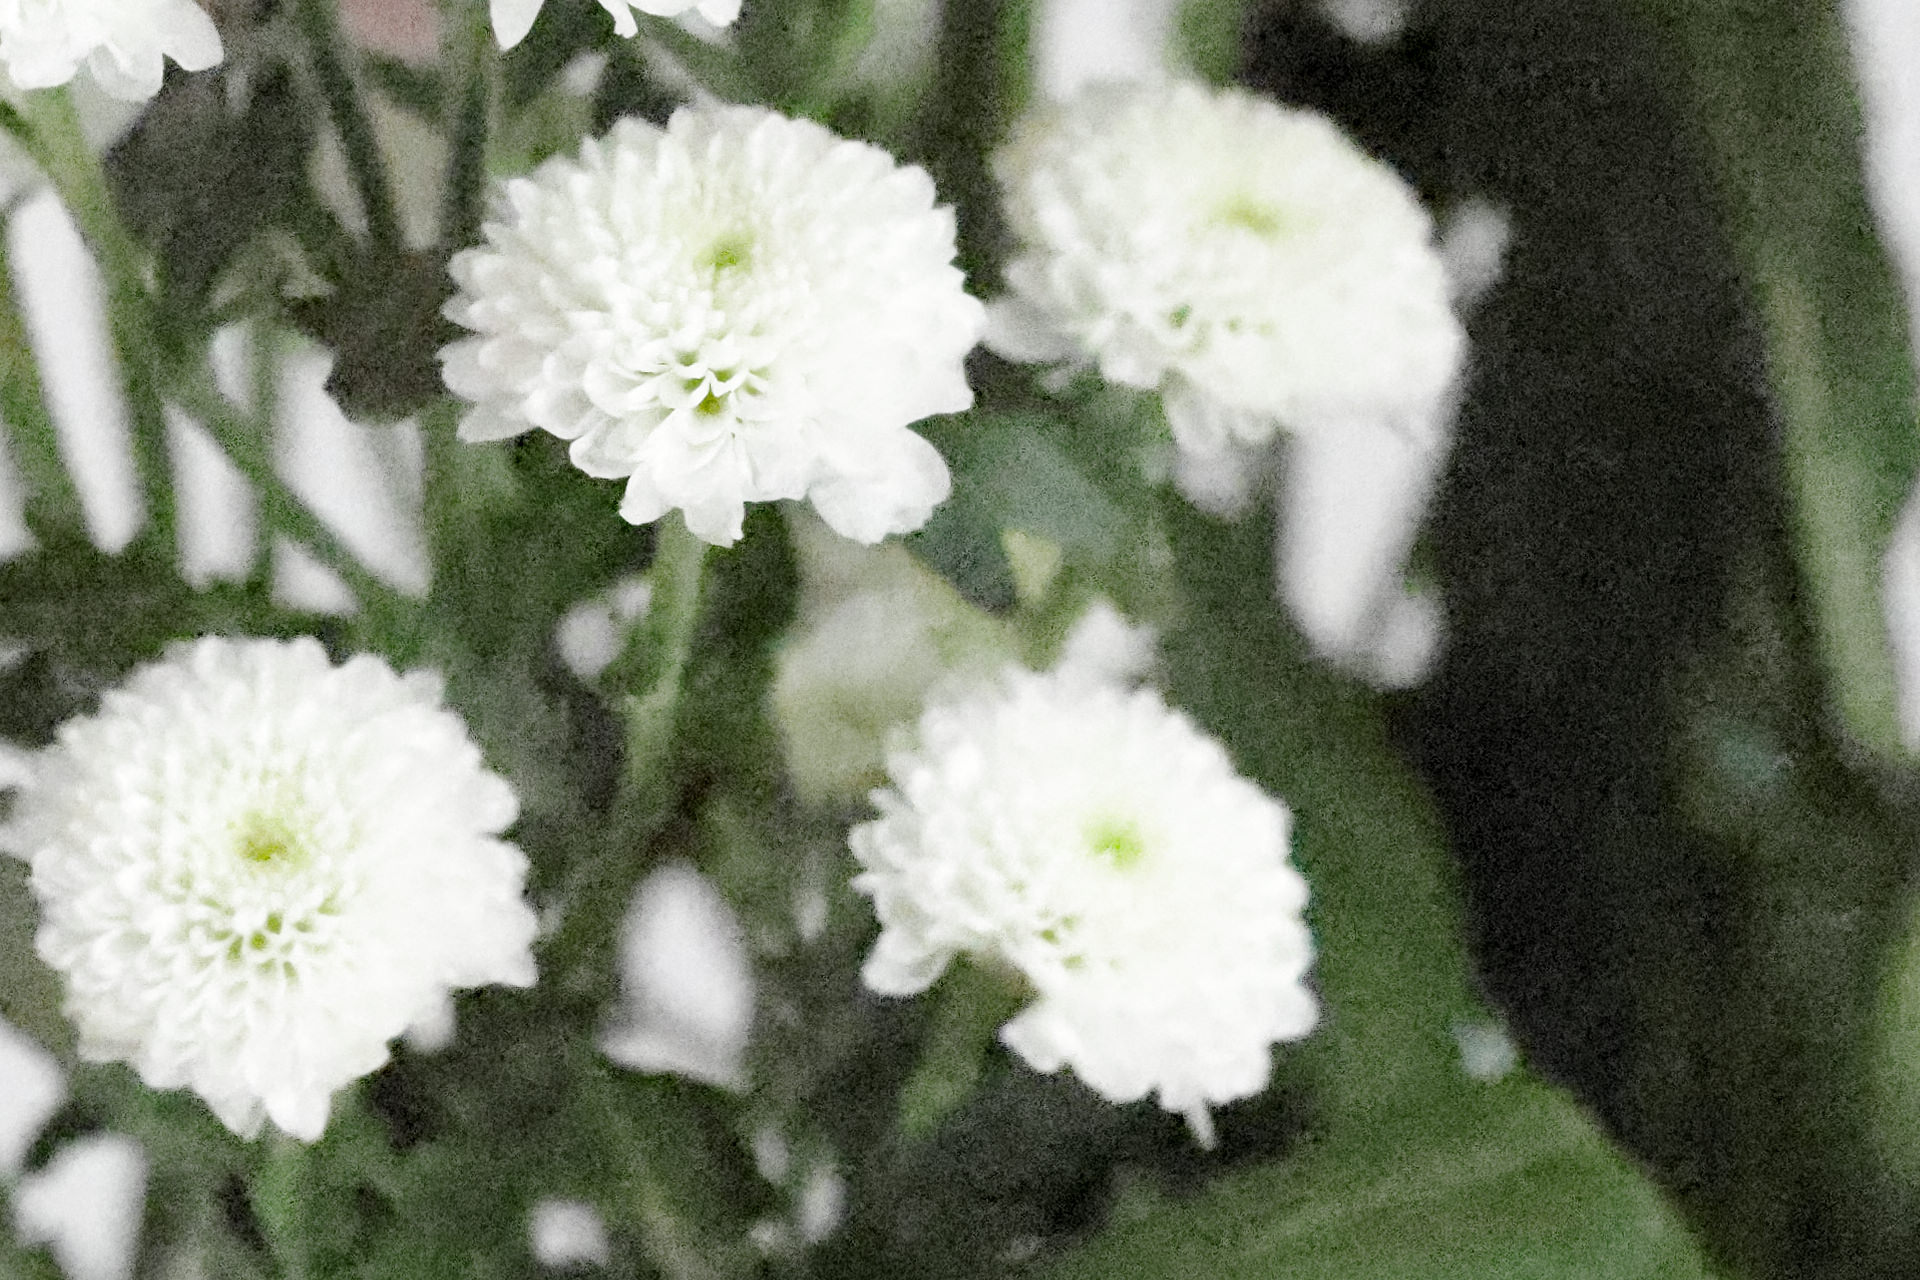
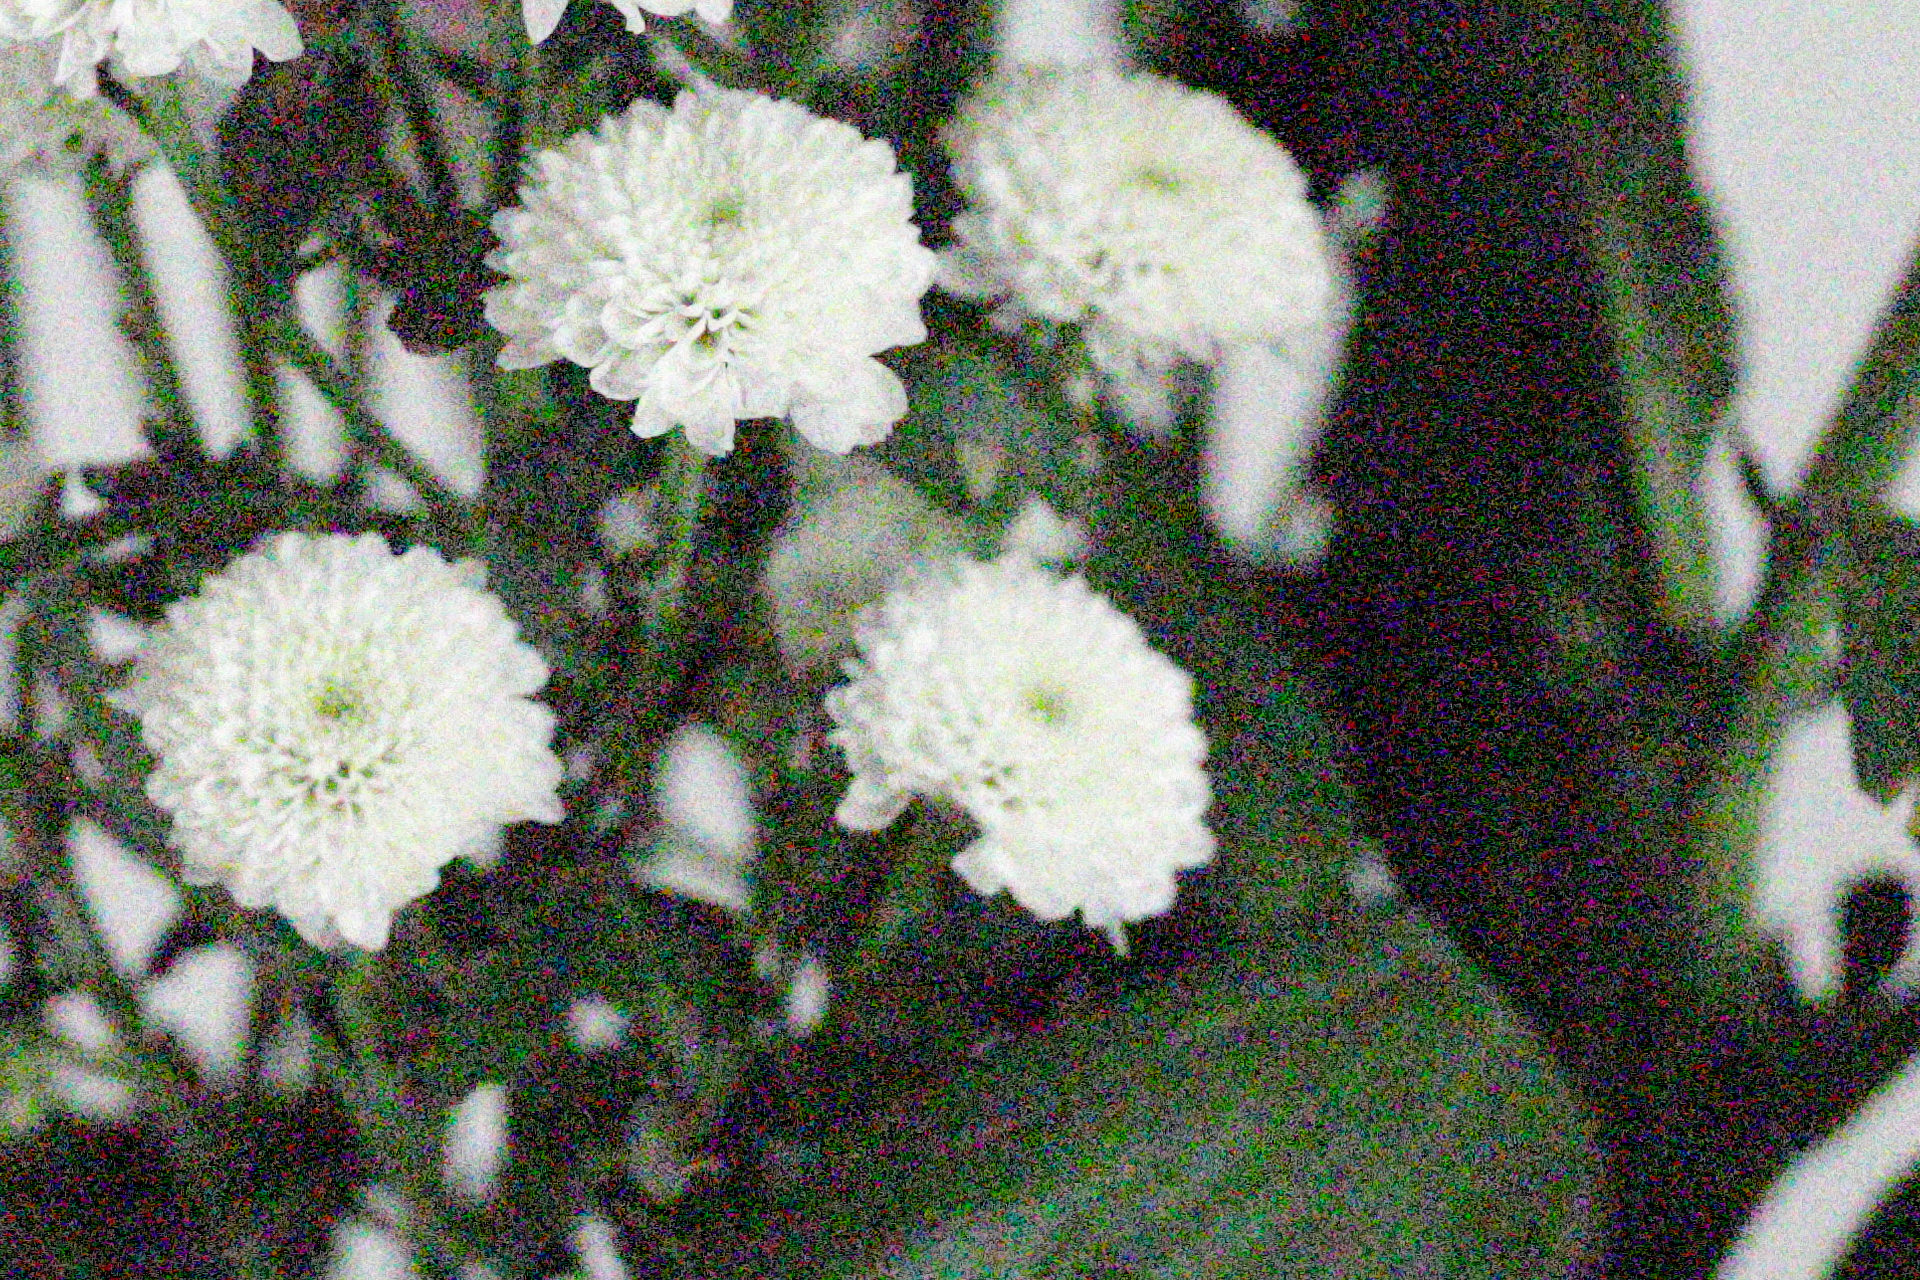
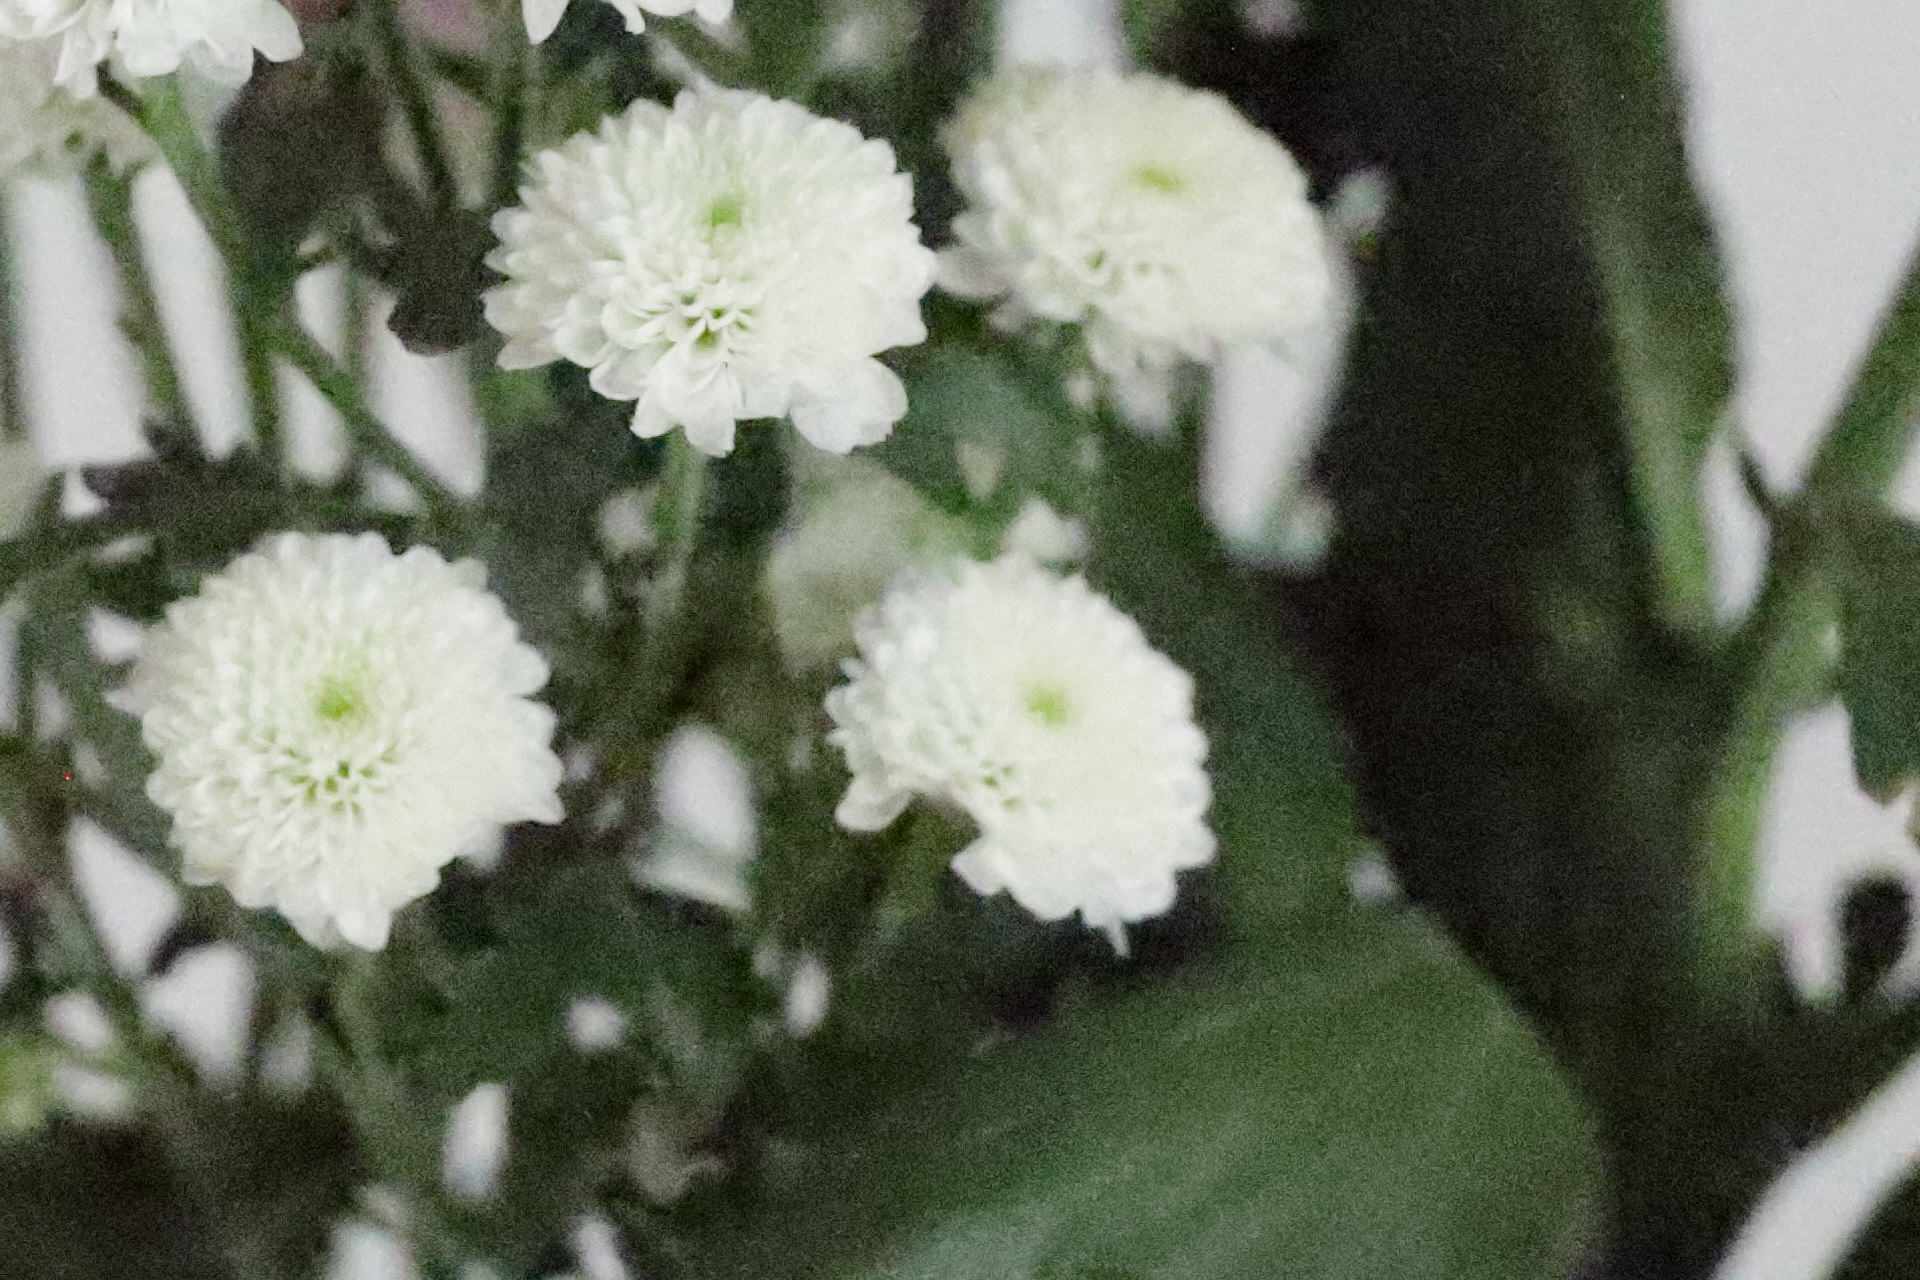
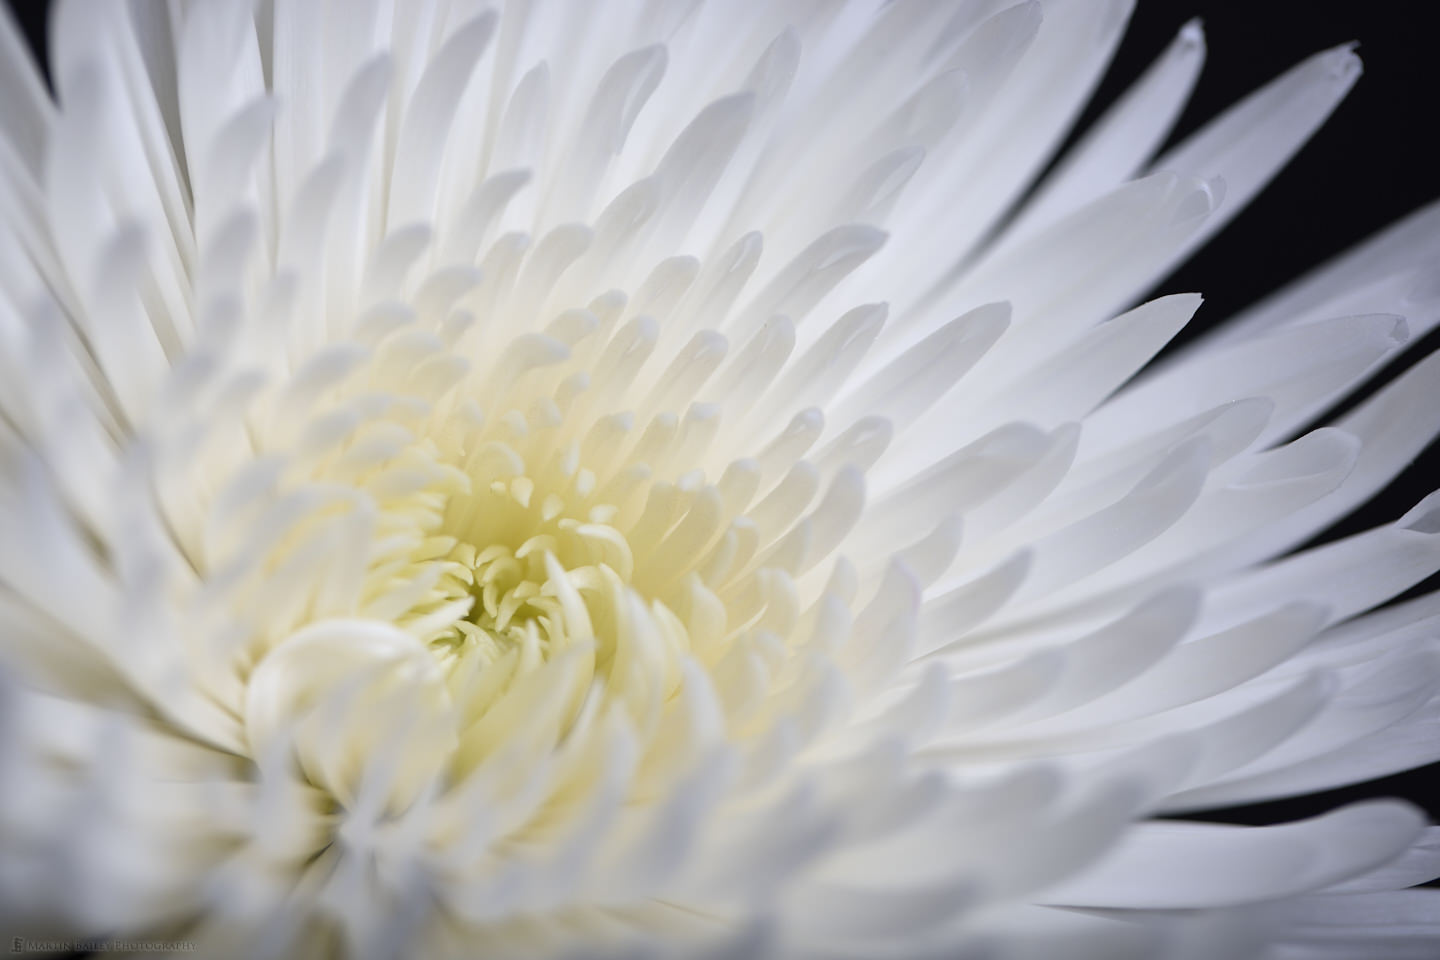
Kind of as a test of the old 100mm Macro L lens that I have, along with the Control Ring Adapter, I shot a few frames of the flowers that I bought to use in my tests as well. I absolutely love the soft tones that we get with the EOS R5, and at f/4 at these close shooting distances, the bokeh is beautiful.
Capture One Pro R5 (and R6) Support
UPDATE: Note that on August 25, 2022, Phase One released an update for Capture One Pro that includes support for the EOS R5 and R6 cameras. The Shinjuku images above look OK without something to compare them to, but having reprocessed them in Capture One Pro as opposed to converting to DNG, the images came to life! I released another short post to share four of the images from the first day again with before/after sliders etc. You can see that post here: https://mbp.ac/716
Sharing My Settings
I've been asked a lot about my settings for the EOS R5, so kind of as a second podcast embedded in this one, I have created a video to walk you through every settings screen on my Canon EOS R5 and included specifically my settings for wildlife and fast-paced shooting, so I hope you find this helpful. Note that I do not go into the video settings screens. Video is not my core competence, so I'll leave that for other reviewers. I don't go into full detail on every option either, but I do talk about all of the areas that I feel are important, and why I make the selections that I do. The video also has chapters, so you can check out each set of settings screens individually if you prefer.
Note that I have since figured out what the difference between Auto 1 (only screen) and Auto 2 (auto switching) is on the Set up 3 screen, Screen/Viewfinder display option. I couldn't figure out what was different initially, but since found that Auto 1 switches between the viewfinder and the LCD based purely on whether or not the LCD is folded out into an open position. Basically, if the LCD screen is visible, it will be used, and the Electronic Viewfinder will only become active after you fold the LCD screen away completely. In Auto 2 mode the LCD screen can be visible when you put your eye to the Viewfinder and the viewfinder will activate regardless, so that's my mode of choice from now on.
Conclusion - 10 Stars out of 5!
OK, so there will be other things that I want to talk about, but I want to get this review out into the world, especially as the camera was a week late, and frankly not having support for the Canon EOS R5 in Capture One Pro caused me more headaches than I'd anticipated, so we'll blast this out now and I'll follow up with other findings as time and our not-so-friendly neighborhood virus allows.
I would like to say though in closing that I have literally not been as excited about any camera in Canon's history as I am with the Canon EOS R5. I've been a Canon user since 1991, and I've owned some of their best cameras, such as the 1Ds Mark III and 1D X, but the R5 beats them all, in almost every respect. Of course, the 1 Series Canon cameras have much better weather-sealing and they are built like bricks, but that aside, the specifications and image quality of the R5 beats them all.
I don't usually do star ratings etc. but if I was to rate this camera on a five-star rating system, I'd honestly want to give it ten stars! It really is a stellar camera. Even just using it every day in my studio over the last week has been an absolute pleasure. I'm sure that my wife is sick of hearing me say that Canon has really made something special this time.
As I mentioned earlier, I was enabled by the kind folks at ProGrade Digital by sending me some of their amazing memory cards and a second card reader to test and include in this and my previous review, although that does not affect how I report my findings to you in any way. Canon gives me zip. No gear, and no preferential treatment. I buy all of my camera gear from a camera store in Tokyo, with my own hard-earned Yen, and I still can't say enough about this camera, so hopefully all-in-all, you'll trust me when I say that all of the opinions I have shared in this review are simply me telling it how I feel it is.
A Word on the Naysayers
I would like to just add that although I am aware that there is a lot of negative feedback going around about the EOS R5, I want you to be careful as you read or watch some of that stuff. I have always created my reviews straight from the heart, and tell you exactly what I think about my gear, but that is not always true of people reviewing gear. Although I will skim the headlines, I don't read other reviews, because I want to report my own findings without being influenced by others.
One trend that I am noticing more and more though, is that some reviewers will use negative reviews as a way to draw an audience. Why does this work? Because human nature is essentially flawed and people generally like to hear bad news, but also, many people that are sitting on the fence over new technology want to hear something bad about a product so that they can decide not to buy it.
Personally, I like to make up my own mind. I'm a lone-wolf in that respect, but some people need a push, and the negative reviews provide that push. I've also noticed that people with negative opinions can be very vocal. You'll see more people complaining about the overheating of the R5 than singing its praises for the amazing things that it brings us because people like to defend their decisions not to buy it. I'm not a psychiatrist, but I'd bet there is a term for someone that deep down really wants the R5 but they protect their credit cards and probably their egos too, by gathering and spreading negativity. My advice to you is for you to make up your own mind, but be aware, that the naysayers say it louder and generally based on flawed motives.
Support Our Efforts
If you want to help to support the work I do in bringing you these reviews, please consider buying using our affiliate links, a selection of which I've placed below.
B&H Affiliate Links
Canon EOS R5 Body – https://mbp.ac/EOSR5
Canon EOS RF 24-105mm f/4L Lens - https://mbp.ac/rf24-105
Canon RF 50mm f1.2L USM Lens - https://mbp.ac/RF50mm
Canon RF 15-35mm f/2.8L IS USM Lens – https://mbp.ac/15-35
Canon RF 100-500mm f/4.5-7.1L IS USM Lens – https://mbp.ac/100-500
Canon LP-E6NH Battery - https://mbp.ac/lp-e6nh
ProGrade Product Links
650GB CFexpress Type B Memory Card (Cobalt): https://amzn.to/30zbobA and on B&H https://mbp.ac/cfe650c
325GB CFexpress Type B Memory Card (Cobalt): https://amzn.to/39B4nuQ and on B&H https://mbp.ac/cfe325c
512GB CFexpress Type B Memory Card (Gold): https://amzn.to/2CXBPjh and on B&H https://mbp.ac/cfe512g
1TB CFexpress Type B Memory Card (Gold): https://amzn.to/2CX1vfW and on B&H https://mbp.ac/cfe1tbg
Thunderbolt 3 CFexpress Type B card reader: On Amazon https://amzn.to/39ISXVV and on B&H https://mbp.ac/pgdt3r
USB 3.2 Gen 2.0 Dual Slot CFexpress and SDXC UHS-II Reader: On B&H https://mbp.ac/pgdcfedsr
Show Notes
Visit the ProGrade Digital Website here: https://progradedigital.com
Audio
Subscribe in iTunes to get Podcasts delivered automatically to your computer.
Download this Podcast as an MP3 with Chapters.
Visit this page for help on how to view the images in MP3 files.

Very helpful and informative…Now, if I can just GET my R5…I am chomping at the bit to put this camera through its paces. Currently shooting a Canon 7DM2, so I have been longing for this upgrade for quite a while. Almost 100% Wildlife (usually from a kayak) so the animal eye AF is extremely attractive. Thanks again…
Thanks John! I’m pleased you found this useful. I hope you get your R5 soon. You have certainly given the 7D2 a good run for your money. Well done! You will be amazed by the R5. I did own a 7D2 for a while, so I can say for sure, they are worlds apart!
Hello Martin, thanks for the comprehensive review. May I ask if you feel can use the camera in the snowy and wet conditions you are often seen in? I’m thinking about that tilting LCD screen. Secondly, could you tell me if you can ‘fine tune’ the shutter to match flickering back ground screens seen at sports grounds and in theatres where I work (or hope to work when Covid ends). The fine tuning should allow one to match the frequency of flickering background or video walls. Regards Simon Vail
Hi Simon,
You’re very welcome. Thanks for stopping by.
I am confident that the EOS R5 will at least have better weather-sealing than the EOS R, which fogged up in wet conditions. The diagrams of the weather-sealing that Canon is showing looks substantially more than the EOS R. I won’t know for sure until the winter comes again, but I’m thinking it will be much better.
I don’t believe the anti-flicker can be manually fine-tuned, but the camera does try to detect the amount of flicker and automatically correct it. If you can download a copy of the manual, check page 164. It has some details about the feature.
Regards,
Martin.
Great review Martin! I look forward to watching your settings video once I have my R6 in hand, assuming that many (if not all) settings will be the same. Look forward to hearing more about your experience with the camera!
Thanks, Holly! I hope you find it useful.
hi Martin,
Thanks for the info. Can you do a post on using the r5 with ef lenses and extenders?
Hi Mike,
I did a post here https://mbp.ac/674 showing the autofocus with extenders and EF lenses, and I compared the EF and RF 24-105mm f/4 lenses here: https://mbp.ac/671
I also compared prints from the 5Ds R and the EOS R to see the difference and used both EF and RF lenses for that, which you can see here: https://mbp.ac/660
But, I have now sold my EF Extenders, and have the new RF Extenders, but no lens that works with them yet. I’m waiting for the 100-500mm in September. Until then I can use the 100-400mm via the Control Ring Adapter, and it works great, but no Extenders. All of my Winter Wildlife work in 2019 and 2020 was shot with EF 100-400mm or the 200-400mm with a combination of Extenders, but that was all obviously with the EOS R, not R5.
Regards,
Martin.
Hi Martin,
Good to hear you’re happy with the R5. I’m also switching from the original R, but I pre-ordered the R6 instead of R5. I will use it mainly for bird photography as I have been using the R. My main worry, and I’m sure many others are wondering about this as well, is how much cropping will 20 megapixels allow compared to 45 megapixels of R5. I find myself nearly always cropping when birds are the target, and the R has been just great in that sense. Is this something you could share your experiences about or maybe somehow show it for us who are wondering about this? Thank you and keep up the good work!
Best regards,
Ari
Hi Ari,
That’s a tough one. Cropping on 20-megapixel files doesn’t leave you much to play with, but it depends on what you want to do with the images. If you don’t sell or print your work, i.e. your main outlet is the Web, then cropping in on a 20-megapixel file is OK, but otherwise, I would definitely recommend the R5 over the R6, just to give yourself some extra wiggle-room.
Sorry if that’s not what you wanted to hear. 🙂
Regards,
Martin.
Thanks Martin,
Not at all, this was more or less my understanding. I’m just an amateur so Web and mainly Instagram only :). My local dealer in Helsinki told me not 2 weeks ago that they received seven R5s, have 50 pre-orders and no idea when and how many Canon will be sending…So the idea is to start with R6 and then switch to R5 if it turns out 20 megapixels don’t cut it. Of course it’s an additional swap which is never good money wise, but let’s see. Anyways, I’m hoping someone will actually do this kind of comparison cause it would be really interesting to see the difference.
And of course to make it more complex, there’s the issue of lenses (And their cost) in play as well. R6 and longer reach needed vs R5 and less reach needed :).
But isn’t it great that Canon now has these options available in their mirrorless line-up!
Cheers,
Ari
Hi Ari,
Yes, I’d heard the same, about many stores not getting much stock. I heard somewhere the whole of Berlin only got 5 R5 bodies in the first shipment! The store I use in Tokyo usually gets more too, but I had to weight an extra week. Luckily they are coming in again now, but still in small lots and there is still a backlog.
Here is something to think about with your cropping dilemma… The R6 sensor will give you 5472 x 3648 pixels. For Instagram, you are probably uploading images at around 2000 pixels on the long edge, maybe a little smaller. If 2000 is enough for most of your output, then by dividing 5472 by 2000 gives you 2.736, meaning you could crop into your image by 2.7 x and still have a 2000 pixel long image. The R5 on the other hand, has 8192 pixels on the long edge, meaning I could crop in by just over 4X. This may, or may not, sound like a big difference, and indeed it might not be easy to imagine how much that is in real cropping terms. I’ll see if I can put together a post to illustrate this better for you, and maybe include a few calculated focal lengths as well, to see if that helps.
Regards,
Martin.
G’day Martin, I’ve had my R5 for three weeks now, only last week my 800f11 came in, So spent last Saturday birding with the R5 and 800f11, the first time in ages I went out without a tripod. Shooting in both bright light and in some cases low light all handheld, Using ISO 10,000 I am getting acceptable images in low light handheld at 800mm. I’m used to shooting a sigma 150-600mm sports lens, somewhat heave but nice image quality, but this was so light, the image quality is great of cause you miss the smaller apertures, but for the size weight and price, its one to consider especially for travel. I’m looking forward to the 100-500 coming out at the end of next month. I tried the 100mm f2,8L Macro lens and focus stacked some mushrooms with lighting and the amount of detail in a twenty shot focus stack was something else. The animal eye detect for birds in flight works a treat, I tried that on the darting swallows and got a far better hit rate than I use to get. Like your self, I mainly shoot stills with the occasional video so no issues with overheating for me, I was one of the lucky ones down here how got one early so got a bonus battery with mine, with a full day shooting the second battery came in handy but only just nearly lasted the whole day on a fresh battery, so a second battery would be recommended. All up very happy with it, the R5 with 800mm f11 combined is still lighter than the Sigma 150-600mm sports and not carrying a tripod all day as well meant I wasn’t as tired at the end of the day walking about. All up big thumbs up for me here as well for the R5.
Hi Glenn,
Thanks for the report! You know, I’m not all that interested in the RF super-telephotos. I had my fill of prime lenses with the 600mm. The size and weight is attractive, but as I can get out to 1000mm with the 100-500mm and 2X Extender, I think I’m covered.
Good to hear about your battery use too. I noticed mine running down quite quickly. I bought two extra with the R5, and I’ll probably get at least one more with my second R5 when that comes in, but still, it’s good to know that you’re getting almost a day out of one battery. I’m hoping to brave the Tokyo heat today for a while with the 100-500mm to see what I can get.
Cheers,
Martin.
Hello Martin
I hope all is well with you and you’re staying healthy.
Denis bought me the Canon R5 for Christmas (lucky lady!). I haven’t used it to date and I hate setting up new cameras and I’m sure I saw you had written a blog on how you set your up but I can’t find it on your website. Was I imagining it?
Many thanks and best wishes
Freda Hocking
Hi Fre,
Lucky you! Congratulations on the new camera.
You weren’t imaging that, but it’s not a separate post. Look above, towards the end of this post. There is a video embedded under the Sharing My Settings section.
I hope all is well.
Regards,
Martin.