
Today we continue a travelogue series to walk you through my recent Complete Namibia Tour, as we visit Elizabeth Bay and move on to Sossusvlei and the mystical Deadvlei.
[smart_track_player url=”https://www.podtrac.com/pts/redirect.mp3/traffic.libsyn.com/mbppodcast/mbpp_ep579″ src=”https://app.fusebox.fm/embed/player.js” class=”mbp-ignore”>
It’s been almost two weeks since I returned from Namibia, so I’m in that space now where the trip is gradually fading into memory, enabling me to be a little bit more ruthless in my edit, removing more images, but due to the variety of subjects we cover on this trip, and just the richness of this beautiful country, I’ve still got heaps of images in my final selection, so let’s talk first about the state of my edit, and then we’ll move on to look at today’s ten images.
My Final Edit
After working on my images on and off during last week, I initially managed to complete my second pass to whittle down the 1,028 images that were left after my first pass, to a more manageable 496. I was happy to at least get below 500 at this point but I continued working until I got my selection down to 419. I might be able to get this down a little further before I actually copy these images to my Finals folder, but it’s pretty much my last call on my 3-star selection.
My Rating System
For me, 3-star images are ones that I am happy to let people see and will submit to my stock agency, but that doesn’t necessarily mean they are my absolute favorites. For example, some are slight variations of the same subject. I might have two different head positions of an animal. Both have merit, but I don’t necessarily want to keep both of them in my favorites. Or I might have a vertical version of the same subject. This always works well with stock imagery.
So, at this point, I went through the 419 images and selected my 4-star images, of which there were 191. Four stars for me means that I like them enough to add them to my Apple Photos app so that I can actively show people them as I travel around. These will take preference over the three stars when I’m selecting images to illustrate articles etc.
At some point, I’ll go through my 4-star images and select a small number of my photos to add to my Namibia portfolio. These will become 5-star images, my portfolio-worthy rating. I reserve 2 stars as a way of marking my “originals” in as much as I sometimes have to take an image into Photoshop and do some work on it, and when I bring that back into Capture One Pro, I make the original raw file a 2-star, and make the Photoshop version a 3-star image or higher.
My 1-star rating means it was once selected for consideration during my editing process, but then got demoted out of the selection. This is just my way of keeping tabs on something that I once liked, but it lost the battle to stay in my “Finals” group. I also like to keep tabs on these images, because they are my first port of call if I have to go back to my original shoot folders looking for something else.
Elizabeth Bay
We ended the first part of this travelogue series at lunch time on day three, as we finished our second shoot at Kolmanskop. Like Kolmanskop, Elizabeth Bay is an abandoned diamond mine community, with a couple of differences. The first being that in 2005 the Namibian Government in partnership with De Beers expanded the original diamond mine and started mining again. Because of this, we go through very strict security when entering Elizabeth Bay.
The other difference is the way the buildings are corroding. I imagine that it’s because of the sea air, but in this first image for today (below) you can see from the brickwork at the end of the building that the bricks are corroding more quickly than the mortar holding them together, making for some very strange shapes, as we’ll explore.
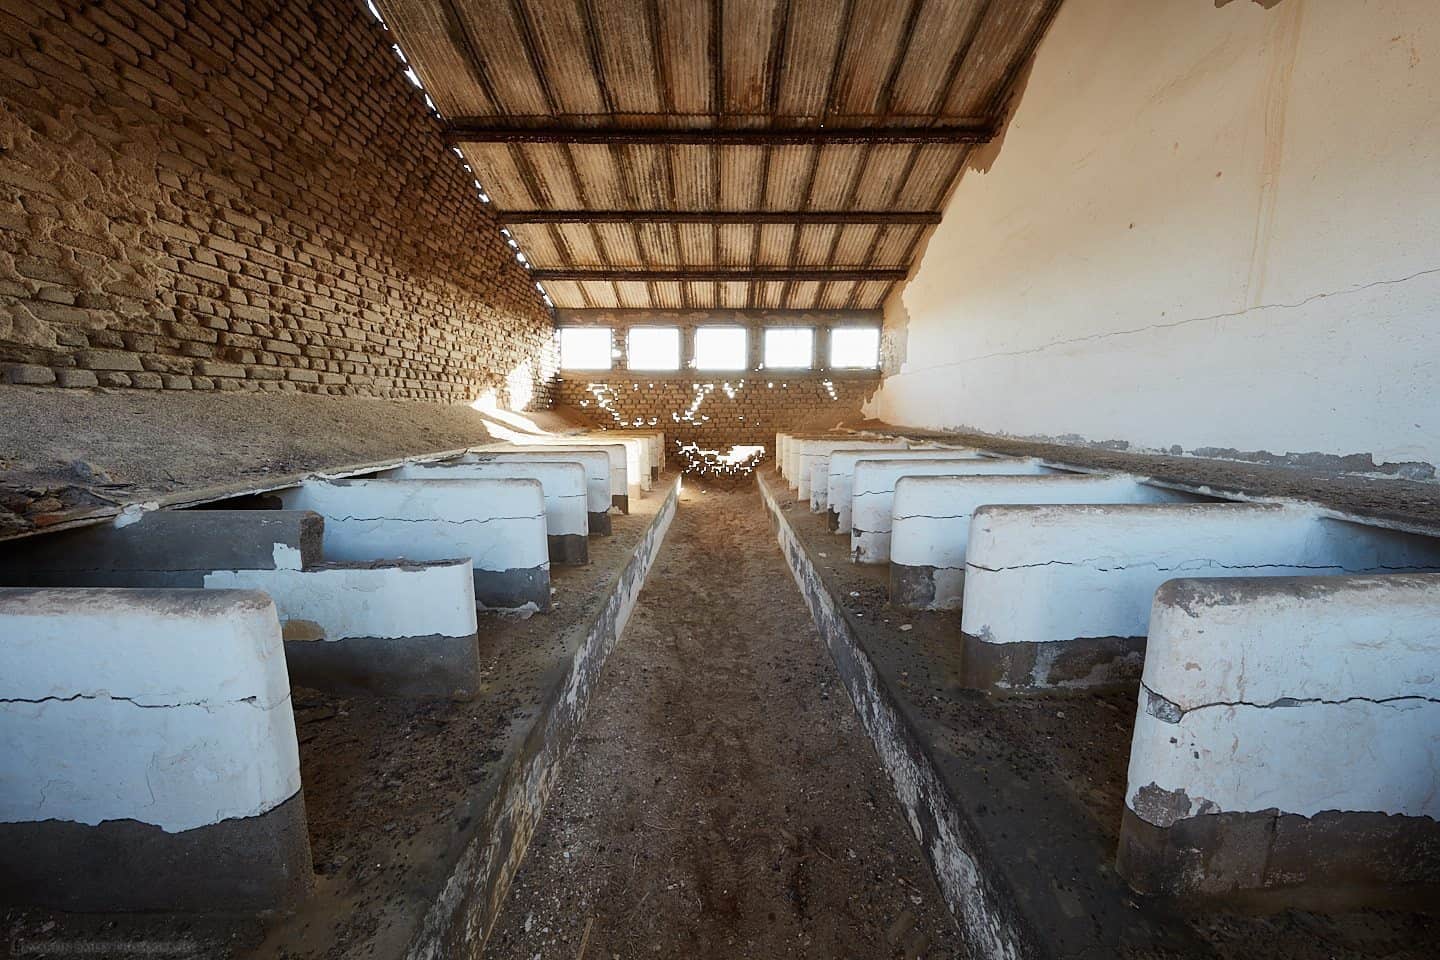
Elizabeth Bay Labourers’ Quarters
The partitions that you can see lining each side of this room are where the laborers slept. We heard one story that these laborers were slaves, but we were given an explanation of the old mine before we photographed it, and were told that the laborers were actually paid very well, so I’d like to believe that story instead. Either way, it couldn’t have been much fun sleeping in those partitions, but as a way to make a good living, if that’s what it was, I can imagine people were able to put up with it.
Again here, I’ve used the one-point perspective that I talked about in last week’s episode, as I really like the drama that this creates. I’ve allowed the light from the windows to overexpose a little, but I don’t mind that. My settings for this image were an aperture of f/14 at ISO 100 for a 0.8 sec exposure. I was using my Canon EF 11-24mm f/4 lens at 12mm, to get more of the room in, but also to emphasize the converging lines.
You can also see how the buildings are corroding in this external view of one of the buildings in Elizabeth Bay (below). As with many of the buildings, this one is partially collapsed, and if you look at the brickwork, in some areas the mortar is still there, but the bricks have corroded away.
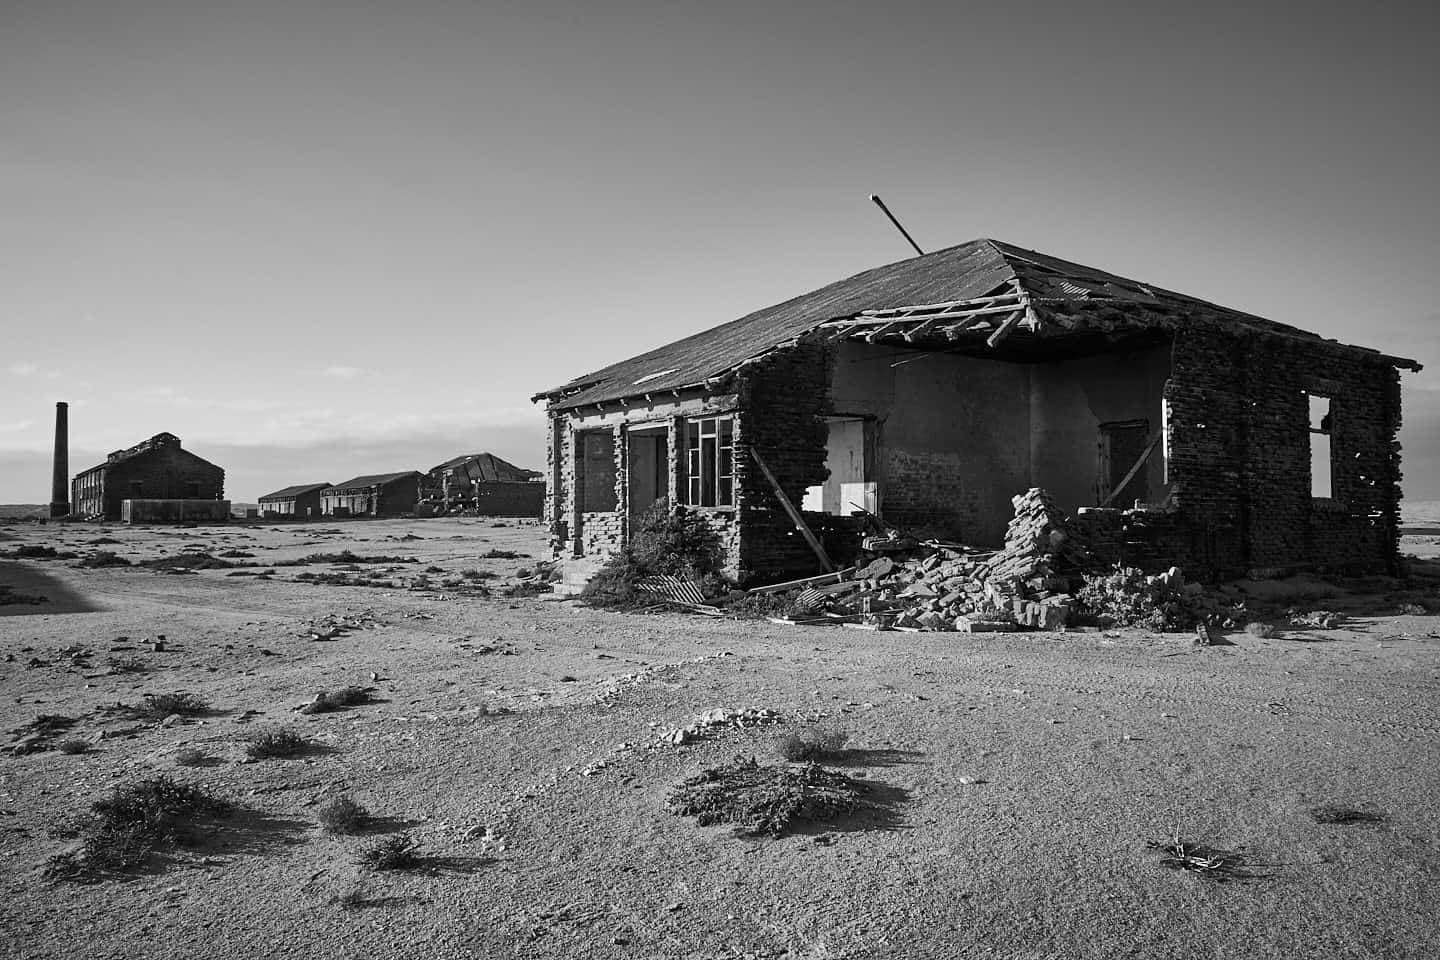
Elizabeth Bay Abandoned Mine
As you can see, although the houses at Elizabeth Bay are mostly newer than Kolmanskop, the sea air really has taken its toll much more, and most of them are just not safe to go inside. Kolmanskop is getting that way, but it has a few more years in it yet I’d say. My settings for this image were f/14 with a shutter speed of 1/60 of a second at ISO 100.
This next photo is of a building that’s bearing up a little better on the sheltered side, and this is also the room that you’ll see on the cover of Freeman Patterson’s Odysseys book. It’s hard to resist shooting this iconic image, even though they all look the same because you have to shoot through a window, giving the same angle essentially (below).
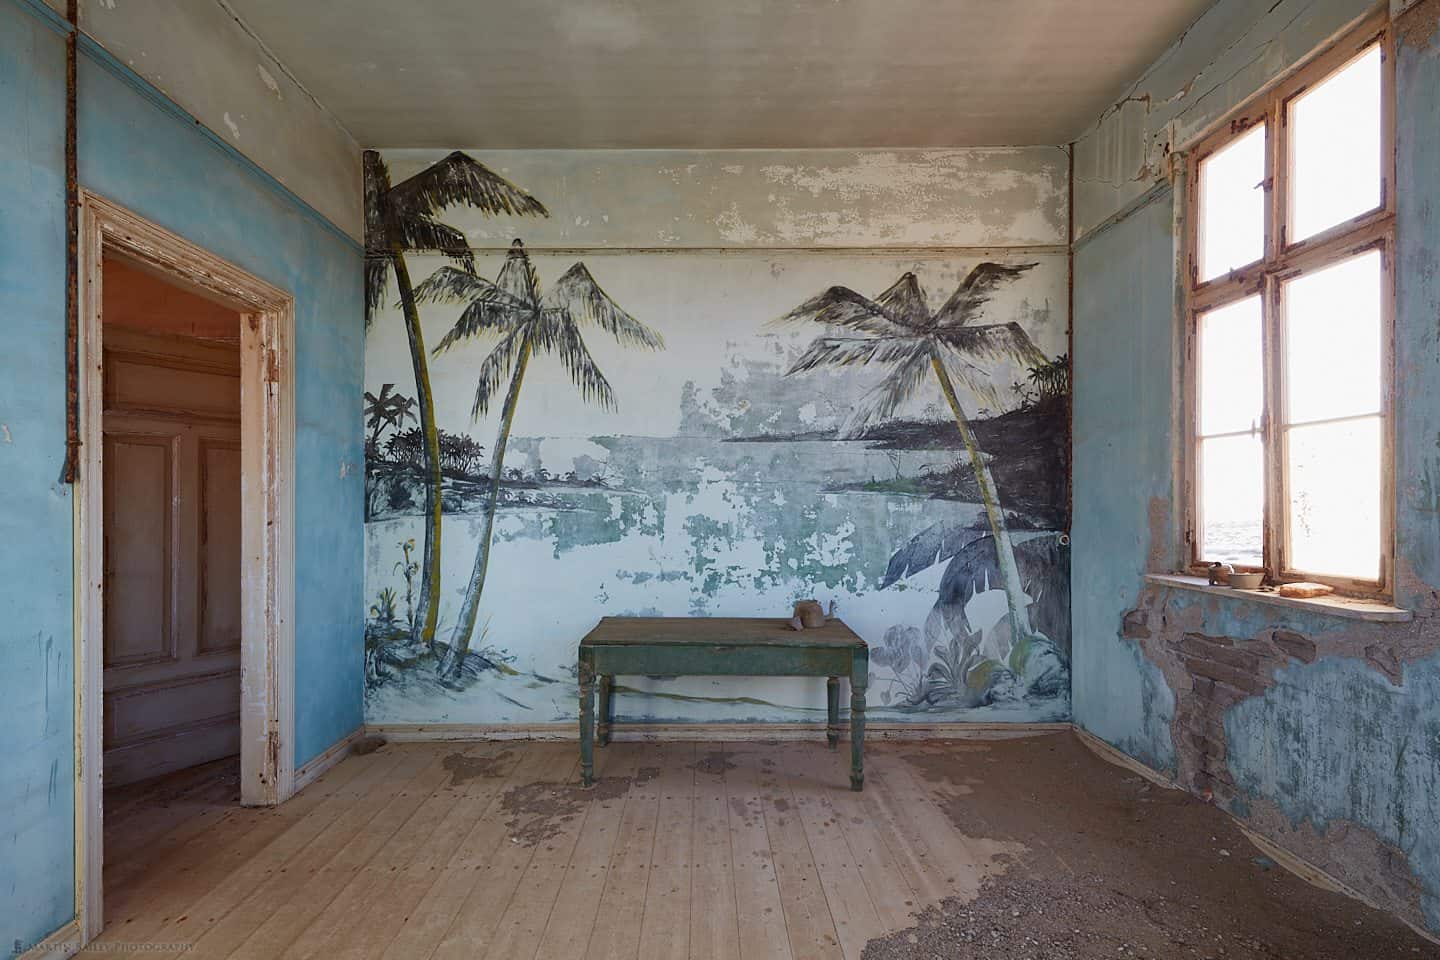
Tropical Wall
It was actually cloudy when we arrived at Elizabeth Bay, so I was hoping to photograph the houses without the strong light coming through the windows, but it cleared up pretty much while we were getting our talk about the place, so we’re stuck with bright windows again, and I’m not one for doing two exposures and blending them together. It’s just not me. The settings for this photo were f/14 for 0.3 sec at ISO 100.
This last photo from Elizabeth Bay (below) is of one of the larger buildings at the start of the town, and as you can see I placed the sun through one of the gaps in the corroded building, to form a starburst. I converted this to black and white in Capture One Pro. I just felt like these external photos suited black and white more, as the sandy color wasn’t really adding much to the feel of the image, and they are more about the graphical shapes of the buildings.
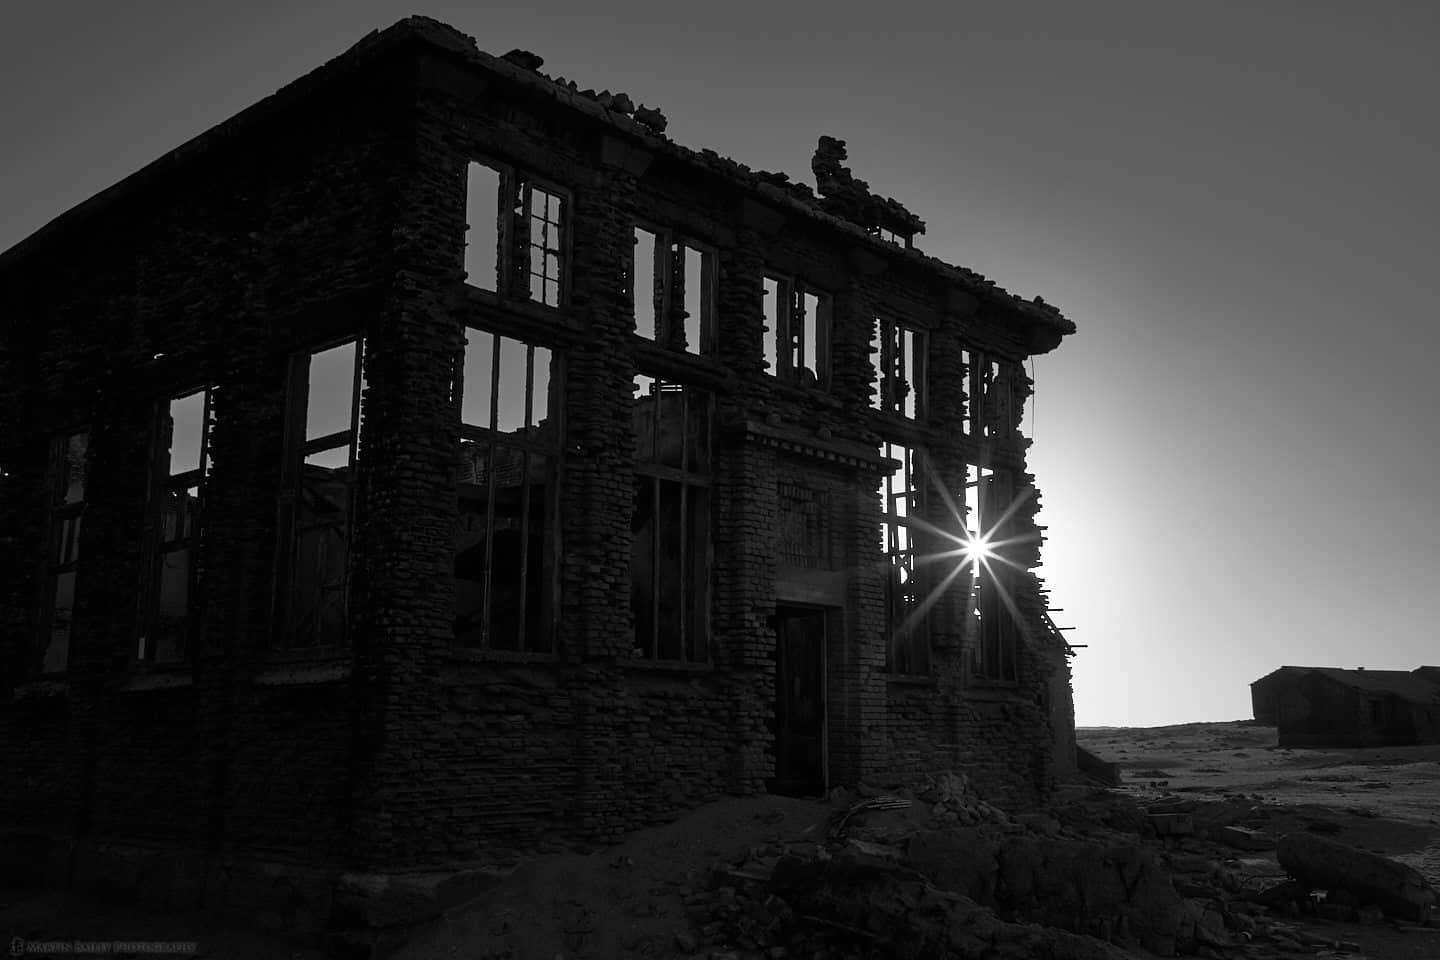
Elizabeth Bay Building Corrosion
I shot this at f/14 again, with a 1/250 of a second shutter speed, at ISO 100. This was one of the first times I’ve done a starburst shot with the new Canon 24-105mm f/4 IS Mark II lens, and I’m very happy with how clean it is. Although I heard some people giving this new lens a bad rap, I’ve still had no problems with it at all, and continue to love the image quality and versatility.
Desert Sunbeams
The sun set as we headed back to our hotel for a second night in this area. As we started our drive towards Sossusvlei the next morning, shortly after passing Kolmanskop, I couldn’t resist stopping our vehicles for a walk up the hill at the side of the road for this scene (below).
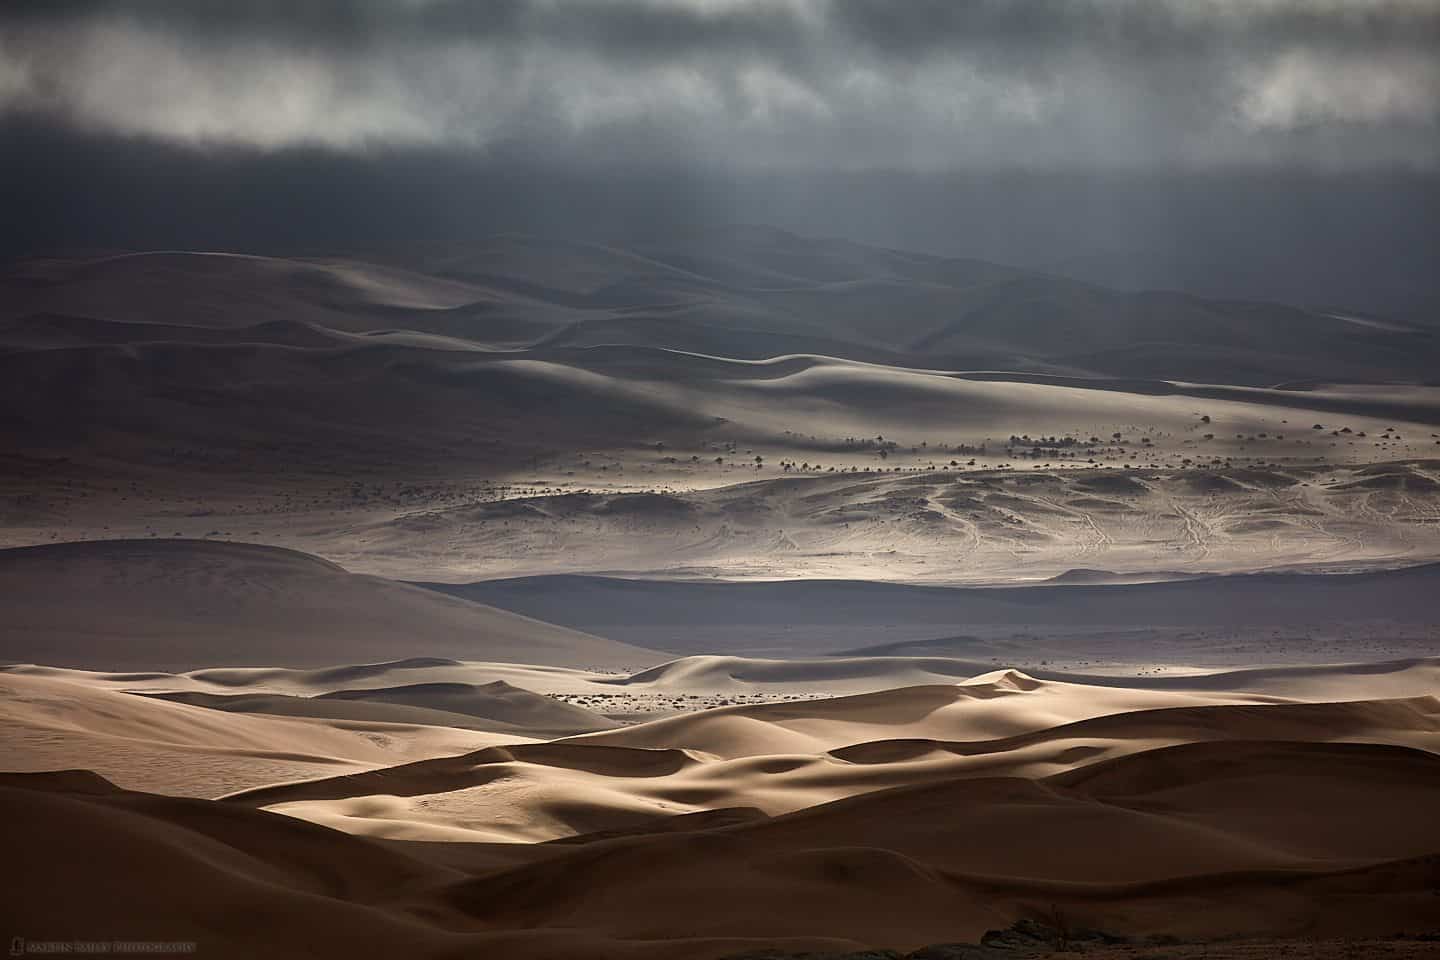
Desert Sunbeams
The light was streaming through the clouds in sunbeams, catching the tops of the distant hills and sand dunes so beautifully we just had to stop. I’ve enhanced this a little in Capture One Pro, to add contrast to the dunes, and I’ve also run a graduated filter down the top third to darken the sky a little more and accentuate the sunbeams, but this is closer to how I recalled this magical scene.
My settings were f/11 at 1/320 of a second, at ISO 100. I moved away from my usual f/14 landscape aperture because I was hand-holding my 100-400mm at a focal length of 286mm, so I needed a slightly faster shutter speed.
Deadvlei
We stopped for a number of photos along the way to Sossusvlei, but we’ll jump to the following morning now, and look at my images from the first visit to Deadvlei for this tour. We arrived well before the sun started to illuminate the sand dune behind the dead camel thorn trees, and I spent quite a lot of time walking around trying to find a composition that I have not already photographed and found that it’s getting difficult to do so.
Here’s my main photo for this first shoot (below) and it’s growing on me a little, but I prefer some of my previous compositions. I was attracted to this because it felt as though these two trees were like hands reaching out from the dried up clay pan, almost in desperation.

Desperation
If you haven’t seen this type of photo from Deadvlei before, there are a few minutes each morning when the sun starts to climb over a sand dune to my back while shooting this, and there comes a point when it is only illuminating the dune and does not yet light up the clay pan, so we can make these beautifully surreal, almost silhouette-like photographs. My settings for this were f/14 for 1/20 of a second at ISO 100.
The line of light moves quickly along the edge of the clay pan, but if you are quick, you can get a few different compositions in before the phenomenon ends, so I ran along and grabbed this second shot, that some of you may recognize (below).
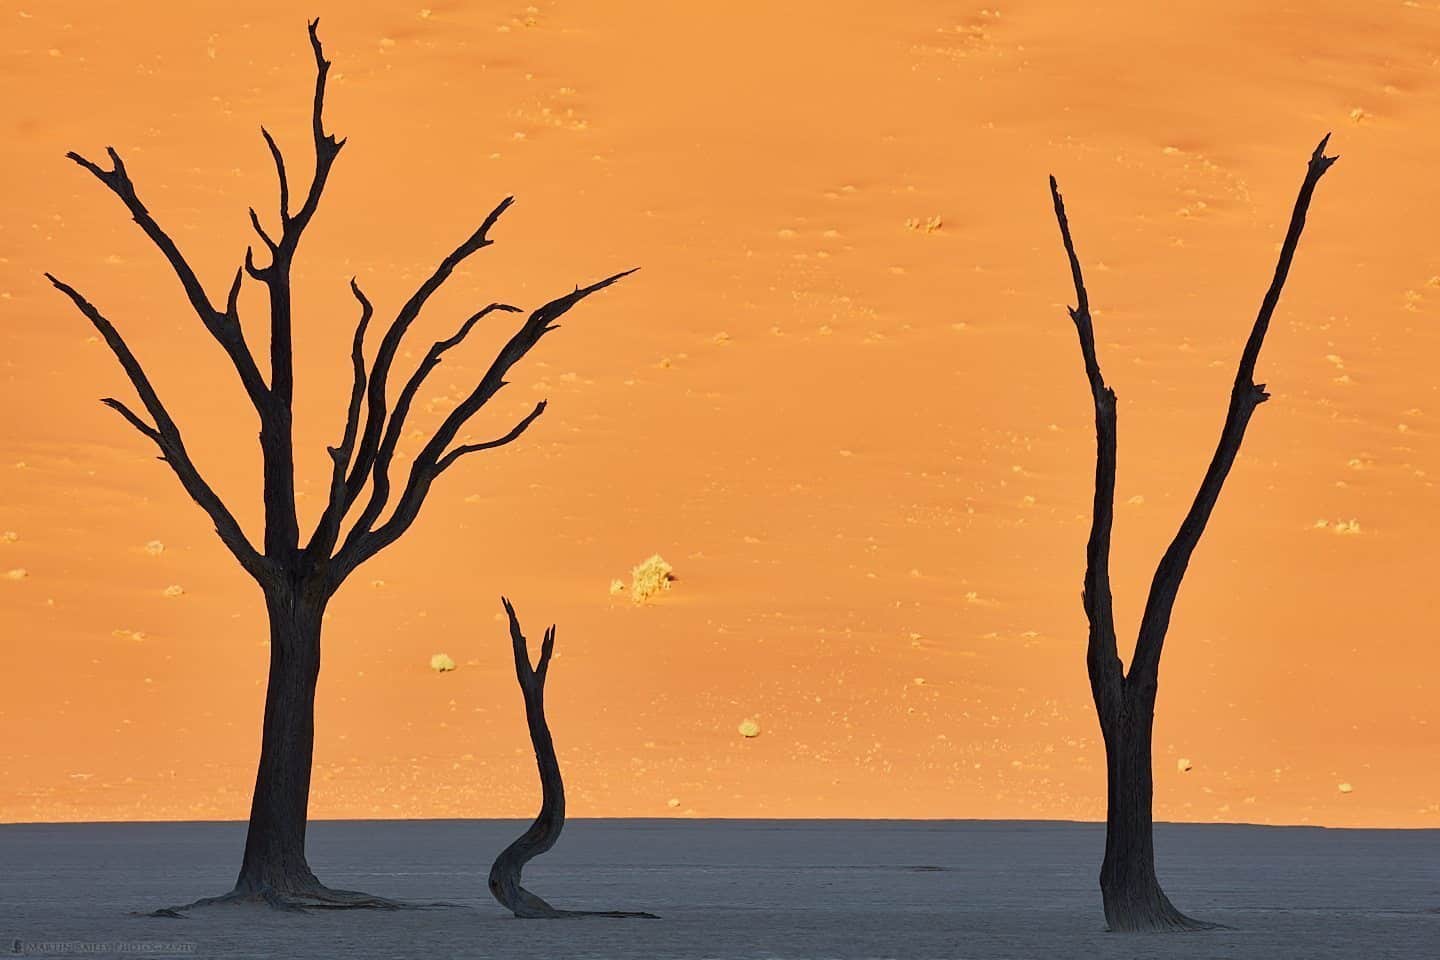
Deadvlei Silhouettes 2017
I didn’t check against my original photo, but this is an almost complete replica of my first Deadvlei Silhouettes image from my first visit in 2013, which you can see in episode 373 if you are interested. The trees to the left are exactly the same as they were four years ago, but unfortunately, the tree to the right is missing a branch from its left side. These trees are between 600 and 700 years old and don’t decay because it’s so dry in this basin, so I imagine someone has fooled around grabbing hold of the third branch, and actually broken it off, which I find incredibly sad.
Checking Focus in Live View
At f/14, the orange dune in the background isn’t completely sharp in these images, but it wouldn’t get much sharper if I stopped down to f/22, but then, of course, we start to see diffraction creep in, which makes everything in the image softer, so I like to avoid that. To me, the important thing is that the two trees are sharp. The trees to the left here are just slightly behind the tree to the right, so I like to check my depth of field.
To check my focus and depth of field in situations like this, I initially focus on one of the trees, then go into Live View and zoom in to 5X, and hold down the Depth of Field Preview button near the bottom right side of the lens mount on my camera. I check both trees to see if they are in focus, and if one is not, with the Depth of Field Preview button still pressed, I manually adjust the focus until it just becomes in focus, and then go back and check the other tree, to see if it’s still sharp. If it isn’t, I adjust the focus back a little and then check the other tree again. The actual focus may be somewhere between the trees, but as long as they are both sharp, I’m happy.
Although it’s quite rare, there were some beautiful clouds while we were in Deadvlei on this first morning, so I capitalized on that with the following image (below). Here you can see the trees in normal light, and get a feel for what the clay basin actually looks like illuminated as well. Anthropomorphizing as I often do, I saw the main tree in this shot as a Sorcerer, perhaps casting his spells on the other trees.
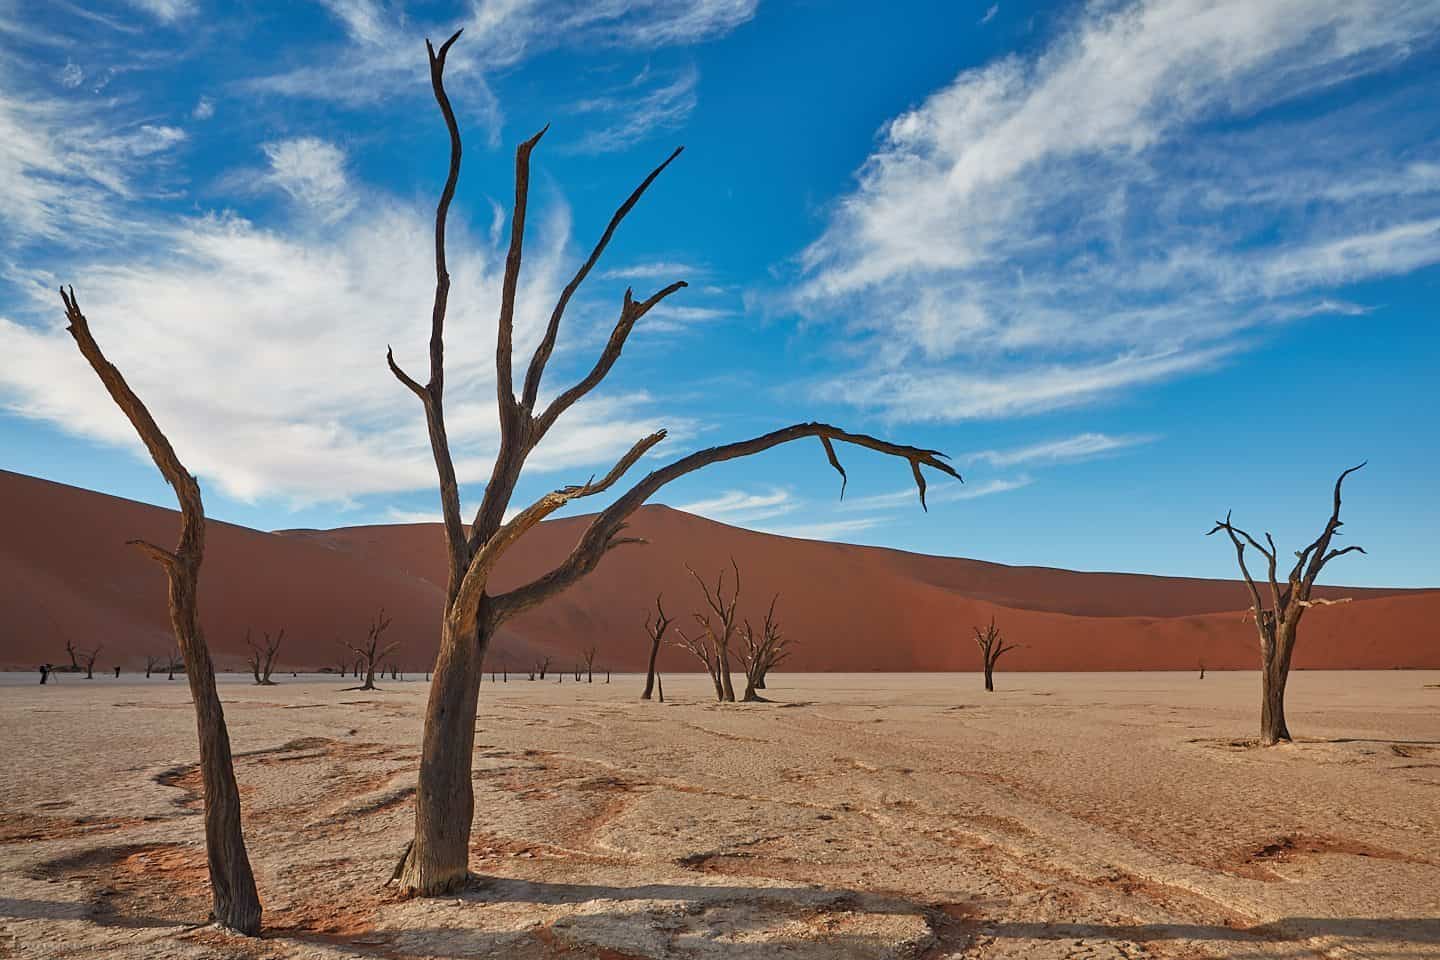
The Sourcerer
I tried a circular polarizer filter on this as well, to see if it would help me to deepen the blue in the sky, but I didn’t like the results. The sky became too dark, and the foreground also became dark as I exposed for the white in the clouds, so I went back to no filter for this image, which I shot at f/14 for 1/60 of a second at ISO 100.
Dune #35
After our morning visit to Deadvlei, we went to another sand dune for a while, then went back to the hotel for lunch, and to grab a few hours of welcome rest. Then, later in the afternoon, we headed back out again to photograph Dune #35. The dunes in Sossusvlei aren’t actually numbered, but people identify them by the distance from the entrance to the national park. The one you can see in this photo (below) is 35km in.
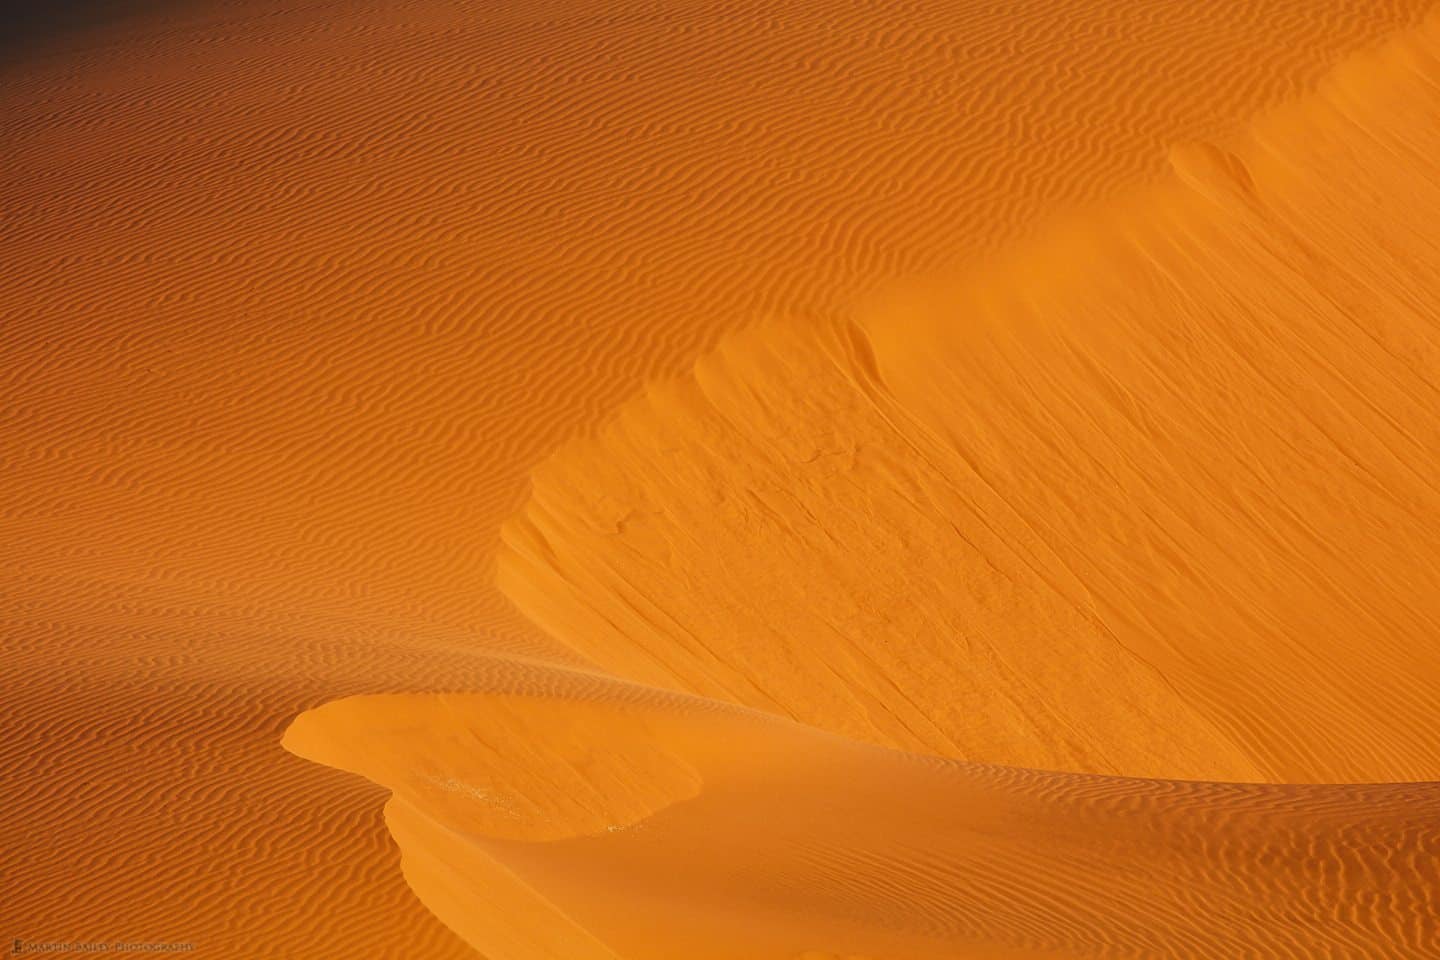
Intimate Dune #35
This dune is quite a walk from the road, perhaps around 2km, so when we looked back towards our safari vehicles from the base of this dune, they were smaller than ants. This does enable us to get quite intimate though, especially with my 100-400mm lens, used at 400mm as I did here.

Dune #35
The sun was perhaps 20 minutes from going down at this point, so the acute angle of the sun had started to highlight one side of the ripples in the sand, and the shadow forming on the other side gives beautiful definition.
In this final photo for today, shot at 158mm from a little further back, you can see a larger section of the same dune, and if you look closely can perhaps make out a bit of sand blowing off the crest.
I was using a circular polarizer filter for these images, partly to darken the blue in the sky, and I also found that the bright side of the dune not only became more vibrant, but the dark side became darker, which works well for this image.
I actually darkened the shadows just a little bit more using the Luma Curve in Capture One Pro, to increase the overall contrast.
I shot both of these last two images at f/14, for a 1/40 of a second exposure at ISO 400. I increased my ISO rather than doing a slower shutter speed because the wind was blowing quite strongly in gusts across the plane, and I didn’t want to risk it moving the camera during the exposure.
Just below the base of this image, there are some trees, which I also included in some of my shots, some of which I really like as well, but in order to keep these episodes to my usual ten photos, we’ll start to wrap it up there for this week. We’ll pick up the trail again next week starting from our second dawn shoot in Deadvlei, perhaps a shot or two of Dune #40, and then we drive up the Skeleton Coast to Walvis Bay and then on to Sesfontein, where we photographed the beautiful Himba people.
Complete Namibia Tour 2018
If you would like to join me in Namibia on my 2018 tour, please do check out the details and you can book from the tour page at https://mbp.ac/namibia. If you can’t wait until next year, you might also consider my Morocco tour from the end of October 2017 as well, which you can find at https://mbp.ac/morocco.
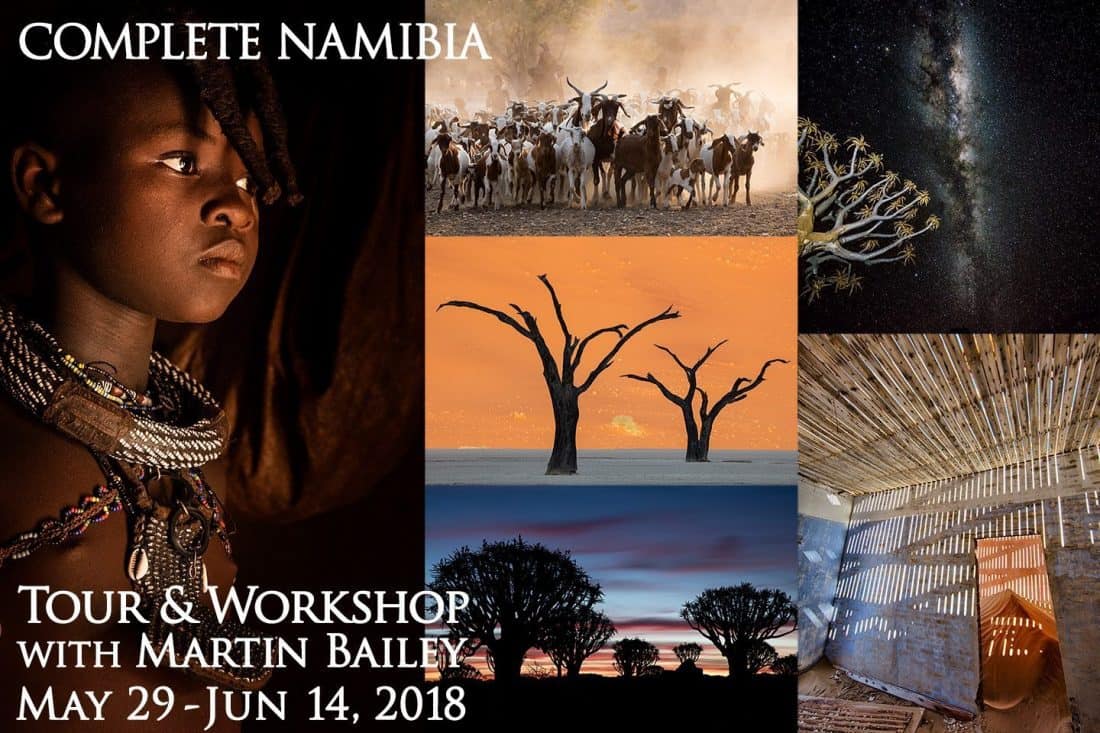
Complete Namibia Tour & Workshop 2018
Show Notes
Check out details of my 2018 Namibia Tour here: https://mbp.ac/namibia
And my Morocco Tour details can be found here: https://mbp.ac/morocco
Subscribe in iTunes for Enhanced Podcasts delivered automatically to your computer.
Download this Podcast in MP3 format (Audio Only).
Download this Podcast in Enhanced Podcast M4A format. This requires Apple iTunes or Quicktime to view/listen.


Hey Martin! Thanks for putting together these extensive reviews. I enjoy reading the very much as they are about as close as I will ever get to participating in one of your tours. German school holidays just aren’t compatible with your tour schedule. Keep up the good work.
Hi Christian! It’s great to hear from you.
I’m pleased you enjoy these travelogues. I thought of you and your beautiful black and white animal photos often as I photographed the wildlife towards the end of this trip. Many of the shots would suite your processing. 🙂
Cheers,
Martin.