
In response to a couple of questions about an image I posted recently, today I’m going to walk you through how I created a totally black background in Silver Efex Pro 2, using a recent Lotus Flower photograph.
Here is the video. Remember to go full screen so that you can see all the juicy detail.
And talking of details, there are a few screenshots of my final settings for this image and some brief information below the video too.
My Settings
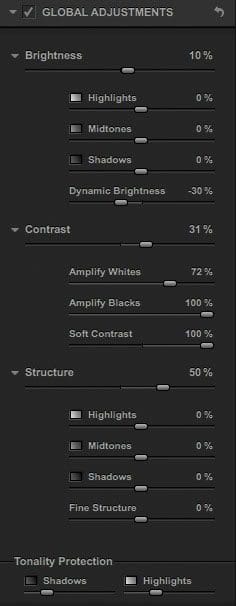 I know there are various schools of thought on the order in which you work the right sliders in Silver Efex Pro 2, but over the years I’ve found the method I show in this video to be the most effective.
I basically work from top to bottom, usually taking two passes to achieve the look I’m working towards. The first pass gets me in the approximate area, then the second pass narrows down the look.
Once I’ve adjusted the color channels and added my control points, I sometimes come back and have a final tweak too, but that’s usually about it.
Another tip is that to find the look that I’m after, I often literally just wiggle the sliders from back and forth, and gradually reduce the amount of wiggle until I get the look.
I’m also not afraid to take a slider to all the way over to the right if necessary, as I did with the Amplify Blacks and Soft Contrast in this image.
Although it was not a problem with this image, one issue I have with Silver Efex Pro is that it can sometimes leave nasty white lines along the edge of high contrast lines, such as along the edge where a dark cliff meets a grey sky for example.
Although I don’t go into details on this in this video, I generally work around this in one of two ways. If I can, I adjust the contrast, or use control points to reduce the white line to the point where it is no longer a problem, or I leave the processing exactly how I want it, and then clone out the white line in Photoshop. The latter is a pain, but sometimes necessary to achieve the look I want.
Tone Curve

Lotus Flower Tone Curve
Although I don’t use the tone curve in every Silver Efex Pro conversion, I sometimes find it can help to add a nice extra bit of contrast, and is also an easy way to bring the background down, especially when my plan is to make the background go totally black as with this image.
I think it’s important to keep in mind what each slider and panel does, and use them in conjunction with each other. You’d often be hard pushed to achieve exactly what you want with just one or two controls.
Tweak the Color Channels
Although I often also use the color filters, for this image I left this set to the neutral grey disk, but I did have a good play with the color channels. See the video for what I did.
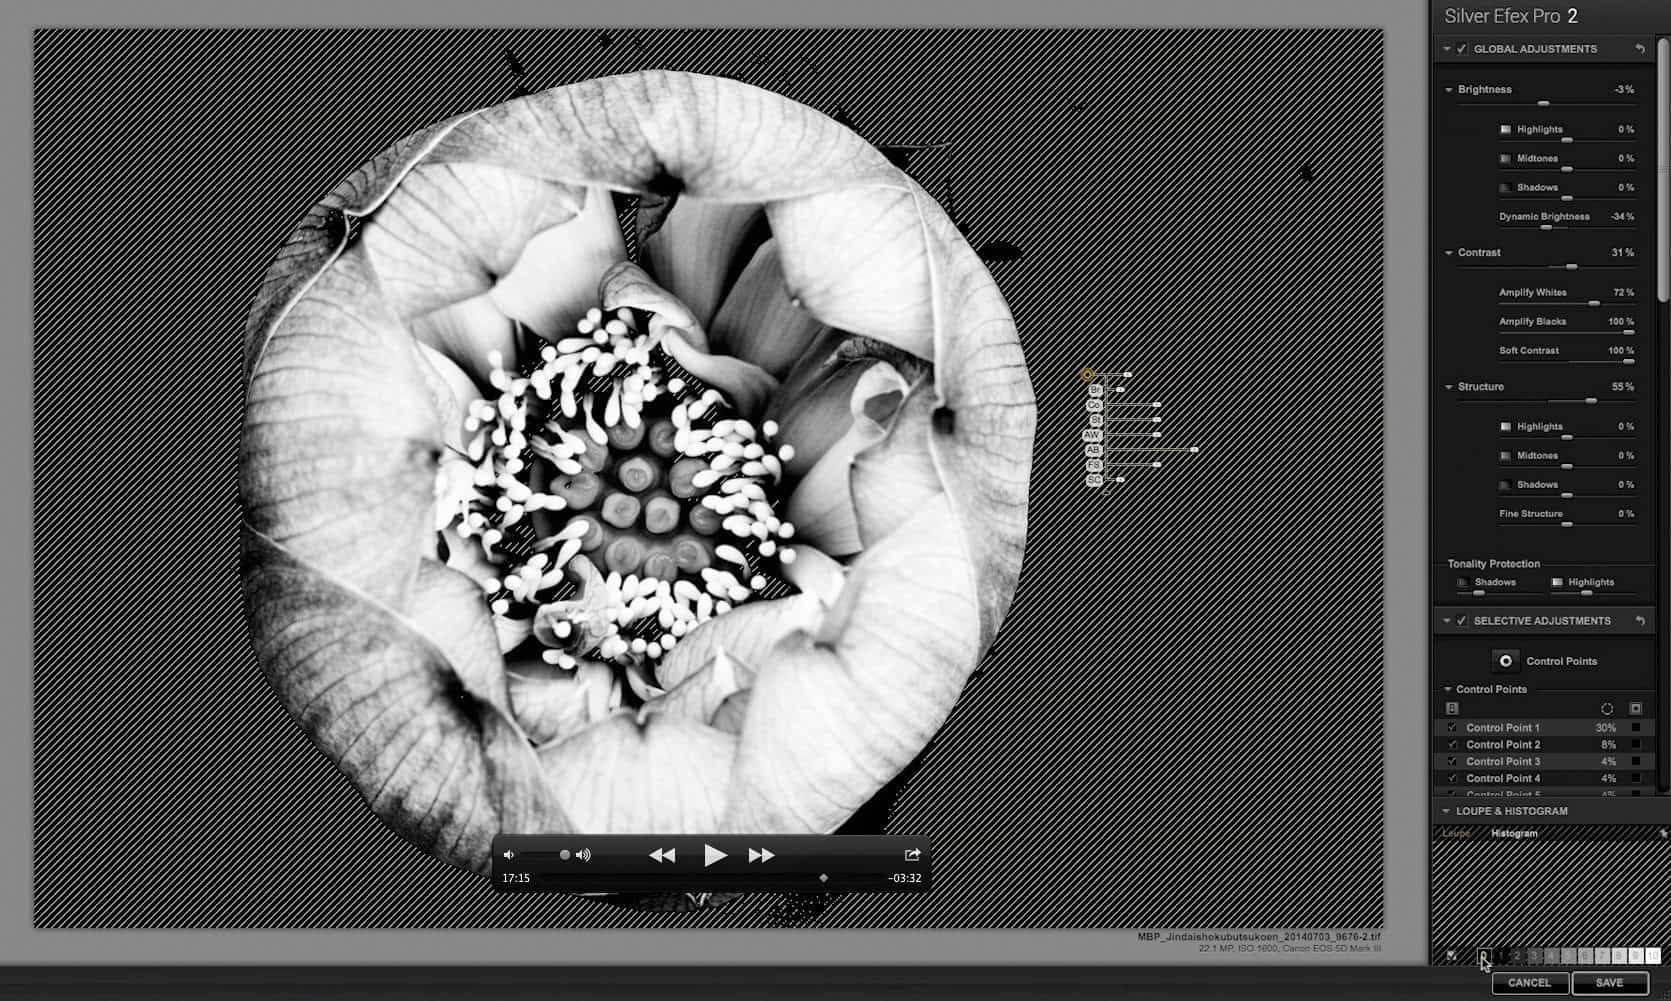
Control Points to Selectively Darken Background
I then start to drop control points on all of the lighter areas of the background, and reduce the Brightness to zero, and increase Amplify Blacks to full. Then while holding the Alt key, drag the control points to duplicate them, and adjust the size as necessary.
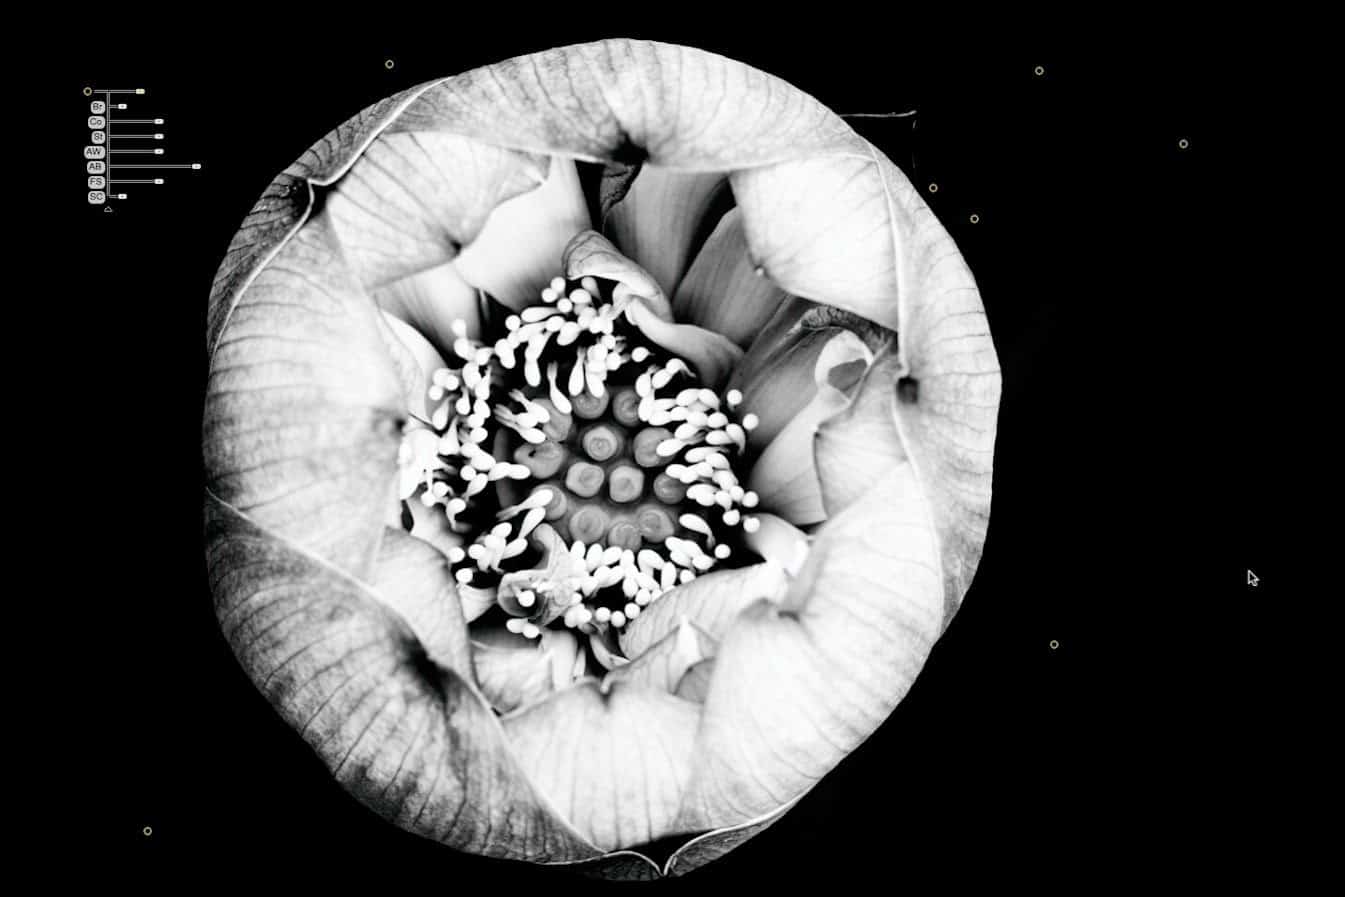
Control Points
I also like to click on the button to the right of the control points to show the effect of each control point, just to make sure it’s not affecting the wrong areas of the image etc.
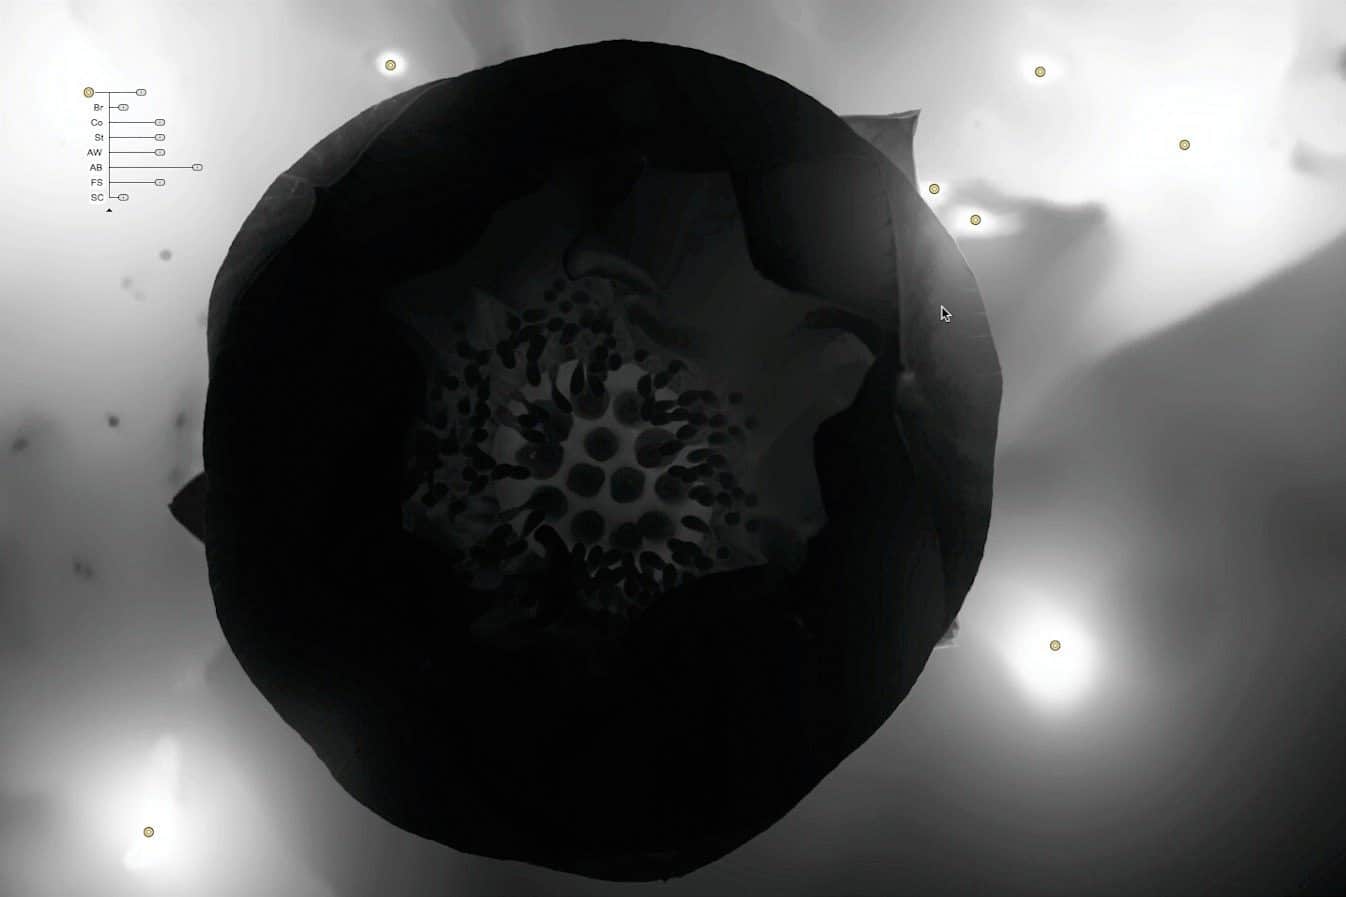
Show the Masks
As I achieve the look I want, I also just roll over the zone system indication numbers in the histogram panel at the bottom right. This enables me to check that I don’t have too much of the image over exposed, if any, and I can also check that if I was trying to get a fully black background, that I’m actually achieving that, by mousing over the zero.
It’s especially important to ensure that the edges are black if you every intend to show your image against a black background, because grey will show up against the black if you don’t plug it up enough.
Zone System Check
Then, before I Save the image and commit my changes, I save a Preset so that I can easily get back to the same settings, although note that these do not include control points, just all the other settings. If you need to revisit control points, open the image as a Smart Object in Photoshop, and launch Silver Efex Pro from within Photoshop. Then, as long as you don’t flatten your image, you’ll be able to revisit your changes later.
Just for reference, here too is the original color version, so you can see how different it was from the final image.

Lotus Flower Interior – Original Color Version
OK, so I hope that was helpful. Do watch the video to see exactly what I did. This additional information I’ve posted is really just to augment the video.
Monthly Wallpaper Subscription
Before we finish, I wanted to briefly mention my new Monthly Wallpaper Subscription service. For as little as $2/month you can get a fresh new high resolution desktop wallpaper image each month, and up to 10 free images when you sign up for a year. For details, see our new Monthly Wallpaper Subscription page.
Wallpaper Subscriptions from $2/Month + 10 Free!
Show Notes
See the video on Vimeo here: https://vimeo.com/103692642
Subscribe in iTunes for Enhanced Podcasts delivered automatically to your computer.
Download the small iPhone video in MP4 format. You can also download the full sized video on Vimeo.


0 Comments