At the end of March I did a studio shoot with two families in traditional Japanese kimonos, and was able to get some behind the scenes shots of the professional kimono fitter actually dressing some of the subjects. Today I’m going to walk you through the studio set up and a few of the resulting images from the shoot.
This episode is brought to you by Squarespace, the all-in-one platform that makes it fast and easy to create your own professional website, portfolio or online store. For a free trial and 10% off, go to squarespace.com and use offer code MBP.
I don’t do a lot of this kind of work, but there are a few families that have asked me to do portrait sessions with them a number of times over the years, and I really enjoy working with them. This year the main event was to document something that is a tradition in some parts of Japan, which is to dress the 13 year old girl of the family in Kimono for a visit to the local shrine. Unfortunately, the weather closed in just as we were getting started, so the shrine visit went out of the window, but the shoot went ahead.
Studio Setup
My wife, who’s become a very competent assistant, and I went to the family’s home on the Saturday night before the Sunday shoot, to set up our studio. They have a large enough living room that by removing the sofa, we had enough space to shoot a small group, up to five people or so, though this still required some Photoshop work to remove the sides of the background for some of the wider shots.
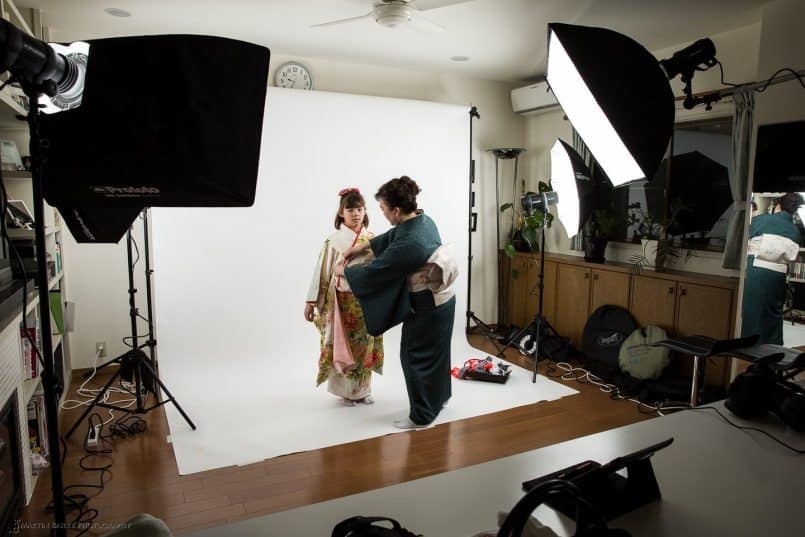
Once we got into the shoot, I took a step back and grabbed this photo of the room with my Profoto Lighting in place, so I’ll walk you through that first. As we can see, I had some white seamless set up as a background. I know this can look a little sterile, but I’m really into the simplicity that a plain white background brings to an image. I’ve used a number of different coloured muslin backgrounds over the years, and they just seem dated to me now.
My lights are all Profoto D1 Air 500 W/S Monolights. These are not the most powerful D1’s available, but they are powerful enough for my needs. I bought these around four years ago now, and added a second pair of D1s around three years ago. I might choose some of the newer Profoto Lights if I was buying now, but I don’t do enough of this type of work to warrant replacing these, and probably wouldn’t anyway, as they still do everything I want them to at this point.
To the right, you’ll see my main or key light which is a 3×4′ Profoto Softbox, and to the left, I have a 2×3′ Profoto Softbox, adding some light to the other side of the subjects face. To light up the seamless background, I used the two umbrellas that came with one of my D1 Monolight kits. I won’t go into detail on all of the lighting stands etc. but I’ve embedded a B&H widget below with all of the studio gear I use included, and of course you are supporting the Podcast/blog by buying with these links.
I did this shoot with my Canon EOS 1D X tethered to Lightroom with a USB cable. Although the Profoto Monolights and Softboxes are pretty much Daylight white balance, I can recreate the exact colours in my subjects, especially the beautiful kimonos I’d be shooting on this day, by calibrating the camera with an X-Rite ColorChecker Passport.
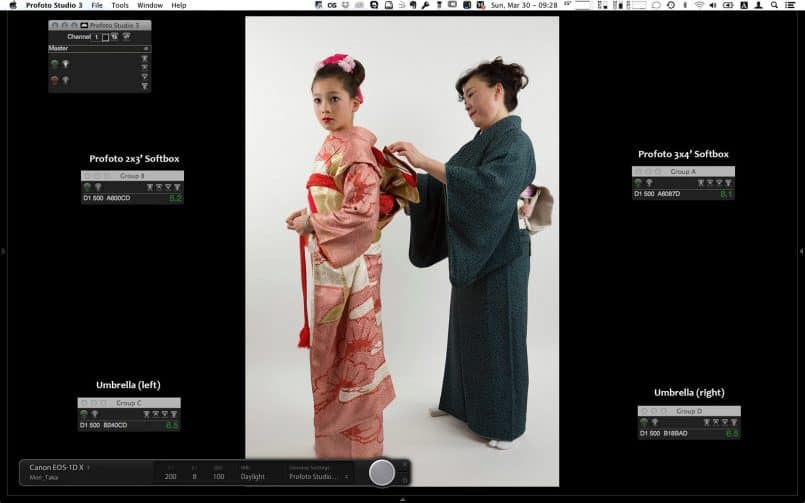
I included the ColorChecker Passport in one of my early images, and created a camera profile, which I applied in Lightroom, then created a Develop Preset including the profile, and I was then able to assign that Develop preset to every image that was automatically imported to Lightroom via the tethering cable. As you can see in this screenshot (below) I had the preset that I created called “Profoto Studio” assigned right there in the tethering window. (Click on the image to view it larger and you will be able to read the text more easily.)
You can also see from this screenshot, that I was using the Profoto Air USB dongle, which enables me to control all of my Moonlights from my computer, and save my settings etc. I set the group on each of my lights to something different, so that I can control them all individually. The Key light was Group A, which you can see was set to 8.1, my second softbox to the left set to Group B with the power at 5.2, almost three stops less than my Key light, so that there was an obvious main source of light, and the second softbox just filled in shadows.
I positioned my two umbrellas at the same distance from the background, so I could have used just one group to control both of them, but there’s a chance that I might have wanted to move these around during the shoot, so I called the Group C and D and set the power of them both to 6.5.
Some people like to angle the background lights more towards the background, but that can leave the centre of the background a little dark, especially when you have a group blocking out the spill from the main lights, so I like to have the angle quite shallow. The light from these two umbrellas also spills over onto the subjects, and reflects onto them from behind off of the white background, but I actually quite like that effect, which is why I set up like this.
To set the power of each light, I used a hand-held light meter, recording the brightness of each light and adjusted the power so that I was getting f/8 at ISO 100 at 1/200 of a second exposure, which is what I was going to be shooting at. Once you have the light meter set to your ISO and shutter speed, it basically just tells you your required aperture based on the light it reads as you fire your lights, so it’s really easy to get your lighting all set in a few tests.
Of course, the reading changes as you move closer or further away from your lights, but this is where the positioning comes into play. I moved my key light a little further away and turned the power up, so that it would provide a wider light that was already tapering off some by the time it hit the spot that I would place a single subject, but because it was further away, I’d be able to increase the number of people in the group, with some closer to the light, without it getting too bright and over-exposing the closer subjects. As the members of the group are placed further away of course, they start to pick up more light from my second soft box, and the entire group is nicely lit.
Once I was all set, I saved the settings of each light with the Profoto Studio software, so that if anything should change I could easily get back to these settings during the shoot. Another great thing about this software is that you can if you want, change the power of all of your lights and have them stay in sync. Say for example I wanted to shoot with a second camera with a different aperture, as I did a few times, I can change all of the lights by a few stops and they stay proportionately synched together, which is very handy.
Another thing I sometimes do is just use a neutral density filter on my second camera. Say I’m going to shoot at f/8 on one camera, and f/2.8 on a second camera, that would let in three stops more light, so I can put a three stop ND8 on my second camera, and just shoot away without adjusting my lighting. I actually find this much easier than messing around with the setting during a shoot.
The Kitsuke Shoot
We left the gear setup on Saturday night, and then went back bright and early on the Sunday morning to photograph the Kimono fitting, which in Japanese is called Kitsuke. The lady that we see in these Kitsuke photos is a professional and actually very well known kimono fitter, as well as a number of other traditional Japanese activities like playing the Koto and the tea ceremony.
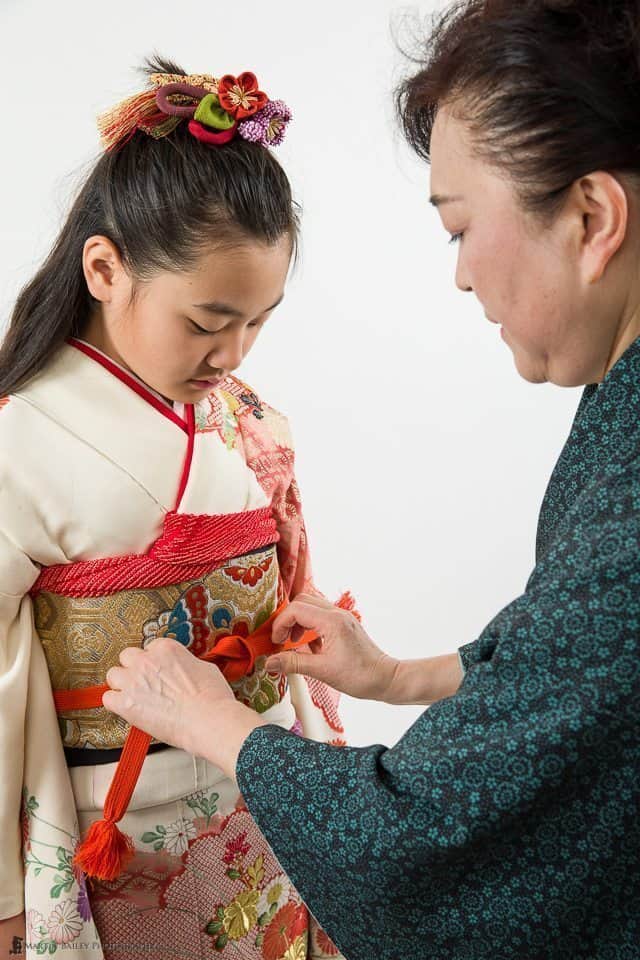
In this first photo, we see the Sensei with her arms all the way around one of the young girls, wrapping the large belt around her. This is more of a documentary shot to show you what’s happening, but I was conscious to try and capture nice movement in the long furisode sleeves, and a theme through many of these photos was the sense of abandonment as the young girls just seemed to trust the sensei quite a long time as the fitting progressed. It actually took around 45 minutes to fit each of the girls, and I ended up with almost 100 photos of each session.
To the Japanese, the tying of knots is quite significant. I suppose it is with most cultures, as it represents finalisation, and a binding of people or things together.
The final touch to the kimono is the tying of the silk rope that goes around the Obi, or belt. After this last knot that we see here is tied, the lose ends are tucked under the rope so that, well, there are no loose ends.
As we progressed to photograph portraits of these girls with their families, whenever the ends of the rope would come loose, the sensei or a mother or grandmother would run in and tuck it back in.
I should also mention that the kimonos that these girls were dressed in actually belonged to their grandmother’s, and so have a lot of history and significance to their families. I was honoured to be able to photograph these kitsuke sessions in this way, with the beautiful simplicity that the white background and soft lighting provides.
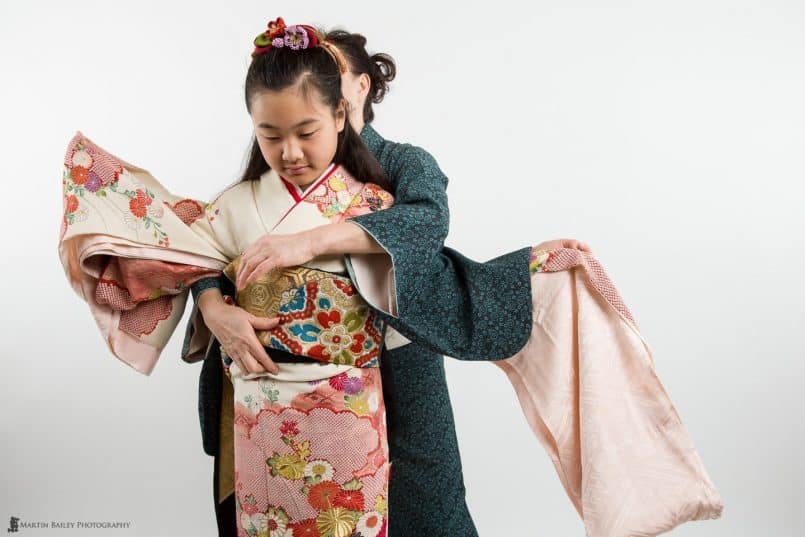
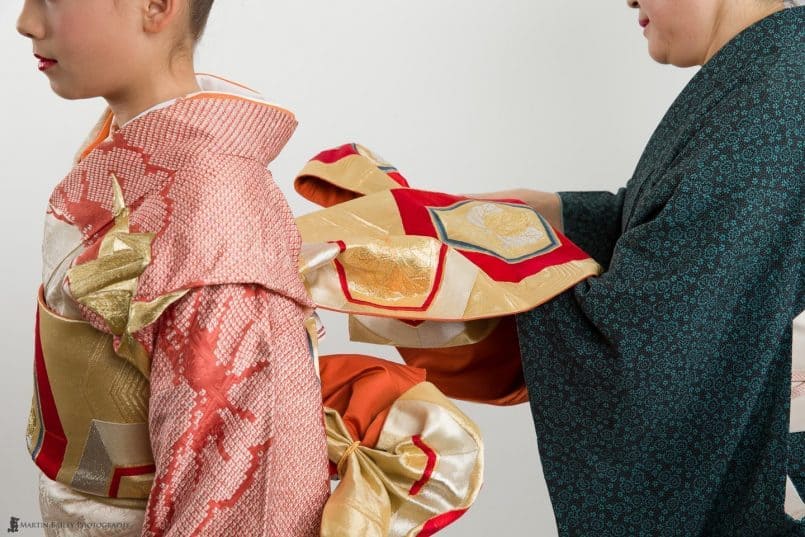
As we progressed through the Kitsuke sessions with the second 13 year old now, I was mindful of composition of course, and tried at times to focus more on the actual dressing, and at times used a more dramatic composition such as this one, where I cut off the faces of the girl and sensei mid-way.
The tying of the bow on the back of the Kimono is of course another significant aspect of the kitsuke session, and because we are usually drawn to eyes, removing them kind of takes away from the weight of the eyes, freeing us to look around more. Of course, we still go back to the human faces, but not with so much immediacy as we would with the eyes in the shot.
Also note that although I’ll often have to ask people to look at the camera or look at a certain point, I didn’t request eye contact at any time during the dressing. I literally just wanted to document it, as though there was no photographer in the room.
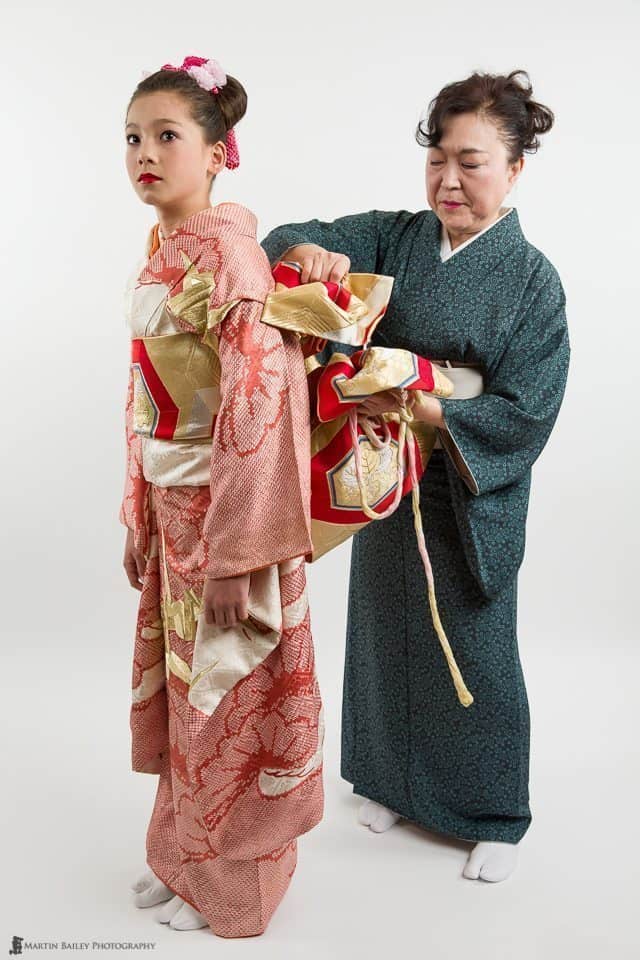
Here again we see the sensei rounding up the length of silk belt into what would become an even more beautiful work of art in position on the back of the kimono.
Another thing that you might have noticed that I was really happy about, is that the kimono fitter also wears full traditional dress, including a beautiful formal kimono with it’s own obi and bow, and tabi, the toed footwear that most people probably associate with Ninja, although these are common here in Japan.
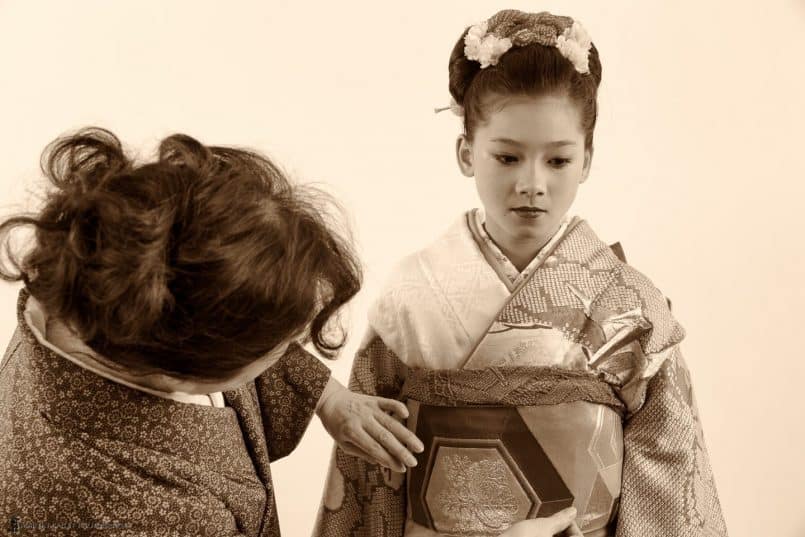
After a photo session, I usually provide my clients with a CD or USB memory stick with a selection of images resized for them to browse or use as the desktop wallpaper on their computers, and a smaller size that they can post on Facebook etc. Once I have my selection of images down, I also batch convert the set to black and white, using a Silver Efex Pro preset and the batch processing functionality in Photoshop. I know that you can batch process right there in Silver Efex, but when you have some 400 files to process it isn’t as smooth as Photoshop.
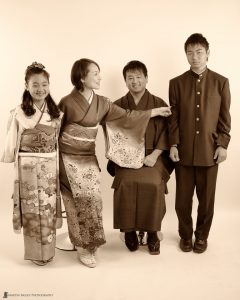
Although I usually do straight untoned black and white, for this shoot I just felt sepia was going to be a better option, as it seemed to match the timeless feel of the traditional clothing much better. This next shot is an example of how the images looked in Sepia. Note too that I was careful not to use an colour filters in Silver Efex too, as there was a wide range of colours in the various kimonos, and I needed to batch this work to save time, so I wasn’t able to go through and inspect and adjust each conversion before applying it. The results were just what I wanted anyway, so there was time saved and all was well.
On a business note, I wanted to just mention that I did not request payment to photograph the kitsuke sessions. I provided photos for the families, but I just really wanted to make these photos for myself, and I had each of the three young girls’ parents and the kimono fitter all sign model releases, and I’ll be submitting some of the images to be considered for inclusion in my Offset stock library.
Family Portraits
So, more than two hours after the Kitsuke sessions started and having dressed three young girls and two men, we were ready to start the family portrait sessions. In a meeting a week before the actual shoot, we’d already established a list of poses that each of the two families wanted, and we worked through each pose, shooting a number of possibilities for each, getting various facial expressions for each as well. I’m not going to go through the details, but we’ll finish by looking at a few of my favourite shots from these sessions.
For example, although we of course get the straight family shots, to me, I actually often prefer moments like this, when a mum tries to get a rebellious teenager to smile for the camera. Something else to note here is how I cropped this down to an 8×10 aspect ratio.
Although it was possible to shoot some groups photos vertically without including a bit of the floor in front of the seamless or over the top of the roll on the background supports, sometimes I just went in closer, or wider for full body length shots, and either cropped the image down to exclude the edges of the seamless, or I selected the messy areas around the seamless in Photoshop and used Content-Aware Fill to clean up the edges.
I could of course have extended the background support up a little, but as we messed up the seamless we cut away the messy part and rolled out more paper to clean it up, and I needed to be able to easily get to the clips that stop the seamless from unrolling, and this is as high as I can reach without using steps, so I generally just deal with this in post, as it doesn’t affect many photos, and it makes the shoot more efficient, which is better for the customers.
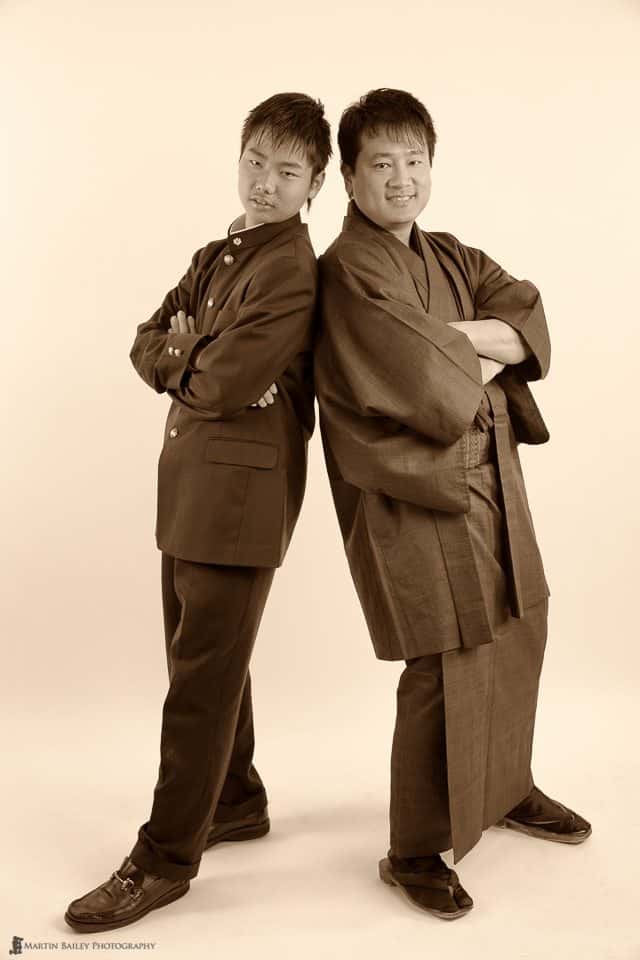
Another way to give a teenage boy a reason to smile is to pitch him against dad, and give him a chance to prove that he’s now almost as big as him.
Note that the Dad here was wearing a traditional man’s kimono, and the son was wearing his school uniform, something that is often done for traditional portraits here in Japan.
I thought it was fun to get the two of them in this pose though, acting a little bit tough, but still obviously enjoying the shoot.
Note too that we now had people wearing shoes, which meant that the seamless got messed up pretty quickly which is why we had to cut it a few times.
This also caused me a lot of extra Photoshop work cleaning it up, which couldn’t really be avoided, other than changing the seamless more often, which again slows down the progress of the shoot so I try to wait until it’s getting pretty bad when I can.
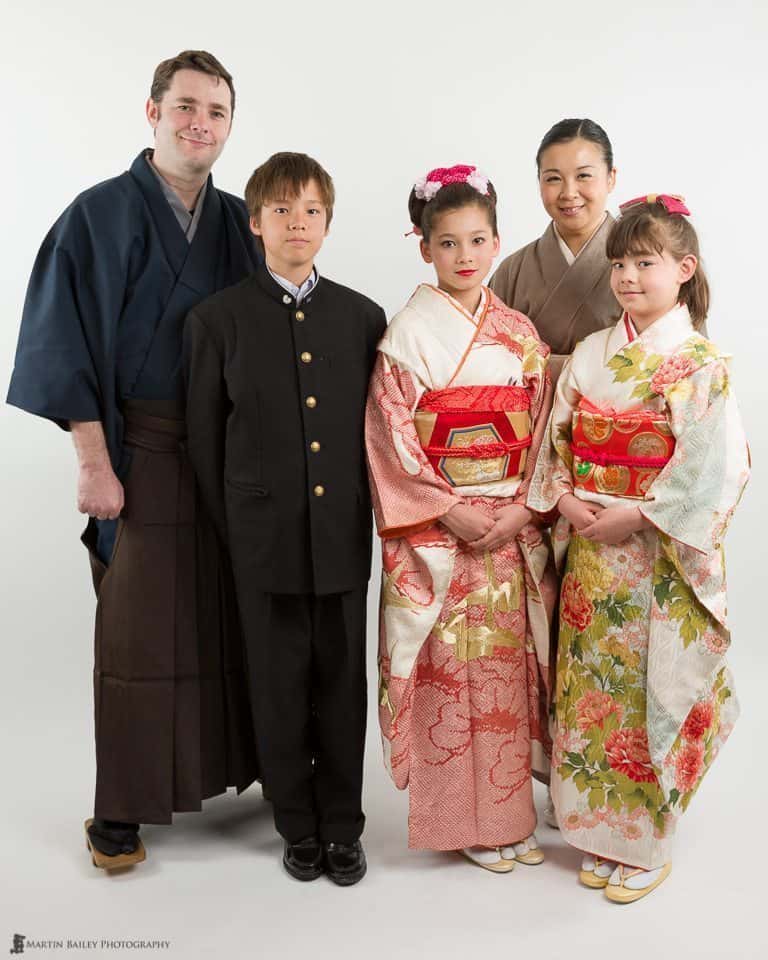
The dad of the other family that we photographed on this day is actually from England, and has lived here since he was nine years old. One of the few people that I’ve met that have lived here longer than me. He speaks good Japanese too of course, so it was fun being able to communicate fluently with him in Japanese when necessary. Here we see a straight family portrait.
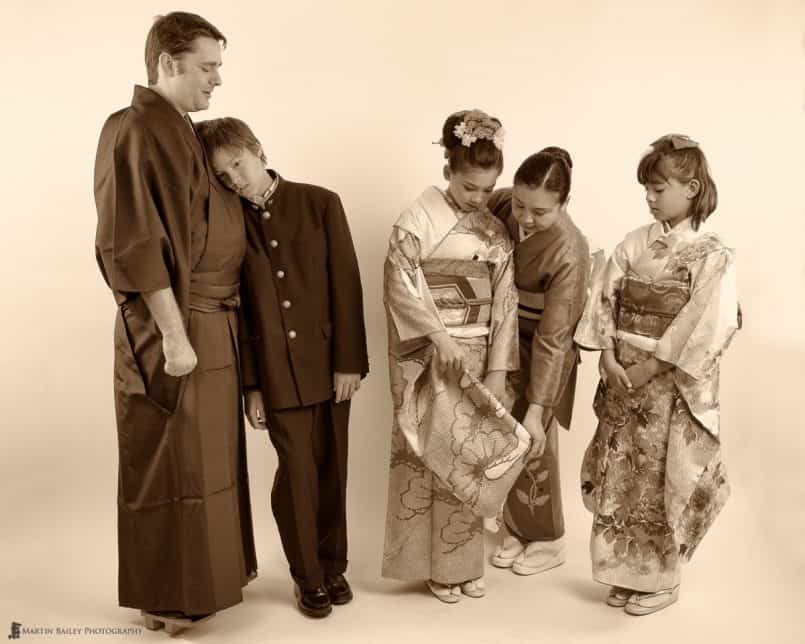
Again though, my favourite of the entire family here is one of those moments when they aren’t posed, as we see here. It’s not just me that likes these photos of course. I often find that although we need the standards, the families generally enjoy photos like this more too, so I also ensure that if I capture something like this, I include it in my selection.
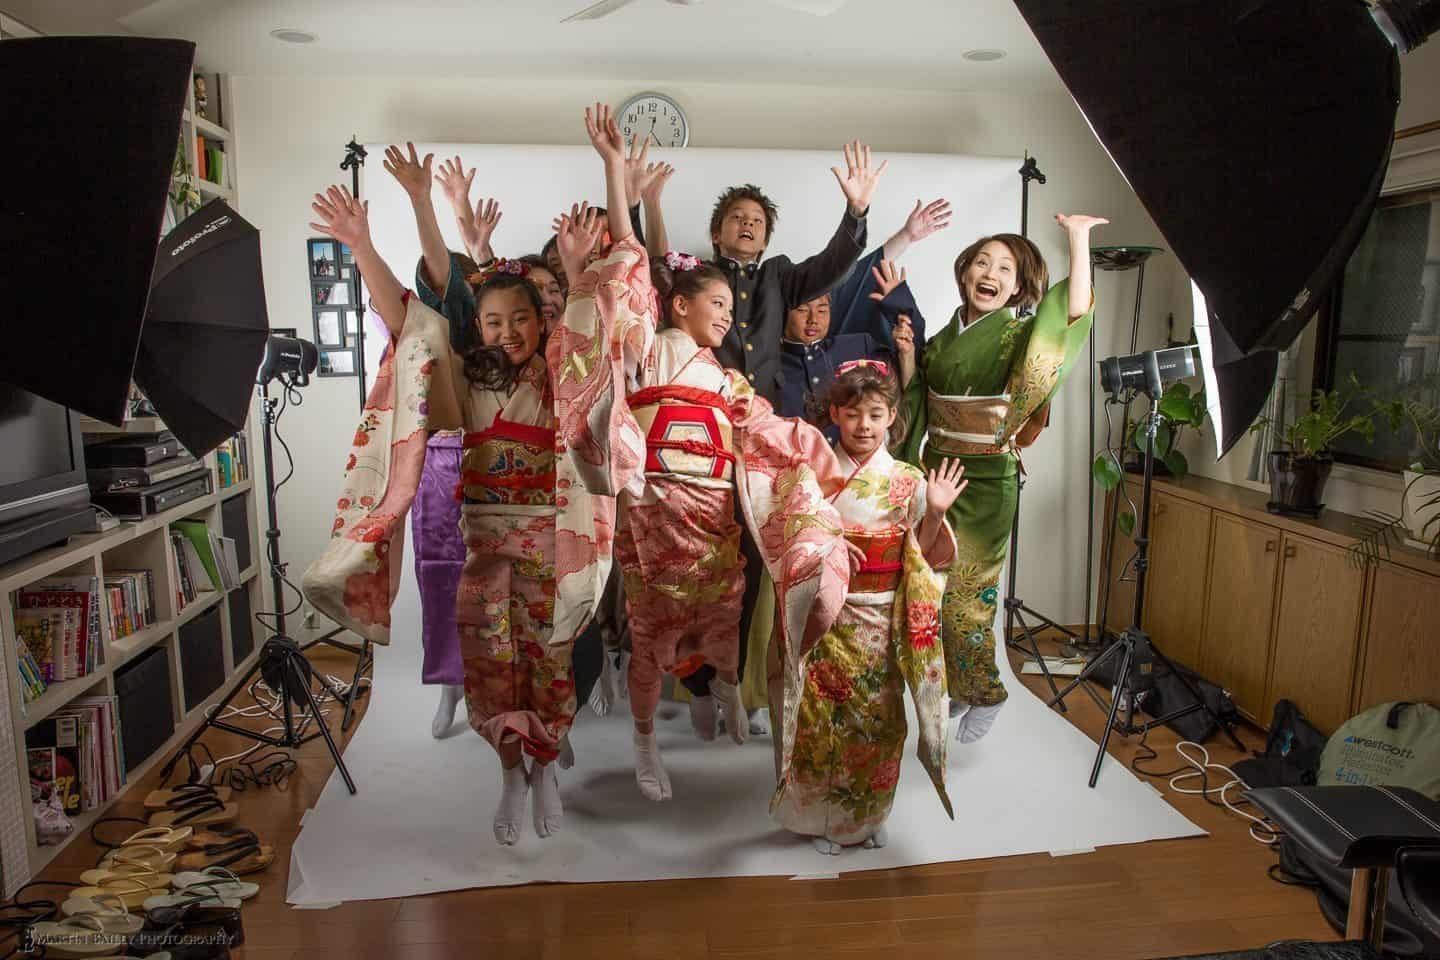
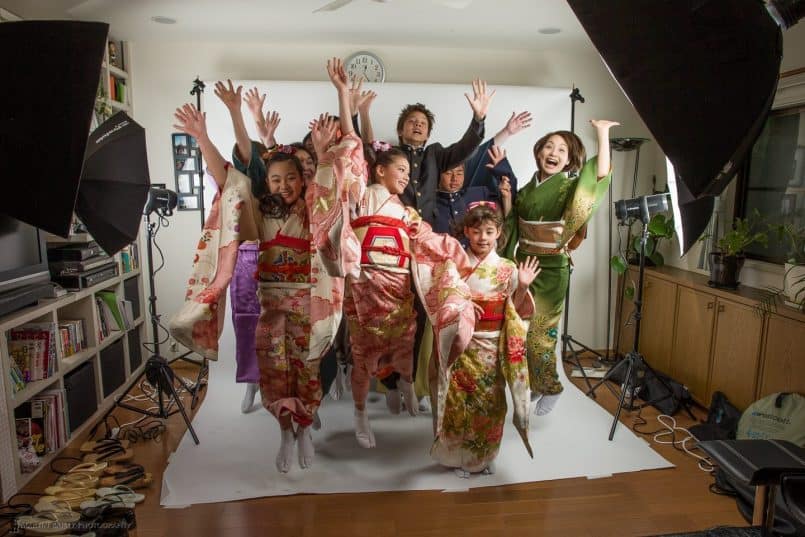
There are lots of other photos that I’d love to show you, but let’s finish today with one last fun shot that we finished the shoot with, where I got everyone back on the seamless to go out with a bang. Remember that because I was shooting tethered, every photo I made appeared on my laptop screen a few seconds later, and the entire group was in stitches when we looked at this one come through, and we finished the session with a huge round of applause, not for me of course, but for all that were involved.
I wanted to finish with a thought here, that although I don’t do this sort of work often, I really do enjoy it when the chance arises. It’s not only great fun to work with people like this, but we really enjoy watching the children of the families that we shoot grow. In an ideal world I’ll still be photographing these families when the kids are all grown and have kids of their own, but I guess we’ll just have to see how that one pans out.
If you are interested in seeing more images from this shoot, I’ll probably share a few more over on my Google Plus account, so please follow me over on G+ if you don’t already, and check these out as I upload them.
Studio Gear
If you do this kind of work yourself, and end up buying any of the gear used if you click through with the below links, you’ll be supporting this podcast and blog, at no extra cost to yourself of course.
 This Podcast is Sponsored by Squarespace
The Martin Bailey Photography Podcast is proud to have Squarespace on board as our current sponsor.
Visit www.squarespace.com and use the code MBP for a free trial and 10% off new accounts.
Show Notes
Follow Martin on Google Plus to see more images: https://mbp.ac/gplus
Music from Music Alley: http://www.musicalley.com/
Subscribe in iTunes for Enhanced Podcasts delivered automatically to your computer.
Download this Podcast in MP3 format (Audio Only).
Download this Podcast in Enhanced Podcast M4A format. This requires Apple iTunes or Quicktime to view/listen.


0 Comments