
Today I’m going to update you on some of my current favorite photography related iPhone and iPad apps. Looking back, I’ve done two previous episodes on photography related iPad apps, starting with Episode 246 back in June 2010, and then again in October 2011 in Episode 304. As these devices and how I use them continues to evolve though, I figured I’d take a little time today to update you on some of my current favorites, and thought I’d include some of the iPhone specific apps I use as well as iPad.
I’m not going to list every photography related app I have, but these are the main ones I use and enjoy regularly.
500px for iPad and iPhone
I’m still very much in love with the 500px iPad app, and it is now both an iPad and iPhone app, and both have been significantly refined since I first started using the iPad app. As I’ve mentioned in the past, I do like the grid of square icons for each of the images, and that’s probably why I’m not a huge fan of the Flow section. I am not one for using my phone for Social Media unless I’m traveling and checking in to Facebook etc. and so probably the other reason that I don’t like flow is because it’s full of what people I’m following are favoriting or commenting on, as I really just don’t care.
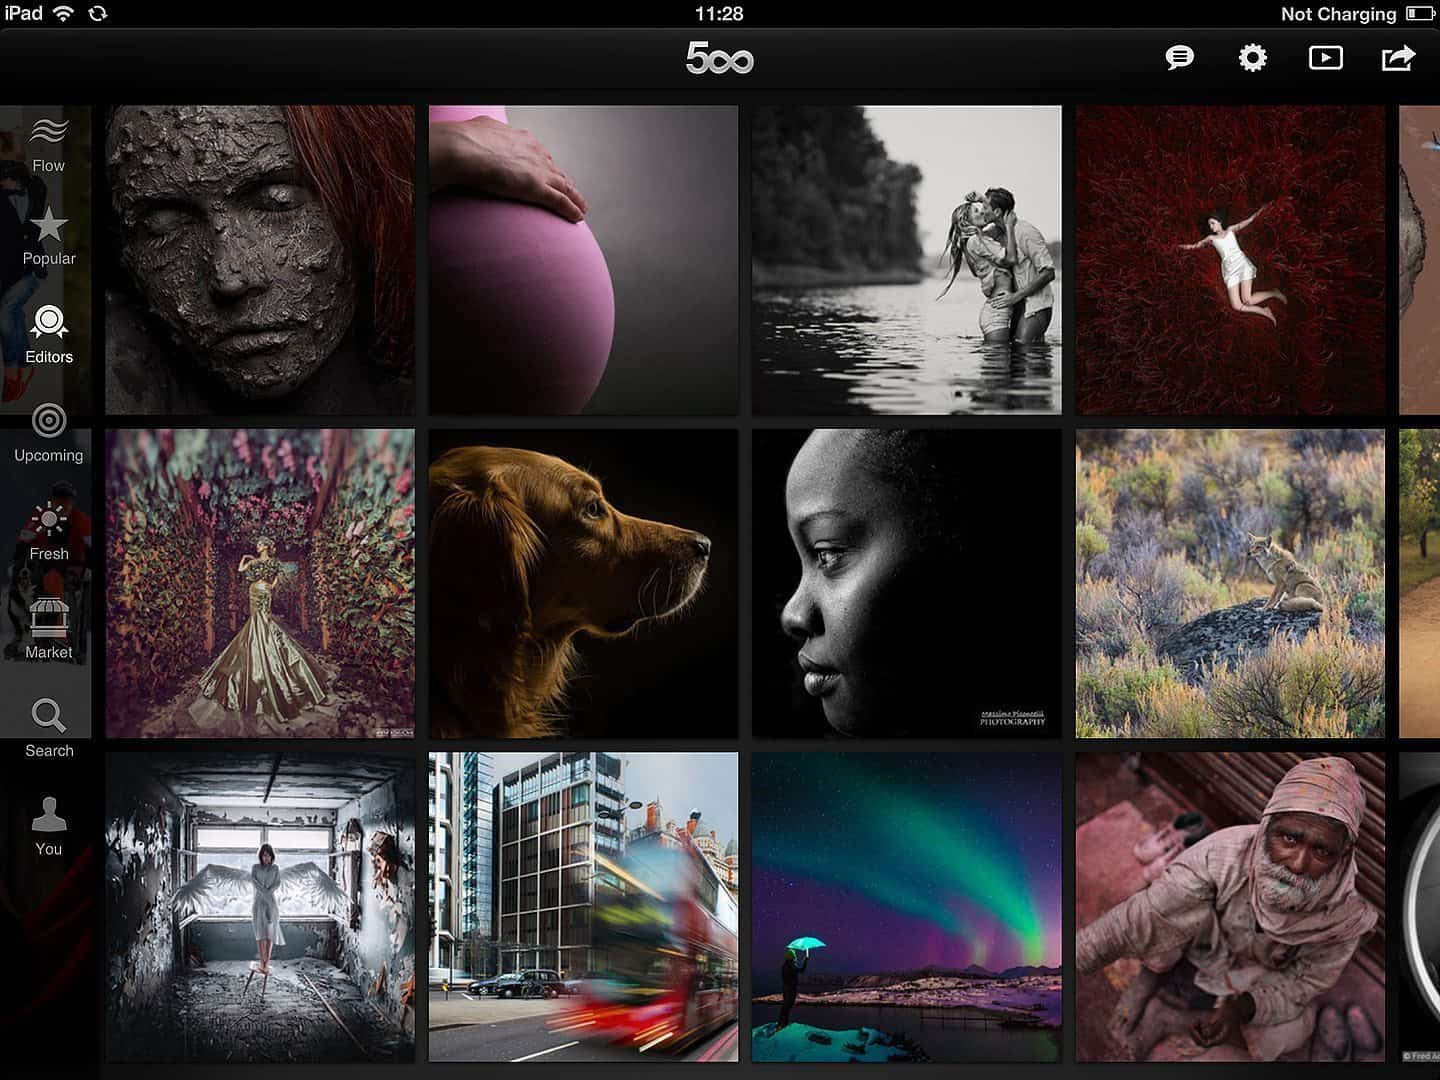
500px for iPad Editor’s Choice (Copyright of each image’s Author)
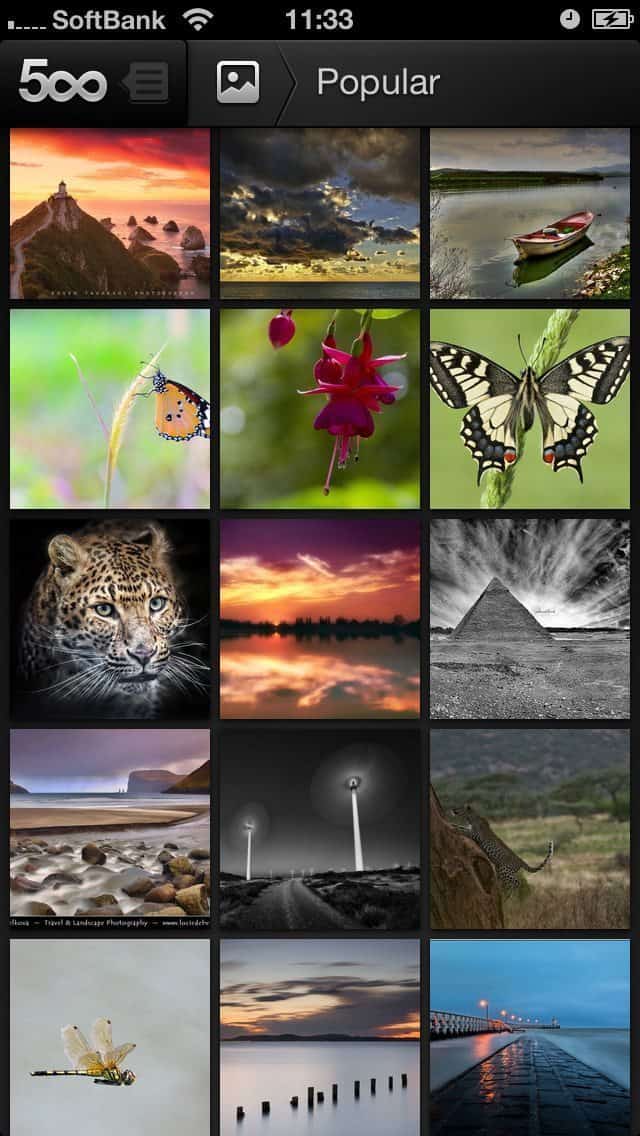
500px for iPhone Popular
I use the 500px apps to get blown away by the quality of work that the editors select, or the images that are currently popular, usually for good reason, so I usually switch to the Popular or Editor’s Choice views, and just flick through screen after screen of beautiful, inspiring photography.
These are served up in the square grid format, which just feels better to me for this kind of presentation. When I want to see the full sized image in its native ratio I just have to tap on it.
The only thing I wish they’d change is that it would be great if they could use any spare bandwidth to download the full sized images in the background, so we don’t have to wait, looking at a low-res square image while the full sized image is downloading after tapping on an icon.I understand that downloading image after image with a low probability that the viewer will actually tap to see the full image is not practical, but it would be nice.
A great alternative to this though, if not something better, is that there is now a slideshow button on the iPad version of the app, which does load every image full-screen and fully res’d-in, so there’s no waiting, and the images look beautiful.
You can even select music from your device to play in the background. The slideshows have been really well thought out, and this is quickly becoming my favorite way to view, with a track or two of my favorite music for accompaniment.
It is also nice to be able to Favorite or Like an image, and even comment occasionally, right there in the app, and even during slideshows. Adding image to favorites enables you to view galleries of just your favorites images. You can also view your own 500px images, which could be useful for showing others your work, especially with the slideshow mode.
It actually turns into quite a sophisticated presentation. All in all, the 500px app just keeps getting better and better, and I’d hate to be without it, now on my iPhone as well as my iPad.
Pocket Light Meter
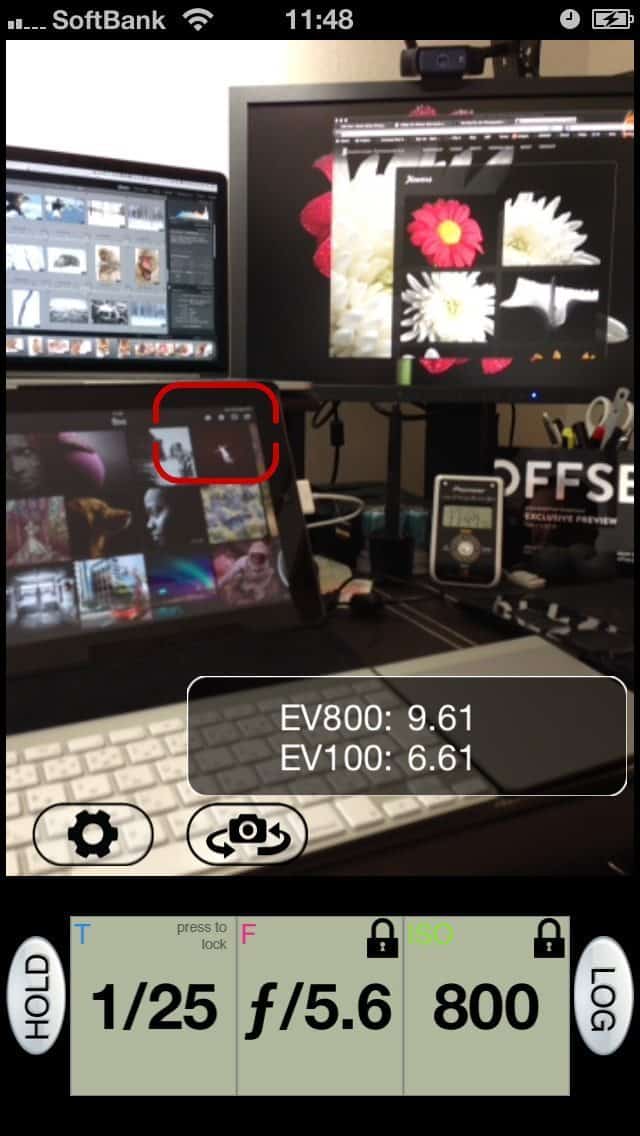
Pocket Light Meter
A great app that I think Chris Marquardt told me about when he joined me for one of my Winter tours this year, is the Pocket Light Meter. One of the most liberating things about the iPhone is that although it may not be quite as good as carrying a specific tool or device around, there are some things that it can do well enough to save you from carrying an extra piece of gear with you, and Light Meter is a great example of this. I own a $500 light meter, that I do use from time to time, but with Live View and the histogram in the camera, I don’t carry a light meter with me all the time. But, if I can have one in my pocket inside the iPhone that I always have with me, this is a great second best, especially for educational purposes, and it works surprisingly well.
Another benefits of this being a phone app is that you can save photos and a log of what you meter and even add notes to help you figure out what you were thinking or doing when you go back to your images later. This may not be so useful when shooting digital, but if you shoot film, this could even be used as an alternative to the EXIF data that is embedded into your digital photos, and that we have come to rely on so much as a way to learn about and correct our mistakes, as well as just general reference.
You can use Light Meter for free if you don’t mind the ads being displayed at the top of the screen, but for a dollar you can get rid of the ads, and for $5 you can buy the developer a pint, which is what I did, and it’s well worth it.
Shoot & Sell
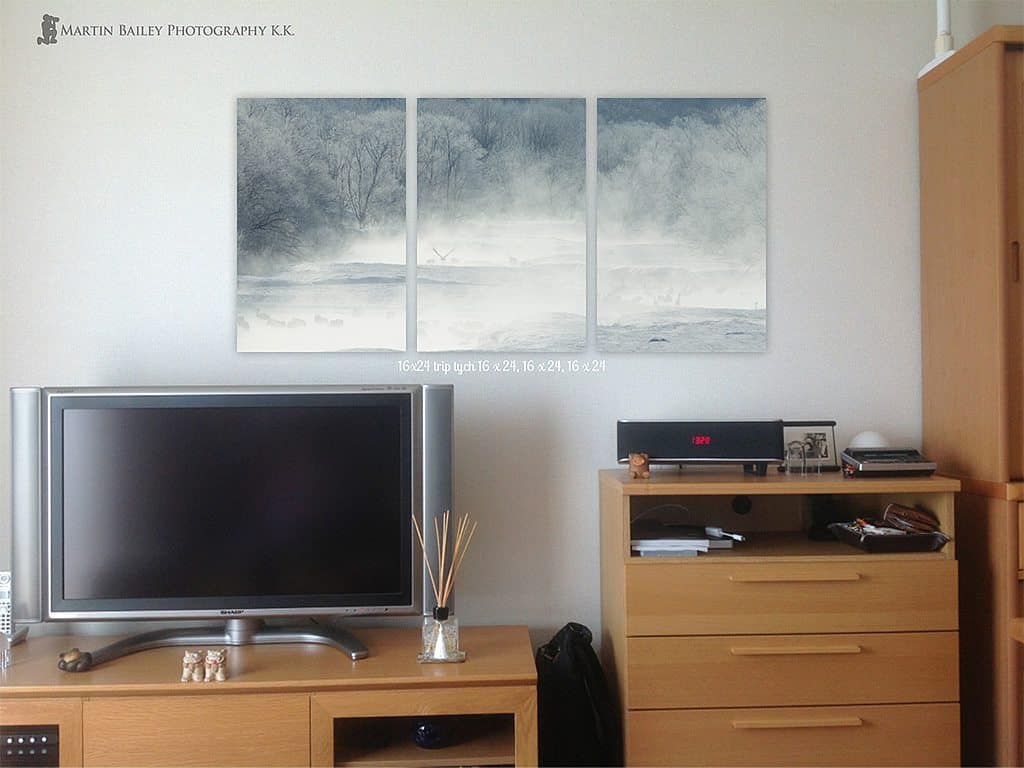
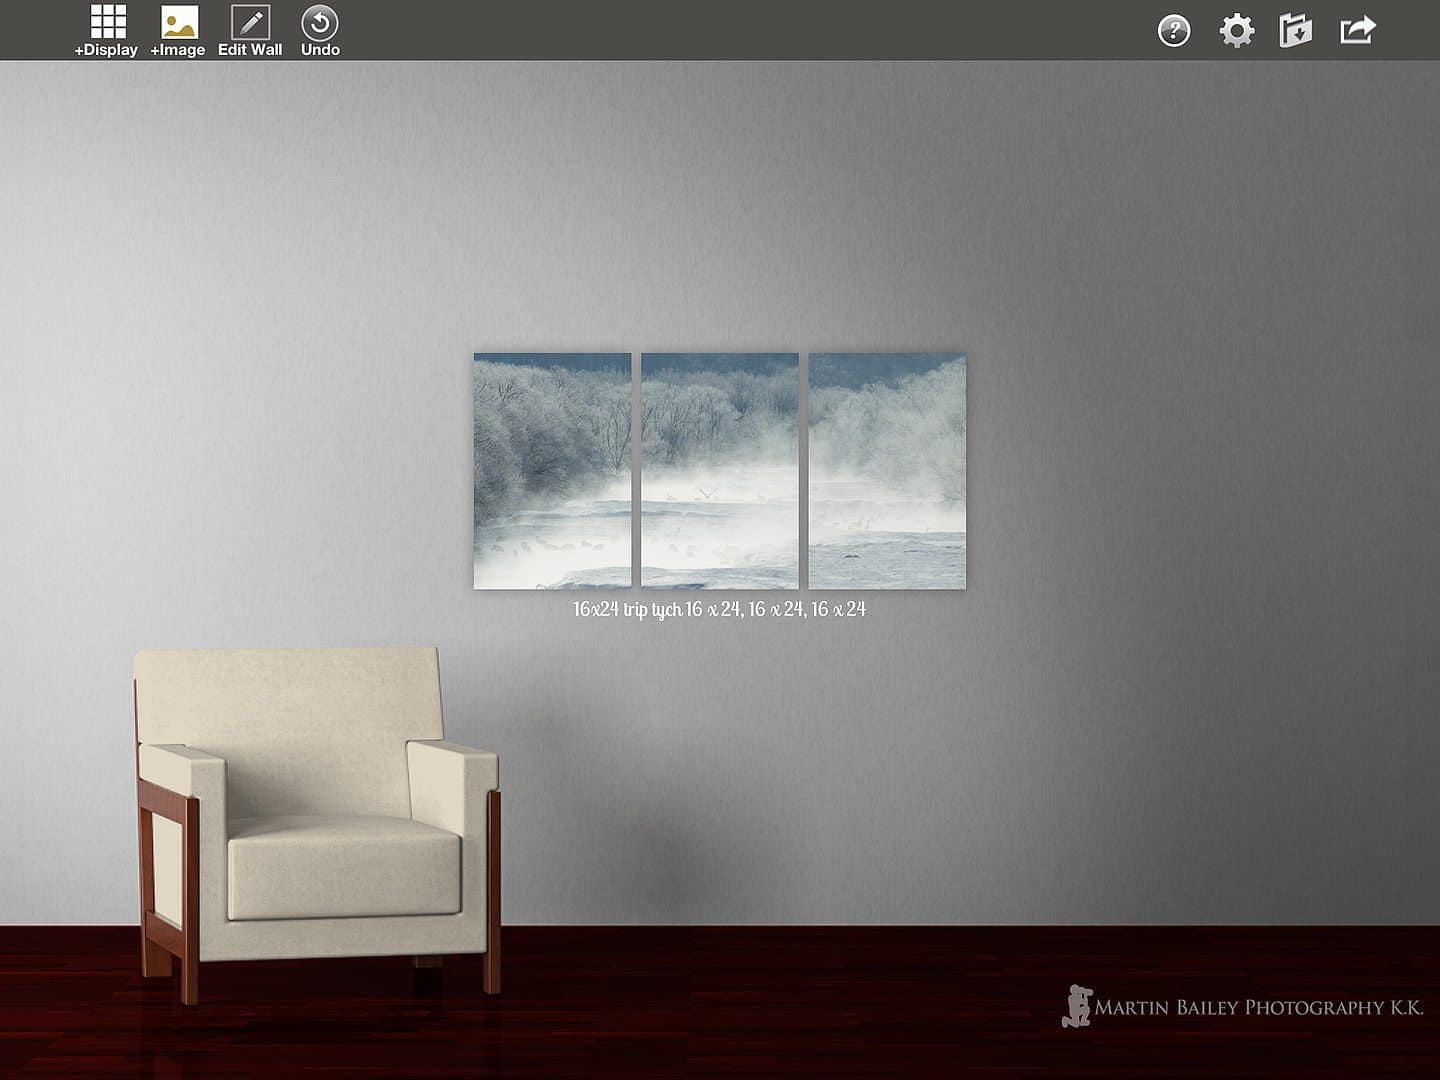
One of the most expensive iPad apps I’ve bought so far is Shoot and Sell, at $79.99, but you won’t hear me complaining about the price. I’m not one for buying expensive things then complaining about the price, unless the product doesn’t live up to it, and that is not the case with this app. Shoot & Sell is a commercial tool to create mockups of your images framed or as gallery wraps, both single and multi-image displays, and enables you to show them in a display environment.
You can select from a series of stock backgrounds that come with the app, or you can buy additional sets of stock backgrounds from within the app. We’ll look at some stock background examples shortly, but in addition to them, you can shoot your own images and load them into the app from your Camera Roll, Flickr or from your Dropbox. I carry all of my best work around on my iPad, so it’s really easy to create a mockup of what an image would look like framed and on various walls, including of course a client’s wall. If you were actually visiting a client’s house or office, and they wanted to see what a certain image looks like finished and on the wall, you can create it right there and then, with the camera in the iPad.
Here is a quick example that I did in my living room when I bought the app, trying to sell my wife on the idea of a three gallery wrap triptych. It’s not quite straight with this shot from the iPad itself, but I’m sure you get the idea. I haven’t quite won this sale yet, as my wife values her white space downstairs. I won’t make a penny from this sale, but I’m going to keep working on that one. 🙂
Shoot & Sell Example
Here’s another example, this time using one of the stock images from within the app. Note that this is a screenshot of the app so that you can get an idea of some of the controls and screen layout, but when you are using the app to create a commercial mockup, you export the images to your Camera Roll, Dropbox or via email. Note too that when you are shooting your own images for use in the app, they advise you to include something in the shot of a known length, so you can get the scale of your artwork correctly. This also enables you to show accurate dimensions in the label’s that are automatically attached to each display.
Shoot and Sell Example with Triptych
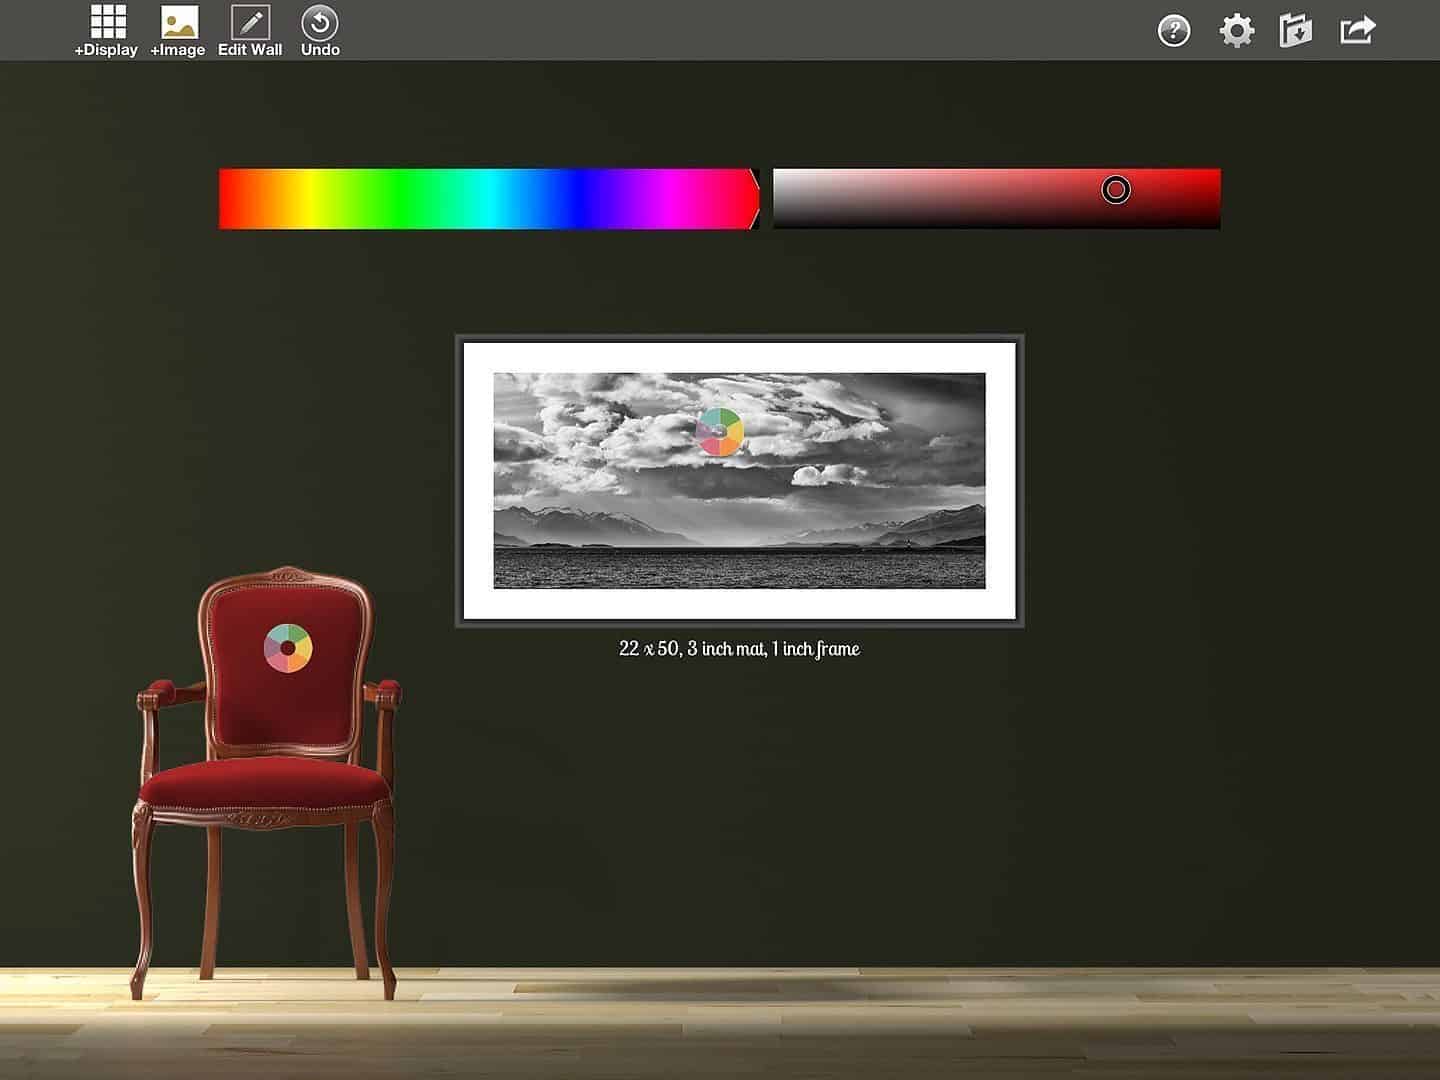
There is also a comprehensive array of simple frames in various sizes and a number of tasteful colors. The app also contains a series of Organic Bloom frames, which are to mockup the frames from a company of the same name. Now, if Organic Bloom Frames were a sensible bunch, they’d make these available for free, not $34.99. Why? Because if people like them, they are likely to want to hook-up with this company for their framing. Also, if someone is already buying their frames from Organic Bloom, why should they have to pay extra for these frames? I’m happy to pay a high price for a quality app that serves a very specific commercial purpose, but this is the only thing that I really can’t understand from a marketing perspective.
That one gripe aside though, here’s another example with a simple black one inch framed 22 x 50″ print, with a 3 inch matte, which I’d love to see on a real wall. Note too that in this screenshot I have the color adjustment controls visible, to show that you can change the color of the walls and furniture in the stock photos that come with the app, which is very useful, and increases the overall experience immensely.
As I don’t do a lot of paid portrait work, for me, the main use of this app will be to sell my fine art prints to potential customers, but if you are shooting for families and selling them prints, you could probably make your money back on this app during your first consultation. It just looks so good to see the finished work on the wall, especially if it was the customers own wall, and photographs of themselves.
Simple Frame and Color Settings
I can also see applications for using Shoot & Sell to experiment with wall layouts for a gallery exhibition. You could photograph all the presentation walls of a gallery, and layout all of your work in frames or as gallery wraps to see how the flow and layout works, and make adjustments quite easily, without having to mock all of this up in Photoshop or Illustrator, which is what I did for my solo show at the end of 2010.
There are a few minor changes that I’d like to see in Shoot & Sell, but I’m also happy to say that when I mailed them, Ariana Felerni, the person behind Shoot & Sell replied in person, and was very professional and open to my requests. One thing was that I’d like to see a small grey stroke around the inside window of mattes, so that you can see where the matte ends and the image starts when using predominantly white images.
The other thing was the ability to create custom sized gallery wrap displays and also to be able to apply one image across multiple gallery wraps. These are mostly things that you can work around and I’m assured they’re slated for addition in a future version, so I’m looking forward to seeing these changes. In the meantime, I’ll still enjoy using this app. It’s very well designed and a pleasure, not to mention a lot of fun to use.
Diptic for iPhone
A Word on Preveal
I probably should mention too that I am aware of a similar product named Preveal, but I have not tried it. I went with Shoot & Sell mainly because it comes with the stock wall photos, and they’re highly customizable. As far as I can tell, Preveal does not have any stock backgrounds. If I’m wrong on this, I apologize, but I think that is correct, at least as of April 2013. I will put a link to Preveal into the show-notes for this episode though, so you can check both out for yourself and make your own decision.
Diptic
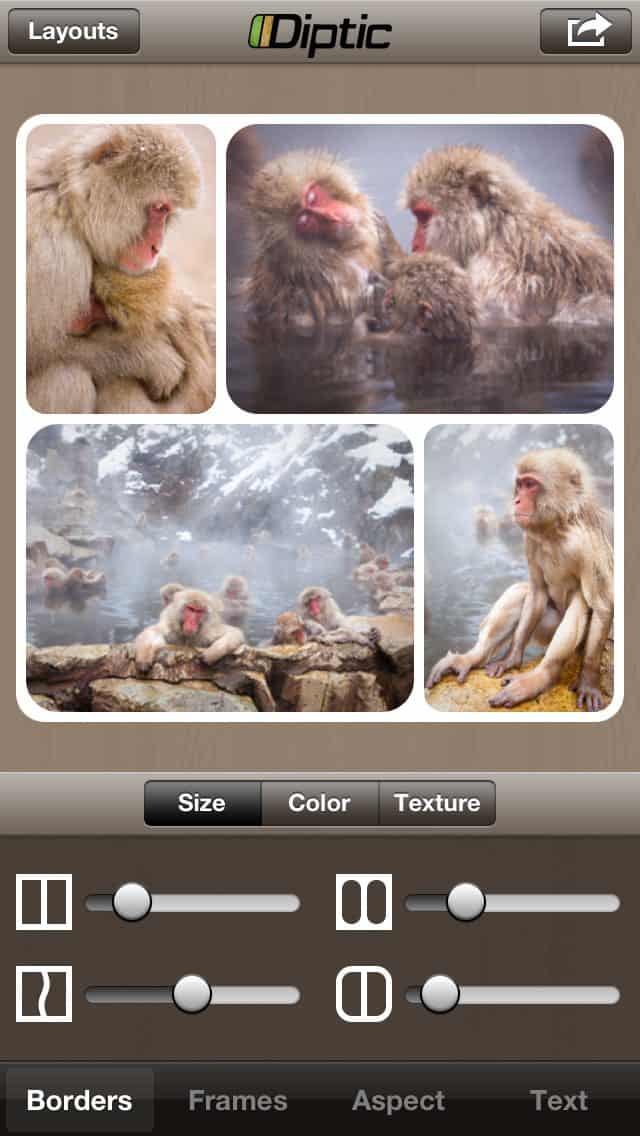
Similar to the triptychs and other display types available in Shoot & Sell, an app called Diptic enables you to create great multi-photo layouts, but more for use as a layout tool creating a final image than to mockup something to help sell prints to potential customers. It’s a lot of fun though, and easy to use.
You can create all sorts of layouts, and round the corners of the resulting image files as well as the files that you include in the layout, such as this image with two portrait and two landscape aspect Snow Monkey photos. Note though that if you want to adjust the aspect ratio, you have to pay an additional $0.99 in app to turn on the aspect adjustment feature. The base app is just $0.99 to start with so this is no big deal, but I can’t help thinking that I’d have preferred to just pay $1.99 to begin with and be done with it. I’m OK with paying for add-ons, but this one seems a bit petty in my opinion. Still, Diptic is fun and works on both the iPhone and iPad.
To the right is a screenshot of the iPhone version of Diptic, and below is the iPad version. Both are easy to use and when you are done, you can export your images in various sizes, up to 2448 x 3264, which is a reasonable resolution. Note too that if you do buy the Aspect ratio adjustment on one device, you can Restore your purchase on the other. It’s not necessary to buy it twice.
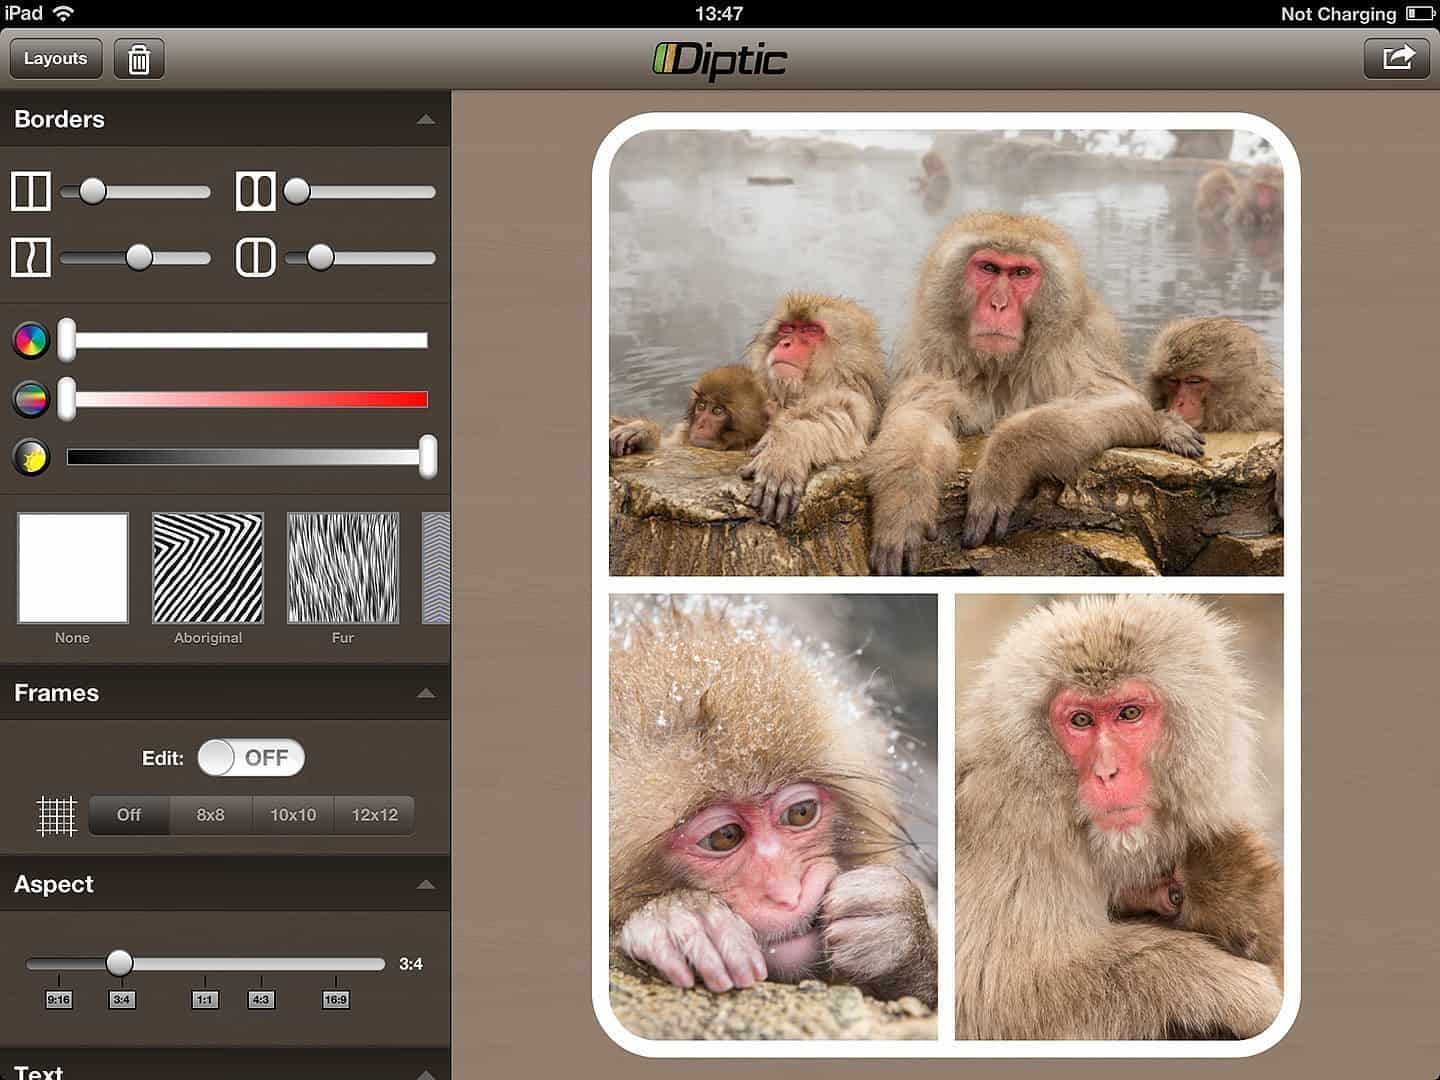
Diptic for iPad
ProCamera
OK, so last for today, but by no means least, is a camera app that I am absolutely head over heals in love with at the moment, called ProCamera for the iPhone. This has to be the most full-featured, customizable and easy to use iPhone camera on the market. I’m not going to touch on every feature, but here are some of the main features that I like.
Firstly, in Expert Mode you can very easily separate focusing from metering, for easy exposure control. If you just tap anywhere on the screen, both the focus square and metering circle move to where you tap, but if you drag from the center, the metering circle goes to where you drag it. A second drag from the middle moved the focus square, so you can place both of these anywhere on the screen. Or of course you can tap somewhere first to place both, then drag to move the exposure circle elsewhere.
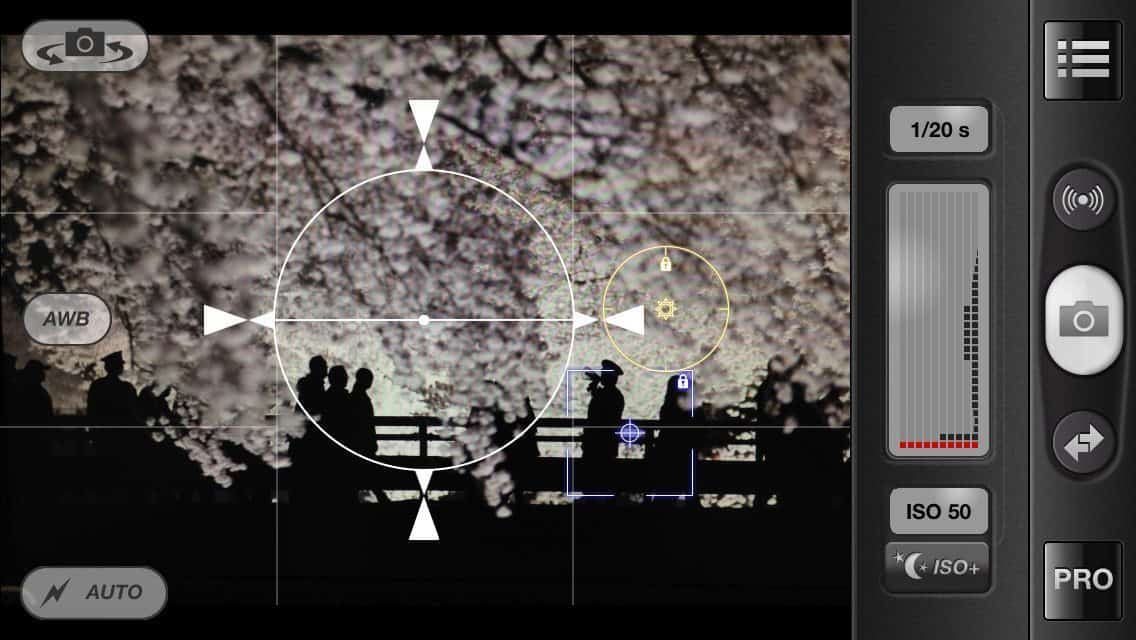
ProCamera Screenshot
As you can see in this screen shot, I have the metering circle on the cherry blossom trees, and the focus on the railing of the bridge. And before you wonder how I got such great bokeh with my iPhone, this is a photo of a photo on my computer screen.
Another thing that I love is that big orientation circle in the middle of the screen. This has become standard on DSLRs pretty much, and it’s great to have the same feature on the iPhone. It’s like a digital level and helps you to get your images straight. This also becomes a normal compass when you have the iPhone flat, either pointing downwards or upwards. I also love that you have a Live Histogram, and all of the controls switch seamlessly between portrait and landscape orientations.
The Settings menu offers endless control over the camera. You can set the compression applied to JPEG files from Low to High Quality, and turn on Rapid Fire to shoot continuously at a pretty respectably fast frame rate. If you are OK with lower resolution images, you can also turn on High-Speed Mode, for an even faster frame-rate.
ProCamera is $4.99 in the App Store, but note that it’s only for the iPhone. There is a slighter older iPad app available as a separate purchase, but I haven’t tried that. These comments are regarding the iPhone app only. Even just for the iPhone app though, it’s a steal at $4.99. I only wish I could have the iPhone start ProCamera from the Lock Screen, as I hate having to use the built-in camera app from there, as I do sometimes when I’m in a hurry to snap something.
MBP Podcast Companion Updated
OK, so I should just mention before we finish today, that we recently updated my own MBP Podcast Companion app with support for the Retina iPhone screen layout, and made a few other incremental changes too, such as updating to the new audio file server, so if you listen to this Podcast in the app, that is now fixed. I guess I should also mention that no matter how many Depth-of-Field calculators I try, I honestly do still thing that the one in my app is the best available, and probably worth the $2.99 that we charge for the app all by itself.
Google Plus MBP Community
I’d also like to let you know that we are winding down the forum here at martinbaileyphotography.com. Basically the spammers have won, we just can’t keep them out, so I’m migrating us over to Google Plus. I’ve created a great community page, and we already have almost 150 people that have joined, and we’re having a great time, discussing photographs, and I’m posting notices of new Podcast episodes etc. As soon as we have the system figured out, we are going to restart the Monthly Assignments too, which I’m really looking forward to, and I’m looking forward to seeing you there in the Google Plus MBP Community!
Show Notes
500px: https://itunes.apple.com/app/500px/id471965292?l=en&mt=8
Pocket Light Meter: https://itunes.apple.com/app/pocket-light-meter/id381698089?mt=8
Shoot and Sell: https://itunes.apple.com/app/shoot-and-sell/id550441549?l=en&mt=8
Preveal: https://itunes.apple.com/app/preveal/id519555211?mt=8
Diptic: https://itunes.apple.com/app/diptic/id377989827?mt=8
ProCamera: https://itunes.apple.com/app/procamera/id300216827?l=en&mt=8
MBP Podcast Companion: https://itunes.apple.com/app/mbp-podcast-companion/id370096838?l=en&mt=8
MBP Google Plus Community: https://plus.google.com/u/0/communities/101105265892822137171
Music by UniqueTracks
 Subscribe in iTunes for Enhanced Podcasts delivered automatically to your computer.
Download this Podcast in MP3 format (Audio Only).
Download this Podcast in Enhanced Podcast M4A format. This requires Apple iTunes or Quicktime to view/listen.


0 Comments