Over this last week I’ve had the pleasure of previewing a new product called Texture A Photo that is being launched today, on June 19, 2012. I’ve never added textures to my images before, but I had a lot of fun playing with the amazing textures that Bryon Lippincott has included in this package, and I’ve been looking forward to sharing this with you today.
 We’ve been kindly provided with a 15% discount code (MBP15) for Texture A Photo, and an affiliate link, so if you find this review useful and want to help support our efforts here, do use this affiliate link. Of course, as usual, I’m only bringing this review to you today because this is a product I believe in and stand by. I have an will never endorse a product just for the affiliate dollars, but I know that you know that, so let’s get started.
The first thing that I wanted to make clear is that Texture A Photo is not a stand alone product, in that you won’t be downloading an application in which you can open your images, apply a texture or two, then save and close the image. Texture A Photo is a collection of 450+ high quality texture files that you use in Photoshop, Photoshop Elements or Perfect Layers 2, which is available for free from oneOne Software.
I like this approach, mainly because I already own Photoshop, and if I’m going to be playing around with my images in an editing program, I want to do that in a familiar environment. Also, unless there is a good reason to open a standalone plugin, I prefer not to over-complicate my workflow. Today we’ll only look at example using Photoshop CS6, but the package comes with documentation for full Photoshop, Photoshop Elements and onOne’s Perfect Layers.
Three Flavors
Texture A Photo comes in a number of flavors, though they all contain the base 450+ texture files and 2 hours of video training. As of the launch date, the cost for the Complete Package is $99, and if you have a reasonable internet connection this might be all you need.
There is a lot of data to download though, with almost 4GB of texture files and documentation, then there will also be the video tutorials, and if that could be a problem for you, note that the Premium Package comes with an 8GB Jump Drive containing the textures and I believe tutorial videos and documentation too, which will be mailed to you anywhere in the world. The Premium Package also includes an extra 100+ texture files that will be available in October and December this year, at no extra charge. This package currently costs $129.
There is also a Premium Package which includes some one-on-one training with Bryon, the creator of Texture A Photo, which may be useful if you want to give this a try, but aren’t really confident with using Photoshop or Perfect Layers or maybe if you want help on choosing the best textures for certain types of images etc. That will be $199 so a steal if you think you’ll need some help.
Let’s Texture A Photo!
OK, so let’s jump in now and actually texture a photo! Bryon’s tutorial documentation is great, and although I haven’t yet seen the Tutorial Videos, I’m sure they’ll be very useful too, so I won’t go into all the details here. I would like to just walk you through adding a texture or two, or three, to one of my images though, as an example to make sure you understand what we’re really talking about here.
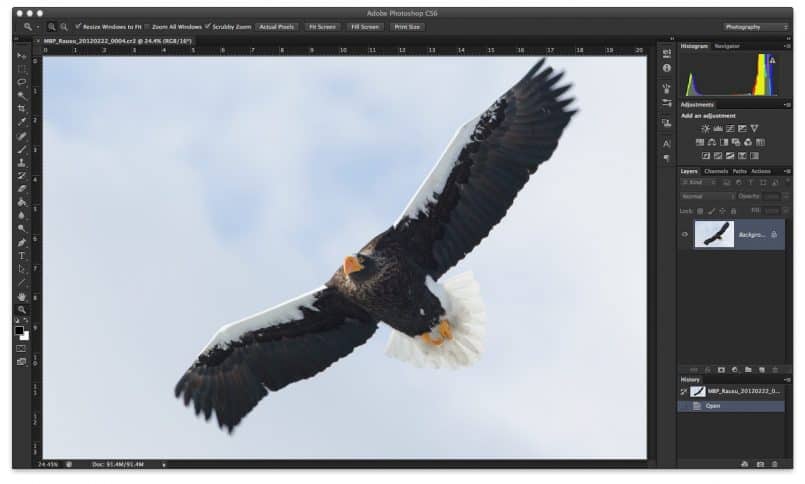
Note though that I am new to this, and so my initial biggest hurdle was selecting an image that would look good with a texture applied. I wasn’t happy with the results of the few tries, and I’m still in two minds about this first example that we’ll look at, as it’s not something that I would usually do with my images, but I had a lot of fun playing with these textures, and at the least, this will give you an idea of how you can use Texture A Photo in your own work. First, let’s look at an example using a photo of a Steller’s Sea Eagle. This first screen grab from Photoshop CS6 is the image with no textures applied.
(Note that if you click the images they’ll open in a light-box to view them larger, and you can navigate back and forth with your mouse or keyboard arrow keys.)
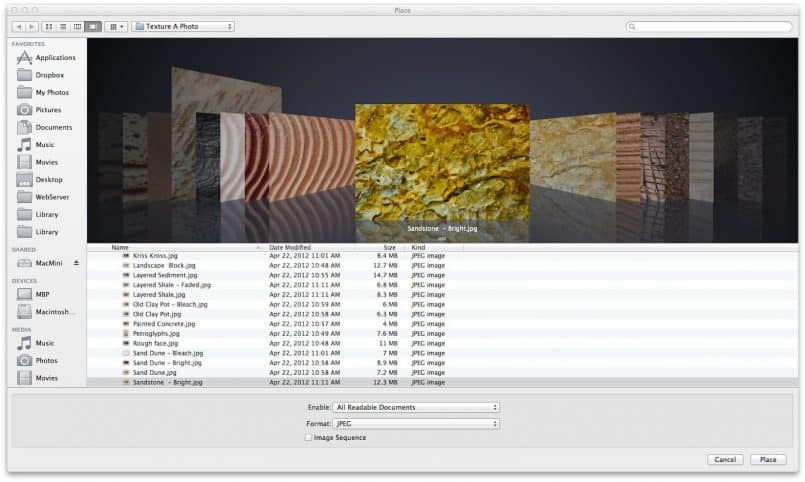
Note that when you first download the Texture files and unzip them, you’ll have four folders, each containing various types of textures in a number of sub-folders. In addition to the original texture files, there are Black and White Textures, as well as a Blue, Red, Green and Sepia tint versions. There is also a directory with some transparent textures which we’ll take a look at shortly. I moved all of these sub-folders into a single folder simply called Textures so that I could see all of the texture types without navigating around the original zip file named folders when I want to use them.
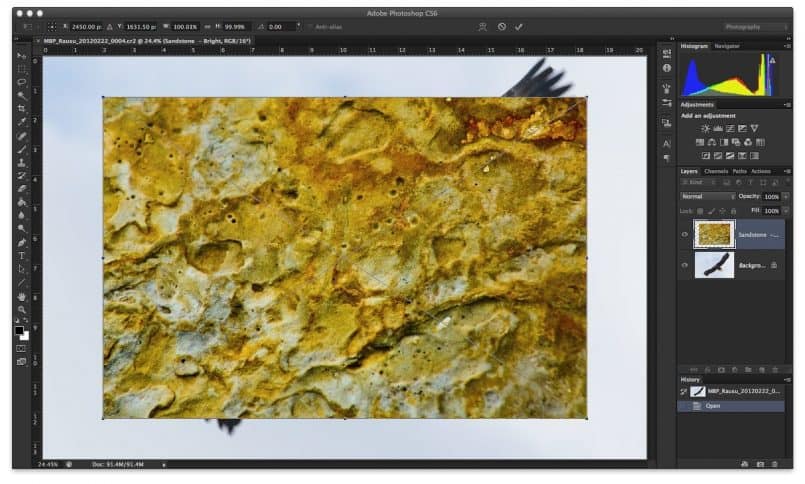
To apply a texture, select Place… from the File menu, and navigate to the Textures folders. I find on the Mac OS that the Cover Flow view that you might recognize from iTunes is a good day to view the textures to see which you want to apply to the image. First I decided to see what the Sandstone – Bright Texture looked like with my Eagle shot.
When you first open the texture file with the Place command, it might be smaller than your image, so you’ll need to re-size it. Just grab the corner nodes of the texture image, and drag it out to the corners of your image. If you want to maintain the aspect ratio, hold down the SHIFT key as you drag, but this might mean that you have to drag wider than your image to fill the frame if the aspect ratios aren’t the same. Once you’ve got your texture the size you want it, hit the enter key to place the text over your image.
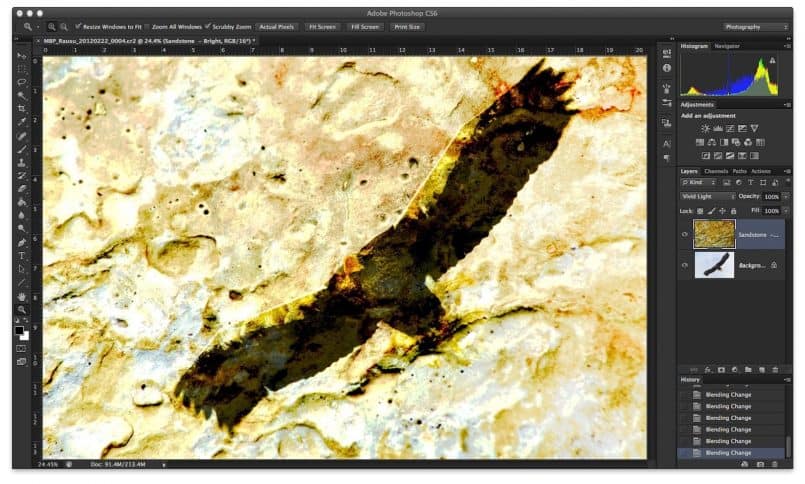
Before you can use the Blending Modes, you have to right click the layer and select Rasterize Layer. Once rasterized, you can select one of the layer’s Blending Modes from the pull-down that usually says Normal. Overlay is always a good place to start, but here I selected Vivid Light for a bit of a gritty look to the overall image.
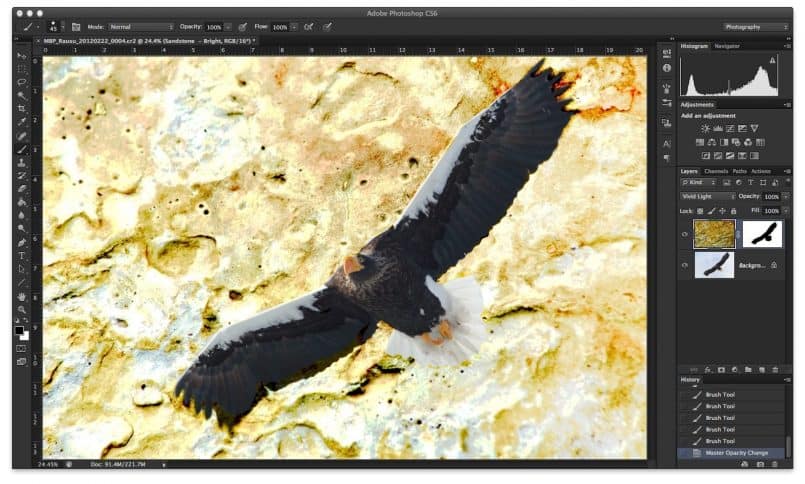
Now, depending on what I’m trying to create here, I might leave the image at that, but let’s see what happens if we mask out the texture over the eagle. To do that, with the texture layer selected, click the Add Layer Mask button. Again, Bryon covers all this in the documentation, so I’m not going to provide detailed screen shots here. The default is to create a white layer, and remember, White Reveals and Black Conceals, so the entire texture layer is visible, until we paint over the eagle with black, so select the paint brush, and ensure that black is your foreground color, and paint on the mask layer over anything that you want to remove the texture from.
As you paint in, note that if you want to leave some of the texture on the main subject, you can adjust the opacity of the brush, or paint using a tone of gray, which also allows the texture to show through some, but not fully. Also, if you go a bit too far over the edge of what you are painting on, you can hit the X key on the keyboard to toggle between your background and foreground colors, so if you set your other color to white, it’s an easy way to correct any over zealous painting you might do.
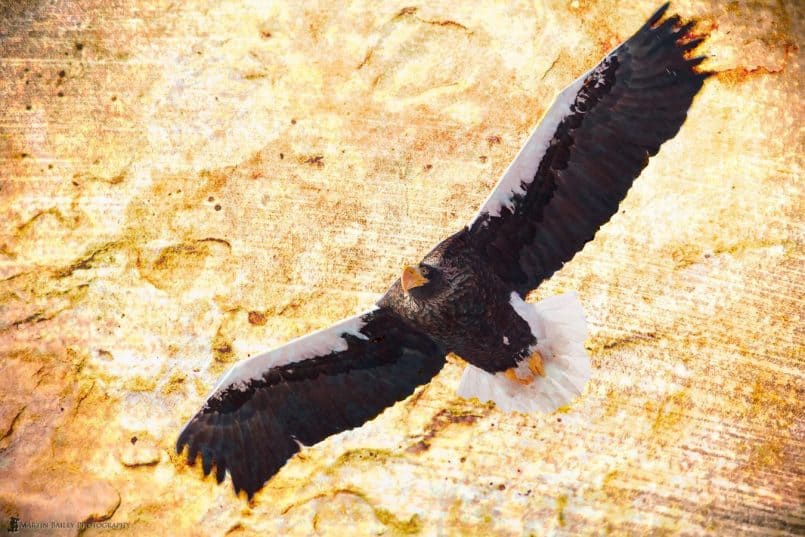
Now my eagle looks like he’s flying in front of a rock face, but to make it look a little more realistic, for now, I’ll reduce the opacity of the texture to 70%, as we see here.
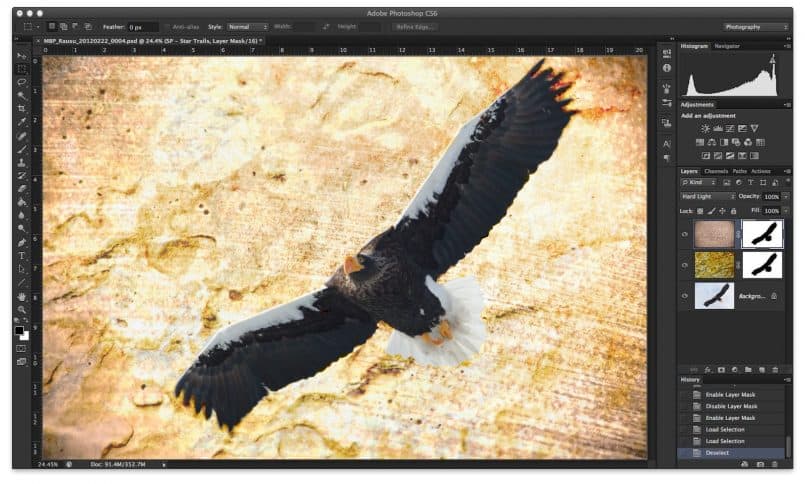
That doesn’t look too bad, but you don’t have to stop at one texture, depending on what you intend to create. If you wanted to, you can add another texture, or as many as you like in fact. Next I’ll add another texture from the Sepia series called Star Trails (below).
Note too that if you spent much time on your first mask, you can duplicate your first texture layer, and drag its mask to the new layer, then delete the layer that you just created. There might be an easier way to do this, but I’m not aware of one. It’s an easy way of copying your mask though.
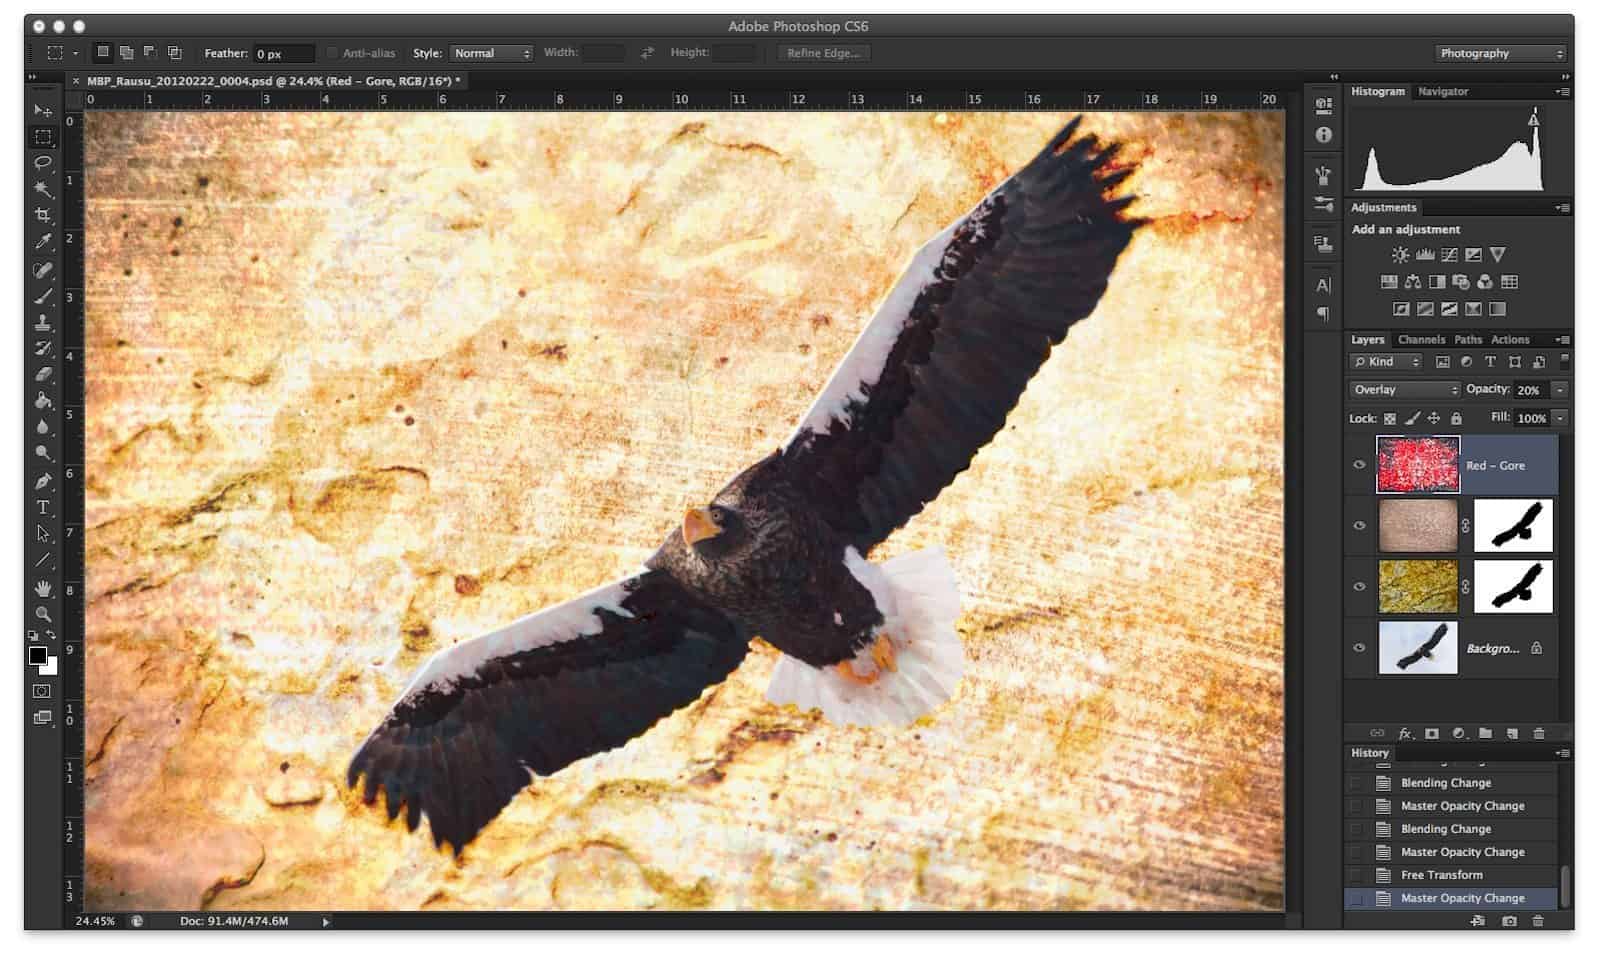
Now, I’m starting to feel as though this is looking like something out of a wild west movie, despite these eagles living in colder climbs, but let’s do one last texture to warm up the eagle and see how that looks. Here (below) I’ve dropped the Red Gore Texture from the Red Tinted texture folder over the eagle, and I let it affect the rest of the image too. To keep it quite subtle though, I’ve reduced the opacity of this third texture layer to 20%.
This is looking much more like graphic art now than a photograph, but that’s the whole point of this, so hopefully this will also give you some idea of how you can build on the layers. Here’s the final image for you to take a closer look at.
Transparent Textures
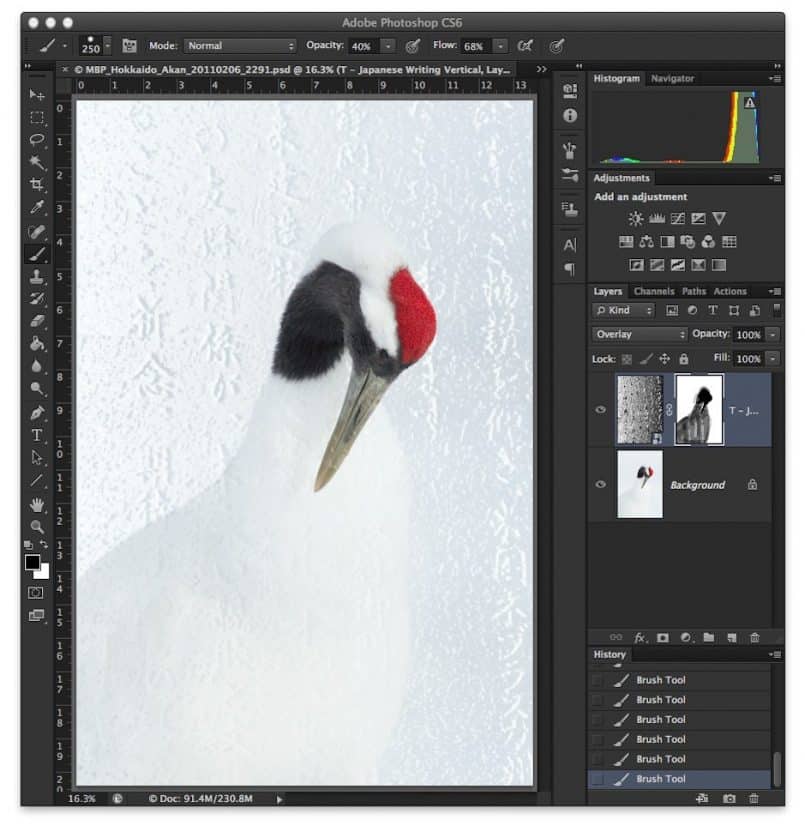
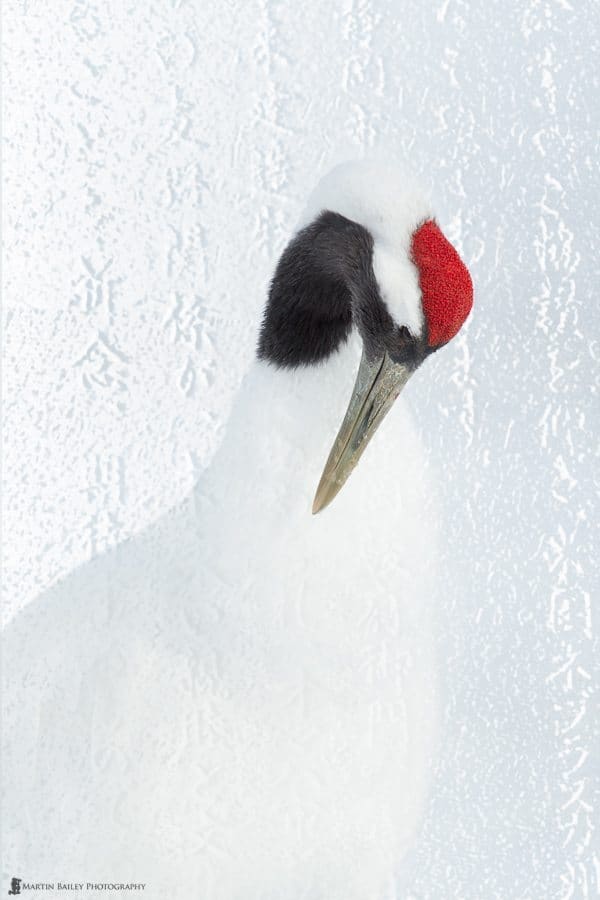
As one last example, here’s something a little more subtle, by adding the Transparent Japanese Writing texture to one of my Red-Crowned Crane Studies, you can see how the transparent textures add no color at all to the image that you apply the texture to.
This time for the mask, after initially bringing the cranes head and neck back fully with a 100% opacity mask and black brush strokes, I reduced the opacity of the brush to 40% and changed the flow to 68% for the body of the crane, so that it left a hint of the texture there. Here’s a standalone image of this too, for you to take a look at.
So Many Textures
We’ve only looked at a handful of textures today, but I do encourage you to take a look on the product Web site to see for yourself just how many textures this complete package includes. As you know this is not something that I would usually do to my images, but I have been aware of this technique, and even have a small collection of textures of my own that I had started to shoot some months ago. I’m glad I did this though, not only because it gives me some other textures to play with, but because it makes me appreciate even more just how much work Bryon has put into creating this huge collection of textures, and making them available at what I consider to be a very reasonable price.
15% Discount!
Remember that if you decide to pick up Texture A Photo, do use the affiliate link from the blog post for this episode, or the short link I created, which is mbp.ac/tap with tap being for Texture A Photo of course. Using the affiliate link will help to support the Podcast and Blog, and don’t forget to use the discount code MBP15 when you check out, to get a 15% discount on your purchase. This means you can get all of these textures for under $85!
Show Notes
Buy Texture a Photo: https://mbp.ac/tap
Discount Code: MBP15
Music by UniqueTracks
Subscribe in iTunes for Enhanced Podcasts delivered automatically to your computer.
Download this Podcast in MP3 format (Audio Only).
Download this Podcast in Enhanced Podcast M4A format. This requires Apple iTunes or Quicktime to view/listen.




Thanks for the great review!! Now I’m more exited to get my 1dx that I preordered – Long time ago 😉
You’re welcome Yair – I hope yours arrives soon!
Great podcast, but I have to say I think these textures are really expensive, I mean you can get 1000’s of textures for $9.95 at sites like http://thetextureclub.com