I’ve spent the last few days getting used to the Breathing Color Lyve Canvas and Timeless Laminate system and today share my thoughts, with some tips for using the system yourself. There’s a lot to keep in mind when using this system, especially when laminating your prints, as this can be incredibly tricky. I’m pretty much on top of the process now, after a couple of days of experimentation, but it wasn’t all rosy. Here are my first impressions, warts and all…
Why Lyve Canvas and Timeless Laminate?
First of all, I should tell you why I chose the Lyve Canvas and Timeless Laminate for my canvas wraps, and these will be the canvas wraps that I use for my December Exhibition here in Tokyo, as well as to make portrait photographs available to customers in the near future. You will probably remember that in Episode 257 I showed you how to actually put a gallery wrap together using the Hahnemühle system. It’s no secret that I love Hahnemühle paper too, but I cannot get the Hahnemühle protective spray here in Japan, and so I started to look for an alternative. Our friend in the MBP community Landon Michaelson has had great results with the Breathing Color Glamor laminate, and so I decided to look into Breathing color products.
I chose the Lyve Canvas over there previous canvases because it’s newer, and they claim it to have a wider dynamic range, or color gamut. The first thing I did before printing to the canvas of course was to profile it, using the X-Rite i1Xtreme color calibration system, and when I soft-proof my images before printing, there are very few that even need any work to get them to look just like they do on the screen when printed to the Lyve Canvas. Having said that, Hahnemuhle’s Daguerre Canvas was also incredibly good as you’d imagine, but Lyve Canvas is cheaper, and has the benefit of the availability of the Timeless Laminate that was made to match this canvas.
So, my decision made, I placed a large order with Breathing Color. I had problems creating an account, because their system does not accept Japan format post codes, but I was able to order relatively painlessly by email, and my order arrived about a week later by FedEx. Here’s a photo of the consignment, so you can probably see that I was banking a lot on this system working for me.
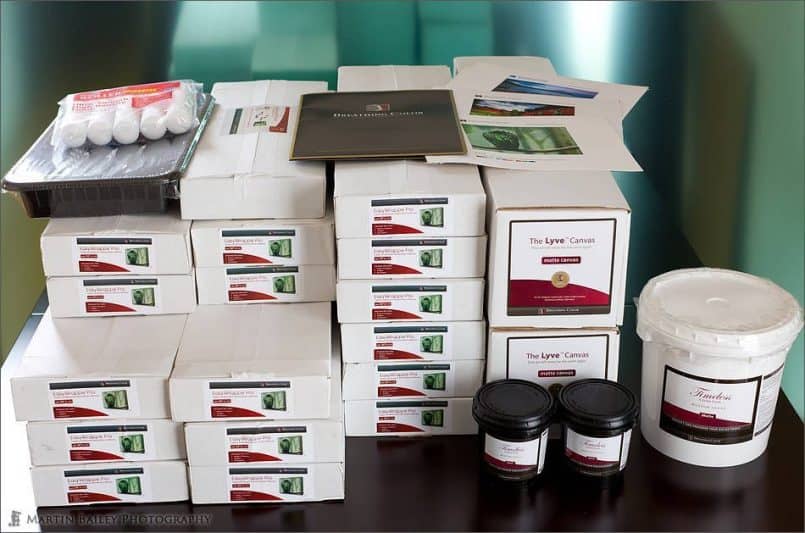
Breathing Color Gallery Wrap Goodies
What You’ll Need
What you need to apply your Timeless Laminate is a flat surface, a plastic spoon or something to stir the laminate in the gallon bucket, and a measuring jug. You should also use something like a ladle to remove the laminate form the bucket into your measuring jug, and you should only take out as much as you need and not return any unused laminate to the bucket afterwards. My work table is slightly narrower than the width of a 24 inch wide canvas print, so I bought a piece of acrylic board as my flat surface, and I covered that with thin plastic like the stuff that painters use to cover furniture etc. This is about $15 for 200 meters, so you can change it out when it gets messed up without worrying too much about the expense.
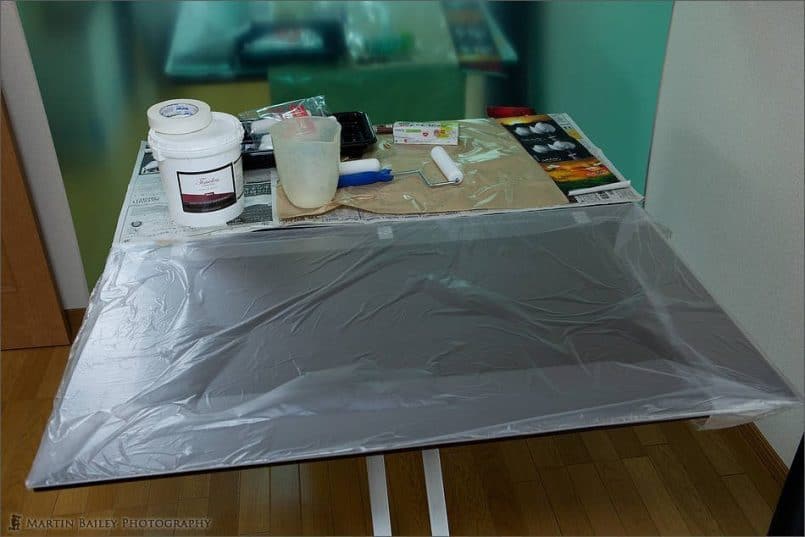
Work Area
Once I’d got everything I need together and my canvas on the workbench, I was all fired up and ready to create my first few masterpieces. I have to admit though, as I started to work with the system it got very frustrating very quickly. You can see two canvas prints that I did for my first attempt in this next photo, and I started with the smaller black and white lotus flower print. I have to tell you though it was a disaster.
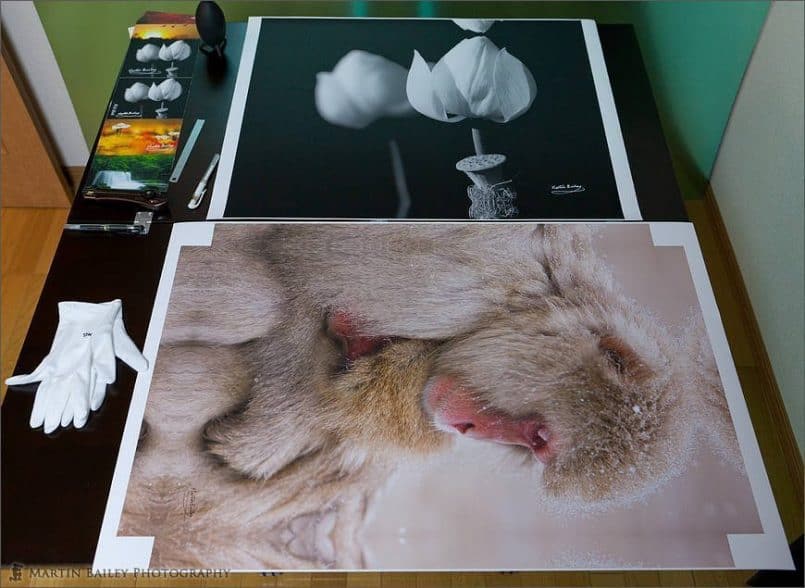
First Two Lyve Canvas Prints
First Try – A Disaster!
I poured a puddle of Timeless Laminate, one quarter the area of the image, as per the instructions, and started to spread it out with the roller. It soon became obvious that this was way too much, and as I was spreading it out, it started to congeal and stick to the roller, first in small lumps, then in entire layers. I ended up scraping this off and throwing it out, wasting a good amount of the laminate.
Having reapplied a layer of the laminate, I got the small flakes again, and decided this canvas was now ruined. I took it downstairs and placed in on my spare room floor to dry, just to see what it looked like, and went back into the studio to try a second. I didn’t have the heart to practice on my precious mother and child snow monkey print, so I used a test print on the Lyve Canvas, and the results were pretty much the same. I screwed up the canvas and threw it out.
These problems may be caused to a degree by the temperature or humidity, which were I should say within the ranges that Breathing Color set out for the application of Timeless, and you might not have such a hard time as I have, but I was really struggling initially. At the end of my first day, I mailed Breathing Color for advice, but it was a holiday in the U.S. yesterday, so I didn’t get a reply before I started my second day of working on the process. I did get a quick reply before I started to record this Podcast, telling me that we’ll be speaking to try to help with my problems, but that will be after I’ve recorded this Podcast, later tonight. I’ll be sure to update you on anything I learn to improve the process later of course, but for now, let’s steam on…
Lessons Learned
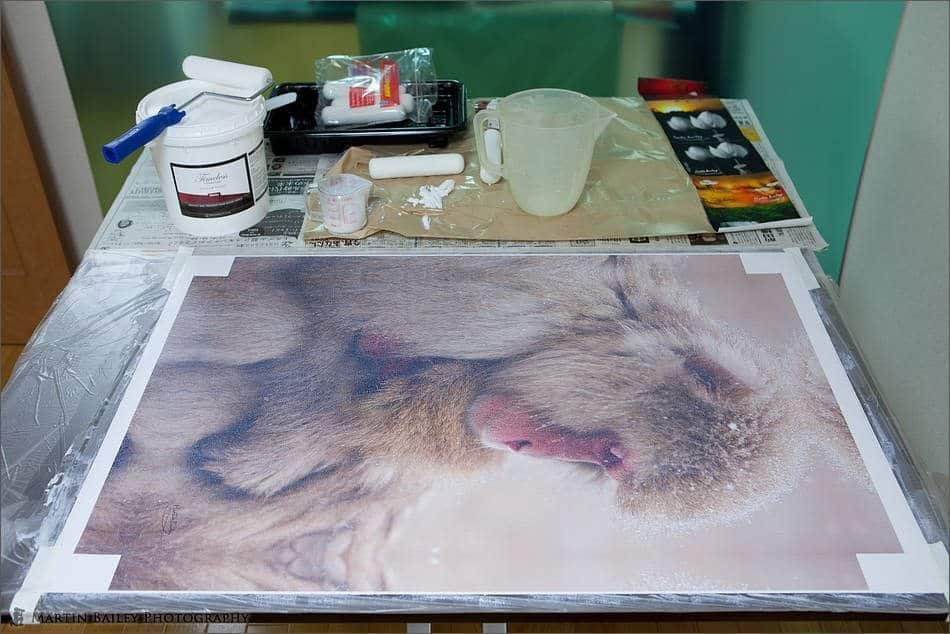
In my first few attempts to apply the laminate, I noticed a few things that started to improve my process, so we’ll touch on these now. Firstly, the peeling and flaking of the Timeless Laminate as I rolled was made worse by the canvas sticking to the roller, and lifting up as I rolled. To prevent this from happening, I started to tape the corners of the canvas to the table before I start to apply the laminate. The corners will be cut away later so it’s not a big deal that these won’t be laminated. I found that taping the corners down did help with the rolling, but the congealed flakes didn’t stop.
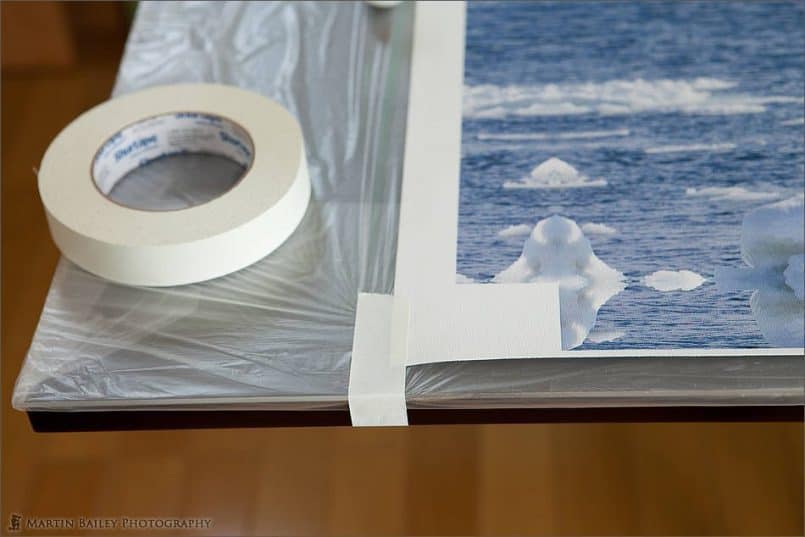
Tape the Corners Down
I also decided to ignore the Breathing Color advice to pour a puddle of Timeless onto the print that is about one quarter the area of the print. You want a much smaller puddle to start with. I found that about 60 to 70CC was enough to laminate a 24×34 inch canvas, for a 20×30 inch gallery wrap. As you start to roll out the Laminate though, keep your measuring jug with more Timeless in close by, and add more as necessary, but not too much. You’ll want to roll this first layer out very quickly, in all directions. Your aim is to get a layer of laminate onto the canvas, and then once you have the entire canvas covered, roll in a vertical action across the entire canvas, then horizontally, maybe twice in each direction then stop.
If you roll for more than a minute or so, you’ll start to get white flakes of congealed Timeless laminate that form on the roller and they’ll stick to the surface of the canvas, which is not good. If you start to see these flakes of Timeless through rolling too much, stop right there. Any more rolling will make it worse. I’ve come to the conclusion that at least under the conditions in which I’m working, you can only apply one or two layers of the Timeless laminate with one clean roller. Make sure you buy some spare rollers, and the moment you start to see the white flakes on the surface, if you are quick, you can remove them with your finger, and then re-roll with a clean roller.
Fourth Canvas Looks Great!
It took me four canvases before I was able to successfully coat a print in without any real problems, but I’m not sure right now that I applied enough laminate. When I peeled the tape off the corners I could see that there was a nice coating of Timeless applied, so I’m optimistic that it will be OK, and if what I’ve learned and my process is correct, then it will have actually been pretty easy, although not very similar to the rolling process that Breathing Color show in their video.
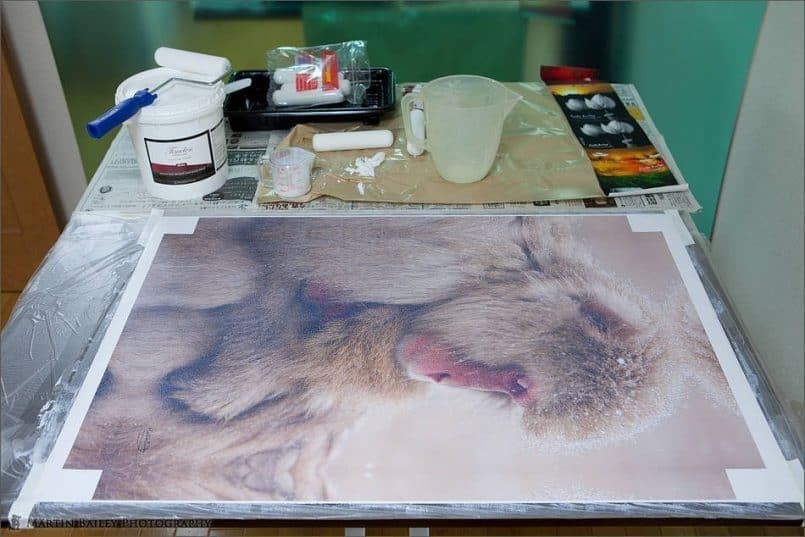
First Really Good Canvas
When this fourth canvas dried though it looked great and I’m looking forward to seeing how crack resistant it is when I stretch it onto the stretcher bars to make the gallery wrap. If it has worked well, then it was a total of one minute frantic rolling, three minutes waiting, then one more minute of careful rolling. I didn’t see any bubbles, probably because I didn’t have enough laminate on it for them to form, but if it’s strong and crack resistant, what the hay! I’ll let you know how I got on with this later after I’ve created the gallery wrap.
If You Mess Up…
If do you screw up totally and get these flakes everywhere, use a flexible silicon spatula like the ones you might use in the kitchen, and scrape off the layer of Timeless. I’m not sure what Breathing Color would have to say about this, but if the spatula is smooth it won’t hurt your print, but the Timeless needs to come off, and you can then start again with a fresh layer, before the Laminate that had already sunk into the canvas starts to dry.
Once you have that first layer applied, and again, this has to be done very quickly, in less than a minute, wait for about three minutes. Walk away and ignore it, and once you’ve waited three minutes, go back and roll a little more. The Breathing Color instructions and video say that you should start to see bubbles at this point, but out of the four Canvases I’ve done so far, I have not seen bubbles on the first application, which is why I think that on the canvas that I stopped after one application, I probably don’t have enough laminate applied.
One Coat or Three?
Breathing Color say that quite often you’ll only need one coat of Timeless, although you can apply more. At this point in time, I’m going to try with just the one from now on, but if the canvas cracks when I stretch it onto the stretcher bars, I will have to continue on and apply a second or even third coat. I’ll know if this is the answer, because three of my current four canvases that need to be stretched had three coats. One actually had five, because the third coast messed up with the flakes, and so I had to scrape it off and start again. If you have to do multiple coats, Breathing Color recommends that you wait about 15-20 minutes between each application and I found this to be about right in my first attempts.
I do start get bubbles in the laminate (see below) if I do a second application, and lots of them. They start to appear as soon as I stop my first frantic application, and start my three minute wait. Many burst during the three minutes leaving little craters, but the craters and bubbles that remain are smoothed over, as you start to roll again. This second rolling after the wait though cannot be too long either. The Breathing Color video says that you might need to roll for up to thirty minutes to get the surface smooth, but in my experience so far this just isn’t possible.
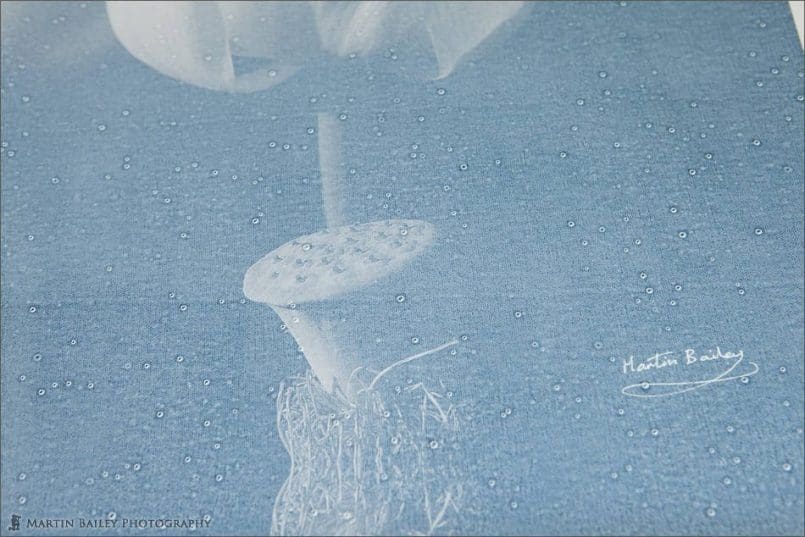
Bubbles!
So, these are the things that I’ve learned so far, and I’m still very much trying to get the hang of this process, so please take this week’s episode more as a work-in-progress report than a foregone conclusion. I will get back to you if Breathing Color have more advice on the process, and after doing four canvases now, as long as my fourth that I only gave one coat stretches onto the frame without cracking, I think I’ve just about cracked the process.
Key Points
The key things to remember are:
- Tape the corners of the canvas down to stop it from lifting while rolling
- Apply a small puddle of laminate, and have more handy
- Spread the laminate quickly, randomly at first, until you fully cover the canvas
- Then roll the entire canvas horizontally and vertical twice each direction, without applying any downward pressure on the roller, then stop rolling!
- This first rolling should take less than a minute
- Wait three minutes, then roll a little more
- Use a fresh roller for each canvas wrap. Never do more than two applications/layers with one fresh roller
- Wash out your rollers and use them again, but you’ll need some spares to work quickly
These are my key takeaways from two days getting used to the process. I’ll update this list in a future episode as I refine my process or as Breathing Color can offer any advice to improve on the process.
I mentioned earlier that I allowed my first failed canvas to dry, and I was pleased to see that the first black and white lotus flower canvas that I had given up on did calm down quite a lot after it totally dried. I had given up on this first canvas, and was ready to throw it out, but I’m glad I gave it time to dry, as this showed me that I didn’t need to get the application of the laminate totally perfect for it to still look pretty good when dry. I tried to give this first attempt another couple of coats to try to fill in some of the ripples and grooves left in the first coat, but this didn’t work out great, and it certainly wouldn’t be possible to sell it to a customer, but I’m going to keep it to one side for now. If I get time to redo this piece for the exhibition, I will. If not, that might just be good enough, if people are viewing from a distance. I’m pretty sure I’ll make time to replace it though.
Before we finish I would like to say that on the smaller samples where I simply just applied a rough coat of the Timeless Laminate, the dried product was flawless and I did test to see how tough it was. It didn’t crease, and when I tried scratching the surface of the canvas with my fingernail, although it came up white for a moment, when I licked my finger and rubbed over the same area it cleared right up, dried instantly and I couldn’t even tell that I’d scuffed it up in the first place.
I should also note, and this is quite important, but this is exactly the reason why you need to laminate canvas wraps. The Hahnemühle Canvas Wraps that I created and shared with you in Episode 257 cracked on the edges a little during the process. I’m expecting that the Lyve Canvas, laminated with Timeless will be much stronger and totally resistant to this sort of cracking and will be much easier for the owner of the piece to care for. They’ll be able to wipe it off with a wet rag if it gets dusty for example, and a few knocks shouldn’t damage it either.
By the way, the stretcher bar system from Breathing Color is pretty much the same as Hahnemühle’s system, and apart from figuring out how long I have to wait after applying the laminate before I can stretch the canvas on the bars, I’m not expecting this to be a difficult process. Again, if anything comes to light when I get to this, I’ll let you know.
Conclusion
The process takes some practice, and although there are still a few things that I need to check, and some things that I’m hoping will get better, right now I’m still happy that I decided to use this system. This work-in-progress report has certainly not been all roses, but I do intend to continue to use these Breathing Color products. So far my experiences with the people at Breathing Color have been great, and if the canvases that I now have laminated stretch onto the frame without cracking, I think I’m onto a winner. Stay tuned in future weeks as I run my final checks and report back on any improvements that I make to the process, either with further practice, or with the Breathing Color team’s help.
Podcast show-notes:
Breathing Color: http://www.breathingcolor.com/
Music created and produced by UniqueTracks.
Audio
Download the Enhanced Podcast M4A files directly.


0 Comments