My new office, come modest studio, is now just about complete, so today I’m going to give you a bit of a guided tour. Of course, it’s not perfect, and if I had even more space, I’d certainly do things differently, but I’m happy with my current space. So I thought I’d share it with you today, touching on some of the details that I bore in mind when putting it together, in the hope that it might help you, if you put your own workspace together at some point.
First take a look at the rough plan that I drew up, and shared with you in episode 251, when I first discussed my plans for the new office and studio space, before I actually moved in. We can see here that it’s not a huge space, and certainly not big enough for a commercial studio. I do have a room downstairs that I can set up a larger studio if I need to, but today we’re just going to look at my space as seen in the diagram.
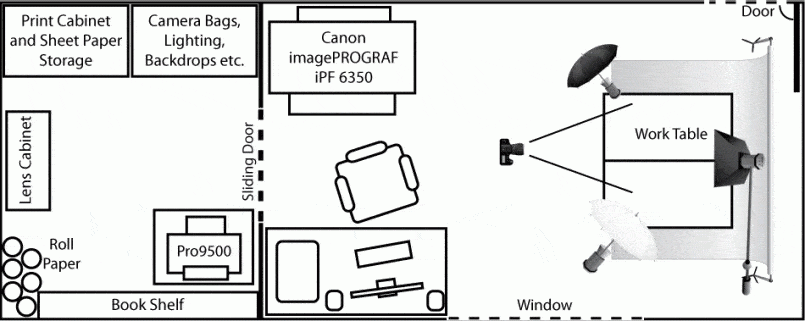
Office-Studio Plan
On the right you can see that I have enough room to put up a backdrop, a simple lighting setup, for either product shoots or one or two people portrait sessions at a push. I had planned to put my lens cabinet and my Pro9500 printer into the walk-in closet that would become my storeroom, but as we’ll see later, these are both now in the main room. As I unpacked my stuff into the storeroom, it pretty quickly became obvious that I had way too much stuff to pack in there, so I’d have to rethink my plans a little. The good thing is that when I am shooting in here, both printers are on casters, and can be easily wheeled into the storeroom to make more room.
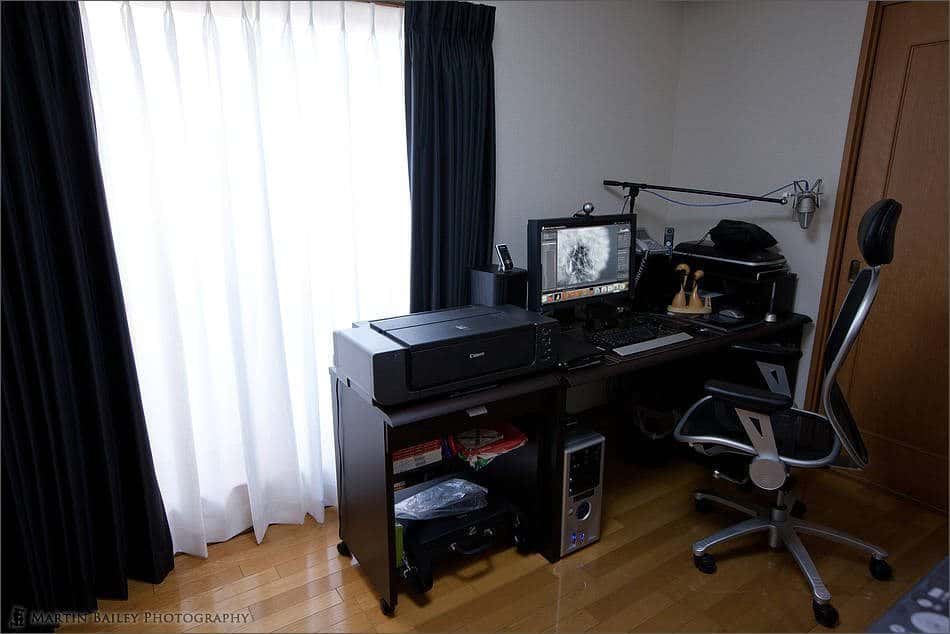
Here (below) is my computer workspace, with the Canon PIXMA Pro9500 printer to the left. I have the one 24″ screen, with two speakers either side. I like to listen to music while I work, and so I picked up these good quality speakers that plug into my computers digital audio, and because I have the storeroom in the back there, through that door, I can turn up the volume a little without having to worry about the neighbors, or annoying my wife, who’s on the floor below. Remember that so far my workspace at home has been 1.5 square meters in the corner of the living room, so just being able to listen to music without headphones is in itself a major luxury for me.
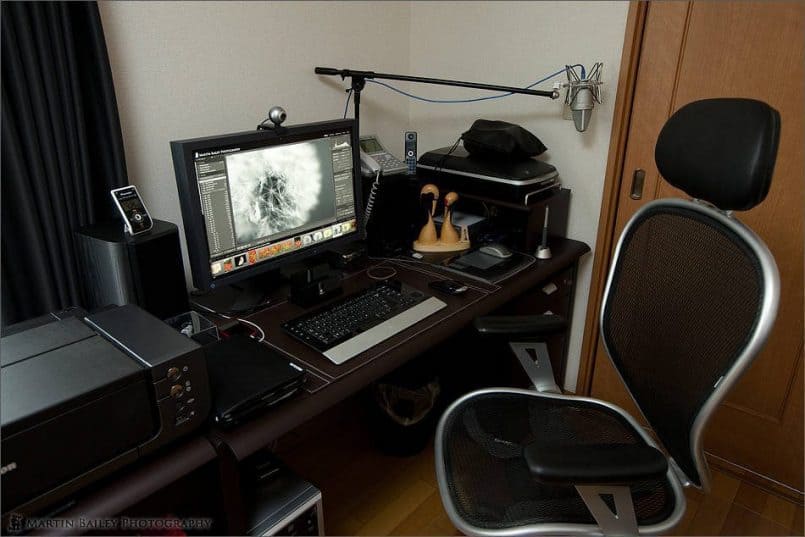
My Computer Workspace
You’ll see that I have room on the desk for my iPad and Wacom Tablet, and a few ornaments. I have two phones in the back there, because I had two lines put in to my new place. One is our private home phone line, and the second is purely for my photography business. The silver phone is the business line, and that also receives faxes, but it obviously doesn’t print them out. It just stores them in a memory card which I can take out and view or print from the computer. It saves space and paper. I have a second cordless handset for this phone downstairs, for when my business rings when I’m not in the office. There’s also a cordless phone to the right of that, which is connected to the private line, with the main phone downstairs. My wife can also call on this second phone, or transfer calls when necessary.
There’s a scanner there in the back, with my headphones that I use when recording the Podcast in the black bag on top of the scanner. Of course that’s my Podcasting mic on the stand across the top of this image. I had to by this stand because my old stand would not attach to the new desk, with the rounded surface, but it’s great because I can just swing it out of the way like this when I’m not recording. The Mac Mini that I use for recording the Podcast is also in the back there, just visible under the scanner and behind my Red-Crowned Crane ornaments.
The 9500 printer is on its own cabinet now, and it’s great to be able to operate the printer at a normal height. You will remember from episode 251 that until now this printer was above my desk, making it a bit of a pain to load paper and inks etc. Behind me as I sit at my desk is the new Canon imagePROGRAF iPF6350 printer, with its swanky cover fitted. Dust in a printer can settle on the paper while printing, and then the dust gets painted with the ink, and then when it falls away, you end up with white spots on your images, so I always try to keep dust out of my printers, and this cheap piece of thin plastic from the hardware store does a good job of keeping it out. I’ll be bringing you another episode on the new printer in the coming weeks.
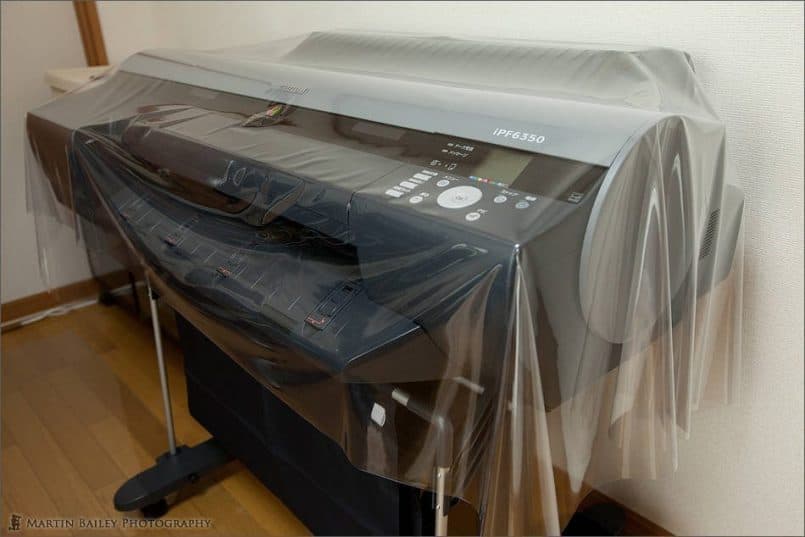
The New Canon imagePROGRAF iPF6350
To the left of the new large format printer is my lens cabinet. This is a double door cabinet and so I can fit all of my lenses, bodies and speedlites, as well as other bits and bobs that I want to keep in a controlled humidity environment. If you don’t live in a humid area, you would probably have never even thought of buying one of these, but in Tokyo, humidity is high all through the summer months, and I have had problems with mold on the inside of my lenses when I didn’t keep them in this cabinet. The digital indicators that you can see here might make me sound as though I’m contradicting myself, because the green 33 is the humidity inside the cabinet, and the red 27 is the humidity outside the cabinet. Humidity in this room actually get up to 70 or 80 percent when I’m not in the room, and it only came down like this because I had the air conditioning on when I shot this photo. I usually keep the inside humidity at around 38, but it dropped slightly here when I opened the cabinet to get a lens out to shoot this.
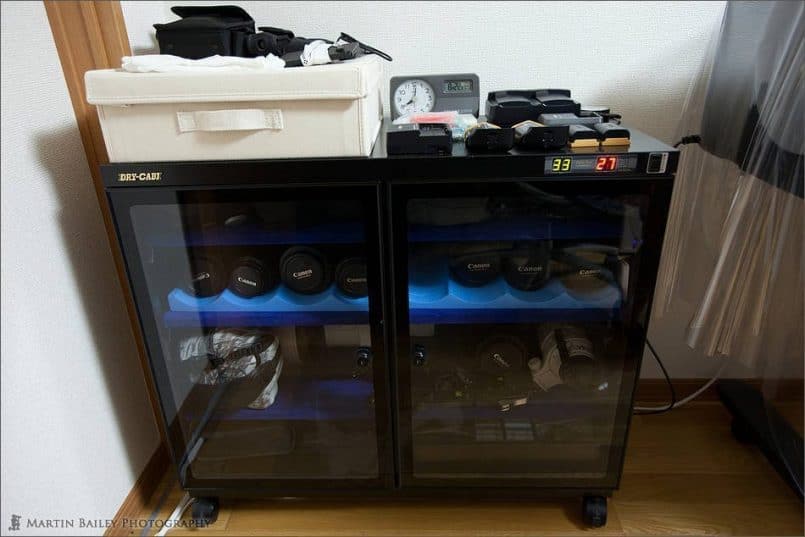
Lens Cabinet
One other point here about using a lens cabinet is that although you might think it’s a pain to take everything out of the camera bag when you get home, and put it away like this, it’s actually quite a nice routine to get into. It not only helps you to keep stock, because everything has its place, it’s also useful when you are preparing for a job or even just a walk in the park. You grab the bag that will suit your gear, and fill it appropriately each time. I’m able to decide exactly what I take really easily this way.
If we open the door that you could see to the right in the photo of my desk that we looked at earlier, you’ll see the storeroom that we see here. I still have some rearranging to do, but basically this is where all of my photography junk goes.
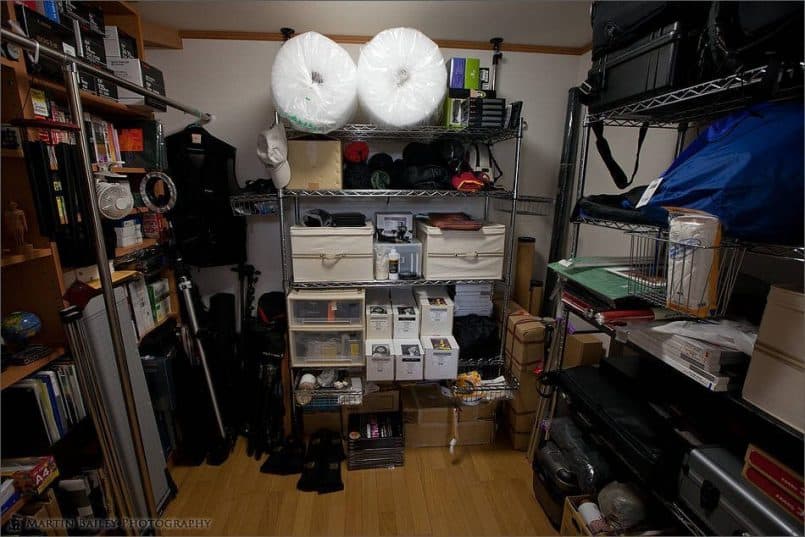
The Storeroom
In the center and to the right you can see that I ended up buying two stainless steel racks that you build yourself. The one on the back wall, in the middle of this image has some of my packaging materials for when I’m shipping my fine art folios, and I’m currently keeping things like my rainproof clothing and waders from Outdoor Photo Gear, and some more folio production materials on the floor below the rack. On the first shelf from the bottom there’s the roll paper that I have bought for the new printer, which again, we’ll talk about in a future episode. The boxes in the middle have straps and other pouches and stuff for carrying gear around, and to the left of the rack is my tripods and light stands, and a new boom and soft box. There’s my amazing cool photographer’s vest as well. After all, this is supposed to be a walk-in closet.
By the way, those boxes that I keep straps and pouches in do open from the top, but the shelf that those boxes are on actually extends out forwards, so that I can open them without having to take them off the shelf. It’s just another option of this rack system. We can see this in action on the rack to the right as well, in this next picture. Here’s another shelf that I pulled out, extending it forwards to show you what I mean. This is where I have one of my large portfolio cases, so if I remove the boxes that I currently have on top there, I can open the portfolio case and look through the images without taking the case out of the rack if necessary.
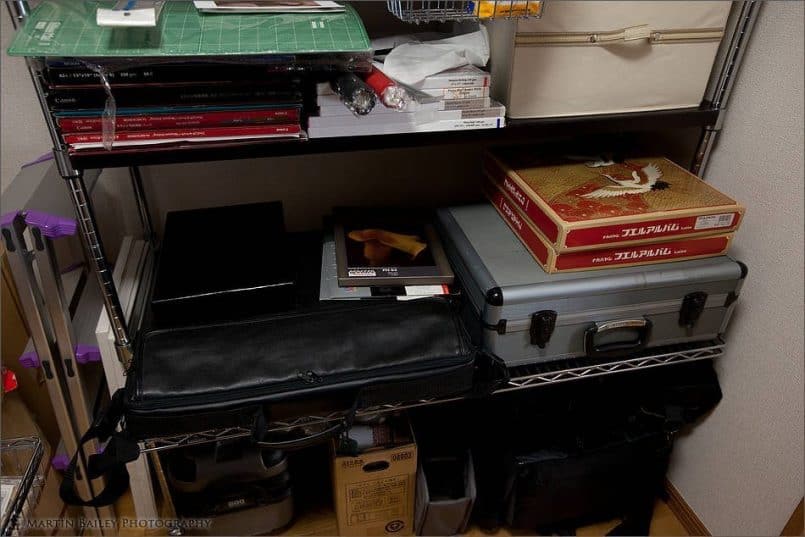
Extending Rack Shelf
Those two red boxed albums to the right need to be put in storage. They are albums that I put together of my first six months or so in Japan, when I first got here in 1991. Below that, the silver case is all of my slides from 1991 to 1997. Again, they are on this moveable shelf so that I can get into the case without taking it out of the rack.
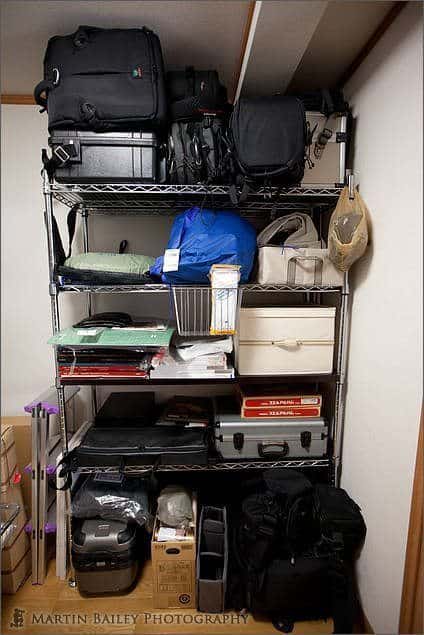
The Bag Rack
Here’s the entire right side rack. Still a little disorganized, but generally it’s where I’m putting my camera bags, and I have a number of backdrops and my reflectors in there, as well as some larger 13×19″ sheet paper. The basket in middle just has a new pack of white cotton gloves in, for handling photos and for changing out the roll paper in the new printer, without getting oils from my skin on the paper. To the left of this rack you can see my stepladder, which is for shooting from higher angles or over the heads of crowds when necessary. To the left of that I’ve got more packaging materials and some rolls of paper that I use as backgrounds for product shoots. The brown bag hanging from the top right is my also amazingly cool knee pads, that with my photographer’s vest help me to look like the coolest and hippest photographer in Tokyo.
If we swing around here, we can see my bookshelf (below, right), which is housing a fair few photography books and magazines, but we can also see along the top there that I have the boxes for my camera bodies and lenses. I keep these to maintain the resale value when I sell gear on, usually to put the money towards more gear. There’s also an old slide projector in the middle at the top there, but it doesn’t get much use these days. I’m going to keep it for another 30 years then sell it as a piece of antique photography memorabilia.
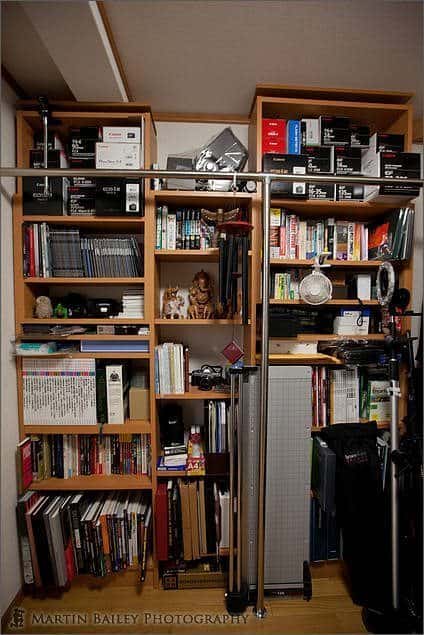
Bookshelf/Storage
In the middle there, we can also see a new 36″ rotary cutter. Now that I have the large format printer, one of my projects is to re-proof my fine art folios for the new printer, and print them out on larger sheets of paper, then cut them up with this rotary cutter. If I can reduce the amount of time that it takes to create the folios, it will help me to bring the price down a little, and hopefully get more sales. They aren’t exactly flying off the shelf at the moment, so this was a major consideration when buying the new printer.
So that’s the storeroom. If we move out and past the desk and new printer etc. we have about half of the main room still open to set up lights etc. for product or portrait shoots as I mentioned earlier. I haven’t yet done a lot of work here, having only just finished sorting everything out, but here’s a shot of a simple setup that I did not long after moving into this room (below), so that you can see that space is someone limited, but it’s really nice to be able to set things up like this, and then leave them for as long as required. Before I had to set things up in my kitchen and had really no more than a few hours before I had to break it all down again, so the new space is very, very welcome.
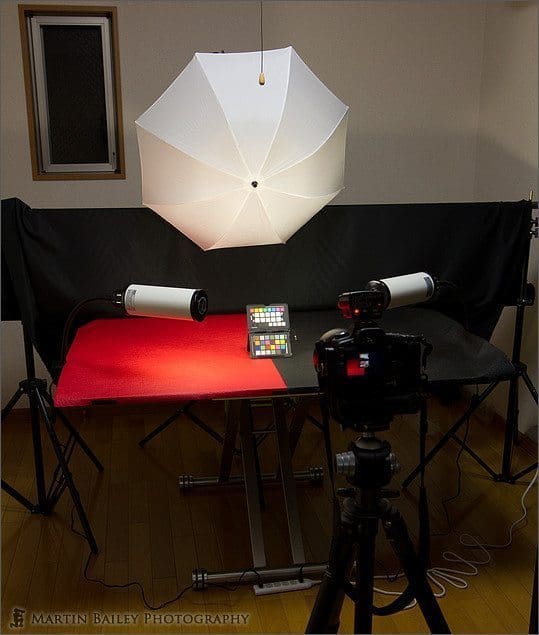
First New Studio Setup
Next, here’s (below) a wider shot of my computer workspace, so just explain another consideration which was black curtains, with white lace curtains, that I had made to order for this room. The lace curtains make for a huge soft-box to the side of my studio area, and I am a big fan of shooting with this kind of window light when possible. I went for plain white curtains, rather than the patterned lace curtains that we had in our kitchen at our last apartment. They sometimes cast a shadow of the pattern on products when I was shooting them, which was sometimes nice, but I’d have preferred it not to have happened.
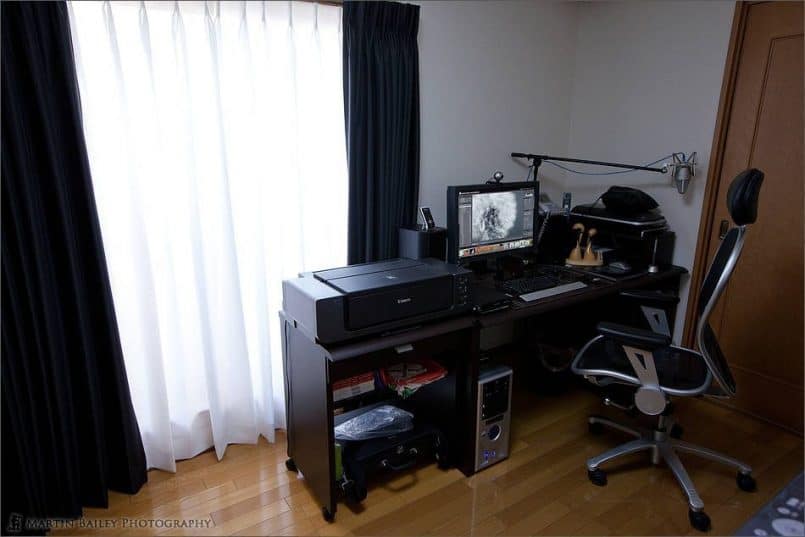
Black Curtains and White Lace Curtains
The black curtains are lightproof, and I had what they call a return sown in to the sides, so the curtains fold back against the wall, shutting out all of the light except that which comes in through the rail at the top. This enables me to control the light in the room to a much higher degree, for when I’m working on images in my digital darkroom. As this is a rented apartment, I can’t change the color of the walls, so they are white and of course therefore will reflect light, but I chose dark furniture for this room, also to reduce reflected light from the other surfaces surrounding my monitor.
This brings us to the last photo and consideration for putting my new office together. With the curtains closed, although it was dark outside by the time I shot this, I turn on the main light, and now pretty much have a controllable and repeating environment in which to work. The last job of course is to re-calibrate my monitor for my new environment. It’s not a one off task of course, as I usually calibrate at least once a month, or before working on any important images, but this was actually the first time I calibrated my monitor since moving in one month ago.
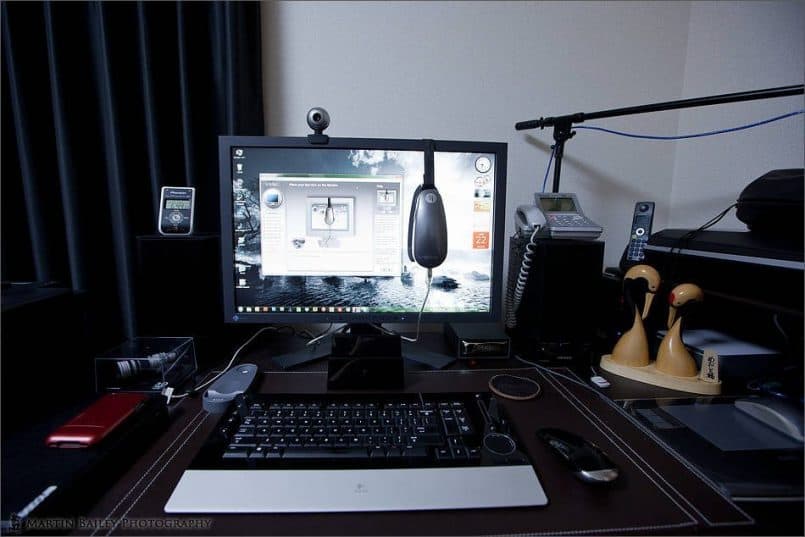
Calibrating My Monitor
I have been so busy with various things surrounding the move and setting up this new space that I really haven’t been doing a lot of photography outside of shooting things like the photos we see here. It’s mid-summer here in Japan too, and so the oppressive heat keeps me inside at this time of year too, but I’m really looking forward to getting stuck into more photography, and also mastering the new large format printer, which as I say, I’ll be discussing in the coming weeks, for those of you that are interested. For now, I hope that some of what we’ve touched on today will be useful if you are setting up your own office or work space.
Podcast show-notes:
Music created and produced by UniqueTracks.
Audio
Download the Enhanced Podcast M4A files directly.


You’ve got a lot of equipment very efficiently crammed into a Tokyo apartment. Impressive.
And I can verify the humidity of the Japanese summer. It’s pure evil 🙂
Thanks for the comment Sean.
It took a little bit of doing, and I think I can rearrange to make the storeroom more efficient, but for now, I’m quite pleased with how things have turned out.
This Japanese summer humidity is something else right!? I love Japan, but the summers I can do without. The same for the majority of the population of course. 🙂
Cheers,
Martin.
Similar square footage to my studio, but your equipment is so well organized. Having a studio to put thousands of $ worth of gear away is so much better than a closet or two.
Thanks for sharing your setup and talking us through it. Wish I lived closer so I could pop in once in awhile. But at least we have the interwebs to share with.
Got to go finish some big frogs now and a toad or two.
Thanks, Martin. Very interesting to see.
Thanks for the comments Landon and Mark!
Landon,
It sure is nice to have this stuff organized and close at hand now. I will rearrange the storeroom later, but still, I’m happy with it all being there, and I still know where everything is.
I wish you were close enough to stop by once in a while too. I reckon you’ll get the opportunity to come over at some point, and remember, I have a guest room come second studio downstairs now too. 🙂
Cheers,
Martin.
Wow Martin, I am thoroughly impressed with your studio. That is an amazing set up. It gives me some great ideas into building my own studio when the time comes. I have to be honest, i’m new to photography, in fact i just purchased the Canon EOS Rebel T2i as a starting point from which to learn from. I’m in the process of reading the instruction manual cover to cover. Although i am in the adolescent stages of my new found hobby, i am on a quest for knowledge. I came across your podcast and after listening to one of them, decided to subscribe and download all of them. I have already learned a great deal, and have enjoyed listening in the car, on my mp3 player, and even at work(when time permits). You cover many different topics, which i really enjoy. Thank you very much for sharing your knowledge and experience. From Las Vegas, Thanks Scott
Hi Scott,
You’re very welcome. I enjoy doing the Podcast and helping others, and it also helps me too. People often say that the best way to really learn something is to teach it.
I hope you continue to enjoy the content I put out, and continue to return.
Good luck with your photography!
Cheers,
Martin.