About a month ago, I picked up a Canon PIXMA Pro9500 printer. In Japan this is called a Pixus Pro9500, not Pixma, but it’s basically the same printer. In Episode 144 of this Podcast, I talked about what I like, and what I dislike about this printer. In this episode, part two, I’m going to spill the beans and tell you how to work around the limitation that Canon chose to impose on us, which causes you to have to print with a 35mm border when using their Fine Art papers. There is also a companion PDF file which I originally released to enable listeners to view the photographs of some of the prints that I made to compare the results of my tests, but now that I’m posting this manuscript as a blog post, I’ll include the images below.
In their ultimate wisdom, Canon decided to build a restriction into their printer driver software for the PIXMA Pro9500, that forces you to have a 35mm border at the top and bottom of the paper, when you select one of their three Fine Art papers. At least in Japan, there are currently three Fine Art papers, the Photo Matte, Photo Rag and Museum Etching papers. When you select these in the printer driver, the software throws an alert, and the 35mm border, or top and bottom margin shackles are clamped firmly around your ankles. As I explained last week, this is not such a big deal for Landscape format 13×19” prints, because I use a large border at the sides, which is basically the top and bottom when we print the image, and as we can print as close to around 3mm to the side, which is the top and bottom of the print when we print, I can easily work around this.
However, for Portrait format prints, the top border of 35mm is overly restrictive, and the restriction also applies to A4 or Letter (8.5×11″) prints too, which is a little too much for a print of this size. Of course, there are also times when we want to print to almost fill the paper. We are paying for a printer that can essentially print full page, with no borders, and yet this restriction seems by all intent and purposes to be totally software enforced. In the absence of a good reason for this from Canon, I can only assume it’s them trying to tell us, the artist, how we should produce our Fine Art prints.
(UPDATE: Last year (in 2011) I had the pleasure of meeting with some Canon Japan printer developers and was told that the reason for the 35mm border is to prevent feed problems with thicker papers, as there is less paper to grip during this last 35mm, and they can then raise an scuff against the print heads etc. Canon also conceded though, that it works fine with my settings, and that they may be being a little over cautious in this area.)
Well, never being one for being told what to do, I decided to see if I could work around this, and have come up with a pretty good way of doing so. Actually, it’s not just pretty good, I’m actually getting better results than when using Canon’s suggested settings and profiles, so let’s get into the details of what I’m doing.
The first thing I started to think about is that the Canon Fine Art Photo Rag and Museum Etching papers are made by I believe a German company called Hahnemuhle. I visited the Hahnemuehle Web site to see if they had profiles available for the Canon Pixma Pro 9500. Sure enough, they were there, for many of the Hahnemuhle papers, and in the list were the Photo Rag and Museum Etching profiles. So, I grabbed the profiles and started to experiment.
Remember that the restriction with the papers is in enforced in the printer driver, when you select the Fine Art paper, and as the Hahnemuhle Web site suggests printing to their Fine Art papers with the paper selection set to Matte Photo Paper, the restriction is lifted. You can print with any sized border, or right up to the edges. They also recommend setting the Rendering Intent to Perceptual, which is right up my street. Remember that if you try this, you’ll need to turn off all color management in the printer driver, and allow Lightroom or Photoshop to do this, with you selecting the profile manually. In Lightroom, you do this in the print job section by clicking the Profile pull-down. If don’t see the profile after you install it, click Others, from the bottom of the Profile pull-down, and turn on the checkbox next to the Hahnemuhle profiles for the paper you will use. From then on, it will be available in the pull-down, so you only need to do this once.
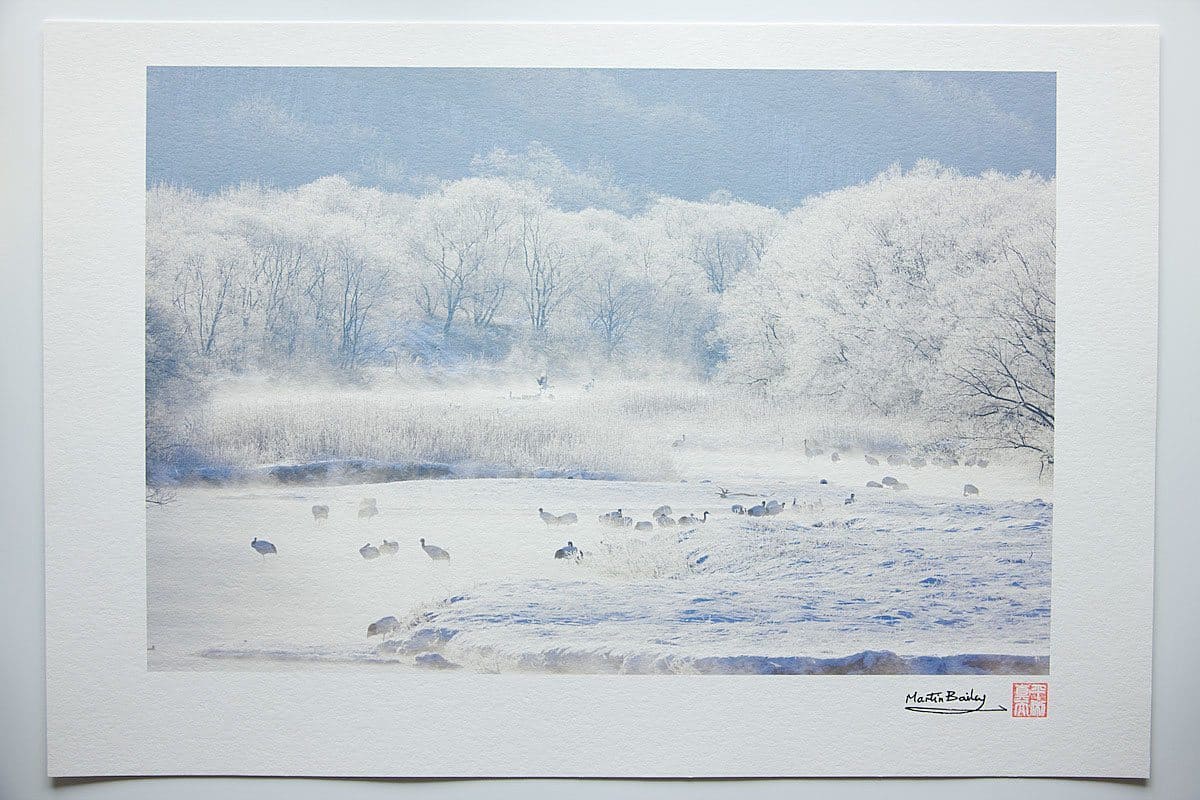
The first thing I did was to print that image we just looked at, with all the green in the background. I printed to both the Canon Fine Art Photo Rag and Museum Etching Fine Art papers, with Matte Photo Paper selected in the printer driver, with color management turned off, and the Rendering Intent set to Perceptual in Lightroom, and the Hahnemuhle profiles selected. Both came out perfect, with no color casts and as sharp as I could wish for. I finally started to feel as though I might be able to use this printer without uncertainty. Over the last week, after figuring out that this was possible, and my first few prints looking very promising, I did a few more experiments to make sure this was really working. My favorite print at the moment is of the cranes in the river in the morning mist during our Hokkaido Workshop in January this year. (Click on images to view larger, and use your keyboard arrow keys or mouse to navigate through images.)
I’ve also though created a PDF file, with a bit of an introduction in the document and a disclaimer that I’d like to repeat here before we go on. Basically, what I’m about to tell you are my subjective views based on my own experiments with the available profiles and papers. If you want to try this as well, please proceed at your own discretion.
Here is the first photo of one of my prints of the above photograph. I’ve called each batch of prints that we’ll look at Print #1a, b, c, Print #2a, b, c, etc. in the top left of each page and I’ve overlaid a text note to let you see the settings that I used for each print, to help as I walk you through each one here to explain my observations.
Print #1 (below) was printed on 13×19” Canon Fine Art Photo Rag paper, using the Canon Photo Rag profile, with the Rendering Intent set to Perceptual. You can hopefully see from the PDF that this has come out very bright, almost as though the photo was overexposed. This is not an over exposed image, or an over exposed image of a well exposed photo print. This is what I get when I use these settings. Too bright, and there is a pink cast on the frosty trees. There is a slight pink cast, as the trees catch the early morning sun, but not this pink.
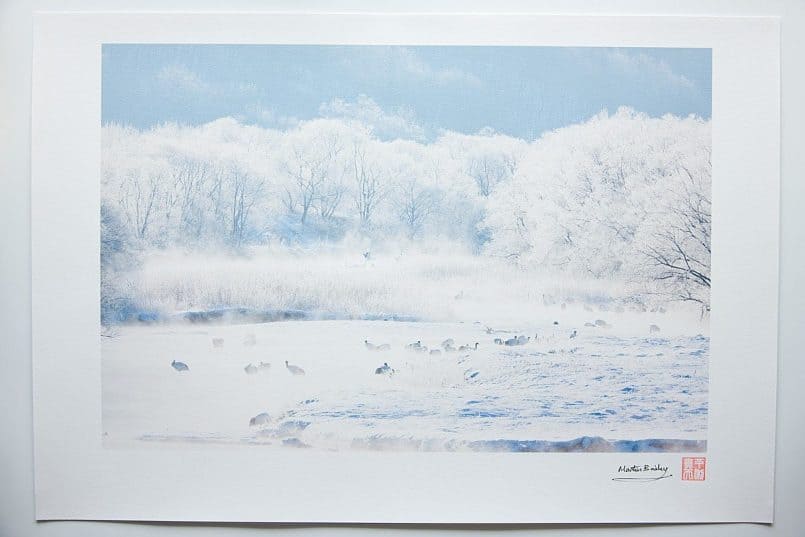
#1a Canon Fine Art Photo Rag paper printed with the Canon Photo Rag profile. Rendering Intent: Perceptual
If we move on to the next image (below), shot with exactly the same aperture and shutter speed etc. We’ll see what happens when I print to the same 13×19” Canon Photo Rag paper, printed this time with the Hahnemuhle Photo Rag profile, with the Rendering Intent set to Perceptual. Remember that I also now have set the paper in the printer driver to Matte Photo Paper, so I can actually open up those margins as wide as I want, or print right to the edges of the paper.
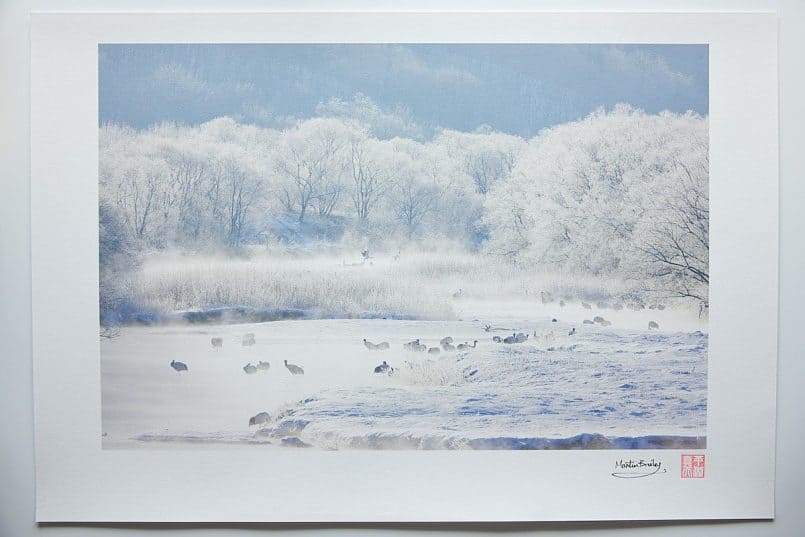
#1b Canon Fine Art Photo Rag paper printed with the Hahnemuhle Photo Rag profile. Rendering Intent: Perceptual
This is exactly what I wanted, in terms of freedom to select my own margins, tonal quality and sharpness. We’ll look at what this looks like up close shortly, and although the quality appears very different between the same image printed from my old Epson and the new Canon PIXMA Pro9500, at a glance, this image looks very similar to what I can make with my Epson, except the Canon print has slightly more detail in the branches of the trees along the right side, and the birds in the river seem to be slightly better defined. I’d say this makes us think that the edges are actually a little sharper, but as we’ll see later, I’m not sure why this is.
Next up is Print #1c, which I printed on Canon Fine Art Museum Etching paper, printed with the Canon Museum Etching profile. By the way, to avoid confusion I should also mention that when I’m using the Canon profiles, I’m also selecting the matching fine art paper in the printer driver, so this is exactly how Canon believes it should look. In this third print I selected Relative as the Rendering Intent. (NOTE: I almost never print using the Relative Rendering Intent now. Perceptual is pretty much always the best option.)
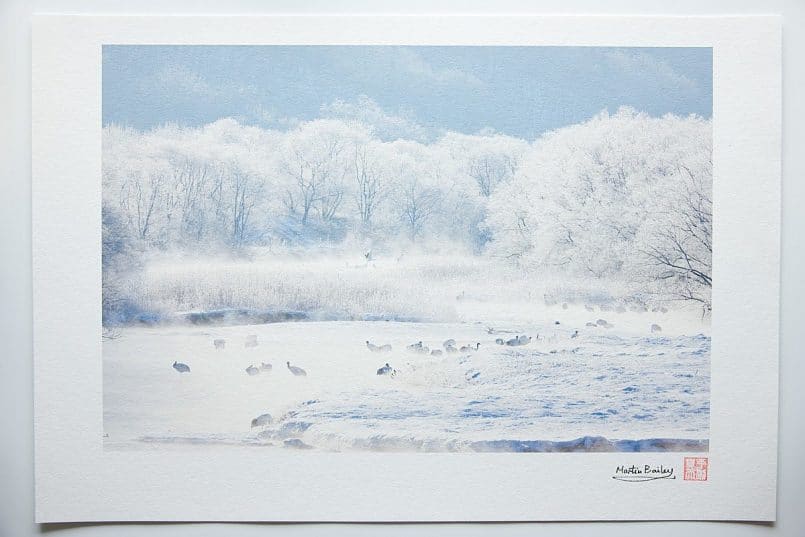
#1c Canon Fine Art Museum Etching paper printed with the Canon Museum Etching profile. Rendering Intent: Relative
The change in paper doesn’t really make much difference to the tonal qualities of the print here, so I tried Relative to see how it looked, and it was again, much brighter than I would like it to be, though not as bad as the Photo Rag using Perceptual for the Rendering Intent. In Print #1d (bel0w) I have again printed to the Canon Museum Etching, but this time using the Hahnemuhle Museum Etching profile, Rendering intent is Perceptual, and again selecting Matte Photo Paper in the driver. This too is exactly what I want in my prints. I actually used this paper and these settings, but printed with a 3mm border, virtually filling the paper, and I now have a copy of this, framed with a large matte on my office wall, and it looks beautiful.
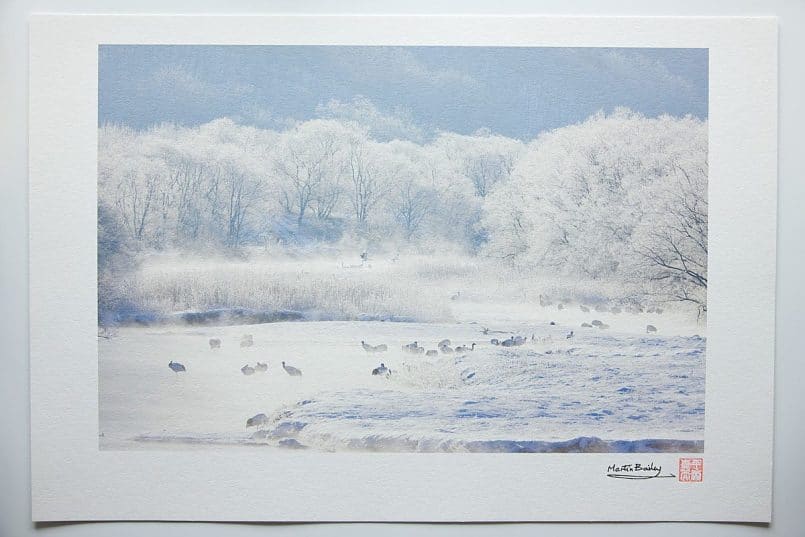
#1d Canon Fine Art Museum Etching paper printed with the Hahnemuhle Museum Etching profile. Rendering Intent: Perceptual
If you look into the back of this first batch of images, you’ll see that there’s actually a pair of cranes dancing, with one of them jumping up out of the mist. What I did for the next batch is shot that section of the image with a macro lens, to inspect the image as though we were looking through a loupe. I decided to do this having done just that. I inspected all of the prints with a loop, as I was concerned that using the Matte Photo Paper in the printer drivers instead of the Fine Art paper, would print at a lower resolution and give me worse results. Although I was happy with the results on close inspection with the naked eye, I will soon start selling prints from this printer and so wanted to be sure they are up to scratch. When I looked with the loupe though, I was surprised at how rough they look when magnified. As someone that makes part of his living from selling these prints, I can assure you that the print you will hold in your hand is a beautiful work of art, but as we look through the next batch, you’ll probably doubt that.
Print #2a (below) is basically just a macro shot of the center of Print #1a, but as a reminder, this was Canon Photo Rag, printed with the Canon Profile, with the Rendering intent set to Perceptual. You can see the slightly rough surface of the paper, and make out the crane jumping up and the branches of the trees and blades of grass in the foreground, but this doesn’t look great, because it’s printed out too bright.
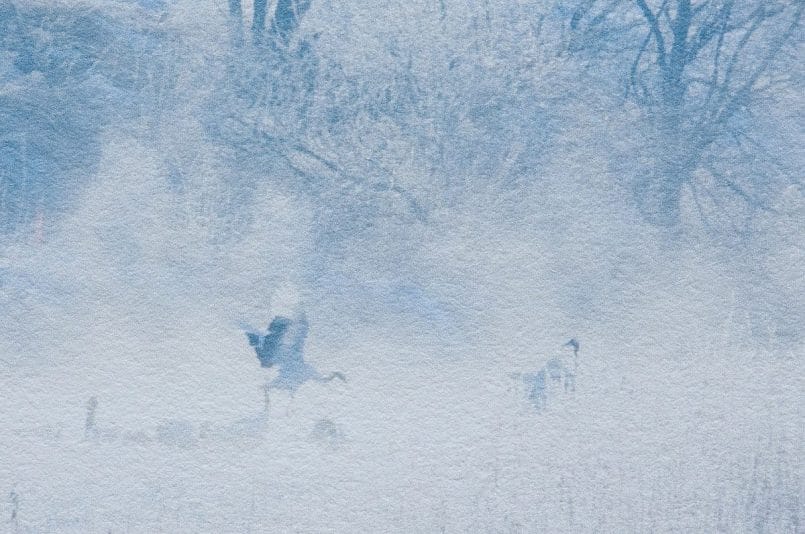
#2a Canon Fine Art Photo Rag paper printed with the Canon Photo Rag profile. Rendering Intent: Perceptual
In Print #2b (below), for which I used the Hahnemuhle Photo Rag profile and the Rendering Intent Perceptual, you can see that we have much more detail, and can make out the shape of the white wings and the body of the bird, and the surrounding birds much better, as well as seeing much more detail in the foreground grass and frosty trees in the background.
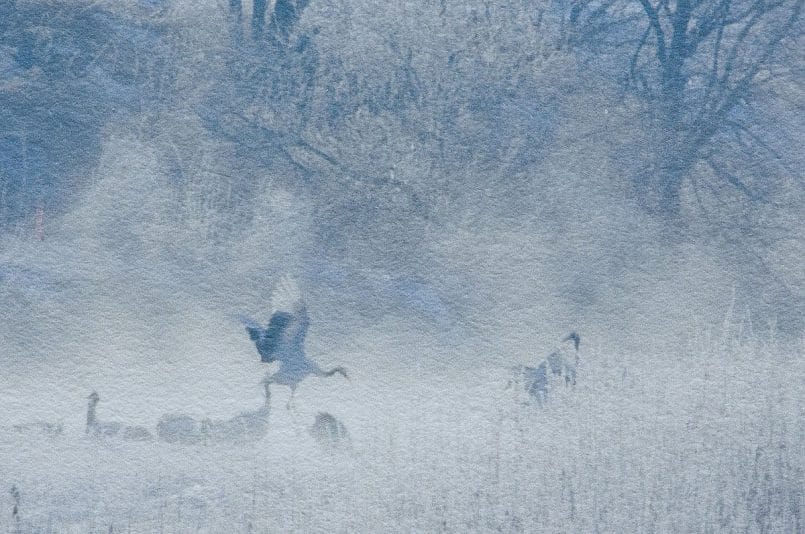
#2b Canon Fine Art Photo Rag paper printed with the Hahnemuhle Photo Rag profile. Rendering Intent: Perceptual
Print #2c (below) is the Canon Museum Etching paper printed with the Canon profile. Again, a little bright, but brought down by the Relative Rendering Intent as opposed to the results with Perceptual.
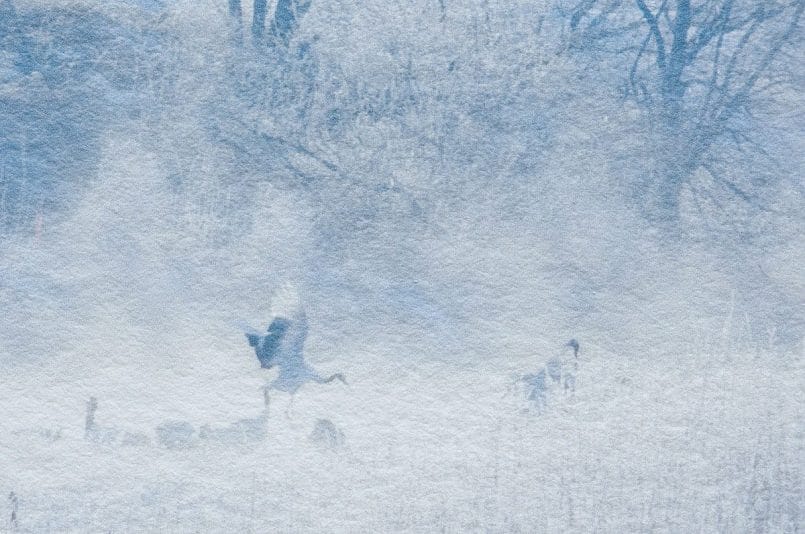
#2c Canon Fine Art Museum Etching paper printed with the Canon Museum Etching profile. Rendering Intent: Relative
Then, once again, in Print #2d (bel0w) we see the Canon Museum Etching paper with the Hahnemuhle profile, and the rendering intent set to Perceptual. This looks a little rough at this magnification, but as I say, this is a very nice print. I’ve actually already made both Photo Rag and Museum Etching paper based Fine Art prints available from my site now, based on these tests. One surprising thing is though, that these still don’t look as good as the Epson Professional UltraSmooth Fine Art prints that I’ve made so far, when viewed at this magnification.
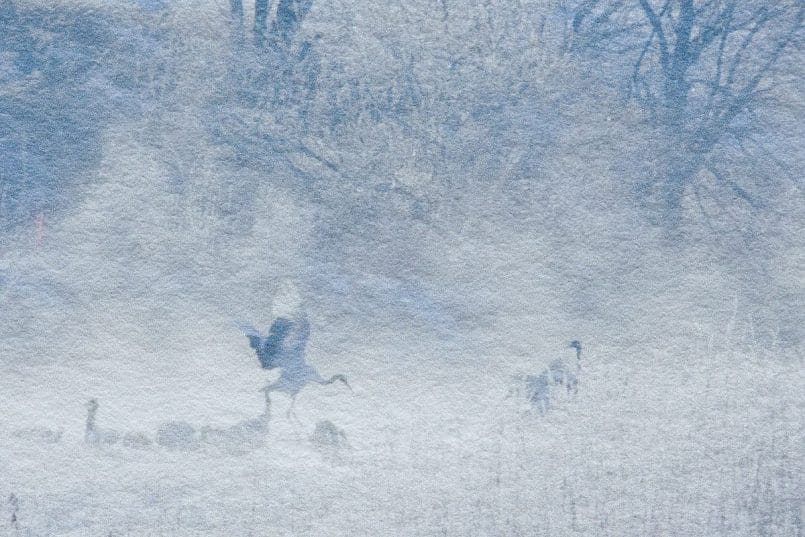
#2d Canon Fine Art Museum Etching paper printed with the Hahnemuhle Museum Etching profile. Rendering Intent: Perceptual
For a reference point, Print #2e (below) is actually just that. The UltraSmooth paper’s texture is actually closer to the Photo Rag paper from Canon than the Museum Etcthing, so for the best comparison you might want to hit the page up or the up arrow on your keyboard three times very quickly, to get back to the Photo Rag print with the Hahnemuhle profile, but I think you’ll be able to tell that the Epson print seems much more analog than the Canon print. The edges seem to be slightly better defined in the Canon print though, and definitely when viewing at a normal viewing distance, the Canon print does seem sharper.
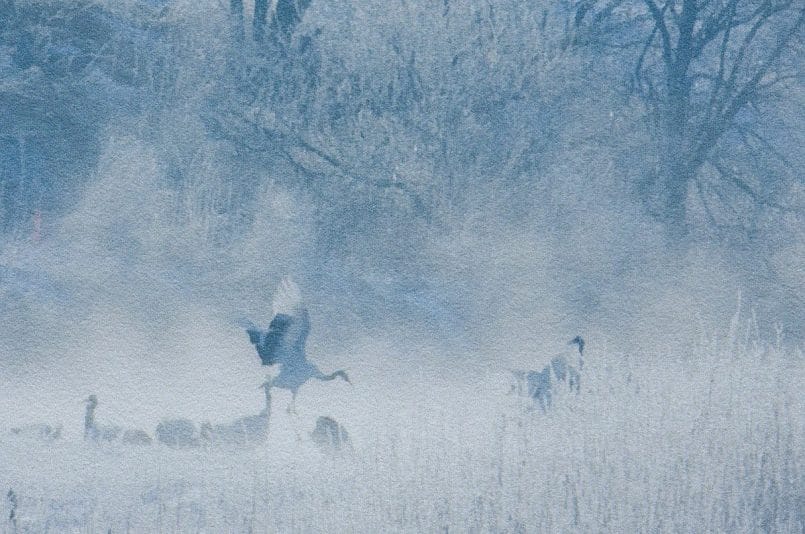
#2e Epson Professional UltraSmooth Fine Art paper printed with the Epson profile. Rendering Intent: Perceptual
Basically, for my immediate purposes, I am now happy to use these two Fine Art papers, with the Hahnemuhle profiles, and so I have updated my Web site to make Fine Art prints available on these papers. Some people though prefer to see images on gloss or semi-gloss papers, so I did a few additional tests to see what I could come up with on Canons papers, and this time, even using the provided profiles, though still printing from Lightroom and allowing Lightroom to do the colour management, I found the results to be quite pleasing, with little element of uncertainty. Of course, the gloss and semi-gloss papers have a much narrower dynanmic range than the Fine Art papers. Blacks are very black, and gradations much more compact, but if that is the sort of punchy image you want, it’s definitely an option. After a few more tests just to make sure that I’m OK to do so, I’ll be adding these two additional papers to my shopping cart so that people can also buy prints using these papers too. Of course, the price of the prints will be adjusted accordingly because these papers are cheaper than the Fine Art papers.
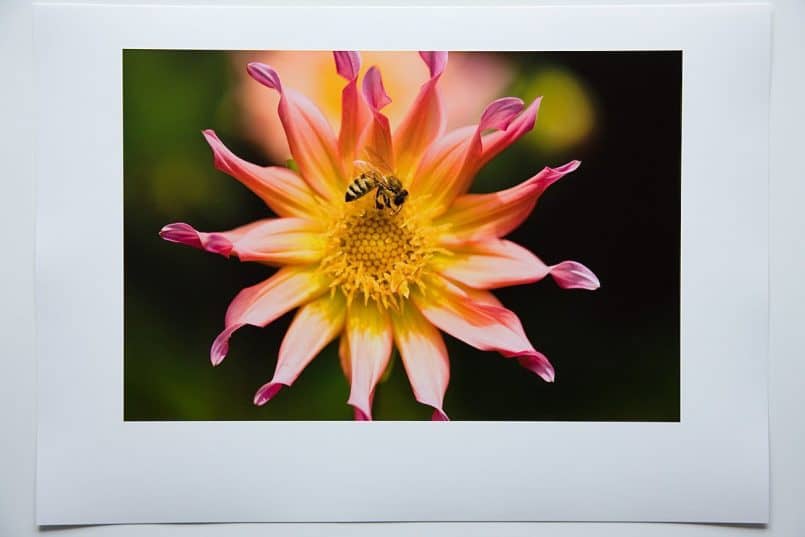
Anyway, let’s take a look at a few prints of a different image, including some of Fine Art papers and the gloss and semi-gloss papers. These are all prints of the following image.
We can see my test prints starting with Print #3a (below). This batch of prints was done on A4 paper. Again, I’ve used the 35mm top and bottom border, or the sides of a landscape format print, even when using the Hahnemuhle profile workaround, so that the sizes of the image on the page are consistent throughout. This first print, number 3a is done on Canon Fine Art Photo Rag paper, using the Canon profile and the rendering intent set to Relative. Now, for relative, this doesn’t look all bad. We have nice gradations in the bokeh and lots of dynamic range in the image. The blacks are nice and black, and the colors have reproduced well too, including the greens.
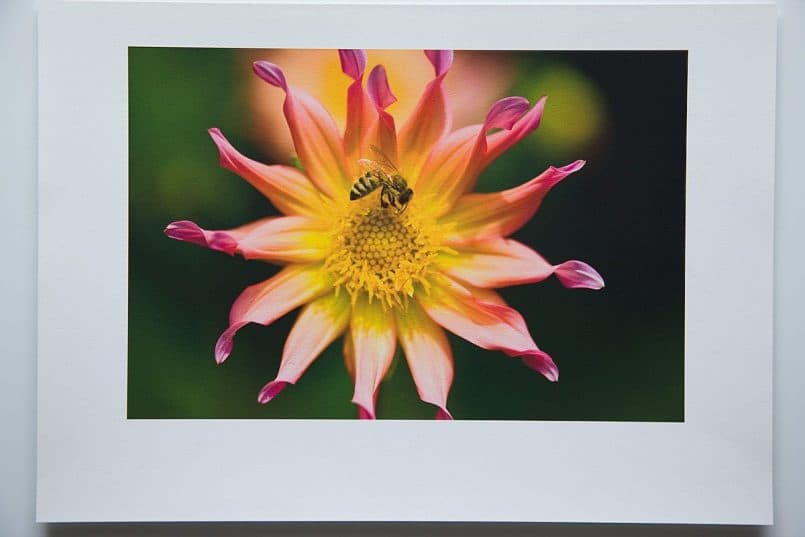
#3a Canon Fine Art Photo Rag paper printed with the Canon Photo Rag profile. Rendering Intent: Relative
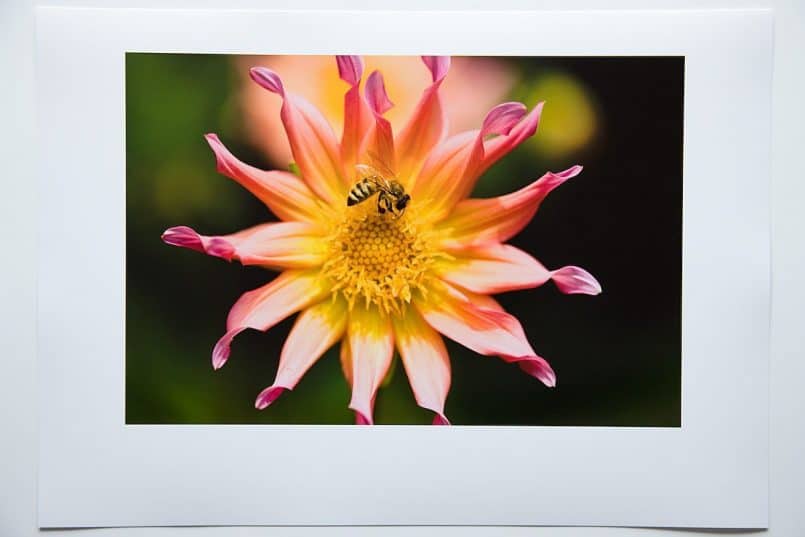
For print #3b (below), I used Canon Photo Rag paper, but this time used the Hahnemuhle Photo Rag profile, with the Rendering Intent set to Relative. Here, the photo is definitely not as good as the Canon profile print. The gradations are not as clean and the colors a little muted, especially in the green and pink bokeh in the background. This is not really surprising as Hahnemuhle suggests using the Perceptual Rendering intent, so these profiles were probably made with prints with the rendering intent set to Perceptual. I have not managed to find any detailed instructions on printing with the Canon profiles, so I’ve still not found what they suggest, but I’m starting to think that it generally should be set to Relative, although that does create overly bright prints much of the time.
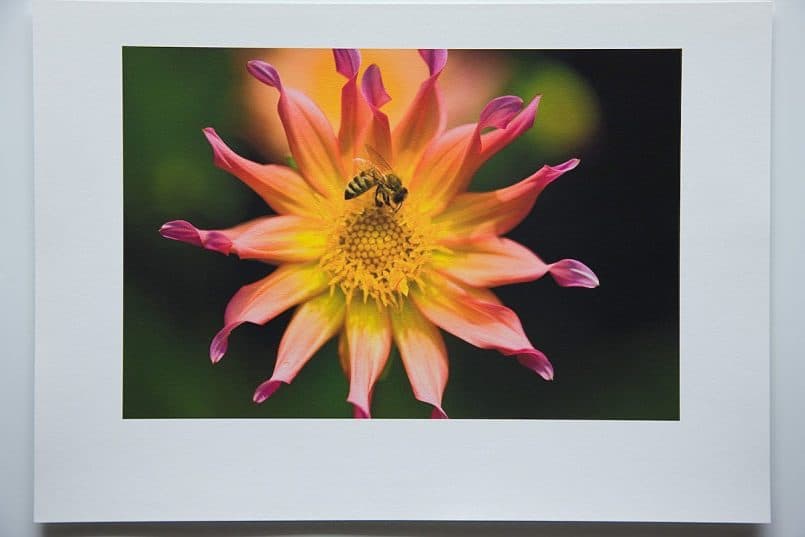
#3b Canon Fine Art Photo Rag paper printed with the Hahnemuhle Rag profile. Rendering Intent: Relative
We can see in Print #3c though (bel0w), for which I used Photo Rag with the Hahnemuhle Photo Rag profile, and the rendering intent set to Perceptual, that we have the most dynamic range of all three prints, and the bokeh, especially that ball behind the top right of the flower, seems to spread out a little more. Overall, this is my favourite of the three prints, and a close inspection with a loupe tell me that it is as sharp as when using the canon profiles and the paper set to Fine Art paper in the printer driver. Remember that when I’m using the Hahnemuhle papers, I am trying with the paper set to Matte Photo Paper, so that I can remove the 35mm border restriction.
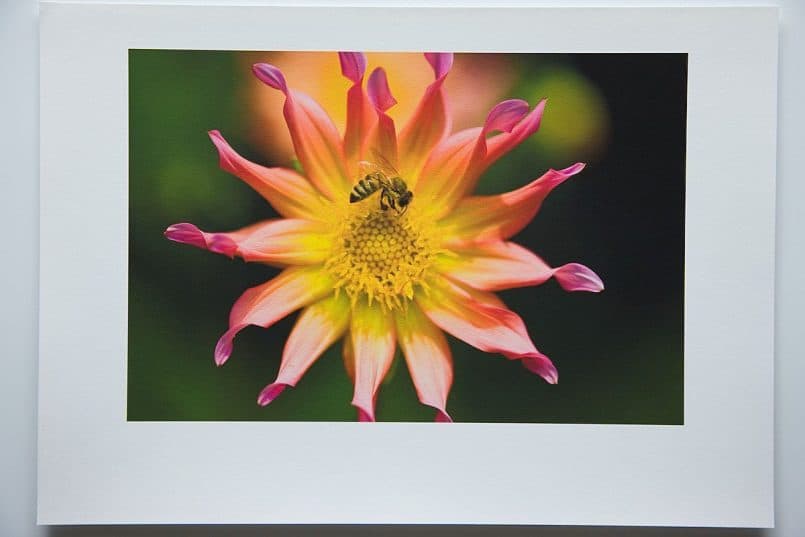
#3c Canon Fine Art Photo Rag paper printed with the Hahnemuhle Rag profile. Rendering Intent: Perceptual
In Print #3d (below), we can see a print that I made to the Canon Semi-Gloss Photo paper, using the Canon profile and semi-gloss selected in the printer driver. All Canon settings and as this has no 35mm border restriction, I can print with whatever size border I want, so I didn’t do any more experimentation. For this paper, the Perceptual Rendering Intent seems to do a nice job too, though the prints are much punchier, with deep dark blacks and compacted gradations. If you toggle between this and the last picture with your up and down arrows or the page up and page down keys on your keyboard, you’ll be able to clearly see how much more the bokeh spreads out on the Fine Art paper than on this semi-gloss print. Still, as a photograph I still think it has value, so as I say, I’m going to add prints using these papers to my shopping cart as soon as I’ve done a few more tests.
Print #3e (below) was done on Canon’s Gloss Photo paper, again with Canon’s profiles and the same paper selected in the printer driver and the rendering intent set to Perceptual. I’m pretty happy with this print too, for a gloss paper, which I rarely used before. We can see, especially if you toggle back and forth again with the semi-gloss version, that the gloss paper actually seems to have slightly more dynamic range, but still with nice, though somewhat compacted gradations, and good color reproduction.
The other good thing about gloss and semi-gloss papers is that they are often sharper under close inspection than the Fine Art papers, due to the nature of the paper, but I personally prefer to look at a Fine Art paper print, and under glass, there is no doubt in my mind that the Fine Art papers are better. The glass actually adds back a little of the gloss that the Fine Art papers don’t have any way. If you put gloss paper under glass, it can often be way too reflective, and you have to be much more careful where you place the prints on the wall to avoid reflections from windows and other light sources.
Anyway, that’s it. My conclusion is that my workaround for the 35mm border issue is valid, and also removes much of the guess work with the use of the rendering intent with the Canon profiles etc. The image quality is in general better with all the tests that I’ve done so far. As I said before, I’m sure that these paper profile combinations are not recommended by Canon but they are both tools available to us, so if you want to try it, please go ahead at your own discretion. I’m finally now though very happy with my new printer, and looking forward to creating and selling more Fine Art prints that will hopefully make people as happy if not even happier than the ones I’ve sold so far with my old faithful Epson.
NOTE (May 2012): I should note here that since 2010 I have been using a large format printer, the Canon imagePROGRAF iPF6350, and have continued to develop as a printer (someone who prints). I actually released a Craft & Vision ebook on printing in January 2012, in which I take the reader through the entire process of printing, color management and even creating gallery wraps and selecting fine art papers etc. You can find my book Making the Print and many other incredibly useful and insanely inexpensive ebooks at Craft & Vision.
Show Notes
Here’s the PDF file mentioned, with some photographs of a number of test prints that I did, but these are the same images embedded above:
http://traffic.libsyn.com/mbppodcast/mbp_canon_pixma_pro9500_printer_test_photos.pdf
You can see details of the printer on the Canon Web site here: http://www.usa.canon.com/cusa/support/consumer/printers_multifunction/pixma_pro_series/pixma_pro9500
There’s also a pretty cool flash page with lots of information about Canon’s professional range of printers here: http://www.usa.canon.com/app/html/proPrinter/index.html
Music from Music Alley: http://www.musicalley.com/
Subscribe in iTunes for Enhanced Podcasts delivered automatically to your computer.
Download this Podcast in MP3 format (Audio Only).
Download this Podcast in Enhanced Podcast M4A format. This requires Apple iTunes or Quicktime to view/listen.




Hi Martin
Many thanks for this work around. My printer was giving me hell by not printing to the size I wanted – the border problem!!!! I will certainly try this along with all the other information you give. (Wonderful what information you can get from the Web)
Best wishes
Mike
You’re welcome Mike! I’m pleased you found this useful.
hi, im here now at japan i used pixus pro9500 and the ink cartridge is PGI2., can i used PGI9 ink cartridge for pixus pro9500? thank you so much..
Hi Jun,
I believe you can only use the PGI-2* cartridges with the Pro9500. Here is the Canon page with this information.
http://cweb.canon.jp/cgi-bin/pixus/supply/product.cgi?pr=pixuspro9500
Dear Martin, I could kiss you right now!
Thank you so much, for solving a major problem for me, that I have been struggling with (on and off) for over a year.
I have a Canon Pixma 6250, with a similar large margin restriction.
A year ago, I bought some lovely Canson Infinity paper, to make high-quality prints of my artwork, but simply couldn’t get the colors right, and the margin would cut off some of the image. I have been so frustrated over this, so many times. The paper being quite expensive, and ordered online from far away, I was afraid to make too many tests and waste the sheets.
Your “Matte Photo Paper” + Perceptual intent solution worked wonderfully for me.
If there’s anyone else out there with a similar printer, please allow me to share the specifications:
– Printer properties – defined “Fine Art Photo Rag” icc profile
– Printer Settings – defined “Matte Photo Paper” + High Resolution + Rear tray
– Photoshop Print Settings – defined “Photoshop Manages Colors” + Perceptual intent.
(Print preview looked horrible, but the prints themselves are lovely).
Since reading your post 2 hours ago, I’ve already made several successful prints, on Canson Infinity Photo Rag 210g. as well as textured Aquarelle Rag 210g.
Canon should pay you for this post, for saving their frustrated & baffled customers 🙂
Many many thanks again!!!
That’s great Tulla! I’m pleased this was useful.
Thanks for letting me know, and for providing your settings etc.
Happy printing!