Today I’m going to talk a little about shooting through glass. This has been brought up a few times, and I have actually spoken about this in other Podcasts, like the ones from Chester Zoo in the UK and in my Podcasts in September 2007 when I shot a few images from a plane on my way back from India, but it probably isn’t easy to see where tips related to this are, so I thought I’d do a quick Podcast today on just this, having shot a nice nightscape through glass recently. Before we get on to that, I’d like to read out a reader’s mail.
I recently received a mail via my contact form from another Martin, which I’d like to read out for two reasons. The first reason is because it’s just a really nice mail. Although I get many nice mails from you kind folk out there, the second reason I want to read this one out in particular is because Martin seemed to end an invalid email, and I haven’t been able to reply and say thanks. I always reply to email, and would hate for Martin to think that I had ignored his. Anyway, here’s what he says. “Martin, thanks for your fantastic podcasts! I GREATLY appreciate the time and energy you put into this. I’ve recently moved to Shanghai for work and one of the best side benefits has been a rejuvenation of my interest in photography. My rekindled interest comes as a result of a desire to capture the strong culture that I find here in China. That’s how I’ve found my way here – to your MBP podcasts and this site. My Saturday morning routine now consists of a cup of coffee and listening to your most recent podcast before heading out to take try to capture the scenes. Your shots are a great inspiration to me because I find them to be a wonderful representation of the world around you without being overly processed with unrealistic colors. All the best to you and thank you again.”
Well, thanks very much for your mail Martin. I really appreciate it. I always find it a kick to hear that the work I am doing here on these podcasts being appreciated and helping people out, but also it’s great to hear actually how you listen to the Podcast. This adds another dimension that is really such a thrill. Thanks very much once again.
I’d hate to have not been able to reply to you, so I hope you don’t mind my reading your message out today. This has also prompted me to put a message on the thank you page after sending me a message via the Contact form page to remind people that if they don’t receive a CC of the mail, the chances are the mail address had problems. If you don’t receive a copy, please try again and double check the mail address you used. Now let’s spend a relatively short time to discuss how to shoot through glass.
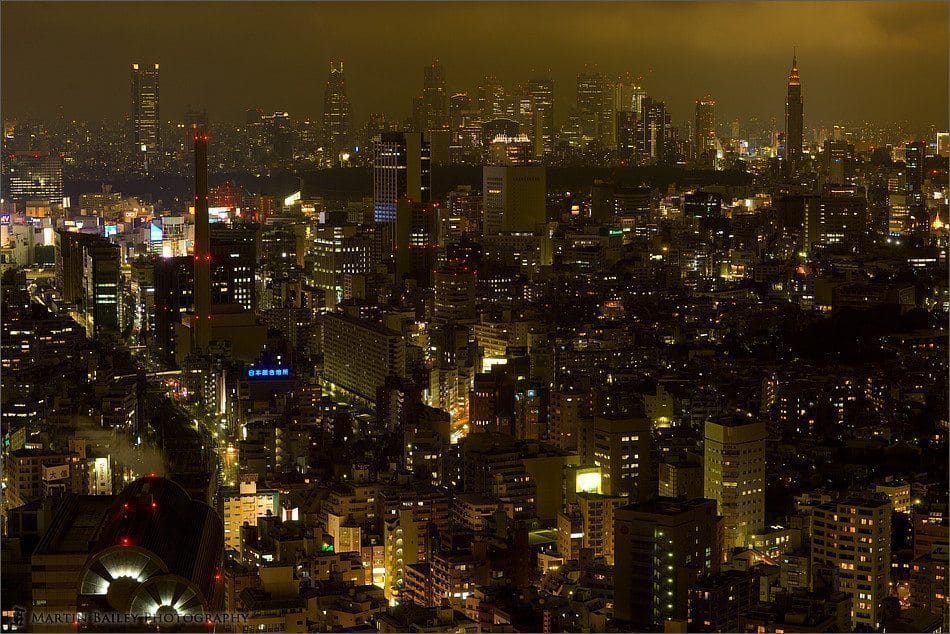
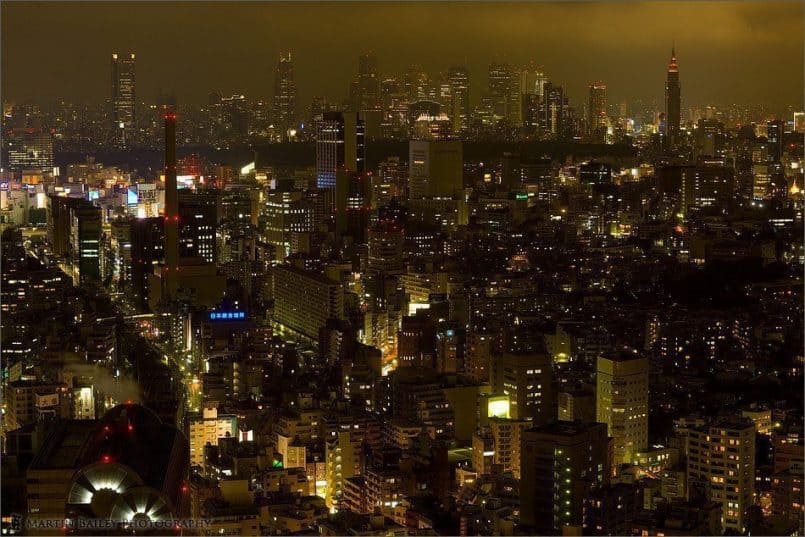
So, as I say, today I’m just going to talk relatively briefly about shooting through glass. Let’s start by taking a look at the Nightscape I mentioned that I shot last weekend, which is image number 1679. This was shot from the 39th floor of the Ebisu Garden Place Tower not far from my apartment in Tokyo. I was there to get dinner with my other half, and noticed that the rain that had just stopped was giving a nice hazy effect on the distant buildings in the Shinjuku area, and the still low cloud was reflecting the light from the city, so thought it would make a nice shot. I had my 85mm F1.2L lens on the camera, and the other lens I had with me was the 16-35mm F2.8L lens. I shot with the wide angle after the meal as well, but really find that this one we’re looking at now is my favourite.
I’ll get into the other considerations when shooting through glass in a moment, but something I wanted to mention before moving on is that I used the LiveView feature on the 1Ds to set the exposure of the scene, which is something I’ve not really been able to do until now, having never owned a LiveView camera before. There is a setting on the camera though to show the results of the exposure on the LCD, and not correct it automatically. This means that if your exposure settings will result in a dark image, the LCD will be dark, and if it is too light, the LCD will be too bright too. This is actually really quite useful. I ended up just selecting my aperture and shutter while viewing the LCD, and went with those settings without the need for a reshoot, even having looked at the histogram. I just thought this and the LiveView itself for that matter, was really useful, especially when you are not able to view through the viewfinder any way, as I was here.
By the way, I was shooting with ISO 200 and an aperture of F5.6, for 1.3 seconds for this shot. For those that are interested, the two arch shaped lights are the JR Train station in Ebisu, and the Empire State Building look-alike in the distance to the right is the Docomo Tower, a cell phone carrier’s building. I shot another image with Tokyo Tower in from the actual restaraunt window, but I don’t like it as much as this one, so we won’t bother looking at that today. Take a look in my online gallery at martinbaileyphotography.com if you are interested. I’ll drop a link to that image into the show-notes as well, just in case.
Anyway, when photographing through glass, there are three things that I pay attention too. You’ll want to try to find some glass with no reflections on it, especially from inside the room or vehicle that you are in. I find that when shooting from tall buildings like in the image we just looked at, there are often pillars that cast a shadow against the glass, which act as great shades. If there is none, try to find something else to shade yourself with, a little like the big black cloths that large format photographers use. Your coat can be good for this, and it really helps if there is someone with you that can hold the coat against the window and over your head and camera to create a nice dark space for you to work in.
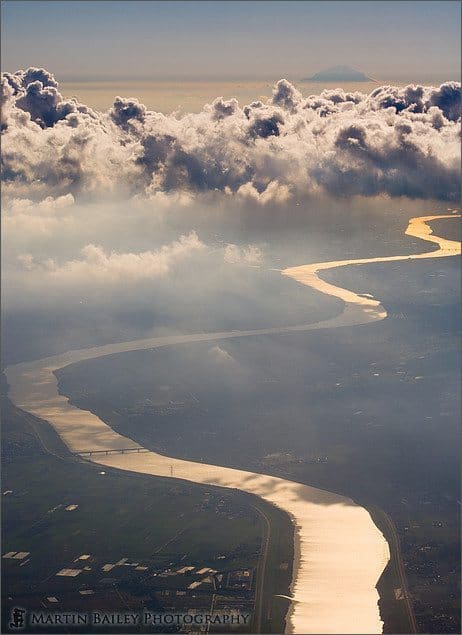
To discuss the next important thing to bear in mind, let’s take a look at another shot, image number 1549 from September, 2007, that I shot from a plane, obviously through the thick glass of the little porthole style window next to my seat. Here I think I mentioned in an earlier Podcast that getting as close to the glass as possible is a must when shooting through glass. If you can get right up close to the glass, and you are using a lens hood, particularly one that is black and non-reflective inside, as most of them are these days, you’ll find that this alone can often create enough darkness between your lens and the glass for you to remove any unwanted reflections. The 70-200mm F2.8L lens has a nice deep hood that gave me enough coverage to shoot this shot even with a fair amount of light hitting the plane window.
Finally, and this is a pretty obvious one, find a patch of glass that is clean. You can get away with a certain amount of dirt, especially if it is not illuminated by the sun or other light sources. Still, even on a relatively dirty window you’ll want to look for an area of the glass that is cleaner than the rest. Note here that the closer to the other side of the glass your subject is the more important this gets, as you will be focusing closer, making the dirt more visible. If you are going to be focusing much further away as I was in this shot, you can often get away with more dirt or marks.
Something to note with plane windows as well is that they often have a plastic cover on the inside, which plays tricks with a PL filter. If you want to play around with the effect, which can be fun, please do give it a try, but you’ll find that you get all kinds of rainbow colours in the plastic as you turn the PL filter.
Note too that for the nightscape that we looked at earlier, I didn’t use a tripod, despite it being a 1.3 second exposure. If you can take a tripod, and have space to set it up, that will work best, but even if I had taken mine, I would not really have been able to set it up, as the window had a large shelf, or platform in front of it. What I did was to kneel down in front of that platform and set my camera down directly on it. That however meant that the camera was facing downwards too much, as the 1Ds has the large battery compartment and vertical grip, much like using one of other bodies with a battery grip on it. What I did here was to take my blower from my camera bag, and put that under the lens to support it.
As you know, these blowers are soft rubber, and so not very stable, so you have no chance of pressing the shutter directly. It would make too much vibration. I even found that setting my camera to a two second timer with mirror lockup, to reduce vibration was not enough. The camera was just not settled in the two seconds that elapsed before the shutter was tripped. To overcome this, I was actually using the 10 second timer. I could have adjusted this to 5 seconds or so probably, but didn’t bother to do that. All of my other cameras until now didn’t have the ability to adjust the length of the long timer anyway, so let’s just think that 10 seconds is better than 2 for these long but somewhat instable exposures.
I should also mention that I have never shot through glass with a flash. I imagine if you got it right up to the glass as well, then it might work, or better still, get it off camera, and light the subject from another place, or maybe use multiple flash units. It’s been discussed on the forum in the past about this and maybe the possibility of actually putting the flash on the other side of the glass when the situation can be controlled, and of course, you are working on the ground floor. I try to steer clear of things I’ve not got first hand with though, so I won’t try to go into this today.
Well, that’s it for today. Before we finish just a quick word from our current sponsors, DxO Labs.
DxO Optics Pro sets the standard for automatic correction of your digital images. Based on extensive analysis of cameras and lenses, this award-winning software enables photographers to improve hundreds of images very quickly, saving time and providing spectacular results. Version 5 of DxO Optics Pro runs on Mac and Windows. Version5 which has only just been released incorporates a new generation RAW converter providing more details, and less noise artefacts, for a new level of image quality.
Remember too that our current Assignment with the theme of Long Exposures closes this coming Sunday on January the 20th, 2008. Voting will then start for two weeks when we’ll find out the winner of this Assignment and also the winner of the accumulated votes prize for the last five assignments. That winner will receive a copy of DxO Optics Pro and the Film Pack from DxO Labs. Of course the Long Exposures winner will also get a Fine Art Print of their choice from my online gallery at martinbaileyphotography.com.
And that’s about it for today. So with that, all that remains to be said is thanks for listening, and you have a great week, whatever you’re doing — Bye-bye.
Show Notes
The music in this episode is from the PodShow Podsafe Music Network at http://music.podshow.com/
Subscribe in iTunes for Enhanced Podcasts delivered automatically to your computer.
Download this Podcast in MP3 format (Audio Only).
Download this Podcast in Enhanced Podcast M4A format. This requires Apple iTunes or Quicktime to view/listen.


0 Comments