Welcome to episode 50. Well, I’ve been looking forward to this episode for some time, as with this we’ve hit the 50 episode mark! That’s 50 weeks of the Martin Bailey Photography Podcast! I want to thank all of you that keep on listening. One of the things that I constantly hear from listeners is that you appreciate the tips that you get from my experiences in photography via this Podcast, that are applicable to your own photography. From today for a few weeks I’m going to take a brief look at each episode to date, and give a brief mention of what was discussed and mention one or two of the main points of that Podcast. I won’t be able to cover all the tips and techniques of course. To do that, you need to listen to the original Podcasts. But kind of to celebrate the achievement of reaching the 50th episode, I’m hoping this will be a way to not only condense the main gist of what I’ve covered so far, but also give new comers a brief outline of what is in the archives. There are going to be many more pearls hiding in the old episodes, but with so much listening time needed to catch up, it’s hard to think of where to start. Hopefully this will give you some pointers.
As I go through them, I’ll also talk about how things have changed since I first spoke about any particular tip or technique as necessary, so it’ll be kind of like a condensed update too. I’ll be as brief as possible, but I’m still going to need two or three more weeks to cover everything to date, along with updates, so please bear with me. Hopefully it will be worthwhile.
First though, before we go on, although I usually leave housekeeping to the end of the show, today I want to share some great news with all of you about one of our long time members. Normally I check my email before starting to record an episode but last week I was a little pushed for time and decided to just go ahead and record it first. I really regretted this as it meant that I had to wait a whole week to tell you this news. Many of you will know Graham Morgan, user name N.S.W. Graham is a long term member of the community, and I’m really pleased to tell you that he has recently won two prizes in the Australian Wildlife Photography Competition!! In fact he has not only won prizes, his image “Gannets at Berrara” WON, that’s FIRST PLACE in the Interpretative section and his image “Entrance at Sunrise” took second place in the Landscape section.
I did start a post straight after receiving an email from Graham, and congratulations have come flooding in, but I just wanted to say a huge “CONGRATULATIONS” to Graham in the Podcast itself. Graham often tells me how happy he is to be a part of the MBP family, but I can tell you Graham, you’ve definitely done us proud. I hear that the competition is open to professionals and amateurs from Australia and New Zealand and gets wide publicity, as it is their most prestigious Wildlife Photography Competition. The winning images will be published nationally in the weekend press on September 17 and Graham’s images along with the other short-listed entries will become part of an exhibition that tours the country and will be published in a book! I know that Graham is thrilled to bits with his wins, and I am so happy for you, as I’m sure the other listeners will be. Once again, congratulations Graham. A well deserved win for your amazing images.
OK, so on with today’s main topic and a few of the tips from the last 49 episodes. I’m going to go through these in chronological order, starting with oldest first, and not in order of importance or usefulness, as it will really depend on the individual what is more useful or important. I’ll include some but not all images from the previous episodes too, but if you want to see all examples and haven’t listened to the original episode, it would perhaps be worth going back and listening to the original episode for more details.
So on to the first tip – Way back in Episode 1 I touched on a rule of thumb you can use to avoid camera shake, and I referenced image number 595. Basically, if you use a shutter speed the same or faster than your lens’ focal length you should be able to hand hold your camera without introducing camera shake. For example if you are shooting at 100mm you should use a shutter speed of 1/100th of a second or faster. If you are shooting a digital SLR that does not have a full size sensor, you will also need to increase the shutter speed due to the crop factor, which might be 1.3, 1.5 or 1.6 depending on your camera. So if say you are using a Canon EOS 30D, you’d have to multiply the focal length of 100 by 1.6 to get 160. In this case 1/160th of a second should be your slowest shutter speed. Of course, Image Stabilizer or Vibration Reduction will give you longer hand held shutter speeds of 2 to 3 stops, and more for some new lenses, so you can bear this in mind when the feature is turned on. Don’t be fooled into thinking that Image Stabilizer is a magic bullet though. Subject Movement can still get you if you are shooting something that moves.
Tip number two is from episode 2, when I discussed a few tips to get a firm posture when you have to break the rule I just mentioned in tip number one, and we referenced image number 584. Firstly, the basics of holding a camera are a given, like supporting it with both hands, and especially if it’s an SLR, one hand around the camera grip with your finger on the shutter button, and the other under or around the lens, I prefer to support the lens with my hand cupped underneath it, palm up with my thumb pointing forwards, so that I can not only support the lens, but also fine tune the focusing as necessary.Also standing with your legs apart makes you more stable. There are various schools of thought with regards to how to position your legs. Depending on the subject and more importantly the equipment I’ll sometimes stand with my legs parallel to the film plane either side of me at shoulder distance, which would make them 90 degrees off from the lens axis. This works well for shorter lenses that don’t need much supporting. Other times, like when I’m using a longer, heavier lens, I’ll stand kind of sideways on to the subject, with my left leg out in front of me with the foot pointing towards the subject, and my right leg slightly behind me, and my foot pointing 90 degrees to my right. My torso is probably actually around 45 to 60 degrees from the film plane to the lens axis, which you can think of as the imaginary line drawn through the centre of the lens’ cylinder, out towards the subject.
Having a good firm stance or posture to start with will definitely help, but sometimes, even having raised the ISO to an acceptable limit, using a wider aperture, using Image Stabilizer and all other technology at your disposal, there are times when you just can’t get a fast enough shutter speed to avoid camera shake using a tripod or monopod is not an option. The first thing is to find something rigid to support you. A tree, lamppost or wall to lean against can help a lot. Get into your normal stance and then lean your weight against the tree or wall, and you’ll find that you can hand hold to much slower shutter speeds. If there are no walls around, and you don’t need to be standing upright, or better still as with the example I used in this episode, you want to be low down, I tend to kneel with my right knee on the floor and my left leg bent to form a right angle in front of me, a bit like I was about to propose to someone. This way, you can rest the elbow of your left hand on your left knee and support your camera or lens with your left hand. This was actually the main tip from episode two. I’m getting a bit carried away going into so much detail about the basics of holding your camera etc. The other thing I mentioned was also mentioned in future episodes too, but shooting in bursts when you’re concerned about camera shake will also help to get a few good shots on many occasions, as long as the shutter speed is not really just too slow. I also didn’t mention this in episode two, but I find literally just sitting down cross-legged with my elbows resting on my knees or even laying down like a sniper can also make for a very firm shooting posture. I often carry a large plastic bag around me when shooting now to keep myself relatively clean and/or dry when having to do this.
In episode three I discussed seeing shots, and I also touched on this in the last episode two, but basically, the tip was to look around you when out shooting. Being alert and looking for every photographic opportunity is very important and not something that comes naturally to everybody, but in addition to that, turning around from time to time to see what is happening behind you can really increase your chances of getting a great shot that others might miss.
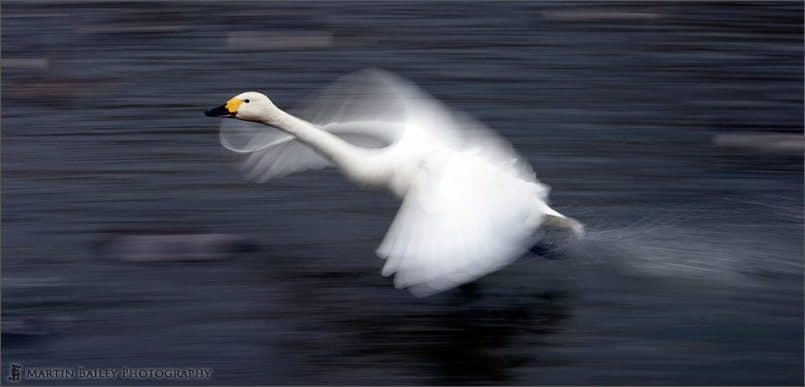
In episode four we discussed Panning, looking at image number 198 among others. Panning is when you track a moving object with your camera, most often horizontally, and shoot at a slow enough shutter speed to cause the background to blur. The main effect on shots made with this technique is that they give the impression of speed and/or movement. The tricky part is to keep the subject or a part of it crisply sharp against the blurred moving background. In the image of the swan in flight we can see that the head is pretty much sharply focussed. The shutter speed needed to blur the background in a panning shot will vary depending on the focal length you’re shooting at, but with a standard zoom lens a shutter speed between 1/10 and 1/15 of a second should do the trick, and it helps if you have image stabilizer with a mode specifically for panning. I used my old 28-135mm IS lens for the swan image and it only had one mode, and did not have a panning mode. With longer lenses though, you can get a blurred background with my fast shutter speeds. In fact once you get over a few hundred millimetres, it’s best to experiment with faster shutter speeds or you might not get any shots with the subject or part of it in focus. With that in mind, if you are going to try panning, I suggest just shooting lots and lots of images. Not only will this increase your chances of getting a winner, with this technique, as with most, practice really does make perfect. The more you do it, the better your results will be.
In episode 5 I did a review of the Canon EOS 5D which I received just a few days before the Podcast. There were not really any tips in this episode, though I touched on areas like using the RGB histogram and the spot metering etc that was now available to me. I also recall panning the Landscape Picture Style because it over saturated bright colours, especially reds, but now you’ll know that I pretty much have my camera set to the Landscape Picture Style all the time now. I just deal with the over exposed individual colours as necessary now, preferring the nice saturated colours that remind me of Fuji Velvia positive film from my film days.
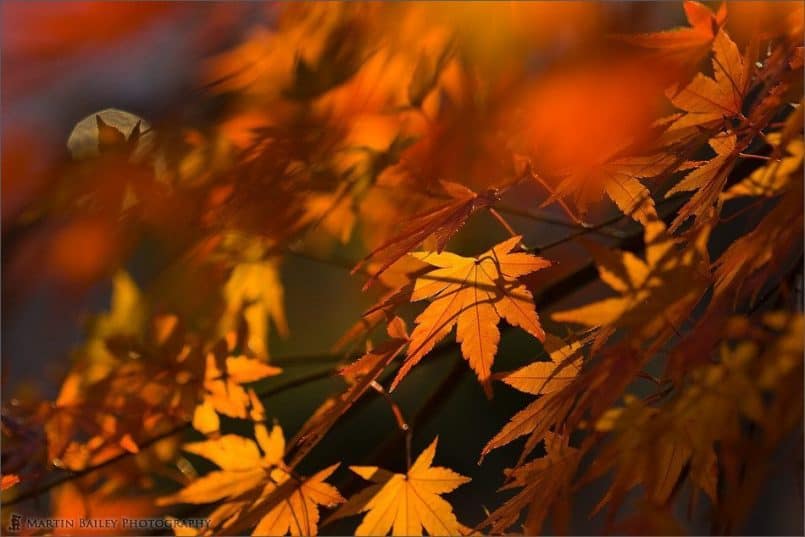
In episode 6 I touched on using Bokeh effectively in your images, and the first example image I used was number 559. Bokeh as you know is one of those words like tsunami that have made their way into the English language, and it is used to describe the blurred areas of an image that are outside of the depth of field. If you have followed my work over the last year you’ll probably see that I use wide apertures quite a lot to give an image a soft dreamy look, especially flowers, where I often only leave just a tiny part of the flower in focus. As I upgrade my lens arsenal to include more lenses with wide apertures, I’m finding it more and more possible to do this, which might be a little frustrating for people that don’t like this style of shot, but I definitely do like it and will continue to employ this technique. More so with this episode though I talked about purposefully including items like the leaves in the foreground to add patches of translucent colour to the image to increase the feeling of depth and overall aesthetic.
In episode 7 I discussed the controversial aspect of not giving away your artwork. I am still very much against people just giving up their images for free, as this is damaging the market for images, but the more I get into selling my own images, both in the form of prints from my Web site and commercially, the more I have to come to terms with the reality of the current market. I will never sell myself short, and will continue to negotiate my price for commercial work, but the cost brackets are definitely coming down. Having listened to the opinions of others, including Brooks Jensen in his LensWork Podcast and LensWork Extended on CD, talking about the false elitism and issues around the pricing of photography, I have in fact more than halved the cost of prints available from my Web site. I can’t go quite as low as Brooks does and I still don’t know how he does it, but I have changed my opinion on this enough to modify my own pricing substantially. My basic message still stands that if I am approached by someone that wants to use my work in any way that will bring them financial gain, I will work with them to negotiate a fair price. If that negotiation does not result in my getting that price, I walk away with my price in tact. The problem now though, is deciding what that price should be. The truth is though I’ve sold three times more prints since lowering the prices. Brooks is right, as usual, and staying in tune with the times and not pricing yourself out of a changing market is also very necessary for your survival. I don’t know if Brooks listens to this Podcast, but Brooks if you do, many thanks for your constant words of wisdom. I enjoy your Podcasts and now Extended CD as much now as when it first enthused me enough to start Podcasting myself. If any of your don’t yet tune into the LensWorks Podcast, I suggest you check it out in iTunes or check out both the Podcast and the LensWork Extended CD at lenswork.com.
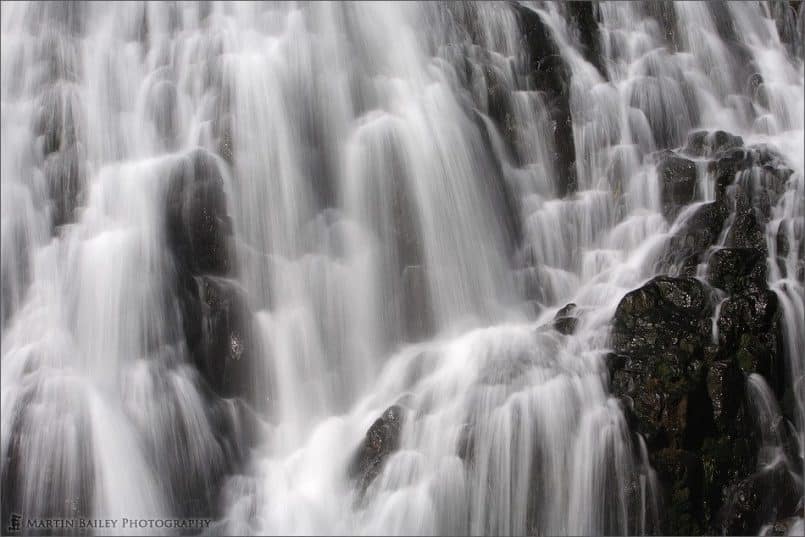
In episode 8 we looked at getting in close in your landscapes. This really pretty much goes for most photography. How many shots do you see, say family snaps even, where the gang is all lined up for the “hey, here we are in Disney Land” group photo, and there’s about 40% of nothing above everyone’s heads? This would be fine if the background was also interesting, but more often than not it’s just sky. If you want to photograph the sky do the landscape shot. If you want to photograph your family in Disney Land, take a few steps forward and fill the frame with them. The shot will have a lot more impact. In the context I mentioned in Episode 8, and have mentioned a few times since, taking a telephoto with you when shooting landscapes will improve your landscape work no end. Shoot the vista. The sweeping landscape is always going to be beautiful to look at when done right, but also do what the human eye does subconsciously, that is, isolate parts of the scene that you find interesting, and close in on them as I often do, like with the steps of the waterfall in image 1095 that I mentioned in episode 49 as well.
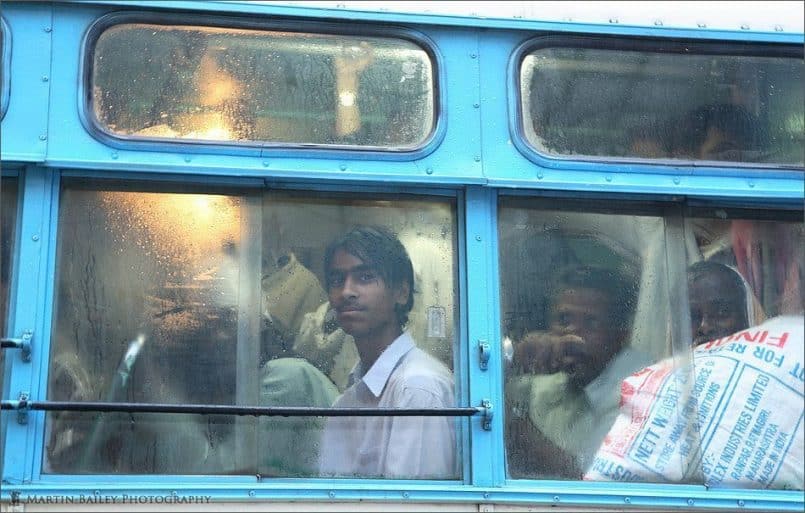
In episode 9 I discussed for the first time my weakest photographic genre, which is environmental portraiture. I try to shoot portraits sometimes, especially when I’m in locations away from what I consider the norm. Many people have told me that they envy the fact that I live in Japan, and I know that I’m throwing away a lot of chances pretty much concentrating on nature photography while I’m here, but having spent almost 13 of the last 16 years here, the Japanese people don’t seem very different to me than myself, although I’m from the other side of the world. So for me, the environment that sparks the most portraiture is India, and the images we looked at in episode 9 were all from there. One of my favourites from the trip was image number 717, and the advice linked to this image was in the interaction with the young man on the bus in the moments before I shot this image from a car on a rainy afternoon. I saw him sitting on the bus and opened the car window to get a better look. We made eye contact and I smiled and showed him the camera and gestured that I want to take a photo, holding the camera up and nodding my head towards it. He showed no objection, and as I raised the camera to my eye, he gave me that wonderful smile. I got two good shots. This was the first and the one after was slightly blurred and he was smiling more. I also got two more as the bus started to pull away that were useless. The point was twofold. Firstly, although the fear of rejection is always in the forefront of my mind when shooting portraits, I always now get either verbal, or in cases like this where it’s not possible, visual permission to shoot the subject. The second thing is I think the initial eye contact to display my intentions to the young man helped to create a connection that I think resulted in possibly the best photo of the trip. There was probably not more than ten seconds between looking out of the window and seeing the shot, to getting permission and shooting it before the bus pulled away, but it made all the difference.
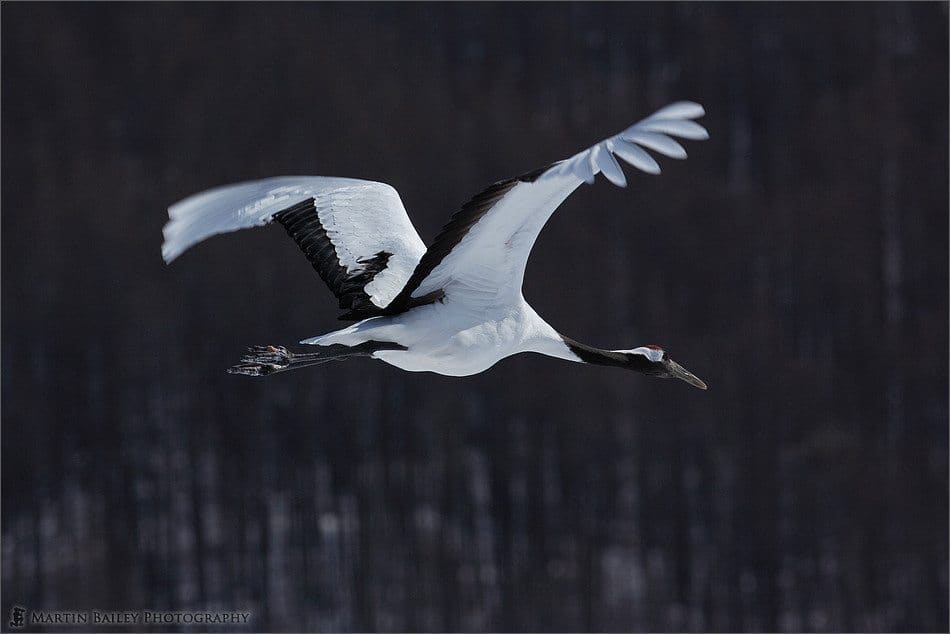
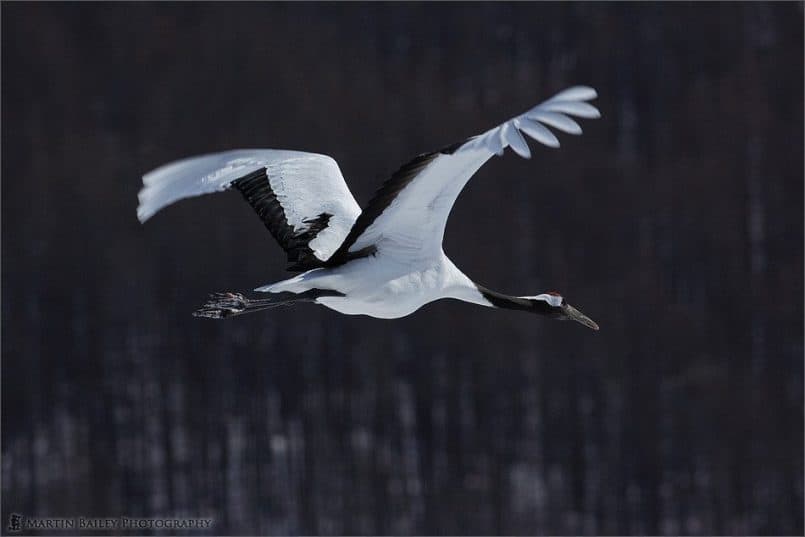
In episode 10, I went into shooting in Manual Mode. As with most things, I’ve touched on this again a number of times since, including during a recent Podcast from Oirase and in my Podcasts from my February trip to Hokkaido. Basically, as in image number 841, from my trip this year, when you are shooting a subject that might move between areas of extreme contrast, it’s better to switch to manual mode, if you usually use aperture or shutter priority, or even the program mode. What you need to do is get a meter reading for the subject you want to be correctly exposed. In this case, the white of the Japanese Red-Crowned Crane needs to be white, and the black needs to contain detail, and not have any detail lost in the shadows. Also, if I was to shoot scenes like this in aperture priority mode, the camera would give me a much slower shutter speed for my aperture when the bird flew from the white snow background to the dark background of the trees, and the whites would blow out totally, loosing all detail. The best thing to do is to get a meter reading you can trust and use that in manual mode, keeping your eye on the amount of available light if you are working outside. In this case, I took a reading from the white snow, because I know that white snow on a relatively bright day will require plus 1 and 1/3 to 1 and a half stops of exposure compensation to stop the white from going grey as the camera tries to render the scene like an 18% grey card. You can either get this reading in aperture or shutter priority modes then switch to manual, or go straight to manual if you camera shows the amount it thinks the scene is over or under exposed in the finder, and then adjust the aperture and shutter speeds as necessary, until the needle points to 1 and 1/3 of a stop over zero. If you are using a digital SLR you can check the histogram to see if there are any flashing areas indicating that the white is or is close to blowing out, and fine tune as necessary. As I shot the cranes in manual mode after this, it didn’t matter what background they stood or flew against, because I know that their reflectivity is about the same as the snow, and I so they would not get blown out as they flew against the dark background. If you are shooting anything where the background contrast can cause problems, getting your metering done in advance using the histogram if you have one and then dialling that in, in manual mode, will save a lot of pain later trying to rescue detail from highlights or shadows due to back exposure in the field. Remember that getting it right in the field is the key to good quality images at the other end of your workflow.
I also went into detail about calculating Exposure Values in episode 10 to help when shooting in manual mode, including how to quickly calculate how much to raise change the aperture if you need a different shutter speed or ISO for example. This subject takes a fair bit of explaining though, so if you are not comfortable with calculating shutter speed, aperture and ISO shifts, go back and listen to episode 10 for a full explanation.
Next week I’ll try to be a little more concise and will continue to skip the lesser tips. I’ll try to keep this down to two, or a max of three more episodes. Remember though, if you heard anything today that sounds useful or interesting today, the old episodes are all still there in the archives, so you can go back and listen to any of them again at your leisure.
One more piece of housekeeping for today is a reminder that the Depicting Culture assignment is now closed, and voting has started until September the 3rd. I’ll be announcing the winner in the next Podcast after the 3rd.
Have a great week whatever you do. Thanks very much for listening. Bye bye.
Show Notes
Music from Music Alley: www.musicalley.com/
Subscribe in iTunes for Enhanced Podcasts delivered automatically to your computer.
Download this Podcast in MP3 format (Audio Only).
Download this Podcast in Enhanced Podcast M4A format. This requires Apple iTunes or Quicktime to view/listen.

![The Pink Flamingo's Stare [C]](https://martinbaileyphotography.com/wp-content/uploads/2013/07/Flamingo_7021-805x537.jpg)

0 Comments