
Welcome to episode 49. This will be the last in the series of Podcasts covering my travels around Oirase and Hokkaido in July 2006. I’ll explain the importance of sticking with a subject on multiple visits to get what you want, with real-world examples as usual. If you haven’t caught the first episodes of this series, although I’d say each one will be of interest in a standalone format, you might want to go back to episode 46 where I started this trip in Oirase in the Aomori Prefecture at the northern tip of the main island of Japan, or from 47 in which I cover activities since making the crossing to Hokkaido, the very northern most island, and the part of Japan which I personally find the best place to be for nature photography.
After the amazing morning on Mount Asahi that we finished on last week, it was time to take a steady drive over to Utoro on the Shiretoko Peninsula. If you’ve been following this Podcast for a while you’ll probably have heard me mention before that Shiretoko is registered as a Unesco World Heritage site. There are two towns on the Shiretoko Peninsula, one on the north-western shore, which is called Utoro, and one on the south-eastern shore, which is called Rausu. Rausu is where I shot the eagles that we looked at in Episode 27. In Episode 28 you might remember that we looked at a partially frozen waterfall, and that is just outside of the town of Utoro, where I plan to stay today.
The main reason I came over to Shiretoko on this trip was to go out on a Boat on the following day, which would be July 20th, but today, I wanted to revisit the Oshinkoshin falls in the hope of bettering my previous attempts to capture the beauty of this spot. I first shot the Oshinkoshin falls back in August 2003 during my first visit to Hokkaido, but the overcast skies on the day left the shot falling short of what I had visualized. I’m not going to include it in this Podcast, but you can take a look at image number 165 on my Web site to see the results. Remember that to view images by number, you can go to martinbaileyphotography.com and input the number to the small field at the top of the top page or the Podcasts page and then click the orange button to jump to the image. If you do look at image 165, you’ll see a shot that is actually two vertically shot images stitched together. I had to do this as I was shooting with my 10D at the time which has a 1.6X crop factor, and even the 17-35mm F2.8 lens could not fit the entire falls in the frame, because it is not possible to step any further back away from the falls.
I went back to these falls as I said in February this year, and got a nice shot of them partially frozen, with a nice blue sky, but I really wanted a few clouds in the sky to break up the blue, and also the time I visited in February was quite early in the day, and coupled with the low angle of the winter sun, you might remember that the bottom of the falls were in shadow. Again, I won’t include this image today, but if you want to see the results of the February shoot, take a look at image number 935. The first image that I’ve included in this weeks Podcast is the shot that is pretty much what I originally visualized in August 2003, and is image number 1091. Here we can see an image from pretty much the same vantage point as the first two, but this time I didn’t need to stitch two images together. I was shooting with my Canon EOS 5D, which is a full frame sensor camera, so using the 16-35mm F2.8 lens I was able to fit the entire falls in the frame. This is one millimetre wider angle than my old 17-35mm lens, but the main factor is that I didn’t have to contend with the 1.6X crop factor of my previous digital SLRs. More importantly for me on this day though was that I had arrived shortly before 3PM so there was no shadow across the base of the falls, and I was lucky enough to get the sky that I’d been hoping for, with a couple of wispy clouds to break up the blue.
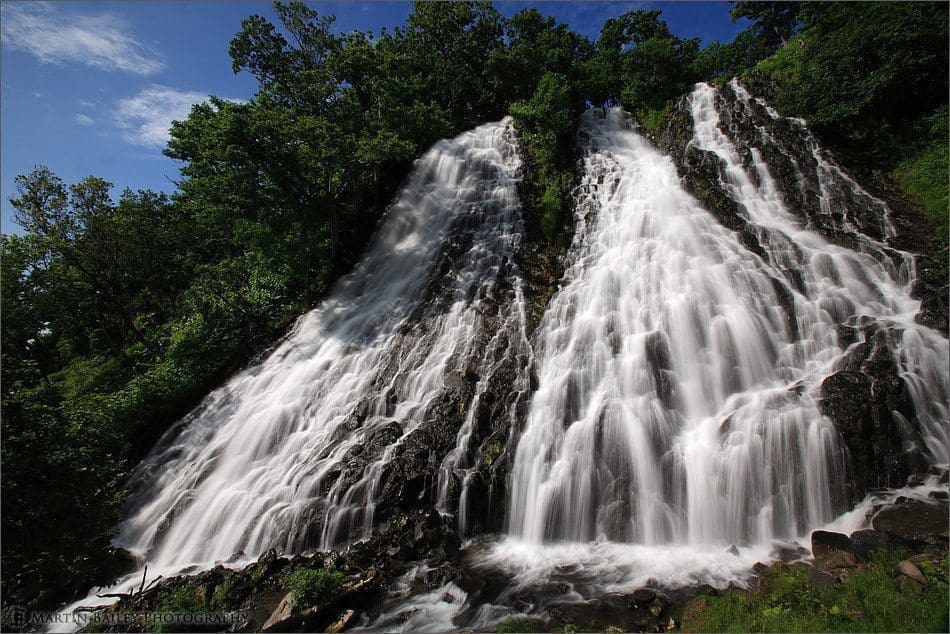
Oshinkoshin Falls Summer 2006
I did use a Circular Polariser filter to make the sky just a bit bluer, but also to reduce my shutter speed by two stops to give the water that flowing effect. To increase the shutter speed even more, I stopped the aperture down to F22 and selected ISO 50. The result was a shutter speed of 3/10ths of a second. As I experiment more with flowing water, I’ve pretty much come to the conclusion that you need 1/4 of a second or slower to get the effect that I like, so 3/10ths was going to be enough. Another thing that I like to do when confronted with a scene is see if there are any areas of the scene that would make for a good image if picked out and shot close up. In the next image, number 1095, we can see an example of this. Here I’ve shot a part of the center of the right side of the falls with the same F22 and ISO 50 for a slow shutter speed, this time of 1/4 of a second. As I say, one quarter of a second is about the limit to get the water looking like it’s really flowing. I find that this shutter speed does leave a fair amount of texture in the water though, instead of making it totally silky. I composed this image with the dark almost fully revealed rock in the left third intersection, but with the patch of rock to the right along the edge of the frame. The water running along the far right allows us to see that there is more waterfall to be seen, though leaving it to the imagination. The water in the center of the frame hits that small ledge that works its way diagonally down through the shot from the rock on the right, leading our eye through the shot and out of the bottom along with the water. Because of the various ledges in the rock throughout the image though, we can find lots of areas to go back to, keeping the image interesting, despite its overall simplicity. The tip here would be then as I said, when faced with a scene, don’t just be satisfied with the whole picture. Look for small areas or details that will make for a nice image all by its self. I shot this image at 70mm so you would not have needed to carry around really long lenses just for this, but a nice medium to long telephoto lens, if you have one, does help in most other situations for getting in that bit closer.
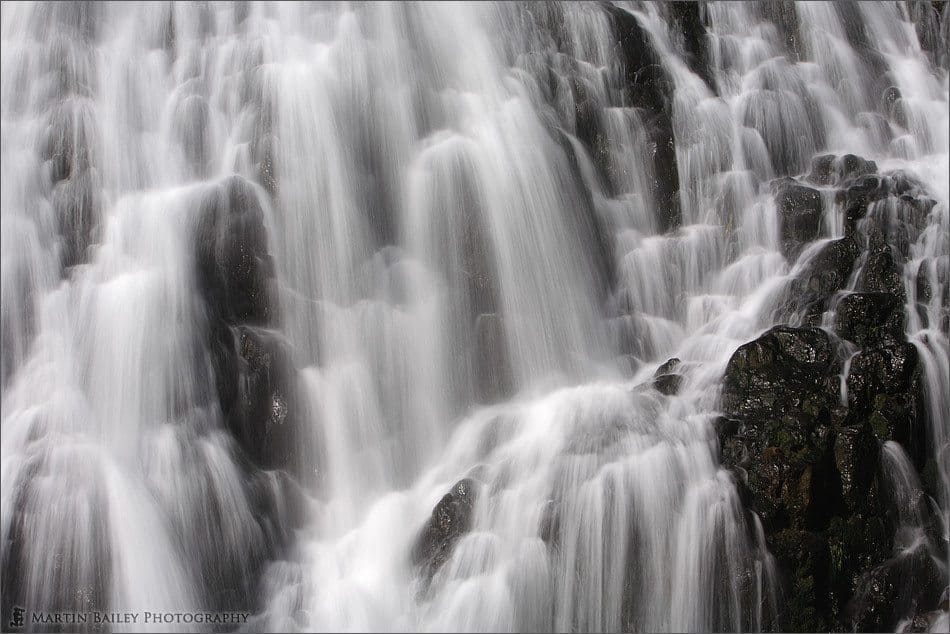
Ballet of Water and Rock
Once again, on my first visit to this area in August 2003, I shot an image that I revisited today. Although I was relatively happy with the original, it was not what I visualized, and I wanted to better it. Again, not included in today’s Podcast, image number 166 is the first attempt to capture two rocks that I noticed jutting out of the Okhotsk Sea on my way into Utoro, just after the Oshinkoshin Falls we just visited. When I first spotted this scene I shot a number of images including 166 which basically had the sun still quite high in the sky, but I exposed for the highlights throwing the rocks into silhouette. At this point though I visualised another image that I wanted, which was a sunset between the rocks. Enough sea is visible through the rocks to make this a sunset with a difference. I went back o the same day shortly before sunset, and although there was heavy cloud on the horizon, I hung around in the hope that the cloud would break for a moment or two, but it didn’t happen. On this visit, once again I went back to the same location at sunset in the hope of getting another shot, and the result is image number 1096. The sunset itself was not great, but there was enough red light reflecting from the nearby clouds, and the sun itself was only hidden by cloud on the horizon for the last degree or so of its path across the sky. And more importantly for the shot I’d visualized was that the suns reflection on the sea was just what I wanted. In my first attempt at shooting this location I’d had to shoot with a wide angle as the sun was still quite high in the sky, but this time I was able to close in on the subjects that initially drew my attention, which are the rocks. You can see that I’ve cropped very closely to the top of the two rocks in the top of the frame, and I included just about the same amount of space in front of the two small rocks in the sea at the base of the image. There’s roughly the same amount of sea visible either side of the rocks too, though the top of the left hand rock is a little closer to the side for overall balance.
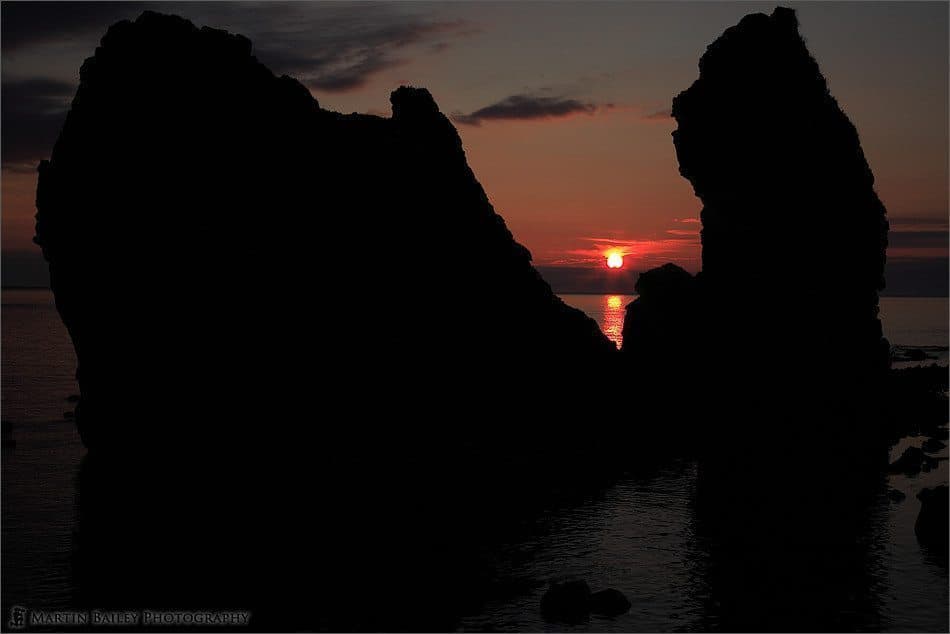
Rausu Sunset Between Rocks
I had focused on the edge of the rocks to make sure that this line was sharp, but as I used an aperture of F16 at 58mm the hyperfocal distance is 7.1 meters or 23 feet, which basically means if I focus at anything past that, everything from there on out will be in focus, so the sun and it’s reflection, plus the clouds and everything are all in acceptable focus too. The shutter speed at F16 with an ISO of 100 was 1/100th of a second. This does initially seem a little dark, especially in the Web version, but the brighter versions I also shot loose the atmosphere that I was after. Basically, I’m now happy that I got something worthy of my Web gallery, and probably my portfolio too.
As you will by now have realized, two of these last shots are the results of visualization and revisiting the location multiple times to get the shot. Later on, before we close today, I will talk a little more about this, as I have another great example to come, but for now, let’s continue our journey chronologically, by moving on to the other reason I was hear in Shiretoko in addition to wanting to revisit the Oshinkoshin falls and the two rocks. I had planned to go on what they called a Nature Boat ride on the 20th. Unfortunately, although the weather had been great on the 19th, my luck had run out on the day of the boat trip. I called from the hotel before leaving to check that the boat would go out, as they instructed us to do, and the answer was yes. Hopefully that the mist that we could see from the hotel would clear at some point after putting out to sea, it was not to be. We did board the boat, along with about eight or so other nature loving passengers, and sailed the choppy waters for a while along the edge of the Shiretoko peninsula. As this is a World Heritage Site, it is not possible to get any closer than the boat does in a number of places, but on the day, the mist was so think that there wasn’t much chance to see anything very much.
I was hoping for a chance to see maybe a deer, or even a brown bear on the shore, which is sometimes possible here, but as you can see in image number 1097 the mist was quite heavy, making it only really possible to see any detail in the shore when we were as close as this. I have uploaded this image and in fact only really talking about it today more as a documentary shot, so that I don’t forget I was there. We travelled the whole length of the shore to the tip of the peninsula, and could make out some of the great waterfalls and scenery, and I photographed most of it for posterity more than anything else, but very little worth sharing came out of it. I kind of like this shot, made at F6.3 for 1/250th of a second with ISO 400. I was shooting with my 100-400mm lens at 250mm for this particular image. Technically, I was pretty happy to have gotten the shoreline level at the bottom of the frame from a heavily rocking small boat, and I managed to compose the image with the waterfall to the left and the four cormorants flying over in the right third out of the frame. The black birds help to add some contrast against the paler misty background, but I’m not overly thrilled with this shot.
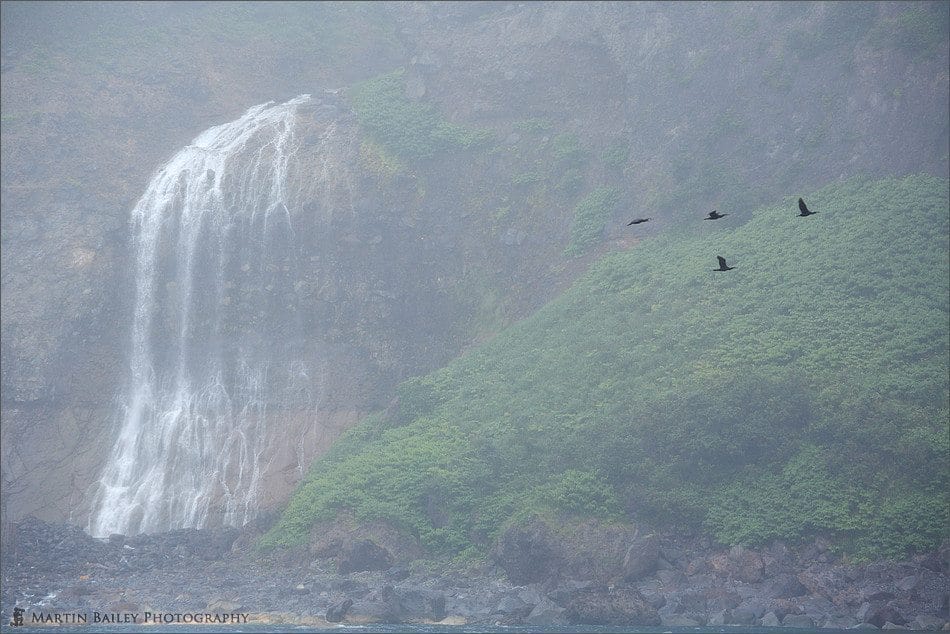
Cormorants in Mist
I’m afraid the company that I chose for their promise to get in close as only the small boat they use allows, was perhaps more sales patter than something they were actually trying to achieve. At least that is the impression I got on this day. It was incredibly cold out on the sea for this time of year due to the mist and wind factor when the boat was speeding along. We travelled for a couple of hours to the very tip of the Shiretoko peninsula, but again, the weather was against us so nothing really to show. I did have the 600mm F4 lens ready on a monopod for most of the time, and I managed to get a snap of three dolphins’, or more accurately Harbour Porpoise’s backs as they surfaced around a hundred or so feet away, but that too was a pretty nondescript shot, as they were just too far away. We spent a few minutes chasing them around, but as soon as the boat got anywhere near to them and turned so that we could see them, they sped off, again making me think that the company I chose were not really that good at this kind of tour.
Originally, this was to be the last day of the trip. The plan was to get off the boat, then drive for seven hours or so over to the ferry port, then spend the night of the 20th on the ferry before arriving on the morning of the 21st and spending the day taking a steady drive back to Tokyo 600 or so kilometres away. If you remember back in Episode 47 though, I briefly mentioned that I have been hoping to shoot “the” standard image of the flower fields at the Farm Tomita in Furano We looked at image number 1049 in which you could see the poppies that had started to bloom, almost completing the red stripe in the field that is was too early for in my visit in 2005, but at this point they were still not quite there. Realizing that the timing of my visit this year was still just a little bit early, I changed my plans and extended the trip by one day so that I go back to Furano one more time before getting the ferry back to the mainland.
We’re going to take a look at three shots from this field now, as I want to explain my thought patterns as I made these shots. Firstly, I snapped the standard. Image 1099 is what I wanted since my first visit to Furano in August 2003. This is the sort of image that is used in travel brochures for the Furano area and Hokkaido in the summer time. Today the clouds were perfect, nice and wispy but with a great blue sky, and that red line of poppies was exactly what I’d been waiting for. I had to queue for 20 minutes or so just to be able to get to the rope at the boundary of the field between the hordes of other photographers waiting to make exactly the same image. People were trying to push in, in front of me, but I guarded my position in the queue pretty well, then a guy from China kindly moved his tripod slightly to the right to allow me to get mine in with the legs set between two others tripod legs. Once in, I spend some time waiting for the cloud formations to improve and experimenting with various angles. The resulting first shot was made with my 24-105mm F4 lens, for 1/30th of a second at F16 to ensure lots of depth-of-field. I was using ISO 100 and minus one third exposure compensation to keep the bright colours of the flowers and the sky saturated, but without looking under exposed.
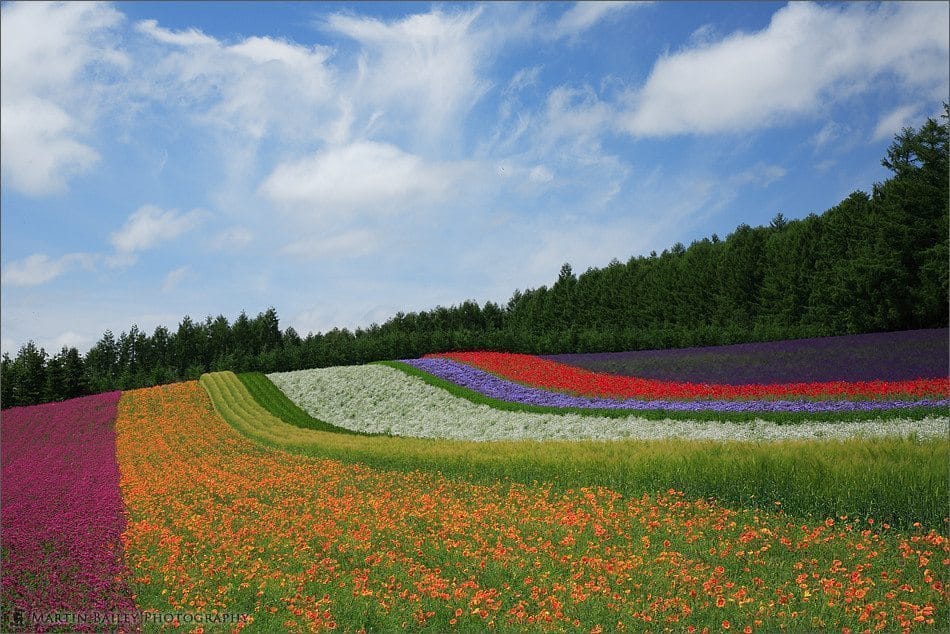
Farm Tomita Flower Field – The Standard
At this point, I was a happy teddy. I had the shot that I had been trying to get for three years. But as photographers, we don’t walk away from a scene like this once we’ve got the standard shot. I moved ten paces to my right along the footpath at the edge of the field where there was no queue, because everyone was only looking to shoot the standard shot, and I positioned my camera for image number 1100. This time what I did was tried something more original, that I’ve not seen done here. You may remember from episode 46 from Oirase the first place I visited before crossing to Hokkaido the previous week, that I have been trying to include movement in still images by using a slow shutter speed to purposefully introduce subject blur when the subject moves in the wind. Now, if the entire subject is moving, this will just give you a totally blurred image, that might not be of any use at all. If just part of the image is moving though, I think this can be quite effective.
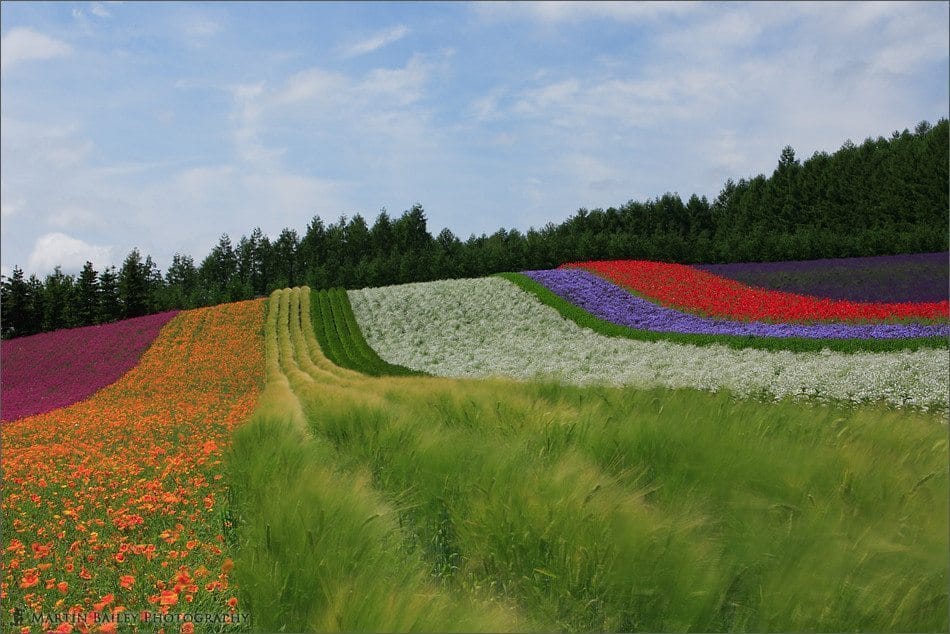
Breeze
We can see in image 1100 that the barley in the foreground is swaying around in the breeze, with just a few heads of the barley sharp as they were stationary for long enough to register in the image. The movement in the scene is perhaps more prominent in the full sized image than the Web version, but I’m hoping you can see what I’m getting at. I was using the circular polariser, as for the last shot for that matter, to get the blue sky as blue as possible, but for this image I also was using an ND8 circular neutral density filter. This gave me a shutter speed of 1/2 a second at F22 with ISO 100. Plenty slow enough to introduce movement in the barley as the breeze caught it. I did have to time the shot right as the breeze was not constant, but a number of attempts, around 7 or 8 I think, allowed me to get one image in which a few heads of barley were stationary so as not to over do it.
Now, I’ve taken the standard shot a little further here by experimenting a little, but I was still shooting with a very similar perspective as the first shot. In image number 1101 though, my favourite shot from this location you can see that I’ve now switched to a much wider angle. I used my 16-35mm F2.8 lens at 22mm, with a shutter speed of 1/13th of a second now, at F22, still at ISO 100. The 1/13th of a second shutter speed was slow enough to give us some subject blur in the barley, so that there’s some of the effect that we saw in the last shot, but not as prominent. What’s happening in this shot though is the clouds, as you can see, are radiating out from a point somewhere just of centre of the image. Also, all of the bands of flowers are also radiating out from a similar point, and the and the direction of the breeze that we can now see, thanks to the slow shutter speed, is also radiating out from this same point. This gives us the feeling that the whole image is emanating from a place just left of centre, and this is emphasised by the wide angle. When viewed full screen you can actually more clearly make out around 6 people standing up in the right of the image to the right of the line of trees, which actually adds scale and another point of interest. Basically, I’m very pleased with this image, and I’m so glad that I extended the trip and continue to come back here a number of times to enable me to make this image.
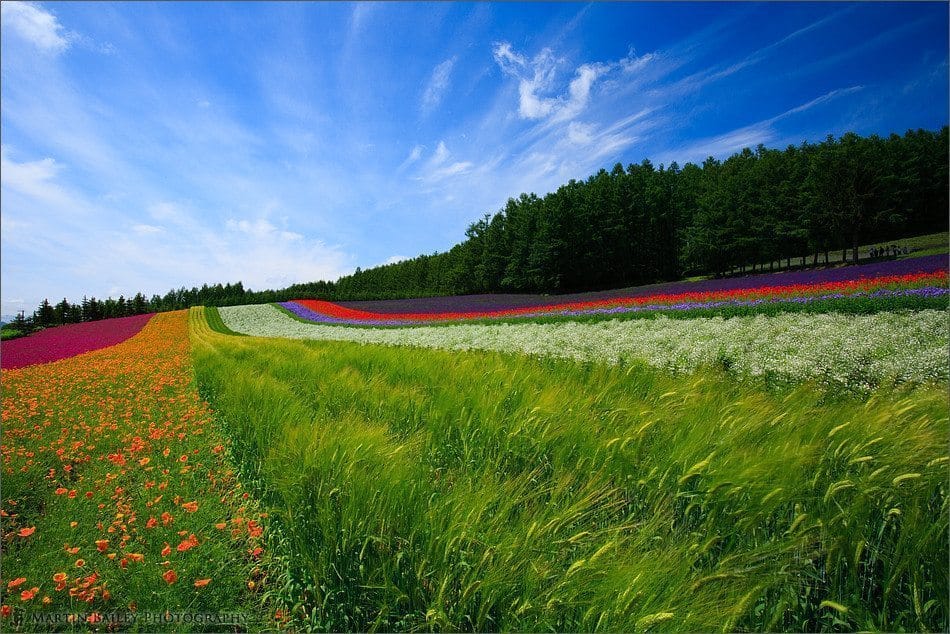
Emanation
Of course sometimes good planning and a touch of luck will help you to get a winning image the first time you visit a location, but as with the first few images we looked at today of the waterfall and the sunset between the rocks, and again with this last image which I think is a real winner, you need to persevere a little more and make the trip a number of times at different times of year or different times of the day. I’m not saying that you won’t get great shots if you don’t do this. Quite often you can get the shot you’re after with the first visit, and I don’t think that you need to spend months and months, and many visits to get a shot if you are lucky enough to get something you are happy with first off. Of course, some things will happen only once, and trying to better them can be a waste of time, money and effort. But also, I find it to be very important to recognize when something you’ve shot can be made better by further visits. Bear in mind that the weather is something that we cannot control. I thought I was going to get it just right with the timing of the poppies blooming when I got to this location one week before I made today’s image, but it wasn’t quite there. So even making the opportunity to visit multiple times on a single trip, even extending the trip as I did this time, just to get the opportunity is something that we may often find necessary to get that winning shot. It could of course have not gone my way. It rained a lot throughout the last few weeks, and today may not have been clear. The cloud formation that adds so much to this shot only lasted a short while at this location. Had I come a few minutes earlier or later, I could not have made this image. In Episode 11 of this Podcast from way back in November last year I discussed how good planning is essential for getting yourself to a location at the right time, but often it’s down to luck as to whether you get that additional element or two to set your images apart from other photographers. In this image, I believe I’ve done that, turning a very common image, a very popular location to photograph, into something just a little more special. Experimentation and visualization, perseverance and at the end of the day, luck, are what will set your work apart from the rest.
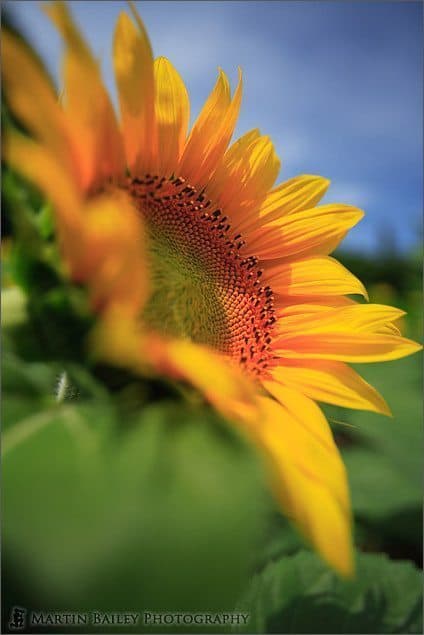
Sunflower 2006 #1
So, moving on to the last few images before we close this series, let’s take a look at image number 1103. In the field next to the one we’ve just looked at, there is a long band of sunflowers. I shot a number of images and the others are online if you want to take a look. Again, there’s a link in the show notes to list all images from this trip. For this image though I decided to do something different again. You know that I love shooting flowers with my macro, but a macro lens is not necessary for fill the frame with a large sunflower head. What I did was decided to go totally the other way, and used my 16-35mm F2.8 lens to get a slightly different perspective once again. I shot this at 27mm at F2.8 at ISO 100, which gave me a shutter speed of 1/640th of a second. At this wide angle, an aperture of F2.8 was enough to give me enough depth of field to get the black stamen and the petals on the far side of the sunflower in focus, but allows the near side and the large green leaf in the foreground to be blurred, which is the effect I was after here. Also, the clouds in the blue sky are so far out of focus as a result that it really just looks like a watercolour painting rather than a real sky. I also was using the angle finder looking down into the camera for this shot to allow me to easily get this angle looking up at the flower rather than head on or down at it if I had not done so and not bend down quite a way. I am quite pleased with the results, and hope you also can appreciate what I’m trying to do here.
From here, I had a few more hours left before making the couple of hours drive to the Tomakomai Ferry port, and took a steady drive through the hills of Biei, that we also visited in the first of this three part series on Hokkaido. That sky was nice, often showing up some streaky patterns throughout my remaining few hours, and in image number 1108 from the Kita ???? viewing platform, you can see the last shot for today of the hills around Biei and also a nice big sky with those wispy clouds. Shot at F16 for 1/80th of a second at ISO 100, there’s nothing special about this shot, and nothing that I really want to say about it, other than this marks the end of my trip. I hope you’ve enjoyed this virtual tour around my favourite part of Japan.
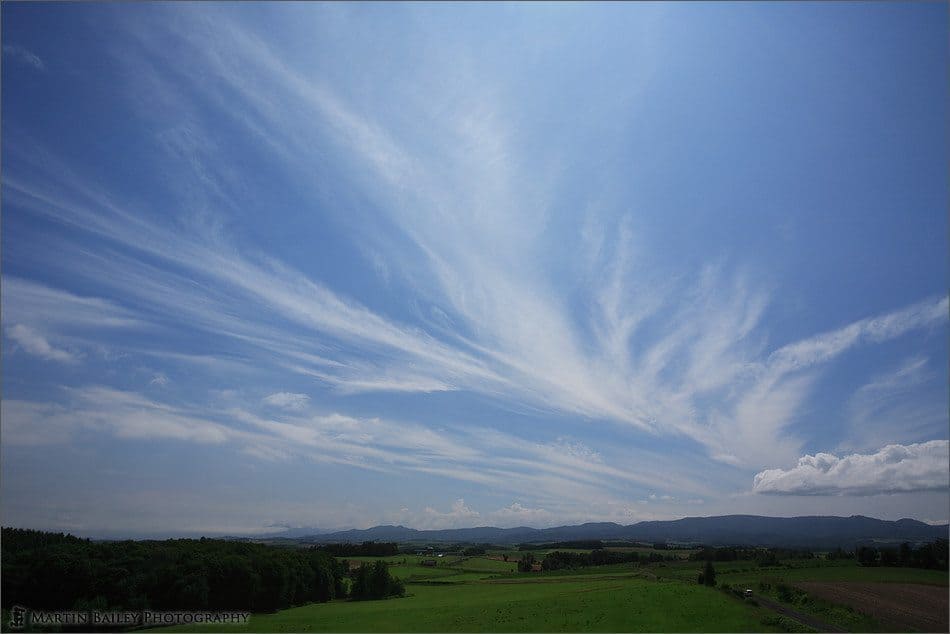
Wispy Clouds #3
So that’s it. It’s been a total of four parts when we include the first week in which we visited Oirase in the Aomori prefecture. Like I say, I hope you’ve enjoyed the trip. If you got even a fraction of the enjoyment I got in travelling around the locations we’ve covered over the last four weeks then I’m sure you will have done.
Remember that you can contact me with feedback, good or bad either by registering at martinbaileyphotography.com and sending me a private message via the forum, or you can use the contact form on the Podcasts page. I’m always interested to hear what you have to say, and I promise to reply to every mail that I receive, so please do feel free to drop me a line.
Finally, I’d like to give just a quick reminder that we are now into the last week of shooting for the “Depicting Cultures” assignment. You’ll be able to upload your entry until midnight on Sunday the 20th of August. Have a great week, and thanks very much for listening. Bye bye.
Show Notes
Music from Music Alley: www.musicalley.com/
Subscribe in iTunes for Enhanced Podcasts delivered automatically to your computer.
Download this Podcast in MP3 format (Audio Only).
Download this Podcast in Enhanced Podcast M4A format. This requires Apple iTunes or Quicktime to view/listen.


0 Comments