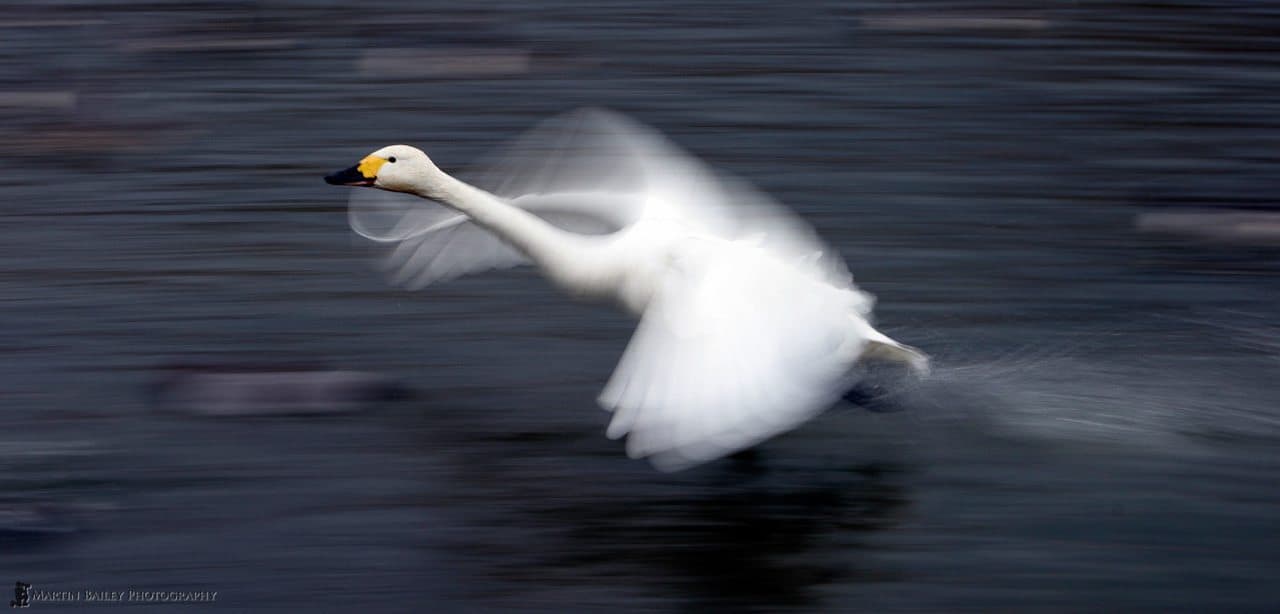
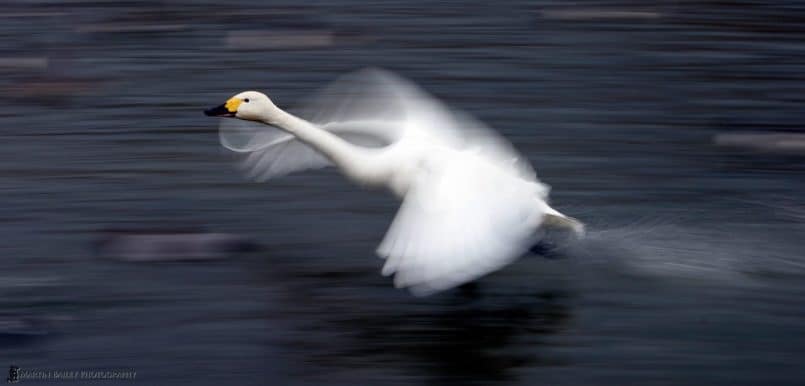
Today I’m going to talk about a photographic technique called ‘Panning’. As I explain what this is, take a look at the first example photo (below) of a swan taking flight, kind of running across the water gathering speed as it takes flight. You can see from the relatively sharply focused head and neck that I succeeded with the pan. Also note actually that the unrecognizable blurred lighter areas on the background are actually ducks, so you can probably understand just how long I panned with this swan.
To begin with, here’s a brief explanation of this technique. Panning is when you track a moving object with your camera, most often horizontally, and shoot at a slow enough shutter speed to cause the background to blur. The main effect on shots made with this technique is that they give the impression of speed and/or movement. The tricky part is to keep the subject or a part of it crisply sharp against the blurred moving background.
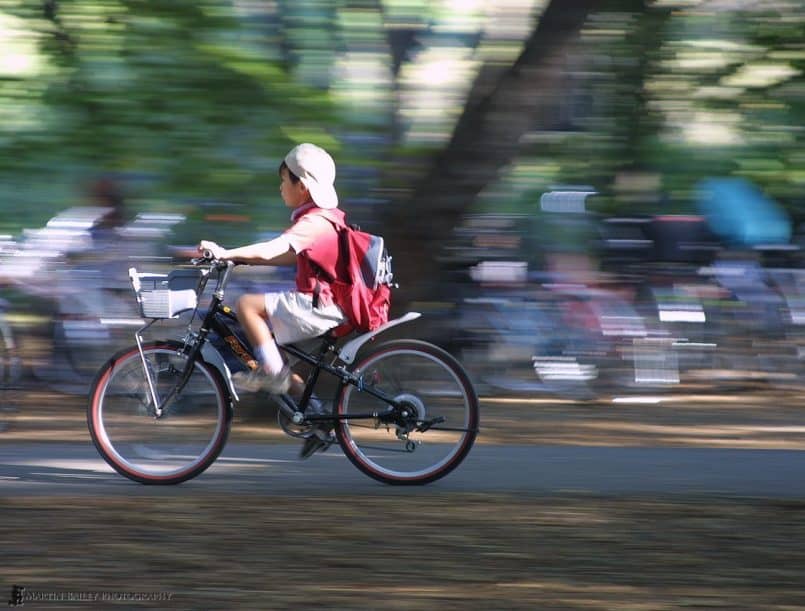
As with anything, practice makes perfect, and this is one of those techniques that really takes practice to get a hold of. Planning your practice session will help. First think of where you might find a suitable subject. I chose a public park with a track for cyclists, but you might chose a road where cars will be driving past, or something similar. Take a look at the second photo for today of a boy on a bicycle (below). I took during this shot during this practice session. Just try to find somewhere that objects will be moving at a steady speed in a predictable direction. It also helps to have enough open space to be able to track your subject for at least a few seconds before and after taking your shot. I’ll explain why you need some space after taking the shot later.
A mid range telephoto or zoom lens also works well with this technique as it will exaggerate the blur more than a wide angle lens. If you are comfortable using your camera in manual mode, that would be good, it will probably be best to set your camera to Aperture priority mode then set a small enough aperture to give you a shutter speed between 1/10 and 1/15 of a second. If you are more accustomed to using Shutter Priority mode that’s fine too, just select a shutter speed between 1/10 and 1/15 and let the camera set your aperture. It will definitely help if you have an image stabilizer lens here. If you don’t, you might want to try with a slightly faster shutter speed, but if you are using around 70 to 135mm telephoto lens, you want to keep it under around 1/25 to 1/50 of a second. This goes directly against the rule of thumb I talked about in Episode one and two where you use the focal length of the lens to decide the slowest shutter speed, but this is one of those times where we break the rules.
Note that if you are taking shots of very fast moving objects, such as racing cars, you will not need such a slow shutter speed to blur the background.
If you are in very bright conditions to get a slow shutter speed, you can also try selecting a slow ISO such as 50 if you camera supports it or an ISO 50 film if you’re using a film camera. You can also use a Neutral Density filter to get a slow enough shutter speed to blur the background. Even in dimmer conditions you can do this in addition to or instead of reducing the aperture to maintain a shallower depth-of-field and therefore add to the blur effect of the background. If we have too shallow a depth of field though, this can reduce the panning effect in the final shot, so again here, practice makes perfect.
Your stance is very important when panning. Stand with your legs slightly apart at about the same width as your shoulders. Tuck your elbows well into your side for additional camera stability. You should be facing the point at which you want your subject to be in when you take the shot. Pay attention to the background here too. Although it will, if you succeed be nicely blurred, it will not be totally insignificant. Lot’s of brightly coloured objects may work well, but large objects of a colour totally different from the surroundings may detract from the main subject.
The most important thing about panning shots is that you must be tracking your subject in the lens when you take the shot. If you were to simply focus on a point where you want your subject to be, wait for them to come along, and then trip the shutter, you’ll get a lovely shot of the background with your subject blurred as it moves through the frame.
If the distance to your subject is going to be pretty much constant as you track them autofocus will work fine, but if they are going to be moving towards or away from you at all, it might be useful to put your camera into manual focus mode and focus on the point where you intend to make the final shot in advance. You can also use the servo focusing mode if your camera has it. If you use servo focusing your camera will focus on the object for you as it moves closer or further way. Of course, successfully using servo focusing will depend on the size of the object in your frame and the accuracy of the focusing system. It also means that you may need to keep the subject in the center of the frame, and that might not be the way you want to compose the shot.
So, let’s get down to actually taking the shot. You will twist smoothly at the waist in the same direction as your subject. Get your subject in the frame from as early as possible and move with them, twisting at the waist as the subject moves across the scene. This motion needs to be as fluid as possible and hence having your feet out at least as wide as your shoulders will give you a good steady base. As the subject approaches the optimal point I suggest you start shooting in continuous shooting mode. If you are using film, take at least three shots as the subject approaches and moves through the point at which you want the shot and one more afterwards. If you are using digital, depending on how many shots you can take in one burst, start shooting earlier.
It is important to keep shooting through the point at which you really want the shot as just the action of easing off the shutter release button can cause unwanted movement. It is also very important to keep moving as your subject moves past the optimal point, even after you’ve taken your shots. If you intend to stop as soon as you release the shutter you’ll subconsciously start slowing down while shooting and get out of sync with your subject and you may well loose the shot altogether.
This is not an easy technique, so give yourself the best chance of pulling it off by getting into the habit of following through. If you play golf you’ll probably be able to relate this to a golf swing. Beginners often can’t understand the importance of following through on a golf swing after hitting the ball. After all, you already hit it right!? Wrong! You will subconsciously change your motion in anticipation of stopping after the event.
As we are dealing with slow shutter speeds, you could try using your tripod with the locking nuts loosened enough to enable you to pan the camera, but I personal find this difficult as you have to move your head around the out circle that the camera will make while panning. I did this for a while during a shoot of Japanese Red-Crowned Cranes in Hokkaido here in Japan, but soon gave up in preference of hand holding. Another option is a monopod. I imagine this will work better than a tripod, but I’ve not actually tried it. I’d be interested to hear from anyone that is using either a tripod or monopod in panning shots. We could share that information with the other listeners.
Before we wind up for today, as we are creating a work of art here, let’s talk a little bit about composition. Where you position the subject within the frame will greatly affect the feel of your shot. You can do this when shooting or after the event by cropping the shot. Needless to say though, if you can, doing this during shooting will help to retain a larger shot for clearer prints at larger sizes.
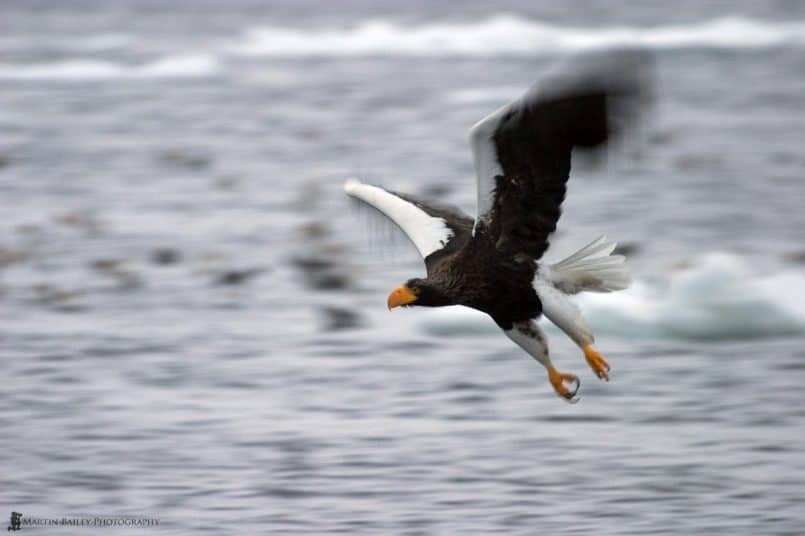
I don’t usually like to put my subject right in the center of the shot, but in my photo of the swan, I wanted to include the water being thrown up from the swans feet as it ran across the water, and give the bird some space to move into, as it was about to take off. In the second example the boy on the bicycle is moving out of the frame. Here I wanted to give the impression of the boy speeding away. Finally, take a look at the third and final photo for this Podcast (below), which is a sea eagle taken in Shiretoko, in Hokkaido, which incidentally has just been registered as a Unesco’s World Heritage site. In this shot the bird is in the right hand side of the shot, giving it space to fly into. It really is up to you though, so please exercise your right to use artistic license.
Finally, more so than in most photography, you might find that luck plays a big part in getting a good panning shot. In the case of the swan shot we looked at earlier, I was shooting in the other direction on the bank of a river when I heard the sound of the swans flapping it’s wings and paddling the water coming towards me from the other direction. I new that I had a relatively small aperture set to slow the shot down and had just a second or two to turn, steady my feet a little, and get three shots as the swan passed me. The first and last shot were a right-off, but the middle shot was the one you see here. Although you can plan shots as I did with the boy on the bicycle photo and get a much higher success rate, for the swan shot luck was probably 90% and 10% technique. I’m sure though I could not have got the swan shot had I not previously practiced the technique.
Show Notes
Music from William Cushman © 2005, used with kind permission.
Subscribe in iTunes for Enhanced Podcasts delivered automatically to your computer.
Download this Podcast in MP3 format (Audio Only).
Download this Podcast in Enhanced Podcast M4A format. This requires Apple iTunes or Quicktime to view/listen.


0 Comments