

Visit Library for MBP Pro eBooks |
Around 12 or 13 years ago, during a visit to the Ginichi Studio Shop in Tokyo, I bought a few things that I was hoping to someday use to experiment with photographing food dye in water. One of the things I bought was a five-centimeter diameter perspex ball that I was hoping would give a good effect as the dye flows around it, and the second was a very small perspex tank, that I realized afterward would not be big enough to make this work, and that is part of the reason why thirteen years have passed and I never got to this project.
Well, last week I recalled the project and took a look on Amazon Japan and found a set of eight food dyes that would be great for dropping into water, and I bought a small fish tank, 30 centimeters across, that I figured would probably be around the smallest I could use and get the results I was hoping for. I roped my wife in, and we used a good chunk of our Sunday afternoon to see what I could come up with. I was relatively happy with the results, so I'll share them with you in this episode.
I learned a lot, and will probably do this again at some point, probably after my wife's patience has replenished, as I ran it rather thin yesterday. The main things I learned were that using a dark background makes a lot of bubbles show up both on the sides of the tank and in the dye being dropped into the tank, but also how you drop the dye in makes a difference. From the start, I cut a hole in the cardboard cover that came on the fish tank and pushed the spout of a funnel through that. I wanted the dye to enter the water with as little resistance as possible, so I filled the tank with enough water for the spout of the funnel to become submerged. We then learned that pouring the water straight into the hole in the funnel produces bubbles, so we started to pour the liquid around the edges and allow it to run down the edge of the funnel into the spout. This gave the best results.
I also gave some thought to the colors used and the order in which each color would be added. Essentially, you get one clean color per tank full of water, and then you can add colors, and have the first color present at the bottom of the tank, and the colors will gradually mix as you add more, until the level of dye in the tank gets too high, or the colors mix so much that it simply doesn't look good anymore.
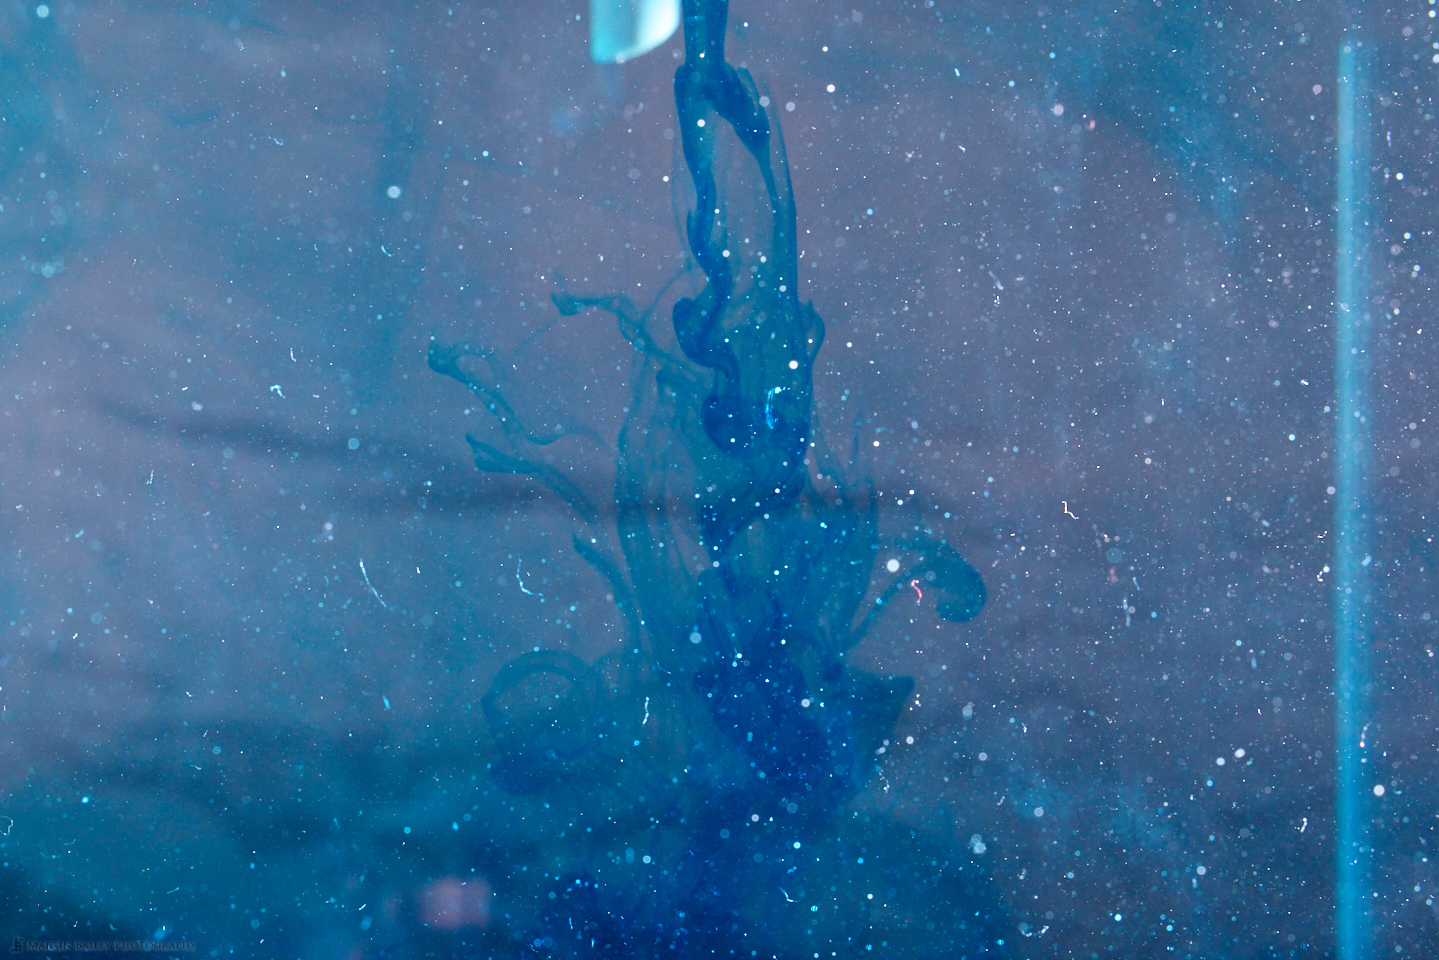
For the first few tanks of water, I was mixing around 15 drops of food coloring with about 5 millimeters of water, which was about 20 milliliters. With a dark background, I had to increase the exposure so high that every imperfection in the glass showed up and even though I was firing a Profoto studio strobe with a 10° Honeycomb Grid fitted directly into the tank at almost full power, it really didn't work, as you can see in this image, which is straight out of the camera. I had run a plastic rule along the inside of the tank to remove bubbles, but it was really just a mess with the dark background, so I switched to white. For comparison, my exposure for this image was ISO 4000 at ƒ/11 for 1/160 of a second.
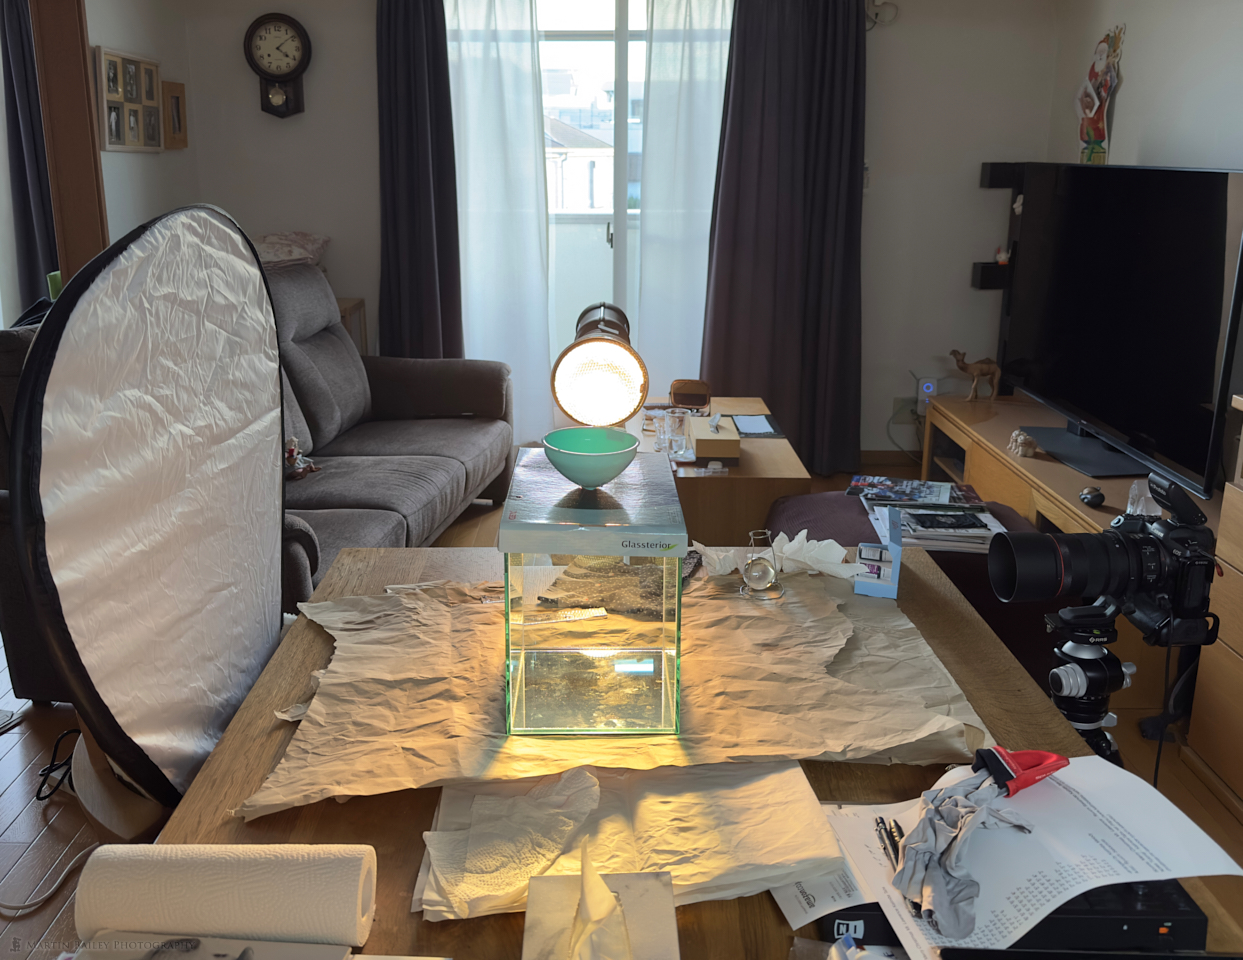
Here is an iPhone photo of our dining table with the tank full of water, the funnel in place on top, my camera with a macro lens on the right, pointing into the tank, and a white reflector on the left, acting as a makeshift white background. It was wrinkled which left some texture in the background, but I wasn't worried about that, because I had switched my plan, and intended to use the excellent new background selection tool in Capture One Pro to select the white background and turn it black. Also, note that to focus, I moved the camera up a little, and focussed on the spout of the funnel, with the lens in manual focus mode, and then recomposed so that the funnel was just out of the shot at the top of the frame.
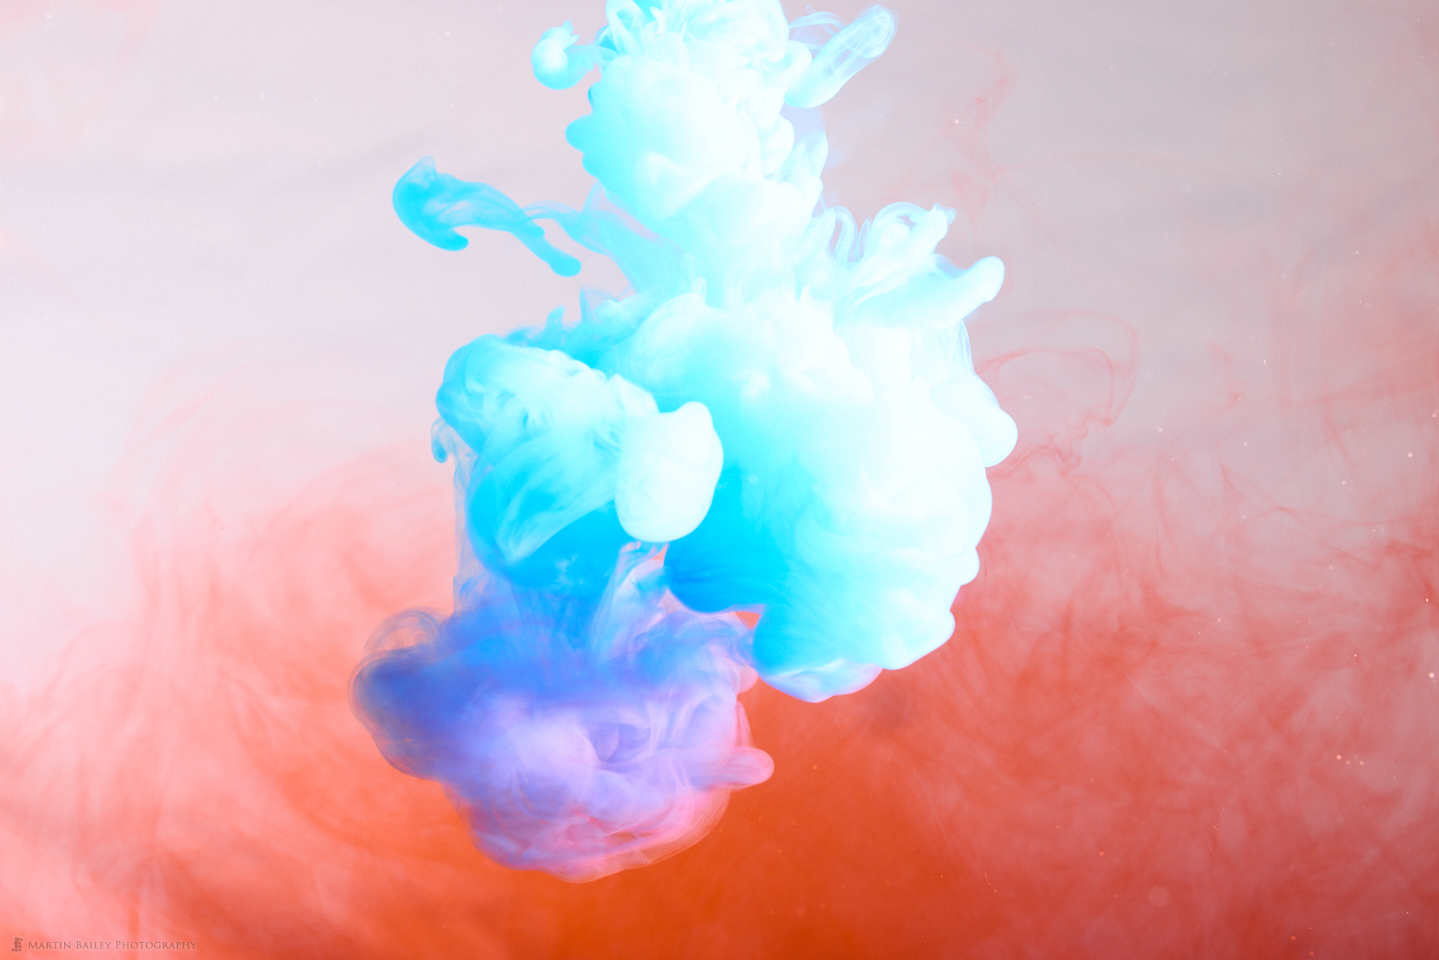
I was starting to get the results I wanted by the third tank and decided to introduce the perspex ball to see what would happen as the dye flowed around it. I made a wire stand for the ball which I cloned out, and I still had to do a certain amount of cleaning up, because my exposure had to be relatively high still to pick up the color of the dye. I'm including this image as well, to document the learning process, but this isn't what I'd hoped would happen. That's also why I didn't spend a lot of time on the cloning out of the wire stand, so don't beat me up for my shoddy processing on this one. As you can see, we'd dropped in some blue dye first, and then red, so both colors are present, and mixed to create purple in some areas. For this shot, I lowered my ISO from 4000 to 1250. My shutter speed remained at 1/160 of a second and the aperture at ƒ/11.

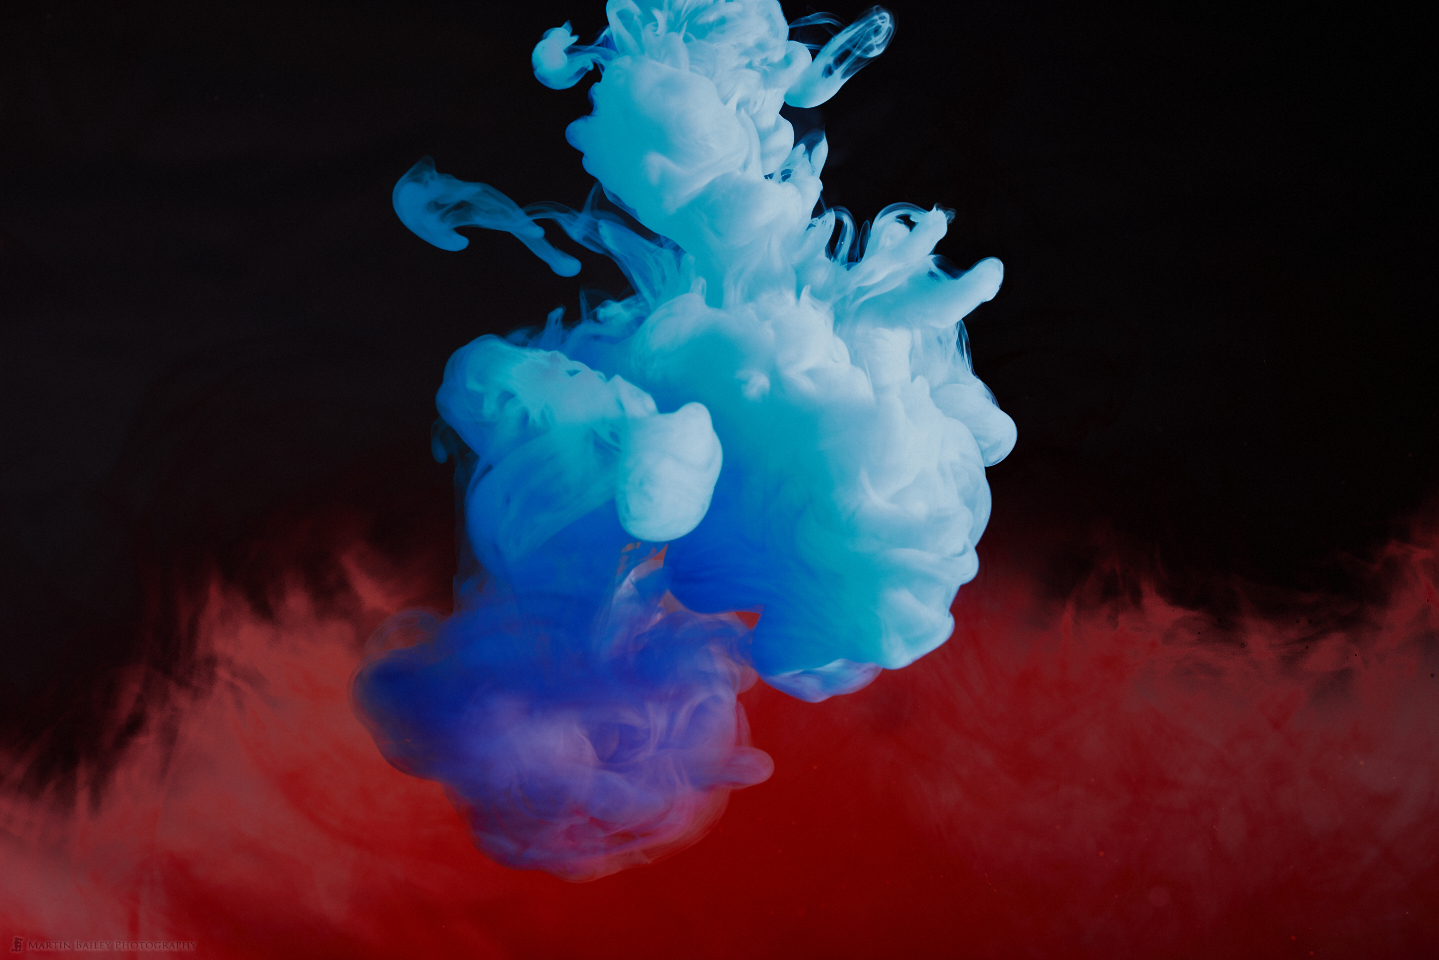
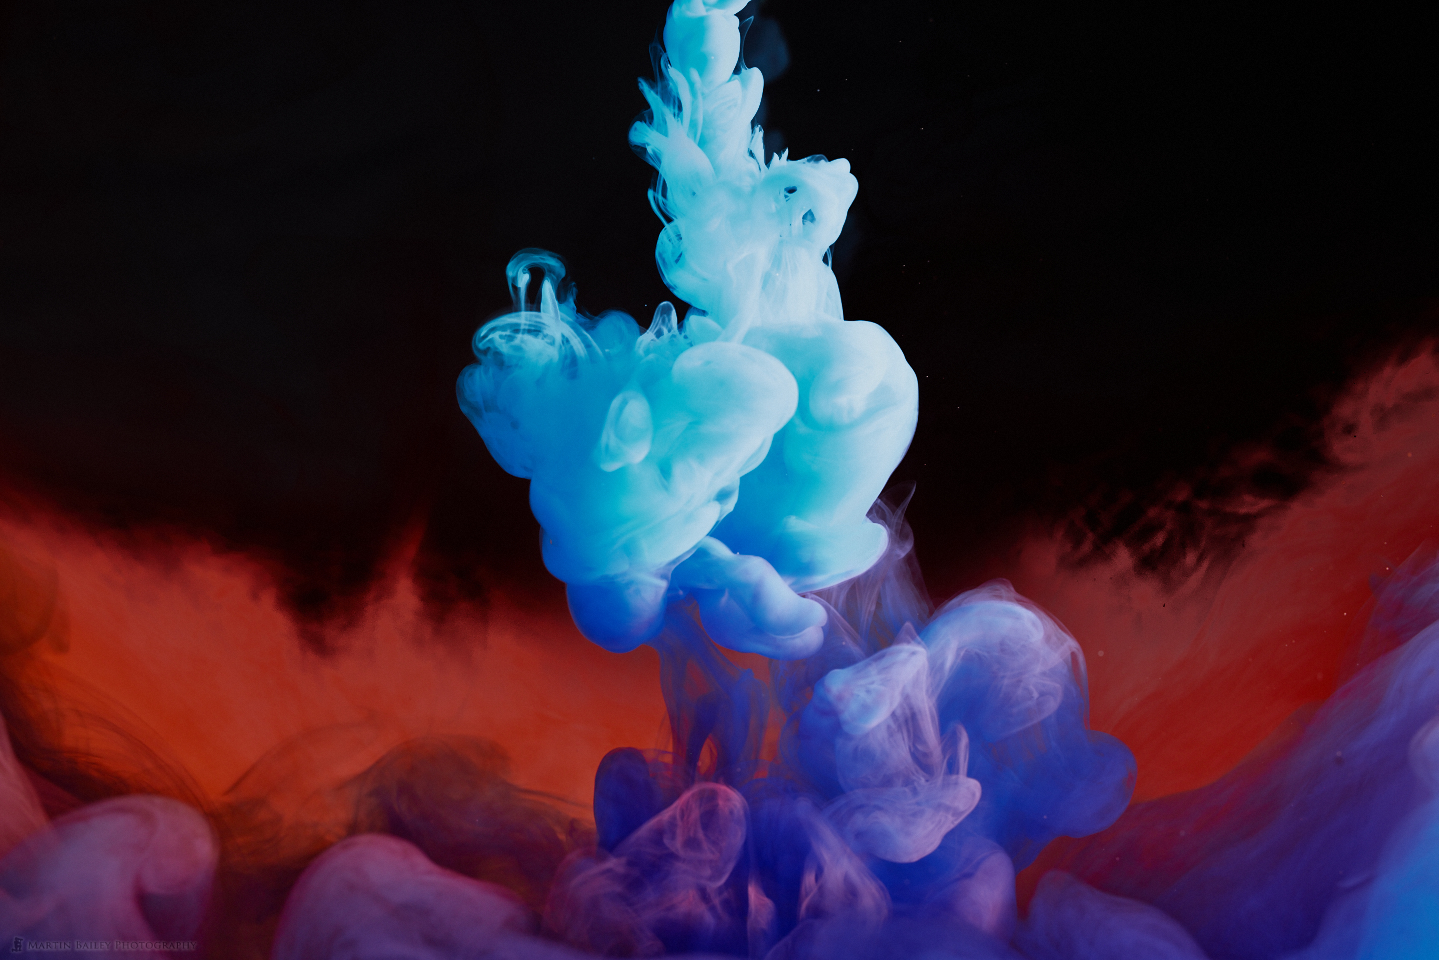
I was still not happy with what I was seeing in my camera though, so as I prepared my dye for the second time on our fourth tank of water, I dropped some milk into the dye, so it was around half water, half milk, and again, around fifteen drops of blue dye. This completely changed the game. Here is the unprocessed image as the milky blue dye entered the tank. As you can see, the milk gave the dye so much opacity that it now caught all of the light from the strobe, and was now overexposed, even though I'd lowered my ISO slightly to 1000, but this was the Eureka moment.
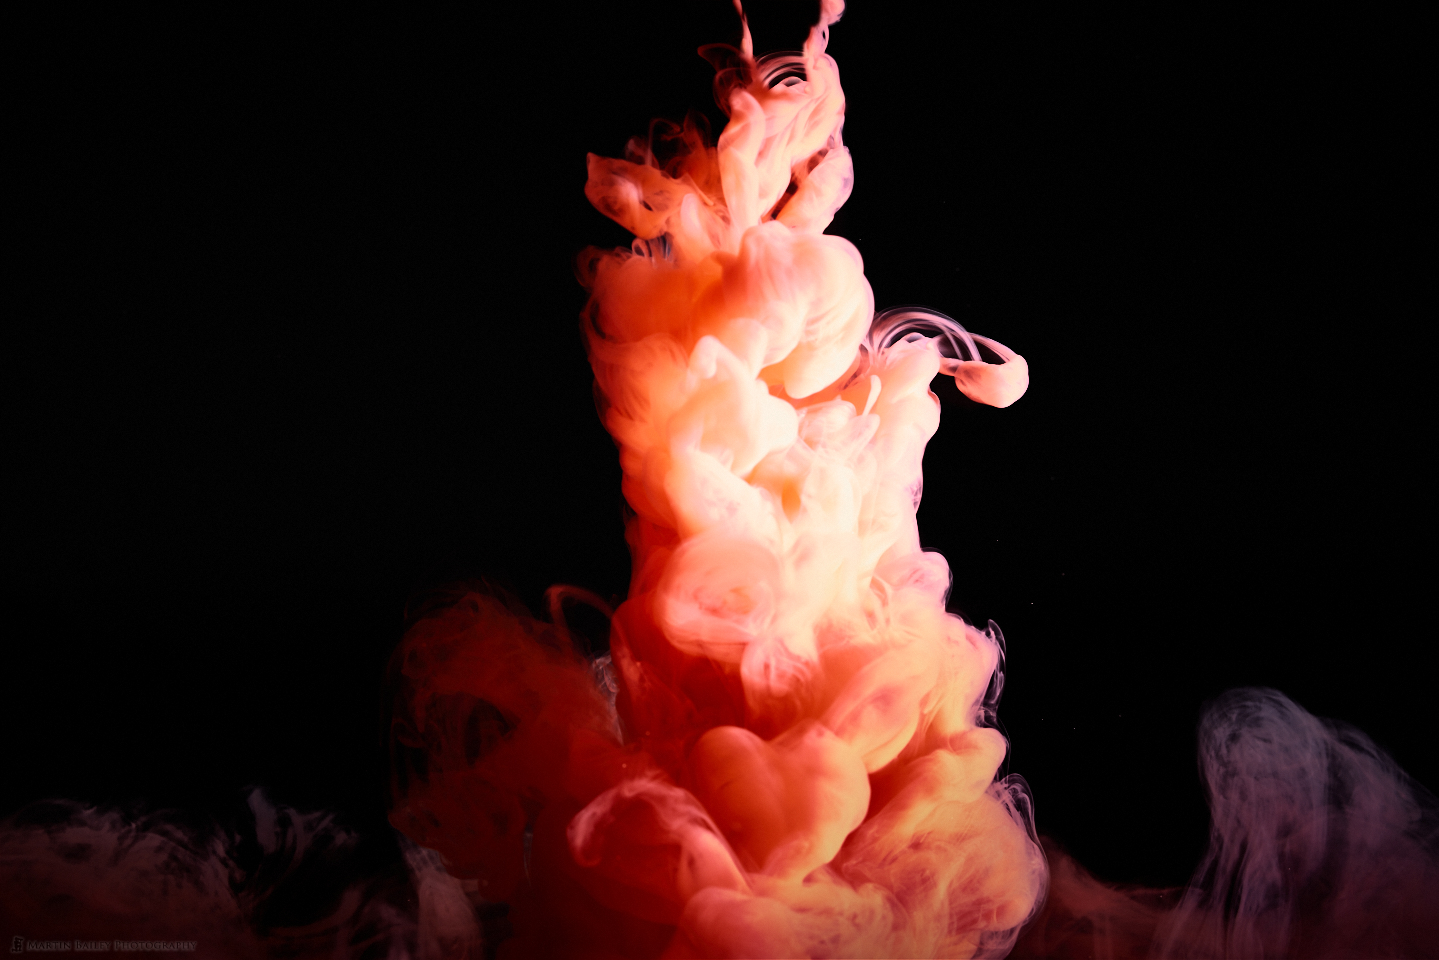
I was able to do two things with this that gave me pretty much what I'd been hoping for, as you can see in this processed version. First, I brought the exposure under control, and then, I selected the background and made it black. This was the look I was hoping for, so we did another tank or two, now using a solution with half milk and half water.
The logical thought process here leads me to believe that if I'd used milk in the dye to begin with, because it caught the light so much more, requiring a lower exposure, I probably could have gone back to the dark background, and may have saved a little processing time, although I may have still had a certain amount of cleaning up to do to remove the imperfections in the glass. With this setup, and the ability to select the background relatively easily in Capture One Pro, I was able to process around twenty images that I was happy with, so I'll chalk this one up to a success, with some good learning in the process.
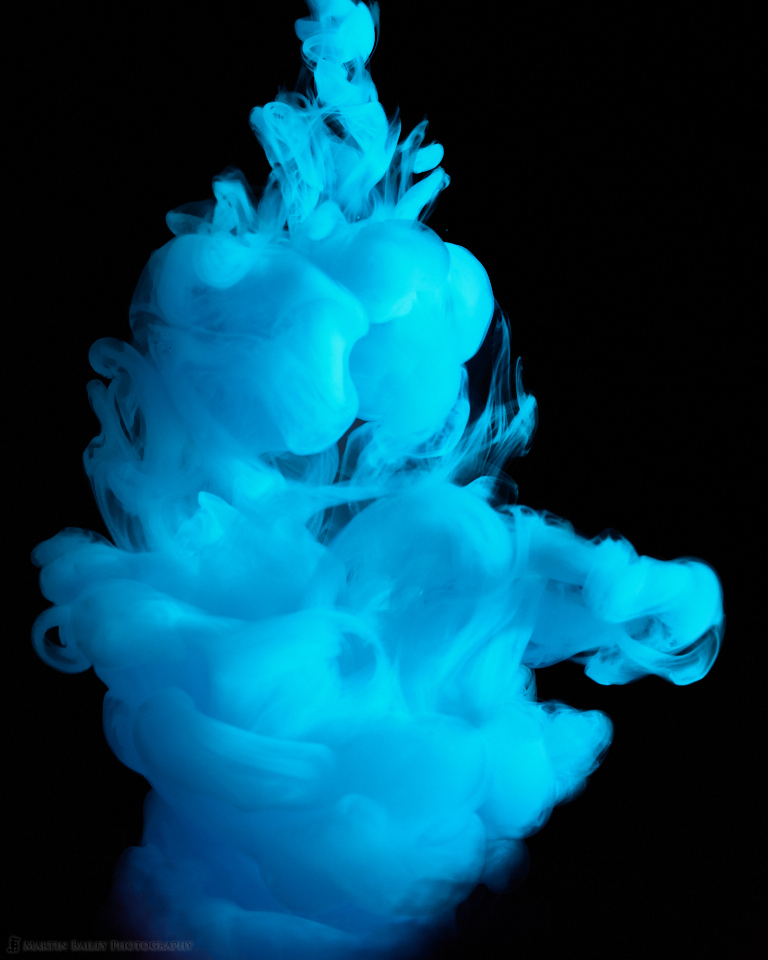
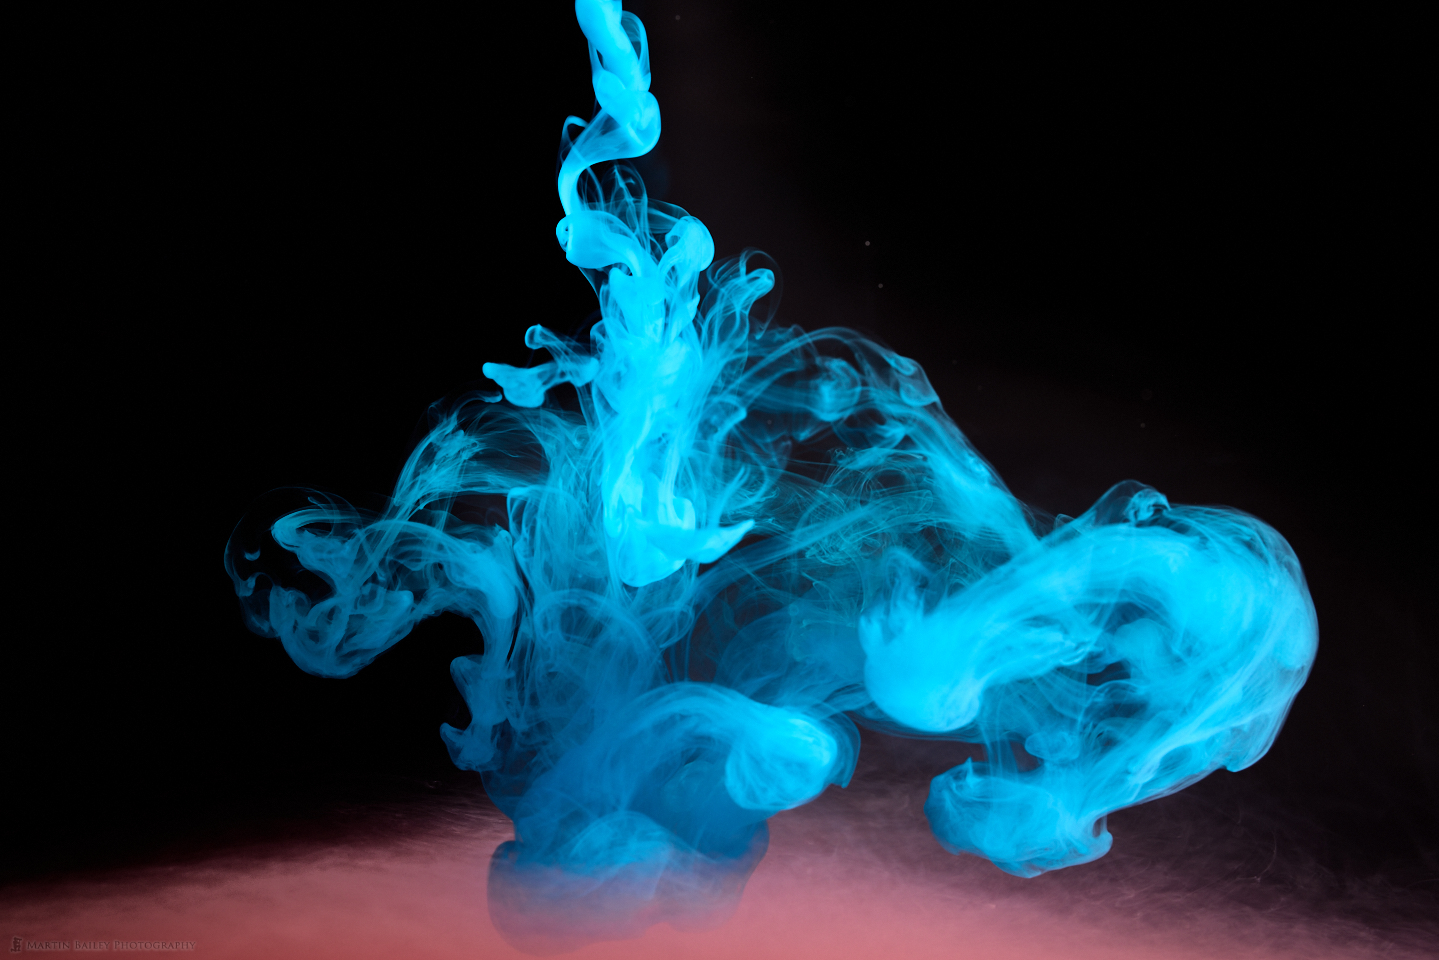
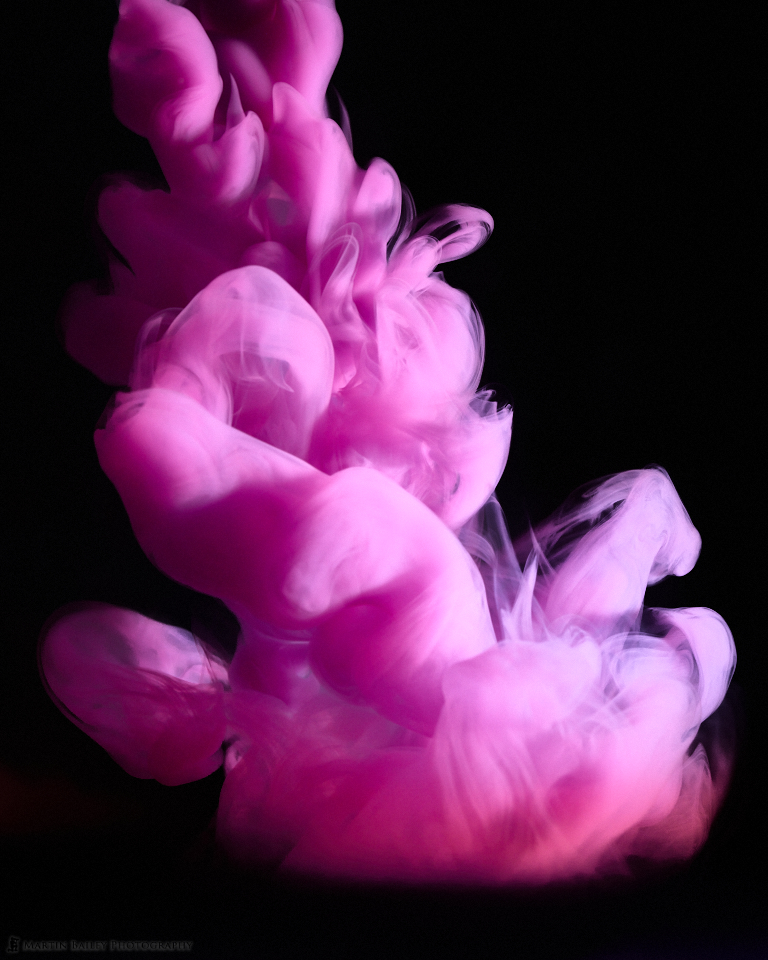
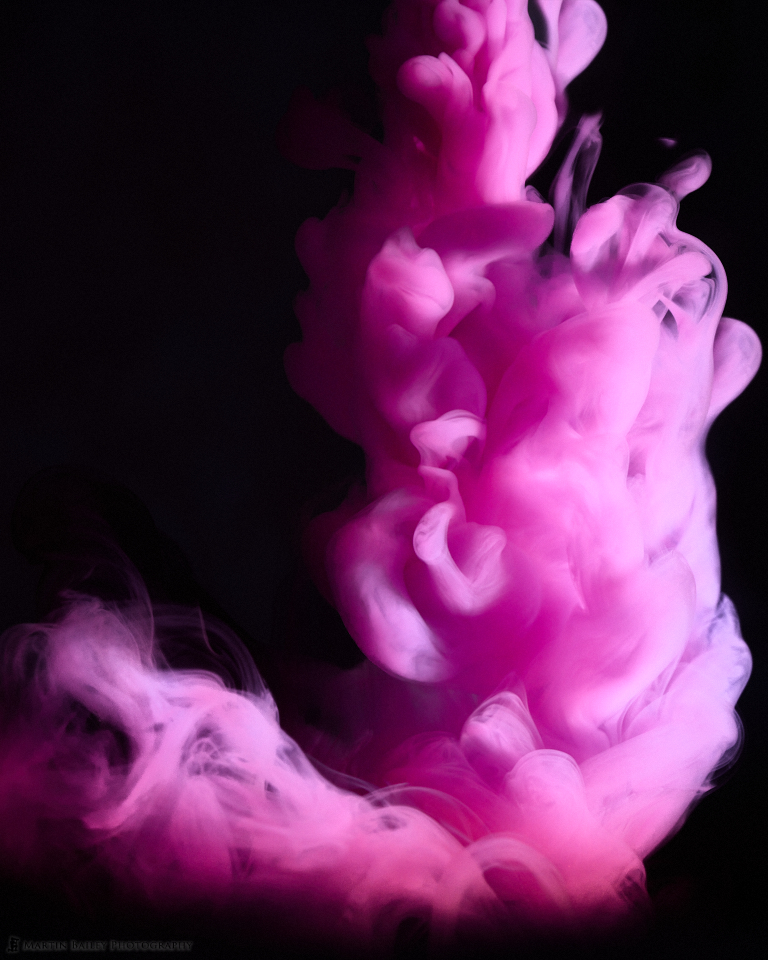
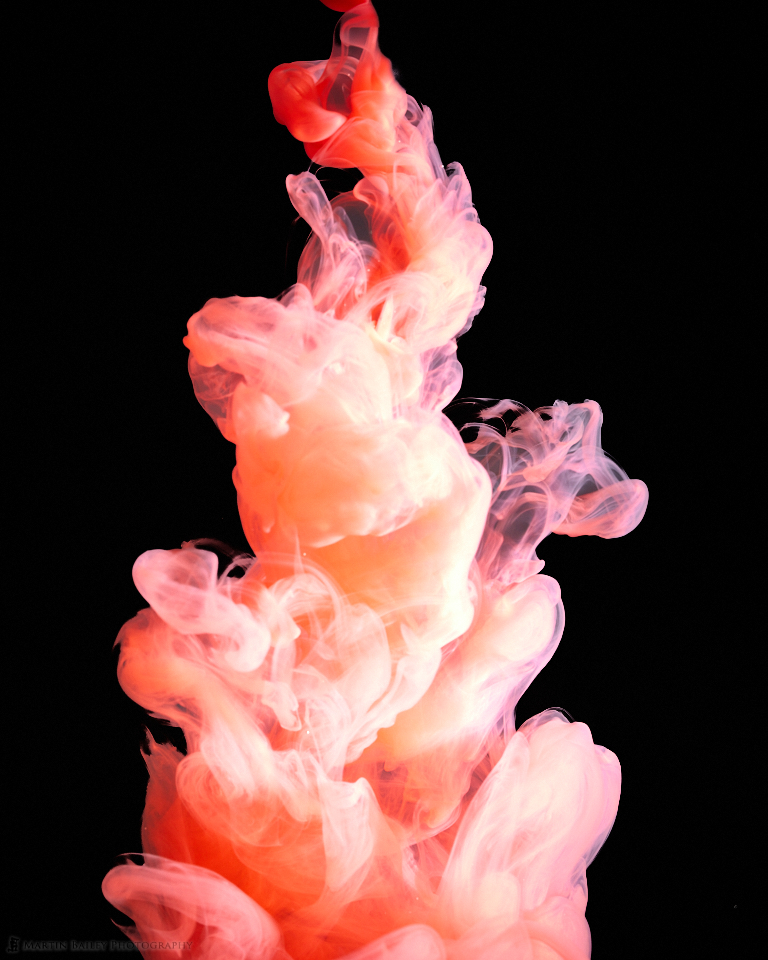
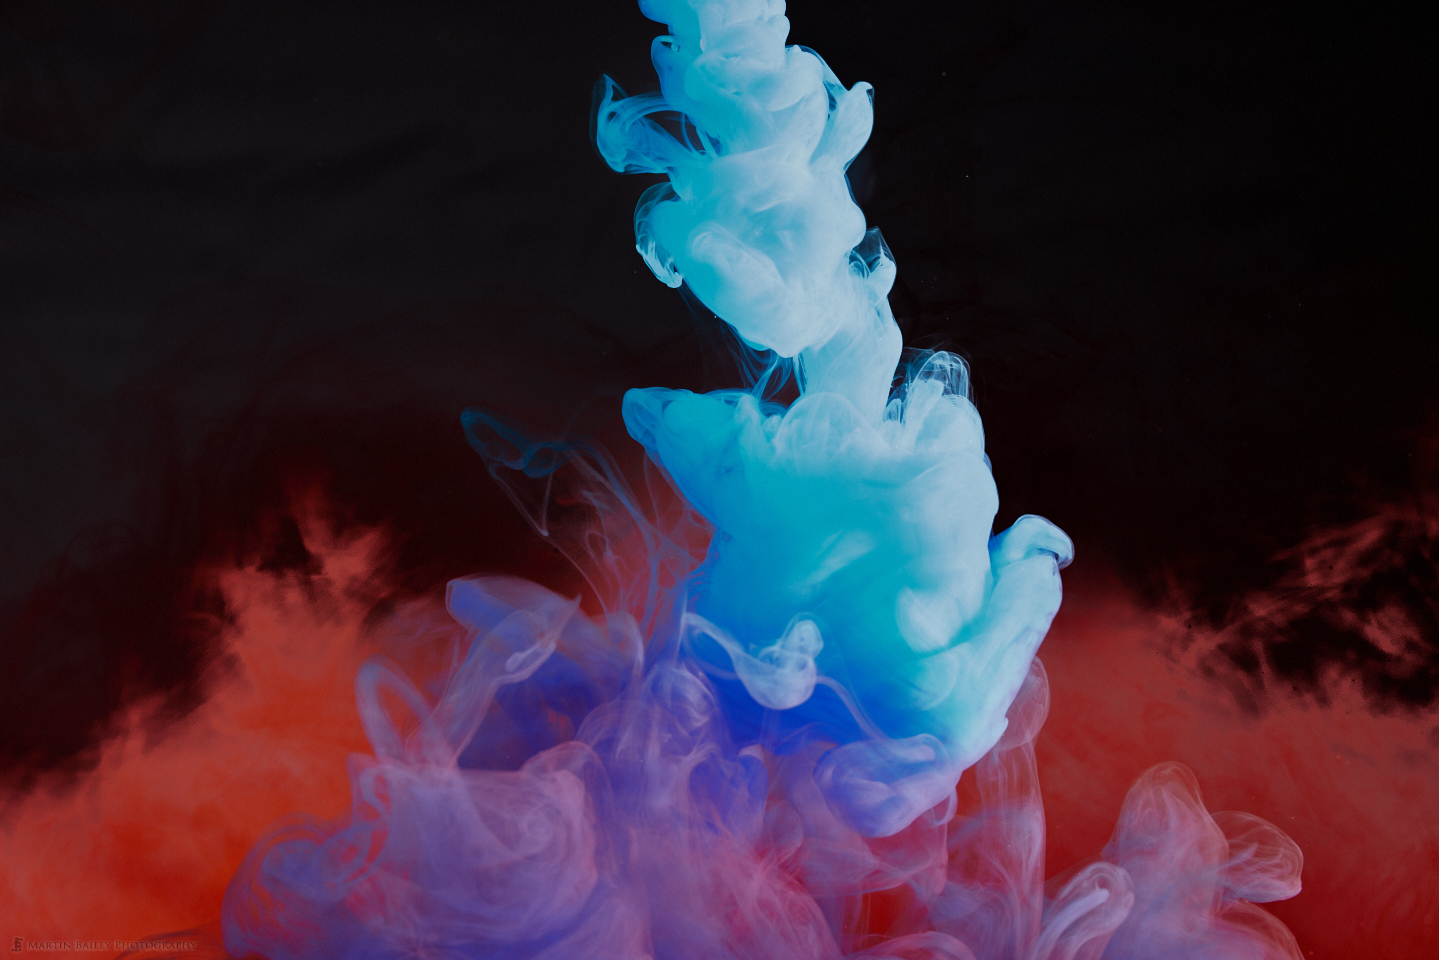
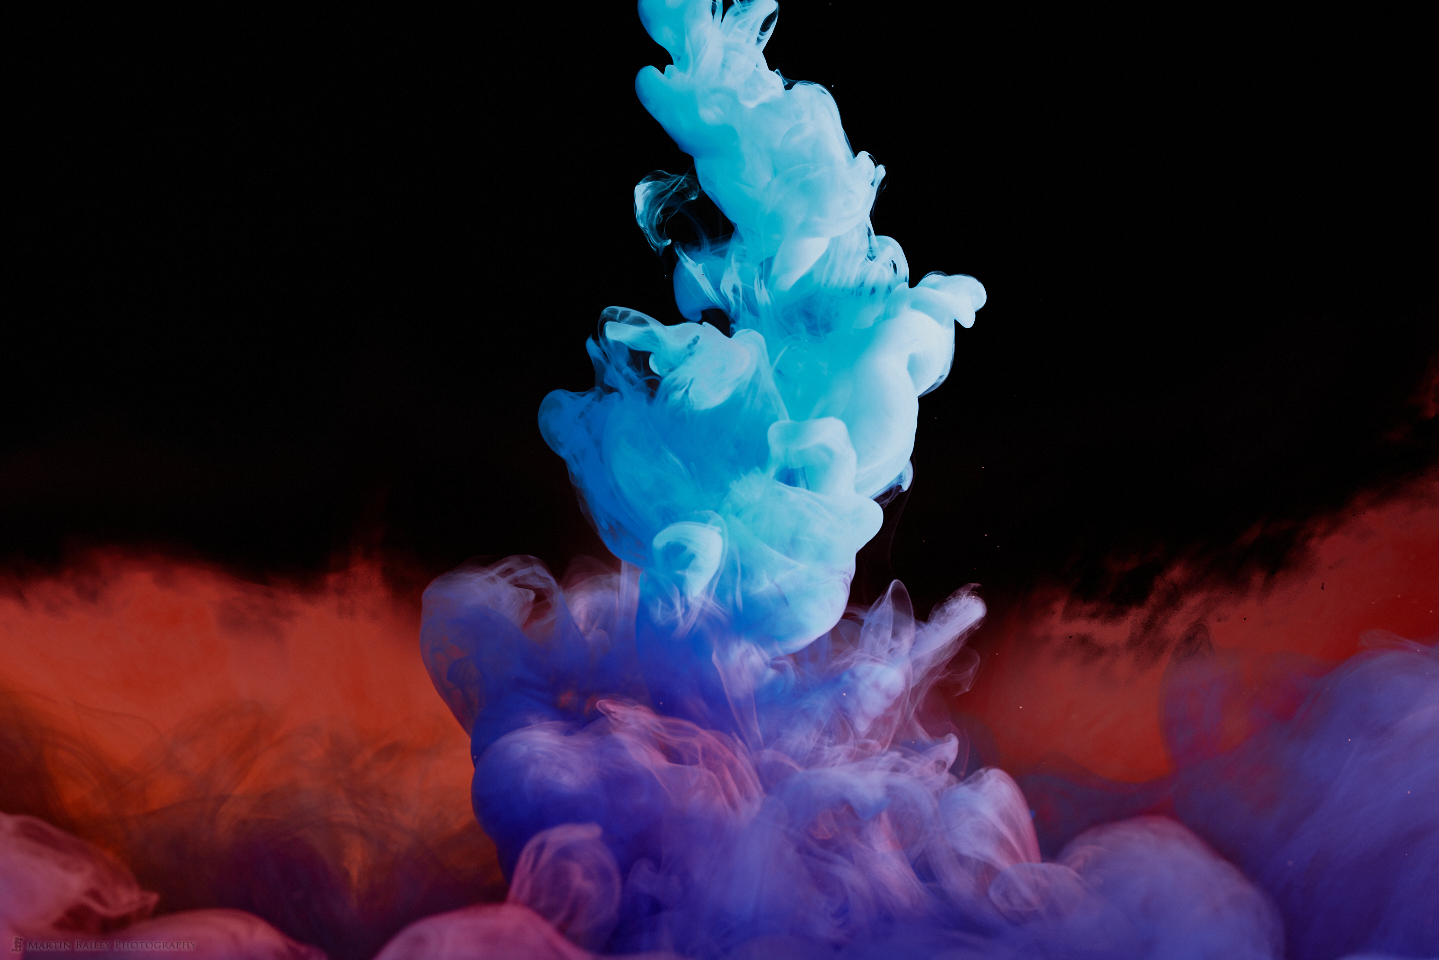
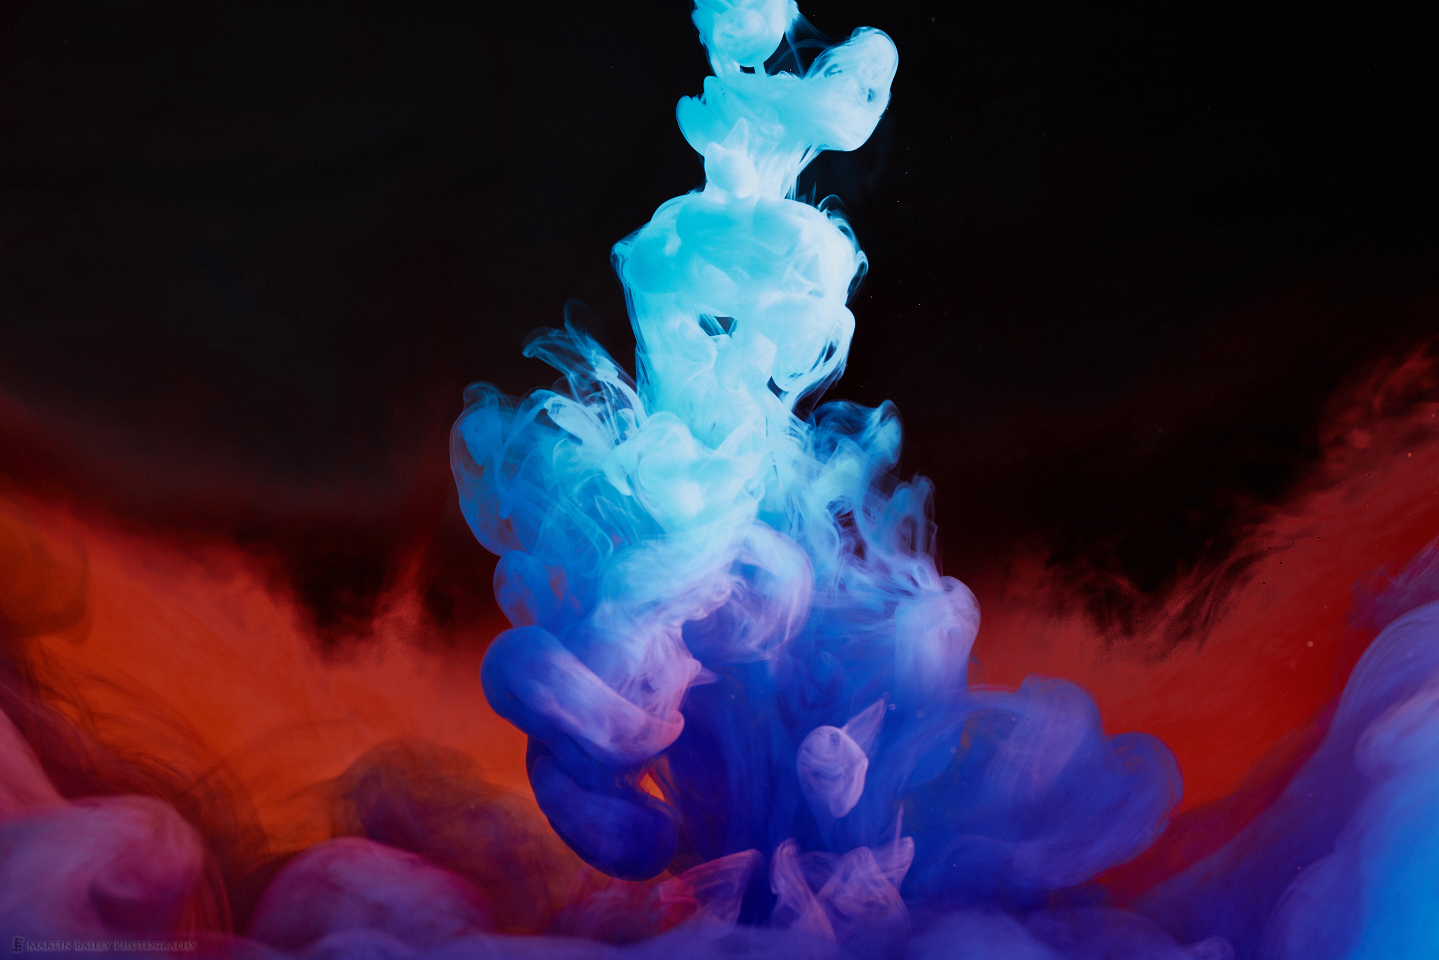
Here is an album of ten of my twenty selected images, so that you can see my results. I reduced the ISO to as low as 400 for some of these and didn't have to mess with the exposure in post.
I enjoyed the time spent figuring out how to do this type of photography, and I'm looking forward to making time to explore this even further in some future sessions. I hope you found that useful, and maybe decide to give this a go yourself. If you do give it a try or have already done this sort of photography and want to share some tips, or if you have any questions about my process, please leave a comment.
Before we finish, I'd like to let you know that I have now started taking bookings for the 2025 Japan winter landscape and wildlife tours. We also have a few places left on the upcoming 2024 Hokkaido Landscape tour, and we have to tell the hotels our final numbers very soon, so if you'd like to join me on the minimalist winter photographer's dream tour in early January, please let me know while there's still time. To see availability for all of my tours currently open for booking, please check out our Tours page. I don't usually do discounts, but if you listen to this and a discount will help you finalize your decision, drop me a line and I'll see what I can do.
Show Notes
Check out our tours here: https://mbp.ac/tours
Subscribe in iTunes to get Podcasts delivered automatically to your computer.
Download this Podcast as an MP3 with Chapters.
Visit this page for help on how to view the images in MP3 files.


0 Comments