Visit Library for MBP Pro eBooks |
I’ve spent some time over the last week building a slideshow of images and videos from my Complete Namibia Tour 2022, and today share some of the main things you might want to keep in mind when using Boinx Software’s FotoMagico 6 to build slideshows of your own. I’ve been using FotoMagico for many years since I switched to the Mac OS full-time in 2010, as my old slideshow software was for Windows, and I needed a good Mac alternative. FotoMagico was the obvious choice, and they have made some nice changes over the years, but in essence, just a very easy way to make powerful slideshows.
In preparation for starting to build my slideshow, I opened Capture One Pro, my raw processing and asset management software of choice, and I selected all 320 of the images that I selected from my Namibia images. I don’t intend to use all of them, and this initial selection does include some groups of similar images, which I generally will only need one photo of. Still, on occasion, I build out an image using variations, and so to start with, I want to see all images at my disposal. Note too that FotoMagico will use just about any image type with any color space, so for ultimate image quality, you might want to go with Photoshop PSD or TIFF files, but I like to use uncompressed JPEG files, as it makes FotoMagico lighter to use, and reviewing your slideshow as you build it can be a little smoother. Note too, though, that I generally don’t resize my images for the slideshow. I export full-sized images. This allows me to zoom in on parts of the images and pan around them etc. If you resize your images to 4K resolution, you can’t zoom in on them without the image quality degrading.
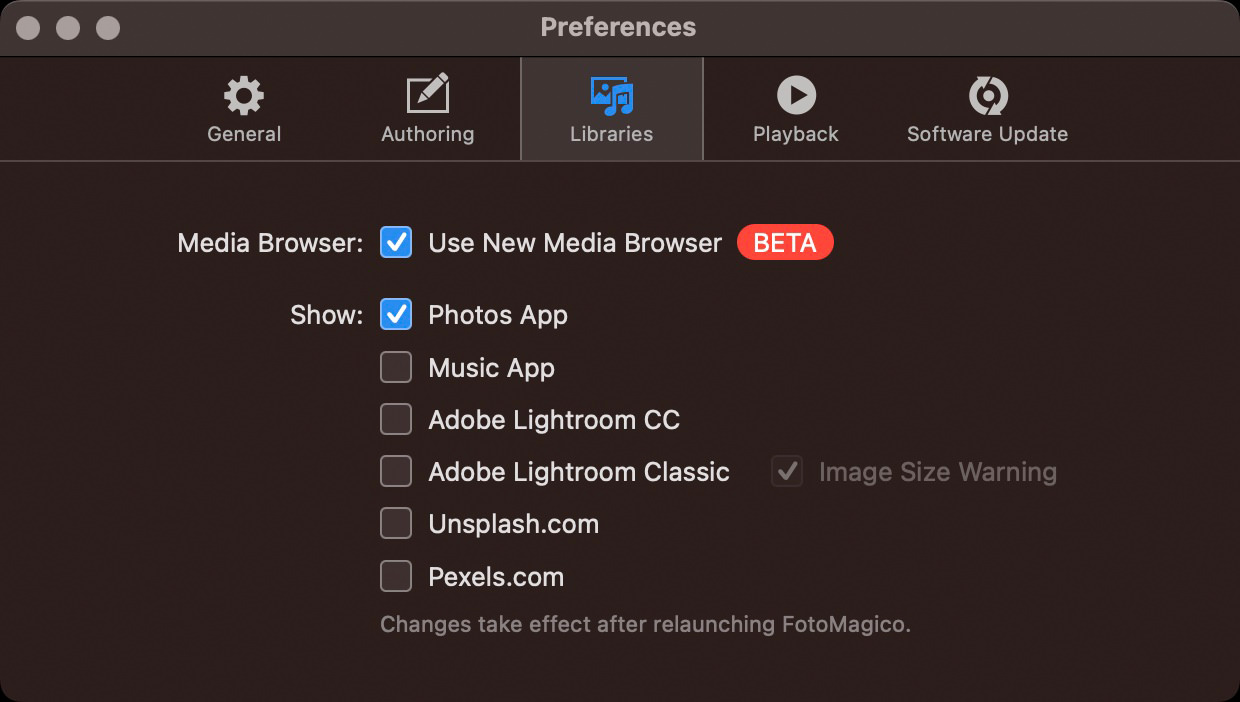
I exported my 320 images into an images folder inside a folder that I called Namibia_2022_Slideshow. Then I went back to my original shoot folders and started to select the various videos that I wanted to include. Some of the videos were in the Apple Photos app as well, as I shot them on my iPhone, so in the FotoMagico Preferences, under the Libraries tab, I turned on the New Media Browser which is currently still in beta. I left just the Photos App checkbox turned on. If you are not going to share your slideshow publicly, i.e., it’s just for private use, you could also enable the Music App to look for your background music, but if you are going to post your video online, you need to steer clear of using any music that you downloaded from Apple Music, etc. as it will result in a copyright strike. I’ll talk more about options for music later.
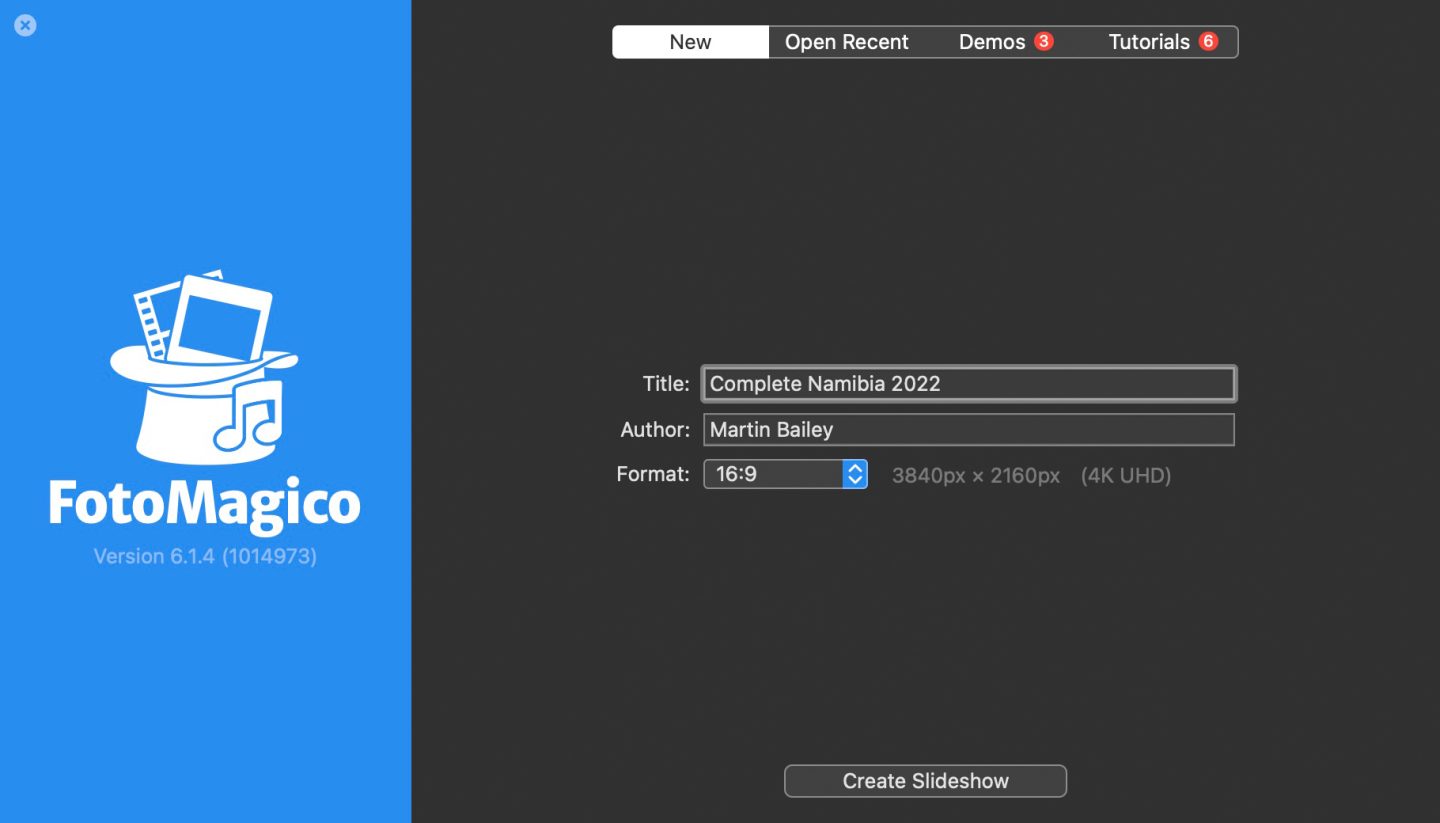
All of the videos were shot handheld, and some of the footage needed to be stabilized, but I also waited to see which video clips I would use before taking the time necessary to stabilize it. After starting FotoMagico, and applying the most recent updates, we are now presented with a new dialog. Then I entered the title Complete Namibia 2022, and my name is already saved as the Author. For the format, I selected 16:9, and the grayed-out words 3840px x 2160px (4K UHD) appeared to the right of the Format selection pulldown.
Once FotoMagico is open, I recommend selecting Animation Assistant under the Slideshow menu and confirm that your settings are in line with your expectations. Here are the settings that I use. We’ll set the slide length manually in a moment so you can ignore the Animation Speed slider. It would be nice if this could be set to a specific length, but with just slow to fast and no seconds displayed, this slider is pretty useless.
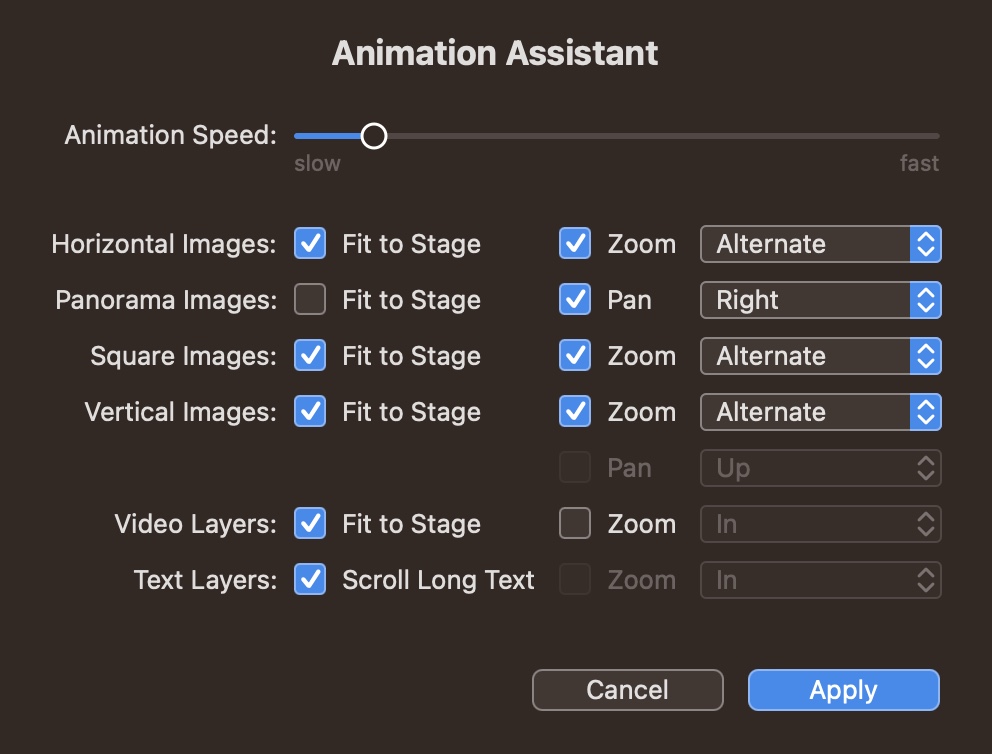
The rest of the options are probably self-explanatory, but the important thing, at least for my taste, is that the pulldown for the Horizontal, Square, and Vertical Images options is set to Alternate. What this essentially does is alternates the Zoom affect that is automatically applied to your slides when you add them to the slideshow. With Alternate selected, if one slide is set to gradually zoom in on the image, the following slide will zoom out, and then repeat this pattern for all following images.
Once I’ve checked the Animation Settings, I generally insert all of the images I want to include in the slideshow. I then click the Timeline icon above the bottom toolbar because I prefer to work in that view, and then click on any image, then hit Command and the A key on my keyboard to select all images. You can also select all images from the Edit menu. Once you have all images selected, click on the Options icon to the right, just above the Timeline, and under the Slide options, click the number for the Duration, and type in the length of the duration you want to use for your slides. And while you are there, type in something like 1.5 seconds for the Transition Duration as well.
Deciding Your Slide Duration
You can change these durations later, but it will save you time if you think about the slide duration before you start. The easiest way to do this if you already have some music for your slideshow in mind is to listen to the music and find how long each musical bar is. A bar is usually the length of four beats, although it can be different, so listen, and when you find the transition between chords or a natural looping of the drums, etc., use a stopwatch or something to time the length of the bar. If it is a fast-tempo song, you may need to use two bars for each slide. Your goal is to use somewhere between 3.5 and 5.0 seconds for duration. More than five seconds can make the presentation drag, and anything less than 3.5 seconds with the transition overlap will start to feel rushed. I’ll get into the music more later, but I found that for my music, I needed to run with a 3.8-second duration for my slides, so that’s what I entered. If you do already know what music you’ll use, you can drag that into the timeline too, and ensure that it starts where you want it to.
After that, you can start to play your slideshow and see how your images look as they appear one after another and ensure that the timing looks right if you already have music inserted. I use this phase to remove the images that I feel don’t quite match the set. Depending on the purpose of the slideshow, you may need to restrict the length to a specific number of minutes. In the bottom status bar in FotoMagico, you should now see the number of slides you have in your presentation and the total length of the slideshow in parentheses. My original show with all of my images was around 25 minutes, so I tried to remove as many images as possible, but I also added some video, so I’m probably going to be looking at a final presentation of around 18 minutes. I’m going to live with that, although it is quite long because the purpose of my video is to show what is possible in my 17-day Complete Namibia Tour. Plus, on showing it to my wife, who initially frowned when I told her it was 18 minutes, she was surprised when it ended, saying that she thought it was 18 minutes? When I told her 18 minutes had passed, she said it felt more like 8 minutes. That’s the kind of response we’re hoping for.
Productivity Tips
Of course, as you remove images, you will start to notice some places where your zoom doesn’t alternate. A zoom-in may be followed by another zoom-in, and that can look a bit clunky. Ignore these while you remove unnecessary images. Once you are relatively happy with your selection and the flow of your presentation, select all images again and then reselect the Animation Assistant and press the Apply button again. It should reapply all of the zooms so that they alternate again. If you have already started to adjust the duration of some individual slides to match tempo changes or pauses in the music, you can select smaller groups of images and Apply the Animation Assistant more selectively as well.
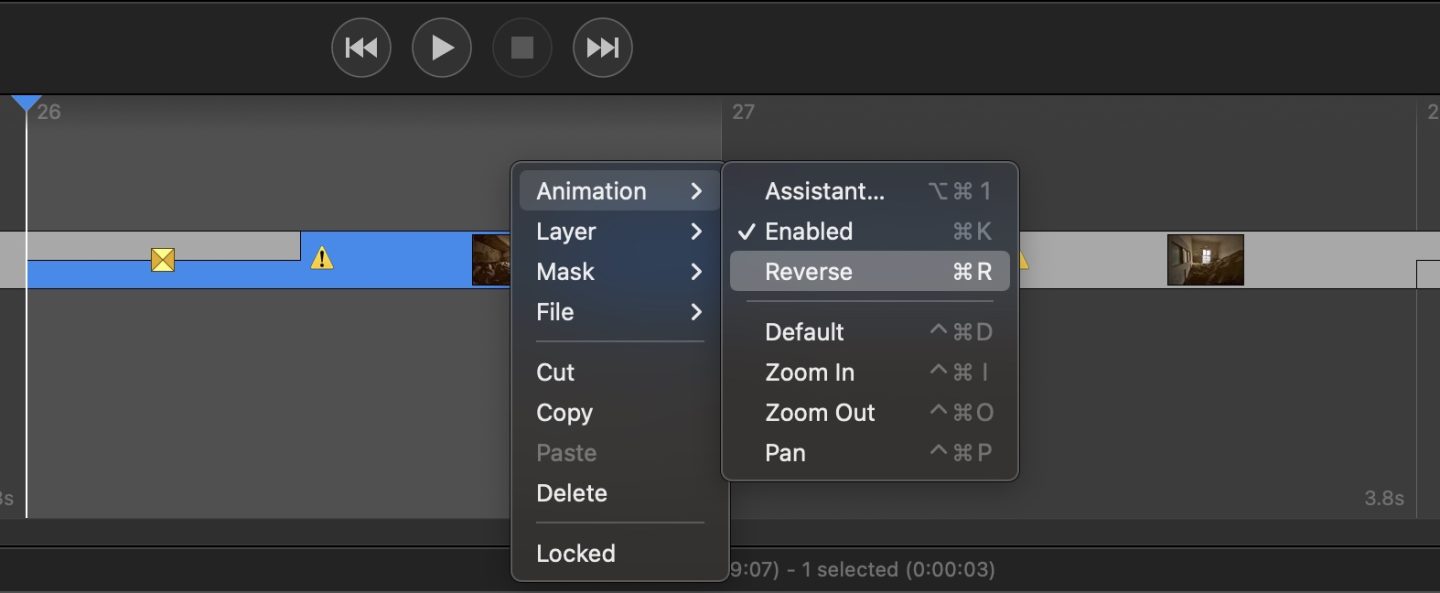
Also, if you delete images and just have a relatively small number of images that need to switch their zoom direction, you can right-click the images that need changing and select Reverse from the shortcut menu, as you see in this screenshot. This will switch the scaling and position of the Start and Finish points for the slide or slides that you have selected.
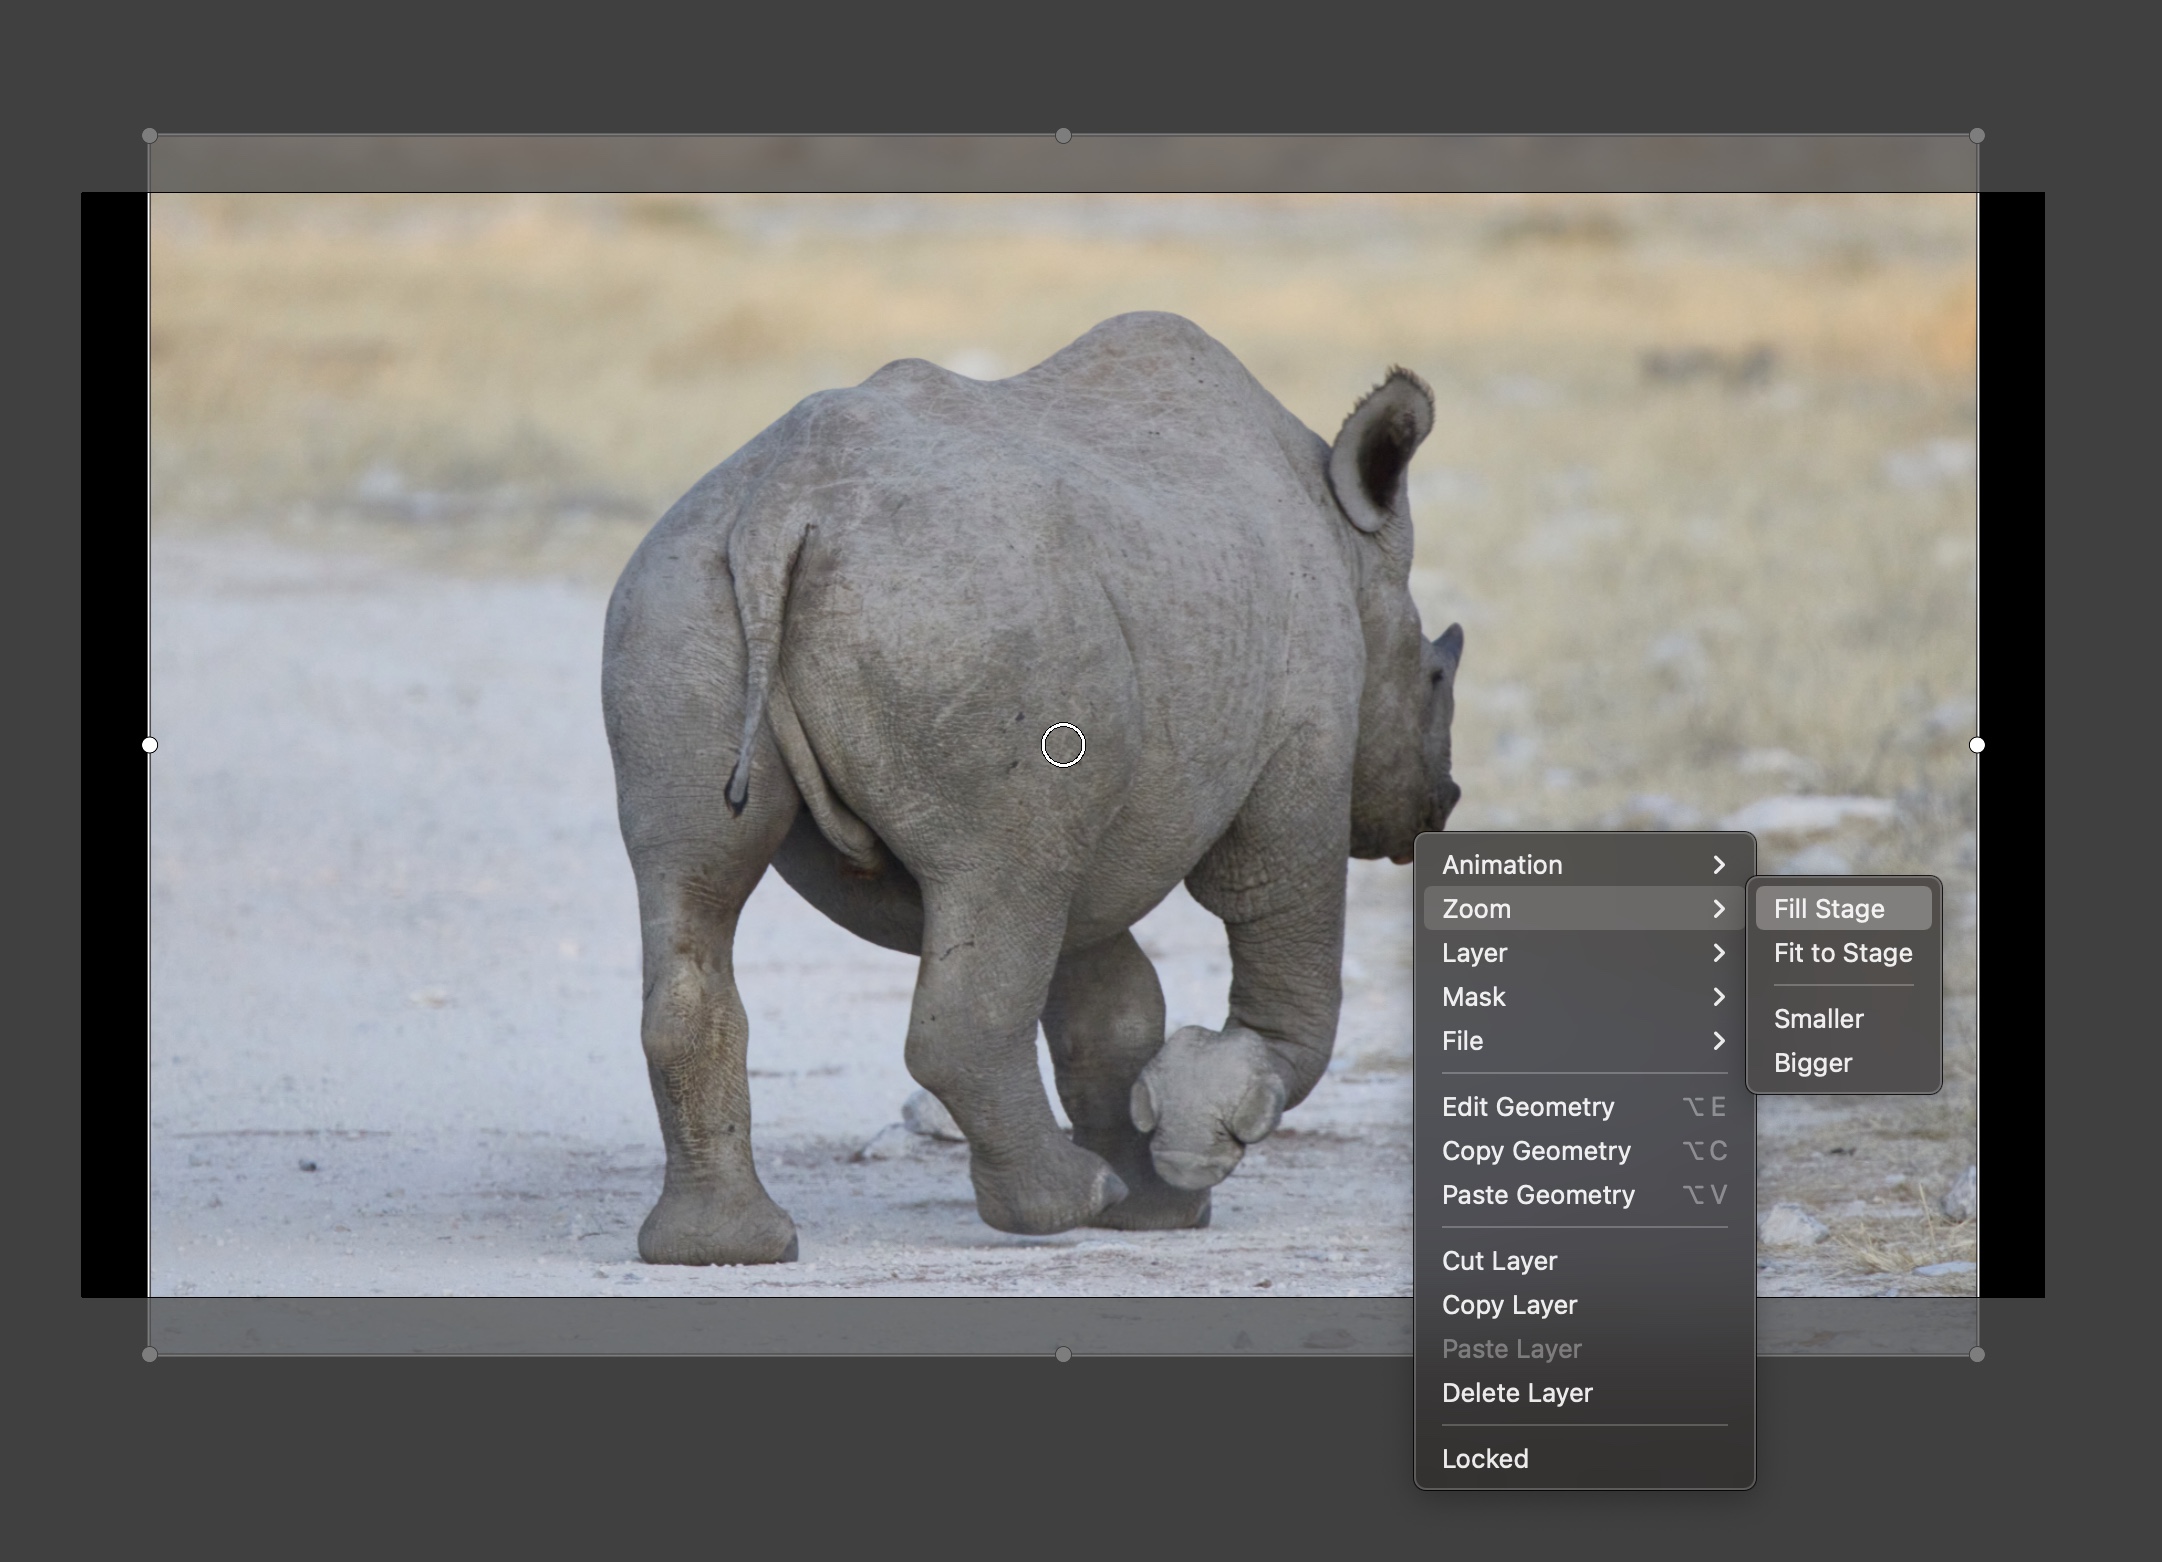
For one-off adjustments of the slide or transition duration, you can simply drag the lines at either side of the slide in the Timeline or adjust the durations under the Options for individual slides. Another option I use a lot as I tweak the size of my images is to right-click them and select Fill Stage or Fit to Stage from the shortcut menu. This is much faster than trying to drag the image nodes in or out, and it center aligns the image at the same time, so can help to avoid a number of possible alignment issues.

Also, note the small circle in the center of the previous screenshot. If you move the start or finish image position, you’ll see that circle move around the image. It’s indicating a focal point in the image so for example, if you zoom in on an animal’s eyes, it can be very effective to adjust the position of the image so that the circle is over the eye. That way, as the zoom progresses, the viewer will see that the focus of the zoom is the animal’s eye rather than, for example, the center of the image.
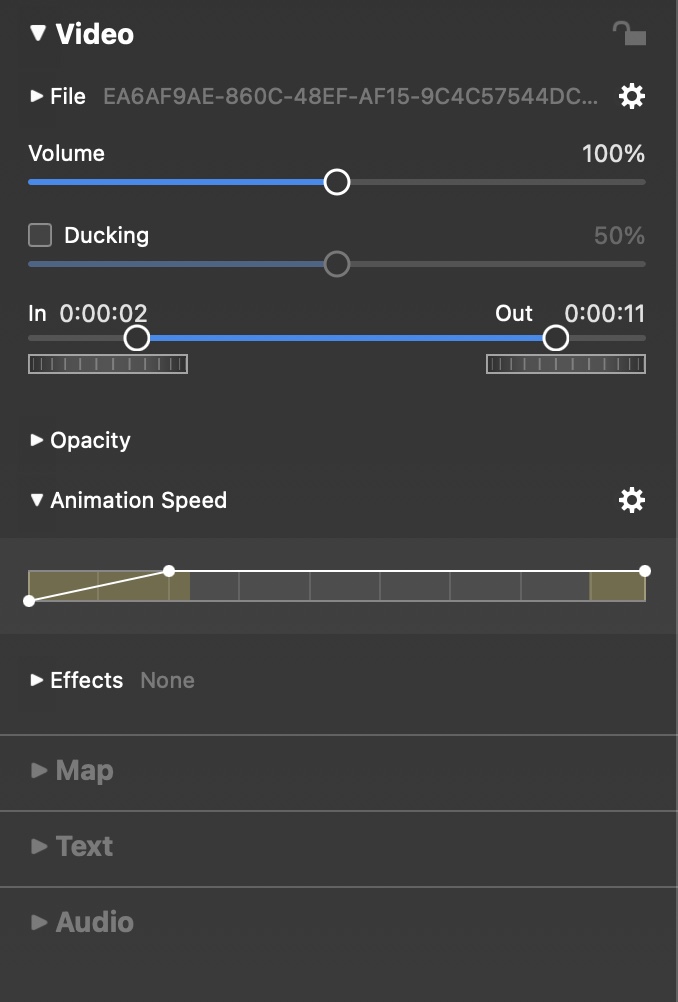
Note too that if you have a video or a large panorama image that seems to start and stop very abruptly, you can adjust the ease-in and ease-out of the animation by selecting the video or image in the Timeline, then select Options to the right, just above the Timeline. You should see an Animation Speed option. Open this and drag the node at the start or end of the Animation Speed, and you’ll see a second node appear as you drag the first away from the edge.
You can then drag the new node down, causing the speed to gradually ramp up or ramp down if you are adjusting the end speed. The further away from the edge you move the first node, the longer the ease in or out will take. Note too that you can see the boundaries of your selected slide transition in yellow as a reference.
Adding Music to Your Slideshow
If you have not yet added some music to your slideshow, you probably will need to think about that, as a slideshow without music can be pretty boring. I’m not going to go into much detail on my first recommendation, but essentially, you need to search for some music that you can either use for free or can buy a usage license for at a reasonable price. Check the terms and conditions and ensure that your intended use is covered. For example, if, like me, you will have some commercial messaging in your video, you must buy a license that includes commercial use. Be warned though, that if you upload your video to YouTube, even if you have a license, you will probably still get a copyright strike unless they have changed their policy over the last few years.
I stopped using YouTube years ago because despite presenting YouTube with a license for my background music, signed by the CEO of the company from which I licensed the music, I could not keep YouTube from slapping copyright strikes on my videos. Every time I fought and cleared one strike, the robots would reflag my video, and I had to go through the entire process again. Eventually, after clearing a copyright strike, I immediately deleted my videos, before the bots could reflag anything.
I have since then uploaded all of my videos to Vimeo, and although they do have a copyright strike system, they have humans remove strikes and keep them away. And that has only happened to me once on Vimeo, not continuously, as it did with YouTube. So, I highly recommend Vimeo if your videos contain commercial messaging and licensed background music. The problem there, of course, is that YouTube has a much larger audience, so if you want people to find your videos in searches, you’re going to have to deal with YouTube, and then, my next recommendation becomes almost essential, although I know this is not for everyone.
What I do for all my videos now is create my own music. This is time-consuming and takes a lot of skills and software that you may not already have. If you are not already making music as a hobby or for work, this is probably unrealistic, and therefore I’m not going to go into much detail. For my Namibia video, I started by getting the basic rhythm from the clapping of the Himba people from a video that I include in the video and built on that, using Ableton Live, which is a DAW or Digital Audio Workstation software. I also use a lot of plugins, and some MIDI hardware, namely a Komplete Kontrol S61 keyboard and a Maschine Mikro, both from Native Instruments, and a Seaboard RISE 49 from Roli.
I’ve already spent a number of days trying to create something I feel fits, and although I now have what I think is a very simple and effective introduction, using an African instrument called a Kalimba, I’m stuck for how to proceed to the rest of the piece, so although I wanted to release my slideshow video along with this tutorial, I’m actually going to release this now, and then I will follow up with my video next week, after hopefully completing the music to complement the images and video that I captured.
FotoMagico is available as a free trial if you want to try it before paying for it. They are now running on a monthly or yearly subscription payment rather than a regular license purchase. I know this doesn’t work for some people, but this is how a lot of software is sold now, so as they say, if you want to dance, you’ve got to pay the band. If you don’t see yourself using Fotomagico regularly, you could save money by opting for the Monthly subscription and stop your subscription when you don’t need it. I don’t recall seeing anything about any penalties for doing this, and that is why I opted for the monthly payment.
OK, so I hope the tips I’ve provided today are useful. I’ll embed the video to this post when I’ve finished the music and probably release the video itself as next week’s episode, so please stay tuned for that.
Before we finish, I have decided to unlock the posts on the Martin Bailey Photography website, so you no longer need to be a Patreon supporter to see the content. I did want to add, though, that the Patreon program is still in place, and I very much welcome anyone that finds value in what I’m doing here to support us via Patreon, starting from as little as three dollars per month, which is just $1 per episode, as well as unlocking all previous 784 episodes.
Show Notes
Check out FotoMagico here: https://fotomagico.com
Subscribe in iTunes to get Podcasts delivered automatically to your computer.
Download this Podcast as an MP3 with Chapters.
Visit this page for help on how to view the images in MP3 files.


0 Comments