I recently visited an industrial area in a place called Chidori Town near Kawasaki in the Kanagawa Prefecture of Japan, to photograph some amazing chemical plants there, so today I’m going to share some of these images and some of the shooting techniques that I used.
A number of years ago on a Google Plus photo walk, I met a photographer named Masanobu Tanzawa, who had a photo of a chemical plant on his business card that just blew me away. You wouldn’t think they’d make great subjects, but the beauty of his work was instantly obvious. We’ve met again a few times since and I have continued to follow him and his work on Google Plus and Facebook etc. More recently he’s doing a wonderful, very surreal series called Tokyo Ghost Town, which you might also want to check out. It really is stunning work.
Last week though, as I started to free up some time having just completed the preparation for my 2017 Namibia Tour, I got a mail from my friend Joerg Rockenberger, who I’ve travelled with on tours a number of times. Joerg is also a member of the MBP Community on Google Plus, so some of you that participate in that community might already know him. Anyway, Joerg was going to be in Tokyo for a few days, so we started to discuss meeting up for a shoot, and I started to think about heading over to these chemical plants.
When you fly in or out of the Haneda Airport in Tokyo, you can sometimes see a vast industrial area just south of the airport, and I knew that the work that Tanzawa-san had been doing was in that area too, so I jumped on Google Earth, and had a poke around. It didn’t take long to realize that you can drive into the industrial area and there were spots here and there where you can park a car, so I arranged to pick Joerg up at Kawasaki Station at 3pm, and fifteen minutes after that, we were driving through the industrial area of Chidori Town.
From the images I’ve seen of this area, it’s obvious that part of the beauty comes from the lighting of the plants as it gets dark, but we arrived earlier, so that we could have a drive around a few areas first, to decide what we would shoot as night fell. We decided the spot that we would come back to, and then with a few hours left until it got dark, we had a drive a little further down the coast to the next island, where I initially made this photograph (below).
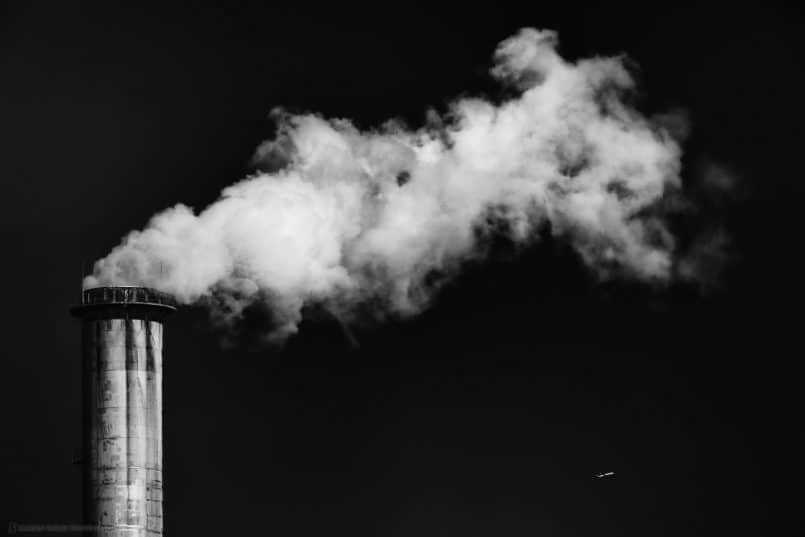
We had parked where there was a view between some ships, and I’d made a few frames over the chemical plants, but I didn’t really like what I was getting, the light was still very harsh, so I switched to my 100-400mm lens and shot the top of this smoke stack with the steam billowing out of it.
As I shot, a couple of times a plane flew through the scene. This one is in the distance, and so probably from the Narita Airport. I have another with a plane above the smoke, much larger, which was probably from the Haneda Airport. I like both shots, but I’ve decided to go with this one for today. The sky was a clear blue, and I have obviously made it very dark in Silver Efex Pro, during the black and white conversion.
If you have followed my work, you’ll probably already know a couple of things. Firstly, when converting to black and white I often go heavy on the contrast. This look just really appeals to me. The other thing is, I am just not a fan of blue skies. I like nice weather for hanging out in, but for my photography, I much prefer nasty, heavy skies. The only photos I am happy to leave a blue sky in really are my eagle photos. Otherwise, they just don’t appeal to me, so even as I shot this, I mentioned to Joerg that I’d be converting this to black and white, and this is what I had in mind. I shot this at 1/320 of a second at f/11, ISO 200 at 255 mm.
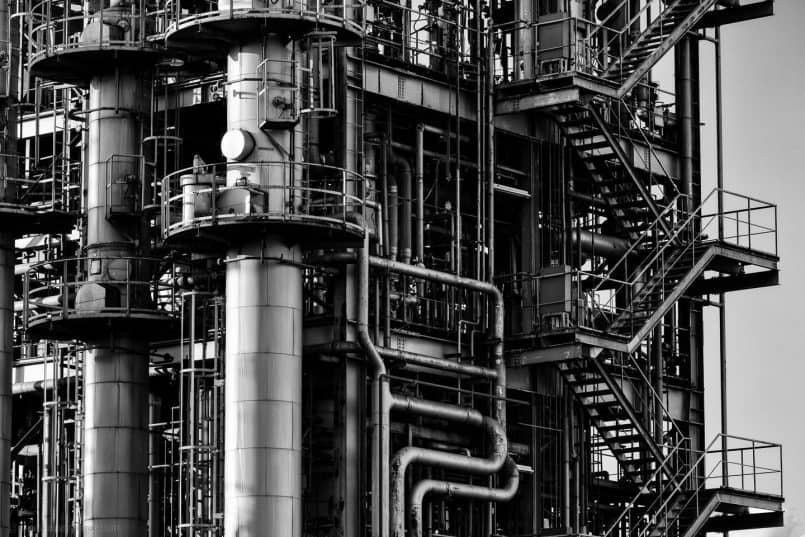
By 5pm we headed back around to the area that we’d first staked out, and started to photograph the plants as the sun got close to the horizon. The light was warmer now, but not spectacular, and also because I just like the silvery feel to these daytime images, I continued to convert to black and white in Silver Efex Pro, as you can see in this photograph (below).
The complexity of these plants is mind boggling to me. Joerg is a scientist, and actually understands how these plants work, so it was fun to talk about this a little as we photographed them together. For this image I stepped back a little, and used my 100-400mm lens again, for two reasons. The first reason is that the long lens enables me to frame just a small area of the plant. I was at 153 mm for this image.
The other reason I stepped back was so that I could get a more square on view of the plant. As you’ll see shortly, I really don’t care about my vertical lines converging in as we look up at buildings. In fact, with wide angle lenses I use this affect in my images on purpose. Some people like to straighten these vertical lines either by shooting with a tilt-shift lens, or later on the computer, but I personally don’t like to do this. It’s just personal preference. Having said that, for this long shot, stepping back did enable me to naturally straighten these lines a little, and for this shot I think that perhaps works better, because of the apparent closeness to the scene.
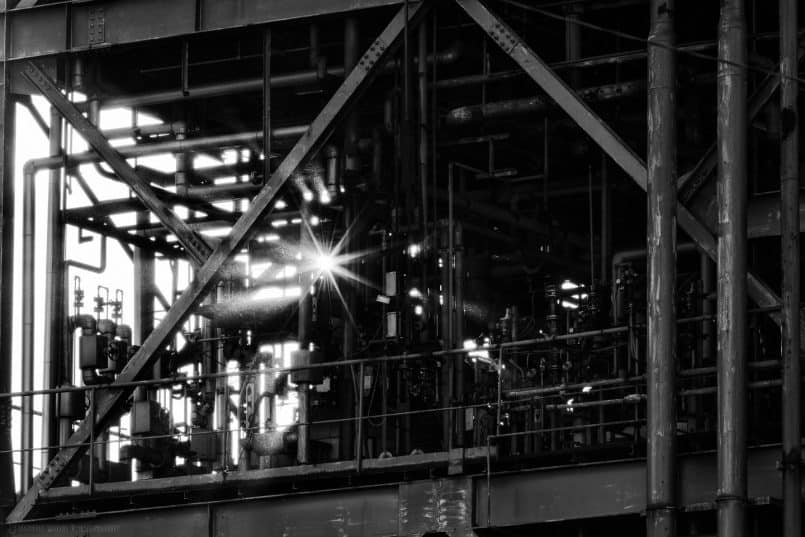
I shot this next image at 300mm from a distance again (below). This might not come across so well in the Web sized images, but if you look closely, there is dust in the air from the plant that is being lit by the sun coming through a gap in the pipes causing that starburst effect. I had stopped down my aperture a little to f/14, which helps to define these starbursts, but I’ve had these at much wider apertures too. In situations like this, it’s more about finding a camera position that forces the sun to shine through a small hole than it is about photographing it with a small aperture set in the lens.
You can perhaps see that I’d allowed the sky showing through the structure to just blow out a little, to give me better detail in the shadows. Following last week’s Podcast about ISO Invariance you’d think I might have allowed this scene to go a little darker and increased the shadow detail in post, especially as I was shooting at ISO 100, but I couldn’t bring myself to do this. Although I now understand how I can use ISO Invariance in my work, I’m just so used to exposing to the right, it’s difficult to adjust my shooting workflow. Plus, the benefits for Canon shooters are small to nonexistent, depending on the type of scene we’re shooting, so I think for the majority of scenes, I’m going to continue to expose to the right.
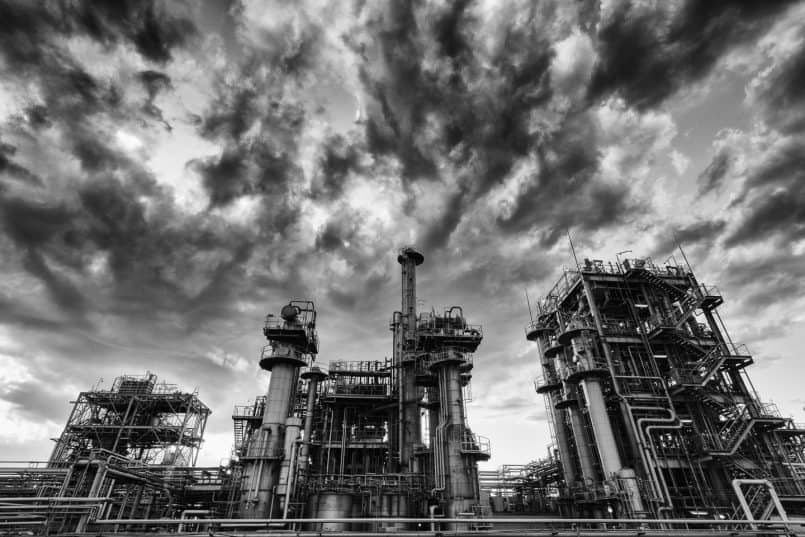
By 6:10pm, about 15 minutes before sunset, there was now some cloud detail in the sky, so I reached for my 11-24mm lens, to emphasize the big sky, and include multiple structures in the frame, as you can see in this photograph (below).
The sun was still shining quite brightly from the horizon, but my shutter speed was now 1/6 of a second at f/14, ISO 100. Again, I converted this to black and white in Silver Efex Pro, but this time, more to bring out the detail in that big sky. I was still of course conscious of the metal in the structures, and adjusted my sliders to keep good structure and texture in both areas.
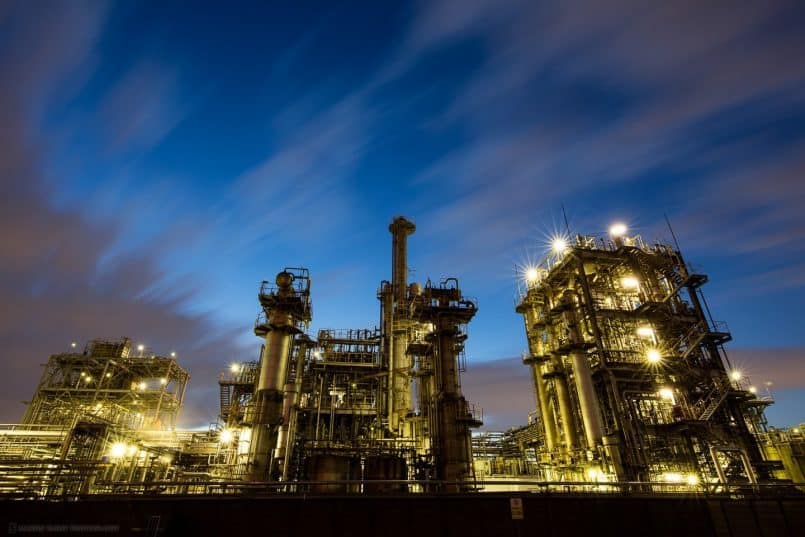
For a few frames, I attached a neutral density filter, and did some really long exposures, but as the sun went below the horizon, even without a filter, I was able to shoot this at 90 seconds, as the sodium lights of the plants started to warm up, and the color of the sky got progressively cooler, as we can see in this photograph (below). I found the contrast in colors quite pleasing here, so I’ve left this and the rest of the images in color.
There isn’t a lot of processing done to these images. In fact, all I’ve done to this is added +15 on the Clarity slider in Lightroom, just to give the detail in the structure a slight boost. I should also mention that to maintain the yellow, almost green glow o the lights, I left my camera in the Daylight white balance preset. I pretty much do this all the time, but consciously left it like that here, for this effect. I did have a play with the white balance in post, to see if I could get a better effect, but kept coming back to the original Daylight preset.
Again, you’ll notice that I’m also now just rolling with the distortion caused by the wide angle lens on the buildings. I just personally prefer to see this, rather than straight vertical lines.
When I can get a good angle on a structure in reality, I’m happy with straight too, but when I’m shooting from below, it just feels more natural to me like this, and I think in general, people are also accustomed to seeing this kind of distortion in images. I can’t help thinking that some of the desire to straighten everything comes from the photographer, rather than the viewers of our images, but again, it’s really just personal preference.
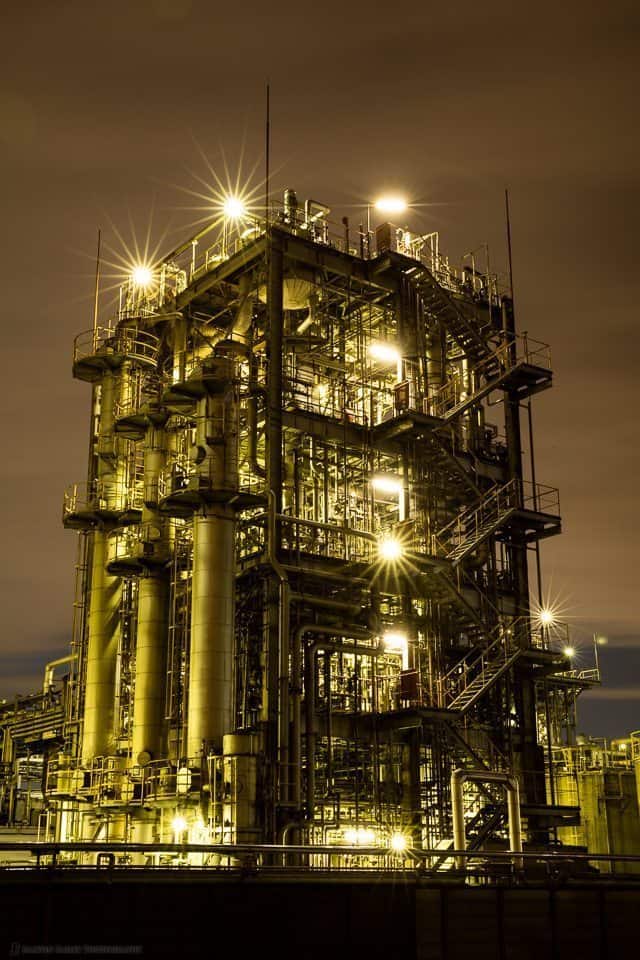
For a while, I switched to my 24-70mm lens, and zoomed in a little for some closer studies of the plant structures, as you can see here (right).
This is obviously the right of the three structures from the last few photos, but I think the detail of each of these warrants a closer look. I’ve shot some even closer images just of the center of this structure, but as I like to keep each episode down to 10 images, I won’t share all of these today. If you’d like to see all of the shots from this shoot, I’ve created a portfolio called “Pipe Dreams” if you are interested in taking a look.
As the natural light fell, this image was a 60 second exposure at f/14, ISO 100, with a focal length of 50mm.
I wanted to also mention that it was very windy over by the coast as we shot these structures, but my Really Right Stuff tripod with the BH-55 ball head held up really well, even for these long exposure. It was so gusty that I was a little concerned, but it all turned out OK. Both Joerg and I were covered in dust by the time we’d finished shooting though. At one point Joerg pulled a huge grain of grit out of his eye, which we had to laugh about.
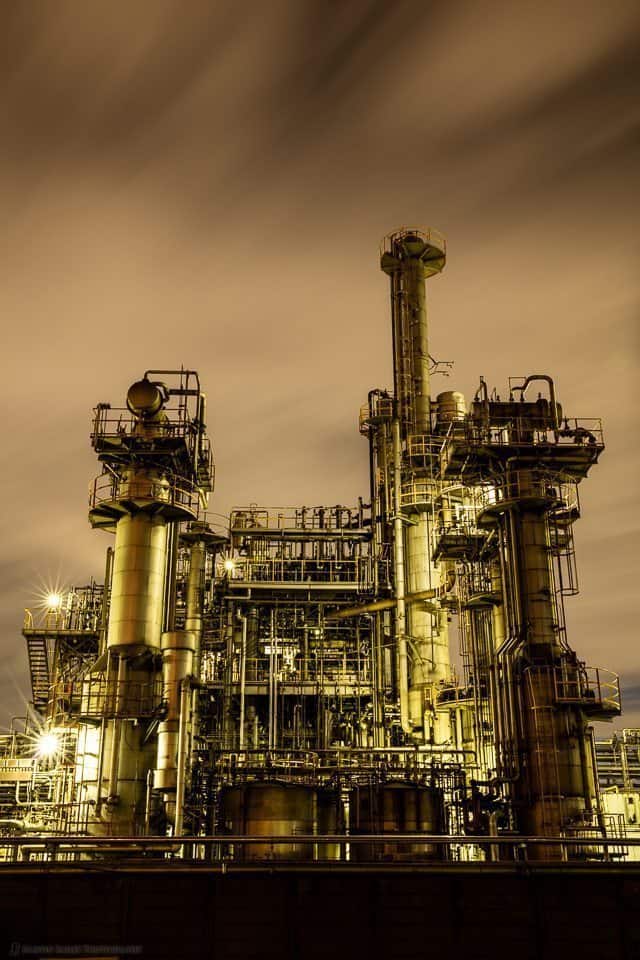
This next image (right) is the center of the three structures from the earlier images. Again, here I’m just making closer studies of the same structures, as I think there is enough interest in each of them to warrant this.
I increased my exposure a little for this one, by opening up my aperture from f/14 to f/11, for the same 60 second shutter speed, because this structure isn’t lit as well as the previous one, so it benefitted from the extra two-thirds of a stop of exposure.
I like the streaky clouds in this shot, caused by the long exposure, but an alternative crop here might be a perfect square, which I can do and include just the plant, from the top of the dark wall, to just above the tallest tower there. I think I might try that as a print at sometime, probably on Breathing Color’s Vibrance Metallic. That would make these images sing, for sure.
I also wanted to mention that if you decide to go and shoot similar structures in your own country, be sure to research any security policies in place before you head out.
There are obviously keep out signs and fences all around these structures. I was actually shooting with my oversized tripod, using Live View looking up at the camera, so that I could get a view over the top of a fence. These particular structures were also on the other side of a train line, and there were security guards patrolling the area.
But, in Japan at this point in time, at least at these plants, it is not illegal to photograph these structures. As long as you are standing on public roads, there is nothing to stop us from shooting these kind of images. I’m sure there are some locations where the owners try to prevent you from shooting, but there are no legal issues in photographing these sites and we were not hassled in any way as we shot.
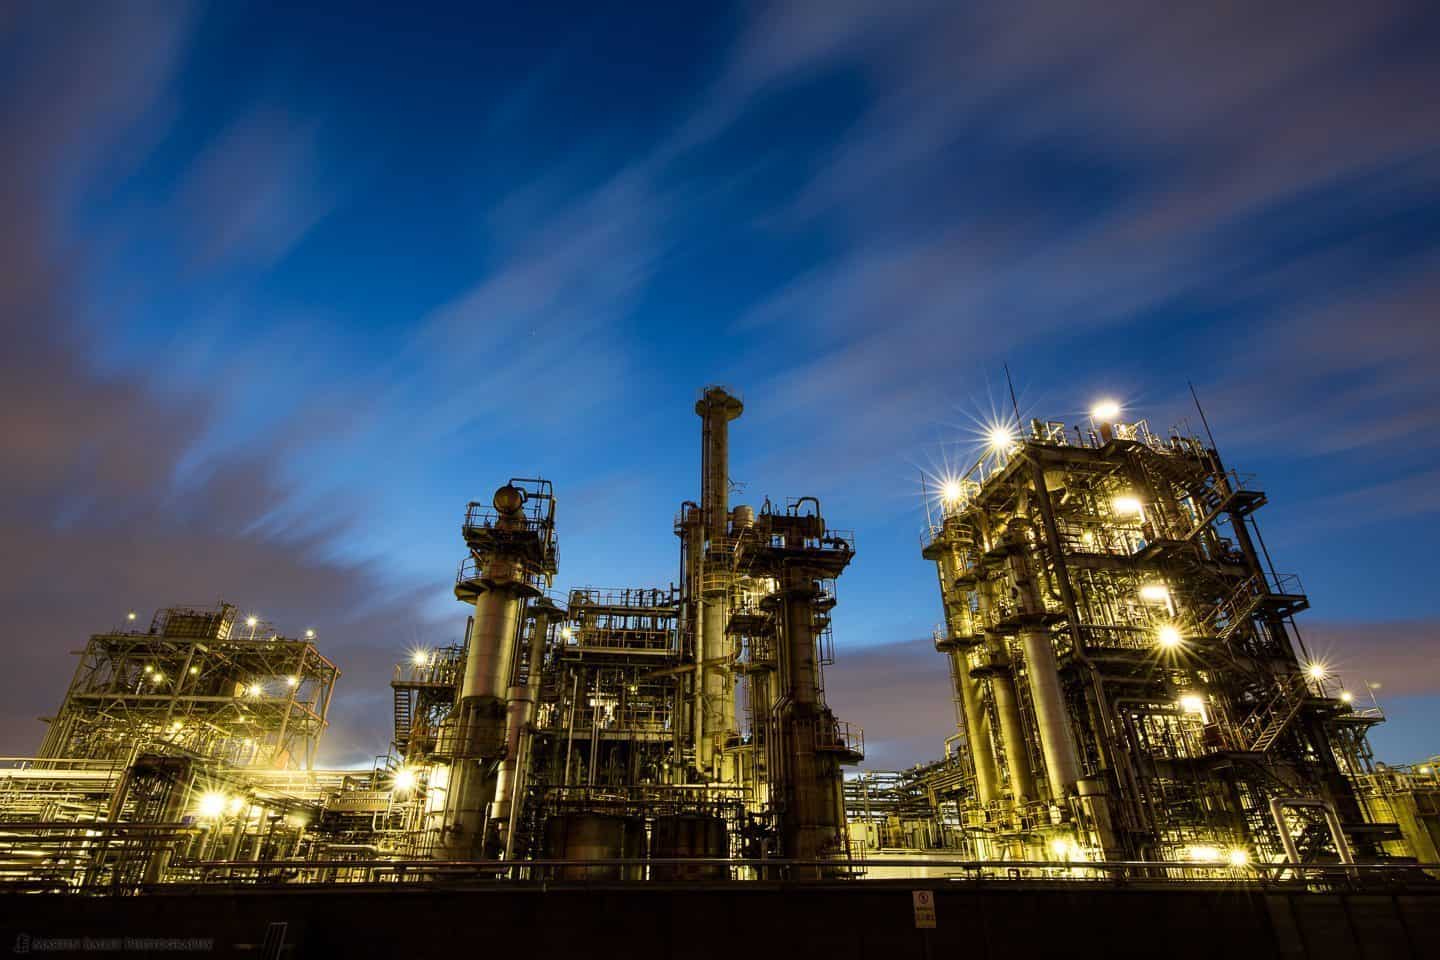
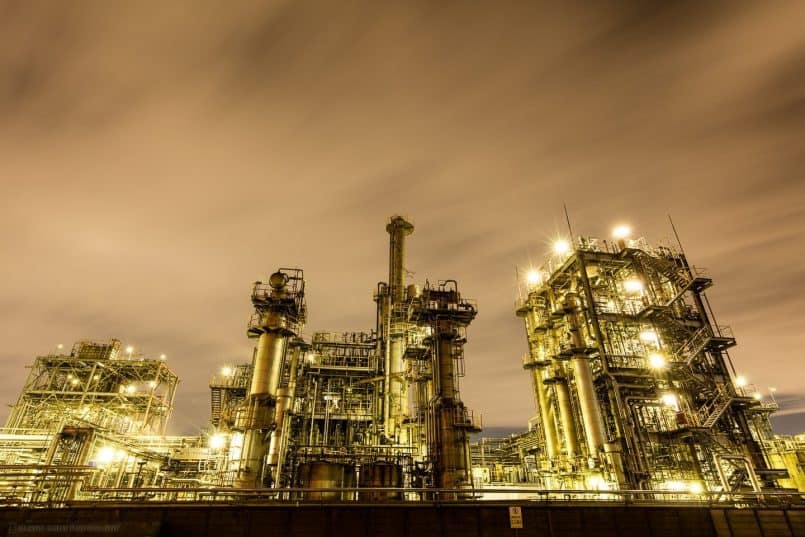
OK, so one last image from this location before we move on. Now that the natural light had gone from the sky, I couldn’t resist dropping the 11-24mm lens back on to my camera, for one last wide shot of the three main structured I’d been photographing, as you can see here (below).
As I said earlier, this would have been a perfect candidate for shooting the scene a bit darker to prevent the lights from over exposing quite so much, but I couldn’t resist increasing my exposure to 75 seconds at f/11 to capture all of that yellow light inside the plant, and allowing the starbursts from the lights to spread out a little more too.
Another thing that I thought about doing here is removing that keep out sign on the wall at the bottom of the photograph, for aesthetic reasons, but as Joerg said at one point as we worked this location, there isn’t really anything in the scene to show you that it’s in Japan, so I left that sign in because of the Japanese writing as a clue to the location.
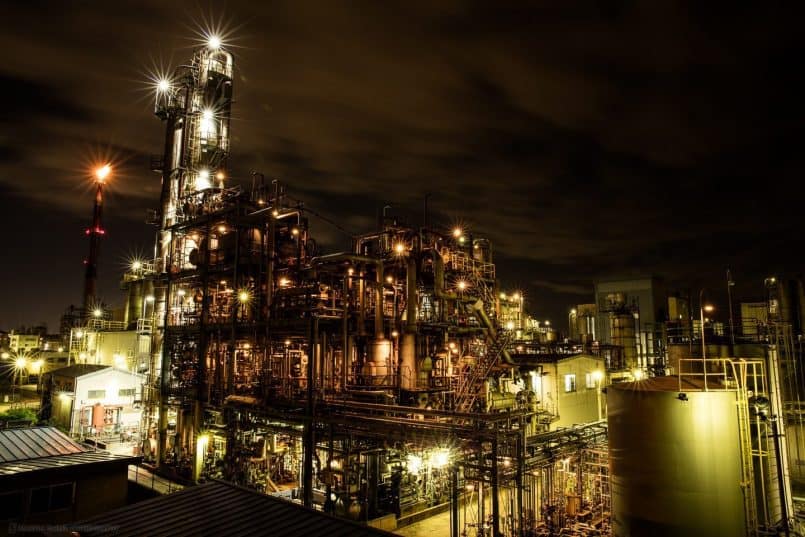
By this time it was 7:30pm, and we needed to start to think about heading back, but we decided to gate-crash the location that Masanobu Tanzawa has shot so beautifully over the years, just to grab a few frames before we left. I tried hard not to be influenced by Tanzawa-san’s work as I shot this plant, but the scene kind of composes itself in some ways, so it is what it is, as you can see here (below).
It’s fun too that although some of the lights are still sodium, many of them have been replaced with LED lights, which don’t have that strong yellow cast, and I quite like that contrast. The big orange light on the left though, if you look closely, is fire, as the plant burns off some gas, probably a byproduct that they don’t need. I should have asked Joerg about that though. It’s probably some other totally different reason.
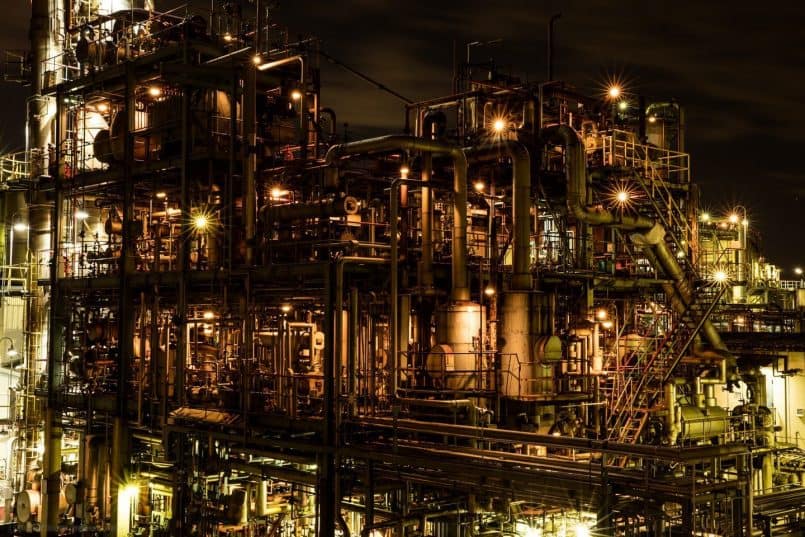
For the last photo for this episode, here is a closer shot of the amazing detail in what Tanzawa-san calls the Pipe House. I tried this framing because the sodium lights are sort of framed by the whiter LED lights. I didn’t really want to get in any closer, as it felt too much like I was stealing Tanzawa-san’s photos, so I shot one more frame after this that you can see in the portfolio gallery, and then we decided to leave.
We had planned to go and get something to eat and a beer, but because I was driving, that would have meant driving an hour back to my place to park the car first, and it was already close to 8:30pm by this time, so we called it a day, or a night.
I know this is a little bit of a departure from my usual nature and wildlife work, but I found it fun, and this is the sort of project that I like to work on as time allows, but it doesn’t take as much time as leaving the city for the beautiful landscapes etc. I will probably head back over to this and similar locations in the future, and build on that Pipe Dreams portfolio, and probably remove a few of the current images too as I replace it with better work.
I hope you’ve enjoyed this episode though, and going through these photos with me. If you’ve shot similar subjects yourself, please do drop a link into the comments below. I’d love to see what other countries or even other locations here in Japan offer, and it’s always nice to see your work too.
Show Notes
Check out Masanobu Tanzawa’s work here: https://plus.google.com/u/0/+masanobutanzawa/posts
Check out Joerg Rockenberger’s work here: https://plus.google.com/u/0/+JoergRockenberger/posts
See my Pipe Dreams portfolio here: https://mbp.ac/pipedreams
Subscribe in iTunes for Enhanced Podcasts delivered automatically to your computer.
Download this Podcast in MP3 format (Audio Only).
Download this Podcast in Enhanced Podcast M4A format. This requires Apple iTunes or Quicktime to view/listen.


Hi Martin. On the subject of signs in the environment, people seem to like this: http://www.shanebaker.photos/landscapes#h22d8d284 . It’s in winter near Canberra. A little further out, I grabbed this one morning on the Nullarbor: http://www.shanebaker.photos/p514344351#h71133e95 . All the best.
Great shots Shane! The second one would be classic if there was a tent in the scene as well. 🙂
All the best to you too. Thanks for stopping by.