Having been asked many times about the Neutral Density filters that I use for my long exposure images, today I’m going to explain what Neutral Density filters are, which one’s I use, and how I use them, along with some ways to easily calculate your new shutter speeds, and some guidelines on how much neutral density to use for various effects.
Before we jump into today’s episode, I’d like to thank our sponsors Squarespace. Squarespace is the all-in-one platform that makes it fast and easy to create your own professional website, portfolio or online store. For a free trial and 10% off, go to squarespace.com and use offer code MBP10. We’ll hear more from Squarespace later on.
Basically, neutral density or ND filters, stop a given amount of light from passing through your lens to your sensor, making it necessary to increase the length of the shutter speed to achieve the same exposure. There are applications when you might use an ND to shoot say portraits in bright light when you still want to use a wide aperture for a shallow depth of field. There are also times when NDs are used for video, because video usually looks best when shot at 1/50 or 1/60 of a second, and I’ve used both of these techniques, but today, we’re going to concentrate on the use of ND filters used to achieve longer shutter speeds to capture movement in our subjects, such as to make waterfalls look silky smooth, or to capture movement in clouds etc.
Are They Really Neutral?
The idea behind the ND is that they are supposed to be totally neutral in color, cutting down the amount of light passing through the lens without changing the color of the resulting photographs. The filters that I use pretty much are neutral and have never been a problem, though I have heard of people getting a magenta cast on their images. My friend David duChemin for example says that he gets a magenta cast sometimes when stacking two of his square resin filters. The type that attach to the front of your lens using a screw in filter holder.
I used to use these, and I think they’re useful especially if you want to use graduated neutral density filters, which are dark on one half and clear on the other, with a graduation between the two. These are used to darken the sky for example, when you have a light sky and a much darker foreground. You’d use a graduated neutral density filter here to even out the light in the scene.
I personally stopped using graduated ND filters a few years ago, as I simply haven’t found them necessary since the dynamic range in our cameras became so much greater. I keep in mind that I might sometimes have to shoot multiple images to merge together in Photoshop later, but we can bring so much detail out from the shadow areas in Lightroom or Nik Software’s Silver Efex and Color Efex Pro now, that I haven’t merged images like this in years either. The result is that my main use of NDs now is in the form of circular screw-in solid neutral density filters. I use a mixture of Kenko, Hakuba and Hoya filters, though mainly Kenko. I have also heard good things about B+W filters, though I have never used them myself.
Neutral Density Ratings
Neutral Density filters are often rated with a number so that we can understand how much light they will stop from entering our camera. An ND2 will block out one stop of light, so if for example we use this with a base shutter speed of 1/250 of a second, with a one stop ND2 filter fitted, we’d need to adjust the shutter speed to 1/125 of a second, twice as long as the original shutter speed, because we need to let in one stop more light, and that always require us to double one of our exposure settings, such as ISO, Aperture or Shutter Speed, but as I say, because most of the time we use NDs to increase the shutter speed, that’s what we’ll concentrate on here.
The next rating you’ll see is an ND4, which blocks out two stops of light, and then an ND8, which blocks out three stops of light. I know these numbers might seem counter-intuitive, but if you think of these numbers, 2, 4 and 8 as the denominator in fractions, it gets easier to understand. An ND2 cuts the light entering the camera by 1/2, an ND4 cuts the light to 1/4 and an ND8 cuts the light down to just an 1/8 of the original amount of light that would have entered the camera without the filter fitted.
So, because an ND2 cuts the light entering our camera to 1/2, we have to double the shutter speed to compensate for this, and I’m sure you already know that if we double the shutter speed, we are increasing it by one stop. This is why an ND2 gives us one stop of darkness, and an ND4 gives us two stops, and an ND8 gives us three stops of darkness, or longer exposure.
This calculation is continued, with the not so commonly seen values ND16, ND32 and ND64 and so on. Each consecutive rating halving the amount of light is passes through compared to the previous value filter. The next value filter I own is an ND400, which of course is not a fraction. The natural progression would be ND128, ND256 then ND512, as we keep halving, but the manufacturers decided that ND400 would be a good value to add to the range too. This does still cut the light down by 1/400 though, so if we do the math, we find that this is an 8 and 2/3 stop filter.
The absolute darkest ND filter I own, which is actually made for directly photographing the sun, is an ND100000, which cuts the light down to 1/100000 of it’s original brightness. This filter can give me multiple hour exposures if I want to, or still take me down to multiple minutes in very bright conditions, like when you are shooting towards the sun over the sea, for example, when there is a lot of reflectivity going on.
Optical Density
OK, so I know I’m geeking out here, but before we move on, I’d just like to cover the other neutral density number system that you might see quoted on ND filters, and that’s the Optical Density. Now, although I’ve figured out how to do these calculations in Excel using a logarithmic formula, Wikipedia says, and I quote “For an ND filter with optical density, the amount of optical power transmitted through the filter can be calculated from the logarithm of the ratio of the measurable intensity after the filter to the incident intensity.” That helped me to develop my Excel spreadsheet, but I’ve never really felt there is any benefit in trying to figure out what the hell that means, so let’s just look at a table of the values as a reference.
| ND Rating ↓ |
Optical Density ↓ |
F-Stop Reduction ↓ |
% of Transmission ↓ |
| No Filter | 0.0 | 0 | 100% |
| ND2 | 0.3 | 1 | 50% |
| ND4 | 0.6 | 2 | 25% |
| ND8 | 0.9 | 3 | 12.5% |
| ND16 | 1.2 | 4 | 6.25% |
| ND32 | 1.5 | 5 | 3.13% |
| ND64 | 1.8 | 6 | 1.56% |
| ND128 | 2.1 | 7 | 0.78% |
| ND256 | 2.4 | 8 | 0.39% |
| ND400 | 2.6 | 8.64 | 0.25% |
| ND512 | 2.7 | 9 | 0.20% |
| ND1024 | 3.0 | 10 | 0.10% |
| ND2048 | 3.3 | 11 | 0.05% |
| ND4096 | 3.6 | 12 | 0.02% |
| ND8192 | 3.9 | 13 | 0.01% |
| ND100000 | 5.0 | 16.6 | 0.001% |
You’ll also see that I included F-Stop reduction and the % of Transmission here too. The percentage of Transmission is the amount of light that gets through, starting at 100% with no filter, 50% for a one stop filter, and 25% for a two stop filter, and so on. This isn’t used to rate ND filters for photograph use though, so you don’t need to be too concerned with this. The F-Stop reduction for each filter is useful though, so do take a look at the chart though, especially if you have a filter with a known optical density, but you aren’t sure of its ND rating or how many stops it reduces the light by.
What Do I Use?
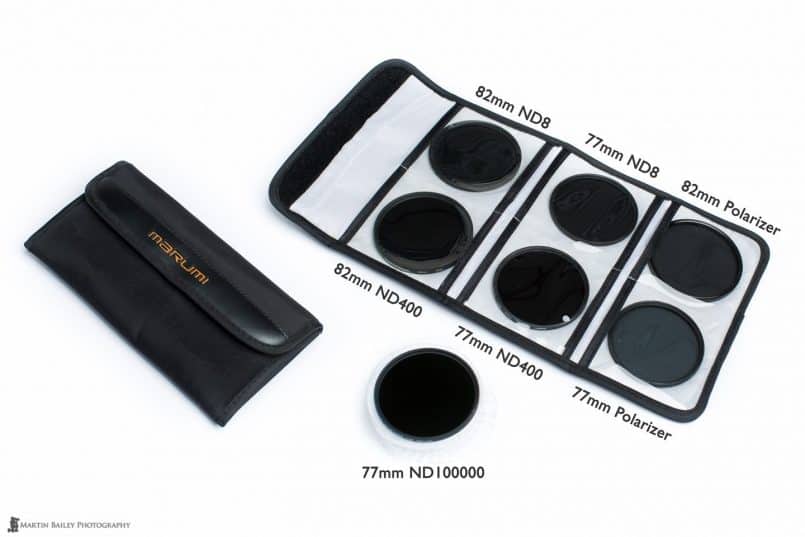
Although I own a couple of ND4 two stop filters, I actually don’t carry them with me any more. I mainly carry my ND8 and ND400 filters, in both the 77mm and 82mm filter sizes. I also have a circular polarizer in each filter size, and all six of these filters live in an envelope style filter case from a company called Marumi, that is really slim and slips nicely into my vest pocket. I basically lives there the whole time while I’m out shooting. I also often carry the ND100000 in my camera bag, just in case I need it.
Stacking Filters
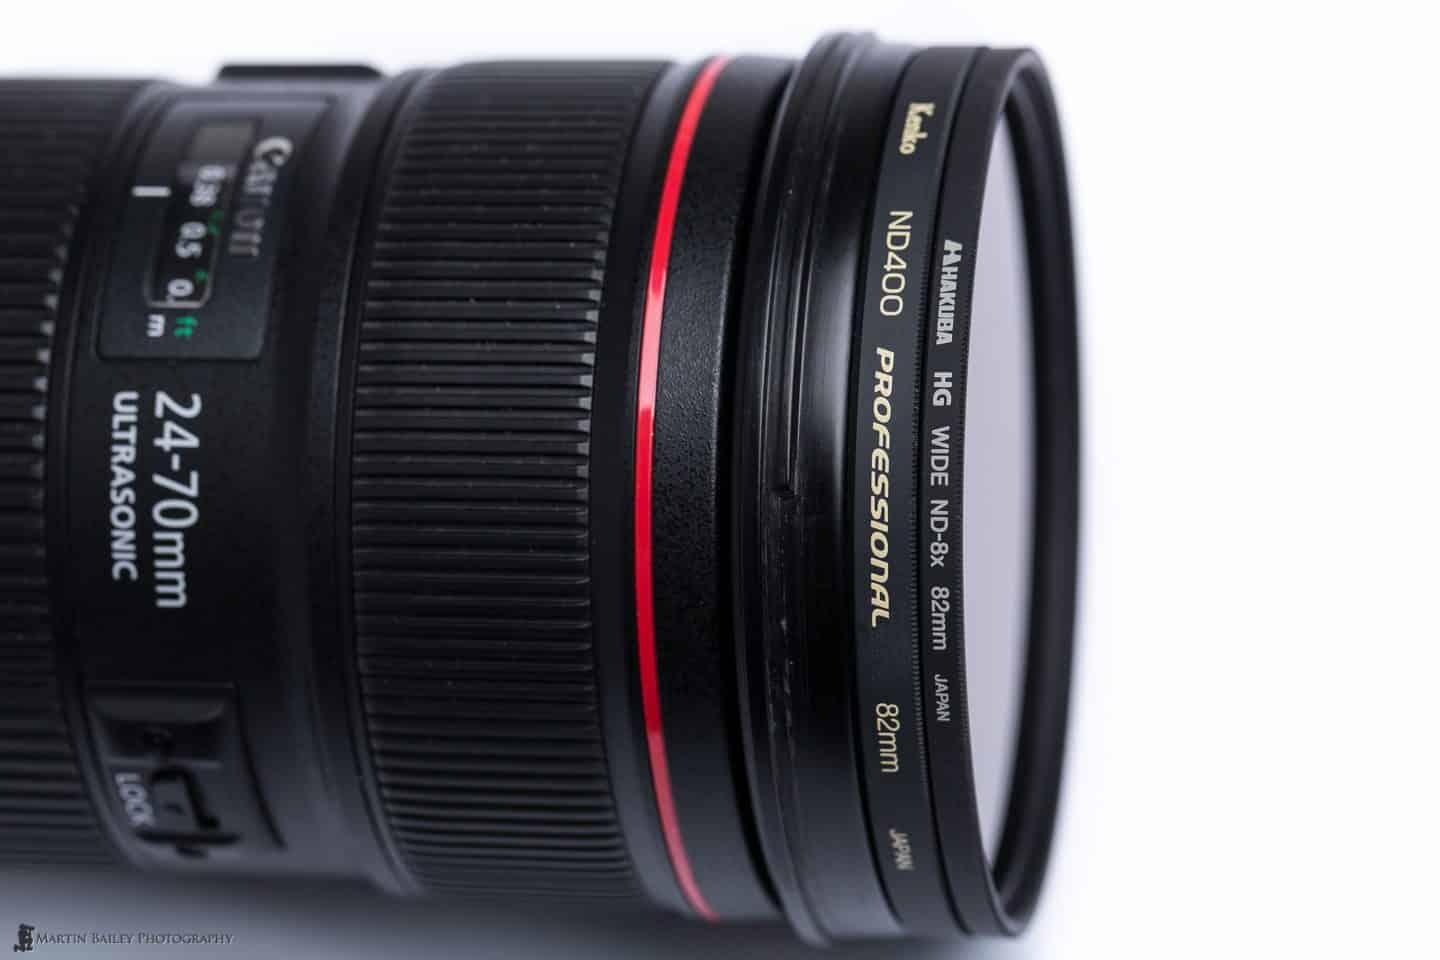
I should mention too that it’s OK to stack ND fitlers, and the calculation for your new ND Value when doing this is really easy. You literally just add together the stops for each filter. For example, when I only owned an ND4 and ND8 filter, I would sometimes stack them for 5 stops of darkness. Nowadays, the ND8 and ND400 give me a hair under 12 stops of darkness, and this is enough to get me down to between 10 seconds and a couple of minutes in the middle of the day, depending on how much light I have to start with.
Remove the Protector
I know that there is a lot of polarity out there surrounding whether or not you should use a protector filter, and if you don’t use them, that’s fine. It’s your decision, but I do use them, and intend to continue to use them for a number of reasons that we don’t need to go into today. The reason I mention this now though, is because if you do use a protector filter, you will often need to remove them when you stack multiple neutral density filters.
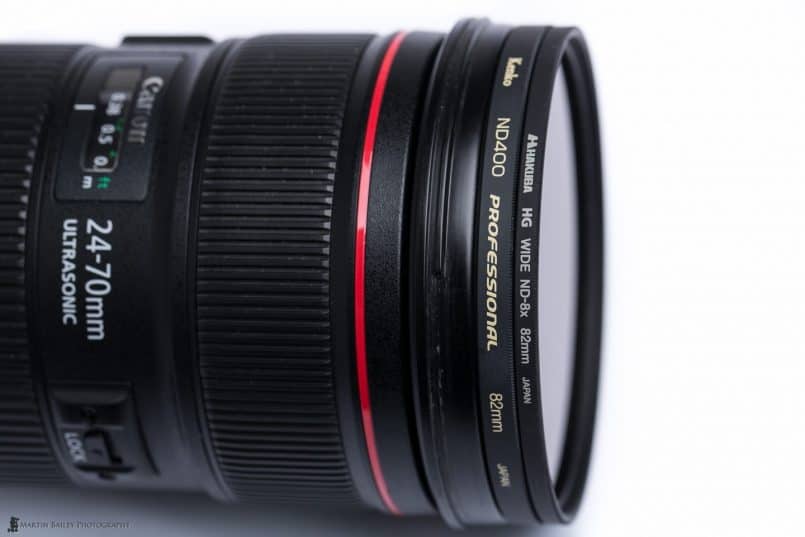
I try to buy the narrow framed filters when available, so I can usually get away with one ND on top of a protector filter, but using two causes vignetting, which is where the corners of the image goes dark, on my 16-35 and 24-70mm lenses when used at the wide end, so whenever I’m stacking filters, I take my protector filter of first.
Another way to avoid vignetting of course is to use the large square filters like the LEE system, but I’m not a fan of square filters. They have their benefits, like only having to buy one system that you can easily use with many filter thread sizes, but I can use step down filters with my circular filters if I wanted to as well. I choose not to for the same reason that I choose not to use the large square filter systems, which is because there is no easy way to use a lens hood with either solution. LEE apparently do an absolutely awful lens hood for their system that very few people like, and once you start using a larger screw in filter with a step-down adapter, your lens hoods can’t be attached either.
Not a Fan of Vari-ND
And while we’re on the subject of systems that I don’t personally like, I’m not a fan of the variable neutral density filters that change in density as you rotate the front element either. These are basically two polarizing filters that create a varying amount of darkness depending on their rotational relationship to each other, but because they are using polarization to create the effect, the results can be pretty nasty when used on wide angle lenses, with some parts of the scene much darker than others. I bought a Singh-Ray Vari-ND, and although it worked well with longer focal length lenses, and I found it useful for video, it was pretty much useless on my 16-35mm lens, so I stopped taking it out with me.
Here are two images both shot with the Vari-ND at 20mm, but with the ND rotated slightly differently. The first image (left) was shot at 1.6 seconds, with a bit of the effect showing, but the second image (right) was a 4 second exposure, and I tried to get a longer exposure, but also in an attempt to get rid of the patchy darkness that can be clearly seen in these images. In the end I gave up, and this was pretty much the end of the Vari-ND for me. If you click on the images to view them larger in your browser, then use your mouse or keyboard arrow keys to jump back and forth between them, the effect I’m talking about is very easy to see.
Another reason that I don’t like variable ND filters, is because they don’t give you a definitive indication of the levels of density. All of the variable NDs I’ve seen, have a series of notches or marks without any numbers, so you can’t easily just set them at exactly 7 stops for example. You can take a good guess, but then you may end up basing a two minute exposure on that, only to find that it’s under or over exposed, and I don’t want to mess around with exposures that long.
The fact that they give a smooth transition between often 2 and 8 to 10 stops of density can be a benefit of course and is workable if you are using Aperture Priority or otherwise allowing the camera to control the exposure, because you just rotate the filter and let the camera do the math. I rarely use Aperture Priority though, as many of my longer exposures are more than 30 seconds anyway, which is the longest exposure my camera will do before I have to jump into Bulb mode and do my own exposure calculations anyhow.
Calculating the New Shutter Speed
So, let’s look at how I do my exposure calculations in the field. For exposures up to a few seconds, I generally just use Live View on my camera with Exposure Simulation turned on, so I can see on the live histogram exactly where my exposure is, and don’t really need to do any difficult mental calculations. If you don’t have Live View or a live histogram, you can just shoot a test frame, then check your histogram in image playback mode, and adjust as necessary.
Remember, you generally want the brightest part of your image, which is the right side of the graph, to be just touching the right shoulder of the histogram box. These days there is usually a line around the box, so it’s easy to see, but if your camera is getting a little long in the tooth, you may need to be careful with this, as many didn’t have the box. See the episode of Exposing to the Right (ETTR) if you want more information on why it’s better to expose this way.
One thing to note too is that when you use a heavy ND filter, like the ND8, or even darker, like the ND400 or ND8 and ND400, it starts to get very difficult, if not impossible to see through the viewfinder to compose your shot. What I sometimes do is set up my shot, deciding on my composition and get it focused etc. then find my ideal exposure without the neutral density filter on, and then screw the filter or filters on to the front of the lens and mentally calculate my new exposure.
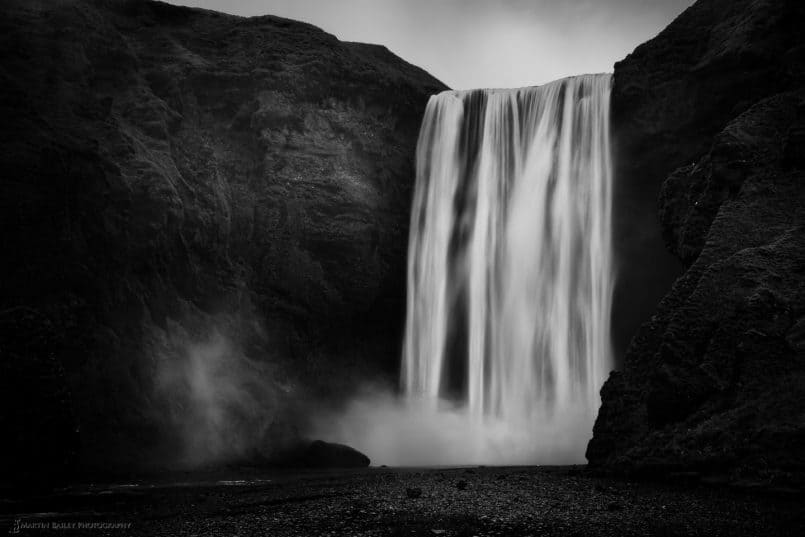
For example, in this shot (below) I was photographing a waterfall in the daytime, and without an neutral density, the shutter speed was 1/20 of a second at f/16, with ISO 100. In this case, I only intended to use an ND8, so all I needed to do was put the filter on, and check the exposure in Live View, but what I generally find myself doing is counting out in clicks from my base exposure. I have my cameras set up to adjust exposure in 1/3 stop increments, as most Digital SLRs do, and this means that all I need to do is increase the shutter speed by nine clicks on the main dial. Three clicks per stop, multiplied by three.
Clicking and Counting on One Hand
If necessary, you can use this technique for heavier ND filter combinations. If I use the 8 and 2/3 stop ND400, I can literally just count in sets of three clicks, folding a finger for each three, which is one stop, until I get to 8 stops, and then add two more clicks for the last 2/3. The Japanese way of counting to ten on one hand is useful here too, because I’m using my second hand to rotate the main dial.
I start with an open hand, with all five fingers extended for zero, then fold the thumb in for one, while counting three clicks, then the index finger for two stops, counting another three clicks off on the main dial, and son on. Once I fold my little finger or pinky for five stops, I then re-extend the little finger for six stops, still counting three clicks per stop on the main dial, and work my way back, until I extend my middle finger for eight stops, then count off two more clicks for the final two thirds of a stop.
If I’m using my ND400 with my ND8 for 11 2/3 of a stop, I’d keep going until I had all my fingers extended again for ten, then I simply start again folding the thumb back in for my eleventh stop, then rotate the main dial twice more for my final two thirds. One problem with counting and clicking with this much neutral density of course, is that if you aren’t working in quite bright conditions, you will go past 30 seconds, and the camera won’t go past 30 seconds just by rotating the main dial, so you have to use Bulb mode and a timer or cable release, which we’ll get to in a moment.
For me, I know that 1/125 of a second is the slowest base shutter speed that I can be using before I will go past 30 seconds when using my ND8 and ND400 together. So, if my shutter speed is is lower than 1/125 a second, I start with two clicks on the main dial, as 2/3 of a stop is more difficult to calculate in my head later, so I like to get that out of the way.
As an example, let’s say, we just we have a base shutter speed of 1/100 of a second. From there I count my first two clicks, for 2/3 of a stop, taking me down to 1/60 of a second. Now I have 11 full stops to count to get my new exposure. That will take me through 1/30, 1/15, 1/8, 1/4, 0.5 and I get to 1 second after 6 stops. Once you get to full seconds, I stop clicking the main dial and start doubling the seconds, so 2, 4, 8, 16 to 32 seconds, which is the time I have to program into my Remote Timer.
Note too that if I want to go even longer than 32 using this same example, I’ll start looking at my aperture and ISO again. Generally, I’ll also be using ISO100, but changing that to ISO50 would take me to 64 seconds. If I was already at f/16, I might consider going to f/22, although I don’t like to because diffraction can start to make the image softer, but if that will take me from 64 seconds to 128 seconds or 2 minutes 8 seconds, then I might go for that, and deal with the diffraction later, using Canon Digital Lens Optimizer, although I rarely find I have to with my current lenses.
Anyway, this may not be a very scientific way of doing these calculations, but it works for me. Remember that a lot of the time I’m all togged up and often even have gloves on, so getting my phone out and using an ND Calculator can take me longer, plus, most of the ND Calculators available don’t give you the ability to stack filters, or they don’t have the ND400 in the list, or they use the optical density instead of the ND number, so I generally find them quite frustrating to use. When we get around to adding the functionality to my iPhone app, it will be a very different story.
Bulb + Remote Switch
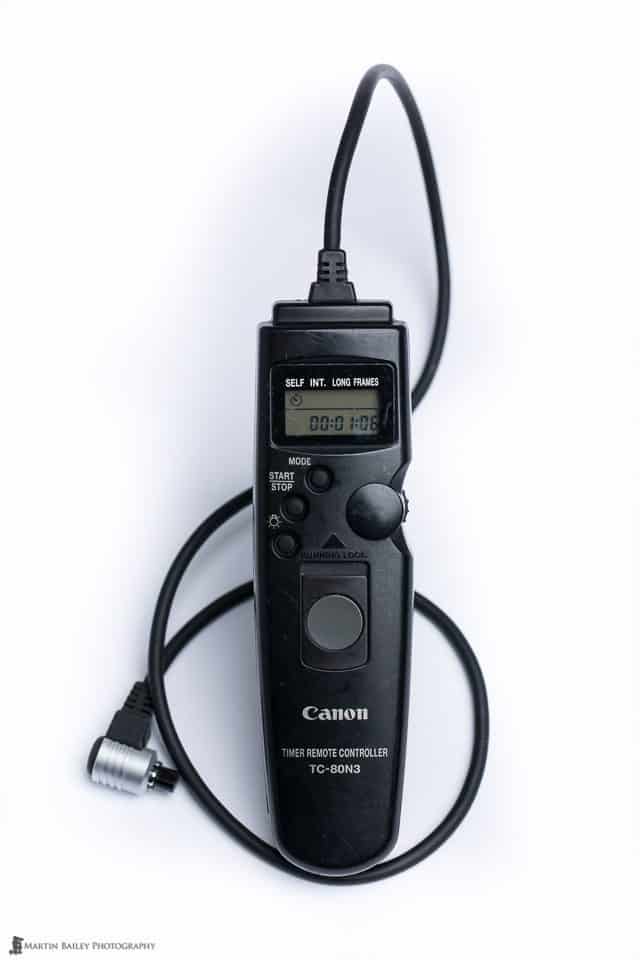
So, as I said, you will run into problems, especially on Canon cameras, if your exposure goes past 30 seconds, because most of them only go to 30 seconds as their longest camera timed exposure. After that you have to start using the Bulb mode. In Bulb, you have to use a cable or remote release, and time the exposure yourself, or use a Remote Timer, and program the exposure time in, then press the button, and it will start and stop the exposure automatically.
If you have a basic cable release, you need to start the exposure, then time it and release the button to stop the exposure. Most cable releases have a locking mechanism so you don’t actually have to hold the button down the entire time, but I think I’d find it a pain having to sit over a stop watch or count out seconds on my watch while the exposure is made.
Another quick tip here on the use of the Remote Timer–I generally also use a 2 second timer before I start my exposure, so that the camera is totally free of any vibration that I might have caused by touching the camera, by the time the exposure starts. Because of this, I just add two seconds to the exposure time that I set with the Remote Timer. This way the Remote Timer starts the two second timer on the camera initially, and then the real exposure starts two seconds later, and I get the exposure time that I want.
Also, if it’s windy, I tie the remote timer around the tripod head so that it doesn’t dangle and bang on the tripod legs, vibrating my setup. If it’s really windy, I hold the remote timer ensuring that I don’t pull on the cable, which would again wiggle the camera, messing up my shot. I’ve often thought that it would also be a good idea to put some Velcro or magic tape on the back of the timer and another piece on one of my tripod legs, so I could just stick the timer on there while the exposure is running.
Don’t Bother with Mirror Lockup Any More
Note too that I haven’t mentioned Mirror Lockup, basically because I don’t use it any more. Some of the early DSLR cameras with Live View used to jiggle the mirror around before they started the exposure, even when shooting in Live View, so mirror lockup was necessary for a while, but now, if your shooting in Live View the mirror is already up, and doesn’t move when the exposure starts, so mirror lockup isn’t necessary when shooting in Live View, which I use pretty much exclusively when I’m shooting long exposures.
I’m able to do this, even in Bulb Mode, because the Live View on Canon cameras actually still give you a pretty good idea of what you are shooting, with an ND8 and even my ND400 sometimes, depending on how light the scene is before I apply the filters.
ISO Shift Compose Technique
This brings me to another useful technique that I sometimes use when applying a lot of neutral density. Although Live View can give me a pretty good idea of what my image will look like even when I have a certain amount of neutral density applied, once the available light drops or you start to really go heavy on the NDs, even Live View goes dark, and you can’t see to compose your image or focus.
In these situations, you can remove the filters, and check the composition and focus through the lens if there is enough available light, but another trick you can try is to just crank your ISO way up. For example, if you have an ND400 on for just under nine stops of neutral density, and you are shooting at ISO 100, you can crank your ISO up as high as it goes, which will usually give you about eight or nine stops more sensitivity. The image on the LCD gets very grainy when you go this high, but you can at least see to compose your image and usually see well enough to know when your focus peaks, even if it’s not totally sharp.
This is often easier than removing the filters, and is especially useful if the front of your lens rotates when you focus, as you can shift your focus when you screw the filters back on otherwise.
When to Go Heavy?
OK, so earlier we looked at a waterfall photograph, that I shot with a 0.4 second exposure. Waterfalls will smooth over like that from around a quarter of a second, while maintaining a little bit of texture. They really start to smooth over from 1/2 a second or more. I shoot waterfalls with two or three second exposures too, if I want to really smooth the water over. It really depends on the effect you are looking for. I rarely shoot waterfalls in direct sunlight, as they just look terrible with all the contrast. It’s usually either cloudy or I visit them at a time of day that I know they’ll be in the shade due to the position of the sun. This means that you can usually get down to around half a second quite easily with a three stop ND8 filter.
Falling water is moving quite fast though. If you want to smooth over the sea, which moves slower and doesn’t smooth over as easily, or even clouds, that move slower still, you have to use more neutral density. Coincidentally, if we continue using the 1/20 of a second starting exposure that I had before adding the ND8 for the photo we viewed earlier, I would get a 20 second exposure if I used the ND400 instead.
20 seconds will smooth over a relatively rough sea, but won’t give you much cloud movement. Of course, it depends on how quickly the clouds are moving, but generally, if you want cloud movement, you’ll want to get down to at least 30 seconds, and if possible, go down to more than a minute. This photo from the Falklands a few years ago was a 2 minute 30 second exposure, so the clouds have moved significantly. You can also see that the relatively rough sea has smoothed over, but leaving some texture, which I quite like in this shot.
There’s also a seagull in the bottom left of the frame that stayed very still for me during the exposure. There were also some gulls on the boat that moved, leaving a ghostly outline, which I also generally like. Notice too that I more often than not convert my long exposure images to black and white in Silver Efex Pro. Sometimes the color works, but I generally just think long exposures look better in black and white.
Use a Good Sturdy Tripod
One last thing that I want to touch on before we finish, is that once you slow your shutter speed down with neutral density filters, you’re not only going to need a tripod, you’re going need a good sturdy tripod. Don’t think that just because you are going to have to carry it for a while that you can get away with a flimsy little thing. Also, don’t fall into the trap that all Gitzo tripods are good either. Gitzo make a whole range of tripods, and even their smaller carbon fiber tripods don’t cut it for long exposures with heavy gear, especially when the wind gets up. For long exposures you just have to bight the bullet and use a big sturdy tripod. See my episode on what tripods I use and when for more information on this.
So, I hope that was useful for you. As you know, I love long exposures, and try to make time to do them whenever possible. It does take more time, literally, but you really find yourself in a location for a while if you make a couple of exposures, but watch what the clouds are doing, try a few different shutter speeds, try to shoot a few frames, and enjoy the process. Of course, long exposures also work with people on a busy street in the middle of the day, and you maybe get one person that stands still for you. The possibilities are endless once you get into this, so I hope you give it a try if you don’t already do long exposures.
 This Podcast is Sponsored by Squarespace
The Martin Bailey Photography Podcast is proud to have Squarespace on board as our current sponsor.
Visit www.squarespace.com and use the code MBP10 for a free trial and 10% off new accounts.
Show Notes
Why Expose to the Right (ETTR)
What Tripods I use and When I Use Them
Music by UniqueTracks
Subscribe in iTunes for Enhanced Podcasts delivered automatically to your computer.
Download this Podcast in MP3 format (Audio Only).
Download this Podcast in Enhanced Podcast M4A format. This requires Apple iTunes or Quicktime to view/listen.
Freebie Post
This post is unlocked for non-Patrons as it is a sponsored post or advertising Martin Bailey Photography products. If you found it useful and would like to unlock all other posts please click the button below. Thank you for your support!
Become a Patron!



What a great episode, thanks Martin.
I found myself casually reading through my morning emails with my coffee and before I knew it, 15 minutes later I’d reached the end of this episode.
Thanks for sharing, really good information in here.
Thanks
Michael
Your welcome Michael! I’m pleased you enjoyed it.
Wow! 15 minutes! I can’t read that fast. 🙂
One feature that the Olympus EM5 has ( and I guess other more recent models) is the live bulb/live time mode.
Both work in a similar way, live bulb requires holding down a shutter button/remote while exposing the photos, live time requires two presses, one to open, one to close. I prefer the live time mode, especially if working without a remote.
While in these modes, during the exposure, the camera shows a preview of what the image looks like at the time, for long exposures, it starts of pretty black, but as you approach the ‘correct’ exposure time you know what the image will look like, and you can stop when the exposure is perfect.
This is ideal for changing light conditions, or things like the rough sea shots where you are metering off a mainly blue/green sea, but want an image where it is going to actually appear almost white. This also saves any mental maths, and that awful moment after a 2m long exposure (plus the 2m noise reduction dark frame wait) when you realise that the metering was a little off, or you got the maths wrong, and you’ve got to start again.
Although not related to ND filters, the feature is also great for fireworks, you open the shutter and watch the fireworks appear in the image, and then close it when a nice picture has developed, before it gets too ‘busy’ with lots of fireworks.
It is such a good feature, I’m sure it will be appearing in other brands over the next year or so.
I’ve seen that in action. It is pretty impressive, I agree. It has to start and filter out to other manufacturers.
Perfect timing, Martin. My sons got me a Tiffen ND 3.0 10stop the other week for my birthday.
Thanks to your brilliant podcast, I am now using BBF, ETTR and now I can follow your latest advice very slowly!!
I seem to remember you wishing for the facility in the last comment on TWIP a year ago?
Glad you found this and the Podcast useful Andy.
Sorry, you’ve lost me with the last sentence. Which facility are you referring to?
The idea of an imagee “growing” as the exposure progresses. You were particularly discussing stopping the “growth” automatically at the righthand edge of the histogram.
Aah, yes. I’m with you now. That is something that shouldn’t be that hard to do, but would make way too much sense for the manufacturers to actually put that feature in a camera. 🙂
Hi Martin,
I’ve just listened to the podcast 4 times straight through on my way home. There are a couple of associated long exposure points you did not mention:
What is your opinion on using the long exposure noise reduction custom function?
Also (how) do you cover the camera eyepiece during your long exposures?
Thanks for your help as always
Good points Andy!
I never use the camera’s noise reduction. Just don’t find it necessary.
If I’m doing long exposures with light coming from behind the camera, I generally just hold my hand up, stopping light from directly entering the eyepiece. If I’m working in low light to begin with, I don’t do anything. If I’m doing really long exposures and it isn’t windy, I often drape a cloth over the camera to stop light getting in through the eyepiece.
Cheers,
Martin.
It’s like you’re a mind reader Martin, I’m off to Iceland for a short break in two weeks so the last 5 episodes have been invaluable! Just taken the plunge on some NDs so I can practice before I go Thanks for all the tips and advice and all the hard work, much appreciated!
That’s great Mark! Have an amazing time in Iceland. You are going at a great time of year. I’m envious. I have to wait another year. 🙂
Hi Martin,
I google searched “ND100000” and found listings primarily for Marumi, is this the brand you have are using?
Hi Chris,
It’s similar, though I think the Marumi has a thicker frame, meaning it will vignette more easily. I use the Kenko ND100000, but I can’t find anywhere outside of Japan that stocks this. I’m not sure if Amazon.co.jp will ship abroad either. https://mbp.ac/nd100000
Note though that singh-ray.com have just announced a 15-stop ND filter too, although it’s more than double the price of my Kenko filters.
Cheers,
Martin.
Thanks for the podcast Michael. Very helpful and informative. Now I’m all jazzed up to get myself a series of ND filters. Cheers.
You’re welcome Dave! I guess that would be Martin though. 🙂
Enjoy your NDs!
For shooting video on a DSLR what ND filter and settings would you recommend?
That totally depends on how much available light you have Zac. For video, it’s common to use 1/50 of 1/60th of a second, as the rule of thumb is using double the frame rate, so you would need to adjust your exposure first, and then add enough neutral density to get down to these shutter speeds if there was still too much light to achieve this with low ISO and aperture settings.
I should also add, I was wanting to keep night city scape bright, so my thought was to use a graduated nd, framing it so city is in lower half.
If you want to use a neutral grad upside down, with the city darkened so that you can capture a star-filled sky, that would work, but I can’t really recommend an actual ND rating without seeing the scene. Probably try an ND8 grad, but you would also perhaps need an ND4 and ND2 and the ability to stack these to achieve other densities as necessary.
Great tutorial and ideas Martin,i have questions
I’m using nd400 filter and my images looks either more black or white,this is because of light entering eyepiece.
How to correct vignetting problems.
Please help me Martin 🙂
Hi Karthikeyan,
Thanks for taking a look!
If you have light entering the eyepiece, you simply need to cover it while shooting.
If you are getting vignetting because you are adding your ND400 on top of your protector filter, then remove the protector filter when using it. Some lenses vignette with two filters but not so much with just one.
The other thing you can do is to apply Lens Corrections in Lightroom if you use it. This often gets rid of vignetting of the lens.
You can also sometimes just clone out the corners if they are dark, although this can be tricky if there is a lot of detail in the corners.
I hope this helps!
Martin.
Hi martin
I wonder if you could help. I know how to calculate the shutter speed when using a nd filter, well I have an an for my iPhone NDTimer You just put in the shutter speed without the filter then dial in the number of stops your filter is. I’m sure they are all the same. After reading your post I actually do understand it a lot more, the way you explained made it sound so easy.
My question is how to I work out what the stop value is on my home made welders glass is. I thought it would be easy make a not of perfect exposure without filter then fit filter adjust the shutter speed until perfect exposure is achieved and cout the number of clicks it took. Having done this and taken a photo it came out almost black so I don’t quite get where the light is coming from to make the camera think its the correct exposure. This is done on Manual setting.
Cheers
Hi Graham,
Without some very expensive equipment to actually measure the density, then your method sounds OK, but you lost me towards the end there.
Here’s what I’d do. In Manual mode without any filters on, adjust your aperture, ISO and shutter speed to reach the exposure you’d like. I would use Live View and ensure that Exposure Simulation is turned on, although this isn’t accurate with very dark filters, but it’s a good place to start.
Then fit your welders glass filter, and as you say, count the clicks to your new exposure. You’re camera is probably using third stops, so every three clicks is one stop. Keep increasing the shutter speed until you see your histogram (in Live View) reach the same point that it was before you applied the filter. If your exposure simulation stops working, you’ll just have to guess at the exposure, keeping tabs on how many stops you moved from the initial exposure, and make a test shot. If it’s too dark or too bright, adjust and reshoot. Eventually you should find the correct exposure, which you can use as a reference from that point on.
Of course, you need to do this test with relatively constant light, probably in the middle of a cloudless day to start with. That will not only give you more constant light, but your exposures will be faster, so you won’t waste so much time.
Another way to decrease your test time is to also increase your ISO, instead of going with really long shutter speeds. Keep tabs on your adjustments in full stops, until you reach your ideal exposure with the filter on. For example, you might be shooting at 1/500 of a second ISO 100 on a bright day, and then add your filter. If your filter turns out to be say 15 stops, your new shutter speed would be 1:05. Not so bad for testing, but if it turns out to be say 18 stops, your shutter speed at ISO 100 would be 8:44, which would mean you could waste a lot of time fine tuning. Instead, increase your ISO to say ISO 3200, which is five stops more sensitive than ISO 100, and just add those five stops to your test results. If for example you find that your ideal exposure is 16 seconds from 1/500, that would be 13 stops, plus 5 stops of ISO, meaning your filter is 18 stops.
I hope that makes sense!
Cheers,
Martin.
Most comprehensive article on this subject I have found, and I’ve searched a lot. Thank You!
I’m surprised I had not encountered optical density before when looking at info about ND filters. It makes sense there are scientific terms not used in photography.