Once again I’m going to reply to a listener question this week, this time a question from listener Fred Kotler about when and how I use my tripods. I thought this would be a good chance to take a look at my current support line-up, and discuss a little about why I have each of them, when I like to use a tripod, and why I sometimes decide to go hand-held or now also use a monopod sometimes.
First let me read out Fred’s message, that spurred today’s episode: “I’m a serious amateur photographer who has always hand held my camera. That meant I could never get decent shots in low light conditions nor could I experiment with long exposure photography. I’ve remedied the problem by purchasing a top quality tripod system from Really Right Stuff and I was hoping that you could devote a podcast episode to how you use your tripod. Under what conditions do you use one and under what conditions do you not.”
Thanks for the question Fred, and congratulations on avoiding a very common mistake right off the bat. Many people buy a cheap crappy tripod to begin, and often use it for a number of years until they realize that it isn’t helping and perhaps even sometimes hindering their photography. I did it with my first tripod some twenty years ago, and I used that tripod for some 12 years before I bought a decent one, with my old Manfrotto. You went straight for the Really Right Stuff, so despite their high price, you’ve probably saved yourself some money buy doing this.
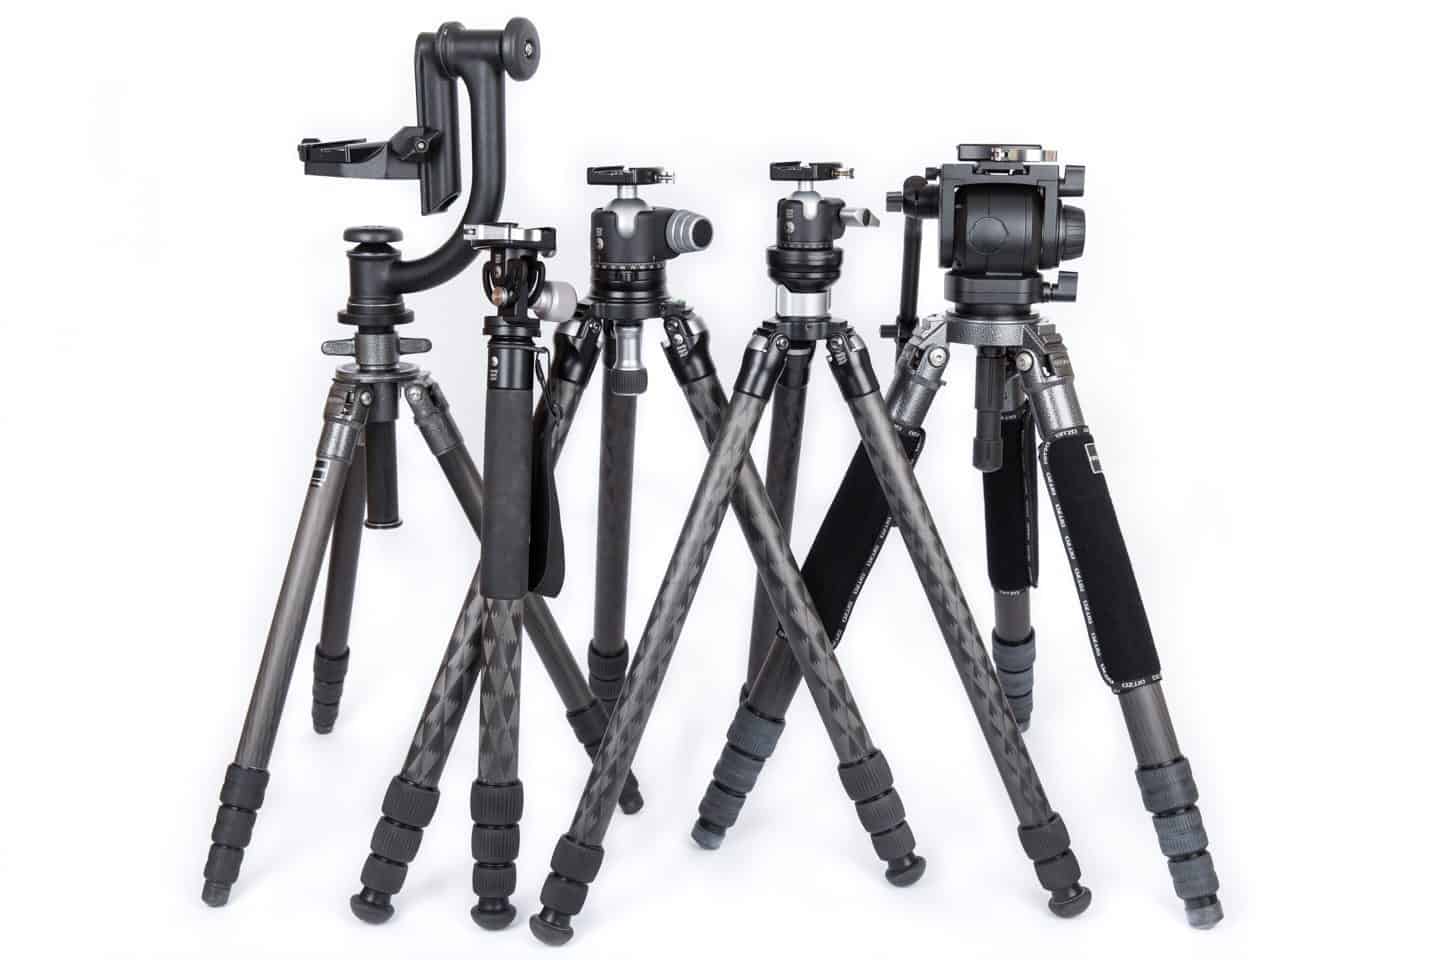
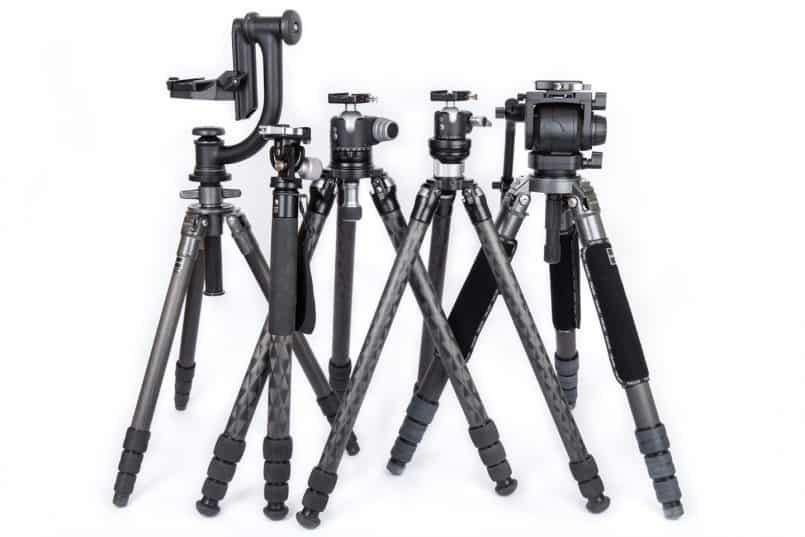
Over the years I’ve managed to gather a little collection of tripods, two of which are not in this photo, but I’ll use this to first walk you through what I currently use, and the reasons why they ended up in my collection. From left to right we have an old Gitzo Tripod fitted with the Wimberley Head, which is a gimbal head that I use for long lenses. Next is a Really Right Stuff Monopod, then two Really Right Stuff tripods, the left one fitted with a BH-55 and the right one fitted with a BH-40 ball head. On the right we have see a 5 Series Gitzo tripod that is fitted with a Manfrotto 519 Fluid Video Head.
The left most tripod is now over 5 years old, and superseded by other models, but it’s a GT3540L. My first Gitzo tripod is actually older than this, and although I still have it, I don’t use it anymore, basically because it was made before Gitzo introduced their Anti Leg Rotation system, so whenever you tighten or loosen the legs, quite often a different leg section would come loose, and you have to hold the second leg section to stop that from rotating. This basically drove me crazy, but the good thing about this first tripod was that I could get the camera to my eye level without extended the fourth leg section. One of my Really Right Stuff tripods also does this though, so basically the old big Gitzo has been shelved.
Actually, the GT3540L that we see here is now pretty much a backup tripod, although it’s still a very capable and steady piece of kit. The reason I replaced it is because one of the legs came loose and I had to send it in for repairs, but this happened just a few weeks before the 5 year warranty expired, and I was due to leave for my Pixels 2 Pigment tour in September 2012 before the repairs would be complete. Secretly I was happy, because I had been hankering after a Really Right Stuff tripod for a while, and this was a good chance to pick one up.
Gimbal Heads
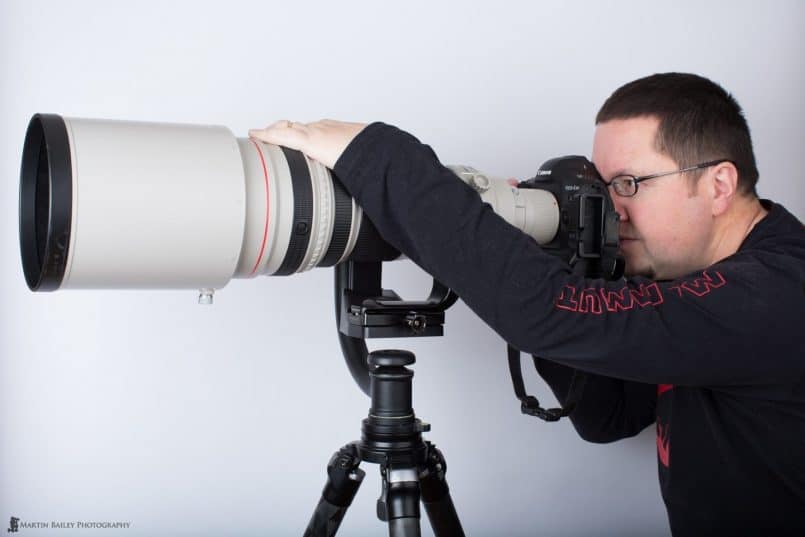
Anyway, the main reason the left Gitzo is in this photo is to support the Wimberley Head which is still very important to my photography. As I explain in my latest Craft & Vision eBook, Sharp Shooter, gimbal heads are extremely useful for supporting long lenses without the need to lock them down in any one position. A well balanced gimbal head will allow you to move the camera around with one finger, and stop wherever you let go of it.
This is the closest you can get to the freedom of hand-held shooting without actually having to hold the weight of the camera and lens, which is why they are so useful with big heavy lenses like this. I also use a long lens support system from Really Right Stuff to support long lenses and stop them from shuddering from the vibration of the shutter unit. I cover this in Sharp Shooter too, and I’ll be updating you as to whether it’s still necessary to use the long lens support with the new 200-400mm lens once I’ve really had a chance to use it in the field and put a full review together.
Monopods
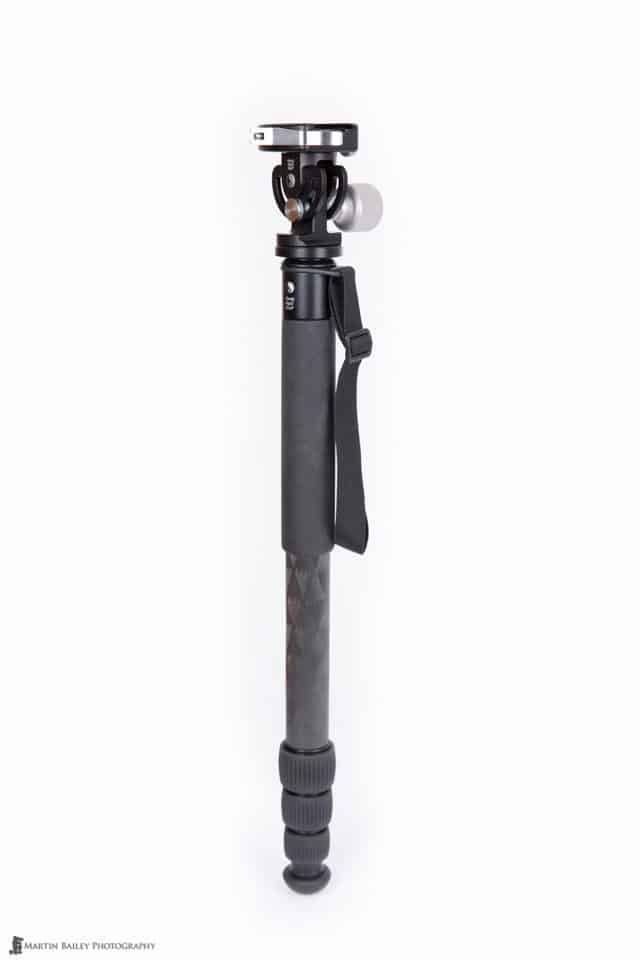
What I do expect to be using more now with the 200-400mm lens, is the Really Right Stuff Monopod. I owned a Manfrotto monopod some eight years or so ago, and used it a fair bit, but after a while it broke, just locked up solid and couldn’t be extended, and I hadn’t used it enough to warrant getting it fixed or buying a new one. I’m expecting that to change with the 200-400mm lens which is a bit too heavy to hand-hold, but won’t always warrant a full tripod or gimbal to support it, especially for fast paced shooting, and also from the boat where we shoot the eagles in Hokkaido. I won’t be able to use a tripod there, but it would be way too heavy to hand-hold for the 2 hours that we shoot from the boat. Monopods are of course also popular with sports photographers who need to support heavy glass but have some of the freedom of hand-holding shooting without the space required for a tripod and gimbal head, which also require more time to move around and level, and time is not usually a luxury sports photographers are afforded.
Really Right Stuff currently only do one carbon fiber monopod, the MC-34, and I bought it with the MH-02 LR head, which allows you to tilt the camera up and down easily, and it can also be easily oriented either parallel or perpendicular to the tilt of the head by unscrewing the Index Lock Knob and rotating the clamp in 90° increments. This is useful if you sometimes use shorter lenses with a camera plate or L-Bracket, as opposed to the longer lenses with a lens plate running parallel to the lens barrel. The MC-34 at full extend gets the camera quite a way above me eye level, so will be fine height wise too. Again, I haven’t really used this much yet, but intend to really start using it with the 200-400mm, and possibly other lenses as well in the near future. I’ll let you know how this goes too in a future episode.
Really Right Stuff Tripods
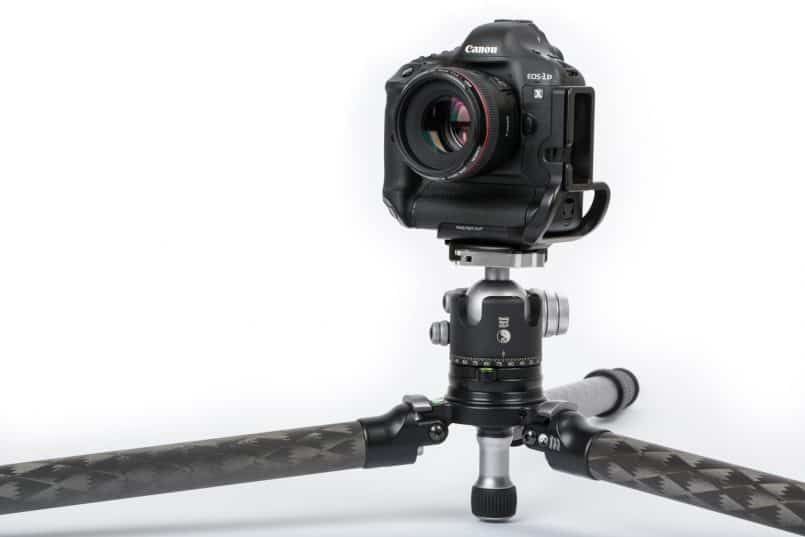
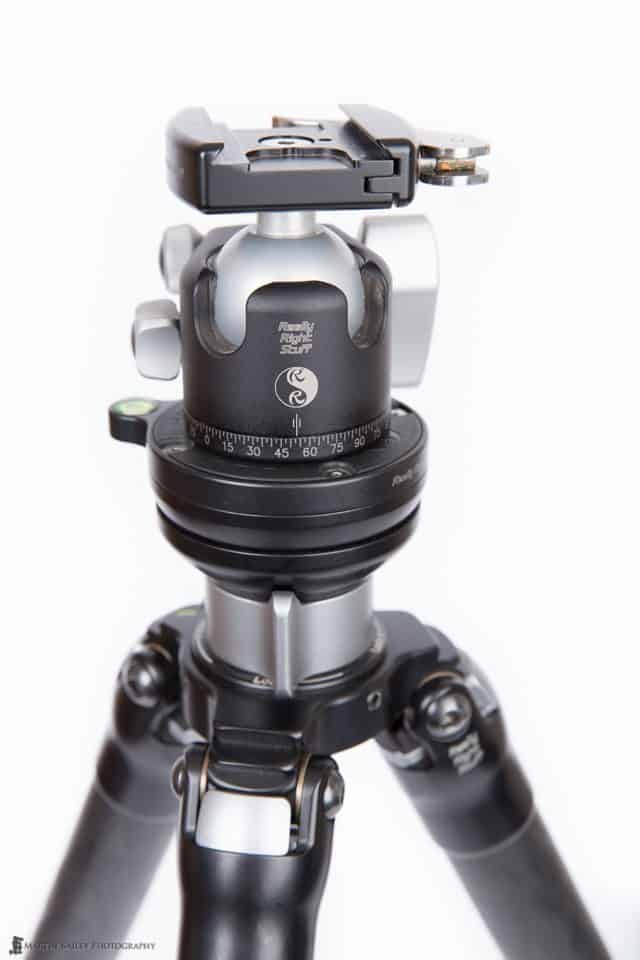
In September 2012, I released Podcast episode 350, in which I discussed my Really Right Stuff tripod, and the various L-Brackets, plates and tripod heads that I use to support my gear. For more information on the plates and heads etc. do take a look at that blog post and Podcast at https://mbp.ac/350. I’m not going to go into so much detail on that area today, but I do want to recap on some of the points of my TVC-34L tripod, which is the second from the left in the photo, and the TA-3-LB leveling base that I had it fitted with.
In reality, this has become the tripod that I use the Wimberley Head with, for the main reason that I can level the head in just a few seconds with the leveling base, rather than having to adjust the levelness of the head by painstakingly adjusting the height of the bottom section of each leg. Of course, you always shorten a tripod with the thinner bottom leg sections first. Always use the fatter, top leg sections first, as that helps to maintain the rigidity of the tripod.
For my Winter Wonderland Tours this year, I actually just took the RRS TVC-34L tripod and both the BH-55 ball head and the Wimberley Head, and switched between the heads as necessary. The gimbal for the bird photography with the 600mm f/4 lens, and then the BH-55 for all of my landscape work. This works really well, and as I rarely do both at the same time, I no longer take two tripods with me.
Another thing to note here though, as I mentioned earlier, is that the TVC-34L tripod, like my first Gitzo, gets the camera to my eye level without having to extend the fourth leg section. This is important in places like Hokkaido because the snow can sometimes be so deep, that you either need to attach snow feet to your tripod, which I really don’t like to carry around, or allow the feet to sink into the snow. This of course means if the tripod sinks very far, you can end up stooping to see through your viewfinder, and that’s not good if you need to shoot for longer than a few minutes. Having an extra leg section helps to avoid that.
Lose the Center Column
I also don’t like to use a center column with my tripods, and this means if you need to get the camera way up in the air, tilted upwards with you looking up into the viewfinder, you really need a little extra height. I don’t use that center column purely for stability. One pole is less stable than three, so you should always try to calculate your tripod height without figuring in the height of the center column. Having a high tripod also allows you to use step-ladders and shoot over the heads of crowds etc. which is another benefit, especially if you shoot events and have the lens power to still get your shots from behind the crowd.
Another reason I don’t like to use a center column is because it stops you from easily going to ground level. Some manufacturers have tripods with center columns that swing out for easy low level work, but I prefer to keep the camera in the middle of the tripod, and so like to just go really low, as we can see in this photo (above). With my old Gitzo I used to be able to take the center column out and put it in upside down, hanging the camera underneath the tripod for low angles like this, and I quite liked that for macro work, but I found more and more that I just wasn’t doing that, preferring to actually just lie on the floor if I needed to get lower than this, so I didn’t worry about this too much when I bought my Really Right Stuff tripod.
A “Lighter” Alternative
When I was preparing for my Namibia trip, I decided it would be better to take a slightly lighter tripod and head, so I picked up the Really Right Stuff TVC-23 tripod with a TA-2-LB leveling base, and the BH-40 ball head that we can see in this photo (right). You can see from the first photo we looked at that this tripod and head is actually a shade longer than my other RRS Tripod, because the leveling base has to be fitted on top of the TVC-23 tripod, but this combination weighs just 2.3kg (5lbs) as opposed to 3.29kg (7.25lbs) for the TVC-34L with the BH-55 and Leveling Base. That extra kilogram makes a lot of difference when you’re trying to get your overall carry-on weight under 20kg, and it was also nice to have the lighter tripod when walking any distances.
Note too that if I really needed to shave off some weight, and I could live without the leveling base, I could take out, saving an extra 330g (11.6 oz) and the BH-40 actually mounts flush to the top of the Really Right Stuff Versa Series 2 tripods.
The BH-55 ball head has a load capacity of 23kg (50lbs), compared to the BH-40 at 8kg (18lbs), but this means that even the BH-40 would even support my 1D X and the old 600mm, weighing in at a total of 7kg (15.5lbs) are under the maximum load, although I wouldn’t use that combination. Anything up to a 300mm f/2.8 lens and a pro body though would be fine with this combination, and I didn’t have any problems in Namibia at all, even when shooting multi-minute long exposures.
It is always necessary to check the maximum load though. My tripod before my old Gitzo 3540L was a Manfrotto that got my viewfinder just to my eye with all legs fully extended, but not the center pole. I haven’t a clue what capacity it was rated to now, but it stopped supporting my gear when I got my first pro body, the 1Ds Mark III and the 300mm f/2.8 lens. These were just too much for it, so I bought the Gitzo and the Really Right Stuff BH-55, and never looked back.
Video Heads
I’m not going to go into detail on this today, but the fourth tripod in my first photo is a Gitzo 5541LS with a 75mm Bowl Adapter and the Manfrotto 519 Fluid Video Head. This is a beast to carry around, but an essential tool for video shooting, when you need to pan around smoothly. Since I bought this around four years ago now, there have been some interesting fluid heads released from Manfrotto, Gitzo and now also Really Right Stuff, so if I was buying now, I probably wouldn’t have gone for this particular head, just from a weight perspective, but when shooting video, this sort of thing is the way to go.
When Do I Use a Tripod?
So, that’s what I use, with a little information on why and when I use them interwoven, but to more thoroughly answer Fred’s question, let’s talk a little about my general guidelines for when I will use a tripod, and when I don’t.
My general rule of thumb is to use a tripod, unless it doesn’t make sense to do so. What I mean is, my default mode is to use a tripod, but that doesn’t mean I use one all the time, as my definition of “makes sense” is quite flexible. For example, if I go for a walk around a local park alone, I will often use a tripod the entire time, unless I need to get really low, in which case I’ll lie down and either put the camera on the floor, or support it with my left hand and my hand rested on the floor. Otherwise, I use the tripod.
I find that using a tripod makes me think about my photography more. Unless I’m shooting a moving subject, I generally shoot landscapes and flowers etc. in Live View mode. I sometimes start by lining the shot up through the viewfinder, but then switch to Live View, and this helps me to see the world two dimensionally, just as it will be in the final image. I feel it’s easier to fine tune the composition of an image in this way, rather than looking through the viewfinder the entire time, as in there everything is still three dimensional, and it’s easier for our brains to correct things that we don’t notice until we see the image flattened into two dimensions.
I can also zoom in on the viewfinder in Live View, and tweak my focus manually. I actually rarely use the autofocus in Live View, except sometimes to quickly get me focussed on something as I set up the shot, and then it’s always tweaked while zoomed in, in Live View, before I release the shutter.
The slower process also leads me to shoot less. I find that because I’m so happy with what I see when shooting from a tripod, I generally only shoot a handful of frames of each subject, unless I’m waiting for a critical moment, when I might shoot more to increase my chances of capturing that moment, but generally, I shoot less, and that helps to get through your editing process more quickly, and also just feels more like a craft. I’m certainly not saying that you shouldn’t shoot lots of frames, because I go crazy with birds in flight or wildlife, trying to get the absolute best pose, but when you can slow down, I think it helps your photography.
The Freedom of Hand-Held
I already noted that I use a tripod with a gimbal for very long lenses, and I will be trying the monopod again as I get out with the 200-400mm more, but these two methods are really trying to bring us as close to hand-held photography as possible. Following on from my walk in the park example, if I’m walking with my wife, and it’s supposed to be a walk in the park, not a photography shoot, then I will have a camera with me and shoot what I can, but I rarely even take a tripod on these walks, because it annoys the hell out of her.
It’s the same for what little street photography I do. I just want to be fast on my feet, and have the camera ready to shoot, then just do it, rather than spending the time to set up a tripod, which in most cases would take so long that you’d lose the shot, unless you were to set up and wait for a scene to unfold, but then you’d also draw attention to yourself as well, which you might not want to do.
Long Exposures
I have set up a tripod in the city before, to do long exposures. With long exposure shots, be it nature or city photography, you need a very stable tripod. This is one of the reasons I buy such good quality tripods. I’ve seen so many people with flimsy tripods doing multiple second long exposures, then wondering why their images are soft. The camera has to stay perfectly still, or it won’t work, and the only way you can make that happen, is with a good firm tripod. You also need to use a cable release or two second timer to get your hands away from the camera etc. but I’ve covered all that before in a dedicated episode, so we won’t go into that again today.
Wildlife Photography & Panning
I also like to shoot wildlife hand-held, again, when it makes sense. If I’m shooting up to a medium telephoto, which in my books used to be something like my 300mm f/2.8 lens with an Extender, usually a 1.4X giving me a 420mm focal length. I also like to use the 70-200mm f/2.8, sometimes with the Extender, and I’ll pretty much always hand-hold these lenses if the wildlife is moving around, or I need to move around a lot to capture them from the best angle.
If the wildlife is not moving a lot or the light is getting low, this means hand-holding does not make sense any more, so I might go back to the tripod. Of course, I might have waited for the light to get low so that I could use a slowish shutter speed and do some panning, and I always hand hold for panning shots, because the action needs to be from the waste, and not rotating around a tripod, so again, it’s all about whether or not it makes sense to use a tripod.
Tripods in Macro
Again, I’ve done episodes dedicated to this, so just a quick word, but there are times when a tripod is the best way to do macro work. Even as we breath we tend to rock back and forth a little, so for very close macro work, I find it works best to use a tripod, especially if I’m also using a Twin-Lite strobe and additional off camera flashes. I’ve done this hand held and it can be frustrating, and sometimes just not work at all, especially if you are trying to hold an off-camera flash in one hand and shoot with the other.
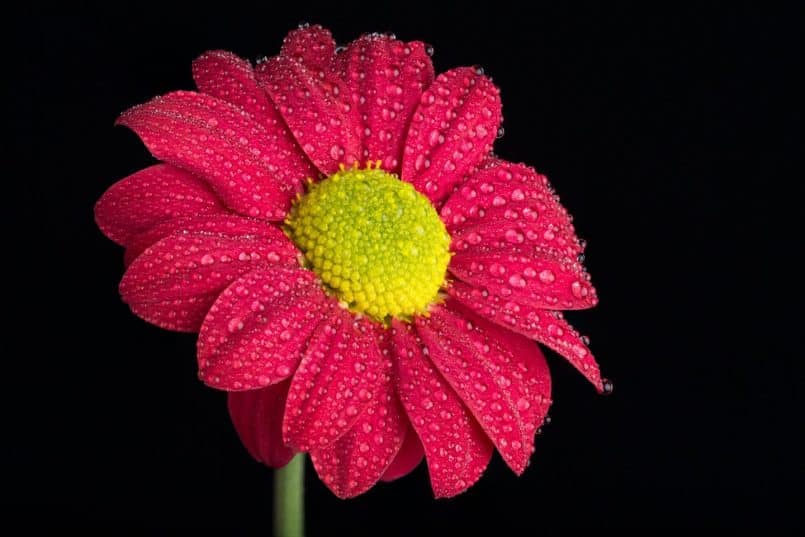
I also always use a tripod when doing focus stacking. Especially for macro work, you don’t want the camera moving around, or Photoshop will have a job on its hands trying to align the images for you, and it sometimes doesn’t even work. Here’s a shot of a spritzed flower that I did a focus stack of to illustrate this technique in my latest ebook Sharp Shooter.
There are times of course when you are trying to capture an insect for example, flying from flower to flower, when you might go hand-held, and with the IS enabled macro lenses available now, it’s certainly an option. Again, it’s all about whether or not it makes sense to use the tripod, and sense is something that is very individual to each of us.
Studio Shooting
I find that when I’m shooting in a studio, with full blown studio lighting, I prefer to hand hold, even if I’m shooting still life. Firstly, I’m usually shooting at 1/200 or 1/250 of a second, and the flash is much faster than that, so camera shake isn’t really an issue. If I need to really work the framing, I might spend the time to set up a tripod, but I usually like to move around a little more freely, changing angles all the time, working the various nuances that a slightly different angle can create. When shooting people in the studio it’s even more the case. I like to move around a lot, and interact, as well as finding the various angles that really make the shot, so I never shoot people in the studio with a tripod.
Find Your Style
We all shoot differently, so these guidelines are really just a summary of my shooting styles. You might find that using a tripod doesn’t work for you the way it does for me, or you prefer to use a tripod when I don’t. It’s really totally up to you, but if my own guidelines spark any ideas in you, then it’s probably been worth putting this together. The most important thing I think is to shoot as much as you can, and this will help you to define your shooting style for various subject types.
Show Notes
Find Really Right Stuff camera supports here: http://www.reallyrightstuff.com/
Music by UniqueTracks
Subscribe in iTunes for Enhanced Podcasts delivered automatically to your computer.
Download this Podcast in MP3 format (Audio Only).
Download this Podcast in Enhanced Podcast M4A format. This requires Apple iTunes or Quicktime to view/listen.



I don’t think any company makes gear as beautiful as RRS. Their designs are art in themselves.
Absolutely! I couldn’t agree more Tim.
Dear Martin,
thank you for your good points on tripods. I bourght recently a Manfrotto 190CXPRO3 carbon fiber and a MH054M0-Q2 ball head to support my heavy Mamiya AFD with Aptus 65 back, but how do I test the combo at best?
Working on a tripod I usally use the mirror up – although it is a (machanical) pain on the AFD. But I would also love to use my old Mamiya MF 500/5.6 for nature photography.
Since I know that it will take 3s to stop shaking from the mirror and that on realy long exposures i.e. 30s that 3s shake would not be visible in the shot – would you suggest to set up a test with exposure times around that 3s? Do you have a suggestion how to test if the tripod meets my demands?
Thank you – greetings from Magdeburg, Germany
Soenke
Hi Soenke,
I’m sure you’re fine, but to test, just look at your images at 100%. If they look sharp, you’re in good shape.
Cheers,
Martin.
Hi:
I’m in the final stages of ordering a Canon 500mm lens to increase my reach doing wildlife photography.
I currently use a Canon 7D or 5Diii, mounted on a RRS tripod or monopod, depending on the application. My current bird lens is the 100-400mm, and I generally go through the day’s shoot with the monopod or tripod–lens and camera attached–over my shoulder so I can quickly bring to bear for the sudden appearance of birds/wildlife.
My question is, I have ordered the RRS PG02-LLR for my incoming 500mm lens; can I have this lens (with the RRS replacement foot) mounted on my TV-34L and shoulder carry the rig when I walk? I use an Upstrap as a safety on my camera strap mounts (main point of contact is an RRS clamp strap holder on a RRS L-plate) since Upstraps straps are known for their industry-standard setting strength and reliability.
I plan to use the Upstrap on the strap mounts found on the upper barrel of the 500mm lens, while shoulder carrying; that way, if the foot plate or other point of contact failed, the lens would be still attached at two points and around my neck.
Do you have experience of carrying your big glass on an RRS gimbal setup over your shoulder while doing nature work?
Fantastic blog and overall web setup.
Best,
Chris Kiez
http://www.chriskiezphotography.com
Hi Martin,
I came across your website while looking into the RRS TVC-33 and TVC-34L tripods. Thank you for your time providing invaluable photographic information.
I am considering the purchase of either one of the tripods mentioned above.The TVC-34L currently goes up to 68.5″ tall when fully extended, adding the benefit of extra height for those situations you mention.
One interesting point is you recommend using the fatter, top leg sections first to help maintain rigidity, which makes totally sense. I would certainly want to use it this way. But upon inquiring, RRS advices to use the bottom leg section first, as doing so would minimize the collection of sand, water and dust in the bottom twist lock, which otherwise would be sitting right next to the feet. They also mention it would minimize maintenance requirements. I was wondering if you have experienced any problems with this.
The TVC-33 is 58″ tall when fully extended. It is a 3 section tripod and so in theory I would think it is more rigid than the TVC-34L extended to the same height taking RRS’s advice to extent the bottom, thinner section first. However, RRS contends there is no noticeable difference in stability when both tripods are set to the same height, regardless of what and how many sections are being utilized on the TVC-34L. Any thoughts?
Thank you for your help.
Mundo
You’re very welcome Mundo. Thanks for stopping by.
On the advice you received from RRS, that’s surprising, and in my opinion, just wrong. They are of course confident in the strength of their leg sections, but still, you should always extend the top sections first for utmost rigidity. If you really use the tripod, you’ll stick all sections into water, dust, sand and all sorts of stuff. These are tools, and if they need to be maintained through use, so be it.
Having said that, I have stuck my RRS tripods in sand, dirt, water, snow, dust etc. and it’s always been fine. It gets a bit smelly if I can’t dry it out quickly enough, but basically when it’s gotten wet, I extend all the leg sections when I get home or back to the hotel, and give each leg a wipe, and allow it to dry out. That’s all I do, and it’s as good as new. My advice is to ignore what you were told.
In the field, I’ve found both the TVC-33 and TVC-34L to be about the same rigidity. Because I usually use the BH-40 on my TVC-33, it isn’t quite as rigid as the TVC-34L with BH-55 when shooting in windy conditions, but if weight is an issue when traveling, I am happy to take the TVC-33 with BH-40, and still do long exposures etc. without issues. Note though that although it’s lighter, the TVC-33 is actually slightly longer than the TVC-34L when compacted, because of the lack of that extra leg section.
I hope this helps!
Martin.
Hi Martin,
Thank you for your quick response to my post below and kind sharing of how you use your tripods in the real world. It’s very much appreciated.
Whichever tripod I end up choosing, TVC-33 or TVC-34L, I will pair it with a BH-55 ballhead. And your hands-on assessment of both will definitely help me make an informed decision.
Mundo
You’re welcome Mundo. I’m pleased I was able to help.