Lem Fugitt and I first met virtually a while back, when Lem asked some advice when he was getting ready to buy a new camera. Then Lem commissioned me to shoot his portrait for his professional profile image, which I was happy to do. I haven’t done a lot of portrait shoots yet, though there have been a few that I am not able to discuss. The last time I talked about the gear I’m going to mention today was in episodes 151 and 155, which were about a Pet shoot, and a Maki-e Craftsman shoot that I did in July and August last year. Although I’m not big on street photography, at least not here in Japan, I do enjoy portraiture, when, like with Lem, it’s something that’s commissioned and pre-arranged. I enjoy the challenge of trying to make someone look as good as they can, with the lighting and other light modifiers available. I’m still not a total Strobist expert in many respects, but I am getting the results I like, and more importantly, the clients are happy with the results.
Before we get into details of the shoot, I wanted to give you some details about Lem, as I found him to be an incredibly interesting person. Lem has lived in Japan in total for about 18 years, which is a couple of years longer than my total, and he has a permanent resident visa, which means he can pretty much do anything he likes, and they can’t kick him out. He first came to Japan in 1982, sent by aircraft manufacturer McDonnell Douglas, to support the introduction of their CAD/CAM software system. The introduction was a success and the software was even used for the mechanical design of the Minolta Maxxum cameras in the early 80’s. Today Lem has fingers in many pies. He is a Director of Asia Business Development at Sawgrass Technologies, the founder of BigMikan Productions, and most intriguing to me is that Lem is the owner and publisher at Robots Dreams. If you are into robots check out www.robots-dreams.com. Note that it’s robots, in the plural, and not singular robot, as that will take you to a different site. Lem is also on Twitter, as robots_dreams, which I’ll also put in the show-notes, in case you are interested.
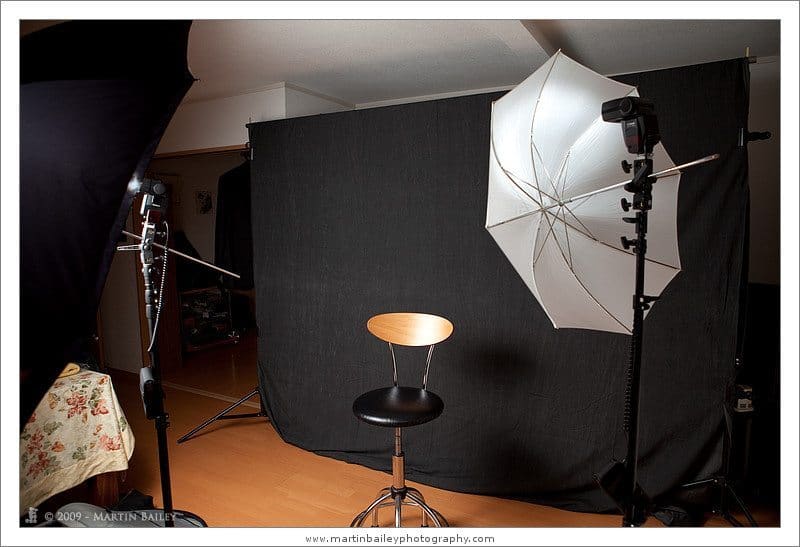
So, back to the shoot, there were three objectives from the shoot. One was to get a portrait of Lem in casual clothing, another was to get Lem with one of his robots, and the third objective was to get Lem in a suit, for his professional profile image. Lem didn’t want any prints, and we negotiated that I was give him 5 full-resolution JPEG images from the shoot which he is currently selecting. It turns out that Lem’s idea of casual, is a shirt without a tie, which is not surprising really for a corporate professional. While Lem was changing into his suite after the first two portraits were done, I took a photo of the set, to help explain how I set things up, so we’ll take a look at that first (above).
We can see that I have a large 10′ wide backdrop, which is from Backdrop-Alley, and it’s a reversible Charcoal Gray with a Lighter Gray on the back. This is one of three backdrops that I took, and I let Lem chose, from this one, a beige backdrop and a black and blue marbled backdrop. I actually picked up this backdrop especially for this shoot, as Lem told me he was going to be wearing a gray suit, so I knew it wouldn’t clash. We used the Charcoal Gray side for the shoot. The backdrop is held up by an Impact Background Support System, which has four three foot sections of pole, and here I was using three of them, for what is actually a nine foot wide support. You can also probably just make out that I have four large black clamps holding the backdrop taught, so as to stretch out the creases that you inevitably get in these backdrops. The stool here is actually a little bit further back than where we had Lem sitting during the shoot. I move the subject away from the backdrop as far as space allows, again, to allow the creases to disappear into the bokeh, which is enhanced the further away from the background we get.
The umbrella to the right is a 45″ Photoflex convertible umbrella, with the black cover removed, and the strobe putting into the umbrella, basically shooting through it. This provides quite a strong light source, but relatively soft as I place it as close to the subject as possible, without it getting in the way of the photograph. The further away you move the light source, the smaller it gets in relation to the subject, and the harsher the light will get, because it doesn’t wrap around the subject as much as it does when it’s close to them. Note that I have the Canon Speedlite 580EX II on the right light-stand, and I have mounted it sideways, with the infra red window pointing towards me, then I have turned the flash head back towards the umbrella. This is to give me the best line of sight from the Canon ST-E2 Transmitter that was mounted in the flash shoe on my camera. Also note that I turned the power of this right strobe right down for this image, as there was too much contrast to make this photograph otherwise. All you could see was this one umbrella and everything else was dark.
The large umbrella that you can see to the left is a 60″ Photoflex convertible umbrella, which is again white, but this time used with the black backing on, and I’m shooting into the umbrella, reflecting light back towards the subject. This way it provides a very broad, diffused soft light, like a fill flash, to just pop a bit of light into what would otherwise be quite harsh shadows, where the main light doesn’t hit the subject. To make sure the shadows are not overly filled in, I turned the power of the 550EX strobe on the left, to -2/3 of a stop. To make sure that my main light was indeed the main light, I turned this up to +2/3 or a stop. I sometimes leave the strobes on zero and just use the ratio settings on the ST-E2, but both give you the same effect. The result, to my eye, is a nice natural light, with some catch-lights in the subject’s eyes, and just a bit of reflected light in the subject’s forehead, as we can see in image number 2364 (above right). Meet Mr. Lem Fugitt.
This is Lem with the casual look, without a tie. You can see those catch-lights, and how the light seems to be coming mainly from his right, with the shadows on the left side of his face as we look at this, filled in pretty naturally. If Lem was a lady, I would probably have brightened the left strobe a little more, to lighten the shadows more, but I thought for Lem that we should see the lines in his distinguished face, for a more rugged look, but not to the point where he looks old. Remember we’re trying to make the subject look as good as we can here.
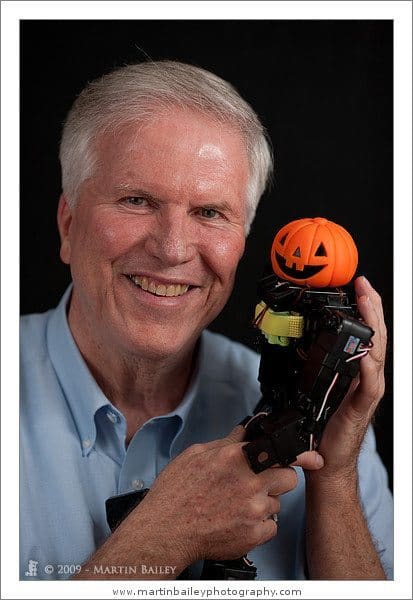
In image 2363 (right) you can see that we now have Lem, still casual, but this time with one of his robots. Here I directed him to hold the robot with his hand right up the robot’s back, and almost supporting the head, as you have to a young baby. Note too how I had Lem tilt his head towards the robot, showing the close connection between the two of them. You’ll note that I am cropping very tightly in these shots, which is basically so that we can avoid getting Lem’s stomach in the image. He is tall and well built, and has a bit of a beer belly that he is a little conscious of. Again, as our job is to make the subject look as good as we can, I avoided including the stomach in all of the images with this tight crop. With a not insignificant abdominal expansion problem myself, I know exactly how he feels on this one.
In image 2361 (below right) you can see that Lem is now in his suite, for his corporate profile image. For this first shot I was standing on the sofa, and had the subject look up at me slightly. We also had a large reflector now in front of Lem, bouncing some of the light from the large umbrella to the left back under his chin, to de-emphasize the lines on his neck. Not unsightly in any way, but the better we can make the subject look, the more they are going to like the images.
I used my 85mm F1.2 L II lens for all but one of the images that we’ll look at today by the way. I used the 135mm F2 for the shot with Lem and the robot, but that’s all. The camera was in Manual mode, and I set the shutter speed to 1/200th of a second, and let the ETTL do all the work with the exposure. I didn’t have to take total control and go to manual flash, which is an option if you’re going to have things change the way the camera meters the scene. In this image I had opened the aperture up to F1.8 for a nice shallow depth-of-field, and of course focused critically on the eyes.
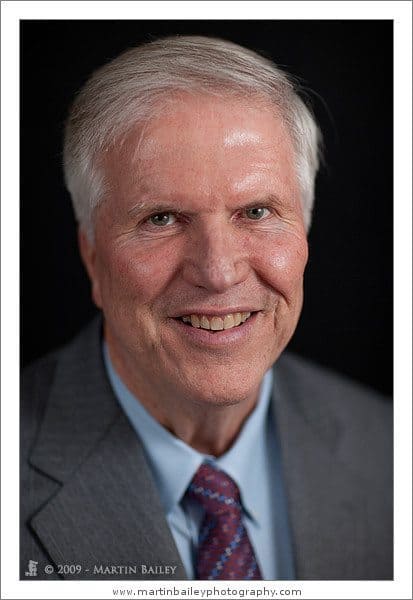
In the next image, number 2360 (left of double image set below), I opened up the aperture fully, to F1.2, for a very shallow depth-of-field. I was a little further away from the subject at this point though, so it was probably about the same as the last shot. Again though, when shooting wide open with this lens, focusing is critical, and although I use a tripod and Liveview to get my focus spot on with landscape and flower shots, I find that the only way to move quickly and freely for a portrait shoot is to work hand-held. This means that both you can move and the subject can move, and when you are working with this shallow a depth-of-field, you invariably get some shots that don’t hit the mark. The trick is to keep on top of the focusing, and shoot a couple of images for each pose.
You’ll see that Lem has a very natural smile in these images, and I was lucky that he had no problems smiling and being natural. It’s incredibly important though to keep talking to your subject, and not just become a photo machine, plugging away at the subject totally disregarding their feelings. A portrait shoot can be stressful, and I like to use up to 90 minutes to 2 hours for the actual shoot, so it can be tiring for the subject too. I found that Lem looked the best and most natural while he was chuckling so every so often, when I felt the smile was getting lost a little, I’d ask Lem to give me one of those chuckles again, and we got right back on track.
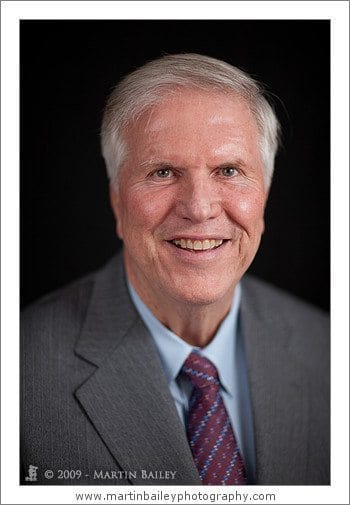
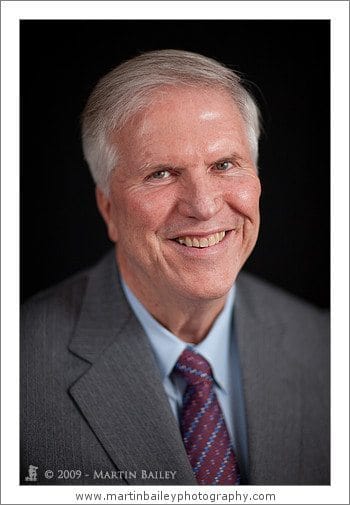
As we move to the next image, number 2359 (right of double image set below), note the very slight change in the angle of the subject’s head. In the previous image, we have a distinguished gentleman, looking as though he could be the president of the United States, but in this image, we have a cheeky boyishness. This is all from that slight tilt in the head. I actually really like this shot. I think it’s one of the best from the sitting. I don’t know if Lem will chose this mind, and I know that he listens to the Podcast, so I don’t want to say too much, but this one really works for me. Again shot wide open at F1.2, the framing is spot on, the lighting is good, with nice catch-lights, and the reflector bouncing light under the chin. It all works for me.
I like to have the subject look away to one side, then look back at me, and I often hold a hand out to one side and ask the subject to look straight at my hand, then without moving their heads, look back at me. I don’t know if this is a standard practice, and I don’t know if I heard it somewhere and subliminally recalled this, or if I just figured this out myself, but it works for me.
  |
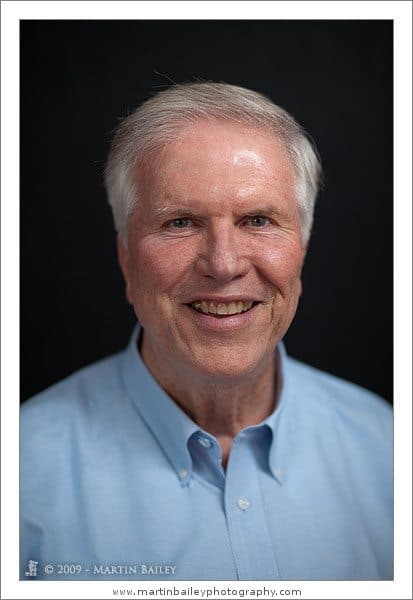
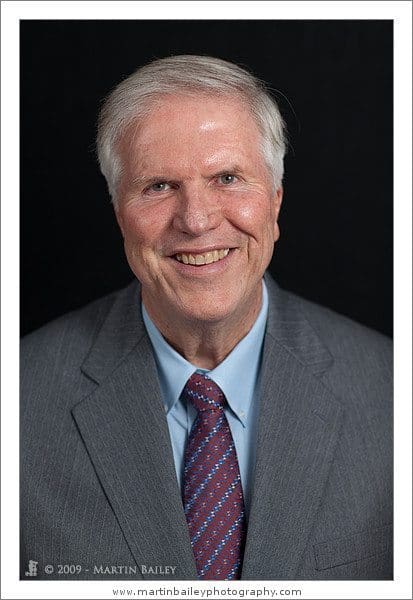
What works for me though may not always work for the client, so I make sure I get some pretty much straight on shots too, like the last image we’ll look at from the shoot, number 2358 (right). Here I closed the aperture down to F2.8, to get more of the subject in crisp focus, and had him face me and look directly into the lens. This is a nice standard portrait I think, and definitely something you should try to capture as insurance. I checked with Lem that he likes wide aperture shots, with lots of bokeh, before shooting most of the images we looked at today, but still, it’s best to make sure you get your insurance shots. Throughout the shoot I shot anything from wide open, down to F2.8, and even down to F4 a couple of times. The images that I chose to talk about today are the wide open ones, because that’s what I like.
I edited some 260 frames from the shoot down to 61 images which I presented to Lem to make his selection. If I was selecting images for myself, I’d have gotten it down to 5 or 6, probably the one’s we looked at today, but because I don’t really know the subject that well, I feel that we should leave a certain amount of choices to the client, perhaps with a little guidance. There are going to be small nuances that make one image more attractive to the client than another, and unless we really know the subject very well, it’s difficult to guess this from the photographer’s perspective. Feedback from Lem so far tells me that he is very happy with the images.
One other thing that I want to mention is that I intentionally didn’t light the backdrop. I think this almost black background adds to the images here, and helps to bring out the rugged yet distinguished features of the subject. Had I wanted to light the background, I could have either turned the large light more towards the background, and it would have still fallen on Lem, or I could get a third speedlite maybe with a soft-box, or even a hot-light just for the background or place it overhead so that it lights both the subject’s hair as well as the backdrop. I don’t think I needed that here, but it’s certainly something that I’m bearing in mind as I do more of this sort of work.
So, that’s about it on my setup and thought process as I worked through the shoot. As I said, I’m really not an expert on this stuff yet, but still, I hope it’s been on some use for you to walk through this with me. Before we finish I’d like to say thanks to Lem for allowing me to use these images, and thanks for a great shoot. You were really easy to work with, and a true gentlemen, in every sense.
Podcast show-notes:
Lem’s Web site: http://www.robots-dreams.com/
Lem on Twitter: http://twitter.com/robots_dreams
Backdrop from Backdrop-Alley: http://www.bhphotovideo.com/bnh/controller/home?O=workaround.jsp&A=details&Q=&sku=588575&is=REG
Impact Background Support System: http://www.bhphotovideo.com/bnh/controller/home?O=workaround.jsp&A=details&Q=&sku=437786&is=REG
Photoflex 60″ Umbrella: http://www.bhphotovideo.com/c/product/42512-REG/Photoflex_UM_RUT60_Convertible_Umbrella_60_.html
Photoflex 45″ Umbrella: http://www.bhphotovideo.com/c/product/42515-REG/Photoflex_UM_ADH45_Umbrella_with_Adjustable_Frame_45_.html
Music from Music Alley: http://www.musicalley.com/
Audio
Download the Enhanced Podcast M4A files directly.


A very respectable set of images of a clearly respectable man. I can see why you like the 85mm 1.2, the shallow depth of field on the suited shots really draws the eyes to Lem’s face as the suit itself blurs away in the bokeh. Lem has every reason to be pleased with the results
Thanks Peter!
Yes, the 85mm 1.2 is an amazing piece of glass. I wouldn’t like to do portraits without it. The 135mm F2 is another great portrait lens, but you need a big room/studio to be able to get far enough away for a head and shoulders.
I’m looking forward to seeing how the new 100mm Macro IS L lens works out in these situations as well.
Cheers,
Martin.
Martin
Another fine job!
I am curious to know whether there was a reason you decided not to convert a few of these fine portraits in to black and white?
Thanks Al!
I actually did do a few B&W versions, but they didn’t do a lot for me. Definitely not anything that I felt I would like to share.
I might revisit, as I love black and white, this set just didn’t seem to work that well IMO.
Cheers,
Martin.
Martin,
Thanks for another interesting and informative podcast. You’ve given me some great tips on improving my portraits. Cheers!
Thanks Jonathon! I’m pleased this helped out.
I think i’ll jump forward to this episode straight away. so I don’t have to “cheat” with photoshop to create the right lights in portraits!
very impressive use of shallow dof; i can never do without my 50mm at 1.8 for portraits but it pales in comparison to the effect of your 1.2! really impressive level of sharpness on the whole of the face and not just the eyes
Wow! Just legendary! Your publishing manner is pleasing and the way you dealt the subject with grace is admirably. I am intrigued, I presume you are an expert on this topic. I am subscribing to your future updates from now on.
Terrific Article! Your ideas as well as insights are very well worth seeing. You truly us useful information. Thanks for posting it!
Hiya, I can value most of the autor on the internet business. All of is clear not to mention effective. The picture is furthermore fantastic in my view. Are you willing to remember phon i is there much template is it possible you make use of? thank-you as soon as as well as keep up the excellent get the job done.
Well, I love what you wrote, but only up to a point. Anyway, its all good material. Good stuff!