This week we start a multiple episodes series to walk you through the February 2009 Hokkaido Workshop and Photography Tour. As I mentioned last week, the workshop went very well again, with a few things that didn’t go according to plan, but most which did were great fun and everyone got a whole bunch of great photos. Let’s jump right into it and take a look at 10 images from the first day.
Now, I don’t intend to do one episode for all nine days of the tour, so don’t worry about that. Some days though just warrant a single episode because there were so many things to shoot and to talk about. The first day was February the 16th, 2009, and we met at Haneda Airport in Tokyo to head out to Hokkaido to start shooting for the first day. It seems that as much as I try, the first day in Hokkaido for me often winds up with me doing something silly or hurting myself. I won’t go into details to save time, but this time, as soon as I got on the plane, and went to put my bag in the overhead compartment, I caught the weight of it a bit funnily, and briefly dislocated my thumb. Luckily, as soon as I felt it pop out, I took the weight off it, and it popped straight back in again, but there was some damage done. It swelled up a little, but I put some cold pads on it for the first few nights and it was OK after that. It still hurts even now though, three weeks later, so I definitely tore something. Kind of relieved that my jinxed first day injury was out of the way now, I settled down for the flight with the other participants.
I’d asked everyone to come for the flight dressed for the day, as we spent a little too long getting everyone changed at the start of the 2008 trip, and so after one more mishap where someone left their passport in the luggage cart at the airport, and us going back to find it still there, we hit the snow in the middle of the morning, between around 10:30 to 11AM. With there always being so much to shoot on this workshop, we don’t really get time to do any practical study in the field. It’s difficult to get everyone in one place for one, and even if I start to talk about something that I want to impart on the participants, something happens, and everyone jumps straight back to their gear to continue shooting. Because of this, I prepare everyone for the shoot on the bus on the way to the location, then we build on this as necessary with each individual in the field. I generally set up my gear too, so that I can not only get into the zone, as they say, as well as getting some pictures myself of course, but I also need to be shooting to understand the conditions and make myself aware of anything that I need to let the participants know so that they can get the best possible shots while there too.
On this first day, the most apparent thing was that the patchy cloud was making exposure difficult. Aperture Priority or shutter priority simply don’t work with the cranes, because they move from a pure white background to a very dark almost totally black background and any split of the two, very quickly, and very often. Trying to keep up with exposure compensation in conditions like this is pretty much impossible, so I get the group shooting in manual mode as soon as possible. Both this year and last year it took some time for the necessity for this to sink in, but usually after the first day or so, everyone is in agreement that it is the only way to go. Basically, if you are not in manual mode, every time the white cranes jump up in the air or fly, and the brightness of the background changes, the camera’s meter will get all confused and over-expose the cranes considerably. I’ve spoken about this a number of times over the years, so if you still don’t understand why, either listen to the previous related Podcasts or sign up for next year’s workshop. I’ll be releasing details on how to do so very soon.
Anyway, to get back to what I was talking about, on this first day, there was a lot of patchy cloud, which means that although manual is still the only way to go, you have to keep your eye on the light conditions constantly. When the sun was fully out, we were shooting at around 1/1250th to 1/1600th of a second at F5.6 with ISO 100, but then when the sun went behind the cloud, we’d have to reduce the shutter speed to around 1/640th or even 1/500th of a second. This means there was around one and a third of a stop difference in amount of the light we were shooting with. So, we had to constantly keep our minds on the whether the sun was behind the clouds or not and keep switching between the two extremes of exposure. The good thing is that the two extremes were pretty predictable for most of the day, but still, it posed some difficulties. One option is to simply shoot them all a little underexposed and bump up the exposure in post processing, but I personally don’t subscribe to that way of shooting. If you do this you’ll end up with muddy and grainy blacks that look pretty horrible. The mantra of getting it right in camera will pretty much always help you to get the best results, even if you have to constantly keep your eye on your exposure. You do sometimes blow out the odd highlight, or something turns out a little dark, because you didn’t notice the light shift, or it happened right in the middle of a piece of action, but in those cases, as long as you are shooting RAW, you can usually rescue the image. This will result in lower quality images of course, but if something is worth saving then go for it. Aiming for the best you can is the most important thing, and we can fall back on the technology as necessary when things don’t go as well as they might.
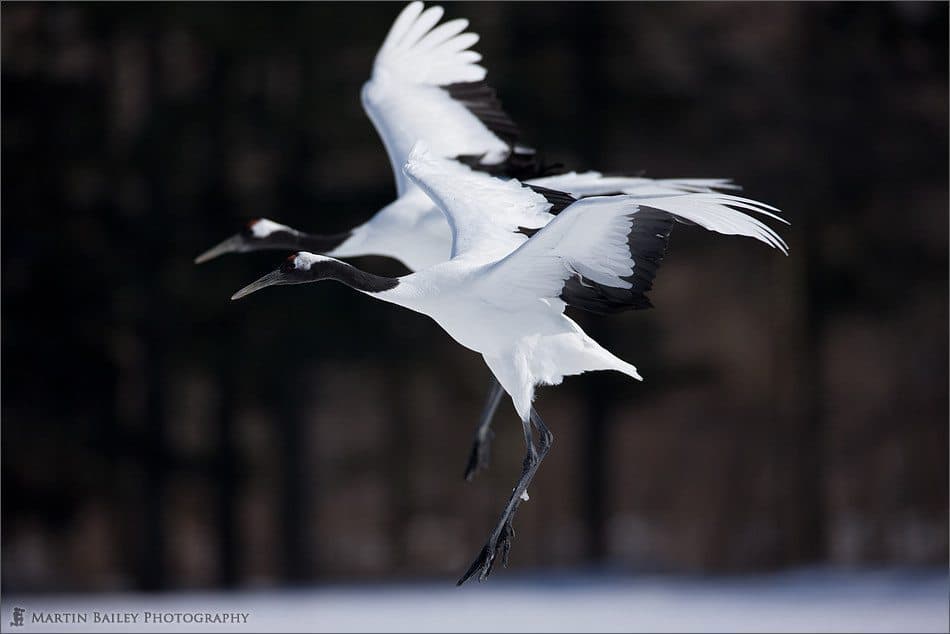
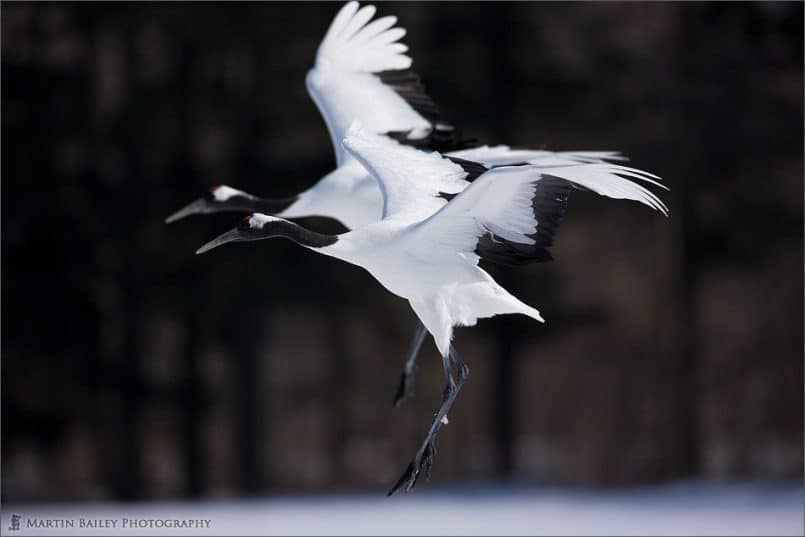
Let’s take a look at some images now though, to see what we were shooting and what I mean about the exposure. First let’s look at image number 2107. This is a pair of cranes coming in to land at the Akan International Crane Center. You can see here that I have perfect, bright whites, still though with lots of detail in the dark, black feathers around the crane’s neck and along the back side of their wings. If I was to rely on brightening the images back up, and not shooting to the right shoulder of the histogram, this detail would simply not be there in the blacks. I’d be able to pull some detail out, but it would end up grainy and muddy. I like the overall symmetry here, with the back crane in almost the same post as the foreground crane. I shot this at 1/2000th of a second at F4.5 with ISO 100. I was using the 600mm F4 lens for this, as the cranes were at a distance. It’s important when shooting the cranes and the eagles later in the week, to have two camera bodies with you, one with your long lens on, and another with a wider lens.
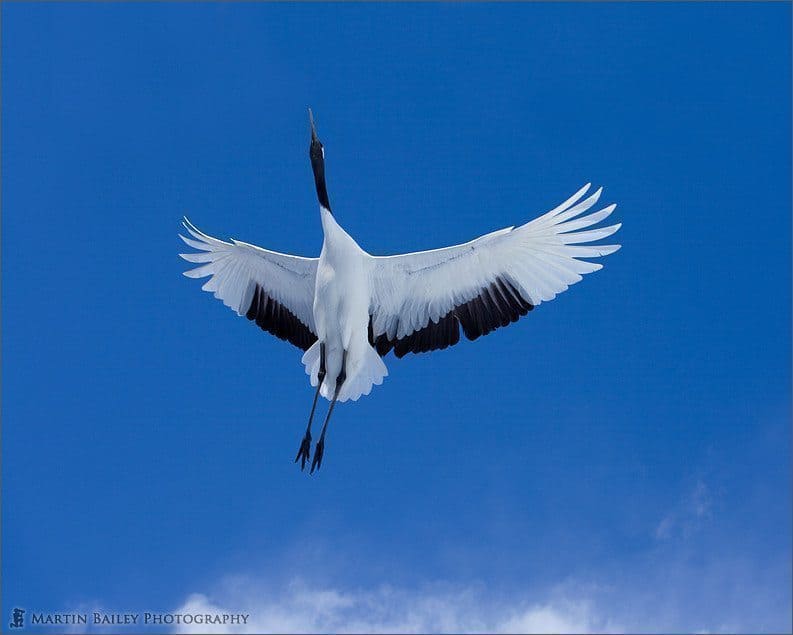
I find that the 70-200mm range is perfect for the wider lens at these places, and we can see why in image number 2111. As the cranes flight out of the crane center, they sometimes fly right over your head, as this one did, and they are very close. This image was shot at 70mm, which is of course the widest end of the 70-200mm F2.8 lens. Now, this is one of those shots that I just could not throw out, because of the perfect detail in the underside of the bird, and when you zoom in, there is actually a bit of a catch-light in the eye, that you can just see. The exposure was perfect too, as I was keeping on top of that, but I actually cropped this very close to the end of the birds beak in camera. There was a slightly better framed shot before this, but it was a bit soft as I probably wasn’t panning with the bird as smoothly as I needed to, basically because I was panning upwards and had my back craned right over by this time, no pun intended, so I was simply at my extreme physically. It is just too good a shot to throw out though, so I increased the size of the canvas by around 15% along the top, and cloned the sky in from the top edge, to fill the canvas. I probably wouldn’t have done this a few years ago, but I’m kind of OK with doing this now, to save something that I just can’t bring myself to throw out.
As the number of cranes gradually grows, which is a good thing of course as they almost died out in Hokkaido a number of decades ago, one problem that we face when shooting them is that it’s difficult to get a clear shot of just one or two cranes. The cranes sometimes start honking and do a mating dance with their partner, and sometimes just do a dance with their family, including the young from the previous year, and also sometimes in a foursome, with two pairs honking together. It can though be really tough getting a shot of this from where you are set up. As you need a leveled, pretty long lens, and because there are only so many free spaces along the edge of the viewing area, it’s not always practical to move to a better spot either.
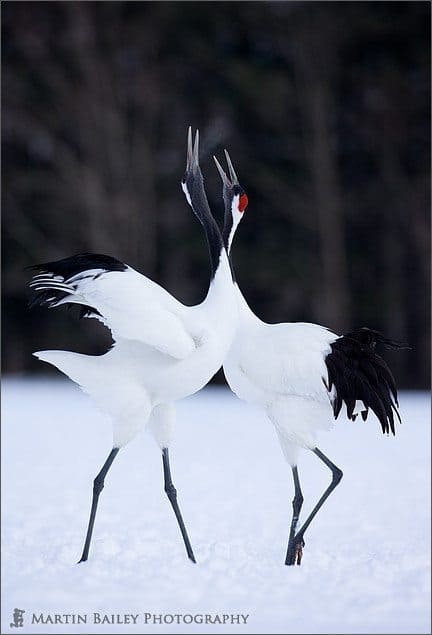
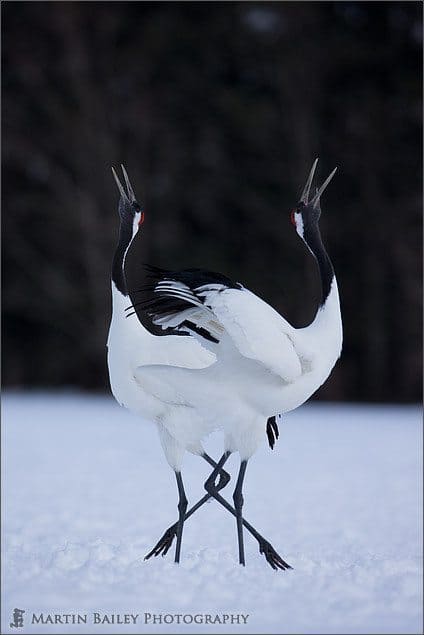
Sometimes though, you do get a clear, what I call a “through-shot”, so let’s take a look at some of mine that I was quite pleased with. The first one is image number 2115. I followed these two birds as they maneuvered through the crowd of birds. In fact, I won’t include the image, but you can see that I got another shot of these birds 15 seconds earlier, as they started to honk in unison, with their backs to me. That in itself is a nice shot, but as I tracked their movement, they turned to each others, and started to cross over each other from my perspective. This is one of my favourite crane photos as it shows both the tufted tail of the crane on the right of the frame, but also shows the wings on the left bird raised upwards, showing us that what usually looks like a black tufted tail is actually not a tail at all, but the back edge of the crane’s wings. We can see here that the Japanese Red-Crowned Crane’s tail is actually pure white. I’ve tested Japanese people on this, asking them what colour they think the crane’s tails are, and they all say black, because that’s how they appear with the wings contracted. We also just see the shape of the birds body very well in this image, and one other thing that I have tried to capture many times, is the breath of the bird, slightly white against the dark background. For me, everything works in this image, so I was really pleased that I got a clear shot of just the two birds.
I continued to shoot, as the crossed over, and got another that I was happy with, which is image number 2116. Overall, I prefer the last shot, but in this image, we have that wonderful symmetry in the legs, and the almost symmetrical pose, both with necks arched backwards, making a kind of wine-glass shape. Both of these images were shot at F5.6 with ISO 100, and a shutter speed of 1/640th of a second. I was using the 600mm F4 lens.
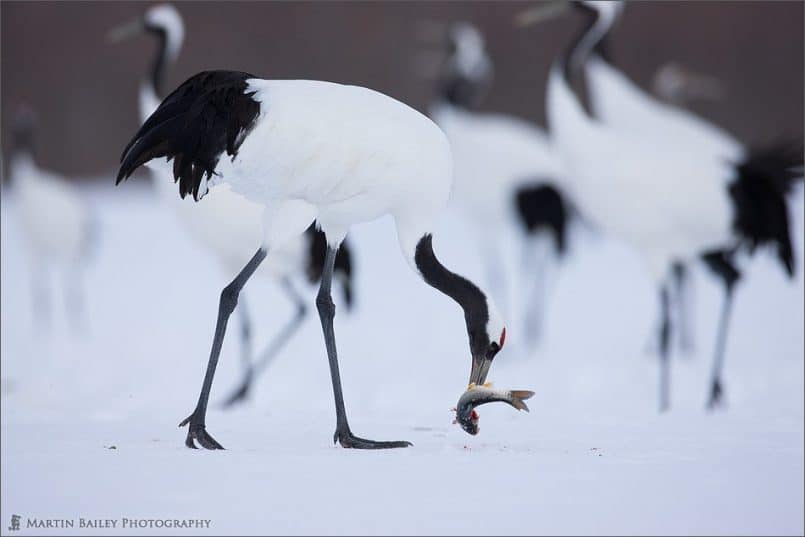
Let’s move on to a more documentary shot, which is image number 2118. Here you can see at least seven cranes in the background of this one eating a fish that has just been thrown out for the cranes. This shows just how crowded the place is with cranes, and hopefully helps you to appreciate how difficult it is to get a nice clear shot of just a single pair. It also shows that the cranes are fed fish for a few reasons. One reason is to help the cranes feed themselves. The cranes were dwindling in numbers due to human encroachment into their breeding and feeding grounds for many years, until a few organizations and individuals started to set land aside for them and feed them. They don’t feed them much. If you watch, I’d say they only throw out 1 fish for every five or six cranes, so they don’t all get a belly full at feeding time. That brings us to the other reason for them feeding, which is really to ensure that the cranes come back to this same spot, not just because it’s a safe place for them to be, but also because it helps to attract another, not so rare species, call the photographer. Photographers, particularly the sub-species with latin names like wildolifus or naturalis photografius, thrive on images of rare and beautiful creatures like the majestic red-crowned crane, so it’s kind of a symbiotic relationship.
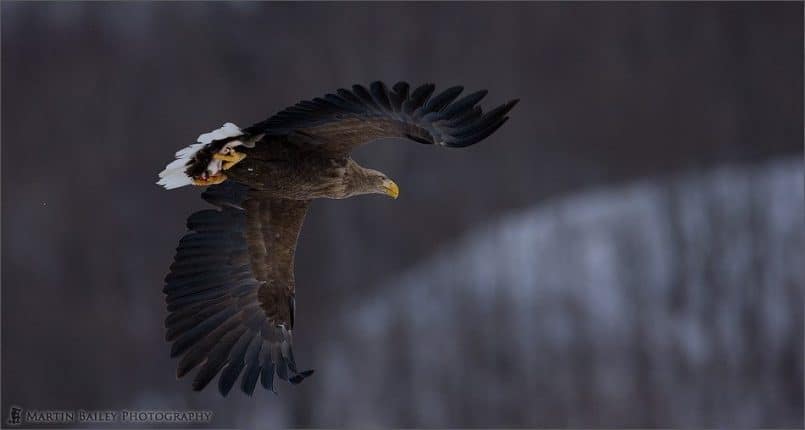
The fish also attract other birds, such as the White-Tailed Eagle and the Steller’s Sea Eagle, and we can see a White-Tailed Eagle making off with one of the fish in image number 2120. I cropped this across the top and bottom a little, to narrow the path of the bird out of the image a little, which I thought worked, probably partly because of the shape of the snowy bank in the trees in the background of the image as well as the arch made by the eagle’s wings, kind of like a boomerang in this shot. To capture the action, I’d changed to ISO 200 now and was shooting with a shutter speed of 1/1600th of a second, still at F5.6
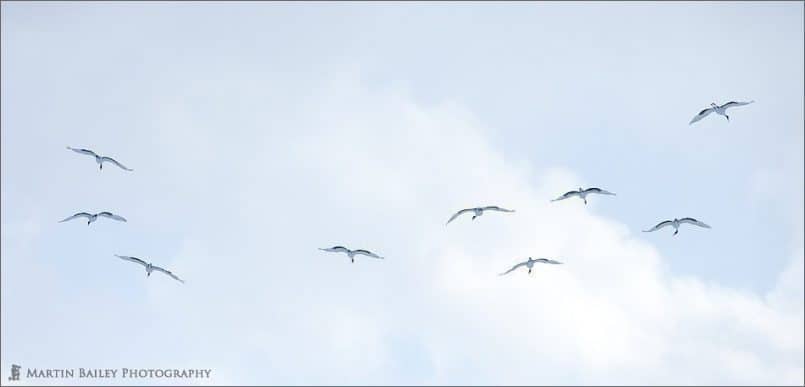
Let’s move on to image number 2121 now. After the feeding, the cranes start to make their way out of the crane center, sometimes in pretty large numbers, as we can see here. Again I’ve cropped this image a little to keep focus on the birds, as the top and bottom of the shot really don’t add much. I think I cropped the left side a little too, to balance it out with a similar amount of space as the right side. This again is another reason to have a second body, with a wider lens on, or you would simply miss these shots. I got this with the 5D Mark II and the 70-200mm F2.8 IS lens, shooting at 200mm. Still at ISO 200, I was shooting with a shutter speed of 1/800th of a second now due to the cloudy sky, and I was still at F5.6. The birds are heading off to the nearby river to roost, which is where we were hoping to shoot the birds in the mist the following day. There is a location about 30 minutes or so from the Akan Crane Center, where a kindly farm owner has set aside a field for the cranes to stop off at, and an area for photographer’s to set up their gear and photograph the cranes flying overhead. Shortly after shooting this image, that is where we were headed.
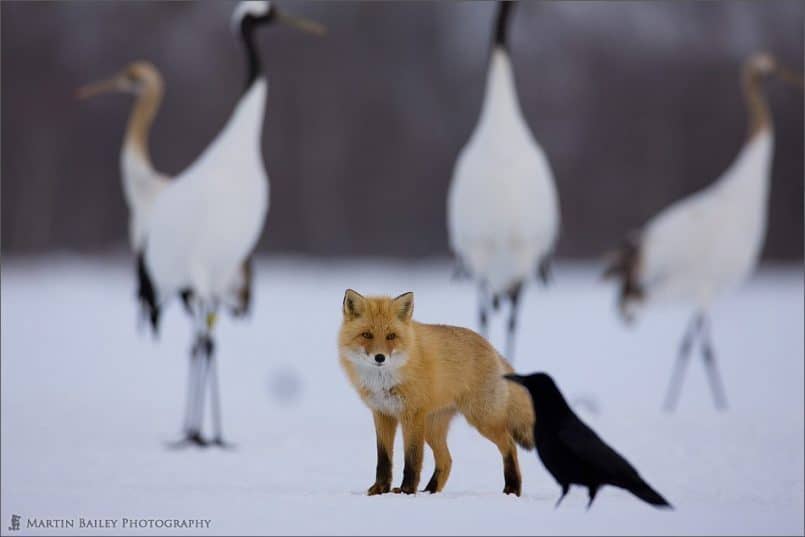
Before we go though, let’s take a look at one last shot from the Crane Center for today, which is image number 2122. Another animal that makes his way to the center at feeding time is the fox, as we see here. The crows are everywhere in Japan, so can often just be a nuisance, but here I kind of like the play with the sharp fox, with the cranes behind him, and the crow in front, with the fox firmly focused on it. I know that some of the cranes heads are cut off, but they are also out of focus and really just providing some context, so I’m not too worried about that. I kind of like the way the fox is staring at the crow though, so thought I’d stick this one into the collection for good measure. The foxes are there of course to get a piece of the fish action when they can, but at great risk, because the 160cm tall cranes have little patience for the eagles and foxes and other things that try to steal “their” fish, as we saw in one of my shots from last year, where a juvenile crane was stomping down pretty hard on a distressed White-Tailed Eagle.
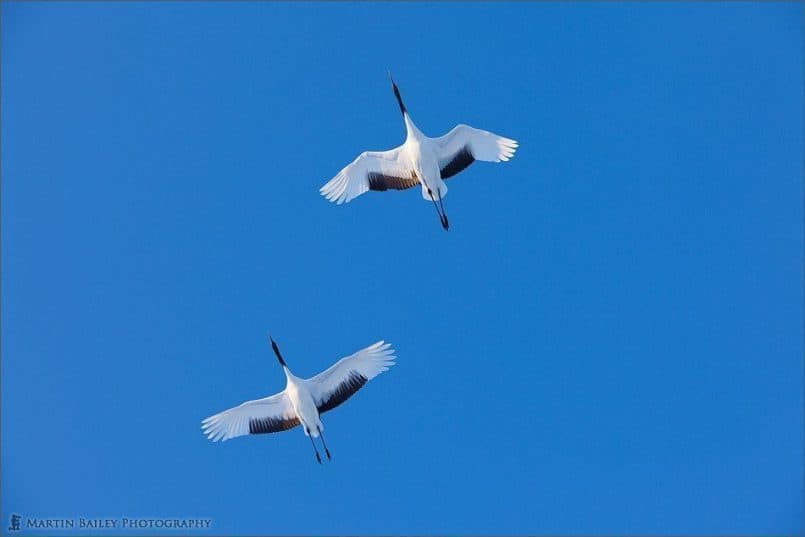
Over at the Kichuchi Farm now, to shoot the flyover as the cranes make their way to the roost, I shot image number 2123. This shot is very much something that I could have shot at the last location, but you’ll notice that there is much warmer light on the underside of the crane’s wings here, as the sun is now almost on the horizon at the end of the day. It also makes for that stunning, almost shocking blue sky, as a backdrop for this image. Shot at ISO 200, I was still at F5.6 with a shutter speed of 1/320th of a second now, as the light dies at the end of the day.
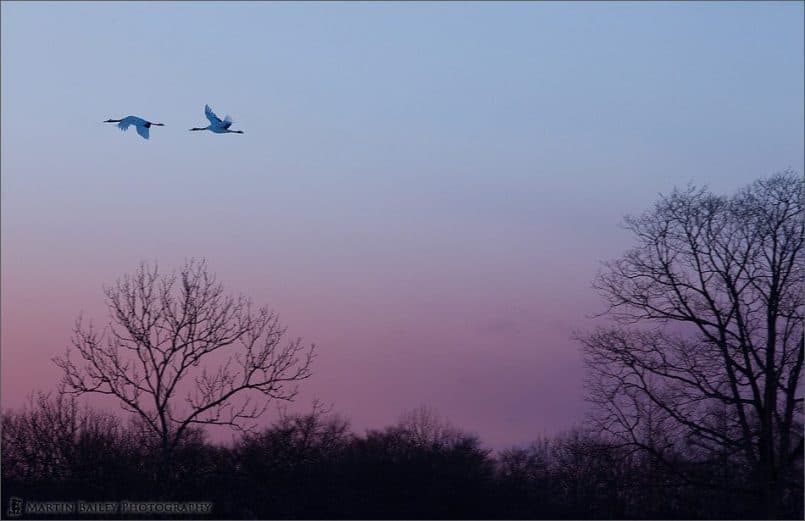
Finally for today, we have a slightly played with shot to finish, which is image number 2124. So, getting very experimental here for me, and in the spirit of being totally open about what I’m doing, there are a few things that I wanted to talk about. Firstly, I got two shots of this scene, with the cranes in this position in relation to the trees, which I quite liked. The first shot, had the trees slightly blurred, as I panned with the cranes, but the cranes were a little too blurred. The second shot had really sharp cranes, but the trees were too blurred. Basically, what I did was opened them both as layers in Photoshop, which is now one of the edit options in Lightroom by the way, and grafted the sharper birds from the second shot into the first shot, with the sharper trees. Again this is something that I would never have done years ago, but I’m pushing the boat out a little here these days. The second thing that I did was to add a coloured gradation filter to warm up the bottom half of the shot for that after sunset red glow in the sky. Here I was thinking of my film days, when I would sometimes drop a warm red or orange graduated filter over my lens to get exactly this effect, and figured, well, if I could do it with film, why not. I quite like the end results, so I thought I’d finish with this for today.
So, that was the first day of the Winter Wonderland Workshop from February 16th to the 24th, 2009. As I said earlier, I don’t intend to take an entire episode for every day, but some days just seem to warrant it. Join me again next week, as we pick up the trail at the beginning of the second day, when were were hoping for calm weather, with temperatures of -15 degrees Celsius or below, so that we could get the frosty trees and mist on the river, like we did on the second day of the 2008 trip. See how that turned out next week. For now, you have a great week, whatever you’re doing. Bye bye.
Show Notes
For details of the workshop itself, including next year’s workshop once the site it updated, please check out my workshops Web site here: Tours & Workshops
Music by UniqueTracks.
Subscribe in iTunes for Enhanced Podcasts delivered automatically to your computer.
Download this Podcast in MP3 format (Audio Only).
Download this Podcast in Enhanced Podcast M4A format. This requires Apple iTunes or Quicktime to view/listen.


0 Comments