This week I’m going to answer a number of questions from listeners, and we start a new service. Not only can you now leave recorded messages and greetings, that I will include in the show intro. Also, thanks to an idea by listener Mojo_Yugen who’s real name is Brian Schultze, I’m also now asking you to send me in a recording of any questions you might have. If I can answer based on my own experience, I’ll do so in a future episode, and of course, that will be followed by my playing the recording of question. To record you message or question, just go to martinbaileyphotography.com and look for the applet on the top page under the Record Audio Greeting section. If you click on the leave a message button you will go to a special Web site at MobaTalk, to record and leave your message. You can currently only record 2 minutes at a time, but if your question is longer, record it in multiple messages, adding something like part 1, part 2 to the title, and I’ll stitch them together for the Podcast. If you’d prefer, you could just record your question on your own machine, and send it to me in mp3 format by email at info@martinbaileyphotography.com. I am still open to questions by mail too if you don’t have a mic, and you can contact me on the same email address, or via the Contact Form at my Web site, or with the private mail function on the Forum at martinbaileyphotography.com. Anyway, thank for the idea Brian, and let’s get on with today’s main topic.
So, quite often I receive questions via email about topics that I’ve covered in the Podcasts, and sometimes just general questions. The answers to these questions are often quite valuable, although they are only shared with the one person that asked the question. If nothing else, I’m sure there are a few people out there that have thought the same things, and so hopefully these Q&A sessions will be of some use to most of you. So today, I’m going to talk about a number of things I’ve been asked recently, and then in future, maybe once a month or so, I’ll do follow up Podcasts to discuss topics either asked of my in email, or hopefully via audio recordings either mailed to me or recording on line with the new applet I’ve add to the top page.
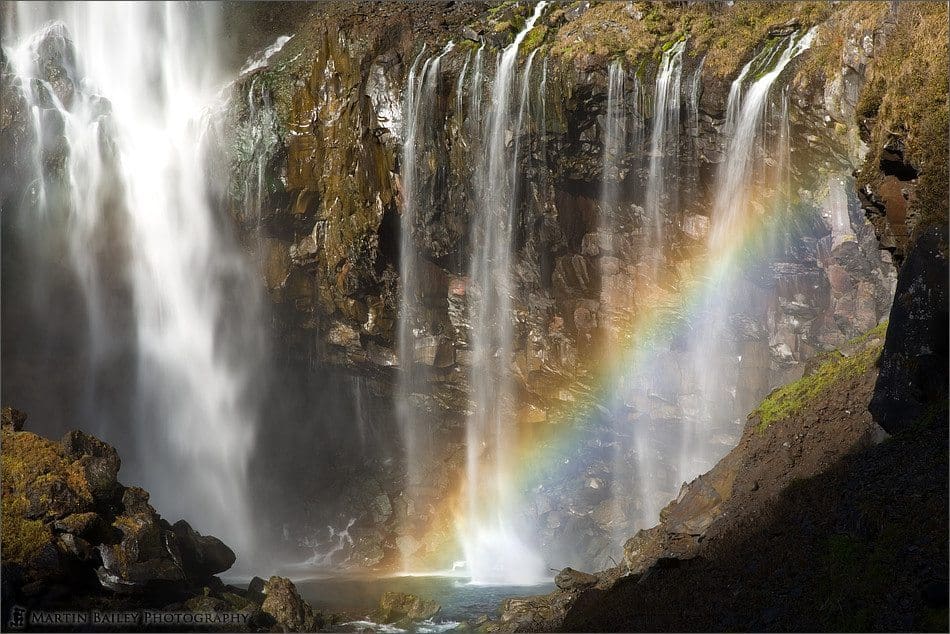
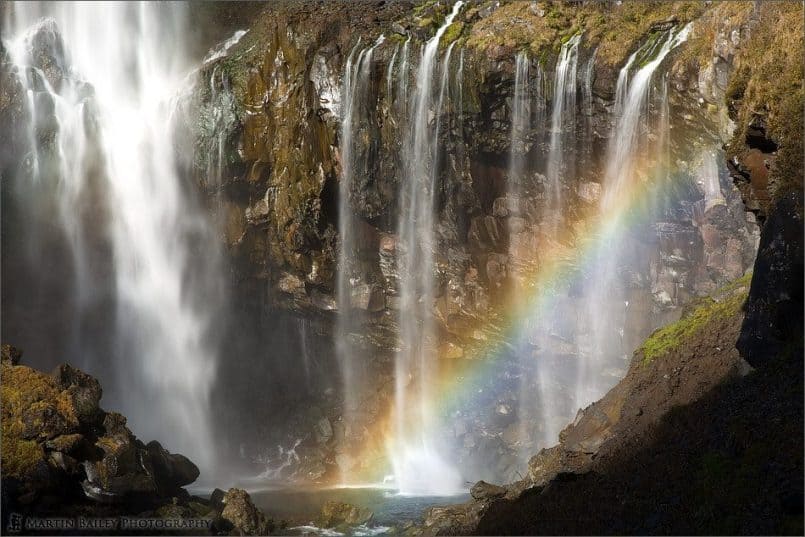
So, the first question for today is from Robert in Germany. Robert had a question with regards to the photo of the waterfall with the rainbow, that I spoke about in Episode 11 called “Good Planning… Good Luck!” Robert asks “Why did you use a PL filter? As you explained in the Podcast you took the risk of eliminating the rainbow. Would not a gray filter also be possible to filter away some light?”
Let’s take a look at the image in question, number 731, as I explain my thought process here. Firstly, what Robert says is exactly correct. I did say in the Podcast that a PL filter can be used to pretty much eliminate a rainbow, and it can. Well, a few days ago when I replied to Robert by mail, I said that I had left my Neutral Density filter in the car, but as I don’t have the best memory in the world, I checked the notes for Episode 11 and found that I did have the ND filter with me, but attaching a Cokin filter holder and then fitting the ND filter takes a little bit of time, and the light was only going to be there for a moment or two, so I realized that I was not going to have time for that. But I did need a slow shutter speed to make the water look like it’s flowing, and I needed it quickly. First I lowered my ISO to 50, and the aperture to F22, and still I couldn’t get a shutter speed slow enough to make the water flow as much as I wanted, and we can see in the resulting photo. Without doing anything, I was faced with a shutter speed of 1/50th of a second, which would have introduced some motion blur, but I wanted a little more. Anyway, my only realistic option was the PL filter in my pocket, which I could attach much more quickly.
A PL filter cuts out around 2 stops of light so the shutter speed dropped from 1/50 of a second to 1/10, which was enough to give a flowing effect in the water without going over the top. There is risk as I mentioned, but if we remember the effect a PL filter has on a blue sky, you will recall that as we rotate the filter while looking through the finder, at some points the sky looks very pale, and other points it can become a very deep blue. The amount of effect the PL has depends very much on the conditions, but I’m sure you’ve all seen this effect to some extend. A PL works by cutting out the scattered light that bounces off shiny surfaces and water particles in the air. For this to work though we have to turn the front element of the filter until it aligns just right with the light coming straight at the camera, cutting out the scattered light. Of course, as a rainbow is basically just light reflecting off water there is the risk of erasing the rainbow pretty much completely. If we continue to turn the filter to the other extreme, checking as we turn it, you can see that it stops having any effect on the scene for a while, until we turn it past that point.
While shooting the rainbow and the falls, I could check the effect very easily. As I turned the filter, at some points the rainbow completely disappeared, but as I continued to rotate, it came back in full colour. I have to admit, I was a bit worried, but having checked the shots with and without the PL filter after getting home, the end results had no difference in colour what so ever, except the slower shutter speed has increased the flow of the water, as anticipated. All in all, it was a bit of a gamble, but in hind-sight, I don’t think this was a bad move. So if you find yourself in a pinch, either you don’t have a Neutral Density filter with you, or you just don’t have time to fit your filter kit to the lens, you can possibly make do with a PL, if you are careful to ensure it is not having the wrong effect. Also note too that I bought a circular ND8, which is a three stop neutral density filter after this, so now I have something that I can quickly drop on to the lens without having to play around with the Cokin system. I do still think the Cokin system is excellent, but only when I have the time, which is really still a very small amount of time, to use it. Anyway, I hope that makes that a little clearer Robert. Thanks for your very astute question.
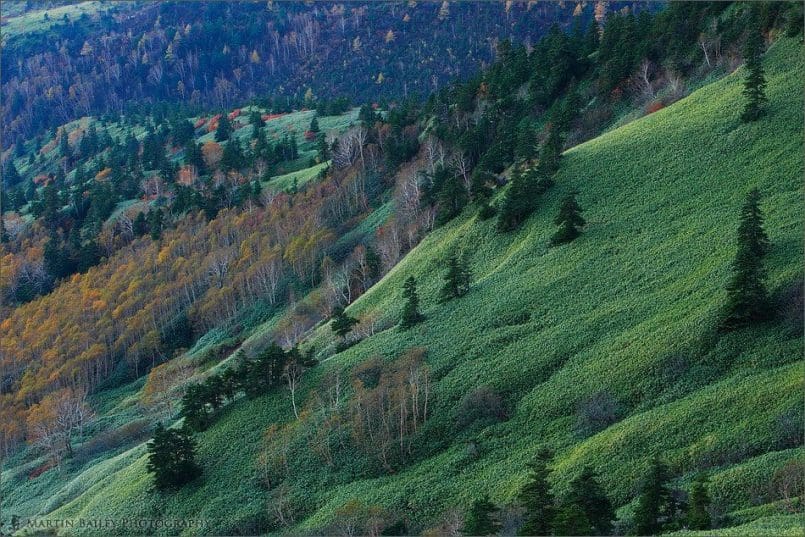
The next question I had was from a listener who’s name I won’t mention as I wasn’t able to get permission to do so in time. This is another reason why a recorded message will be great! Anyway, the question was about the last episode, number 59, when I spoke about my early morning shoot at the Shibutouge mountain pass. The listener asked why I used negative exposure compensation for my shots when they didn’t seem to have a great deal of contrast. Well, this is another great question. The reason for the compensation in shots like number 1141, which I shot at minus 2/3rds of a stop, is really just because I didn’t want the camera to falsely brighten up the image. If I had simply trusted the camera’s meter, it would have tried to make the scene an 18% neutral grey style exposure, which in this case would have been too bright. The sun was still behind thick cloud on the horizon, and not really lighting the scene at all. With my eyes, I could not see anywhere near as much detail as the camera captured in this 1.3 second exposure. So I was really just making up for the cameras tendency to miscalculate the exposure for non-average scenes. This is very much the same with a very bright scene, such as a sunlit field of snow. The shot would be metered at anything up to 2 stops below what it should be, as the camera is trying to turn the snow into an 18% grey. Now, we all now that a field of snow in daylight is white, not grey, so we need to reduce the exposure by 2 stops to capture it correctly. So, it’s not always about contrast. In fact, I’d say it’s less often about contrast. For high contrast shots, I often switch to manual mode to ensure I get it right, but that’s another story that I also covered recently.
Finally, I received another question last week from a listener called Kris Bjornstad from Scranton, PA (USA), with regards to a recent experience when shooting a sunset. At first, Kris was shooting pretty much as the camera dictated, but then decided to stop down the exposure manually. With this, Kris got some great shots of a deep red, fiery sunset. The thing is Kris wasn’t sure why the colours became so rich and saturated as he stopped down, or reduced the exposure. I explained in a mail that the less you expose, the more saturated, or richer, colours get, to a certain extent. Let’s think first of what happens if you over expose an image. The colours get less and less saturated until eventually everything turns white, right? On the other hand, as you lower the exposure, the image gets darker and darker, until everything goes black. But if you underexpose, or use just a little negative compensation the colours move toward black, but not too much, making them darker and hence richer.
One thing you can try to prove this is to open a well exposed image in Photoshop. Hopefully you can find one with lots of colour in it. Then open the brightness slider and slide it to the far right. You’ll see that the image gets very pale and washed out, with very weak colours. Move the slider to the far left though, and you’ll see that the colours get much darker and at least for a while, much richer, or more saturated. This is really what Kristian was doing by reducing the exposure of the sunset, making the scene much more saturated, which is exactly what you want in this situation. The other thing you could do if you want to play is to go to my web site at martinbaileyphotography.com, and select “Colour Wheel” from the Quick Links pull-down in the top menu. Place your mouse over the colour wheel somewhere in the middle between the dark centre and the white outside area. If you then move the mouse pointer from the centre to the outside the colour gets paler and paler until it turns white. This is very much what will happen to that colour as you increase the exposure. If you go the other way, the colour will get richer for a while, until it starts to get too dark to really be what we’d call a well saturated colour, and then it turns black. This would be the same as reducing the exposure, until totally underexposing the image. You can also click on the colour wheel at any point to record the colours in the list along the left side of the screen for easier comparison as you move your mouse around.
So, I hope that has been of some help. Remember that from now on I’ll be trying to answer any questions you might have, that you can mail me or contact me from my Web site about, and also, the things I’m really hoping for, is if some of you could record your questions using the new message recording tool on the top page of martinbaileyphotography.com. For now though, thanks very much for your questions guys. {NOTE: The recording tool mentioned here was discontinued some time ago.}
So once again, I’m very late getting this Podcast out. I’m sorry about that. I’m still very busy with other commitments, but also this week we’ve have more web site problems that have eaten into my preparation time. I’ve also gone and caught a pretty nasty cold too, as you may be able to tell from my voice. I guess I’ve been burning the candle at both ends a little too much. Something else that I’ve found this week is that the Japanese text from both the forum and the titles and comments I add to the photos I upload in my gallery has all become corrupted in the server move in September. It mostly looks fine in the gallery, apart from a few tell tale signs, but when I looked into this, it seems that the jump from an older version of the database to the current version has broken all of the Japanese characters. I’ve figured out how to setup the database to behave correctly, and I have also figured out how to restore the old information, but it is going to require taking the gallery and then the forum down for 15 to 30 minutes or so each while I make the changes. I’m thinking to do this over this coming weekend, so if you come to the site and find either the gallery or forum down, please try again 30 minutes or so later, and everything should be up and running again. I am really sorry for all the continued trouble, and I’m still hoping that it will all be over soon.
Finally, if you haven’t voted for your favourite entry in the Reflections Assignment, please go to mbpgalleries.com and check out the Assignment Album, and make your vote. You have until the end of this coming Sunday, which is November the 5th. Once again, it’s tough, because the level of entries is so high, but it would be great if you could take the time to choose your favourite if you haven’t already. I’ll announce the winner and two runners up next week, and we’ll kick off the next assignment too, so stay tuned for that. And for now, have a great week, what’s left of it, whether you’re out shooting, or whatever you do. Bye bye.
Show Notes
Music from Music Alley: www.musicalley.com/
Subscribe in iTunes for Enhanced Podcasts delivered automatically to your computer.
Download this Podcast in MP3 format (Audio Only).
Download this Podcast in Enhanced Podcast M4A format. This requires Apple iTunes or Quicktime to view/listen.


Everything is very open with a very clear description of the
issues. It was definitely informative. Your website is very useful.
Thanks for sharing!