I recently received an email from a guy called Tomasz Trzebiatowski (Tomash Tchebiatovsky) with regards to Exposure Compensation. At first I thought Tomasz was just asking for the technical reasons why we use Exposure Compensation, but it turned out that he was thinking more along the lines of any artistic reasons why we compensation exposure. It occurred to me though, that although I often mention that I used minus two thirds exposure compensation, or plus a third etc. I rarely explain why, other than because the background is dark or bright. I kind of expect that most listeners already know this, and I don’t think I’m mistaken in thinking that. It did start me thinking though that there are going to be some listeners that either have never really given this a thought or might want to just brush up on the reasons behind Exposure Compensation, from both a technical and an artistic point of view. So with that, today I’m going to do a brief episode on this subject. Also, if you have any similar requests for me to discuss various techniques that I have not really explained in any detail, please do drop me a line via the forums private messaging or the Contact Form at martinbaileyphotography.com. In fact, I am making this mail address more public these days anyway, so you can also go right ahead and mail me on info@martinbaileyphotography.com as well. So let’s move on to the main topic.
For those of you that have followed this Podcast for a while, or have caught up on the archives, you’ll probably remember that I discussed Exposure and shooting in Manual Mode in Episode 10, way back in November last year. In that Podcast I went into detail about EVs, or Exposure Value and we discussed how to easily calculate by how much you need to increase shutter speed for when decreasing the size of the aperture, and visa versa and also situations when we might switch to Manual mode. You might want to catch up on Episode 10 if you haven’t already and you are a little shaky in these areas. I also spoke briefly about why we use Exposure Compensation too, but we’ll go into a little more detail today and take a look at some real-world examples while we’re at it as usual.
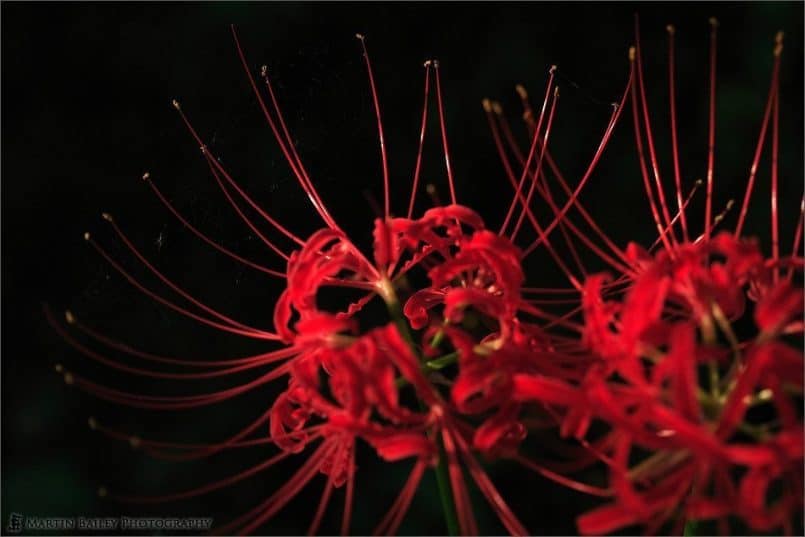
So first of all, why do we need to even use Exposure Compensation? Well, in-camera light meters are getting incredibly accurate and intelligent, but as they still cannot connect to our brain and see what we see in the same way that we see it, they make mistakes. Your camera will try to render your scene in neutral brightness, similar to that of an 18% gray card. Now if the scene is actually very dark, say it contains a lot of black objects, the camera will try to brighten them up and over-expose your image. If you remember in last weeks Podcast I mentioned image number 1117, which has some bright reds, but a very dark background. Let’s look at this image again first today and you’ll see what I mean. I actually found it took quite a lot of time to find some examples of where I’ve used exposure compensation in my images, as I tend to switch to Manual quite often, as I did with this shot, but for now, let’s just pay attention to the fact that there are bright reds, with a very dark background. Had I allowed the camera to select a shutter speed for me in Aperture Priority mode, it would have undoubtedly metered more for the dark background, which it would have tried to brighten up, and the resulting image would have had a red flower so bright, that almost none of the detail in the flower would have remained.
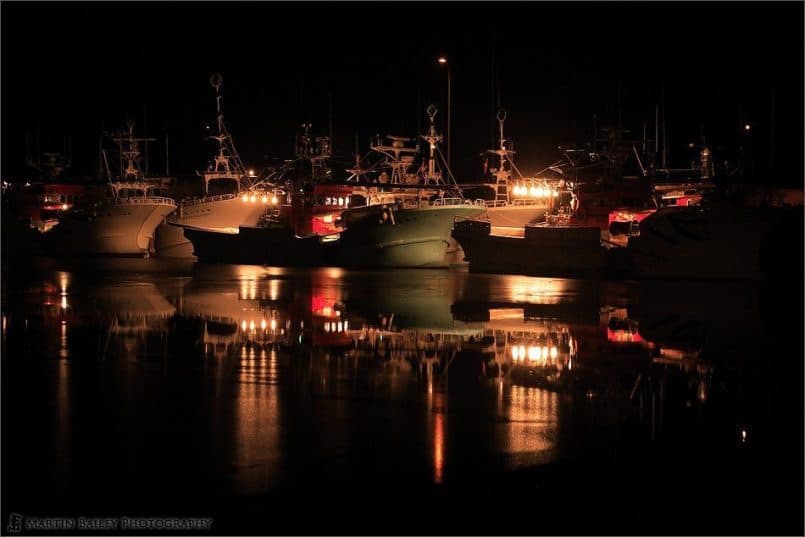
If we take a look at the next image, those of you at a computer can view the image on my Web site and therefore be able to see the EXIF shooting data below the image. Those of you that are not at a computer right now will just have to trust me. The image is number 895, which you can view either on your iPod, or in iTunes, but if you want to view the shooting data too, click the thumbnail in iTunes or go to the Podcasts page on my site and either enter the number 895 into the field on the top page or the top of the Podcasts page and click the orange button to jump to the photo, or find this episode in the table of Podcasts and click on the thumbnail. You should be able to see a photo of some boats in a harbour at 5:20AM, before the sun came up. This is a perfect example of when to use exposure compensation to stop the camera from being fooled into making the shot too bright. Firstly you’ll notice that the top and bottom of the shot is in total darkness, and there are a number of lights on the boats, but it is overall quite a dark image. Take a look at the EXIF data below the image, and find the item called Exposure Bias. This is the amount of exposure compensation I applied when I shot this image. You’ll see that it says 1.666666 EV, which is minus one and two thirds of a stop. Two rows down from that you can see that I was shooting in Aperture Priority mode. You can of course also use exposure compensation in Shutter Priority mode. The difference is in Aperture Priority you set the aperture and allow your camera to automatically set the shutter speed, and in shutter priority you set the shutter speed, and your camera automatically sets the aperture to get what it thinks is the correct exposure. So as you compensate exposure in Shutter Priority mode, your camera will change the aperture size, and with aperture priority mode, exposure compensation affects the shutter speed.
So if we look at the aperture for this image it was shot at F5. If we look at the shutter speed, we can see it was shot at 1/80th of a second. Had I not used any exposure compensation, we can calculate from this that I would have had a shutter speed of 1/25th of a second. This would have let so much light in that the scene would have been quite bright, and probably not have looked like night time any more. The other important thing here is, like the bright red flower in the first example, the bright lights on the boats and their reflections would have become very bright, and started to over power the shot. If you can’t figure out how I got from 1/80th of a second to 1/25th of a second in the calculation a moment ago, let’s do some quick mental arithmetic. As we wanted to calculate the effect of minus 1 and two thirds exposure compensation, we need to count the other way. As I am really not good at maths at all, I usually start by doing the whole numbers, which is to add one stop of exposure. To add one stop of exposure, we simply need to double the length of the shutter speed, and as we are working in fractions of a second, to double the shutter speed, we just half the 80 to 40. One fortieth of a second will allow light to enter your camera for twice as long as on eightieth of a second. After that, we have to add another two thirds. Again, my math skills are pretty bad, so I tend to take a strange route, by once again adding one stop by halving 40 to 20. The last part takes a little bit of memorizing the steps a camera uses to jump between thirds of a stop, because if we were to calculate an exact third, we’d end up counting back to 1/27th of a second, but cameras use 1/25th of a second instead.
Another thing you can do if none of this is making much sense is actually pick up your camera, and switch to manual mode, then start to change the shutter speed and see the steps that it jumps by. You can also select 1/80th of a second, and as long as your camera is set to jump in thirds of a stop and not half, you will see that three clicks takes you from 80 to 40, then one more click takes you to 30, and the last click, a total of 5 thirds, takes you to 1/25th of a second. If you are not familiar with these steps is no big deal. The important thing is getting used to apply plus or minus exposure compensation.
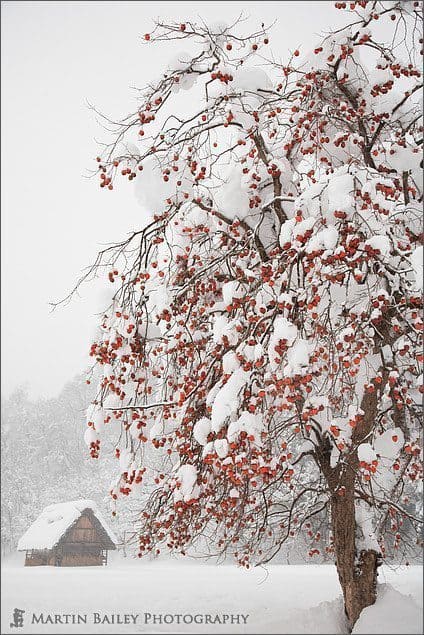
So the last example was a dark image, next let’s look at a reverse example. Image number 782 was shot on a snowy day, so there’s a lot of white in the frame. This has the reverse effect on your camera meter, as it wants to make white darker. Although there are a lot of reds and dark branches in this picture of a persimmon tree with fruit covered in snow, the camera still wanted to darken it down too much in the search for an average brightness image. This time it took plus two thirds of a stop to correct the exposure. Again you can check the number 0.66666 in the shooting data below the image. In shots with lots of white and few dark areas, like a full field of snow, would require much more exposure compensation of around plus one and a third on an overcast day, or one and two thirds on a bright day. As I said earlier though, in challenging situations I tend to switch to Manual mode, and set both the aperture and shutter speed myself. As the meter in the camera is very accurate, I don’t carry my hand-held light meter around with me very much at all these days. Rather I use the camera’s meter, first selecting the aperture I want to use to get the depth of field I feel will suit the shot. As you change the exposure you can see how much above or below what the camera thinks the exposure should be by looking at the indicator in the viewfinder. As you change the shutter speed or aperture, the camera will display how off it thinks you are.
Whether you are in manual mode, or just using exposure compensation, I strongly suggest that if you are using digital, shoot a test shot and then check your histogram. If your camera has a histogram that can display the Red, Green and Blue channels separately, I suggest you use it. In scenes where there is a predominant colour like the reds in the Equinox Flowers we looked at last week, it is very easy for them to clip. Clipping is an expression used to mean that one or more of the channels is hitting the right or left side of the histogram and therefore the colour is blowing out or becoming totally white if it’s the right, or the dark areas are becoming totally black if the histogram is hitting the left side. When this happens, either too bright or too dark areas will contain no detail what so ever. Although I myself try to get the exposure spot on in the field, if you are the sort of person that tends to just shoot away and then try to fix it in Photoshop, you will probably already know that there is no way to get detail back in areas that have clipped in this way. There are tools that will enable you to get a bit of detail back, but this always depends on the area at fault not clipping totally. When this happens, no amount of playing around in Photoshop will help. Anyway, if you keep your eye on the histogram, even if it is not an RGB histogram, and ensure you don’t touch the right or left edges you will have detail throughout your image.
Of course, there will be times when the scene contains more contrast than your camera can record. When this happens, you have two choices. Either exposure for the highlights and allow the shadows to go totally black loosing detail, or go the other way, and expose for the shadows, allowing the highlights to blow out, going totally white. You can also use gradual neutral density filters to reduce the contrast in the shot, or you can shot two images, one for the highlights and one for the shadows and then merge them in Photoshop. This is the method I’m choosing over gradual neutral density filters these days. I spoke more about this in Episode 36 if you are interested in listening to more about these techniques.
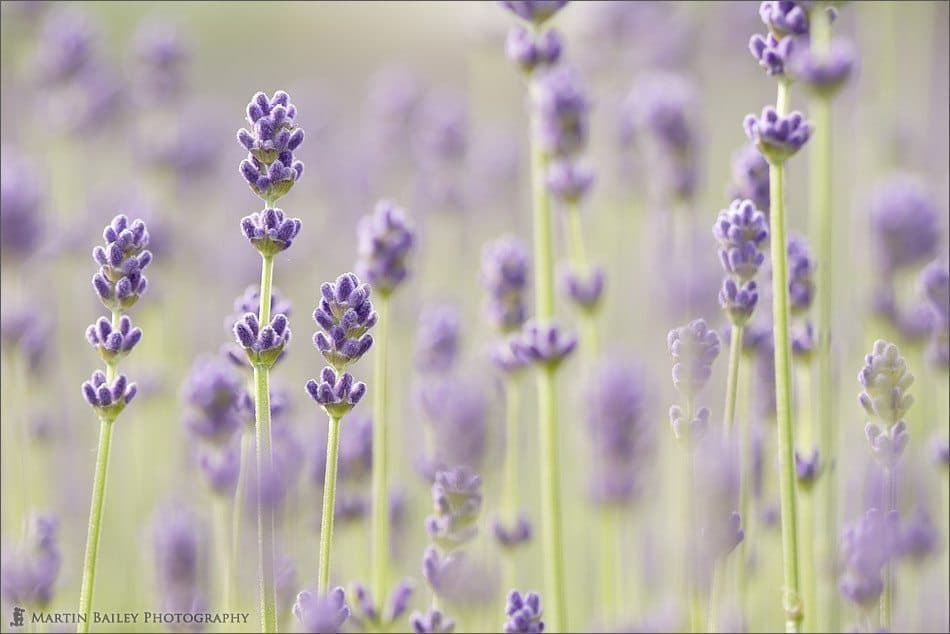
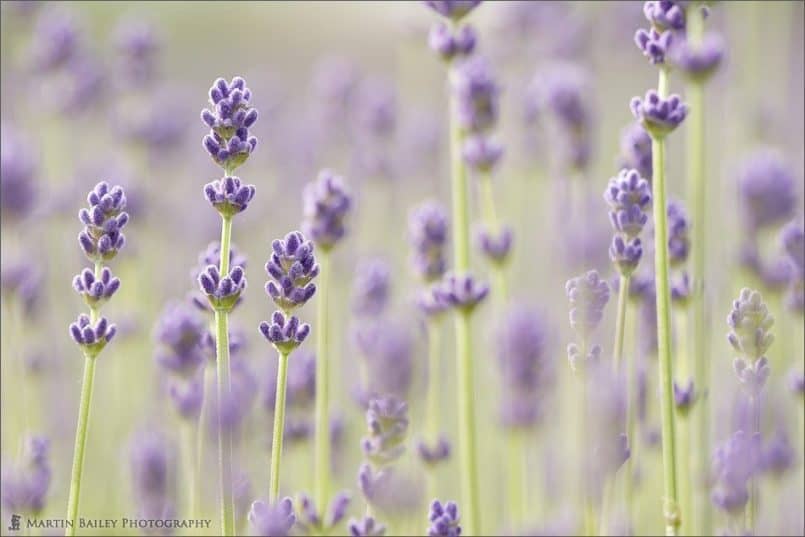
So, I also said that we’d look at some artistic reasons for using Exposure Compensation. Before we really get into that though, we should note that really there is no right or wrong exposure, so pretty much all exposure compensation is simply a means to an end. Either its to get to what we believe is the correct exposure, or to modify the exposure to the point that it produces what would generally be thought of as an artistic effect, as opposed to a correct, quote unquote, exposure. In image number 673 we can see a very bright picture of some lavender. In this image I used plus 1.3 stops of exposure compensation, really pushing the brightness way up, which in combination with a wide aperture for a very shallow depth of field, give a really soft, dreamy look. The aperture for this shot was F2.8 with my 100mm macro lens, and this aperture gave me a shutter speed of 1/200th of a second at ISO 100. This is one example of an artistic application of exposure compensation I guess.
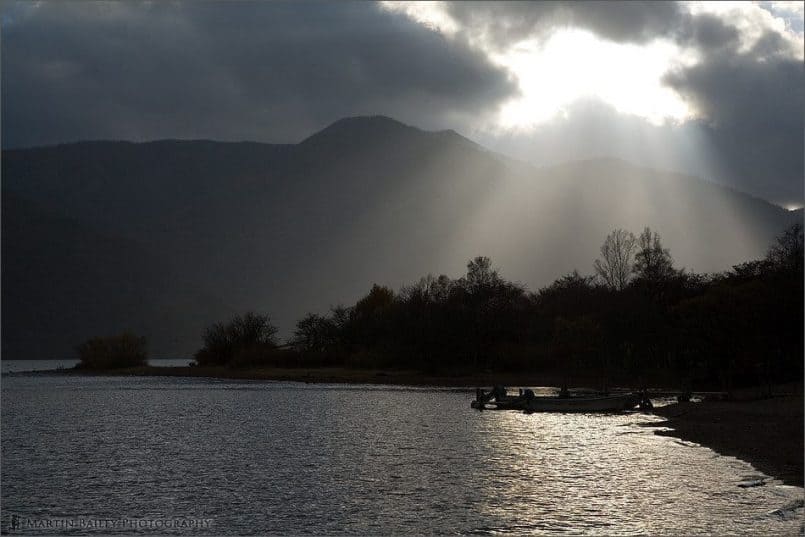
Another example is image number 729, in which I used minus one and two thirds exposure compensation to make the line of trees, the boat and the shoreline quite dark, though not totally silhouetted, against the bright rays of sunshine bursting through the thick cloud. This was shot at F8 for 1/640th of a second, again at ISO 100. Of course, had I not used minus exposure compensation here, the suns rays would have been very bright, as well as the trees and shoreline, so the mood of the shot would have been lost totally. With that in mind, I guess there are two reasons for compensating here, but I reckon both could be classed as artistic decisions..
So, that’s about it for today. As I said, if you have any particular subject that you’d like me to discuss, please do drop me a line from the forum or Contact Form, or mail me at info@martinbaileyphotography.com. Pretty much any topic would be OK, but please remember that I only usually talk about things that I have experience with. So for example, if you mail me with a request on how to do wedding photography or studio lighting, I couldn’t do a Podcast on it myself, as I’ve never done it. I could though perhaps find someone that does have experience in these areas to interview, so by all means go ahead and mail on just about any subject. Also, I’m not very up on equipment other than Canon, so if you have specific questions about camera or lenses from other makers, it would be better to post something in the forum. Again though, if it’s a generic question, like why do we sometimes get flare in lenses, or how is a lenses focal length calculated I would be able to get something out to you.
Thanks again to Tomasz for today’s topic. Tomasz actually has just started a Photography Podcast of his own which you can find at shutterstories.com. They are short snippet type Podcasts of less than 5 minutes each, but they got me thinking a little when I checked them out the other day, so by all means do give them a listen.
Finally, a reminder that the “Reflections” assignment is still in progress. You will be fine to upload your entries to the MBP Members’ Gallery assignment album until midnight on Sunday the 22nd of October, just about anywhere in the world. Check out the assignment forum for more details.
So with that, please do have a great week, whatever you do. Bye bye.
Show Notes
Music from Music Alley: www.musicalley.com/
Subscribe in iTunes for Enhanced Podcasts delivered automatically to your computer.
Download this Podcast in MP3 format (Audio Only).
Download this Podcast in Enhanced Podcast M4A format. This requires Apple iTunes or Quicktime to view/listen.


0 Comments